User Profiles
When first entering the user profile menu, you are given the option to select a different profile, edit an existing profile (‘Edit’), delete an existing profile (‘Delete’) or create a completely new one (‘New’).
Controls
Various types of key presses are recognized by the game: single tap, double tap and hold. This document refers to default controls, please note that you can view and configure controls freely in Options — Controls at any time in the game (see ArmA: Manual).
Character Controls
Move Mouse Left/Right - Turn Left/Right
Move Mouse Up/Down - Look Up/Down
Left Mouse Button - Fire
Right Mouse Button (Hold) - Zoom/Hold Breath/Lock Target
Right Mouse Button - Iron Sight (Optics)/ Normal View Toggle
Middle Mouse Button - Perform Default Action / Show Action Menu
Mouse Wheel Up/Down - Select Previous/Next Action
W - Forward
2xW - Sprint (until you release W)
A - Strafe Left
D - Strafe Right
S - Back
Left Shift - Temporary Switch Walk / Run
2xLeft Shift - Toggle Walk / Run
Z - Prone
X - Crouch
C - Stand
R - Reload Weapon
F - Change Weapon/Weapon Mode
Q - Lean Left (2xQ Lock Lean Left)
E - Lean Left (2xE Lock Lean Right)
Left Alt - Free Look Switch (2xLeft ALT Toggle Free Look)
Caps Lock - Voice Over Net
Tab - Next Target
Space Bar (Hold) - Quick Command
2xSpace Bar - Toggle Commanding Mode
G - Gear Screen
B - Binoculars (If Available)
K - Compass
+ (Numpad) - Zoom In
- (Numberpad) - Zoom Out
Enter (Numberpad) - Toggle 1st/3rd Person View
Fkeys - Select Subordindate Unit
Numbers - Select Radio Command
Ground Vehicle Controls
It’s very similar to characters.
W — Forward
E — Fast Forward
A/D or Mouse Left/Right — Turn Left/Right
S — Brake/Reverse
Left shift — Turbo
Aircraft Controls
Move Mouse Left/Right — Default Turn (Yaw or Rudder Left/Right, based on current speed)
Move Mouse Up/Down — Nose Up/Down
- Q — Helicopter Increase Height
- Z — Helicopter Decrease Height
- A — Helicopter Bank (Yaw) Left
- D — Helicopter Bank (Yaw) Right
- X — Rudder Left
- C — Rudder Right
- W — Tilt Down (Forward)
- S — Tilt Up (Backward)
- 2x — Activate Auto Hovering
- — Deactivate Auto Hovering
- Flying Helicopters
- STOVL : Short Take Off and Vertical Landing
Joystick/Driving Wheel
Compatible Joysticks and/or driving wheels can be used with ArmA for optimum control and enjoyment.
ArmA supports only one sticka at the time, it automaticly selects the controler with the most buttons.
Joystick Sensivity Adjusting
TrackIR
ArmA is one of the premier first-person shooters to fully support Naturalpoint’s TrackIR system. For more information on TrackIR, please visit Naturalpoint’s website at http://www.naturalpoint.com/.
Settings/Options
Video Options
Standard Video Options
- Resolution — select the optimal screen resolution for your system. Generally a higher resolutions means you will see a sharper image, but it can negatively affect your framerate.
- Aspect ratio — toggle between normal (4:3) and widescreen (16:9) aspect ratios.
- Refresh — choose the best refresh rate for your screen.
- Brightness — use the slider to vary the overall brightness.
- Gamma correction — controls the overall brightness of the image you see.
- Visibility — this is the visible distance in meters.
- Quality preference — select quality settings preset (note that this influence or other options in this dialogue)
- Default — restore your settings to their defaults.
- Advanced — show more advanced options
Advanced Video Options
- Terrain Detail — the higher the terrain detail, the more subdivisions each square can have. This results in smoother and more natural terrain.
- Objects detail — sets the overall quality of object models, so with a lower setting you may see lower Levels of Detail for objects.
- Texture detail — the overall quality of textures in the game. A lower setting may cause more blurry textures.
- Shading detail — affects all of the special shading techniques used in the game.
- Postprocessing — some special effects like the Depth of Field.
- Shadow detail — detailed shadows can make a scene come alive, but also demand a lot from your hardware. If you experience performance issues, try lowering this option.
- Anisotropic filtering — a method of enhancing the quality of textures on surfaces that are far away and on a small angle to the camera.
- Antialiasing — this technique tries to minimize aliasing (jagged edges) caused by showing high-resolution content at lower resolutions.
- Blood — turn in-game blood on or off.
Audio Options
Effects — the volume of general sound effects, like weapon reports, explosions and engine noises.
Radio — the volume of radio chatter.
Music — the volume of the in-game music.
Hardware Acceleration — toggle hardware accelerated sounds on and off (recommended to turn it off unless you know your audio card handles full hardware acceleration under OpenAL).
EAX — advanced audio effects
Difficulty
Two difficulty modes are available within ArmA, namely Cadet and Veteran. The difficulty menu allows you to fine-tune most of their settings. Note that in a multiplayer game, the difficulty settings of the host apply to all players in that session.
In the list of settings there are three columns: the setting description, toggle for Cadet and toggle for Veteran. If a setting is red and ‘Disabled’, you cannot change it. All the other settings can be enabled or disabled to match your personal preferences.
Below the settings list you are able to set the difficulty of the AI units, both on your side and the enemy’s side. This affects how smart the AI units are in general, how fast they aim and how accurate they fire at their target.
Finally it is possible to toggle subtitles for general voice acting and radio messages on or off.
Controls
Controls options allows very detailed configuration of all aspects related to controls.
In the main controls options dialog, you can see list of all available actions. You can also filter types of actions displayed by combo box.
To manage control configuration of an action, select it from the list and click by left mouse button. A configuration dialog will be displayed.
It also is very flexible and powerful.
Few tips:
- if an input is overloaded (use for more than one action), it is marked red. To find other use of the input double click on it in the controls dialog
- various key combinations are supported: hold first switch key and tap the additional action key
- double tap keys are supported: simply quickly double tap a key in the configuration dialog
Multiplayer
Session browser
Your first stop on the way to play ArmA’s multiplayer modes is the session browser. Pressing ‘Play’, followed by ‘Multiplayer’ will take you there. From here you can choose to join an existing session or host a new one yourself, on either LAN or the Internet.
Address
By default your browser is set to look for games on the Internet. If you want to change this, press ‘Address: Internet’ once. You will now search your sessions on the LAN and you can press this button again to switch back. When looking for LAN sessions, you may also need to change the network port that is used, which can be done by pressing the default ‘Port: 2303’ button once.
Sorting
Filters at the top of the session list allow you to sort the sessions using a different property. Clicking any of these, for example ‘Host’, will sort the sessions by this property in ascending order. Pressing it again will sort them in descending order instead. From left to right, the columns show:
- Whether the session is password protected or not
- Host name
- Mission currently playing
- Amount of players currently in the session / maximum amount of players for this session
- Quality of your connection to this host
Filtering
Sometimes you can be overwhelmed by the long list of sessions available and it may be hard picking a good one. This is where you can use the ‘Filter’ settings to ease your search. In this menu there is a list of properties to filter by:
- Host — description of the host
- Max. ping — maximum ping (ms) to hosts
- Min. players — minimum amount of players already in this session
- Max. players — maximum amount of players in the session
- Full servers — toggle to show or hide sessions that are full
- Mission — description of the mission name
- Passworded servers — toggle to show or hide password protected servers
Refreshing
The ‘Refresh’ button empties your session list and starts gathering new information about available sessions.
Passwords
To the lower-left of the browser the game displays the password you are using (no password is entered by default). If you do enter a password here and then start a new hosting session, the session will be protected by this password. A player wishing to join a protected session needs to enter the correct password before joining.
Joining a Game
There are two ways of joining an existing session; you can pick a session listed in the browser or you can manually enter a host’s address. To join a session from the browser, double-click your left mouse on a session or press ‘Join’ with a session selected. If you would like to join a specific host, press ‘Remote’ and enter the host’s address plus port number. If the host has password protected the session, you need to enter this password in the main session browser before you join.
Choosing a role
After you have joined, you will enter the ‘Multiplayer setup’ lobby. This screen shows mission details, available roles for all sides and a player pool. Upon joining, the game automatically selects an available role for you. If you would rather choose another role, do so by dragging your name from the player pool to a different role with the left mouse button. Alternatively you can left-click the role you want to switch to. Note: sometimes the host of the session will choose a role for you. If this has been done, you can no longer change your role yourself. Your best bet is to ask the host nicely. When you are ready to go, press ‘OK’ and the rest of the players will be notified.
Hosting a Game
To host a new session you can press ‘New’ or double-click ‘Host session’ from the session browser. You will now be asked to select an already created mission on any of the islands or to create a new one with the editor or wizard. Having done this, you find yourself in the ‘Multiplayer setup’ lobby, where you can assign player roles and change host settings. Players showing up red in the player pool have not yet been assigned a role. Those with a yellow name have picked a role, but did not yet confirm they are ready and players who ready to start are green. Pressing ‘OK’ launches the session.
- Did you know…… you can run ArmADemo.exe with commandline parameter -server to create a dedicated server for ArmADemo?
Dividing roles
Entering the lobby, you will have been automatically placed in an available role of the mission. You can very easily change this by dragging your name from the player pool to another role with the left mouse button. You can also just left-click the role you want to switch to.
The host of a session has the power to impose roles on players. You assign these roles by dragging players from the player pool. This player cannot change his or her role any longer.
- Did you know…
- … you can disable the AI taking over from a player who disconnects, by clicking the AI icon next to this player’s role?
Kicking a player
A situation could arise where you need to kick a certain player. You do this by clicking on the player in the player pool once and pressing ‘Kick Off’.
Mission settings
Some missions allow the host to alter the mission settings. Examples are the amount of kills that are needed to win the scenario, or the maximum amount of time the mission will last. Mission designers are free to create new mission settings and they will all be displayed under the player roles.
Host settings
- ‘Disable/Enable all AI players’ — toggling this setting will empty all roles on all sides that are currently filled by AI players, or it will fill all empty roles with AI players.
- ‘Lock/Unlock server’ — by locking the session, you can prevent any more players from joining the game.
Communication
A multiplayer game can get a lot more fun and tactical when you can communicate with the other players. ArmA offers players several tools to do this without needing to use external applications.
Channels
The game uses several different communication channels to make sure you don’t get overwhelmed.
- ‘Global channel’ — every single player in a session can hear each other using the global channel.
- ‘Side channel’ — only players on the same side can hear you in this channel.
- ‘Group channel’ — all members of your squad are on this channel.
- ‘Vehicle channel’ — everyone on your vehicle’s intercom can use this channel.
- ‘Direct communication’ — no radio is used here, so only players within voice range will receive these messages.
To switch to another channel press either ‘.’ (colon) or ‘,’ (comma).
Text chat
One method of communicating is sending and receiving text messages. To start typing a message, press ‘/’ (forward slash). Now you will see the message box in which you can type you message and send it by hitting ‘Enter’.
While typing a message you need to use ‘Up’ and ‘Down’ to change channels, instead of the normal ‘,’ (comma) and ‘.’ (full stop).
Voice chat
Another method is voice chat and this is generally much faster, because you can keep playing while you are talking to other players. With your microphone connected and on, press and hold ‘Caps Lock’ to commence broadcasting.
  'Did you know ...'
  ... ArmA has a voice communication system build right into the game?
Map markers
Pointing out enemy forces, plotting routes or assigning artillery targets are a couple of the things you can do with map markers. By double-clicking anywhere on the map you start placing a map marker on that location. This marker is visible to everyone in the selected chat channel.
While placing a map marker you can enter text to go with your marker. The ‘Up’ and ‘Down’ arrow keys will select another type of marker. If you also press and hold the ‘Shift’ key when pressing ‘Left’ and ‘Right’, this changes the marker’s color. ‘Enter’ finalizes the marker and places it on the map. A marker can be deleted by hovering your mouse cursor over it and pressing ‘Del’.
General Gameplay Information
Mission Briefing
The briefing screen is displayed before the start of most missions and it contains important information regarding the objectives of your mission. Some locations in the briefing text have been underlined and clicking these will take you to the corresponding location on the map. The map notepad has several other tabs next to the main briefing text:
- ‘Notes’ — extended background notes and information for the mission.
- ‘Group’ — a list of all members of your squad. As the squad leader you can also access each member’s ‘Gear’ section from here.
Gear
The gear screen lets you organise your gear and the gear of your subordinates. It is how you pick up items you find in the environment or drop items onto the ground.
In the top-left corner of the gear screen there is a list of all objects around you that you can interact with. These can be members of your squad, ammunition crates, dead bodies, etc. Selecting any of these objects shows you the items they hold.
The ‘Available items’ list below this shows all items that are nearby in the environment. These items can be placed in an inventory by dragging it to one of the objects in the list above. Pressing ‘Take’ will place the item directly into your own inventory.
You can get more information on a certain item by clicking on its picture. With an item selected you are also able to ‘Drop’ it to the ground.
  'Did you know ...
  ... that when you drop a weapon, you will automatically drop all associated ammunition?
Map
In the Cadet difficulty mode, your position will be displayed on the map. A higher difficulty setting will require you to scan your environment for landmarks such as buildings, trees, and landscape contours, in order to determine your location on the map. Note: you should use the map to read the terrain around you, enabling you to use it to your advantage when engaging or evading the enemy. Very often you will have a tactical advantage when you attack an enemy force from an elevated position, such as a hill.
The map is divided into grid sectors, with latitude (vertical lines) indicated alphabetically and longitude (horizontal lines) numerically. Zooming in on the map will increase the accuracy scale by dividing the map into smaller sub-grids. Mission briefings and radio communications often refer to certain grid coordinates, so it is a good idea to train using this tool. Some missions also provide you with a GPS indicator, which allows you to read out your grid position on the map.
  'Did you know ...'
  ... you can move around map elements like the watch, by pressing then holding your left mouse and moving the mouse? Double-click to zoom them.
Combat
Movement
Combat postures
ArmA features three distinct combat postures, each with its own strengths and weaknesses. It’s up to you to determine the most suitable one for each situation. Going prone on the ground will give the enemy only a very small target to fire at and your aim will be much steadier, but you will be significantly slower when moving. Standing allows you to run and sprint from cover to cover, but you expose your full body to the enemy and your aim will be less steady. Crouching takes a little bit of both.
Movement speed
Another choice you have whilst moving is how fast you want to go. Sometimes it may be prudent to very carefully patrol an area and you will want to walk slowly. Not only does this give you time to scan the environment for enemies, but you also avoid tiring which affects your aim amongst other things. Running is faster than walking and the game’s default movement speed. It nicely balances speed and the impact on your stamina. There are situations where even running is not speedy enough, such as when you’re running away from an armed grenade. This is when you can use sprinting. Be aware though that sprinting a long distance tires you very easily, which in turn affects your aim.
Raising and lowering weapons
Instead of always walking around with your weapon raised, you may choose to lower it. You can do this by either toggling it to lower or pressing and holding the default control.
Leaning
Close combat is often the most dangerous part of an infantryman’s fighting career and he’ll want to use every tool at his disposal to accomplish his mission and survive it. Leaning is one such tool. By leaning around a corner of an object you can peak around it, fire your weapon and still keep most of your body covered.
Swimming
As a soldier you have been trained to swim in order to save yourself from drowning. You may not be fast and it is possible you will lose some of your equipment, but at least you can handle getting back to shore after you’ve parachuted into the ocean.
Views
ArmA allows you to view your controlled character or vehicle in the following ways:
1st Person View
This is the default view mode, which lets you view the game from your character’s perspective. It is the most realistic and immersive mode, and is ideal for controlling characters on foot.
3rd Person View
Gives a greater view of your surroundings, and is particularly useful when controlling vehicles. Using the Veteran difficulty setting, 3rd person view is disabled. Cadet mode does allow you to toggle between 1st and 3rd person view by pressing ‘Numpad Enter’.
Weapon View
All weapons in ArmA have realistic scope and iron-sight views, which can be used to accurately engage targets at a range of distances. The default method of switching to this view is to double-click the right mouse button. Amunition in ArmA has set balistic trajectory, so learn on what distance are each weapons sights leveled.
Optics/Ironsights leveling on distance:
50m > MP5, pistols
100m > AK74UN, M4/M16 with Aimpoint, ACOG sights or suppressor
120m-400m > M4SPR
150m > Grenadelauncher ironsights  (M4 with ACOG 200m)
200m > SVD, KSVK, AK74PSO
300m > AK74, AK74GL, AK74U, M16A2, M16GL, M16A4, M16A4GL, all G36, machineguns
500m > M107
Orientation
To make sure you have full situational awareness at all times, the following options are available to you:
Compass and clock direction indicators
When communicating in a squad, two different methods are used to indicate direction. The first method is based on a standard compass and uses a 360 degree system to indicate direction; 000 = North, 090 = East, 180 = South, and 270 = West. Use the numbers on the outer ring of your compass to get an exact reading. This method is often used when issuing a movement order. The second format is based on the clock system, where 12 O’clock is directly in front of someone, and 6 O’clock is behind them. Keep in mind that these directions are relative to the person reporting them. In Cadet mode, a small clock is displayed as soon as someone indicates a relative direction. This clock indicates the path that is being followed, making it easier for you to find their proposed direction. This method is most commonly used to indicate the direction of a target or object.
Used to indicate your current direction or the direction of an object or enemy contact. It is especially effective if used in combination with the map view. Vehicles with a target radar on board display your compass heading at the top of the screen. Note: the Cadet mode will also display a yellow line on your compass, indicating the direction of your current waypoint.
Peripheral vision
To support your orientation and situational awareness, ArmA features peripheral vision indicators. These are small dots indicating the direction of known enemies, as well as friendly or neutral objects. These dots appear to the edge of your screen, indicating the general direction of objects in-range, outside of your current view angle.
GPS
Some missions provide you with a GPS device in your map view. This device displays the exact grid reference of your current position, so you can cross-reference it with your map.
Targeting and Firing
As in real life, your weapon is never fully stabilised. The amount of motion depends on your stamina and posture. Going prone allows you to shoot more accurately, and also limits your weapon’s recoil effects. Your character’s stamina is reflected by the intensity of his breathing.
ArmA simulates weapon ballistics, which means bullets will take time to reach their target, and are also affected by gravity. Remember this when firing at targets over a long range, and in particular when firing at moving targets.
If you want to get the most out of your aiming, try concentration mode. In this mode you hold your breath and focus your attention on one particular area for an accurate hit.
The Action Menu automatically appears when a new action becomes available, listing the specific action and the appropriate button to activate it.
Taking Command
There are multiple methods of commanding troops at your disposal. Every of them can be handy in certain situations and may well suit different playing styles.
Quick Command
Hold ‘Spacebar’ to activate the Quick Command system.
Your cursor will now change to command mode and is context sensitive, which means its functionality and appearance changes depending on what you point at with the cursor.
You select any particular unit by clicking the left mouse button on it (hold ‘Shift’ and click if you want to select the entire team this unit belongs to). You can also use the mouse wheel to select a unit in the Unit select menu that’s displayed in the top left corner of the screen. By default you will have everybody selected. Simply scroll in the unit selection menu to select a particular unit (or units part of team or in a vehicle) or click by mouse wheel on more positions in the list to have them all selected.
You can also order your subordinates using the command cursor (unless it is pointing on your squad member):
- To move somewhere by clicking on any position on the terrain
- To engage a target by clicking on the target (RMB reveals target, LMB orders engage, so subordinate can leave formation)
- To mount a vehicle by clicking on the vehicle
- To watch in a direction or on a unit, vehicle or object if you click while holding left ‘Alt’
- To hold fire by clicking anywhere while holding Control
After you release ‘Spacebar’, all units are deselected and you return to normal mode.
Command Menu
There are multiple options to switch to command mode:
Whenever you switch to a command mode
- Hold ‘Spacebar’
- Press any ‘F’ key
- Switch to Tactical view (see below)
Communications in ArmA are done through the Command Menu. This menu can be accessed by any time by pressing a number for a command on the main level of the Command Menu.
Note: You may have some communications options available in the commanding menu even as a single or subordinate unit.
You navigate in the Command Menu by scrolling by mouse wheel up and down and select an item by pressing it.
Alternatively, you can also use keyboard shortcuts (numbers for commands and F keys for unit selection) to quickly navigate.
Example: If you have a subordinated unit 2, pressing ‘F2’ ‘1’ ‘1’ will issue command «Return to Formation».
When operating in an AI controlled squad, there’s often no need to use these report functions all the time. However, when playing multiplayer with people who might not speak English, these simple commands can be used as an effective form of communication during a mission.
- ‘Where Are You?’ — Requests the current position of your team leader.
- ‘Done’ — Confirms you understood the last order.
- ‘Fail’ — Informs your team leader you are unable to execute the last order.
- ‘Repeat’ — Requests your team leader to repeat the last order.
- ‘Radio’ — Some missions allow you to send specific messages to other squads using the radio.
Teams
There are 5 different color groups, to which you can assign your units for quick selection.
In some missions units may already be preassigned to teams, but as a commander you can also assign units to a team at any point whilst you’re playing.
- Select the units that should become a team and select ‘Assign’ (‘9’) from the commanding menu. Now assign the units to a particular team color (the white team is used for any unassigned units).
To select the entire team (alternatively, if you already have the entire team selected, you can deselect them using the same method):
- Hold ‘Shift’ and click by mouse using Commanding Cursor on any team member.
- Hold ‘Shift’ and press ‘F’ key of any team member.
- In Quick Command menu scroll by mouse wheel on team and click by mouse wheel on the team you want to command.
Movement
Formations
When a number of troops are moving there are standard formations they will follow as instructed by the commanding officer, the formations vary both in how far apart the soldiers are spread as well as in the manner that the soldiers are aligned. The formations possible are:
- ‘Column’
- ‘Staggered Column’
- ‘Wedge’
- ‘Echelon Left’
- ‘Echelon Right’
- ‘Vee’
- ‘Line’
- ‘Compact Column’
- ‘Delta’
Experience will teach the commander which formation is best for which circumstance, but a couple of things to remember are;
- When travelling quickly on foot from one location to another a staggered column can result in soldiers to the rear losing sight with the rest of the squad.
- A squad using a tightly packed formation can be decimated if an enemy grenade lands in their midst.
As a rule you should spread out when at risk of enemy contact and stay fairly close together when quickly travelling on foot.
By orderins Move — Advance, Move — Flank*, Move — Stay Back you can offset selected squad members aprox 50m from main formation.
Attacking
There is a range of command menu options which give you control over the Rules of Engagement of your subordinates.
- ‘Open fire’ — by default your squad members are using this mode and it means that if they have a target, they are allowed to fire their weapon at it.
- ‘Hold fire’ — when ordered to hold fire, a subordinate may target something, but not fire at it.
- ‘Fire’ — this command will specifically tell the subordinate to fire its weapon.
- ‘Engage at will’ — when units have been set to engage at will, they will not only target enemies, but also engage them. They may move away from the formation and go to a better vantage point.
- ‘Disengage’ — the subordinate is told to no longer engage its target and move back to the formation.
Tactical View
‘Numpad .’ switches between normal view and tactical view. In tactical view you see your nearby area from above and you can use all commanding techniques available in normal commanding view to command troops. The tactical view allows the commander to zoom the camera out to show a greater detail of the world around them, this allows for a more strategic real time commanding of troops.
Note: In order to be able to switch to tactical view, 3rd person view should not be disabled in your difficulty settings.
Comanding in Tanks
- Only commander of tank can assign Lights on/off or Turning out actions.
- If the commander is not present, gunner is in command.
- Tank commander has machinegun mounted on his turret. RMB assigns target, LMB fires from commanders machinegun.
- ALT+CTRL comand toggles cease/open fire. Open fire is set as default, so gunner shoots instantly on any given target, even a friendly.
- Commander can use arrows to order movement direction.
- Mouse, Space Bar and command menu are than used for more complex commands.
- Space+LMB over a place calls Move to
- Alt+Spacebar+LMB calls Watch at
- Space+RMB over an object calls select target
- Space+LMB than orders fire.
- Commander can order gunner to switch main weapon by pressing Space+F.
- Commander of a single tank can command gunner to change cannon amunition by switching main weapon to cannon and than selecting the gunner with F2 key and calling Action «reload to HE/SABOT» from command menu.
- Commander of subordinate tank (does not have commanding menu) can switch ammo type by holding Space bar, selecting main gun and than from action menu in lower right corner switch ammo type with middle mouse.
Support Units
Support can be divided into three categories:
Medical Support
When injured, you can inform the rest of your team using the Command Menu option ‘Status’ > ‘Injured’. To receive treatment you can walk over to a medic, ambulance or field hospital, and select ‘Heal at …’ from the Action Menu. If you are unable to move, or can’t find a medic, you can call out for one using the Command Menu option ‘Call support’ > ‘Medic!’. If you are the subordinate in a squad, your commander can also send a medic to your position.
- As a comander, assign medic to injured squadmember by selecting the injured and calling radio Action — Heal at medic
- If you are injured commander, select medic from your squad and order him to come close to you. When medic gets close you will get action Heal in your action menu.
Ammo Resupply
High-tech weaponry is worthless without the proper ammunition, and an extended firefight can drain your ammo in seconds. Tanks and helicopter gunships can head back to base to replenish their ordinance, but an infantry squad has to be much more cautious about their rate of ammo consumption. Getting bogged down in stalemate engagements, and over-extending a mission’s duration, should be prevented at all costs. If absolutely necessary, it is possible to pick up weapons and magazines from fallen friendly or enemy troops. You can do this by walking up to a corpse, and using the action menu to pick up any of the weapons or magazines.
Vehicle Support
Due to their size and tactical importance, vehicles are far from immune on the battlefield. As well as damage sustained vehicle crews also have to monitor their fuel consumption, and should therefore refuel where possible. However, their ability to quickly break away from enemy contact often allows vehicles to receive support out of range of direct enemy fire. The ammo, repair, and fuel trucks that provide this support, are vital to the success of any combined arms operation. Move your vehicle close to any of these support units, and select the appropriate action, to either repair, rearm, or refuel your vehicle.
Combat Tactics
When on a battlefield, one of the most important aspects isn’t simply the thought of killing the enemy, but rather preventing the enemy from killing you. Think before you act. Here’s a list of some good tactics that could you help survive on the battlefield, and beat your enemy.
Get Down
- Lie prone whenever possible. It reduces your silhouette and the target it represents, plus it steadies your aim.
- If you can’t lie down, try to crouch.
- Don’t get caught with the horizon or open sky behind you; it makes your silhouette easy to recognize and target.
Stop to Fire
- You cannot fire while sprinting in the game at all. You may do so while walking but for higher accuracy it is always better to stop and even better to crouch or go prone.
- Your aim is less accurate if you are breathing heavily after running. Wait to calm down first for more accurate aim and note that you may also want to hold your breath for a few seconds.
Look Around
- Scan the area to your front as well as sides, rear and above — avoid tunnel vision. The main reason flanking is so effective is because of tunnel vision.
- Due to HDR simulation the sun and other bright lights can adversely affect your eyesight, so avoid attacking enemies with the sun behind them else you will be at a significant disadvantage.
Note: You can look around while moving by holding ‘Alt’ and moving the mouse simultaneously. Also, in some difficulty settings in ArmA there are subtle color dots at the edges of your screen indicating there is something nearby. This simulates your real world situational awareness.
Take Cover
- Reload only behind full cover.
- Don’t get so suppressed you can’t peek out of cover. The enemy might walk up and shoot you.
- Use cover and concealment whenever possible, when running or taking cover. The enemy can’t see you coming if there is a tree between the two of you.
- A bush is concealment, not cover, since bullets can and will go through bushes. The same can apply for certain other materials and for example a wooden wall really is not good cover either.
Combat Movement
- When moving under fire, zig-zag randomly. This gives the enemy less opportunity to target you.
- Don’t stray in front of a buddy or you might get shot in the back.
- Keep moving. It forces the enemy to look for you and try to predict what you are up to.
- When stopping, do so behind partial or full cover.
- If you stay stationary too long, the enemy is going to send someone to flank you.
Confuse the Enemy
- Try not to be predictable when moving from cover to cover — all the enemy has to do is aim and wait for you to run into his sights.
- When firing from behind cover, change firing positions/places to keep the enemy from predicting where you will appear next.
Welcome to the Armed Assault Wiki!
There aren’t many strict rules to follow when editing anything on this Wikia. However, please try to at least adhere to the following guidelines when making edits or creating new pages.
|
PLEASE NOTE: |
ArmA vs. Arma/ARMA
All games in the series are officially titled as Arma (with a lowercase «a«). However, for consistency reasons please stick to naming such articles as ArmA (with an uppercase «a» as opposed to Arma/ARMA).
Isn’t this counterproductive?
Due to the Wikia’s initial setup, the ArmA naming was used instead. As it is simply too late to refactor this to its correct stylisation (not to mention the problem of breaking more than just a few pages), ArmA will be used for the foreseeable future.
Relation to other Wikis
This Wikia IS NOT affiliated to similarly named FANDOM Wikias set up in other languages (i.e. Chinese [.zh] or Russian [.ru]) and retains no administrative control over their content.
This is also not the official Wiki for content from the Arma series. Please refer to the official Bohemia Interactive Community Wiki for technical information related to mission making, server maintenance and/or in-game scripting commands.
Canon vs. non-canon information
Everything listed in the official Armaverse Timeline is considered canon.
All information shown on in-game materials and content is considered canon.
The events of the Red Hammer campaign for Operation Flashpoint: Cold War Crisis / Resistance is considered as non-canon and should NOT be shown on the wiki (i.e. the Red Hammer protagonist Dimitri Lukin).
Eagle Wing is considered non-canon in the timeline BUT its events and related information is still relevant due to being an official product.
Of the three main endings to Old Man, it is not clear as to which of the endings is considered to be canonical. Due to this uncertainty, the ambiguous template should be applied as a disclaimer wherever it is appropriate to do so.
State Scarlet is non-canon as it is a spin-off campaign that comes from a Creator DLC that was not developed by Bohemia Interactive.
S.O.G. Prairie Fire is non-canon as it is also a spin-off campaign that comes from another third party-developed Creator DLC.
At this time, the Extraction mini-campaign/scenario is considered to be non-canon due to the DLC’s third party status.
First Contact is non-canon as Contact is a spin-off expansion pack. However, the events that preclude it (i.e. Exercise Electron-39) are canon.
ARMA Reforger’s events depicting a war between the United States and Soviet Union in 1989 remain (as of present) in an ambiguous state. For the time being, any articles related to its events should also be given the ambiguous template as a disclaimer.
Unless otherwise stated by Bohemia Interactive, all campaign endings follow the «best» or neutral endings (i.e. War That Never Was for ArmA 2’s Operation Harvest Red campaign). The sole exceptions to this are for Royal Flush and Operation Black Gauntlet’s endings, which follow the events of Escape and Deception (respectively).
A character is considered to be alive unless stated otherwise by Bohemia Interactive. If their fates are uncertain following the events of a campaign (i.e. Aleksei Guba in Cold War Crisis), then they should have their status listed as either Determinant or Unknown.
Spelling
American English vs. British English
Use British English spellings when writing or editing an article. This means:
- Avoiding use of American English spelling where possible. Words that end with an -ize should always be suffixed with s instead of z (example: analyze being spelt as analyse), or the unit of distance meter being written as metre.
- Additionally, this also applies to words such as color (American English) being spelt as colour instead.
The sole exception to this rule is when it comes to names that are officially written by Bohemia Interactive themselves in-game or on official material with American English spellings (usually proper nouns). A prime example of this can be seen with ORBAT units being called Mechanized as opposed to Mechanised (British English).
Grammar
Everyone makes errors when writing stuff for articles. Don’t be too fussed if you accidentally spell something incorrectly by mistake; just quickly correct it and move on.
However, there is an exception for this when it comes to in-game material; Field Manual or Armoury Description entries for weapons or vehicles from each game being prime examples. Copy and paste the exact content from the game itself. Don’t correct any spelling mistakes or errors from the source.
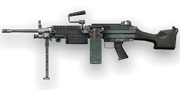
A good instance of this is in practice is the L110A1 light machine gun from ArmA 2’s British Armed Forces DLC. Its in-game Armoury Description incorrectly spells «5.56mm» as follows (highlighted):
| « | The L110A1 is a British designation for a Belgian 5.m56mm light machine gun Minimi Para. It is an air-cooled weapon, capable of fully automatic fire only, and it is adjusted to be used as paratroopers weapon. This rifle features the red-dot Aimpoint gunsight and the AN/PEQ-2 laser pointer.
Armoury Description |
» |
«5.m56mm» is obviously the incorrect spelling for «5.56mm«. However, just leave it as it is. There is no need to adjust it as this is how it’s officially displayed in-game.
Content removal
Any sections, videos or images which contain information deemed unrelated/outdated/invalid can be subjected to immediate removal by any of the administrators or bureaucrats. Reasoning should usually be provided in the article’s Talk page, or a comment left behind prior to the edit’s commit.
Prime examples of content removal include topics or in-game data which cannot be verified properly in the latest patches. Alternately, the original editor who wrote the section is no longer present to update the information.
If a non-admin editor wishes to dispute the removal, they should start a thread in the article’s Talk page to justify why said content should be restored.
Categories
Always tag your article with the right categories.
A weapon like the M4A1 carbine from ArmA 2 for instance, should always be tagged with the Weapons (ArmA 2) category. On the other hand, a ground vehicle like the Hunter MRAP from ArmA 3 will go into the Vehicles (ArmA 3) category instead.
If the category does not exist, then you can create one. Just make sure to check whether one already exists first, and ensure that the created category is parented to a related higher category (i.e. Weapons (ArmA 3) would obviously be a subcategory of the Weapons category).
Images
Licencing
Ensure that images are properly labelled with the correct licence when uploading them onto the Wikia. Examples being official material from Bohemia Interactive using the Fair use licencing (as the image is owned by BI).
If the image was made by yourself or is not owned by a particular entity, then you can leave the licencing section blank or with whatever append is most suitable.
Quality
Turn up the video settings of your game; especially anti-aliasing and texture quality. Remember, your FPS (Frames Per Second) isn’t important when you’re taking a non-animated screenshot. Aesthetics take precedence over performance in this case.
On the other hand when adding images to an article, try to make sure that it uses the Portable Network Graphics (PNG) file format as opposed to a lossy format such as JPEG.
If the image comes from an official source and is in JPEG by default (which is again, exclusive to media released by Bohemia Interactive), then the image is permitted to stay that way. Likewise, exceptions are permitted in the case of image resolutions that are larger than 1080p (i.e. 1440p) as their file sizes would exceed 5 MB, or composite images that combine one or more 1080p-sized pictures.
This isn’t strictly enforced, so don’t be too worried if you lack an image editing program to alter the format or can’t be bothered to do so.
Naming
Try to avoid using generic or serialised names. Uploading something called ARMA3-251521-123531-12.jpg isn’t particularly neat or helpful, so the format for filenames should always be as follows:
- GAME:
- Arma4 for ARMA 4 and its DLCs
- Reforger for ARMA Reforger
- Arma3 for ArmA 3 and its DLCs
- Arma2 for ArmA 2 and its DLCs
- Arma1 for ArmA: Armed Assault and the Queen’s Gambit expansion pack
- OFP for ArmA: Cold War Assault
- MobileOps for ArmA: Mobile Ops
- Tactics for ArmA Tactics
- CONTENT
- Is it for a vehicle, weapon, character, or object? If so, then name it as such for the respective article name (a shortened version is fine too). Examples being:
- Arma2-character-portrait-maddox.png for a named character from ArmA 2; in this case for Lieutenant Maddox from ArmA 2’s Operation Harvest Red campaign.
- Is it for a vehicle, weapon, character, or object? If so, then name it as such for the respective article name (a shortened version is fine too). Examples being:
- NUMBER
- Suffix your images with a number beginning with 00, and increment it with each subsequent image related to the article.
Beginning with ArmA 3, Creator DLCs also need their own prefixes applied when uploading their image. For instance, an asset added in a CDLC like Global Mobilization — Cold War Germany needs its abbreviation applied after the GAME and CONTENT have been defined as follows:
- Arma3-helmet-gmcwghelmetwz67-00.png for a screenshot used by the Helmet wz. 67.
Galleries
Going back to the Maddox character from ArmA 2, an example for an image placed in the Gallery section would be called like this Arma2-character-maddox-00.png.
An officially sourced image on the other hand such as for the Tanks DLC in ArmA 3, would be named as follows: Arma3-dlc-tanks-04.jpg (the fourth picture in a series of DLC promotional images).
Infoboxes
Images placed in infoboxes are more specific, and should always be named with the following:
- icon for weapons and their accessories (i.e. Arma3-icon-car95.png for the CAR-95 bullpup in ArmA 3’s Apex expansion pack)
- render for vehicles, aircraft, boats, and other objects (i.e. OFP-render-lst.png for the LST troopship in ArmA: Cold War Assault)
- portrait for a character’s face (i.e. Arma2-character-portrait-brianfrost for Brian Frost from ArmA 2’s British Armed Forces DLC)
Image categorisation
Unlike for article pages, this isn’t too important to have.
However, do try to categorise your images with an appropriately matching one where possible. Examples being Ben Kerry’s portrait (a character from ArmA 3) being placed into the Character images (ArmA 3) category. This will make it easier for future editors to find the image should they need to.
Description
Nice to have but is optional. This isn’t required for images, but can be added if you feel the need to do so.
Game interface
Unless the image is from an official source which already has the in-game player interface displayed (examples being one of the OPREP images for the ZSU-39 Tigris article), don’t upload images with the HUD shown. Such images will either be removed or cause the article edit to be reverted if found.
That being said, screenshots uploaded specifically for use in mission walkthroughs/guides are fine. This is the only other occasion where an exception will be made.
Modded content
Except in very specific circumstances, DO NOT include images that contain modded content that is not officially available from Bohemia Interactive. Any images that contain unofficial content in them will be subject to immediate deletion.
As noted, exceptions will only apply if the image is of particularly notable quality and the modded content is not visibly identifiable from a casual glance. A good example of this is the Design block image used for the T-140K Angara article, or those that add custom character faces.
In these cases, images will be judged on a case-by-case basis instead. That being said, keep expectations low and don’t get your hopes up immediately just because your image falls into this category.
Unit measurement
Metric vs. Imperial
Please don’t use the Imperial System when listing values for any unit of measurement. Only use the Metric System equivalent for this purpose. Examples would be:
- km/h (kilometres per hour — Metric) instead of mp/h (miles per hour — Imperial) for vehicle speeds
- kg (kilograms — Metric) instead of lbs (pounds — Imperial) for weight values
…and so on.
You can suffix the converted Imperial values in brackets, but don’t use it as the actual display value.
Once again, the only exception to this rule is if the Imperial unit of measurement is specifically used in-game instead.
Rate of fire
For weapons, only list the cyclic (number of projectiles per minute) and not the sustained/effective rate of fire.
You do not need to list this if the weapon is single shot only; good examples being the RPG-42 Alamut rocket launcher from ArmA 3.
External sources
Whenever posting a link to an external source, please try to exclusively use the English Wikipedia whenever possible in lieu of manufacturer websites, specific product pages or non-Wikipedia encyclopaedias. You can generate a link to Wikipedia using the WikipediaLink template and inputting the URL of the article.
As for products from Bohemia Interactive (i.e. DLCs/expansion packs), only links to either the Steam Store or the Bohemia Interactive Store are permissible.
Other officially-approved resellers include:
- Google Play and the Apple App Store (for mobile spin-off titles)
- The official Microsoft Store (as of ARMA Reforger)
Do not post links to third party sellers that are not officially sanctioned by BI.
Why shouldn’t X, Y, Z link to website be used?
Manufacturer websites — especially for their products that are either discontinued or rebranded, tend to remove linked pages from their website without leaving a redirect behind. This can cause issues for readers who may attempt to click on the link expecting to see the referenced content, only to end up at a 404 page.
What if there aren’t Wikipedia articles for X asset?
In the event this is the case, then linking to a non-Wikipedia article is acceptable. However, if an article on Wikipedia is ever made available for it in the future, then it should be replaced by a link to its corresponding article.
Humour
Sarcastic captions and snarky commentary is welcome on most articles; aside from main games and other non-fiction articles (i.e. Bohemia Interactive’s page).
Try not to go too overboard. Well…unless it’s about a topic that is clearly intended to be humorous.
Conclusion
…and that’s all there is!
If you need clarification on anything specific, don’t hesitate to contact an administrator for assistance. Drop a message on their wall as needed, and we’ll try to get back to you ASAP.
Have fun editing!
See also
- Block policy
| Меню сайта |
|
 |
| Категории раздела | ||
|
||
|
| Наш опрос |
|
Лучший пулемет Результаты | Архив опросов Всего ответов: 1535 |
|
| Главная » Статьи » ArmA: Armed Assault 2 |
ArmA2 — Руководство пользователя
Руководство в формате pdf, для просмотра требуется программа Adobe reader Скачать ArmA2 — Руководство пользователя |
Категория: ArmA: Armed Assault 2 | Добавил: acroloid (16.07.2011) |
| Просмотров: 4103 | Комментарии: 3
| Рейтинг: 0.0/0 |
| Всего комментариев: 1 | |
|
Порядок вывода комментариев: 1 Lore
I am forever indebted to you for this ifnormatoin. |
|
Добавлять комментарии могут только зарегистрированные пользователи.
[
Регистрация
|
Вход
]
| Профиль |
|
Гость
Сообщения:
Время:11:20 Выход или авторизуйтесь!
|
|

| Поиск |
|
| Статистика |
|
Онлайн всего: 1 Гостей: 1 Пользователей: 0 |
|
| Форум |
|
|
|
| Последние комен-ты |
|
Kuznetsov CV Миссия для arma night stalkers Мод Project 85 EVO-FFA_RED 1.05Crysis_EDITION_HARD(BETA TEST) EVO 1.07C_Cr{Y}s1S^ Edition (Hard Teleport)Version 2 |
|
| Banners |
|
|
|

| Наша кнопка |
|
|
|


Arma 2
19.06.2009
Экшен,
Шутер,
Тактика,
От первого лица,
От третьего лица
8.6
903
оценки
1
2
3
4
5
6
7
8
9
10
-
Arma 2
-
Новости37
-
Мнения13
-
Юмор5
-
Файлы138
-
Читы17
-
Гайды4
-
Форум196
-
Cкриншоты154
-
Галерея379
-
Игроки
©
![]()
adigyran
11 августа 2009
Гайды
Официальное руководство к игре
![]()
adigyran
Подписчиков: 17
7
6
Последние посты по игре Arma 2

Тепловые ловушки
Краш игры при заходе в настройки

ArmA 2 «Миссия — Cipher»
Комментарии: 6
сначала
лучшие
- новые
- старые
- лучшие

Ваш комментарий
adigyran
14 августа 2009
Почему вы не скачиваете?
- пожаловаться
- скопировать ссылку
0
AlexRuga
17 августа 2009
+10!СПС! 
- пожаловаться
- скопировать ссылку
0
MiKe8888_Rus888
20 августа 2009
оу спасибо за русик звука!!)))
- пожаловаться
- скопировать ссылку
0
snegi26
25 августа 2009
Спасибо, есть что почитать!;))
- пожаловаться
- скопировать ссылку
0
KiberNETTT
5 октября 2009
хрень
- пожаловаться
- скопировать ссылку
0
AlexXxBig
30 июня 2010
Спасибо за руководство, очень помогло !!!!!!!!!!!
- пожаловаться
- скопировать ссылку
0

вчера в 19:42
|
ПК
Owlcat Games поделилась инфографикой и выводами на основе отзывов игроков альфы Warhammer 40,000: Rogue Trader
Warhammer 40,000: Rogue Trader
13
46

22 апреля
|
Индустрия
Techland поздравила Dambuster Studios с запуском Dead Island 2
Dead Island 2
24
80

сегодня в 08:12
|
Кино и сериалы
Фильм «Крэйвен-охотник» получил взрослый рейтинг, в картине можно будет увидеть жесткую схватку с Носорогом
8
21

21 апреля
|
ПК
У одной игры в Steam есть странное лицензионное соглашение
59
151

вчера в 15:03
|
Обновления
Для Pathfinder: Wrath of the Righteous вышло обновление 2.1.3j
Pathfinder: Wrath of the Righteous
2
26

вчера в 22:42
Mundfish представили лимитированную коллекцию ламповых часов «Капсула» в стиле Atomic Heart
Atomic Heart
30
44

вчера в 09:34
|
Слухи
Файтинг Mortal Kombat 12 будет анонсирован в рамках большой презентации PlayStation
Mortal Kombat 12
14
47

вчера в 17:36
|
ПК,
Скриншоты
Любитель Red Dead Redemption 2 потратил несколько недель на создание почти пятидесяти индейских персонажей для игры
Red Dead Redemption 2
13
61

вчера в 22:24
|
ПК
Обнародованы системные требования Diablo 4 для ПК
Diablo 4
25
59

вчера в 10:03
Игрок заметил очаровательную деталь о популярном компаньоне Fallout 4
Fallout 4
10
40

22 апреля
|
ПК,
Обновления
ПК-версия The Last of Us: Part 1 получит новый патч на следующей неделе с улучшением графики и оптимизации
The Last of Us: Part 1
282
105

вчера в 13:30
|
Индустрия
Дизайнер квестов CD Projekt высказался про ААА-игры: «Мы бежим к стене и очень скоро разобьемся об неё»
Cyberpunk 2077
49
36

вчера в 18:47
|
Кино и сериалы
Том Круз в окружении друзей и недругов на новых изображениях фильма «Миссия невыполнима: Смертельная расплата. Часть 1»
16
38

23 апреля
В Dead Island 2 есть упоминания о том, что случилось с героями первой игры
Dead Island 2
11
93

19 апреля
|
Кино и сериалы
Черная Клеопатра в «документальном» фильме вызвала негативную реакцию — на Netflix подали в суд
267
516

23 апреля
Новую Fable уже тестируют внутри Playground Games
Fable 4
20
117

вчера в 23:19
|
ПК,
Раздачи и скидки
В Steam стартовал ивент «Фестиваль головоломок»
4
21

вчера в 14:08
|
ПК
Вышла новая версия неофициального патча для Control от программиста Remedy, улучшающая HDR, DLSS и другое
Control
15
45

вчера в 21:16
|
Кино и сериалы
Джеймс Ганн сообщил, будет ли в «Стражах Галактики 3» сцена после титров
1
20

вчера в 15:25
|
Кино и сериалы
Актер «Симпсонов» ответил на вопрос, когда может закончиться сериал
22
52

21 апреля
|
Кино и сериалы
Скарлетт Йоханссон «покончила» с фильмами Marvel
62
141
Самые новые и популярные игры можно получать бесплатно
Пополнение Steam-кошелька не проблема, если у вас есть бонусы
Дорогие и дефицитные геймерские девайсы теперь не нужно покупать
