-
Contents
-
Table of Contents
-
Troubleshooting
-
Bookmarks
Quick Links
AV SURROUND RECEIVER
AVR-2308
Owner’s Manual
Bedienungsanleitung
Manuel de l’Utilisateur
v
English
Deutsch Français
Book 1
Book 2
Italiano
Español Nederlands Svenska
PRESET CODE
Related Manuals for Denon AVR-2308
Summary of Contents for Denon AVR-2308
-
Page 1
AV SURROUND RECEIVER AVR-2308 Owner’s Manual Bedienungsanleitung Manuel de l’Utilisateur English Deutsch Français PRESET CODE Book 1 Book 2 Italiano Español Nederlands Svenska… -
Page 2
ENGLISH DEUTSCH FRANCAIS ITALIANO ESPAÑOL NEDERLANDS SVENSKA SAFETY PRECAUTIONS CAUTION RISK OF ELECTRIC SHOCK DO NOT OPEN CAUTION: TO REDUCE THE RISK OF ELECTRIC SHOCK, DO NOT REMOVE COVER (OR BACK). NO USER-SERVICEABLE PARTS INSIDE. REFER SERVICING TO QUALIFIED SERVICE PERSONNEL. The lightning flash with arrowhead symbol, within an equilateral triangle, is intended to alert the user to the presence of uninsulated “dangerous voltage”… -
Page 3
NOTE ON USE / HINWEISE ZUM GEBRAUCH / OBSERVATIONS RELATIVES A L’UTILISATION / NOTE SULL’USO / NOTAS SOBRE EL USO / ALVORENS TE GEBRUIKEN / OBSERVERA ANGÅENDE ANVÄNDNINGEN • Keep the unit free from moisture, water, and dust. • Halten Sie das Gerät von Feuchtigkeit, Wasser und Staub •… -
Page 4
ENGLISH DEUTSCH FRANCAIS ITALIANO ESPAÑOL NEDERLANDS SVENSKA A NOTE ABOUT RECYCLING: This product’s packaging materials are recyclable and can be reused. Please dispose of any materials in accordance with the local recycling regulations. When discarding the unit, comply with local rules or regulations. Batteries should never be thrown away or incinerated but disposed of in accordance with the local regulations concerning battery disposal. -
Page 5: Table Of Contents
Contents Getting Started Accessories ······················································································2 Cautions on Handling ·····································································3 Cautions on Installation ·································································3 About the Remote Control Unit ····················································3 Inserting the Batteries ····································································3 Operating Range of the Remote Control Unit ································3 Part Names and Functions ·····························································4 Front Panel ·····················································································4 Display ···························································································4 Rear Panel ······················································································5 Remote Control Unit ······································································6 Connections…
-
Page 6: Getting Started
Specifications ··············································································· 70 List of preset codes ··········································· End of this manual Getting Started Thank you for purchasing this DENON product. To ensure proper operation, please read these owner’s manual carefully before using the product. After reading them, be sure to keep them for future reference.
-
Page 7: Cautions On Handling
Note Wall About the Remote Control Unit In addition to the AVR-2308, the included remote control unit (RC- 1081) can also be used to operate the equipment listed below. q DENON system components w Non-DENON system components •…
-
Page 8: Part Names And Functions
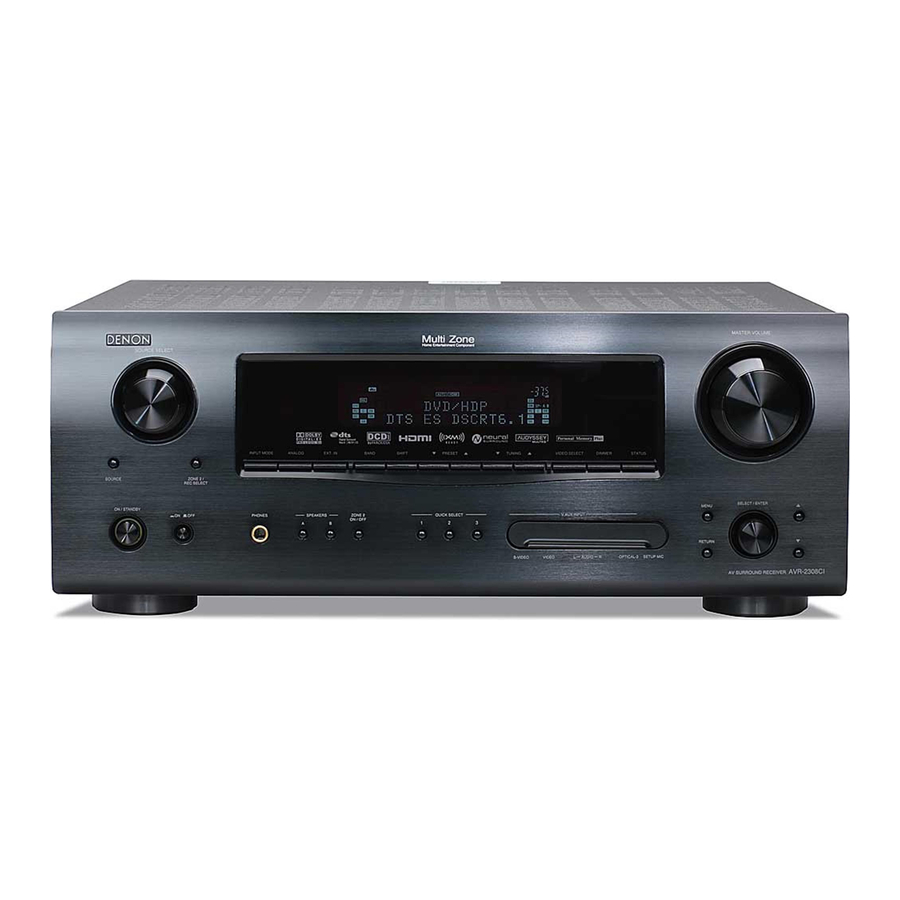
ENGLISH Part Names and Functions For buttons not explained here, see the page indicated in parentheses ( ). Front Panel W1 W2 W3 W4 W5 Power operation button (ON/STANDBY) ··········································· (43) Power indicator ··········································· (43) • The SELECT/ENTER knob on the main unit operates Power switch (hON jOFF) ·····················…
-
Page 9: Rear Panel
Rear Panel RS-232C connector ····································· (18) Power cord ·················································· (19) REMOTE CONTROL jacks··························· (18) Digital audio connectors (OPTICAL / COAXIAL) ·························· (12, 15) TRIGGER OUT jack ····································· (18) COMPONENT VIDEO connectors ·············· (12) DOCK CONTROL jack ································· (14) HDMI connectors ·········································(11) Speaker terminals (SPEAKERS) ··················…
-
Page 10: Remote Control Unit
ENGLISH Remote Control Unit [ Front ] NOTE If buttons on the front or rear are pressed strongly, the button on the opposite side will be activated too. Indicator ······················································ (51) Power buttons············································· (43) Tuner system buttons ································ (45) QUICK SELECT buttons ····························· (50) Source select buttons ································…
-
Page 11: Connections
Please select the types of connections suited for the equipment you are connecting. With some types of connections, certain settings must be made on the AVR-2308. For details, refer to the instructions for the respective connection items below. NOTE •…
-
Page 12: Video Conversion Function
S-Video connector the MENU button or the remote control unit’s DISPLAY button is operated. • When only HDMI or component video signals are input to the AVR-2308, the characters of the on-screen display are not displayed over the picture. Video connector…
-
Page 13: Speaker Connections
Front speakers Place the front speakers to the sides of the monitor or screen and as flush with the screen surface as possible. The table below shows a typical speaker configuration for the AVR-2308. FRONT SURROUND CENTER 7.1-channels (FRONT A+B) 7.1-channels…
-
Page 14
If the protection circuit is activated again even though there are no problems in the ventilation around the set nor in the connections, the set may be damaged. Turn the power off, then contact a DENON service center. -
Page 15: Connecting Equipment With Hdmi Connectors
16/20/24 bits DVD-Video • When the AVR-2308 and DVD player are connected using an HDMI cable, also connect the AVR-2308 and monitor using an HDMI cable. • If the connected monitor or DVD player only has a DVI-D connector, use an HDMI/DVI converter cable.
-
Page 16: Connecting The Monitor
ENGLISH Connecting the Monitor • Connect the cables to be used (vpage 8 “Video Conversion Function”). • With HDMI connections, the video and audio signals can be transferred with a single cable. • To output the audio signals to the monitor with HDMI connections, set menu “Manual Setup” – “HDMI Setup”…
-
Page 17: Record Player
• With some record players, noise may be generated when the ground wire is connected. If so, disconnect the ground wire. NOTE The AVR-2308’s SIGNAL GND terminal is meant to reduce noise when a record player is connected. This is not a safety ground terminal. CD Player Connect the cables to be used.
-
Page 18: Ipod
ENGLISH iPod ® Use a DENON Control Dock for iPod (ASD-1R, sold separately) to connect the iPod to the AVR-2308. For instructions on the Control Dock for iPod settings, refer to the Control Dock for iPod’s operating instructions. iPod • With the default settings, the iPod can be used connected to the VCR (iPod) connector.
-
Page 19: Connecting The Recording Components
Digital video recorder • Make analog connections if you wish to record analog audio signals. • When recording via the AVR-2308, the playback device’s cable must be of the same type as the cable used to connect the AVR-2308’s DVR OUT connector.
-
Page 20: Cd Recorder / Md Recorder / Tape Deck
Setup” – “Input Mode” – “Input Mode” – “EXT. IN” (vpage 34). • The video signal can be connected in the same way as a DVD player (vpage 12). • To play copyright-protected discs, connect the AVR-2308’s EXT. IN connector with the DVD player’s analog multi-channel output connector.
-
Page 21: Antenna Terminals
Antenna terminals An FM antenna cable plug can be connected directly. Direction of broadcasting station FM antenna 75 Ω/ohms Coaxial cable FM indoor antenna (supplied) AM loop antenna assembly Connect to the AM antenna terminals. Remove the vinyl tie and take Bend in the reverse direction.
-
Page 22: Multi-Zone
Receiver (RC-7001RCI, sold separately) two-way communication with an RF Remote Controller is possible. The AVR-2308’s status information as well as iPod can be browsed watching the RF Remote Controller’s display. For details, refer to the operating instructions of the respective devices.
-
Page 23: Connecting The Power Cord
Turning the Power On (vpage 43) Menu Operations To household With the AVR-2308, settings and operations for most functions can be performed by operating while power outlet looking at the menus displayed on the monitor screen. (AC 230 V, 50 Hz)
-
Page 24: Example Of Display Of Default Values
ENGLISH Example of Display of Default Values In lists of selectable items or adjustable ranges, the item surrounded by a border is the default value. B A + B [Selectable items] Examples of On-screen Display and Front Display Some typical examples are described below. GFront displayH *MENU Auto Setup…
-
Page 25: Menu Map
Menu Map MENU 1.Auto Setup 2.Manual Setup 3.Input Setup 4.Parameter 5.Information Information Parameter (vpage 41, 42) (vpage 38 ~ 41) n Status n Surround Parameter • Main Zone • MODE • ZONE2 • CINEMA EQ n Audio Input Signal • D.COMP n HDMI Information •…
-
Page 26: Preparations
ENGLISH Auto Setup • This procedure lets you measure the acoustic properties of your speakers and listening room and make the optimum settings automatically. • This function provides the optimum listening environment for all listening positions in a home theater where several people view or listen to the video or audio source simultaneously.
-
Page 27: Auto Setup
Auto Setup Optimize settings for speakers in use. F Menu screen F 1-1.Start Menu Step1:Speaker Detection Please place microphone at ear height at main listening position. Front Sp. Amp Assign Start Cancel a Start Menu The settings are performed automatically. Start Start auto setup and output the test tone.
-
Page 28: Error Messages
ENGLISH Error Messages If the auto setup procedure could not be completed due to speaker installation, the measuring environment, etc., an error message is displayed. If this happens, check the relevant items, be sure to take the necessary measures, then perform the auto setup procedure over again.
-
Page 29: Manual Setup
Manual Setup Make detail settings for various parameters. Speaker Setup Use this procedure to set the speakers manually or if you wish to change the settings made with the auto setup procedure. F Menu screen F MENU 2.Manual Setup 1.Auto Setup 2.Manual Setup 1.Speaker Setup 3.Input Setup…
-
Page 30: Channel Level
ENGLISH Distance measurement Select the speaker you want to set, then set the distance. Set the value closest to the measured distance. [Variable range] 0.00m ~ 18.00m : Display when “Meters” is set. 0.0ft ~ 60.0ft : Display when “Feet” is set. NOTE Set the distance between the listening position and the various speakers to no more than 6.00 meters (20.0 ft).
-
Page 31: Hdmi Setup
HDMI Setup Make settings for HDMI video/audio output. F Menu screen F 2.Manual Setup 2-2.HDMI Setup 1.Speaker Setup 2.HDMI Setup 3.Audio Setup 1.HDMI Audio Setup 4.Zone2 Setup 2.HDMI Video Setup 5.Option Setup a HDMI Audio Setup Select HDMI audio output device. HDMI Audio Out Select test tone playback method.
-
Page 32: Audio Setup
ENGLISH Audio Setup Make settings for audio playback. F Menu screen F 2.Manual Setup 2-3.Audio Setup 1.Speaker Setup 2.HDMI Setup 1.EXT.IN SW Level 3.Audio Setup 2.2ch Direct/Stereo 4.Zone2 Setup 3.Dolby Digital Setup 5.Option Setup 4.Auto Surround Mode 5.Manual EQ a EXT. IN Subwoofer Level Set the subwoofer level for playback.
-
Page 33: Manual
g Manual EQ Adjust tonal quality for each speaker using graphic equalizer. Base Curve Copy Copy the Room EQ´s “Audyssey Flat” correction curve. [Selectable items] “Base Curve Copy” is displayed after the auto setup procedure has been performed. Adjust CH Select speaker adjustment method.
-
Page 34: Option Setup
ENGLISH Option Setup Make various other settings. F Menu screen F 2.Manual Setup 2-5.Option Setup 1.Speaker Setup 1.Amp Assign 2.HDMI Setup 2.Vol.Control 3.Audio Setup 3.Source Delete 4.Zone2 Setup 4.On-Screen Display 5.Option Setup 5.Quick Select Name 6.Trigger Out 7.Remote ID Setup 8.2Way Remote 9.Display 10.Setup Lock…
-
Page 35: On-Screen Display
f On-Screen Display Make on-screen display related settings. Screensaver Make screensaver settings. Use the screensaver to prevent burn-in on the monitor screen. When set to “ON” , the screensaver is activated if there is no activity for about 3 minutes. [Selectable items] : Activate the screensaver if there is no activity for about 3 minutes.
-
Page 36: Remote Id Setup
Set remote control ID. [Selectable items] NOTE When using the AVR-2308 with only the included remote control unit (RC-1081), there is no need to make settings. When using a separately sold remote control unit (RC-7000CI, etc.), this function can be used. Match the ID setting of the remote control unit and the receiver.
-
Page 37: Input Setup
Input Setup Use this procedure to select the input source and make the settings related to playing input sources. n TUNER (AM/FM) This menu is for “TUNER” . F Menu screen F 3.Input Setup TUNE R 1.Auto Setup 2.Preset Skip 3.Preset Name 4.Input Mode 5.Rename…
-
Page 38: Input Mode
“Input Mode” to “Digital” . • When the AVR-2308 and monitor are connected with an HDMI cable, if the monitor is not compatible with HDMI audio signal playback, only the video signals are output to the monitor.
-
Page 39: Ipod
OPT3 connected to the VCR (iPod) connector. • Even if “iPod dock” is set to “Assign” , if the AVR-2308 is not connected to a Control dock for iPod, the input source can be used as the normal input source.
-
Page 40: Surround Modes
MULTI CH IN 7 .1 z1 : This is displayed when the input signal is “DTS-ES Matrix 6.1” and the AVR-2308’s “AFDM” setting is set to “ON” . z2 : This is displayed when the input signal is “DTS-ES Discrete 6.1”…
-
Page 41: Dsp Simulation Playback
DSP Simulation Playback The desired mode according to the program source and viewing situation can be selected from among 7 DENON original surround modes. The surround parameters can be adjusted (vpage 62, 63) to achieve an even more realistic, powerful sound field.
-
Page 42: Parameter
ENGLISH Parameter F Menu screen F 4.Parameter 1.Surround Parameter 2.Tone Control 3.Room EQ 4.RESTORER 5.Night Mode 6.Audio Delay a Surround Parameter Adjust surround sound parameters. The adjustable parameters differ for the different surround modes (vpage 62, 63). MODE Select the mode according to the playback source. n In the PLgx or PLg mode [Selectable items] CINEMA MUSIC GAME z: Can be selected in the PLg mode.
-
Page 43
ROOM SIZE Determine size of acoustic environment. [Selectable items] small : Simulate acoustics of a small room. med. s medium med. l large : Simulate acoustics of a large room. NOTE “ROOM SIZE” does not indicate the size of the room in which sources are played. -
Page 44: Tone Control
ENGLISH s Tone Control Adjust the tonal quality of the sound. Tone Defeat Turn tone adjustments off. [Selectable items] : Playback without tone adjustment. : Allow tone adjustment (treble, bass). The tone cannot be adjusted when in the DIRECT mode. Bass Adjust low frequency range (bass).
-
Page 45: Night Mode
g Night Mode Optimized setting for late-night listening. [Selectable items] : Turn night mode off. : Low setting. : Middle setting. HIGH : High setting. Operating from the remote control unit Press the NIGHT button. The “ ” indicator lights when “LOW” , “MID” or “HIGH” is selected.
-
Page 46: Hdmi Information
ENGLISH HDMI Information Shows information about HDMI input/output signals and monitor. F Menu screen F 5.Information 5-3.HDMI Signal Info. 1.Status 2.Audio Input Signal Resolution 3.HDMI Information 480i 4.Auto Surround Mode 1080p 5.Quick Select Color Space 6.Preset Station YCbCr 4:2:2 YCbCr 4:4:4 Pixel Depth 8bits 10bits…
-
Page 47: Playback
SOURCE SELECT <SOURCE> <PHONES> MASTER VOLUME <POWER> <SPEAKER> <ON/STANDBY> [Front] [OFF] [ON/SOURCE] SOURCE SELECT MASTER VOLUME [MUTING] [MODE SELECTOR 1] [Rear] SOURCE SELECT About the button names in these explanations < > : Buttons on the main unit : Buttons on the remote control unit Button name only: Buttons on the main unit and remote control unit Playback…
-
Page 48: Playing Video And Audio Equipment
ENGLISH TUNING SOURCE SELECT SHIFT <PTY> <RT> BAND <RDS> PRESET CHANNEL [Front] PRESET SHIFT CHANNEL SOURCE SELECT [MODE [MODE SELECTOR 1] SELECTOR 2] [Rear] [TUNER] SOURCE SELECT TUNING [MODE] BAND [MEMORY] About the button names in these explanations < > : Buttons on the main unit : Buttons on the remote control unit Button name only:…
-
Page 49: Presetting Radio Stations (Preset Memory)
Presetting Radio Stations (Preset Memory) Your favorite broadcast stations can be preset so that you can tune them in easily. Up to 56 stations can be preset. Tune in the broadcast station you want to preset. [MEMORY] Press SHIFT Press to select the block (A to G) in which the station is to be preset.
-
Page 50: Rds Search
ENGLISH <SOURCE SELECT> <PTY> <RT> <ON/STANDBY> <RDS> PRESET CHANNEL [Front] PRESET CHANNEL [MODE [MODE SELECTOR 1] SELECTOR 2] [Rear] [TUNER] [iPod] About the button names in these explanations < > : Buttons on the main unit : Buttons on the remote control unit Button name only: Buttons on the main unit and remote control unit RDS Search…
-
Page 51: Rt (Radio Text)
Basic Operation Make the necessary preparations. q S et the iPod in the DENON Control Dock for iPod. (vSee the Control Dock for iPod’s operating instructions.) w Assign the Control Dock for iPod’s input. MENU : ”Input Setup” – “Assign” – ”iPod dock”…
-
Page 52: Listening To Music
[ENTER] pressing [STATUS] during playback. • On the AVR-2308, folder and fi le names can be displayed as titles. Any characters that cannot be displayed are replaced with “ . (period)” . • The time for which the on-screen display are displayed can be set at menu “Manual Setup”…
-
Page 53: Other Operations And Functions
Other Operations and Functions Other Operations Recording on an External Device (REC OUT mode) You can listen to one program source while recording a different program source. <ZONE2 / REC SELECT> Press “ZONE2 SOURCE” is shown on the display. ZONE2 SOURCE ZONE2 TUNER ····…
-
Page 54: Quick Select Function
ENGLISH <SPEAKER A> <SPEAKER B> <POWER> QUICK SELECT [Front] QUICK SELECT About the button names in these explanations < > : Buttons on the main unit : Buttons on the remote control unit Button name only: Buttons on the main unit and remote control unit Quick Select Function With this function, the currently playing input source, input mode, surround mode, room EQ settings and volume can be stored in…
-
Page 55: Remote Control Unit Operations
Presetting • DENON and other makes of components can be operated by setting the preset memory. • This remote control unit can be used to operate components…
-
Page 56
ENGLISH Functions of Buttons by Component n Front [ON/SOURCE] [OFF] [SHIFT] [CHANNEL +/–] [1], [2], [3], [A/B], [0], [DISC SKIP +/ FAVORITE], [6 7], [SETUP], [uiop], [8 9], [AUDIO], [ENTER], [VCR CH +/–], [DISPLAY], [RETURN], [MENU] [MODE [MODE SELECTOR 1] SELECTOR 2] Device CD Player… -
Page 57
SUBTITLE DISPLAY – – – – RETURN – – – – Default DENON DENON setting – – (111) (151) (Preset code) Special – Remarks GSpecial RemarksH q Only one device can be set in the preset memory for each mode. Also, when a new code is preset, the previous code is automatically deleted. -
Page 58: Punch Through Function
ENGLISH [Front] [1], [2], [3], [6], [7], [8], [9] [RETURN] [MODE [MODE SELECTOR 1] SELECTOR 2] [Rear] [NUMBER] [MEMORY] [RETURN] Punch Through Function “Punch Through” is a function allowing you to operate 1, 2, 3, 6, 7, 8 and 9 on CD, iPod/NETWORK, TAPE/CD-R/MD, DVD/VDP or VCR components when in the SAT/CABLE or TV mode.
-
Page 59: Amp Assign / Multi-Zone Connections And Operations
Multi-zone Settings with the Amp Assign Function The amp assign function lets you assign the amplifiers for the different channels built into the AVR-2308 to the speaker outputs for the different zones. Select the desired playback environment from among “Setting 1” to “Setting 4” , then set the corresponding “Amp Assign”…
-
Page 60
ENGLISH Setting 2 : With this setting it is possible to switch between the following two playback modes. 5.1-channel playback 2-channel playback Switching ················Surround Mode switching Main zone Surround Mode DIRECT / STEREO 5.1ch Multi Channel / Surround n Amp Assign mode setting and speakers connected to the various speaker terminals Speaker terminal FRONT… -
Page 61: Multi-Zone Settings And Operations With Zone Output
Main zone (7.1-channel system) DVD player SURR. BACK / AMP Remote SURR ASSIGN control unit FL -A/FR-A Bi-Amp connection FL -B/FR-B Bi-Amp connection Audio signals ZONE2 OUT Stereo ZONE2 Monitor Pre-main amplifier AVR-2308 ZONE2 Input audio output : Multi-zone audio cable ENGLISH…
-
Page 62: Multi-Zone Operations
ENGLISH SOURCE SELECT VOLUME <ZONE2 ON/OFF> [Front] SOURCE SELECT VOLUME [MUTING] [MODE [MODE SELECTOR 1] SELECTOR 2] [Rear] [ZONE2 ON] [MAIN OFF] [ZONE2 OFF] [MAIN ON] SOURCE SELECT About the button names in these explanations < > : Buttons on the main unit : Buttons on the remote control unit Button name only: Buttons on the main unit and remote control unit…
-
Page 63: Other Information
Other Information About Speaker Installation Surround back speakers Sound positioning directly to the rear can be achieved easily by adding a surround back speaker to a 5.1-channel system. In addition, the acoustic image extending between the sides and the rear is narrowed, thus greatly improving the expression of the surround signals for sounds moving from the sides to the back and from the front to the point directly behind the listening position.
-
Page 64: Dolby Surround
G As seen from the side H Surround The AVR-2308 is equipped with a digital signal processing circuit that lets you play program sources in the surround mode to achieve the same sense of presence as in a movie theater.
-
Page 65
Audyssey MultEQ Audyssey MultEQ is a technology designed to provide the optimum listening environment for multiple listeners within the listening area. Test data collected from multiple listening points is analyzed comprehensively and equalization that improves the sound quality for the entire listening area is performed. Audyssey MultEQ not only corrects frequency response problems in large listening areas, it also fully automates the surround system setup. -
Page 66
ENGLISH Surround Modes and Parameters Channel output Surround mode Front L/R Center Surround L/R PURE DIRECT, DIRECT MULTI CH DIRECT STEREO EXT. IN MULTI CH IN DOLBY PRO LOGIC gx DOLBY PRO LOGIC g DTS NEO:6 DOLBY DIGITAL DTS SURROUND 7CH STEREO ROCK ARENA JAZZ CLUB… -
Page 67
Parameter (default values are shown in parentheses) Surround mode PRO LOGIC g/gx MUSIC mode only CENTER PANORAMA DIMENSION WIDTH PURE DIRECT, DIRECT MULTI CH DIRECT STEREO EXT. IN MULTI CH IN DOLBY PRO LOGIC gx S (OFF) S (3) S (3) DOLBY PRO LOGIC g S (OFF) S (3) -
Page 68
ENGLISH Differences in Surround Mode Names Depending on the Input Signals Button Note Surround mode STANDARD DTS SURROUND DTS ES DSCRT6.1 DTS ES MTRX6.1 DTS SURROUND DTS 96/24 DTS + PLgx CINEMA DTS + PLgx MUSIC DTS + NEO:6 DTS NEO:6 CINEMA DTS NEO:6 MUSIC DOLBY SURROUND DOLBY DIGITAL EX… -
Page 69
Button Note Surround mode ANALOG DIRECT DIRECT MULTI CH DIRECT M DIRECT + PLgx CINEMA M DIRECT + PLgx MUSIC M DIRECT 7 .1 PURE DIRECT PURE DIRECT MULTI CH PURE DIRECT M PURE D + PLgx CINEMA M PURE D + PLgx MUSIC M CH PURE DIRECT 7 .1 DSP SIMULATION 7CH STEREO… -
Page 70
ENGLISH Relationship Between Video Signals and Monitor Output Input signals Video convert HDMI COMPONENT S-VIDEO S (1080p) S (480p ~ 720p) S (480i / 576i) S (1080p) S (480p ~ 720p) S (480i / 576i) S (1080p) S (480p ~ 720p) S (480i / 576i) S (1080p) S (480p ~ 720p) -
Page 71
S-VIDEO Input signals Video convert MONITOR OUT HDMI COMPONENT S-VIDEO — — — Used Not used — — — Used Not used — — — Used Not used — — — Used Not used S : Signal input A : No signal MONITOR OUT VIDEO HDMI… -
Page 72: Troubleshooting
• Set is damaged. • Turn off the power and contact a DENON service center. Cause Countermeasure • Batteries are worn. • Replace with new batteries. • You are operating outside of the •…
-
Page 73
• DVD player is not compatible • Use a DTS-compatible player. with DTS sound playback. • The AVR-2308’s “Decode Mode” • Set to the “Auto” or “DTS” setting is set to “PCM” . mode. HDMI audio • The “Manual Setup” – “HDMI •… -
Page 74: Specifications
ENGLISH Specifications Audio section • Power amplifier Rated output: Front (A, B): 100 W + 100 W (8 Ω/ohms, 20 Hz ~ 20 kHz with 0.08 % T.H.D.) 135 W + 135 W (6 Ω/ohms, 1 kHz with 0.7 % T.H.D.) Center: 100 W (8 Ω/ohms, 20 Hz ~ 20 kHz with 0.08 % T.H.D.) 135 W (6 Ω/ohms, 1 kHz with 0.7 % T.H.D.)
-
Page 75
List of preset codes / Liste von voreingestellten Codes / Liste de codes préréglés / Lista dei codici pre-regolati / Lista de códigos pre-ajustados / Lijst van vooringestelde codes / Förteckning över förinställda koder DVD Player Curtis Mathes Cybernex Aiwa Denon 014, [111] Daewoo Hitachi Daytron 006, 011… -
Page 76
011, 012, 013, 018, 021 002, 003, 022 Aiwa 001, 035, 043 Burmster Carvery 003, 035 014, 023 [111]*, 044 Denon 004, 024, 025 Emerson 004, 005, 006, 007 Fisher 003, 008, 009, 010 018, 019 Kenwood 011, 012, 013, 014, 017… -
Page 80
Denon Brand Company, D&M Holdings Inc. Printed in China 00D 511 4734 005…
Инструкцию для Denon AVR-2308 B на русском языке, в формате pdf можно скачать с нашего сайта. Наш каталог предоставляем Вам инструкцию производителя фирмы Denon, которая была взята из открытых источников. Ознакомившись с руководством по эксплуатации от Denon, Вы на все 100% и правильно сможете воспользоваться всеми функциями устройства.
Для сохранения инструкции «Ресивер Denon AVR-2308 B» на русском языке на вашем компьютере либо телефоне, нажмите кнопку «Скачать инструкцию». Если активна кнопка «Инструкция онлайн», то Вы можете просмотреть документ (manual), в своём браузере онлайн.
Если у Вас нет возможности скачать инструкцию по эксплуатации либо просмотреть её, Вы можете поделиться ссылкой на эту страницу в социальных сетях и при удобном моменте скачать инструкцию. Либо добавьте эту страницу в закладки Вашего браузера, нажав кнопку «Добавить страницу в закладки браузера».
В представленном списке руководства для конкретной модели Усилителя — Denon AVR-2308. Вы можете скачать инструкции к себе на компьютер или просмотреть онлайн на страницах сайта бесплатно или распечатать.
- Инструкции и файлы
- Характеристики
- Основные поломки
- Сервисы по ремонту
В случае если инструкция на русском не полная или нужна дополнительная информация по этому устройству, если вам нужны
дополнительные файлы: драйвера, дополнительное руководство пользователя (производители зачастую для каждого
продукта делают несколько различных документов технической помощи и руководств), свежая версия прошивки, то
вы можете задать вопрос администраторам или всем пользователям сайта, все постараются оперативно отреагировать
на ваш запрос и как можно быстрее помочь. Ваше устройство имеет характеристики:Тип: AV-ресивер, 7.1, Количество каналов: 7, Схемотехника: полупроводниковый, Мощность фронтальных каналов (многоканальный режим): 100 Вт, Мощность центрального канала: 100 Вт, Мощность тыловых каналов: 100 Вт, полные характеристики смотрите в следующей вкладке.
Для многих товаров, для работы с Denon AVR-2308 могут понадобиться различные дополнительные файлы: драйвера, патчи, обновления, программы установки. Вы можете скачать онлайн эти файлы для конкретнй модели Denon AVR-2308 или добавить свои для бесплатного скачивания другим посетителями.
Если вы не нашли файлов и документов для этой модели то можете посмотреть интсрукции для похожих товаров и моделей, так как они зачастую отличаются небольшим изменениями и взаимодополняемы.
Обязательно напишите несколько слов о преобретенном вами товаре, чтобы каждый мог ознакомиться с вашим отзывом или вопросом. Проявляйте активность что как можно бльше людей смогли узнать мнение настоящих людей которые уже пользовались Denon AVR-2308.

виктор
2019-10-02 01:47:39
разбираюсь
Сергей
2019-12-13 12:23:50
Крутой ресивер
виктор
2020-10-27 16:48:46
10 лет нормальной работы. высокий уровень качества.
Основные и самые важные характеристики модели собраны из надежных источников и по характеристикам можно найти похожие модели.
| Общие характеристики | |
| Тип | AV-ресивер, 7.1 |
| Количество каналов | 7 |
| Схемотехника | полупроводниковый |
| Параметры усилителя | |
| Мощность фронтальных каналов (многоканальный режим) | 100 Вт |
| Мощность центрального канала | 100 Вт |
| Мощность тыловых каналов | 100 Вт |
| Мощность центральных тыловых каналов | 100 Вт |
| Воспроизводимый диапазон частот | 10 — 100000 Гц |
| Цифровая обработка звука | |
| DSP | есть, SHARC ADSP-21367 |
| Частота дискретизации аудио ЦАП | 192 кГц |
| Разрядность аудио ЦАП | 24 бит |
| Количество предустановок DSP | 7 |
| Интерфейсы | |
| Входы | композитный x6, S-Video x6, компонентный x3, HDMI x2, коаксиальный x3, оптический x2, 7.1CH x1, линейный x7 |
| Выходы | композитный x1, S-Video x1, компонентный x1, HDMI x1, наушники x1, оптический x1, 7.1CH x1, линейный x2, PreAmp |
| Интерфейсы | RS-232 |
| Разъемы на передней панели | наушники, линейный вход, композитный вход, S-Video-вход, оптический вход |
| Разъем для подключения наушников | 6.3 мм |
| Разъемы для акустики | винтовые |
| Функции | |
| Увеличение разрешения видеосигнала | есть |
| Экранное меню | есть |
| Подключение дополнительных комплектов акустики | есть |
| Декодеры | |
| Dolby Digital | есть |
| Dolby Pro Logic II | есть |
| Dolby Pro Logic IIx | есть |
| Dolby Digital EX | есть |
| DTS | есть |
| DTS 96/24 | есть |
| DTS ES Matrix 6.1 | есть |
| DTS ES Discrete 6.1 | есть |
| DTS Neo:6 | есть |
| Dolby Headphone | есть |
| Тюнер | |
| Тип тюнера | цифровой |
| Режимы | AM/FM |
| Количество станций | общее: 56 |
| Функции | автоматическая настройка, ручная настройка, RDS |
| Питание | |
| Блок питания | встроенный |
| Потребляемая мощность в режиме ожидания | 1 Вт |
| Количество сетевых розеток | 1 |
| Конструкция | |
| Дисплей | есть |
| Цветовое оформление | черный, серебристый |
| Материал корпуса | алюминиевая передняя панель |
| Размеры (ШхВхГ) | 434x171x420 мм |
| Вес | 12.8 кг |
| Дополнительная информация | |
| Пульт ДУ | есть |
Здесь представлен список самых частых и распространенных поломок и неисправностей у Усилителей. Если у вас такая поломка то вам повезло, это типовая неисправность для Denon AVR-2308 и вы можете задать вопрос о том как ее устранить и вам быстро ответят или же прочитайте в вопросах и ответах ниже.
| Название поломки | Описание поломки | Действие |
|---|---|---|
| Перегорают Защитные Предохранители | ||
| Автоусилитель Уходит В Защиту | ||
| При Включении Усилителя Загорается Красный Светодиод | ||
| Усилитель Включается, Но Звука Нет | ||
| Str-De698 | При Включении На Дисплее Protect | |
| После Сбоя При Обновлении Не Работает Кнопка Menu | Во Время Обновления Произошел Сбой В Эл/Сети И Процесс Обновления Был Нарушен. После Включения Ресивера Перестала Работать Кнопка Меню. Причем Сделать Сброс Удалось, Зажав И Удерживая Одновременно Кнопки Power И Menu. Но Это Не Помогло. Всё Остальное — Зв | |
| Не Работает Вход По Usb. | Усилитель Работает Нормально. При Подключении В Качестве Цап Компьютер Не Реагирует На Подключение Юсб Устройства, С Телефона Нет Вывода Сигнала. Другой Цап С Телефоном Работает Без Проблем. Е18 Был Куплен На Тайване, Под Воздействием Пары Пива В Надежде | |
| Туго Вращается Регулятор Громкости На Yamaha Rx-V459 | Очень Туго Вращается Регулятор Громкости На Yamaha Rx-V459. Пластиковая Ручка Просто Прокручивается … Невольно Хочется Смазать Как Ось Вращения | |
| Тюнер Работает. Все Остальные Входы:hdmi, Опто, Видео Не Работают | ||
| Нет Выхода Hdmi | На Hdmi Выходе Нет Сигнала. Иногда Проскакивает Изображение На Зеленом Фоне. Сильно Греется Микросхема Is 3850 (Adv 7322). Не Могу Найти Прошивку. | |
| Не Работают Каналы Мощности На Фронтальные Колонки | При Включении Усилителя Не Работают Фронтальные Колонки, При Запуске Теста Выдает Code 33 | |
| Vsx 520 K | Не Включается. Ничего Не Сгорели Не Щелкнет | |
| При Ресивер | ||
| Хлопок В Колонках После Включения Усилителя Musical Fidelity M6Si | После Включения Усилителя Musical Fidelity M6Si Примерно Через Минуту Слышен Сильный Хлопок В Колонках . После Этого Усилительработае Хорошо . Это Происходит Не Каждый День . Один Раз В Три Дня . Но Это Не Всегда . Иногда При Каждом Включении В Тот Же Ден |
В нашей базе сейчас зарегестрированно 18 353 сервиса в 513 города России, Беларусии, Казахстана и Украины.

АМФИТОН
⭐
⭐
⭐
⭐
⭐
Адресс:
ул. Маршала Рыбалко, д. 12, корп. 1
Телефон:
74955184079
Сайт:
n/a
Время работы
Время работы не указано
СИТИ СЕРВИС
⭐
⭐
⭐
⭐
⭐
Адресс:
ул. Ивана Франко, дом 48 строение 3, оф.802
Телефон:
74997042882
Сайт:
n/a
Время работы
Время работы не указано
ДОКТОР САУНД
⭐
⭐
⭐
⭐
⭐
Адресс:
ул. Сельскохозяйственная 17 корпус 4
Телефон:
74955454807
Сайт:
n/a
Время работы
Будни: с 1000 до 2000
Суббота: с 1100 до 1800
Воскресенье: с 1100 до 1800
PHILIPS В МОСКВЕ
⭐
⭐
⭐
⭐
⭐
Адресс:
Варшавское шоссе, 56
Телефон:
74999630206
Сайт:
n/a
Время работы
Время работы не указано
LIGRA-SERVICE
⭐
⭐
⭐
⭐
⭐
Адресс:
Павловская ул., вл.7
Телефон:
74959696208
Сайт:
n/a
Время работы
Время работы не указано
Denon AVR-1507 ремонт.
5:42
Очень доволен
хочу
авпваы
Хочу купить
ирлдоьвап ькеьпрлджыкеь дзьакерджь щзрбкежбрь апкыезрбкыеджрбеджр щзапбкерл
Только приобрела,а инструкции нет
Только приобрела,а инструкции нет
Отвалился распрыскиватель
Скачать
AV SURROUND RECEIVER
AVR-2308CI
Owner’s Manual
Manuel de l’Utilisateur
Краткое содержание страницы № 1
AV SURROUND RECEIVER
AVR-2308
Owner’s Manual
Bedienungsanleitung
Manuel de l’Utilisateur
Book 1
English Deutsch Français PRESET CODE
v
Book 2
Italiano Español Nederlands Svenska
Краткое содержание страницы № 2
ENGLISH DEUTSCH FRANCAIS ITALIANO ESPAÑOL NEDERLANDS SVENSKA SAFETY PRECAUTIONS n CAUTION: • DECLARATION OF CONFORMITY We declare under our sole responsibility that this product, to which this To completely disconnect this product from the mains, disconnect declaration relates, is in conformity with the following standards: the plug from the wall socket outlet. CAUTION EN60065, EN55013, EN55020, EN61000-3-2 and EN61000-3-3. The mains plug is used to completely interrupt the power supply to
Краткое содержание страницы № 3
SVENSKA NEDERLANDS ESPAÑOL ITALIANO FRANCAIS DEUTSCH ENGLISH n NOTE ON USE / HINWEISE ZUM GEBRAUCH / OBSERVATIONS RELATIVES A L’UTILISATION / NOTE SULL’USO / NOTAS SOBRE EL USO / ALVORENS TE GEBRUIKEN / OBSERVERA ANGÅENDE ANVÄNDNINGEN CAUTION: • T he ventilation should not be impeded by covering the ventilation openings with items, such as newspapers, tablecloths, curtains, etc. • No naked flame sources, such as lighted candles, should be placed on the unit. • Observe and follow local regulat
Краткое содержание страницы № 4
ENGLISH DEUTSCH FRANCAIS ITALIANO ESPAÑOL NEDERLANDS SVENSKA A NOTE ABOUT RECYCLING: This product’s packaging materials are recyclable and can be reused. Please dispose of any materials in accordance with the local recycling regulations. When discarding the unit, comply with local rules or regulations. Batteries should never be thrown away or incinerated but disposed of in accordance with the local regulations concerning battery disposal. This product and the supplied accessories, excluding th
Краткое содержание страницы № 5
ENGLISH Menu Operations Input Setup Contents Operations ····················································································· 19 Settings Related to Playing Input Sources ·································33 Example of Display of Default Values ·········································20 Auto Preset ··················································································33 Getting Started Examples of On-screen Display and Front Display ····················20 Preset Skip
Краткое содержание страницы № 6
Getting Started Connections Setup Playback Remote Control Multi-Zone Information Troubleshooting ENGLISH Playback Amp Assign / Multi-zone Connections and Operations Preparations ··················································································43 Multi-zone Settings with the Amp Assign Function ·········55 ~ 57 Turning the Power On ··································································43 Multi-zone Settings and Operations with Zone Output·················57 Selecting
Краткое содержание страницы № 7
Getting Started Connections Setup Playback Remote Control Multi-Zone Information Troubleshooting ENGLISH Cautions on Handling About the Remote Control Unit Operating Range of the Remote Control • Before turning the power switch on In addition to the AVR-2308, the included remote control unit (RC- Unit Check once again that all connections are correct and that there are 1081) can also be used to operate the equipment listed below. Point the remote control unit at the remote sensor when operatin
Краткое содержание страницы № 8
Getting Started Connections Setup Playback Remote Control Multi-Zone Information Troubleshooting ENGLISH Q9 SOURCE SELECT knob······························· (43) W5 SHIFT button ··············································· (45) Part Names and Functions W0 SOURCE button ·········································· (43) W6 PRESET buttons ·········································· (45) For buttons not explained here, see the page indicated in parentheses ( ). W1 INPUT MODE button ···············
Краткое содержание страницы № 9
Getting Started Connections Setup Playback Remote Control Multi-Zone Information Troubleshooting ENGLISH Rear Panel Q2 Q1 Q0 o i Q6 Q3 Q7 Q3 Q4 Q5 q w e r t y u q RS-232C connector ····································· (18) i Power cord ·················································· (19) Q4 FM/AM antenna terminals (TUNER ANTENNA) ···································· (17) w REMOTE CONTROL jacks··························· (18) o Digital audio connectors (OPTICAL / COAXIAL) ················
Краткое содержание страницы № 10
Getting Started Connections Setup Playback Remote Control Multi-Zone Information Troubleshooting ENGLISH Remote Control Unit [ Front ] [ Rear ] q Indicator ······················································ (51) q ZONE2 power buttons ······························· (58) Q2 q w Power buttons············································· (43) w Source select buttons ································ (43) e Tuner system buttons ································ (45) e Tuner system buttons ········
Краткое содержание страницы № 11
Getting Started Connections Setup Playback Remote Control Multi-Zone Information Troubleshooting ENGLISH Preparations Connections Cables Used for Connections Select the cables according to the equipment being connected. Connections for all compatible audio and video signal formats are described in these operating instructions. Please select the types Audio cables Video cables of connections suited for the equipment you are connecting. With some types of connections, certain settings must be ma
Краткое содержание страницы № 12
Getting Started Connections Setup Playback Remote Control Multi-Zone Information Troubleshooting ENGLISH Video Conversion Function • When not using this function, connect a monitor output with the same type of connector as the video • This function automatically converts various formats of video signals input to the AVR-2308 into the input connector. format used to output the video signals from the AVR-2308 to a monitor. • The resolution of the HDMI input-compatible monitor connected to the AV
Краткое содержание страницы № 13
Getting Started Connections Setup Playback Remote Control Multi-Zone Information Troubleshooting ENGLISH Speaker Connections Speaker Connections Example: 5.1-channels (FRONT A+B) Speaker Installation Front speakers Front speakers A B Subwoofer Center speaker The illustration below shows a basic example of installation of the amplifier combined with 8 speakers and a monitor. Subwoofer Center speaker Subwoofer Surround back speakers with built-in (L) (R) (L) (R) amplifier w q w q w q w q w q
Краткое содержание страницы № 14
Getting Started Connections Setup Playback Remote Control Multi-Zone Information Troubleshooting ENGLISH Connecting the Speaker Cables Protection circuit Carefully check the left (L) and right (R) channels and + (red) and – If speakers with an impedance lower than specified (for example (black) polarities on the speakers being connected to the AVR-2308, 4 Ω/ohms speakers) are used for an extended period of time with and be sure to interconnect the channels and polarities correctly. the volum
Краткое содержание страницы № 15
Getting Started Connections Setup Playback Remote Control Multi-Zone Information Troubleshooting ENGLISH NOTE Connecting Equipment with HDMI connectors • Use a CPPM-compatible DVD player to play DVD-Audio discs that are copyright-protected by CPPM. With HDMI connections, the video and audio signals can be transferred with a single cable. • The AVR-2308 cannot be controlled from another device via the HDMI cable. • The audio signals output from the HDMI connector (sampling frequency, bit rate, et
Краткое содержание страницы № 16
Getting Started Connections Setup Playback Remote Control Multi-Zone Information Troubleshooting ENGLISH Connecting the Monitor Connecting the Playback Components • Connect the cables to be used (vpage 8 “Video Conversion Function”). Carefully check the left (L) and right (R) channels and the inputs and outputs, and be sure to interconnect • With HDMI connections, the video and audio signals can be transferred with a single cable. correctly. • To output the audio signals to the monitor with HDM
Краткое содержание страницы № 17
Getting Started Connections Setup Playback Remote Control Multi-Zone Information Troubleshooting ENGLISH Record Player CD Player Connect the cables to be used. Turntable (MM cartridge) CD player R L L R R L • When connecting a record player with an MC cartridge, use a commercially available MC head amplifier When using an optical cable for the digital audio connection, make the settings at menu “Input Setup” or a step-up transformer. – “Assign” – “Digital In” (vpage 35). • Induction
Краткое содержание страницы № 18
Getting Started Connections Setup Playback Remote Control Multi-Zone Information Troubleshooting ENGLISH ® iPod TV/CABLE Tuner Use a DENON Control Dock for iPod (ASD-1R, sold separately) to connect the iPod to the AVR-2308. Connect the cables to be used. For instructions on the Control Dock for iPod settings, refer to the Control Dock for iPod’s operating TV tuner instructions. iPod L R L R R L R L When using an optical cable for the digital audio connection, make the sett
Краткое содержание страницы № 19
Getting Started Connections Setup Playback Remote Control Multi-Zone Information Troubleshooting ENGLISH Connecting the Recording Components Video Cassette Recorder Carefully check the left (L) and right (R) channels and the inputs and outputs, and be sure to interconnect Connect the cables to be used. correctly. Video cassette recorder Digital Video Recorder Connect the cables to be used. Digital video recorder L R L R or L R L R L R L R or or L R L R • When re
Краткое содержание страницы № 20
Getting Started Connections Setup Playback Remote Control Multi-Zone Information Troubleshooting ENGLISH Connections to Other Devices CD Recorder / MD Recorder / Tape Deck Component with Multi-channel Output Carefully check the left (L) and right (R) channels and the inputs and connectors Make analog connections if you wish to record analog audio signals, or outputs, and be sure to interconnect correctly. digital connections if you wish to record digital audio signals, depending on the types
Посмотреть инструкция для Denon AVR-2308CI бесплатно. Руководство относится к категории Приемники, 7 человек(а) дали ему среднюю оценку 8.3. Руководство доступно на следующих языках: английский. У вас есть вопрос о Denon AVR-2308CI или вам нужна помощь? Задайте свой вопрос здесь
Не можете найти ответ на свой вопрос в руководстве? Вы можете найти ответ на свой вопрос ниже, в разделе часто задаваемых вопросов о Denon AVR-2308CI.
Когда звук считается слишком громким?
Могут ли устройства разных марок подключаться друг к другу при помощи Bluetooth?
Как лучше всего выполнять чистку Приемник?
Инструкция Denon AVR-2308CI доступно в русский?
Не нашли свой вопрос? Задайте свой вопрос здесь