
Anatolii8355
Я езжу на Dodge Caliber
огромное спасибо за мануал
2 недели

63Anatolii
Я езжу на Dodge Caliber
Спасибо за книгу!
4 месяца

ziamskou
Я езжу на Honda Accord (7G)
Что ж ты делаешь. Смотрел на твои доработки сандеро, пока на нём ездил, купил калибер, а тут опять ты со всяким полезным 
1 год

ElenaSochi-Krsk
Я езжу на Dodge Caliber
Доброго дня! Спасибо огромное за руководство. Одна проблемка. Скачала, а распечатать не могу. Просит код
1 год

LLInuoHuk
Я езжу на Dodge Caliber
Все перерыл, а оно тут! Спасибо!
1 год

MasterKindle
Я езжу на Dodge Caliber
Спасибо, друг!
1 год
- Manuals
- Brands
- Dodge Manuals
- Automobile
- CALIBER 2011
- User manual
-
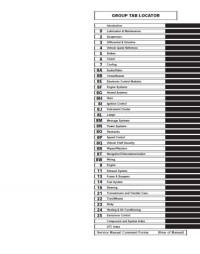
Contents
-
Table of Contents
-
Bookmarks
Quick Links
Related Manuals for Dodge 2011 Caliber
Summary of Contents for Dodge 2011 Caliber
-
Page 1
201 1 user guide… -
Page 2
If you are the first registered owner of your vehicle, you may obtain a complimentary printed copy of the Owner’s Manual, Navigation/Media Center Manuals or Warranty Booklet by calling 1-800-423-6343 (U.S.) or 1-800-387-1143 (Canada) or by contacting your dealer. The driver’s primary responsibility is the safe operation of the vehicle. Driving while distracted can result in loss of vehicle control, resulting in a collision and personal injury. -
Page 3: Table Of Contents
TABLE OF CONTENTS INTRODUCTION/WELCOME Power Inverter ….41 Power Outlet ….42 Welcome From Chrysler Group LLC ..2 UTILITY CONTROLS AT A GLANCE Driver Cockpit .
-
Page 4: Introduction/Welcome
INTRODUCTION/WELCOME WELCOME FROM CHRYSLER GROUP LLC Congratulations on selecting your new Chrysler Group LLC vehicle. Be assured that it represents precision workmanship, distinctive styling, and high quality — all essentials that are traditional to our vehicles. Your new Chrysler Group LLC vehicle has characteristics to enhance the driver’s control under some driving conditions.
-
Page 5
If your symptoms persist, please see an authorized dealer. CHRYSLER, DODGE, JEEP, RAM TRUCK, ATF+4, MOPAR and Uconnect are registered trademarks of Chrysler Group LLC. COPYRIGHT ©2011 CHRYSLER GROUP LLC… -
Page 6: Controls At A Glance
CONTROLS AT A GLANCE DRIVER COCKPIT…
-
Page 7
CONTROLS AT A GLANCE… -
Page 8: Instrument Cluster
CONTROLS AT A GLANCE INSTRUMENT CLUSTER Warning Lights — Low Fuel Warning Light — Charging System Light** — Oil Pressure Warning Light** — Anti-Lock Brake (ABS) Light** — Airbag Warning Light** — Electronic Throttle Control (ETC) Light — Tire Pressure Monitoring System (TPMS) Light — Engine Temperature Warning Light — Transmission Temperature Warning Light — Seat Belt Reminder Light…
-
Page 9
CONTROLS AT A GLANCE Indicators — Turn Signal Indicators — High Beam Indicator — Front Fog Light Indicator — Vehicle Security Indicator* — Electronic Stability Control (ESC) Off Indicator — Cruise Indicator — Park/Headlight ON Indicator Odometer Messages ECO — Fuel Saver Indicator (If Equipped) LoW TirE — Low Tire Pressure door — Door Ajar gASCAP — Fuel Cap Fault… -
Page 10: Getting Started
GETTING STARTED KEY FOB Locking And Unlocking The Doors/Liftgate • Press the LOCK button once to lock all the doors and the liftgate. Press the UNLOCK button once to unlock the driver’s door only and twice within five seconds to unlock all the doors and liftgate.
-
Page 11: Theft Alarm
GETTING STARTED WARNING! • Do not start or run an engine in a closed garage or confined area. Exhaust gas contains Carbon Monoxide (CO) which is odorless and colorless. Carbon Monoxide is poisonous and can cause serious injury or death when inhaled. •…
-
Page 12: Supplemental Restraint System (Srs) — Airbags
GETTING STARTED WARNING! In a collision, you and your passengers can suffer much greater injuries if you are not buckled up properly. You can strike the interior of your vehicle or other passengers, or you can be thrown out of the vehicle. Always be sure you and others in your vehicle are buckled up properly.
-
Page 13: Child Restraints
GETTING STARTED WARNING! (Continued) • Do not drive your vehicle after the airbags have deployed. If you are involved in another collision, the airbags will not be in place to protect you. • After any collision, the vehicle should be taken to an authorized dealer immediately.
-
Page 14
GETTING STARTED • Once you have completed securing the child restraint with the seat belt, secure the top tether strap. The tether strap should be routed over the center top of the head restraint. WARNING! • In a collision, an unrestrained child, even a tiny baby, can become a projectile inside the vehicle. -
Page 15: Front Seats
GETTING STARTED FRONT SEATS Power Seats • The power seat switch is located on the outboard side of the seat near the floor. Use the switch to move the seat up, down, forward, rearward, or to tilt the seat. Manual Seat Adjustment Forward/Rearward •…
-
Page 16
GETTING STARTED Lumbar Support • The lumbar lever is on the outboard side of the seatback. Rotate the lumbar lever downward to increase the lumbar support or upward to decrease the lumbar support as desired. Fold-Flat Front Passenger Seat • The front passenger seat can be folded flat. -
Page 17: Rear Seats
GETTING STARTED WARNING! (Continued) • Do not ride with the seatback reclined so that the seat belt is no longer resting against your chest. In a collision, you could slide under the seat belt and be severely injured or killed. Use the recliner only when the vehicle is parked.
-
Page 18: Tilt Steering Column
GETTING STARTED • If the High-level setting is selected, the system will automatically switch to Low-level after approximately 30 minutes. The Low-level setting will turn Off automatically after approximately 30 minutes. WARNING! • Persons who are unable to feel pain to the skin because of advanced age, chronic illness, diabetes, spinal cord injury, medication, alcohol use, exhaustion or other physical conditions must exercise care when using the seat heater.
-
Page 19: Operating Your Vehicle
OPERATING YOUR VEHICLE TURN SIGNAL/LIGHTS LEVER Headlights/Parking Lights • Rotate the end of the lever to the first detent for parking lights and to the second detent for headlights Instrument Panel Dimmer • Rotate the center portion of the lever to the extreme bottom position to fully dim the instrument panel lights and prevent the interior lights from illuminating when a door is opened.
-
Page 20: Wiper/Washer Lever
OPERATING YOUR VEHICLE WIPER/WASHER LEVER Front Wipers Intermittent, Low And High Operation • Rotate the end of the lever to the first detent position for one of five intermittent settings, the second detent for low wiper operation and the third detent for high wiper operation.
-
Page 21: Speed Control Lever
OPERATING YOUR VEHICLE SPEED CONTROL LEVER Cruise ON/OFF • Push the ON/OFF button to activate the Speed Control. • CRUISE will appear on the instrument cluster to indicate the Speed Control is • Push the ON/OFF button a second time to turn the system off.
-
Page 22: Autostick
OPERATING YOUR VEHICLE ® AUTOSTICK ® • AutoStick is a driver-interactive transmission that offers six manual ratio changes to provide you with more control. The system is activated in the DRIVE position by moving the shift lever side-to-side. ® • Moving the shift lever to the right (+) side will activate AutoStick and shift up to the next higher manual ratio, unless you are already operating in or near Overdrive, in which case sixth gear ratio will be selected.
-
Page 23: Automatic Temperature Controls (Atc)
OPERATING YOUR VEHICLE AUTOMATIC TEMPERATURE CONTROLS (ATC) Automatic Operation • Turn the Mode and Blower Controls to the AUTO position. • Select the desired temperature by rotating the Temperature Control. • The system will maintain the set temperature automatically. Air Conditioning (A/C) •…
-
Page 24: Power Sunroof
OPERATING YOUR VEHICLE POWER SUNROOF • The power sunroof switch is located on the overhead console. Opening Sunroof Express • Press the switch rearward and release. The sunroof will fully open and stop automatically. Closing Sunroof Express • Press the switch forward and release. The sunroof will close automatically from any position.
-
Page 25: Wind Buffeting
OPERATING YOUR VEHICLE WIND BUFFETING • Wind buffeting can be described as a helicopter-type percussion sound. If buffeting occurs with the rear windows open, adjust the front and rear windows together. • If buffeting occurs with the sunroof open, adjust the sunroof opening, or adjust any window.
-
Page 26: Electronics
ELECTRONICS YOUR VEHICLE’S SOUND SYSTEM…
-
Page 27
ELECTRONICS… -
Page 28: Non-Touch-Screen Radios
ELECTRONICS NON-TOUCH-SCREEN RADIOS Media Center 130 (Sales Code RES) Media Center 130 with Satellite Radio (Sales Code RES + RSC)
-
Page 29
ELECTRONICS Media Center 230 (Sales Code REQ) NOTE: Your radio may not be equipped with the Uconnect™ Voice Command and Uconnect™ Phone features. To determine if your radio has these features, press the Voice Command button on the radio. You will hear a voice prompt if you have the feature, or see a message on the radio stating “Uconnect Phone not available”… -
Page 30
ELECTRONICS • Pressing the AUX button will change the mode to auxiliary device if the Audio Jack is connected, allowing the music from your portable device to play through the vehicle’s speakers. • The functions of the portable device are controlled using the device buttons. The volume may be controlled using the radio or portable device. -
Page 31: Touch-Screen Radio
ELECTRONICS TOUCH-SCREEN RADIO Media Center 430/430N CD/DVD/HDD (Sales Code RBZ/RHB) NOTE: Your radio may not be equipped with the Uconnect™ Voice Command and Uconnect™ Phone features. To determine if your radio has these features, press the Voice Command button on the radio. You will hear a voice prompt if you have the feature, or see a message on the radio stating “Uconnect Phone not available”…
-
Page 32
ELECTRONICS • The functions of the portable device are controlled using the device buttons. The volume may be controlled using the radio or portable device. Clock Setting • Turn the radio on, then touch the screen where the time is displayed. •… -
Page 33
ELECTRONICS • Touch one of the ADD PICTURES soft-keys, then select the type of media inserted. • Use the PAGE soft-keys to page through a list of pictures and press the picture you would like to import. • Confirm your selection by touching the YES soft-key. The imported picture is now available in the MANAGE MY PICTURES screen. -
Page 34
ELECTRONICS • After touching one of the subcategories, follow the on-screen steps to complete the process and be routed to your destination. Setting a Home Location • Touch the NAV soft-key in the upper-right corner of your radio screen, to access the Navigation system. -
Page 35: Steering Wheel Audio Controls
ELECTRONICS • Movie Listings • Check which movies (includes start times, ratings, run lengths and summaries) are playing at theaters near your current location. • Sports Scores • View scores and upcoming events for all major sports. • Your favorite location, theater and sports teams can be stored for quick access. •…
-
Page 36
NOTE: The Uconnect™ Phone requires a mobile phone equipped with the Bluetooth Hands-Free Profile, Version 0.96 or higher. For Uconnect™ customer support, call 1–877–855–8400 or visit www.dodge.com/uconnect. Phone Pairing NOTE: Pairing is a one-time initial setup before using the phone. You will also need to ®… -
Page 37: Uconnect™ Voice Command
ELECTRONICS Transfer Ongoing Call Between Handset And Vehicle • During a call, press the Voice Command button • (After the BEEP), say “transfer call”. Changing The Volume • Start a dialogue by pressing the Phone button , then adjust the volume during a normal call.
-
Page 38: Ipod /Usb/Mp3 Control
ELECTRONICS • Not all phones are compatible with this feature. Refer to the phone compatibility list at www.dodge.com/uconnect. Connected mobile phones must be bluetooth-compatible, and paired with your radio. Changing The Volume • Start a dialogue by pressing the Voice Command button , then say a command (for example, “tutorial”).
-
Page 39: Electronic Vehicle Information Center (Evic)
The USB port also supports playing music from compatible external USB Mass Storage Class memory devices. For supported audio file formats, refer to the USB Port section in the Owner’s Manual on the DVD. Refer to www.dodge.com/uconnect ® ®…
-
Page 40: Programmable Features
ELECTRONICS • Distance To Empty (DTE) • Elapsed Time • Tire Pressure Monitor (TPM) • Personal Settings • Pressing and holding the EVIC button once will clear the function currently being displayed. • To reset all resettable functions, press and release the EVIC button a second time within three seconds of resetting the currently displayed function.
-
Page 41
ELECTRONICS NOTE: Pressing the LOCK button while you are inside the vehicle will activate the Vehicle Security Alarm. Opening a door with the Vehicle Security Alarm activated will cause the alarm to sound. Press the UNLOCK button to deactivate the Vehicle Security Alarm. -
Page 42: Universal Garage Door Opener (Homelink )
ELECTRONICS UNIVERSAL GARAGE DOOR OPENER ® (HomeLink ® Programming HomeLink Begin Programming ® • The HomeLink buttons are located in the overhead console. • Erase all channels before you begin programming by holding the two outside buttons for up to 20 seconds until the red indicator flashes.
-
Page 43: Power Inverter
ELECTRONICS • If the device does not activate, press the button a third time (for two seconds) to complete the programming. ® Using HomeLink ® • To operate, simply press and release the programmed HomeLink button and the programmed device will operate. •…
-
Page 44: Power Outlet
ELECTRONICS WARNING! To avoid serious injury or death: Do not use a three-prong adaptor. Do not insert any objects into the receptacles. Do not touch with wet hands. Close the lid when not in use. If this outlet is mishandled, it may cause an electric shock and failure.
-
Page 45: Utility
UTILITY…
-
Page 46: Recreational Towing (Behind Motorhome, Etc.)
UTILITY…
-
Page 47: What To Do In Emergencies
WHAT TO DO IN EMERGENCIES 24-HOUR TOWING ASSISTANCE • Dial toll-free 1-800-521-2779 or 1-800-363-4869 for Canadian residents. • Provide your name, vehicle identification number and license plate number. • Provide your location, including telephone number, from which you are calling. •…
-
Page 48
WHAT TO DO IN EMERGENCIES • Please note that the TPMS is not a substitute for proper tire maintenance, and it is the driver’s responsibility to maintain correct tire pressure, even if under-inflation has not reached the level to trigger illumination of the TPMS low tire pressure telltale. -
Page 49
WHAT TO DO IN EMERGENCIES BRAKE — Brake Warning Light • The Brake Warning light illuminates when there is either a system malfunction or the parking brake is applied. If the light is on and the parking brake is not applied, it indicates a possible brake hydraulic malfunction, brake booster problem or an Anti-Lock Brake System problem. -
Page 50: If Your Engine Overheats
WHAT TO DO IN EMERGENCIES • If a problem is detected, the light will come on while the engine is running. Cycle the ignition when the vehicle has completely stopped and the shift lever is placed in the PARK position; the light should turn off. •…
-
Page 51: Automatic Transmission Overheating
WHAT TO DO IN EMERGENCIES NOTE: There are steps that you can take to slow down an impending overheat condition: • If your air conditioner (A/C) is on, turn it off. The A/C system adds heat to the engine cooling system and turning the A/C off can help remove this heat. •…
-
Page 52: Jacking And Tire Changing
WHAT TO DO IN EMERGENCIES JACKING AND TIRE CHANGING Jack Location • The jack and jack-handle are stowed under the load floor in the trunk. Spare Tire Stowage • The compact spare tire is stowed under the rear load floor in the trunk. •…
-
Page 53
WHAT TO DO IN EMERGENCIES • Assemble the jack and jacking tools. Connect the jack handle driver to the extension, then to the lug wrench. • Place the jack underneath the lift area (triangular cutout) that is closest to the flat tire. -
Page 54: Jump-Starting
WHAT TO DO IN EMERGENCIES WARNING! • Do not attempt to change a tire on the side of the vehicle close to moving traffic. Pull far enough off the road to avoid the danger of being hit when operating the jack or changing the wheel. •…
-
Page 55
WHAT TO DO IN EMERGENCIES Preparations for Jump-Start • The battery in your vehicle is located in the front of the engine compartment below the air intake duct. To access the battery remove the air intake duct by turning the two finger screws, located on the radiator support. -
Page 56
WHAT TO DO IN EMERGENCIES Once the engine is started, remove the jumper cables in the reverse sequence: • Disconnect the negative (-) jumper cable from the engine ground of the vehicle with the discharged battery. • Disconnect the negative end (-) of the jumper cable from the negative (-) post of the booster battery. -
Page 57: Shift Lever Override
WHAT TO DO IN EMERGENCIES WARNING! (Continued) • Do not connect the cable to the negative post (-) of the discharged battery. The resulting electrical spark could cause the battery to explode and could result in personal injury. SHIFT LEVER OVERRIDE •…
-
Page 58: Towing A Disabled Vehicle
WHAT TO DO IN EMERGENCIES…
-
Page 59: Freeing A Stuck Vehicle
WHAT TO DO IN EMERGENCIES FREEING A STUCK VEHICLE • If your vehicle becomes stuck in mud, sand or snow, it can often be moved by a rocking motion. Turn your steering wheel right and left to clear the area around the front wheels.
-
Page 60: Event Data Recorder (Edr)
WHAT TO DO IN EMERGENCIES EVENT DATA RECORDER (EDR) • This vehicle is equipped with an event data recorder (EDR). The main purpose of an EDR is to record, in certain crash or near crash-like situations, such as an air bag deployment or hitting a road obstacle, data that will assist in understanding how a vehicle’s systems performed.
-
Page 61: Maintaining Your Vehicle
MAINTAINING YOUR VEHICLE OPENING THE HOOD • Pull the release lever located below the instrument panel and in front of the driver’s door. • Raise the hood and locate the safety latch, in the middle of the hood opening. • Move the safety latch while lifting the hood at the same time.
-
Page 62: Engine Compartment
MAINTAINING YOUR VEHICLE…
-
Page 63
MAINTAINING YOUR VEHICLE… -
Page 64: Fluids And Capacities
MAINTAINING YOUR VEHICLE FLUIDS AND CAPACITIES Fluid, Lubricant, or Genuine Component Capacities Part ® Engine Coolant 2.0L, 2.4L MOPAR Antifreeze/ 7.2 Quarts (6.8 Liters) Coolant Five Includes heater and Year/100,000 Mile coolant recovery bottle Formula HOAT (Hybrid filled to MAX level. Organic Additive Technology) or equivalent.
-
Page 65: Maintenance Chart
MAINTAINING YOUR VEHICLE…
-
Page 66
MAINTAINING YOUR VEHICLE… -
Page 67
MAINTAINING YOUR VEHICLE Maintenance Record Odometer Date Signature, Authorized Service Center 8,000 Miles (13,000 km) or 6 Months 16,000 Miles (26,000 km) or 12 Months 24,000 Miles (39,000 km) or 18 Months 32,000 Miles (52,000 km) or 24 Months 40,000 Miles (65,000 km) or 30 Months 48,000 Miles… -
Page 68: Fuses
MAINTAINING YOUR VEHICLE FUSES Integrated Power Module (fuses) • The Integrated Power Module is located in the engine compartment near the air cleaner assembly. This center contains cartridge fuses and mini-fuses. Cavity Cartridge Fuse Mini-Fuse Description Empty Empty 15 Amp Lt Blue AWD/4WD ECU Feed 10 Amp Red CHMSL Brake Switch Feed…
-
Page 69: Tire Pressures
MAINTAINING YOUR VEHICLE Cavity Cartridge Fuse Mini-Fuse Description 10 Amp Red IGN RUN Heat/AC/Compass Sensor 15 Amp Lt Blue ENG ASD Relay Feed 3 15 Amp Lt Blue Power Sunroof Feed 10 Amp Red Heated Mirror (If Equipped) 15 Amp Lt Blue ENG ASD Relay Feed 2 10 Amp Red IGN RUN Only ORC Feed…
-
Page 70: Wheel And Wheel Trim Care
MAINTAINING YOUR VEHICLE WHEEL AND WHEEL TRIM CARE • All wheels and wheel trim, especially aluminum and chrome plated wheels, should be cleaned regularly with a mild soap and water to prevent corrosion. ® Wheel Cleaner or • To remove heavy soil and/or excessive brake dust, use MOPAR equivalent or select a non-abrasive, non-acidic cleaner.
-
Page 71: Consumer Assistance
• The Owner’s Manual and User Guide users, dial 711 and for Voice callers, electronic files are also available on the dial 1–800–855–0511 to connect Chrysler, Jeep, Ram Truck and Dodge with a Bell Relay Service operator. websites. • Click on the «For Owners» tab, select «Owner/Service Manuals», then select…
-
Page 72: Reporting Safety Defects In The 50 United States And Washington, D.c
CONSUMER ASSISTANCE In Canada REPORTING SAFETY • If you believe that your vehicle has a DEFECTS IN THE 50 safety defect, you should contact the UNITED STATES AND Customer Service Department immediately. Canadian customers WASHINGTON, D.C. who wish to report a safety defect to •…
-
Page 73: Mopar Accessories
• For the full line of Authentic Dodge Accessories by Mopar, visit your local Dodge dealership or online at mopar.com. CHROME: •…
-
Page 74: Index
INDEX Air Conditioning ..20,21 Driver Cockpit ….4 Airbag ….10 Airbag Light .
-
Page 75
INDEX Instrument Cluster … . 6 Overheating, Engine ..48 Indicators ….7 Instrument Cluster Warning Panic Alarm . -
Page 76
INDEX Store Radio Presets ..28,30 Trailer Weight ….43 Sun Roof ….22 Transmission Supplemental Restraint System — Fluid… -
Page 77
NOTES… -
Page 78
NOTES… -
Page 79
Driving and Alcohol: Drunken driving is one of the most frequent causes of collisions. Your driving ability can be seriously impaired with blood alcohol levels far below the legal minimum. If you are drinking, don’t drive. Ride with a designated non-drinking driver, call a cab, a friend, or use public transportation. -
Page 80
This guide has been prepared to help you get quickly acquainted with your new Dodge and to provide a convenient reference source for common questions. However, it is not a substitute for your Owner’s Manual. For complete operational instructions, maintenance procedures and important safety messages, please consult your Owner’s Manual,…
Руководство на английском языке по техническому обслуживанию и ремонту Dodge Caliber.
- Автор: —
- Издательство: DaimlerChrysler Corporation
- Год издания: —
- Страниц: 5815
- Формат: PDF
- Размер: 72,5 Mb
Руководство по эксплуатации, ремонту и техническому обслуживанию Dodge Caliber с 2006 года выпуска с бензиновыми двигателями.
- Автор: —
- Издательство: Легион-Автодата
- Год издания: —
- Страниц: 352
- Формат: —
- Размер: —
Руководство по ремонту и эксплуатации Dodge Caliber с 2006 года выпуска с бензиновыми двигателями.
- Автор: —
- Издательство: Монолит
- Год издания: —
- Страниц: 246
- Формат: —
- Размер: —

Руководство по эксплуатации Dodge Caliber.
- Автор: —
- Издательство: DaimlerChrysler Corporation
- Год издания: —
- Страниц: 206
- Формат: PDF
- Размер: 3,9 Mb

libcats.org
DODGE CALIBER: Руководство по эксплуатации
Книга DODGE CALIBER: Руководство по эксплуатации DODGE CALIBER: Руководство по эксплуатации Книги Авто Автор: © DaimlerChrysler Corporation Год издания: 2006 Формат: pdf Издат.:ЗАО Даймлер Крайслер Автомобили Рус Страниц: 206 Размер: 4 Мб Язык: Русский0 (голосов: 0) Оценка:Официальное руководство по эксплуатации автомобиля DODGE CALIBER производства DaimlerChrysler Corporation. скрытый текст
EPUB | FB2 | MOBI | TXT | RTF
* Конвертация файла может нарушить форматирование оригинала. По-возможности скачивайте файл в оригинальном формате.
Популярные книги за неделю:
Только что пользователи скачали эти книги:
07.06.2011
1 046 просмотров
Настоящее руководство предназначено для ознакомления с основными правилами эксплуатации и техническогообслуживания Вашего автомобиля.
Соблюдение этих правил позволит Вам на протяжении многих километров комфортно и без поломок путешествовать и наслаждаться вождением автомобиля.
Пожалуйста прочитайте инструкцию перед началом эксплуатации.
Размер: 131,5 Mb
Формат: PDF
| Руководство по эксплуатации и техническому обслуживанию автомобиля DODGE Caliber |
Скачать с Vip-file.com
Скачать с ShareFlare.net
Если Вы являетесь правообладателем, и имеете претензии по размещению этого материала на нашем сайте — перейдите в раздел: ПРАВООБЛАДАТЕЛЯМ
Дорогие друзья!
Если представленный материал принес Вам пользу — поделитесь ссылкой в своих социальных сетях.
Будем Вам бесконечно благодарны.