Для вызова специалиста по ремонту обратитесь в мастерскую «РемБытТех» по телефонам:
+7 (495) 215 – 14 – 41
+7 (903) 722 – 17 – 03
или через онлайн-форму на сайте. В вашем обращении сообщите, пожалуйста, следующие данные:
- Марку и модель вашей машинки.
- Симптомы неисправной работы. Например, стиральная машина не открывается или из нее течет вода.
- Подходящий день ремонта.
- Имя, адрес, телефон.
В назначенный день ремонта наш мастер свяжется с вами, чтобы подтвердить точное время ремонта.
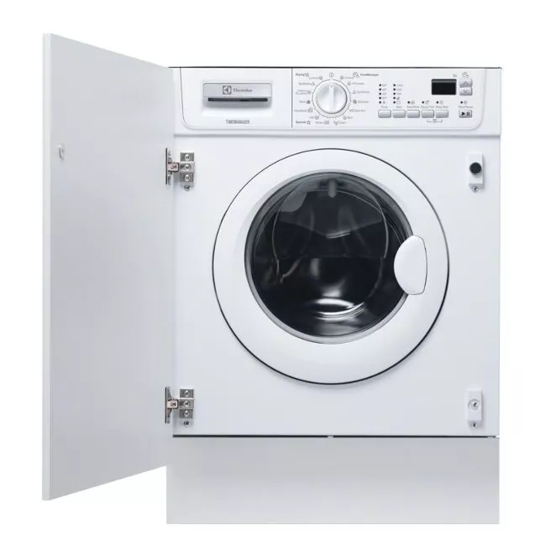
Если ваша стиралка Electrolux EWX 147410 W функционирует со сбоями или вовсе отказывается работать – позвоните в «РемБытТех»! Наши мастера знают все об устройстве и ремонте стиральных машин данной марки и быстро отремонтируют агрегат любого года выпуска прямо у вас дома и уже в течение суток после получения вашей заявки.
- Manuals
- Brands
- Electrolux Manuals
- Washer/Dryer
- EWX 147410 W
- User manual
-
Contents
-
Table of Contents
-
Troubleshooting
-
Bookmarks
Quick Links
………………………………………… ………………………………………
EWX 147410 W
EN WASHER-DRYER
USER MANUAL
Related Manuals for Electrolux EWX 147410 W
Summary of Contents for Electrolux EWX 147410 W
-
Page 1
………………… EWX 147410 W EN WASHER-DRYER USER MANUAL… -
Page 2: Table Of Contents
2 electrolux Electrolux. Thinking of you. Share more of our thinking at www.electrolux.com CONTENTS Safety information Programmes Product description Drying Programmes Control panel Care and cleaning First use What to do if… Personalisation Consumption values Daily use Installation Use — Drying Building in Use — Washing &…
-
Page 3
3 may cause injury or serious malfunction- wired bras must NOT be machine wash- ing. Contact your local Service Centre. Always insist on genuine spare parts. • Garments which have been in contact with volatile petroleum products should INSTALLATION not be machine washed. -
Page 4: Product Description
4 electrolux • Keep all detergents in a safe place out of children’s reach. • Make sure that children or pets do not climb into the drum. To prevent children and pets becoming trapped inside the drum the machine incorporates a special feature.
-
Page 5: Control Panel
5 DETERGENT DISPENSER DRAWER Compartment for detergent used for prewash and soak phase or for stain re- mover used during the stain action phase (if available). The prewash and soak detergent is added at the beginning of the wash pro- gramme.
-
Page 6
6 electrolux DRYING TIME TIME MANAGER buttons If you wish to carry out a timed drying pro- PROGRAMME SELECTOR DIAL gramme, press this button until the drying It allows you to switch the appliance on/off time you want appears on the display ac- and/or to select a programme. -
Page 7
7 DISPLAY The display shows the following informa- of the display for a few seconds and the tion: integrated red light of button 8 start flash- 7.1: ing. • Duration of the selected programme • End of programme After selecting a programme, the duration… -
Page 8: First Use
8 electrolux FIRST USE • Ensure that the electrical and water ECO valve. Then run a cotton cycle connections comply with the installa- at the highest temperature without tion instructions. any laundry in the machine, to re- • Remove the polystyrene block and move any manufacturing residue any material from the drum.
-
Page 9
9 REDUCE THE SPIN SPEED BY PRESSING BUTTON 3 By selecting a programme, the appliance proposes automatically the maximum spin speed provided for that programme. Press button 3 repeatedly to change the spin speed, if you want your laundry to be spun at a different speed. -
Page 10
10 electrolux 1. Set the washing machine to PAUSE by Type of Soil Type of fabric pressing button 8. washing cy- level 2. Press button 6 once until the symbol 0’ icon is displayed Super Quick For items used or 3. -
Page 11: Use — Drying
11 INTERRUPTING A PROGRAMME AT THE END OF THE PROGRAMME Press the button 8 to interrupt a pro- The machine stops automatically. Three gramme which is running, the correspond- blinking zeros ( ) appear on the dis- ing green pilot light starts blinking.
-
Page 12: Use — Washing & Drying
12 electrolux 4. Set the timed drying: press the button 7. Turn the selector dial to the O position 5 until the time you want appears on to switch the machine off. the display (see the «Drying Pro- 8. Remove the laundry from the drum.
-
Page 13: Helpful Hints And Tips
13 6. At the end of the programme turn the the machine off and remove the laun- selector dial to the O position to switch dry. HELPFUL HINTS AND TIPS SORTING OUT THE LAUNDRY • Cotton, linen: drum full but not too tightly packed;…
-
Page 14: Drying Hints
14 electrolux Grass: soap lightly and treat with bleach for all types of fabric, or special for wool- (whites and fast coloureds only). lens only. Ball point pen and glue: moisten with The detergent and any additives must be placed in the appropriate compartments of…
-
Page 15: Programmes
15 bed covers, quilts, sleeping bags and du- GARMENT LABELS vets must not be machine dried. For drying, follow the indications given on • Avoid drying dark clothes with light col- the manufacturer’s labels: oured fluffy items such as towels as •…
-
Page 16
16 electrolux Programme Maximum and Minimum Temperature Cycle Description Detergent Options Maximum Spin Speed Compartment Maximum Fabrics Load Type of Laundry SPIN — COTTONS WITH PREWASH RINSE HOLD 90°-Cold NO SPIN Prewash — Main wash — Rinses EXTRA RINSE Maximum spin speed 1400 rpm TIME MANAGER Max. -
Page 17
17 Programme Maximum and Minimum Temperature Cycle Description Detergent Options Maximum Spin Speed Compartment Maximum Fabrics Load Type of Laundry SPIN — RINSES RINSE HOLD Rinses NO SPIN Maximum spin speed 1400 rpm EXTRA RINSE Max. load 7 kg With this programme it is possible to rinse and spin cotton garments which have been washed by hand. -
Page 18: Drying Programmes
18 electrolux Programme Maximum and Minimum Temperature Cycle Description Detergent Options Maximum Spin Speed Compartment Maximum Fabrics Load Type of Laundry — Drying Programmes — Cotton Drying — Synthetics Drying O = OFF For cancelling the programme which is running or to switch the machine off .
-
Page 19
19 MAINTENANCE WASH With the use of low temperature washes it is possible to get a build up of residues in- side the drum. We recommend that a maintenance wash be performed on a regular basis. To run a maintenance wash: •… -
Page 20: Drain Pump
20 electrolux 5. When no more water comes out, un- screw the pump cover (A) and remove it. Always keep a rag nearby to dry up spillage of water when removing the pump. DRAIN PUMP The pump should be inspected regularly and particularly if: •…
-
Page 21: What To Do If
21 When the appliance is in use and depend- 2. Unscrew the inlet hose. ing on the programme selected there can 3. Place the end of the emergency empty- be hot water in the pump. Never remove ing hose and that of the inlet hose in a…
-
Page 22
22 electrolux Problem Possible cause/Solution The door has not been closed. E40 • Close the door firmly. The plug is not properly inserted in the power socket. • Insert the plug into the power socket. There is no power at the socket. -
Page 23
23 Problem Possible cause/Solution The programme is still running. • Wait the end of washing cycle. The door lock has not been released. The door will not open: • Wait until the pilot light 9 goes off. There is water in the drum. -
Page 24: Consumption Values
24 electrolux Problem Possible cause/Solution No water is visible in the Machines based on modern technology operate very economically drum: using very little water without affecting performance. If you are unable to identify or solve the problem, contact our service centre. Before telephoning, make a note of the model, se- Mod.
-
Page 25: Installation
25 INSTALLATION UNPACKING 4. Slide out the relevant plastic spacers. All transit bolts and packing must be re- moved before using the appliance. You are advised to keep all transit devices so that they can be refitted if the machine ever has to be transported again.
-
Page 26
26 electrolux 2. Connect the hose with the angled con- nection to the machine. Do not place the inlet hose downwards. Angle the hose to the left or right depending on the position of your water tap. Accurate levelling prevents vibration, noise and displacement of the machine during 45°… -
Page 27: Building In
27 • In a sink drain pipe branch. This branch must be above the trap so that WATER DRAINAGE the bend is at least 60 cm above the The end of the drain hose can be posi- ground. tioned in three ways.
-
Page 28
28 electrolux The appliance is originally prearranged for Fig. 4 the assembly of a door opening from right to left (Fig. 2). Fig. 2 c) Mounting the door Fix the hinges to the appliance by means of the M5x15 screws. The hinges can be ad- justed to compensate for possible uneven thickness of the door. -
Page 29: Electrical Connection
29 Warning! Do not remove the screw B. Fig. 6 Fig. 7 If the door has to be opened from left to right, invert the position of the plates E, the magnet D and the plate C. Mount the counter-magnet D and the hinges A as pre- viously described (Fig.
-
Page 30
30 electrolux • The machine works more economically if • Measure out detergent according to the it is fully loaded. water hardness, the degree of soiling and • With adequate pre-treatment, stains and the quantity of laundry being washed. limited soiling can be removed; the laun- dry can then be washed at a lower tem- perature. -
Page 31
31… -
Page 32
132924410-A-122012…
- Manuals
- Brands
- Electrolux Manuals
- Washer
- EWG 147410 W
- User manual
-
Contents
-
Table of Contents
-
Troubleshooting
-
Bookmarks
Quick Links
EWG 147410 W
EN
Washing Machine
User Manual
Related Manuals for Electrolux EWG 147410 W
Summary of Contents for Electrolux EWG 147410 W
-
Page 1
EWG 147410 W Washing Machine User Manual… -
Page 2: Table Of Contents
15. TECHNICAL DATA………………32 WE’RE THINKING OF YOU Thank you for purchasing an Electrolux appliance. You’ve chosen a product that brings with it decades of professional experience and innovation. Ingenious and stylish, it has been designed with you in mind. So whenever you use it, you can be safe in the knowledge that you’ll get great results every time.
-
Page 3: Safety Information
ENGLISH SAFETY INFORMATION Before the installation and use of the appliance, carefully read the supplied instructions. The manufacturer is not responsible for any injuries or damages that are the result of incorrect installation or usage. Always keep the instructions in a safe and accessible location for future reference.
-
Page 4: Safety Instructions
The appliance must be connected to the water mains • using the new supplied hose sets, or other new hose sets supplied by the Authorised Service Centre. Old hose sets must not be reused. • If the mains power supply cable is damaged, it must •…
-
Page 5: Product Description
ENGLISH • Do not pull the mains cable to • Make sure that all metal objects are disconnect the appliance. Always pull removed from the laundry. the mains plug. • Do not put a container to collect • This appliance complies with the possible water leakage under the E.E.C.
-
Page 6: Control Panel
Detergent dispenser Turn the device clockwise, until the groove is horizontal. Control panel You cannot close the door. Door handle Rating plate Drain pump filter Feet for levelling the appliance Water drain hose Mains cable Water inlet hose connection…
-
Page 7
ENGLISH 4.2 Display The display shows the following information: Soil degree indicators: Intensive Normal Daily Light Quick Quick Refresh Super Refresh When you select a programme, the display shows the indicator of the soil de‐ gree automatically proposed by the appliance. Child safety lock (see «Settings»… -
Page 8
Digit • Duration of the selected programme area: After you select a programme, the duration is displayed in hours and minutes (e. g. ). The duration is calculated automatically on the basis of the maximum recommended load for each type of fabric. -
Page 9: Programmes
ENGLISH 5. PROGRAMMES 5.1 Programme Chart Programme Maximum Programme description Temperature range load (Type of load and soil level) Reduced load Maximum spin speed 7 kg White cotton and coloured cotton. Normal soil 3.5 kg and light soil. Cottons 1400 rpm 90°C — (Cold) 7 kg…
-
Page 10
Programme Maximum Programme description Temperature range load (Type of load and soil level) Reduced load Maximum spin speed 1 kg Special programme for silk and mixed synthet‐ 700 rpm ic items. Silk 30°C — (Cold) 2 kg Machine washable wool, hand washable 900 rpm wool and delicate fabrics with «hand washing»… -
Page 11: Consumption Values
ENGLISH Programme ■ ■ ■ ■ ■ ■ ■ + Prewash ■ ■ ■ ■ ■ ■ ■ ■ ■ ■ ■ ■ ■ ■ + Prewash ■ ■ ■ ■ ■ ■ ■ ■ ■ ■ ■ ■ ■ ■…
-
Page 12: Options
Programmes Load Energy Water con‐ Approxi‐ Remaining (kg) consump‐ sumption mate pro‐ moisture tion (kWh) (litre) gramme duration (minutes) Delicates 40°C 0.55 Wool/Handwash 30°C 0.25 Standard cotton programmes Standard 60°C 1.01 cotton Standard 60°C 0.78 cotton Standard 40°C 0.61 cotton 1) At the end of spin phase.
-
Page 13: Time Manager
ENGLISH • The rinse phase uses more water for The button indicator illuminates. The some washing programmes. display shows the selected delay value. • The related indicator comes on. 7.7 Time Manager • The washing programme stops with the water in the drum. The drum turns Press this button to increase or decrease regularly to prevent the laundry the programme duration proposed by the…
-
Page 14: Settings
7.8 Door locked indicator • indicator off: the door can be opened. • indicator flashing: the door is opening. The indicator goes on when the 7.9 Start/Pause programme starts and indicates if the door can be opened: Press this button to start or to interrupt •…
-
Page 15
ENGLISH 10.2 Using detergent and • The display shows the default level of Time Manager, the additives programme duration and the programme phases indicators of 1. Measure out the detergent and the the selected programme. fabric conditioner. • The indicator of Start/Pause 2. -
Page 16: Opening The Door
Press the Start/Pause button to 2. Now, you can set a new washing set the appliance to pause. The programme and the available related indicator flashes. options. b. Press the Delay Start button until Before starting the new…
-
Page 17: Hints And Tips
ENGLISH • Keep the door ajar, to prevent the The appliance spins and drains or only mildew and odours. drains. 3. When the programme is completed The washing programme is and the indicator goes off, you completed, but there is water in the can open the door.
-
Page 18: Care And Cleaning
• To help the environment, do not use • To use the correct quantity of more than the correct quantity of detergent, check the water hardness detergent. of your domestic system. Refer to • Obey the instructions that you find on «Water hardness».
-
Page 19: Cleaning The Detergent Dispenser
ENGLISH 12.5 Cleaning the detergent dispenser 12.6 Cleaning the drain filter WARNING! When the appliance is in use The pump should be inspected regularly and depending on the and particularly if: programme selected there • The appliance does not empty and/or can be hot water in the filter.
-
Page 20
3. Place a container close to the pump to collect any spillage. A = Cover filter. B = Emergency emptying hose. 4. Release the emergency emptying hose, place it in the container and remove its cap cover. 5. When no more water comes out, unscrew the filter cover by turning it anti-clockwise and remove the filter. -
Page 21: Frost Precautions
ENGLISH 8. Put the cap back on the emergency emptying hose and place the latter back in its seat. Replace the filter into the pump by inserting it correctly into the special guides. Screw the filter cover firmly by turning it clockwise.
-
Page 22: Troubleshooting
4. Place a bowl on the floor and put the WARNING! end of the emergency emptying hose Make sure that the into the bowl. Remove its cap. temperature is more than 0 The water should drain by gravity into the °C before you use the…
-
Page 23
ENGLISH 13.2 Possible failures Problem Possible cause/solution The programme does Make sure that the mains plug is connected to the mains not start. socket. Make sure that the appliance door is closed. Make sure that there is not a damaged fuse in the fuse box. Make sure that the Start/Pause has been pressed. -
Page 24: Installation
Problem Possible cause/solution There is water on the Adjust manually the items in the tub and start the spin floor. phase again. This problem may be caused by balance problems. Make sure that the couplings of the water hoses are tight and there is not water leakages.
-
Page 25
ENGLISH Use the gloves. Remove the external film. If necessary, use a cutter. Remove the cardboard top. Remove the polystyrene packaging materials. Remove the internal film. Open the door. Remove the polystyrene piece from the door seal and all the items from the drum. -
Page 26
Put one of the polystyrene packaging elements on the floor behind the appliance. Carefully put down the appliance with the rear side on it. Make sure not to damage the hoses. Remove the polystyrene protection from the bottom. Pull up the appliance in vertical position. -
Page 27: Positioning And Levelling
ENGLISH Remove the three bolts. Use the key supplied with the appliance. Pull out the plastic spacers. Put the plastic caps in the holes. You can find these caps in the user manual bag. We recommend that you keep the packaging and the transit bolts for any movements of the appliance.
-
Page 28
• After having levelled the appliance, tighten the lock nuts. WARNING! Never place cardboard, wood or similar materials under the appliance to compensate for any unevenness in the floor. 14.3 The inlet hose • Connect the hose to the back appliance. -
Page 29: Water Drainage
ENGLISH 14.4 Water-stop device The inlet hose has a water stop device. This device prevents water leaks in the hose because of its natural ageing. The red sector in the window «A» shows this fault. If this occur, close the water tap and contact the service centre to replace the hose.
-
Page 30
Drain hose end • If the end of the drain hose looks like this (see the picture), you can push it directly into the stand pipe. Without the plastic hose guide. To a sink spigot • Refer to the illustration. Put the drain hose in the spigot and tighten it with a clip. -
Page 31: Preparation And Assembly Of The Door
ENGLISH 14.7 Preparation and assembly of the door The appliance is originally pre set for the assembly of a door opening from right to left. Door The dimensions of the door should be: 16-22 mm • width 595 — 598 mm •…
-
Page 32: Technical Data
Counter-magnet WARNING! Do not remove the screw B. The appliance is pre set for a magnetic door closure. To position the closure correctly, it is necessary to screw the counter-magnet A (steel disk + rubber ring) into the inner side of the door.
-
Page 33: Environmental Concerns
ELECTROLUX Name of the distributor Electrolux Lehel Kft 1142 Budapest Erzsébet kir.né útja 87 Model denomination EWG 147410 W Measure unit Energy class (on scale from A to D, where A — most effective and D — least effec‐ tive)
-
Page 34
www.electrolux.com… -
Page 35
ENGLISH… -
Page 36
www.electrolux.com/shop…