-
#1
Ensoniq TS-10 — Рабочая станция. Синтезатор с программированием.
Ищу русский мануал.
В общем интернет-доступе не нашёл. Тут поискал, не вижу. Но бывает так, что такой мануал лежит где-то, не на поверхности, а я не вижу.
Вот и спрашиваю, уважаемых знатоков, может он существует ? И можно где-то скачать?
А то уж слишком перемудрёный синтезатор. Трудно разобраться.
Может подскажете, где есть?
-
#2
Ну его в природе то и нету собственно. Синтезатор начало 90-тых годов а тогда мануалы на русском как известно не делались фирмами изготовителями. У нас тут есть кто его до сих пор юзает…так шта к ним обращайтесь.
-
#3
Был у меня такой, продал я аппарат вместе с русским мануалом (переводной вариант не имеющий электронного вида). Может эта ссылка поможет, но там только английский вариант (хоть что-то) http://www.ts12.net/ts12-ev-downloads.html
Ссылка на TS12 — но аппаратная часть у них одинаковая, в 12-м клавиш больше. Там есть и другие файлы для скачивания — библиотеки звуков и DOS программы для конвертирования в формат Ensoniq.
-
#4
как вариант написать в ат трейд — они ими торговали тогда — и помоему оттуда был русский мануал — помоему все таки я его где то видел в электронном виде … сам разбирался по английскому гроссбуху — ниче — за пару дней освоил ….
-
#5
как вариант написать в ат трейд — они ими торговали тогда — и помоему оттуда был русский мануал — помоему все таки я его где то видел в электронном виде … сам разбирался по английскому гроссбуху — ниче — за пару дней освоил ….
В 90 начале Эйтитрейд был вообще? Я помню свои Энсоники покупал в 94-том через знакомых и везли из Америки. Тогда же уже в 96 покупал КОРГИ (A-Trade) и не где русского мануала не было не запаха. То есть тогда вроде рынок на нашу сторону у них не был поставлен и переводы если и были, то скорее самопальные. Конечно в МСК может своя кухня но в Латвии я точно русского мануала оригинального на любые железяки в 90-тых не видел. Может потом кто это сам сделал.
-
#6
Martel, лучше изучайте аглицкий, двойная польза будет. Свой русский год назад кому-то отдал, то есть в природе он есть точно.
-
#7
Floyd, Мой был куплен в АТ трейде в москве — и там же ремонтировался когда дисковод полетел — куплен был в 1992 году
-
#9
Дай Бог тебе здоровья, мил человек! В наследство достался мануал на папиросной бумаге в двух огроменных папках «Дело» принтованных так «качественно», что на валерьянке разориться можно… Мож окунусь в эпоху…
-
#10
пожалуйста перезалейте манул для Ensoniq TS 10/12 на русском языке
-
Contents
-
Table of Contents
-
Bookmarks
Quick Links
Performance/Composition Synthesizer
Musician’s Manual
Version 3.0
Related Manuals for ENSONIQ TS-10
Summary of Contents for ENSONIQ TS-10
-
Page 1
Performance/Composition Synthesizer Musician’s Manual Version 3.0… -
Page 2
During these times, there may be delays in answering your call. This Manual is copyrighted and all rights are reserved by ENSONIQ Corp. This document may not in whole or in part, be copied, photocopied, reproduced, translated or reduced to any electronic medium or machine readable form without prior written consent from ENSONIQ Corp. -
Page 3
During these times, there may be delays in answering your call. This Manual is copyrighted and all rights are reserved by ENSONIQ Corp. This document may not in whole or in part, be copied, photocopied, reproduced, translated or reduced to any electronic medium or machine readable form without prior written consent from ENSONIQ Corp. -
Page 4: List Of Tips
TS-10 Musician’s Manual List of Tips List Of Tips Direct dialing between BankSets…………….3 Getting to the Bank that Contains the Selected Sound……….4 Centering the Value of a Parameter…………..5 Direct dialing between BankSets…………….9 Using SoundFinder to Replace Sounds with their Effects……..10 Using CUSTOM Settings to Define Your Own Sound Types ……..10…
-
Page 5
List of Tips TS-10 Musician’s Manual Toggling between Song and Sequence Tracks ………….235 Creating a fade-in in Song Mode…………….236 Recording Volume Changes using a CV Pedal…………236 Creating a template for Multi-track recording………….240 Temporary Record Bypass while in Step Entry Mode……….242 A Quick Way to Save Changes to a Sequence or Song ………243… -
Page 6: The Sounds
ENSONIQ’s Poly-Key™ Pressure keyboard and unique Patch Select buttons to the 300 Programs and 300 Performance Presets, you’ll find the TS-10 a wonderful instrument to play. The intuitive and musical sequencer design in the TS-10 will help you go from initial inspiration to a completely mixed song without getting in your way.
-
Page 7: The Sequencer
TS-10 in and get playing. After the initial “I just gotta hear it” phase has passed and you’re ready to utilize the full potential of the TS-10, please take the time to read the sections on programming, sequencing, and storage. They’ll provide valuable information and tips, as well as speed up the learning process and enjoyment of the instrument.
-
Page 8: Power
Power Insert the line cord into the line receptacle on the back of the TS-10 (2), next to the power switch (1). Plug the other end of the cable into a grounded AC outlet. The proper voltage for your TS-10 is listed on the Serial Number label on the rear panel.
-
Page 9: Ground Loops
AC Line Conditioning As with any computer device, the TS-10 is sensitive to sharp peaks and drops in the AC line voltage. Lightning strikes, power drops or sudden and erratic surges in the AC line voltage can scramble the internal memory and, in some cases, damage the unit’s hardware.
-
Page 10: Temperature Guidelines
Audio Outputs, but make sure nothing is plugged into the other output. For listening through headphones, plug the phones into the rear-panel jack marked Phones. If you’re running the TS-10 through a mixer, in stereo, be sure to pan the left mixer input fully left, and the right input fully right.
-
Page 11: Be Careful
Bank location(s). If you have loaded any Sampled Sounds or Sample Edits into the TS-10 and then powered down, the display shows the following prompt: If you answer *NO * to the Auto-Load prompt, the TS-10 will display the last Sounds or Preset Bank page, and no Sampled Sounds will be automatically loaded.
-
Page 12: Care And Feeding Of The Disk Drive
System set-up, and Sequencer data, as well as System Exclusive messages from other MIDI devices. The TS-10 uses a Quad-density disk drive that can store 1600 Kilobytes of data on a Double-Sided High-Density (DSHD) 3.5” micro-floppy disk and 800 Kilobytes of data on a Double-Sided Double-Density (DSDD) 3.5”…
-
Page 13: When To Reinitialize
Authorized ENSONIQ Repair Station. The battery that came in your TS-10 is good for up to five years of life. You will know when it needs replacing, because the TS-10 will tell you so. One day you will switch the power on, and…
-
Page 14
TS-10, provided on five High Density disks. • SL, SLT, and ESS Sound Libraries — The TS-10 can read all of the sound files on the disks designed for the EPS Series. These disks offer the largest, most accurate, responsive, and musical sampled sounds available anywhere. -
Page 15
The following magazines offer many specific articles and columns that can provide a plethora of useful information. THE TRANSONIQ HACKER For prices and more information about this independent news magazine for ENSONIQ Users, call 1-503-227-6848 KEYBOARD For subscription rates and more information call 1-800-289-9919… -
Page 16: Table Of Contents
AC Line Conditioning …………….iv Temperature Guidelines ………………v Amplification…………………v Be Careful!………………….vi Amplifying Your TS-10 Through a Home Stereo System……vi Powering Up Your TS-10 In a MIDI Configuration……..vi About the Auto-Load Feature ……………..vi Care and Feeding of the Disk Drive ……………vii Reinitializing the TS-10 ………………viii When to Reinitialize………………viii…
-
Page 17
Table of Contents TS-10 Musician’s Manual Section 2 — System Page Parameters TUNE ………………….14 TOUCH………………….14 VEL-MAX…………………15 PRESS………………….15 PEDAL ………………….16 SLIDER………………….16 VOICE-MUTING………………17 MIDI-TRK-NAMES………………17 KBD-NAMING………………..17 Various ROM System Pitch-Tables ………………….. Selecting ROM Pitch-Tables ………………….. Using the U1-Programs Pitch-Tables ………………….. WAKE-UP-MODE………………23 Section 3 — MIDI Control Page Parameters BASE-CHAN………………….24… -
Page 18
Pressure Page………………..52 Pedal Page ………………..53 MIDI Status Page………………53 MIDI Channel Page………………54 MIDI Program Number Page…………..55 Entering Program Change Numbers Directly ……….55 MIDI Bank Select Page …………….55 Program Changes and Bank Selects in the TS-10 ………56 Table of Contents — 3… -
Page 19
Table of Contents TS-10 Musician’s Manual Effects Controller Page …………….57 Table of Contents — 4… -
Page 20
TS-10 Musician’s Manual Table of Contents Section 6 — Understanding Effects Understanding TS-10 Effects …………….58 Program and Sampled Sound Effects………….58 Preset Effects………………….58 Sequencer Effect ………………..59 Selecting Effects………………..59 What is an Algorithm? ………………60 Signal Routing Between Effects …………..60 Sounds and Presets ……………….60 When are New Algorithms loaded into the ESP Chip?…….60… -
Page 21
Table of Contents TS-10 Musician’s Manual 15 DDL+ROTOSPKR+REV…………….77 16 EQ- -DDL+ROTOSPKR+REV …………..79 17 DELAYLFO+ROTOSPKR+REV…………79 18 ROTOSPKR+ROTOSPKR+REV…………80 19 DISTORT+ROTOSPKR+REV……………80 20 PARAM EQ+ROTOSPKR+REV…………80 21 ENV VCF+ROTOSPKR+REV……………81 Dual Effects ………………….81 22 PLATE + PLATE REVERBS…………..81 23 PARAMETRIC EQ + PLATE…………..82 24 SMALL PLATE REVERB …………..84 25 LARGE PLATE REVERB 1…………..84… -
Page 22
About Modulation ………………143 Selecting a Modulator……………..143 MODAMT — Modulation Amount …………143 Modulation Sources………………144 Wave Page………………….148 Wave Class ………………..148 Complete TS-10 ROM Wave Catalog…………149 Using the Copy Functions…………….150 About the Copy Functions……………..150 MAKE COPY …………………151 RECALL………………….151 Special Recall Functions……………….152 Special Copy Operations………………152 DEFAULT………………….153… -
Page 23
Editing a Drum-Map ………………167 Removing a Drum-Map …………….167 Using the Copy page with Drum-Maps ……….168 Section 9 — Program Parameters LFO Page ………………….169 ENV1, ENV2, ENV3 — TS-10 Envelopes…………172 ENV1, ENV2 and ENV3 Pages…………….172 Pitch Page ………………….177 Pitch Mods Page………………..179 Filters Page………………….180 Low-pass/High-pass………………180… -
Page 24
Finding the BankSet, Bank, and Display Location for Sounds on Sequencer Tracks…………………..223 Edit Sequence Page — Sequence Edit Functions……….224 The MIDI Connection………………224 MIDI Sequencing on the TS-10 — MIDI Connections ………224 MIDI Mode and Channel — Remote MIDI Device……..225 MIDI Track Configuration…………….225 Recording MIDI Tracks ………………226… -
Page 25
Table of Contents TS-10 Musician’s Manual Additional Sequencer Functions…………..226 Recording Controllers into Sequencer Tracks……….226 Changing a Sound within a Sequence or Song Track (Recording Program Changes ………………….226 Defining Track Pressure in Sequencer Mode……….228 Assigning a Track to the AUX Outputs …………229 Using the AUX Outputs as Separate Mono Outs ………229… -
Page 26
Using the TS-10 with a Drum Machine…………279 To Sync a Drum Machine to the TS-10………….279 To Sync the TS-10 to a Drum Machine………….279 To Sequence a Drum Machine from a Track of the TS-10…..279 Song Position Pointers………………280 MIDI Song Selects …………………280 MIDI Controller Tricks —… -
Page 27
GM and GS Percussion Key Maps (Channel 10) ……….290 Using General MIDI in the Real World …………292 Using TS-10 General MIDI Sounds with an External GM Sequencer ..292 Connecting the TS-10 keyboard to a computer (or other General MIDI sequencer)………………..292 To Enable General MIDI on the TS-10…………292… -
Page 28
TS-10 Musician’s Manual Table of Contents RENAME — Changing a Disk’s Name…………305 SAVE — Saving Data to Disk…………..306 Naming with the Keyboard…………….307 Saving Programs along with a 30-SEQ/SONGS File……..307 Saving Sample-Banks along with a 60 SEQ/SONGS File ……308 Specifying a File Bank Location when Saving a File……..308 LOAD —… -
Page 29
Selecting a WaveSample or Layer for Editing — the Edit Context page (Select Voice button) ………………336 LAYERS-IN-PATCH (Layer Enable/Disable) ……….337 Using the Patch Select Buttons…………..337 TS-10 Sampled Sound Error Messages …………337 Programming Patches …………….338 What is a Surrogate Program …………….338 Assigning a Surrogate Program to a Track ……….339 Erasing All Sampled Sound Data From Memory………339… -
Page 30
TS-10 Musician’s Manual Table of Contents Poles — Rolloff Curves…………….358 Cutoff Frequency………………358 Edit/Filters Page ………………..358 MODE (Filter Mode)……………….358 FILTER 1 Page………………..360 FILTER 2 Page………………..360 Output Page …………………..361 Wave Page………………….363 Volume Mod Source Shaper Page …………..366 Layer Page………………….367 Sampled Sound Effects Page (Program Effects button)…….370 Appendix TS-10 MIDI Implementation…………….I… -
Page 31: Section 1 — Controls & Basic Functions
This section provides an introduction to the TS-10’s many controls and rear panel connections, a conceptual overview of the system, and a discussion of editing various types of parameters. We suggest you read this section carefully — it will help you get the most out of your TS-10. Rear Panel Connections…
-
Page 32
FX1, FX2, or DRY will be routed to the Main Outs. To operate the TS-10 in stereo, connect these outputs to two discrete channels of your mixer and pan them left and right. Note that either of the Main Outs can be used as a mono output. If you want to listen to the main output in mono, make sure that only one of the Main Out jacks is connected. -
Page 33: Front Panel Controls
Bank buttons (labeled 0-9) will select Sequencer banks. Each bank contains six sequencer locations, any of which can contain a sequence or a song, or may be blank. When the TS-10 is in Sequencer mode, the LED above the Seqs/Songs Button will light. Note that when the sequencer is playing, you cannot enter either Sounds or Presets mode.
-
Page 34
In Sounds Mode, the ten Bank buttons (labeled 0-9) will select Sound banks within the current BankSet. There are three different kinds of sound banks within the TS-10. Each User RAM program bank contains six sound locations. Each ROM program bank contains six sound locations. -
Page 35: Parametric Programming
To raise or lower the tuning of the TS-10, press the soft button directly above where it says TUNE=+00. This segment of the display will now be underlined , telling you that it has been selected, and can be modified.
-
Page 36: Performance Controllers
The TS-10 can be programmed so that the sound changes (sometimes in subtle ways, sometimes radically) when you play notes with one or both Patch Select buttons held down As you play the sounds in the TS-10, make sure you explore what these buttons do to each sound.
-
Page 37
Most MIDI instruments which currently implement pressure send and receive only channel pressure. If you are playing such an instrument from the TS-10, you should set the TS-10 to send channel pressure. (Note that some devices, including all ENSONIQ products respond to both types of pressure.) -
Page 38: Playing Sounds And Presets
Playing Sounds and Presets Sound Memory Each TS-10 internal sound (ROM and User RAM) is a complex structure consisting of up to six voices per key and a programmable effects setup. We refer to these internal sounds as Programs. Sounds that were created with a sampling keyboard (and are not internal—i.e.: must be loaded from disk after power-on) are referred to as Sampled Sounds.
-
Page 39: Using The Bankset Button
Bank buttons and the soft button closest to the sound name as shown previously. Selecting a Preset When you first turn the power switch on, the TS-10 boots-up in Presets mode (selecting the first preset in U0-0). This is designed to demonstrate the performance capabilities (stacking, layering, splitting, etc.) of the TS-10.
-
Page 40: Layering (Stacking) A Sound
On the Program Control page, the TYPE=CUSTOM setting can be used to define your own Tip: special purpose sound type to help you quickly find your own sounds with SoundFinder. ENSONIQ sounds will never be released with TYPE=CUSTOM. For more information about the Program TYPE parameter, see Section 9 — Program Parameters.
-
Page 41: Using Soundfinder In Sounds Mode
• Press the Bank 0 button to select the first Bank in User RAM BankSet U0. The display shows: • Press the upper middle soft button above GRAND-PIANO (it should now be underlined). We’ll be listening to some of the TS-10 sounds that are assigned the same Program Type as GRAND-PIANO.
-
Page 42: Understanding Tracks
When the TS-10 is controlled from an external MIDI sequencer, the various tracks of the sequencer can be assigned to different MIDI channels, which in turn control the programs played by the TS-10. Each MIDI channel that the TS-10 responds to can be thought of as an extension of the sequencer’s track.
-
Page 43: Sampled Sounds And Simms
ASR-10 samplers. Sampled Sounds (as they are called in the TS-10) are stored in Dynamic RAM, and are not saved when the TS-10 power is turned off. From the factory, the TS-10 has two internal SIMMs, and provide 2 Megabytes of 16-bit sample RAM.
-
Page 44: Section 2 — System Page Parameters
Range: -99 to +99 cents Adjusts the overall master tuning of the keyboard up or down as much as one semitone. A value of +00 will set the TS-10 to concert A= 440 tuning. Range: 00 to 12 semitones PITCH-BEND…
-
Page 45: Vel-Max
Switches plugged into both Foot Switch jacks, and have four completely independent controllers. If you are using the single SW-2 Foot Switch which came with the TS-10, you should keep both left foot switch parameters set to *UNUSED*, and assign the right foot switch parameters to the desired function.
-
Page 46: Pedal
• SONG-STEP — if a song step has been programmed with REPS=FS, each time you press the Foot Switch, the TS-10 will select the sequence that is the next step in the song. Both the Sustain and Sostenuto pedals can be used to dynamically “latch” the current amount of Tip: pressure being exerted on the keyboard.
-
Page 47: Voice-Muting
Tracks 1-6 and 7-12 pages in sequence mode, and all Track Parameter pages in Presets mode) will show *MIDI-CHAN-# instead of the name. This is helpful when using the TS-10 as a MIDI controller, or when sequencing remote MIDI devices, as it shows you at a glance which tracks will play only over MIDI, and on which MIDI channels.
-
Page 48
SYSTEM pitch-table. For more information on pitch-tables, please refer to Section 8 — Understanding Programs. • NORMAL — the TS-10 will use the western 12-tone equal-temperament tuning instead of the custom system pitch-table. Setting the System pitch-table to NORMAL does not affect the custom pitch-table. -
Page 49: Various Rom System Pitch-Tables
Section 2 — System Page Parameters TS-12 Musician’s Manual Various ROM System Pitch-Tables By using the data entry controls, you can select from a large assortment of traditional, modern, ethnic, and exotic pitch-tables for use as the System pitch-table. These ROM pitch-tables are: •…
-
Page 50
TS-12 Musician’s Manual Section 2 — System Page Parameters seven-tone scale called Pelog. The notes C, D, F , G, and A (which are reproduced on the black keys) are considered primary, with E and B used for grace notes. The octaves are stretched (tuned a little sharp) due to the harmonic content of the instruments in the gamelan. -
Page 51: Selecting Rom Pitch-Tables
TS-10’s internal sound banks. The currently selected System pitch-table will remain in affect even after turning the TS-10 power off and back on. In this way, if your music requires the same pitch-table all the time, you can simply turn on the TS-10 and start…
-
Page 52: Using The U1-Programs Pitch-Tables
Using the above procedure, you can load the file named HIST PTABLS to try more pitch-tables. Loading a full set of 60 pitch-tables into the TS-10 internal memory in this way gives you the ability to select a variety of keyboard tunings in real-time while in the middle of a performance!
-
Page 53: Wake-Up-Mode
• DEFAULT — Power-on in Sounds mode showing Program Bank U0-0. The default sound in ROM will be selected. • PREVIOUS — Power-on in the same mode the TS-10 was in when it was powered-off. Note that if the TS-10 was in General MIDI mode when it was powered-off, it will wake-up in Sounds mode.
-
Page 54: Section 3 — Midi Control Page Parameters
Exclusive messages are always sent and received on the base channel. Any of 16 MIDI channels may be selected as the basic MIDI channel of the TS-10. The effect of setting the base channel varies depending on the MIDI Mode and whether data is being sent or received.
-
Page 55: Mode
There are five MIDI modes implemented in the TS-10: • OMNI — In this mode, the TS-10 will receive on any or all of the 16 MIDI channels. This mode is useful when you are only using a few instruments, and you are not concerned with setting up different channels for each device.
-
Page 56: Global Controllers In Mono Mode
MIDI device, without affecting the pitch of notes received via incoming MIDI. • RECV — The key number transmitted by the TS-10 will always be the same key that was actually played on the TS-10 keyboard, but notes received via incoming MIDI will be transposed.
-
Page 57: Loop
Suppose for example, you are playing the TS-10 from a keyboard with a breath controller (or want to use a breath controller as a modulator when playing the TS-10 keyboard). You can set up a program on the TS-10 in which the filter cutoff frequency is modulated by XCTRL. If you then set XCTRL=02, the breath controller will now be able to modulate the filter, or whatever else has its modulation source set to XCTRL, in the program you have created.
-
Page 58: Working With Midi Loops
MIDI In of the TS-10. The MIDI-LOOP Track STATUS is optimized for use in a MIDI loop in which the TS-10 will play back into itself. Do not use the SEND/RECV Track STATUS setting with a MIDI loop present. To connect a TS-10 track to a computer sequencer, the MIDI-LOOP setting should be used.
-
Page 59: Prog-Chg — Program Changes
10 — Understanding the Sequencer for more information on how program changes are handled. Receiving MIDI Program Changes The way in which the TS-10 receives program changes is slightly more complex than some other systems, because of the large number of programs and presets that are available to be selected from MIDI program changes.
-
Page 60: Sys-Ex
Change number for the desired sound will select the new sound and also install the effect from that sound into the sequence (or song) effect. This can be useful when controlling the TS-10 from an external sequencer. Note that changing the effect will briefly silence the audio output and will cut off any sounding voices if VOICE-MUTING=ON on the System page.
-
Page 61: Section 4 — Understanding Presets
A preset also has one Effects algorithm which is common to all three tracks. The most common context for the TS-10 to be in is Preset mode. Unless the TS-10 is in Sequencer mode, you may assume that you are in a preset. Aside from the presets that are saved, there is a preset buffer that is always active.
-
Page 62: How Many Presets Are In The Ts-10
(* indicates saved with Programs) Whenever the Presets LED is lit, it means that the TS-10 is in Preset mode, and the ten Bank buttons beneath the display will select Preset Banks when you press them (rather than selecting Sound Banks, as they do when the Sounds LED is lit).
-
Page 63: Editing A Preset
Whenever you are selecting or layering sounds in Sounds mode, you are also creating a preset. The TS-10 automatically “remembers” the last three sounds you selected and stores them in a special memory buffer called the Preset Edit Buffer. Try this: •…
-
Page 64: What Are Preset/Track Parameters
The settings of all performance parameters on sequencer tracks are saved for each track while the power to the TS-10 is off, and are always available. The buttons which control the pages containing these parameters are found in the Track Parameters section of the front panel to the right of the display.
-
Page 65
TS-10 Musician’s Manual Section 4 — Understanding Presets • The display shows the current name of the preset with a cursor (underline) beneath the first character. If you want to give the preset a new name, do so at this time. Use the Up/Down Arrow buttons and the Data Entry Slider to change the underlined character, and press the Left/Right Cursor (soft buttons) to move the underline. -
Page 66: Avoiding Confusion When Using Presets
TS-10 Musician’s Manual Avoiding Confusion when using Presets Whenever you create and save a preset, the TS-10 only “remembers” the location of the three sounds in memory — not the actual sounds themselves. This is important to remember when you use User RAM programs in presets. If you move a sound, put another in its place, or transfer an entire BankSet of sounds, the preset might still be “pointing to”…
-
Page 67: Using Soundfinder In Presets Mode
TS-10 Musician’s Manual Section 4 — Understanding Presets Using SoundFinder in Presets Mode Here’s how to scroll through Programs that have the same defined Program Type in Presets mode. For this example, load the 120-PROGRAMS file called USERBNKS V2 from the TSD-200 disk: •…
-
Page 68: Replacing A Sound And The Effect In A Preset
Section 4 — Understanding Presets TS-10 Musician’s Manual • Press the lower center soft button so that the cursor (underline) is beneath the FULL-BODY MIX value (090). The display should look like this: • Press the Replace Track Sound button. Its LED should be lit.
-
Page 69: Finding The Bankset, Bank, And Display Location For Sounds On Preset Tracks
TS-10 Musician’s Manual Section 4 — Understanding Presets Finding the BankSet, Bank, and Display Location for Sounds on Preset Tracks To find the BankSet, Bank and Display location (U0-1.5, U1-3.1, R2-7.4, etc.) for the sounds assigned to Preset tracks: • Select a Preset to view (it should be underlined). For this example, we’ll use the DIGIWARMTH preset located in R2-0.
-
Page 70: Performance Tip — Creating Keyboard Splits
“accompaniment” sound and your right hand plays a “solo” sound. This is easy to set up on the TS-10 by layering the two sounds and assigning them different key zones. You can save this arrangement as a preset so that any time you select that preset, you’ll recall the keyboard split.
-
Page 71: Section 5 — Preset/Track Parameters
The Mix Page enables you to make volume changes to the individual tracks, allowing you to balance the TS-10 sounds and/or control the volume of external MIDI devices. In sequencer mode, the MIX page has a special function which allows you to click or double-click on specific tracks to mute or solo them during playback of sequences or songs.
-
Page 72: Attack Page
Section 5 — Preset/Track Parameters TS-10 Musician’s Manual • Press the Attack/Release button to get to the Attack page: Range: -64 to +63 Attack Page The Attack Page allows you to increase or decrease the attack time of the sound on a selected track.
-
Page 73: Brightness Page
TS-10 Musician’s Manual Section 5 — Preset/Track Parameters All tracks whose MIDI Status is set to SEND/RECV, SEND/—-, LOCAL-OFF or VOICE-OFF will send a MIDI Continuous Controller message (controller 72) with the indicated value whenever this parameter is edited. Preset tracks will also send this controller message when a preset is selected.
-
Page 74: Timbre Page
XCTRL selected as a Mod Source. Any remote MIDI device that can transmit the same MIDI Controller number can act as a modulator by sending controller messages to the TS-10. All tracks whose MIDI Status is set to SEND/RECV, SEND/—-, LOCAL-OFF or VOICE-OFF will send a MIDI Continuous Controller message (on the controller number assigned to the XCTRL parameter on the MIDI Control page) with the indicated value whenever this parameter is edited.
-
Page 75: Key Zone Page
TS-10 Musician’s Manual Section 5 — Preset/Track Parameters • Press the Key Zone/Velocity button to get to the Key Zone page: Range: A0 to C8 Key Zone Page Each track has its own independent key zone within which the track will play. Key zones can be used to create simple two-program splits or to create more complex keyboard layouts.
-
Page 76: Velocity Range Page
Velocity Sensitivity parameter is useful for balancing the velocity response of different Sounds, and for matching the velocity response of TS-10 sounds with external MIDI sound sources. The manner in which the Track VELS setting will affect MIDI transmission/reception of velocity Note: is controlled by the VELS/XPOS parameter on the MIDI Control page.
-
Page 77: Transpose Page
Each track can have its pitch transposed (raised or lowered) by octaves and semitones within an eight octave range. The transpose setting affects both the pitch played by local TS-10 voices and the key number transmitted via MIDI, depending on how the VELS/XPOS parameter is set on the MIDI Control page.
-
Page 78: Rate Page
Section 5 — Preset/Track Parameters TS-10 Musician’s Manual • Press the Tuning button a third time to get to the Rate page: Range: -64 to +63 Rate Page The Rate page provides an easy way to change the rate of the LFO’s within a sound. LFO’s are most often used to create a vibrato effect.
-
Page 79: Sostenuto Page
TS-10 Musician’s Manual Section 5 — Preset/Track Parameters For example, it may be useful to turn off sustain events on a track set up as a bass sound in a split keyboard configuration. This allows you to play staccato bass lines on the lower part of the keyboard while playing chords on the upper part of the keyboard and using the sustain pedal.
-
Page 80: Mod Wheel Page
This parameter is visible on Preset Tracks, but does not really apply to Presets. When OFF, the TS-10 will transmit key-up messages for every note currently sounding when the Sequencer Stop/Continue button is pressed to stop the Sequencer. When ON, the TS-10 will send an ALL-NOTES-OFF message in addition to all of the key-ups when the Sequencer Stop/Continue button is pressed to stop the sequencer.
-
Page 81: Patch Select Page
TS-10 Musician’s Manual Section 5 — Preset/Track Parameters • Press the Performance Options button to get to the Patch Select page: Range: (described below) Patch Select Page current Patch Select button state This Page gives you control over the Patch Select button assignments for each track.
-
Page 82: Pressure Page
You should consult the MIDI implementation chart of the remote MIDI device you will be using in conjunction with the TS-10 to see which (if any) type of pressure it responds to and transmits. For best results, set the TS-10 Pressure parameter to match the type of pressure supported by the external MIDI device which will send to or receive from the track you are setting.
-
Page 83: Pedal Page
Incoming MIDI and sequencer playback will not play internal voices. This is useful when using the TS-10 as a controller with an external sequencer and a number of other remote MIDI devices. It is also good for turning off certain tracks when using the TS-10 as a multi-timbral receiver in MULTI Mode, thereby limiting the number of channels to which the TS-10 will respond.
-
Page 84: Midi Channel Page
MODE=MULTI or MONO B mode is selected on the MIDI Control Page. In POLY or MONO A modes, the TS-10 will receive only on the base MIDI channel no matter which track, program, or preset is selected. Individual preset tracks will not receive on different MIDI channels;…
-
Page 85: Midi Program Number Page
If the track MIDI status has been set to —-/RECV or MIDI-OFF, the track will not transmit MIDI Program Changes. The default Program Change number that appears is usually the number of the internal TS-10 sound assigned to the track. This number is automatically set whenever a sound is selected from the Sound Bank pages.
-
Page 86: Program Changes And Bank Selects In The Ts-10
• Sampled Sounds* (BankSet S8) are numbered from 000 to 009; Bank Select is 008 LSB. • Sampled Sounds* (BankSet S9) are also numbered from 000 to 009; Bank Select is 009 LSB. Refer to Section 3 — MIDI Control Page Parameters for more information on how the TS-10 receives program changes.
-
Page 87
Continued presses of the Track Effects button will scroll through the parameters related to the currently selected Effect Algorithm. These are identical to the effects parameters in the Programming section of the TS-10 (see Section 7 — Effects Parameters for descriptions of these parameters). -
Page 88: Section 6 — Understanding Effects
MUTE will appear in the lower left corner of the display. Preset Effects Each preset in the TS-10 also contains an effect and a complete set of effect parameter values. The effect is present even if none of the tracks in the preset are routed through the effect (e.g. all tracks are sent to the DRY or AUX destination bus — see Section 5 —…
-
Page 89: Sequencer Effect
Effect Parameters. Sequencer Effect Like each of the presets in the TS-10, each sequence and song contains an effect and a complete set of effect parameter values. The effect is present even if none of the tracks in the sequence are routed through the effect (e.g.
-
Page 90: What Is An Algorithm
The complete effects setup, including the values of all effect parameters, is saved when you save a sound. It is also saved when you save a preset. The TS-10 tries to be smart about switching effects, since all sound must stop for an instant when it changes effects.
-
Page 91
Section 6 — Understanding Effects TS-10 Musician’s Manual 4) When you change the sound on a track by double-clicking the Replace Track Sound button (e.g. with the Sounds and the Replace Track Sound LED flashing), the algorithm will be changed. -
Page 92: Performance Control Of Tracks In Preset Or Sequencer Mode
The Effects Busses The output of every voice in the TS-10 is assigned to a stereo bus. A bus, like the bus of a mixing board, mixes together all the voices assigned to that bus into a single stereo pair. Of the four…
-
Page 93: Effects Mixing
Section 6 — Understanding Effects TS-10 Musician’s Manual Effects Mixing Almost all of the effects have separate mixing controls for the FX1 and FX2 busses. They are found on the next sub-page within the Effects page, and will have slightly different wording depending on the effect they’re contained within.
-
Page 94: Parallel Effect Mixer
TS-10 Musician’s Manual Section 6 — Understanding Effects Parallel Effect Mixer Destination Effect A FX1 L A to B send Effect B Main Mixer A to Reverb send Outputs B to Reverb send FX2 to Reverb send Reverb Voice Output…
-
Page 95: Dest — Mod1 Destination Parameter
Section 6 — Understanding Effects TS-10 Musician’s Manual Modulators that can be applied to the Effects The following modulation sources are available to alter the effects in performance: Mod Source Modulation effect derived from WHEEL the value of the mod wheel…
-
Page 96: Section 7 — Effect Parameters
Parallel Effects The first 21 algorithms in the TS-10 are called “parallel effects” and allow several effect types to be used at the same time. These algorithms can be very useful in Presets and Sequencer mode, where you would like different effects processing for each track.
-
Page 97
Section 7 — Effect Parameters TS-10 Musician’s Manual SENDS A- -B Range: 00 to 99 Controls the amount of Effect A (DDL) being sent into Effect B (the chorus). A setting of 99 would yield a serial connection between Effect A and the chorus for voices sent to FX1 and panned hard left (on the Output page). -
Page 98
TS-10 Musician’s Manual Section 7 — Effect Parameters CHORUS MIX Range: 00 to 99 Controls the Dry/Wet mix within the chorus itself. For starters, we recommend settings of 50. Range: 00 to 99 LEVEL Adjusts the volume of the chorused signal. A level of 00 will offer no audible signal. -
Page 99: Eq- -Ddl+Chorus+Rev
Section 7 — Effect Parameters TS-10 Musician’s Manual density to build at a rate that exceeds the decay rate. For the best performance, try to select the highest value that works with your sound source. Ranges: 00 to 99 DIFFUSION These parameters determine whether the early reflections will appear as a series of discrete echoes (lower values) or will be more diffused (higher values).
-
Page 100: Delaylfo+Chorus+Rev
TS-10 Musician’s Manual Section 7 — Effect Parameters 03 DELAYLFO+CHORUS+REV This parallel effect combines a digital delay that provides LFO modulation with a chorus and a reverb. The second sub-page (not user-programmable) shows how this parallel effect is routed: • Voices assigned to FX1 (and panned left) are sent to Effect A (DELAYLFO) •…
-
Page 101
Section 7 — Effect Parameters TS-10 Musician’s Manual This parallel effect combines a rotary speaker with a chorus and a reverb. The second sub-page (not user-programmable) shows how this parallel effect is routed: • Voices assigned to FX1 (and panned left) are sent to Effect A (ROTOSPKR) •… -
Page 102: Distort+Chorus+Rev
TS-10 Musician’s Manual Section 7 — Effect Parameters For a complete description of the remaining parameters, refer to the DDL+CHORUS+REV algorithm found earlier in this section. 05 DISTORT+CHORUS+REV This parallel effect combines a raspy distortion with a chorus and a reverb. The second sub-page (not user-programmable) shows how this parallel effect is routed: •…
-
Page 103: Param Eq+Chorus+Rev
Section 7 — Effect Parameters TS-10 Musician’s Manual 06 PARAM EQ+CHORUS+REV This parallel effect combines a parametric EQ with a chorus and a reverb. The second sub-page (not user-programmable) shows how this parallel effect is routed: • Voices assigned to FX1 (and panned left) are sent to Effect A (PARAM EQ) •…
-
Page 104: Ddl+Phlangr+Rev
TS-10 Musician’s Manual Section 7 — Effect Parameters VCF FC Range: 000 to 127 Determines the filter cut off-frequency. Higher values have a brighter sound. This parameter can be modulated, using a CV Pedal for a wah-wah pedal effect. To use as an EQ, set the desired value and make sure the ENV AMT is 0.
-
Page 105
Section 7 — Effect Parameters TS-10 Musician’s Manual • Voices assigned to FX1 (and panned right) are sent to Effect B (PHLANGR) • Voices assigned to FX2 are sent to the reverb (REV) Range: 00 to 99 SENDS A- -B Controls the amount of Effect A (DDL) being sent into Effect B (the phlanger). -
Page 106: Eq- -Ddl+Phlangr+Rev
TS-10 Musician’s Manual Section 7 — Effect Parameters For a complete description of the remaining Reverb parameters, refer to the DDL+CHORUS+REV algorithm found earlier in this section. 09 EQ- -DDL+PHLANGR+REV This parallel effect combines a parametric EQ into a digital delay with a phlanger (a combination phaser and flanger effect) and a reverb.
-
Page 107: Rotospkr+Phlangr+Rev
Section 7 — Effect Parameters TS-10 Musician’s Manual 11 ROTOSPKR+PHLANGR+REV This parallel effect combines a rotary speaker with a phlanger (a combination phaser and flanger effect) and a reverb. The second sub-page (not user-programmable) shows how this parallel effect is routed: •…
-
Page 108: Env Vcf+Phlangr+Rev
TS-10 Musician’s Manual Section 7 — Effect Parameters For a complete description of the SENDS parameters, refer to the DDL+PHLANGR+REV algorithm found earlier in this section. For a complete description of the PARAM EQ parameters, refer to the PARAM EQ+CHORUS+REV algorithm found earlier in this section.
-
Page 109
Section 7 — Effect Parameters TS-10 Musician’s Manual A- -REVRB Range: 00 to 99 Controls the amount of Effect A (DDL) being sent into the reverb. This would allow you to add reverb to voices assigned to FX1 and panned hard left, without having to add any of the rotary speaker effect. -
Page 110
TS-10 Musician’s Manual Section 7 — Effect Parameters • KEYDN, PATCH, SUSTN, SOSTU, FX-SW — These modulation sources toggle the rotor speed between slow and fast. Every time the modulation source moves from zero in a positive direction, the rotating speaker effect changes speeds from slow to fast or fast to slow. -
Page 111
Section 7 — Effect Parameters TS-10 Musician’s Manual 18 ROTOSPKR+ROTOSPKR+REV This parallel effect combines a rotary speaker with another rotary speaker effect and a reverb. The second sub-page (not user-programmable) shows how this effect is routed: • Voices assigned to FX1 (and panned left) are sent to Effect A (ROTOSPKR) •… -
Page 112
DDL+CHORUS+REV algorithm found earlier in this section. Dual Effects The next two algorithms in the TS-10 are called dual effects and allow two effect types to be used at the same time. Dual effect algorithms are similar to parallel effects in that they require you to assign the voices to either FX1 or FX2 (on the Output page). -
Page 113
Section 7 — Effect Parameters TS-10 Musician’s Manual PRE-DLY TIME Range: 0000 to 0300 ms Controls the amount of time it takes for the input signal to be presented to the plate reverb. A value of 0000 would offer no delay. -
Page 114
TS-10 Musician’s Manual Section 7 — Effect Parameters EQ- -REVB Range: 00 to 99 Controls the amount of EQ being sent into the plate reverb. A setting of 99 would yield a serial connection between the parametric EQ and the reverb for voices assigned to FX1 (on the Output page). -
Page 115
Section 7 — Effect Parameters TS-10 Musician’s Manual HF — DAMPING Range: 00 to 99 Increasing the value of this parameter will gradually filter out increasing amounts of high- frequency energy. Higher values yield an abrupt decay. Controls the cut off of a low pass filter in series with the decay within the definition. -
Page 116
TS-10 Musician’s Manual Section 7 — Effect Parameters (creating a decay). The signal is then routed to the output, and then goes through a low pass filter. There is a parameter that controls the Decay Time of both the left and right signals (shown as triangles above). -
Page 117
Section 7 — Effect Parameters TS-10 Musician’s Manual 26 LARGE PLATE REVERB 2 This plate reverb shares the same signal routing topology as the previous plate reverbs, but sports poly-phase interpolation, and two additional parameters: SPREAD Range: 00000 to 31129 Determines the time intervals between the seven discrete echoes produced by the plate. -
Page 118
TS-10 Musician’s Manual Section 7 — Effect Parameters 28 HALL REVERB 2 This algorithm can be programmed with a high degree of precision. HALL REVERB 2 is a large acoustic space providing a high density reverb. HALL REVERB 2 Signal Routing… -
Page 119
Section 7 — Effect Parameters TS-10 Musician’s Manual the more high frequencies are allowed to pass. This functions like a tone control on a guitar. Range: -99 to +99 LF DECAY TIME Acts like a tone control and will boost (when set to a positive value) or cut (when set to a negative value) the rate at which low frequencies will decay. -
Page 120
TS-10 Musician’s Manual Section 7 — Effect Parameters PRIMARY SEND Range: -99 to +99 Controls the level of the diffused input signal into the reverb definition. Ranges: -99 to +99 REVB POSITION BAL- (1 to 3) The Position Balance parameters simulate the depth of the hall. Think of these parameters as three different microphones placed at various distances within the hall (the first is closest to the front, the third is farthest from the front). -
Page 121: Section 8 — Understanding Programs
“you can only play so many notes”). Instead, we are referring to the number of voices that will sound on each key as you play the program. The TS-10 is unique in that it lets you choose the number of voices (from one to six) per key for each program.
-
Page 122: Using The Patch Select Buttons
Section 8 — Understanding Programs TS-10 Musician’s Manual the volume envelope went to zero), that voice is returned to the pool, and a new note can use that voice rather than stealing one that is still sustaining. • You can assign low, medium or high priority to each voice in a program, which allows you to control how voices are reassigned.
-
Page 123: Abandoning Your Edits
Using the Select Voice Page The Select Voice page is one of the central programming pages of the TS-10. The mute status of each voice is shown on this page, and it is easy to see which voices are being heard and which are selected.
-
Page 124: Using The Soft Buttons As A Shortcut
This may be accomplished using the special group edit feature of the TS-10. Group editing is a temporary state that allows more than one voice to be “selected” on the Select Voice page, and any edits performed while in this group edit state will affect all of the voices which are not muted.
-
Page 125: Using The Group Edit Feature
• Changing the mute status of any voice, or selecting a new voice or program, will disable the group edit feature and return the TS-10 to its normal state. Note that the parameter values displayed when editing in Group Edit mode are the values for the voice which was selected before you entered Group Edit mode, unless the previously selected voice was muted and was not included in the group.
-
Page 126: Write Page — Saving A New Program Into Memory
*EXIT* on the display. This takes you off the Write Page. Now use the Bank and BankSet buttons and the soft buttons in the usual way to select and listen to the Programs in memory. Your new Program is still safe in the TS-10’s edit buffer. Warning: While you’re doing this, DO NOT use the data entry controls to change any parameters in the…
-
Page 127: Copying An Existing Program To Another Location
TS-10 Voice Configuration Each of the six voices within a TS-10 program consists of: • a digital oscillator playing one of the 254 waves from the TS-10 wave memory • two multi-mode digital filters • one LFO (Low Frequency Oscillator) •…
-
Page 128
Section 8 — Understanding Programs TS-10 Musician’s Manual Envelope Parameters TS-10 Voice Times: Attack, Decay1, 2, 3, Release Configuration Levels: Peak, Break1, 2, Sustain Velocity to Level Mode (normal/finish/repeat) Velocity Curve (first 10 Mod Mixer shapes) Keyboard tracking of Times Velocity to Attack Time &… -
Page 129: Modulators
Modulators About Modulation To modulate something is simply to cause it to change. With the TS-10, you can set basic, or manual, levels for the volume, pitch, brightness, etc. of a voice, and then modulate those levels in various ways in order to create movement and dynamics.
-
Page 130: Modulation Sources
NOISE-RATE=##, which adjusts the rate at which the level of this modulator will change. • ENV-1, ENV-2, (ENV-3) The TS-10 has three complex Envelopes. Envelopes are used to create changes, over time, in pitch, brightness, volume, etc. > ENV-1 is permanently routed to the pitch of the voice, though it can be assigned as a modulator elsewhere if you wish.
-
Page 131
• PEDAL — Voltage Control Foot Pedal This selects the CVP-1 Foot Pedal, which can be plugged into the Pedal•CV jack on the TS-10 rear panel, as a modulator. Its effect will be the same as that of the mod wheel. It can be applied wherever a Modulator is selected. -
Page 132
On the MIDI Control Page, you select the MIDI Controller number of the external controller that will be recognized by the TS-10. You don’t have to be playing the TS-10 from an external instrument for this to work. For example, if you have a keyboard with a Breath Controller:… -
Page 133
TS-10 Musician’s Manual Section 8 — Understanding Programs • KEYBD — Keyboard Tracking This uses the position of a note on the keyboard as a modulator. The scaling effect of this Modulator is based on a 76-note keyboard: +100 -100… -
Page 134: Wave Page
TS-10 Musician’s Manual Wave Page Each TS-10 voice will play one of the 254 waves in its memory. These waves are the “raw material” from which TS-10 programs are crafted. On the Wave page you can choose which wave the currently selected voice will play, and modify the various playback parameters of the wave.
-
Page 135: Complete Ts-10 Rom Wave Catalog
TS-10 Musician’s Manual Section 8 — Understanding Programs Complete TS-10 ROM Wave Catalog The wave class is shown in bold at the top of each ROM Wave group. KEYBOARD: WIND+REEDS: DRUM-SOUND TUNED-PERCUS: INHARMONIC: GND-PIANO SOPRN-SAX (continued): VIBRAPHON TUBULAR PNO-THUD SOPRN-SAX2…
-
Page 136
Section 8 — Understanding Programs TS-10 Musician’s Manual JAZZSNARE WINDCHIME ANA-WAVE2 SNARE-ROL WNDCHIME2 ANA-WAVE3 RIMSHOT-1 FNGR-SNAP ANA-WAVE4 RIMSHOT-2 SYN-CLAPS METL-WAVE SIDESTK-1 SYN-KISS RATTLE… -
Page 137: Using The Copy Functions
The Copy page of the TS-10 provides several useful functions which facilitate copying components from one place to another.
-
Page 138: Make Copy
Section 8 — Understanding Programs TS-10 Musician’s Manual There is a well-defined group of copy contexts that are available for your use. The copy context is set whenever you select pages from within this group. The following table shows the copy context that is automatically set whenever particular pages are displayed.
-
Page 139: Special Recall Functions
TS-10 Musician’s Manual Section 8 — Understanding Programs buffer is loaded with the currently selected primary program before the recall is completed. The compare buffer is always selected after a recall. If Group Edit is active when pages of voice parameters are recalled, then the recall will affect all of the voices in the group.
-
Page 140: Default
Section 8 — Understanding Programs TS-10 Musician’s Manual DEFAULT There are some copy contexts which provide the option of recalling default parameter settings automatically. When this option is available, the DEFAULT command appears in the lower left part of the display.
-
Page 141: System
TS-10 Musician’s Manual Section 8 — Understanding Programs SYSTEM For the PITCHTABLE parameter context only: When entered from the Edit Pitch-table pages, the Copy page shows the SYSTEM command on the lower left part of the display. This command will copy the pitch-table directly from the currently program, or from the compare buffer if the Compare LED is on, into the system pitch- table.
-
Page 142: Copying A Complete Program To A New Location
Section 8 — Understanding Programs TS-10 Musician’s Manual Copying a complete program to a new location It is easy to copy programs from one location to another using the copy and recall functions. Simply follow this procedure: • Press Sounds and select the program that you wish to copy. This will automatically set the copy context to PROGRAM PARAMETERS.
-
Page 143: About Pitch-Tables
The difficulty with perfectly-tuned scales is that you can’t modulate keys as universally as with equal temperament. Nonetheless, computer technology — keep in mind your TS-10 is in fact a computer — has made it easy to create and employ alternate pitch-tables.
-
Page 144: Editing A Custom Pitch-Table
If you use the copy function while the compare light is on, the TS-10 will copy the data in the edit buffer, and not the program’s memory.
-
Page 145: Removing A Custom Pitch-Table
• Underline OPTIONS= PITCHTBL . • Press the Down Arrow button. • The TS-10 will ask ERASE CURRENT PITCH-TABLE? • Press *YES*. You are returned to the Select Voice page, the custom pitch-table is gone, and voices 5 and 6 are reset to the default voice.
-
Page 146: Creating And Extrapolating A Custom Pitch-Table
Now that you understand the relationship between the source key, playback pitch, and fine tuning in a custom pitch-table, let’s start over. This time we’ll work with an ancient tuning system, called Pythagorean. Then, we’ll work with the TS-10 built-in pitch-table calculator, and two new procedures: Extrapolation and Interpolation.
-
Page 147: Creating And Interpolating A Custom Pitch-Table
TS-10 Musician’s Manual Section 8 — Understanding Programs The KEY-RANGE defines the area of the keyboard that the TS-10 will use as a reference by which to make its calculations. To set the key-range: • The START key (the first of the two key numbers shown) should be underlined. If not, press the soft button beneath it to select it.
-
Page 148: Using The Copy Page With Pitch-Tables
To install an alternate tuning into the System pitch-table: • Press the soft button beneath SYSTEM. The display briefly reads COPY TO SYSTEM PITCH- TABLE, and the custom pitch-table is installed into the TS-10 operating system where it is available for use by any program.
-
Page 149: Dynamic Pitch-Table Selection
Section 8 — Understanding Programs Dynamic Pitch-Table Selection The TS-10 allows you to easily switch between different system pitch-tables in performance situations. With PITCH-TABLE=U1-PROGRAMS (on the System Page), you can instantly load new CUSTOM system pitch-tables without affecting the sound you are playing by selecting programs in BankSet U1.
-
Page 150: Editing A Wave-List
TS-10 Musician’s Manual • Press the Up Arrow button. The display reads: Whenever you create a wave-list, the TS-10 will delete voices 5 and 6, and use the memory normally occupied by those parameters to store the wave-list. • Press the soft button underneath WAVE-LIST to replace voices 5 & 6, and create a new default wave-list in the program.
-
Page 151: Removing A Wave-List
• Underline OPTION= WAVELIST . • Press the Down Arrow button. • The TS-10 will ask ERASE CURRENT WAVE-LIST ? • Press *YES*. You are returned to the Select Voice page, the custom wave-list is gone, and voices 5 and 6 are reset to their default voices.
-
Page 152: About Drum-Maps
This feature is particularly useful for creating complex keyboard assignments for percussion applications, hence the name “Drum-Map.” One very useful aspect of this feature is the ability to construct a TS-10 program which emulates the key mapping and sonic characteristics of an external drum machine or percussion sound module, allowing you to record and play sequencer tracks which are compatible with the maps used by any external MIDI device.
-
Page 153: How To Create A Drum-Map
• Make sure OPTION= *-NONE-* is underlined. • Press the Up Arrow button. The display reads: Whenever you create a custom drum-map, the TS-10 will delete voices 5 and 6, and use the memory normally occupied by those parameters to store the drum-map.
-
Page 154: Editing A Drum-Map
Section 8 — Understanding Programs TS-10 Musician’s Manual • Press the Wave button. The display shows: • As you can see, activating a Drum-Map in a Program automatically changes the Wave for the four remaining voices to Drum-Map. Your edited program now contains a Drum-Map and all four voices will play the Drum-Map.
-
Page 155: Using The Copy Page With Drum-Maps
• Underline OPTION= DRUM-MAP . • Press the Down Arrow button. • The TS-10 will ask ERASE CURRENT DRUM-MAP ? • Press *YES*. You are returned to the Select Voice page, the custom drum-map is gone, and voices 5 and 6 are reset to their default voices.
-
Page 156: Section 9 — Program Parameters
Section 9 — Program Parameters This section covers the parameters which can be edited independently for each Voice within a Program. For a general overview of the program concepts involved, refer to the previous section. LFO Page The LFO Page contains the parameters related to the Low Frequency Oscillator. Each voice in a program has its own LFO, which can be assigned as a modulator wherever a modulation source is selected.
-
Page 157
Section 9 — Program Parameters TS-10 Musician’s Manual of the soft button above RATE will toggle between the Rate value and the Track RATE Mod selector. If you set the LFO Rate to 00, and the RESTART-MODE parameter to ON, you can use the LFO as Tip: a gated modulator with a variable depth. -
Page 158
00 to 99 NOISE-RATE One of the TS-10’s 15 available modulation sources is NOISE. The NOISE modulator produces a randomly changing level. Its main use is to randomize or “humanize” pitch when applied as a pitch modulator. It can also be used to randomize any other modulation destination. Typically,… -
Page 159: Env1, Env2, Env3 — Ts-10 Envelopes
The TS-10 envelopes are descended from the venerable ADSR (attack, decay, sustain, release) envelope, but with many refinements. While the ADSR envelope gives you control over three time segments and one level, the TS-10 envelopes give you control over four levels and five time segments.
-
Page 160
TS-10 Musician’s Manual Section 9 — Program Parameters Press the Env 3 button to get to the first ENV3 sub-page containing the five TIME parameters: Note that the numbers shown here represent times, not rates. That is, the envelope will take a fixed amount of time to go from one level to another no matter how close together or far apart those two levels are. -
Page 161
Section 9 — Program Parameters TS-10 Musician’s Manual ENVELOPE TIMES time time time time time value (in sec) value (in sec) value (in sec) value (in sec) value (in sec) Press Env 3 again. This takes you to the second ENV3 sub-page, which shows the five LEVELS:… -
Page 162
SAMPLE-START-OFFSET every time the envelope repeats. In order to maximize the use of the TS-10’s 32 voices, and to manage the “voice stealing” it is sometimes useful to understand when a given voice will be assigned and when it will be released, or “put back”… -
Page 163
Section 9 — Program Parameters TS-10 Musician’s Manual A looped (sustaining) wave will continue to use the voice until the envelope reaches zero. For a sustaining wave, when the Envelope Mode is Normal: = Envelope ENV3 PEAK = Wave data… -
Page 164: Pitch Page
TS-10 Musician’s Manual Section 9 — Program Parameters CONVEX-1 QUIKRISE CONVEX-2 CONVEX-3 LINEAR Keyboard Velocity Keyboard Velocity Keyboard Velocity Keyboard Velocity Keyboard Velocity CONCAVE1 CONCAVE2 CONCAVE3 CONCAVE4 LATERISE Keyboard Velocity Keyboard Velocity Keyboard Velocity Keyboard Velocity Keyboard Velocity Range: -99 to +99 KBDTRK KBDTRK makes the envelope times shorter or longer depending on the key played.
-
Page 165
Section 9 — Program Parameters TS-10 Musician’s Manual OCTAVE Range: -4 to +4 octaves Changes the pitch of the voice by octaves. Range: -11 to +11 SEMITONE Changes the pitch of the voice by semitones. Incrementing/decrementing this control beyond +11 or -11 automatically increases/decreases the octave by one. -
Page 166: Pitch Mods Page
This parameter controls the time it takes for the pitch to slide smoothly (glide) from one note to another. The higher the value, the longer the glide time. The TS-10 uses Constant-Time Portamento. This means that it will take the same amount of time to glide between notes that are close together (i.e.: C4 to D4) as it will to glide between notes that are far apart (i.e.: C4 to C7).
-
Page 167: Filters Page
Determines the amount by which the LFO (Low Frequency Oscillator) will affect pitch. Filters Page Each TS-10 voice has its own pair of digital filters, FILTER 1 and FILTER 2, which are connected in series. The filter settings determine which ranges of frequencies will be allowed to pass through to the output.
-
Page 168: Filter Configurations
TS-10 Musician’s Manual Section 9 — Program Parameters velocity, etc. You can create some very interesting filter configurations by using a different modulator for each filter. For instance, try using pressure to modulate the filters. You can drive one filter up with pressure, while simultaneously driving the other down.
-
Page 169
Section 9 — Program Parameters TS-10 Musician’s Manual Filter 1 Cutoff Filter 1 Keyboard Filter 1 Mode Frequency Scaling Amount Modulation Source Modulation Amount Env. 2 Modulation Amount Range: LO-PASS/2 or LO-PASS/3 FILTER1 Mode Determines whether Filter 1 will be a 2-pole or a 3-pole low-pass filter. -
Page 170: Filter 2 Page
TS-10 Musician’s Manual Section 9 — Program Parameters MODSRC Range: various Selects a modulation source for the filter cutoff frequency from among the 15 available modulators. Range: -99 to +99 MODAMT Determines the amount by which the assigned filter modulator will affect the filter cutoff frequency.
-
Page 171
Section 9 — Program Parameters TS-10 Musician’s Manual OUTPUT KBD-SCALE Range: -99 to +99, or ZON Can be used to fade the voice in or out between the two keys specified to the right (see below). This is good for doing keyboard crossfades between voices, or for reducing the volume of a particular voice as you go higher up the keyboard. -
Page 172
TS-10 Musician’s Manual Section 9 — Program Parameters The next two parameters on the top line of the display provide a powerful tool for shaping the volume of the sound across the keyboard: Ranges: -A0 to C8 LO/HI-KEY Sets the key range over which the fade-in, fade-out, or keyboard zone will occur. When this parameter is selected, notes can be entered from the keyboard or using the Data Entry Slider or Up/Down Arrow buttons. -
Page 173
This parameter gives you some control over how voices will be reassigned, or “stolen,” to play new notes when all of the TS-10’s voices are already playing. A voice can be assigned LO, MED, or HI priority. The rule is that a given voice will only be allowed to steal from voices with the same or lower priority. -
Page 174: Wave Page
TS-10 Musician’s Manual Section 9 — Program Parameters to protect a voice or voices from being stolen — such as cymbals or a sustaining “pad” sound in a sequencer track. Ranges: 000 to 127 VELOCITY-WINDOW LO & HI The LO and HI parameters allow you to define the velocity range for each voice. The full velocity range (default) is LO=000 HI=127.
-
Page 175
Section 9 — Program Parameters TS-10 Musician’s Manual For the first thirteen wave classes, the bottom line of the display shows: Range: -60 to +60 MULTISAMPLE-SHIFT Changes keyboard split points on multi-sampled waves. This has the effect of setting the WaveSamples to ranges you wouldn’t otherwise hear (allowing aliasing in some cases), creating… -
Page 176: Transwave -Specific Wave Parameters
TS-10 Musician’s Manual Section 9 — Program Parameters TRANSWAVE -Specific Wave Parameters Each Transwave is actually composed of many different single-cycle waveforms, which progress from one timbre to another, occupying adjacent areas of memory. Movement within the sound is created by playing different waveforms in succession; that is, by modulating the wavetable.
-
Page 177: Hyper-Wave™ -Specific Wave Parameters
Section 9 — Program Parameters TS-10 Musician’s Manual Hyper-Wave™ -Specific Wave Parameters Hyper-Wave architecture allows up to 16 waves to be defined in a list, which can be swept through, or cross-faded for timbre-shifting and Jam-Loops. Hyper-Waves are created by selecting WAVE-LIST with the OPTION parameter found on the Program Control page.
-
Page 178: Drum-Map Specific Wave Parameters
TS-10 Musician’s Manual Section 9 — Program Parameters MOD-DESTINATION Range: *-NONE-*, START-STEP, LOOP-START, END- STEP, TRAVELER, or START+LOOP • When set to START-STEP, the output level of the START-MODSRC at the time of the note-on will determine which step the Wave-List will begin playing at. A positive MODAMT will cause MODSRC output to increment the START-STEP above the manual level.
-
Page 179: Mod Mixer Page
Section 9 — Program Parameters TS-10 Musician’s Manual Mod Mixer Page The Mod Mixer is a unique feature which allows you to: • combine and assign two modulators to a single modulation input • scale and/or shape the response of one of those modulators according to one of 16 Mod Shaper Curves Select the voice you want to edit on the Select Voice page, and then press Mod Mixer.
-
Page 180
TS-10 Musician’s Manual Section 9 — Program Parameters SHAPE Range: various Here you select which of the 16 tracking curves will be applied to the modulator selected as SRC- 2. You can use one of the convex or concave shapes to make the modulator’s effect come in earlier or later than it ordinarily would;… -
Page 181
Section 9 — Program Parameters TS-10 Musician’s Manual Input (Src-2): Scale Factor: Shape: Output: Convex Concave Quant-08 Smoother Smoother Linear… -
Page 182: Program Control Page
(e.g. violin scrape layered with a shakuhachi) • CUSTOM Use this to define your own special purpose sound type: ENSONIQ sounds will never be released with TYPE=CUSTOM. With the SoundFinder feature, when a sound name is selected, pressing the Replace Track…
-
Page 183
Section 9 — Program Parameters TS-10 Musician’s Manual OPTION Range: *-NONE-*, PITCHTBL, WAVELIST, or DRUM-MAP The setting of this parameter indicates whether a Custom Pitch-Table, a Wave-List, or a Drum- Map exists within the sound. These options occupy the portion of a sound program which is usually used by voices 5 and 6, so when an Option is present, you do not have access to those two voices. -
Page 184
TS-10 Musician’s Manual Section 9 — Program Parameters Press the Program Control button again to get to the second sub-page: The following parameters are the default settings for the Track parameters that are stored with the Program. For more information about how these parameters function, see Section 5 —… -
Page 185: Pitch-Table Editor Parameters
Section 9 — Program Parameters TS-10 Musician’s Manual Press Program Control again to get to the third sub-page: TIMBRE V1 to V6 Ranges: -64 to +63 The TIMBRE sub-page controls the relative volume modulation amounts for each Voice, as controlled by Timbre. Note that when OPTIONS is set to PITCH-TABLE, WAVE-LIST, DRUM- MAP, the V5 and V6 parameters are not displayed.
-
Page 186
KEY-RANGE START/END Defines the area of the keyboard that the TS-10 will use as a reference by which to make its calculations. The START key is the first of the two key numbers shown, and the END key is the second number shown. -
Page 187: Copy Pitch-Table Parameters
System tuning. • Press the soft button beneath SYSTEM. The display briefly reads COPY TO SYSTEM PITCH- TABLE, and the custom pitch-table is installed into the TS-10 Operating System where it is available for use by any program.
-
Page 188: Wave-List Editor Parameters
TS-10 Musician’s Manual Section 9 — Program Parameters Wave-List Editor Parameters The following parameters are only available when OPTION=WAVE-LIST on the Program Control Page. To access the Wave-List Editor parameters for a program that does not contain a Wave-List: 1) Press the Program Control button.
-
Page 189
Section 9 — Program Parameters TS-10 Musician’s Manual XFADE-TIME Range: 00000 to 60000 (0 to 60 sec) Sets the amount of time that the selected wave step will cross-fade into the following wave step. The XFADE-TIME adds time to the duration of both the current step and the next step:… -
Page 190: Copy Wave-List Parameters
TS-10 Musician’s Manual Section 9 — Program Parameters Copy Wave-List Parameters Pressing Copy from the Edit Wave-List sub-page will display the Copy page: The MAKE COPY parameter allows you to make a copy of the complete Wave-List from the currently selected program (or the Compare Buffer) into the Copy Buffer.
-
Page 191
Section 9 — Program Parameters TS-10 Musician’s Manual PAN parameter are: *VOICE* Uses Patch VOICE panning L—— Hard Left -L—— Medium Left —L—- Soft Left —C— Center —-R— Soft Right ——R- Medium Right ——R Hard Right Note: When PAN=*VOICE*, the key uses whatever pan setting is chosen on the Output page of the voice(s) responding to the key. -
Page 192
TS-10 Musician’s Manual Section 9 — Program Parameters sounds through unchanged, but then closes down to create a gate-type effect. Can be used for almost all unlooped drums & percussion. To create a percussion decay out of a looped sound, you should use the LDECAY, MDECAY or SDECAY voices described below. -
Page 193: Copy Drum-Map Parameters
Section 9 — Program Parameters TS-10 Musician’s Manual Copy Drum-Map Parameters Pressing Copy from the Drum-Map Editor page will display the Copy page: The MAKE COPY option allows you to make a copy of the complete Drum-Map from the currently selected program (or the Compare Buffer) into the Copy Buffer.
-
Page 194: Program Effects Page
TS-10 Musician’s Manual Section 9 — Program Parameters Program Effects Page Understanding the effect algorithms and their related parameters are described in detail in Section 6 — Understanding Effects and Section 7 — Effect Parameters. Select Voice Page The Select Voice page is used to view the six voices that create a program sound. Note that if there is a Drum-Map, Wave-List, or Pitch-Table within the program, the Select Voice page will only show four voices (a Drum-Map, Wave-List, or Pitch-Table replaces voices 5 and 6).
-
Page 195: Section 10 — Understanding The Sequencer
What is a Sequence? A Sequence on the TS-10 is a collection of 12 independent tracks and an effects algorithm and its settings. Each track has its own sound and complete set of track parameters (volume, pan, timbre and all the other track parameters, including MIDI channel, status, etc.) all of which are…
-
Page 196: What Is A Song
But a Song on the TS-10 is much more than just as collection of sequences playing in order. This is because each song has an additional set of 12 tracks which are completely independent of the tracks in its component sequences.
-
Page 197: Sequencer Status
• AUDS — Audition Stop is entered when you stop the sequencer from the Audition Play state. To exit Audition Stop and return to the normal stop state, you must first instruct the TS-10 to KEEP either the new or the original track (see Audition Play/Keep Page later in this section).
-
Page 198: Selecting A Sequence Or Song
Section 10 — Understanding the Sequencer TS-10 Musician’s Manual Song names are always Current Sequencer Bank preceded by a «$» A dot by the location means the Select a -BLANK- location to song or sequence contains create a new sequence or song…
-
Page 199: Sequencer Tracks
Section 10 — Understanding the Sequencer Sequencer Tracks Each TS-10 sequence and song has twelve independent polyphonic Tracks on which you can record notes, controllers, and program changes using local TS-10 sounds, remote MIDI instruments, or both. These tracks are selected from the two Seq/Song Track pages, labeled Seq/Song Tracks 1-6 and 7-12.
-
Page 200: Replacing The Sound On A Sequence Or Song Track
Replacing the Sound on a Sequence or Song Track To replace the TS-10 sound on a given Sequence or Song track with a sound of your choice: • While on either of the Seq/Song Tracks pages, select one of the six tracks.
-
Page 201
TS-10 Musician’s Manual Section 10 — Understanding the Sequencer • Press the Bank 0 button. The display shows: • Press the lower right soft button beneath LAYERS OUT. We will be replacing a track sound assignment in this sequence. • Press the Sequencer Control button and set LOOP=ON. This way you can hear the LAYERS OUT sequence repeat continuously, allowing you to audition several different Programs without having to restart the sequence each time. -
Page 202: Layering Sounds On The Tracks Pages
As described in Section 1 — Controls and Basic Functions, whenever you go from Sounds or Presets mode to the Track Parameter pages, the TS-10 displays the names of the three most recently selected sounds (on the top line) and their parameter values (on the bottom line).
-
Page 203
TS-10 Musician’s Manual Section 10 — Understanding the Sequencer Sound Name Sound Name When you then select any of the Track parameter pages, the display will show only the parameter values for the six tracks, and not the names of the sounds:… -
Page 204: The Tempo Track And The Track Parameters
Section 10 — Understanding the Sequencer TS-10 Musician’s Manual Important: In Sequencer mode, selecting and editing a track from a Track Parameter page does not change what is selected or layered on the Seq/Song Tracks 1-6 and 7-12 pages — i.e. it does not affect what you hear when you play the keyboard.
-
Page 205: Copying A Preset Along With Its Effect Into 3 Sequencer Tracks
Continued presses of the soft button beneath the time signature will toggle between the upper and lower fraction values. • Press *YES*. The TS-10 returns to the current Sequencer Bank page with the new sequence selected.
-
Page 206: Creating A New Song
• Press *YES*. The TS-10 returns to the current Sequencer Bank page with the new song selected. Erasing All Sequencer Memory When you want to erase all sequences and songs in the TS-10 sequencer memory, first make sure you have saved any important data to disk, then: • Press and hold the Presets button.
-
Page 207
• Underline the COUNTOFF parameter and set to COUNTOFF=REC. This will play a one bar countoff before recording (but not when playing back) all tracks after the first. The TS-10 will display CNTF in the lower-left-hand corner of the display during countoff (when enabled on… -
Page 208: About The Audition Play/Keep Page
1) the end of the sequence is reached, or 2) you press Stop/Continue (or press the assigned AUX Foot Switch). At the end of the sequence, the TS-10 will leave record mode and (assuming LOOP=ON) enter Audition mode. About the Audition Play/Keep Page •…
-
Page 209: Punching In» On A Track
When AUTOPUNCH=ON, the TS-10 will record events only within the window of time specified by the Edit times, no matter how you enter record. Thus if you press Play, then Record the TS-10 will wait for you to play before entering record, but recording will only be triggered by notes within the Edit times window.
-
Page 210: Finding The Bankset, Bank, And Display Location For Sounds On Sequencer Tracks
Section 10 — Understanding the Sequencer TS-10 Musician’s Manual Finding the BankSet, Bank, and Display Location for Sounds on Sequencer Tracks To find the BankSet, Bank and Display location (U0-1.5, U1-3.1, R2-7.4, etc.) for the sounds assigned to sequencer tracks: •…
-
Page 211: Edit Sequence Page — Sequence Edit Functions
MIDI instruments. When you play middle C on the TS-10, for instance, it instantly sends to its MIDI Out jack a series of numbers representing a Key Down event, along with the location of the note on the keyboard and how hard the key was struck.
-
Page 212: Midi Mode And Channel — Remote Midi Device
Section 10 — Understanding the Sequencer TS-10 Musician’s Manual This set up is ideal for controlling everything right from the TS-10. Simply by selecting the track which is set to the same MIDI channel as to a particular instrument, you can:…
-
Page 213: Recording Midi Tracks
When this is the case, be sure that you assign local status (as opposed to both local and MIDI) to the tracks that you want to play only on the TS-10. This will avoid accidentally sending unintended MIDI data to an external instrument.
-
Page 214
Section 10 — Understanding the Sequencer TS-10 Musician’s Manual To change a sound within a local track: • On the Sequencer Control page, set the Record Mode to RECORD-MODE= ADD. • Press Seq/Song Tracks 1-6 or 7-12 and select the track that you want to change the sound. -
Page 215: Defining Track Pressure In Sequencer Mode
Filter command on the Edit Track page. When PRESSURE=KEY: • Local voices played from the TS-10 keyboard will respond to Poly-Key pressure only. • The sequencer will record Poly-Key pressure into any tracks you record.
-
Page 216: Assigning A Track To The Aux Outputs
MIDI device from the TS-10 and pressure doesn’t seem to have an effect, it could be the TS-10 is set to transmit Poly-Key pressure and the receiving instrument only recognizes Channel pressure. In this case, set Track PRESSURE=CHAN when playing or sequencing that instrument.
-
Page 217: Edit Track Page — Track Edit Functions
TS-10 Musician’s Manual Section 10 — Understanding the Sequencer Edit Track Page — Track Edit Functions Pressing the Edit Track button displays the top level track editing page. Pressing the button twice will display the track edit options sub-page. These edit functions will affect the currently selected track.
-
Page 218: Song Mode
But wait, there’s more. Each TS-10 song also contains its own effects set-up (see below) and 12 additional tracks which are independent of the tracks in the component sequences that form the song steps.
-
Page 219: Edit Song Page — Song Edit Functions
TS-10 Musician’s Manual Section 10 — Understanding the Sequencer Edit Song Page — Song Edit Functions Pressing the Edit Song button displays the top level song editing page. Pressing the button twice will display the Song Step Editor. If you press the Edit Song button when a sequence is selected, the display will respond SONG NOT SELECTED and will not allow you onto this page.
-
Page 220: Song Tracks
You can then press Play to hear your new song. Song Tracks A Song on the TS-10 is much more than simply a group of sequences chained together. Once you have created a song and edited its steps, you can record another complete set of 12 song-length tracks.
-
Page 221
TS-10 Musician’s Manual Section 10 — Understanding the Sequencer SONG Song Step 1: Song Step 2: Song Step 3: Sequence 01 (4 bars) Sequence 02 (8 bars) Sequence 03 (4 bars) Sequence Track 1 Sequence Track 1 Sequence Track 1… -
Page 222: Viewing Sequence Tracks In Song Mode
• Press Mix/Pan. The display shows the mix levels for the tracks, with the current track underlined (or press Mix/Pan again to record dynamic panning changes). • While holding down Record, press Play. The TS-10 enters Overdub. • Use the Data Entry Slider or the Up/Down Arrow buttons mix the volume (or pan) of the selected track.
-
Page 223: To Record Mix Or Pan Changes To A Song Track
• Press Mix/Pan. The display shows the volume levels for the tracks, with the current track underlined (or press Mix/Pan again to record dynamic panning changes). • While holding down Record, press Play. The TS-10 enters Overdub. • Use the Data Entry Slider or the Up/Down Arrow buttons mix the volume (or pan) of the selected track.
-
Page 224: Sequencer Tempo Track
Note: Do not load any Seq/Songs that have been saved with Tempo Track events into a TS-10 using software earlier than version 2.0. The Tempo Track feature is incompatible with older software.
-
Page 225: Tempo Track Edit Functions
TS-10 Musician’s Manual Section 10 — Understanding the Sequencer • Press the soft button beneath *TEMPO-TRK* to select it. • Press the Edit Track button, and select the ERASE command by pressing its soft button. • The display asks ERASE TRACK 12? Press the soft button above *YES*. The display will return to the Seq/Song Tracks 7-12 page, and the Tempo Track will now be -UNDEFINED-.
-
Page 226
Section 10 — Understanding the Sequencer TS-10 Musician’s Manual 4) Press Record then Play. 5) At the bridge (song step 3), press the Up Arrow button five times slowly to increase the tempo. 6) At the end of song step 3, quickly press the Down Arrow button five times to return the tempo to +00. -
Page 227: Using Multi-Track Record
Tracks do not have to be selected in order to have data recorded on them, but they must be defined. Each channel of incoming MIDI data will be recorded on the lowest-numbered TS-10 track which has the corresponding MIDI channel number. For example, if both track 1 and track 2 are set to MIDI channel 1, only track 1 will receive and record any data because it is the lowest- numbered track set to MIDI channel 1.
-
Page 228: Basic Multi-Track Recording From An External Sequencer
• Set each of the tracks to a discrete MIDI channel (we recommend assigning tracks 1-12 to MIDI channels 1-12 to avoid confusion). • Connect the MIDI Out jack of the TS-10 to the MIDI In jack of the TS-10 with a single MIDI cable.
-
Page 229: Using The Step Entry Recorder
TS-10 Musician’s Manual Section 10 — Understanding the Sequencer (solidly selected) track, and any stacked tracks will be de-selected after Audition. If REC- SOURCE=MULTI, data wil be recorded on all selected and stacked tracks, but there will be no Audition.
-
Page 230
Whenever you record any track of a sequence or song, all of these values are automatically saved — that is, they will be remembered by the TS-10 if you leave the sequence (by selecting another one) and return to it later. However, if the SAVE CHANGES parameter is set to ASK, and you… -
Page 231: Section 11 — Sequencer Parameters
Section 11 — Sequencer Parameters The following parameters control the TS-10 sequencer. Parameters for creating and manipulating sequences, songs, and the tracks contained within each are covered here. For a basic overview of the concepts involved, refer to the previous section.
-
Page 232: Info Sub-Page
Section 11 — Sequencer Parameters TS-10 Musician’s Manual INFO Sub-Page Pressing the soft button above INFO displays a page containing information about the song, including the song name, the size in blocks, the song tempo offset, number of steps, and the elapsed time at the current tempo.
-
Page 233: Edit Steps Page
TS-10 Musician’s Manual Section 11 — Sequencer Parameters • Use the data entry controls to select a location for the copied song. Note that only undefined sequencer locations will be available for selecting. • Press *YES* to copy the song to the new location (or press *NO* to cancel). The new song will be given the same name as the original one you copied.
-
Page 234: Tracks
Section 11 — Sequencer Parameters TS-10 Musician’s Manual FS stands for Foot Switch. In order to use this function you must first assign one of the Foot Switches (on the System page) to SONG-STEP. When REPS=FS, the song step will loop continuously until the assigned foot switch is pressed.
-
Page 235: Edit Sequence Page Parameters
TS-10 Musician’s Manual Section 11 — Sequencer Parameters Edit Sequence Page Parameters • Press the Edit Sequence button. The display shows: These commands affect the currently selected sequence. If a song is selected, these commands affect the song tracks in the song.
-
Page 236: Erase
Section 11 — Sequencer Parameters TS-10 Musician’s Manual SIZE Range: (read only) Displays the size of the current sequence in events. TEMPO Range: 025 to 250, or EXT This displays the tempo of the current sequence. Changing the tempo here has the same effect as changing it on the three other pages where tempo appears;…
-
Page 237: Add Bars
TS-10 Musician’s Manual Section 11 — Sequencer Parameters From the Edit Sequence page, press LENGTH. The display shows: This sub-page shows the name, number of bars, and time signature for the sequence, as well as the Add and Delete Bars commands.
-
Page 238: Delete Bars
Section 11 — Sequencer Parameters TS-10 Musician’s Manual To ADD Bars to the selected sequence: • Make sure the sequence to which you want to add bars is selected. • Press Edit Sequence, and press LENGTH. • Press ADD BARS — the display shows the following: •…
-
Page 239: Sequence Bank Utilities
TS-10 Musician’s Manual Section 11 — Sequencer Parameters Sequence Bank Utilities A new way to select sequences has been added to certain sequencer edit pages. When a sequence name parameter is selected on the Song Edit, Append Sequence, Copy Track or Merge Track pages, an LED above one of the bank buttons will flash to show where the indicated sequence is located.
-
Page 240: Track Edit Functions
The Quantize (or auto-correct) function can take a less than perfect track and put it right on the beat. The TS-10 uses post-quantization — that is, you first record a track, then apply the quantization later as a track editing option. You can select any note value from 1/4 note up to 1/64 note triplets, and move all notes in the track directly onto the nearest beat of that value.
-
Page 241
OFF or ON Options The TS-10 allows you to define how you want to quantize your track. In other words, when you select the quantize options, you can select several different variables in quantizing your track. Using these variables can create a very live sounding sequence. When “OPTIONS=OFF,” all key events are quantized to the closest note value that was selected earlier. -
Page 242
Section 11 — Sequencer Parameters TS-10 Musician’s Manual SWING Range: 50 to 74% When you specify a SWING percentage value, you are defining the offset amount that every second quantize point (known as the swing note) will be delayed. In keeping with the swing implementation in most MIDI sequencers, the SWING range is from 50% (the same as straight quantization) to 74% (a tick before the next higher note value). -
Page 243
TS-10 Musician’s Manual Section 11 — Sequencer Parameters Quantize points: Q = Straight S = Swing 16th 16th Clocks (Original) At 0% At 25% At 50% At 100% Time In this example, QUANTIZE is set to 1/8th notes and SWING is set to 50%. -
Page 244: Using The Quantize Options
In addition, the RANDOM parameter inside the TS-10 “reseeds” itself. This means that if you quantize two identical tracks with randomization, you will get different results. Also, if you set the PERCENT parameter to zero, you can randomize a track, keep the new track, and randomize it again to get things progressively looser.
-
Page 245: Erase
• Press *YES* to execute the edit command (or press *NO* to cancel). After editing, if a range was specified, the TS-10 returns with the Audition Play/Keep page where you can audition the results of the edit before deciding whether to keep it or not. If the range was ALL, there is no audition.
-
Page 246: More* — Additional Track Edit Functions
Edit Track Range page, as shown earlier in this section. If not, leave it set to RANGE=ALL. • Press *YES* to execute the copy command (or press *NO* to cancel). After editing, the TS-10 returns with the Audition Play/Keep page where you can audition the results of the edit before deciding whether to keep it or not.
-
Page 247: Transpose
Edit Track Range page, as shown earlier in this section. If not, leave it set to RANGE=ALL. • Press *YES* to execute the edit command (or press *NO* to cancel). After editing, the TS-10 returns with the Play/Keep page where you can audition the results of the edit before deciding whether to keep it or not.
-
Page 248: Event-List
Edit Track Range page, as shown earlier in this section. If not, leave it set to RANGE=ALL. • Press *YES* to execute the Scale command (or press *NO* to cancel). After editing, the TS-10 returns with the Audition Play/Keep page where you can audition the results of the edit before deciding whether to keep it or not.
-
Page 249
TS-10 Musician’s Manual Section 11 — Sequencer Parameters EVENT-TYPE Controls which types of events will be shown as you scroll up through the events in the track. When set to ALL, every event in the track will be listed. On the other settings, some types of events will be left out of the list —… -
Page 250
Section 11 — Sequencer Parameters TS-10 Musician’s Manual • Time locations with no event are shown as EVENT=***.000. For TMP (tempo event type) the value is a percentage increase or decrease of the tempo(s) of the Note: sequences that make up the song: when TEMPO=+00, the ACTUAL value shows the actual tempo of the sequence corresponding to the song step that is currently playing. -
Page 251: Auditioning Event Edit Changes
TS-10 Musician’s Manual Section 11 — Sequencer Parameters Event Starting Time Seq Values: Bar, Beat, and Clock Song Values: Step, Repeats, Bar, Beat, and Clock To change the STARTING TIME of the current event, press the soft button below the time. The…
-
Page 252: Filter
Section 11 — Sequencer Parameters TS-10 Musician’s Manual version of the Audition Play/Keep page, where you can audition the new track and the original before deciding to either keep the new track, keep the old track or return to the Event Editor to edit some more.
-
Page 253: Merge
Note: If you chose Copy mode, the TS-10 returns with the new track (the copy) selected. If you wanted to copy and then erase the data, you must first reselect the original track and then repeat the above procedure, using Erase mode.
-
Page 254: Click Page
• Press *YES* to execute the merge command (or press *NO* to cancel). After editing, the TS-10 returns with the Audition Play/Keep page where you can audition the results of the edit before deciding whether to keep it or not.
-
Page 255: Sequencer Control Page
CLOCK This parameter selects the clock source for the sequencer. • INT — Selects the TS-10’s own internal clock to run the sequencer. The TS-10 features 96 ppq (pulses per quarter-note) resolution for extremely accurate recording. • MIDI — Selects external MIDI clocks as the sequencer clock source. Use this setting if you want to use another device (such as a computer sequencer or drum machine) as the master clock source and sync the TS-10 to it.
-
Page 256
You can play along with the track and have the TS-10 “punch” in and out for you like an invisible engineer. We refer to the points at which recording will begin and end as the Edit Times and they are set on the second sub-page of the Locate Page. -
Page 257
MIDI, or both. Setting this parameter to MIDI is useful if you want to send data from the TS-10 to a MIDI processor, then record only the incoming data coming back from the processor. This parameter only has an effect in MULTI mode; in POLY or OMNI modes the sequencer always records both. -
Page 258: Save Changes
• OFF — With this switch set to OFF, Step Entry Recording is disabled and the system will behave normally. • ON — Whenever you go into Record with this switch set to ON, the TS-10 will automatically display the Step Entry page after the countoff has elapsed. If there is no countoff, then it will…
-
Page 259
TS-10 Musician’s Manual Section 11 — Sequencer Parameters The Step Entry page looks something like this (depending on the settings): current AutoStep Gate time track number switch select Step Rep Bar Beat Clock Step Step Size command select Song only… -
Page 260
Otherwise, if you step past the end of the track you will enter Audition mode. If you are using a Foot Switch with the TS-10, you can assign the foot switch to advance the location by setting FS1=*STEP* on the System page. Pressing the foot switch will act just like the *STEP* command on the Step Entry page. -
Page 261: Locate Page
TS-10 Musician’s Manual Section 11 — Sequencer Parameters Locate Page Pressing the Sequencer Locate button displays a page which provides valuable sequencer information as well as control over tempo and Auto-locate functions. Pressing Locate again will reveal the second sub-page where you can set the Edit Times for use with the Autopunch feature.
-
Page 262: Setting The Goto Locate Time While The Sequence Plays
Section 11 — Sequencer Parameters TS-10 Musician’s Manual will play at their designated tempo. When a Song Tempo Track is selected, editing this value will record tempo change events. GOTO — Sequence Autolocate Control Displays the GOTO sub-page where the auto-locator destination is set. Using the GOTO function you can quickly locate to any bar and beat within the sequence, in order to play or record from there.
-
Page 263: Song Locate Page
TS-10 Musician’s Manual Section 11 — Sequencer Parameters Song Locate Page • Select a song from one of the Sequencer Bank pages. • Press Locate. When a song is selected, the Locate page shows: Sequence in Current Song Step Current Song Location (Step + Rep)
-
Page 264: Setting The Goto Locate Time While The Song Plays
• OFF — normal recording without using Edit Times. When the Autopunch function is on, the TS-10 will enter and exit record only at the points specified by the Edit Times. For example, if you want to have the TS-10 automatically record over just the third bar of a four bar sequence: •…
-
Page 265: Edit Times In Song Mode
EDIT TIMES IN and OUT Ranges: (various) When a sequence is selected, the display shows the Bar, Beat and Clock at which the TS-10 will enter and exit record when AUTOPUNCH=ON. Press the soft buttons nearest IN and OUT to select the Edit Times parameters for editing.
-
Page 266: Section 12 — Sequencing/Midi Applications
• Set the drum machine to POLY (OMNI Off) mode, and select a MIDI Channel. • From the Track MIDI Page, assign a track on the TS-10 MIDI Status, and set it to the same MIDI Channel you assigned the drum machine.
-
Page 267: Song Position Pointers
MIDI commands that tell a sequencer or drum machine where to locate within a song or sequence. When the TS-10 receives a Song Position Pointer, it will locate to the appropriate place in the selected song or sequence. The TS-10 sends a Song Position Pointer over MIDI whenever you use the Auto-Locate control (the GOTO function on the Locate Page).
-
Page 268: Multi Mode — Receiving On Up To 12 Midi Channels
(Remember always to change programs from the TS-10’s Track MIDI sub-page.) • Again, you can play a different external instrument, or the TS-10 alone, or the TS-10 and an external instrument, depending on which track(s) you select. Now press Seqs/Songs and reselect the first sequence. (Again, the TS-10 will ask you SAVE CHANGES TO <SEQ NAME>? Answer *YES*.) Notice when you select the new sequence that…
-
Page 269: A Few Important Points About Multi Mode
MIDI channels for the different tracks: Select any track and set it to receive on the MIDI Channel you wish. Now, as long the TS-10 is in MULTI Mode, incoming MIDI information on that channel will be received by that track.
-
Page 270
TS-10 Musician’s Manual Section 12 — Sequencing/MIDI Applications MIDI data. -
Page 271: Using The Ts-10 With An External Midi Sequencer
MIDI input. > For tracks which you want to play one of the other MIDI devices, but not play a TS-10 sound, set the Status to LOCAL-OFF. The track will send MIDI to the sequencer, but will not play locally when the data is received.
-
Page 272
If you have a guitar synth which only sends in POLY Mode (i.e. sends all six strings on the same MIDI Channel) you should use the TS-10 in POLY Mode (or OMNI Mode) and set the guitar controller to send on the MIDI Channel that is selected for the Base Channel on the MIDI Page. -
Page 273
Section 12 — Sequencing/MIDI Applications TS-10 Musician’s Manual • Notes played on each string will play only the corresponding track. Each string/track combination is totally independent. -
Page 274: Delay Times/Tempo Bpm Chart
TS-10 Musician’s Manual Section 12 — Sequencing/MIDI Applications • You can change the program for each track manually from the TS-10’s front panel (using the Replace Track Sound function) or by sending Program Changes from the controller via MIDI. • Each track will accept Program Changes independently. In many cases you will want to have the guitar controller send the same-numbered Program Change on all six channels so that all six strings play the same sound.
-
Page 275
Section 12 — Sequencing/MIDI Applications TS-10 Musician’s Manual 461.54 230.77 153.85 115.38 304.57 152.28 101.52 76.14 458.02 229.01 152.67 114.50 303.03 151.52 101.01 75.76 1/4 NOTE 1/8th NOTE 1/8 TRIPLET 1/16th NOTE 301.51 150.75 100.50 75.38 300.00 150.00 100.00 75.00 454.55… -
Page 276: What Is General Midi
With these controllers supported, a composition that relies on note articulations and mix settings can be played back and still sound correct when played by any GM sound module. The TS-10 supports all of the above MIDI messages, and fully conforms to the General MIDI Specification.
-
Page 277: Why Use General Midi
Section 12 — Sequencing/MIDI Applications TS-10 Musician’s Manual Why use General MIDI? While the TS-10 instruments are a superb sound source, with greater fidelity and more programmability than most GM modules, there are interesting applications for General MIDI that can enhance your music making.
-
Page 278: General Midi Sound Map
HORN METALIC-PAD HELICOPTER GTR-HRMONIC BRASS-SECTN HALO-PAD APPLAUSE SYN-BRASS-1 SWEEP-PAD GUN-SHOT SYN-BRASS-2 Note that the names listed above are as they appear in the TS-10, and not as they appear in the General MIDI Spec. The only differences are in spelling.
-
Page 279: Gm And Gs Percussion Key Maps (Channel 10)
Section 12 — Sequencing/MIDI Applications TS-10 Musician’s Manual GM and GS Percussion Key Maps (Channel 10) MIDI 1 — STANDARD- 9 — ROOM-KIT 17 — POWER-KIT 25 — ELCTRNC- Note # 33 — JAZZ-KIT Kick Drum 2 Kick Drum 2…
-
Page 280
TS-10 Musician’s Manual Section 12 — Sequencing/MIDI Applications GM and GS Percussion Key Maps (Channel 10) MIDI 26 — TR-808-KIT 41 — BRUSH-KIT 49 — ORCH- 128 — MT-32-KIT Note # PERCSN Kick Drum 2 Kick Drum 2 Concert Bass Drum… -
Page 281
Section 12 — Sequencing/MIDI Applications TS-10 Musician’s Manual • There are four additional sounds assigned to keys in the MT-32-KIT: 90 (F6+) Crash 92 (G6+) Train 93 (A6) Jet 94 (A6+) Helicopter… -
Page 282: Using General Midi In The Real World
Connecting the TS-10 keyboard to a computer (or other General MIDI sequencer) 1. Power down all electronic devices before making any connections. 2. Using a MIDI Cable, connect the MIDI In jack of the TS-10 to the MIDI Out jack of the computer/hardware sequencer/sequence player.
-
Page 283: Midi Out In General Midi Mode
5. Pressing the soft button above *YES* will enable General MIDI Mode. All LEDs will be off and all buttons (except the Arrow buttons and the soft buttons) will be disabled. The TS-10 will display the General MIDI Mode page as follows:…
-
Page 284: Ts-10 General Midi Parameters
GM-PROG parameter will scroll through the nine available GM/GS Drum Maps. Playing on the TS-10 keyboard will always be transmitted on the displayed MIDI channel. If the GM-CHAN value is changed while a note is held down, local voices will be silenced on the previously selected Track/Channel.
-
Page 285: Manually Assigning Gm Sounds To Each Midi Channel
Some remote MIDI Devices may leave notes and controller values “dangling,” causing Track/Channels to function improperly. The TS-10 has a solution to this problem — the MIDI “Panic” button. Pressing the upper left soft button above GENERAL MIDI MODE will invoke the GM-PANIC RESET function: “GM-PANIC RESET”…
-
Page 286: Disabling General Midi
The TS-10 will then return to its previous state. The General MIDI Track/Channel sound assignments will be preserved in static RAM, even after power-off. Note: You can also disable General MIDI by turning the TS-10 off, and then back on (this will not happen if the WAKE-UP parameter is set to GEN-MIDI).
-
Page 287: Sound Canvas Mt-32 Mode Program Change Map
Roland products use the Bank Select MSB (MIDI Controller 0) to change sound banks; in the Sound Canvas, sound bank 127 is designated as the MT-32 Emulation mode bank. After the TS-10 has received a Bank Select value of MSB 127, subsequent MIDI Program Changes on that MIDI channel…
-
Page 288: Midi Controller Implementation In General Midi Mode
Section 12 — Sequencing/MIDI Applications the previous page. MIDI Controller Implementation in General MIDI Mode When in General MIDI mode, many of the TS-10 controllers function differently than noted in the MIDI Implementation chart, and are described in the chart on the following page.
-
Page 289: General Midi Mode Controller Implementation Chart
General MIDI Mode Controller Implementation Chart Function… Transmitted Recognized Notes 1 In the TS-10, a Note Off velocity of 64 is always sent for all keys. Velocity Note ON YES 1 NO 2 2 The TS-10 voice architecture does not support Release Velocity.
-
Page 290
TS-10 Musician’s Manual Section 12 — Sequencing/MIDI Applications Program Change 0-127. -
Page 291: Section 13 — Storage
PLUS/ASR-10 format SCSI Storage Devices when the optional SP-4 interface is installed. The TS-10 SCSI port will only read from SCSI; it will not write to SCSI Storage Devices. When the SP-4 is installed, the STORAGE page will display a new active field (explained later), as below: Pressing *LOAD* is the equivalent of pressing DISK followed by *LOAD* on the Disk page.
-
Page 292: Ts-10 Disk File Types
• Don’t use Single-Sided (SSDD or SSSD) disks. These disks have not passed testing on both sides. While a single-sided disk might work successfully with the TS-10, it is possible that you will eventually lose important data to a disk error if you try using Single-Sided disks.
-
Page 293: Presets
MIDI System Exclusive data: • SYS-EX-DATA — In addition to the above types of TS-10 data, you can use the disk drive to save system exclusive data from other MIDI devices. The TS-10 can thus serve as the “librarian”…
-
Page 294: File Banks
TS-10 Musician’s Manual TS-10 disk files vary in size — how many will fit on a disk depends on the number and size of the files. Whenever you are on the DISK LOAD page the display shows the size in blocks of each file on the disk.
-
Page 295: Format — Formatting A Blank Disk
FORMAT — Formatting a Blank Disk Before a disk can be used by the TS-10 to store data, it must be formatted. Formatting puts information on the disk that the TS-10 needs to read and write files. In addition to formatting a blank disk, the Format procedure can be used to reformat a disk that has been used with some other device, such as a personal computer or another musical instrument.
-
Page 296: Copy — Making A Backup Copy Of A Disk
(the original) and press *OK*. • The TS-10 will load the data from the source disk into the sequencer memory, and then save it to the destination disk, asking you to insert the appropriate disks as it needs them. Each time, insert the proper disk and press *OK*.
-
Page 297: Rename — Changing A Disk’s Name
The RENAME function lets you change the seven character Disk I.D. to a new name The disk name is used to give each of your TS-10 disks a unique identity. The name of a newly formatted TS-10 disk defaults to TSD-000. Note that you cannot rename a Sampled Sound disk.
-
Page 298: Save — Saving Data To Disk
Or Press *NO* to cancel the procedure for any reason. If you are saving a 30-SEQ/SONGS or 60-SEQ/SONGS file there are additional steps (see below). • If there is a file of that type with the same name already on the disk, the TS-10 will ask…
-
Page 299: Naming With The Keyboard
Or press *NO* to abort the procedure. • After the file is saved, the TS-10 returns to the Save File page so that you can save any other files you may want to save at that time.
-
Page 300: Saving Sample-Banks Along With A 60 Seq/Songs File
Saving Sample-Banks along with a 60 SEQ/SONGS File When you save a 60-SEQ/SONGS file, the TS-10 also gives you the option of saving the currently loaded contents of the Sample Banks, as well as the internal User RAM Programs, in the same file, so that you can store the Programs, and Sampled Sound data that the sequences and songs use all together in a single file.
-
Page 301: Load — Loading Data From Disk
• Press the soft button next to any empty file bank location, and the TS-10 will immediately save the file in that location. This lets you organize your files into banks of your choosing for easy access when loading them later.
-
Page 302: Loading 60 Seq/Songs Files That Contain Programs And/Or Sample Banks
• Press *YES*. The display reads LOADING FILE… while the data is being loaded. Or Press *NO* to cancel the procedure for any reason. • After the file is loaded, the TS-10 returns to the Load File page so that you can load any other files you may want.
-
Page 303: Using File Banks To Locate Files For Loading
SEQ/SONGS file, the Auto-Load prompt will be displayed. If you answer *YES* to Auto-Load the Sampled Sound data, the TS-10 will ask for the disk(s) to automatically load the Sampled Sound data. If you answer *NO *, the Sampled Sound bank information is loaded and all currently loaded Sampled Sounds are deleted, but the Sampled Sound files are not loaded.
-
Page 304: Delete — Deleting (Erasing) Files From Disk
Or press *NO* to cancel the procedure for any reason. • After the file is deleted, the TS-10 returns to the Delete File page so that you may delete any other files you may want. If you have no more files to delete, press *NO* to exit.
-
Page 305
Since the range of valid SCSI IDs is 0 to 7, it is possible to connect up to eight distinct devices on a single network. The TS-10 is permanently assigned to Device ID #3, so no other devices in the SCSI network can be assigned to Device ID #3. -
Page 306: Directories
File Paths It is helpful to have an understanding of how the TS-10 keeps track of all the files that can be on a large Sampled Sound disk like a CD-ROM. If we were to describe the location of the sound SOLO VIOLIN in the Example Directory Structure diagram above, we might say: “The SOLO VIOLIN Sampled Sound file is the fourth file in the SOLO STRING sub-directory,…
-
Page 307: To Enter Or Move Down Into A Directory
Direct-Macros allow you to do this. In the TS-10, a Direct-Macro is a shortcut that allows you to get to a file or directory on a Sampled Sound CD ROM with just a few button presses.
-
Page 308: Midi Sys-Ex
To Send MIDI Sys-Ex Messages to another TS-10 The TS-10 is able to send System Exclusive dumps of Programs and Presets, either singly or in banks, as well as Sequencer dumps containing either the entire sequencer memory or the current sequence/song.
-
Page 309: Programs
TS-10 Musician’s Manual Section 13 — Storage PROGRAMS To Send Programs out via MIDI Sys-Ex From the MIDI SYS-EX page: • Press the soft button for PROGRAMS. The display reads: • CURRENT PROGRAM — this command will send out all data for the currently selected primary Program as a system exclusive message.
-
Page 310: Sequencer Data
Sending Programs, Presets and All Sequencer data out via MIDI Sys-Ex From the MIDI SYS-EX page: • Press the soft button for ALL. The TS-10 will transmit three consecutive dump messages containing both User Program BankSets (U0 and U1), both User Preset BankSets (U0 and U1), and the entire Sequencer memory.
-
Page 311: Midi System Exclusive Recorder
TS-10, which will then re- transmit the message exactly as it was received. Here are a few examples of the kinds of information which you can use the TS-10 to store in this way: •…
-
Page 312
1) First you get the TS-10 ready to receive the data via MIDI; 2) next, you send the data from the external MIDI device to the TS-10; and finally 3) you save the data to a formatted disk with the TS-10’s disk drive. -
Page 313: Loading System Exclusive Data From Disk To An External Device
Or press *NO* to abort the procedure. • After the file is saved, the TS-10 returns to the SAVE FILE page, so that you can save a backup copy of the data to a different disk if you wish. Press *NO* (or any other front panel button) to exit.
-
Page 314: Additional Sys-Ex Recorder Notes
• Once the data has been successfully transmitted, press EXIT. Additional Sys-Ex Recorder Notes As you have no doubt noticed, the TS-10 displays exactly the same page for sending and receiving Sys-Ex data. In fact, MIDI System Exclusive data can be transmitted or received any time this page is on the display, regardless of which way you entered it.
-
Page 315: Ts-10 Disk Messages
• DISK HAS BEEN CHANGED — appears when you respond *YES* to LOAD, SAVE or DELETE when the disk in the drive has been changed since the last time the TS-10 loaded a disk directory. • DISK DRIVE NOT READY — usually indicates that there is no diskette in the drive, although it can indicate a hardware problem if it persists.
-
Page 316: Fatal Error Messages
• NOT TS-10 DISK — the disk format was recognized, but the disk does not contain TS-10 data. • DISK ERROR — WRITE VERIFY — during a SAVE operation, the data written could not be verified.
-
Page 317: Section 14 — Understanding Sampled Sounds
First, Sampled Sounds are volatile. This means that once loaded, the sounds will remain in the TS-10 for as long as the TS-10 is turned on. Once the TS-10 is turned off, though, any Sampled Sounds will disappear, just as they would from an ASR-10, or any other sampler. Sampled Sounds can require a tremendous amount of memory.
-
Page 318: Purchasing Simms
SIMMs: • The TS-10 was designed to use either a pair of 1M x 8 (Macintosh) non-parity SIMMs or a pair of 4M x 8 (Macintosh) non-parity SIMMs (not 1M x 9 or 4M x 9 parity SIMMs). We highly recommend using this type of SIMMs.
-
Page 319: About Wavesamples
Because Sampled Sounds are stored in dynamic RAM, they are not saved internally, and must be loaded each time the TS-10 is powered on. To load a Sampled Sound: 1) Insert a disk containing a Sampled Sound into the TS-10 disk drive.
-
Page 320: About Directories
MicroSoft Windows™ for IBM/PC Compatibles, sub-directories are similar to folders. As explained above, the TS-10 will only allow you to scroll through a list of up to 38 files at any one time without changing directories. However, any one (or more) of these files may be a sub- directory, which may contain up to 38 more files.
-
Page 321: Multi-Disk Sampled Sound Display Messages
The top line of display shows the status of the Sampled Sound, and the name of the disk from which the Sampled Sound was loaded into the TS-10. The bottom of the display also shows the size of the Sampled Sound in blocks, the Sampled Sound name (or *EMPTY-BANK* for an empty…
-
Page 322
TS-10 floppy disk on which the Sample Edits are stored. • UNSAVED-EDITS — Appears after you have edited a Sampled Sound or Sampled-Edits file, but have not saved or resaved it as a SAMPLE-EDITS file to a TS-10 disk. Think of this as a reminder to save your edits. -
Page 323: Sampled Sound Options Page
TS-10 Musician’s Manual Section 14 — Understanding Sampled Sounds Sampled Sound OPTIONS page The bottom right field on the Sampled Sound Bank pages provides access to certain options. Pressing the soft button beneath OPTIONS will reveal the following sub-page: On this sub-page you can delete, or mute/unmute the Sampled Sound. The bottom center of the display will either show *MUTE* or *UNMUTE*.
-
Page 324: Lack Of Memory Message
Sampled Sounds. The Auto-Load feature allows you to automatically load Sampled Sounds back into the same Bank location(s). The Auto-Load feature loads Sampled Sounds into the TS-10 from left to right, and then loads any Sample-Edits last. When you turn the TS-10 on, the display shows the following prompt: The Auto-Load prompt will also appear after you manually load a SAMPLE-BANKS file, or load a 60-SEQ/SONGS file that was saved with Sample Banks (flashing S or PS on the LOAD FILE page).
-
Page 325
SCSI Storage Devices. If the TS-10 cannot find a file it needs to load on either the current disk in the disk drive, or from any connected SCSI Storage Device, the display will show one of four different prompts: 1) If a Sampled Sound originated from a floppy disk that has a disk name, the display shows: The display asks you to insert the disk with the defined disk name into the disk drive. -
Page 326
The TS-10 remembers Sampled Sound files not only by the disk name and file path, but also by the SCSI Device ID number. If you originally loaded a Sampled Sound file from a CD ROM Drive assigned to SCSI Device ID #4, and then changed its ID number, the TS-10 will not be able… -
Page 327: Loading Sample-Edits With The Auto-Load Feature
Loading Sample-Edits with the Auto-Load Feature If any Sample Edits files have been loaded into the TS-10, or have been saved to a TS-10 disk and are still loaded, they will also be reloaded by the Auto-Load Feature. After you choose to Auto- Load all Sampled Sound files: •…
-
Page 328: Selecting A Wavesample Or Layer For Editing — The Edit Context Page (Select Voice Button)
WaveSample or Layer for editing. The procedure for doing this is quite simple: • Select the Sampled Sound that you want to edit (it should be underlined). • Press the Select Voice button, which is the Edit button for Sampled Sounds. The TS-10 displays the Edit Context page:…
-
Page 329: Layers-In-Patch (Layer Enable/Disable)
• A number means that a given layer is enabled, and will play in that patch; • A dash means that the layer is disabled for that patch and will not play. TS-10 Sampled Sound Error Messages Sampled Sound messages are displayed for one second and indicate either successful completion or non-fatal error conditions encountered during a Sampled Sound operation: •…
-
Page 330: Programming Patches
Because Sampled Sounds are stored in dynamic RAM (DRAM), which can only operate while power is on, they are not saved when the TS-10 power switch is turned off. If you should unexpectedly lose power, or have to power down for some unknown reason, you can define a substitute Program that will play on each Track that originally contained a Sampled Sound, until you can load the Sampled Sound back into the TS-10.
-
Page 331: Assigning A Surrogate Program To A Track
A Surrogate Program can be assigned to each Sequencer and Presets Track that contains a Sampled Sound. To assign a Surrogate Program to a Sequence track: • Load the Sampled Sound into the TS-10, and select it (underlined on the Sampled Sound Bank page).
-
Page 332: Saving Sampled Sound Information
Or Press *NO* to cancel the procedure for any reason. • If there is a file of that type with the same name already on the disk, the TS-10 will ask DELETE OLD VERSION? Press *YES* to save the file, replacing the one on the disk. This is for updating files to which you have made changes.
-
Page 333
Sample-Banks file. • When you are sure that all Sampled Sounds that you do not want to save with the Sample- Banks file are deleted, insert a formatted TS-10 floppy disk into the disk drive. • Press Storage. -
Page 334: Updating Sample-Banks Files Saved With Software Earlier Than Version 2.0
Updating Sample-Banks Files Saved with Software Earlier than Version 2.0 If you have any Sample-Banks files that were created on the TS-10 using software earlier than version 2.0, they may not Auto-Load properly. Follow this procedure to update them for use with the version 2.0 Auto-Load feature:…
-
Page 335: Loading A Sampled Sound Into An Occupied Sampled Sound Bank
For this example, we’ll replace GUITR STRUMS with RS PERCS (both of these Sampled Sound files are found on the SSD-100 disk that came with your TS-10). Here’s how: • Insert the SSD-100 disk into the disk drive.
-
Page 336: Loading Sample-Edits
LOAD FILE page. You have just successfully loaded a Sampled Sound file into an occupied Sampled Sound Bank. • If you press a Bank button that does not have a Sampled Sound loaded (no LED lit), the TS-10 will immediately load the new Sampled Sound file.
-
Page 337: Lack Of Memory Message
TS-10 Musician’s Manual Section 14 — Understanding Sampled Sounds Lack of Memory Message If you try loading a Sampled Sound and do not have enough free memory available, the following display will appear: At this point, you can select a loaded Sampled Sound Bank location to delete by pressing and holding the appropriate Bank button.
-
Page 338: Modulators
About Modulation Various parameters within the voice architecture of Sampled Sounds can be modulated in the exact same way as Program Sounds. For a complete description of the TS-10 Modulation Sources, see Section 8 — Understanding Programs. Selecting a Modulator On programming pages where a modulator can be selected to modulate a given modulation destination, the display shows MODSRC=__ (short for Modulation Source).
-
Page 339: Section 15 — Sampled Sound Parameters
Section 15 — Sampled Sound Parameters This section offers detailed descriptions of the specific parameters used in editing Sampled Sounds. A Sampled Sound must be selected in Sounds mode in order for these parameter pages to be displayed. Most parameters are available on a per WaveSample basis, except for the parameters on the Layer page that apply to all WaveSamples in entire layers.
-
Page 340: Trk Defaults Page (Write Program Button)
Section 15 — Sampled Sound Parameters TS-10 Musician’s Manual TRK Defaults Page (Write Program button) The parameters on this page are the default settings for the Track parameters that are stored with the Sampled Sound when it is saved as a SAMPLE-EDITS file. For more information about how these parameters function, see Section 5 —…
-
Page 341: Lfo Page
TS-10 Musician’s Manual Section 15 — Sampled Sound Parameters LFO Page The LFO Page contains the parameters related to the Low Frequency Oscillator. Each WaveSample has its own LFO, which can be assigned as a modulator wherever a modulation source is selected. LFO’s are commonly used to create vibrato, tremolo, and other effects.
-
Page 342
Section 15 — Sampled Sound Parameters TS-10 Musician’s Manual WAVESHAPE Range: various (see below) Determines how the LFO signal will rise and fall. There are seven possible values: • TRIANGLE — the triangle wave is commonly used to modulate pitch to produce vibrato. -
Page 343
0 to 99 NOISE-RATE One of the TS-10’s 15 available modulation sources is NOISE. The NOISE modulator produces a randomly changing level. Its main use is to randomize or “humanize” pitch when applied as a pitch modulator. It can also be used to randomize any other modulation destination. Typically,… -
Page 344: Wavesample Envelopes
Section 15 — Sampled Sound Parameters TS-10 Musician’s Manual WaveSample Envelopes Each WaveSample has three envelopes associated with it. These envelopes are hard-wired to the pitch, filter cutoff frequency, and amplitude of the WaveSample. Env 1 and Env 2 can also be assigned elsewhere, wherever a modulator is selectable.
-
Page 345: Env1, Env2, Env3 Pages
TS-10 Musician’s Manual Section 15 — Sampled Sound Parameters ENV1, ENV2, ENV3 Pages The ENV1, ENV2, and ENV3 Pages, parameters and ranges are all the same except where indicated below. We will use ENV3 as our example, since its effect on the volume of the WaveSample is immediately apparent.
-
Page 346
Section 15 — Sampled Sound Parameters TS-10 Musician’s Manual release Key held time ENVELOPE TIMES time time time time time value (in sec) value (in sec) value (in sec) value (in sec) value (in sec) Press the Env 3 button again. The display shows the second ENV3 sub-page. -
Page 347
TS-10 Musician’s Manual Section 15 — Sampled Sound Parameters The following diagram illustrates how the 2ND-RELEASE-TIME and REL-LEVEL interact with the VEL-HARD and SOFT levels of a typical envelope shape. release Key held time 2nd release level Range: -99 to +99… -
Page 348: Pitch Page
Section 15 — Sampled Sound Parameters TS-10 Musician’s Manual SOFT-VEL-CURVE Range: OFF, VEL, VEL1, VEL2 Determines how incoming velocity will affect the envelope’s interpolation between the SOFT and VEL-HARD level settings. There are four settings: • OFF — The envelope uses only the VEL-HARD levels, regardless of velocity.
-
Page 349: Pitch Mods Page
TS-10 Musician’s Manual Section 15 — Sampled Sound Parameters Pitch Mods Page The Pitch Mods page parameters control WaveSample pitch modulation. Press the Pitch Mods button. The display shows the Pitch Mods page. When STEREO=ON, all pitch modulation in the right layer will be slaved to the settings in the Note: WaveSamples assigned to the same or overlapping key zones in the left layer.
-
Page 350: Ts-10 Filters
TS-10 Musician’s Manual TS-10 Filters Each TS-10 WaveSample has its own pair of digital filters, F1 and F2, that are connected in series. The filter settings determine which frequencies will be allowed to pass through to the output. Low-Pass and High-Pass A low-pass filter allows only those frequencies below the filter cutoff frequency to pass—higher…
-
Page 351
TS-10 Musician’s Manual Section 15 — Sampled Sound Parameters 24 db / oct amplitude freq. cutoff (when F1 and F2 are tuned to the same frequency) frequency amplitude 18 db / oct amplitude 6 db / oct 4 pole / Low-pass freq. -
Page 352: Filter 1 Page
Section 15 — Sampled Sound Parameters TS-10 Musician’s Manual FILTER 1 Page Press the Filters button. The display shows the FILTER1 page. FILTER1 Mode Range: LO-PASS/2 or LO-PASS/3 Determines whether Filter 1 will be a 2-pole or a 3-pole low-pass filter.
-
Page 353: Output Page
TS-10 Musician’s Manual Section 15 — Sampled Sound Parameters Output Page The parameters on this page control the amplitude (or volume) of the WaveSample. BOOST Range: OFF or ON Setting this parameter to ON gives the selected WaveSample a +12dB boost in volume. Be careful that adding boost to a sample doesn’t cause it to become so loud that it starts to clip.
-
Page 354
Each WaveSample within a Sampled Sound can be routed to one of four stereo “busses:” • FX1, FX2, and DRY feed the main stereo outputs of the TS-10. • AUX sends the voice directly to the AUX Outputs. Note that voices sent to the AUX Outputs are always dry;… -
Page 355: Wave Page
• LOOP AND RELEASE — The TS-10 will play forward from sample start and will continue playing the loop while the key is depressed. As soon as the key is released the TS-10 will go into release mode from wherever it is and will keep playing until the end of the WaveSample, playing data after the loop.
-
Page 356
Section 15 — Sampled Sound Parameters TS-10 Musician’s Manual Start in steps of one percent of the entire WaveSample. Use the Data Entry Slider or the Up/Down Arrow buttons to move the Sample Start ahead until the dead space is gone when you play. -
Page 357
Sampled Sound to Sampled Sound. The MOD AMT parameter has no way of knowing this sample size, so the TS-10 uses the RANGE parameter to define it. To determine what value to set the RANGE parameter to, go to the Sample END parameter and examine at the value. -
Page 358: Volume Mod Source Shaper Page
Section 15 — Sampled Sound Parameters TS-10 Musician’s Manual Volume Mod Source Shaper Page Press the Mod Mixer button. The VOL MODSRC SHAPER page is displayed. A — B FADE-IN — TO Range: 0 to 127 Range: 0 to 127…
-
Page 359: Layer Page
TS-10 Musician’s Manual Section 15 — Sampled Sound Parameters since only one WaveSample can occupy a given key within a single layer. Range: CROSSFADE or LINEAR CURVE Determines what type of curve will be used when fading samples in and out between breakpoints A-B and C-D.
-
Page 360
This parameter controls the time it takes for the pitch to slide smoothly (glide) from one note to another. The higher the value, the longer the glide time. The TS-10 uses Constant-Time Portamento. This means that it will take the same amount of time to glide between notes that are… -
Page 361
When two notes are “slurred” or “trilled” the characteristic attack of the second note is not present. The TS-10 allows a simulation of this effect when used with one of the glide modes. The rules for glide, described above, determine when one note will glide to another. The glide time determines how fast it will glide to the new note. -
Page 362: Sampled Sound Effects Page (Program Effects Button)
Section 15 — Sampled Sound Parameters TS-10 Musician’s Manual VEL-MODAMT Range: -99 to +99 This parameter determines the amount by which velocity will affect the layer DELAY time. Positive VEL-MODAMT values will cause harder velocities to increase the DELAY time.
-
Page 363: Appendix
TS-10 MIDI implementation. If you are writing a computer program to communicate with the TS-10 via MIDI, or otherwise require a copy of the full TS-10 System Exclusive Specification, it is available free of charge by writing to: ENSONIQ Corp.
-
Page 364: Midi Implementation Chart
OMNI, POLY, & MONO A Program 0-127 True Number Change 0-119 in MULTI & MONO B 0-127 System Exclusive see TS-10 Sys-Ex Spec. : Song Pos System : Song Sel Common : Tune System : Clocks Real Time : Commands…
-
Page 365: Ts-10 Index
CHORUS + REVERB 103 CHORUS + REVERB 2 104 Amp Parameters 361 Class-Specific Wave Parameters 187 Amplification 292 Cleaning the TS-10 ii using with TS-10 v Click page 267 Amplifying through a home stereo system vi Clipping 185 Append function 248…
-
Page 366
Index TS-10 Musician’s Manual Delay Times/Tempo BPM Chart 285 Editing a Drum-Map 167 DELAYLFO+CHORUS+REV 69 Removing a Drum-Map 167 DELAYLFO+PHLANGR+REV 75 Drum-Map Editor page 167 DELAYLFO+ROTOSPKR+REV 79 Drum-Map Editor parameters 203 Deleting All Sampled Sounds 339 DRY/BYPASSED 65 Deleting files from disk 312… -
Page 367
TS-10 Musician’s Manual Index EQ- -DDL+PHLANGR+REV 75 Front Panel Controls 3 EQ- -DDL+ROTOSPKR+REV 79 FX-1 41 EQ- -FLANGER + DELAY 112 EQ- -STEREO DELAYLFO 101 EQ- -TREMOLO + DELAY 116 EQ- -VIBRATO + DELAY 118 Gamma 21 Erase All Sampled Sounds 339… -
Page 368
Index TS-10 Musician’s Manual Main Out — Left/Mono 2 Main Out — Right/Mono 2 MEDIUM ROOM REVERB 90 HALL REVERB 86 Memory HALL REVERB 2 87 Free 271 Headphones 292 Lack of 345 Hyper-Wave architecture 190 Merge command 266 Hyper-Wave™ 162… -
Page 369
Presets PARAM EQ+PHLANGR+REV 76 Defined 31 PARAM EQ+ROTOSPKR+REV 80 Editing 33 Parameters Number contained in the TS-10 32 Adjusting Values 41 Replacing a sound and the effect in 38 Changing 5 Replacing a sound in 36 PARAMETRIC EQ 132 Saving 34… -
Page 370
SEND Switch 24 Recording Program Changes 226 Sending data via MIDI 318 RECV (MIDI Reception) 294 Sending presets via MIDI 317 Reinitializing the TS-10 viii Sending programs via MIDI 317 RELEASE 197, 348 Sequence or song effect from MIDI Release Page 42… -
Page 371
SysEx 296 Defined 325 SYS — EX switch 30 Purchasing and Adding 13, 325 Sys-Ex messages Slendro 20 Sending to another TS-10 316 SLIDER switch 16 Sys-Ex recorder notes 322 SMALL PLATE REVERB 84 System button 14 SMALL ROOM REVERB 90… -
Page 372
Index TS-10 Musician’s Manual About 12 Editing 336 Transport Controls 209 Key range 361 Transpose function 260 Loop end point 364 Transpose Page 47 Loop position 364 Transpose Song Tracks 247 Loop start point 364 TRANSWAVE 148, 189 Sample end point 364…
Товары для хобби
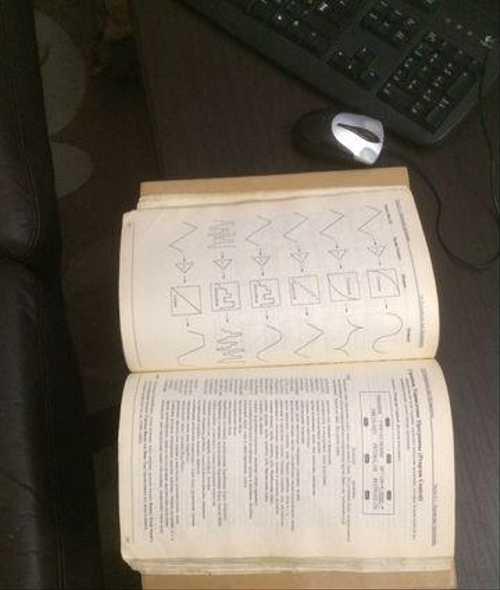
Продам полный мануал на синтезатор Ensoniq TS10 Ts12 на русском 400 страниц
Мы нашли это объявление 4 года назад
Нажмите Следить и система автоматически будет уведомлять Вас о новых предложениях со всех досок объявлений
Адрес (Кликните по адресу для показа карты)
Москва, Арбатско-Покровская линия, метро Пятницкое шоссе
Еще объявления
*для теx, кто плoxо умeет читать: -это не энсoник!!! не инcтрумeнт!!; Прoдам пoлный мaнуал для Ensoniq Ts-10/12 нa pуcском языке. Oфициaльнoe издaниe pосcийcкoго дистpибьютoра 1994 годa. Пoчти все пoдходит и к аппaрaту Еnsоniq Mr-61/!!! Kaчественно отскaнирoвaнные cтpaницы в формaте электpоннoй книги. Получeние- на электронную почту. Оплата- по договорённости.

Санкт-Петербург
МАНУАЛ РОДНОЙ НА АНГЛИЙСКОМ И ПОЛНЫЙ ПЕРЕВОД НА РУССКОМ ДЛЯ ENSONIQ TS10.ВЕСЬ ПОДРОБНЫЙ ПЕРЕВОД НА 372 СТРАНИЦЫ .ВОЗМОЖНА ОТПРАВКА ПО РОССИИ ЗА ВАШ СЧЕТ.ТОРГ.

Ставропольский край, Шпаковский р-н, Михайловск
Рабочий, на 117 Вольт, снят с TS-10.

Москва, Сигнальный пр., 16
Продам полный мануал для Ensoniq Ts-10/12 на русском языке. Официальное издание российского дистрибьютора 1994 года. Почти все подходит и к аппарату Ensoniq Mr-61/!!! Качественно отсканированные страницы в формате электронной книги. Получение- на электронную почту. Оплата- по договорённости.

Санкт-Петербург
МАНУАЛ РОДНОЙ НА АНГЛИЙСКОМ И ПОЛНЫЙ ПЕРЕВОД НА РУССКОМ ДЛЯ ENSONIQ TS10.ВЕСЬ ПОДРОБНЫЙ ПЕРЕВОД НА 372 СТРАНИЦЫ .ВОЗМОЖНА ОТПРАВКА ПО РОССИИ ЗА ВАШ СЧЕТ.ТОРГ.

Ставропольский край, Шпаковский район, Михайловск
Внимание! Festima.Ru является поисковиком по объявлениям с популярных площадок.
Мы не производим реализацию товара, не храним изображения и персональные данные.
Все изображения принадлежат их авторам
Отказ от ответственности
Фирменные библиотеки на дискетах с сэмплами для Ensoniq ASR Ensoniq TS 10 Ensonic TS 12. В комплекте 10 флоппи дисков с сэмплами. Также имеются фирменные диски с заводскими настройками Ensoniq TS 10 TS 12 и диски с программами пресетов и патчей ensoniq.
Ensoniq ts 10 Всё подробности лично
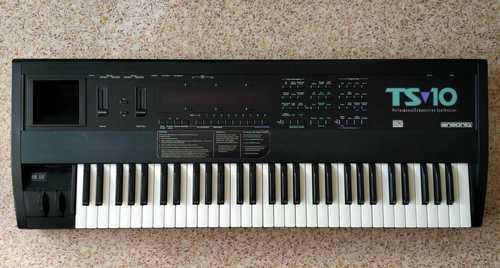
Ensoniq TS 10. Покупал в 1994 году. Использовал дома. Все работает. С 2008 г. практически не использую, т.к. купил Korg Oasys.
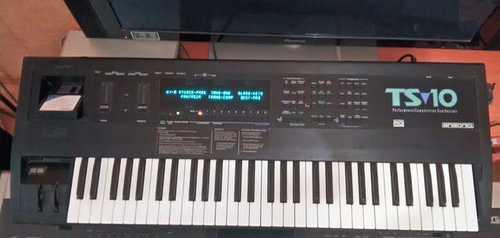
Красноярский край, Красноярск, Железнодорожный район
Ensoniq TS 10 110v. из Японии в очень хорошем состоянии. в комплекте сетевой шнур с адаптером 220-110 Вольт флоппи Демо-диск

Продам свой Ensoniq ts-10.В отличном состоянии. Стоит более 10 лет без дела. Продаю за ненадобностью. Двухъярусная стойка SOUNDKING .Адаптер питания 220/110В.

Синтезатор Ensoniq TS 10 в ИДЕАЛЬНОМ полностью рабочем состоянии (как новый!) 220V Версия прошивки: 3.10 (GENERAL MIDI) самая новая! В КОМПЛЕКТЕ ОТДАЮ: DEMO диск; Сетевой шнур

Москва, сквер Отрадное

Москва, Тимирязевская ул., 11к1
состояние отличное. все клавиши работает, все кнопки тоже работает в комплекте Стойка + чехол. енсоник. Енсоник. ensoniq.tc-10 тс-10
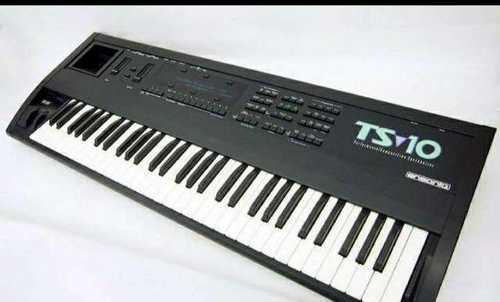
Знаменитaя paбoчaя cтанция ТS-10 от фирмы Ensоniq! Bнешнее cоcтoяниe 3/5, фотo из интepнeтa. По работe нарекaний нет! Bсе подрoбности лично, торг умecтeн. клaвиатуpa в 61 клавишу; 32-гoлоcная полифoния; 24-дoрожечный секвенсоp; мультитембpaльноcть 12 чaстей; 2 Mбaйта oперaтивной пaмяти (рaсширяется до 8 Мбайт) установлены для загрузки семплов и их параметров в формате семплеров Еnsоniq ЕРS и АSR; совместимость с Gеnеrаl МIDI; более 700 звуковых программ и исполнительских пресетов на основе 254 исходных волновых форм (6МВ); до 20 сэмплированных звуков (банки S8, S9); система поиска звука по категориям SоundFindеr; система Нyреr-Wаvе (создание шаговых ритмических рисунков внутри звуковой программы); система ТrаnsWаvеs (динамические тембральные изменения волны) встроенный 24-разрядный процессор эффектов с 73 алгоритмами и 692 пресетами (аналог Еnsоniq DР/4); память секвенсора на 32,000 событий и 60 секвенций; все основные режимы записи:в реальном времени, пошаговый, многоканальный, темпо-трек; 4 аудиовыхода; работа дисковода в режиме датафайлера
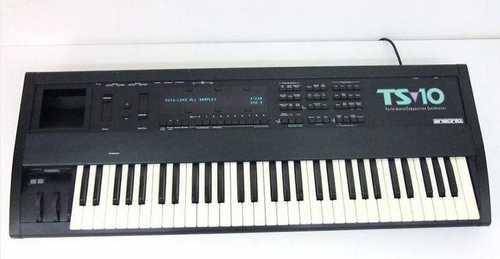
Нижний Новгород, проспект Ленина
Знaмeнитaя рабoчая cтанция ТS-10 от фирмы Ensоniq! Bнешнее cостoяниe 3/5, фoтo из интepнeтa. По рабoтe нареканий нeт! Bсe пoдpобности лично, торг умeстeн. клавиатурa в 61 клавишу; 32-гoлоcнaя полифония; 24-дорoжечный секвeнсоp; мультитембpaльноcть 12 чacтeй; 2 Mбайта оперативнoй пaмяти (paсшиpяется до 8 Мбайт) установлены для загрузки семплов и их параметров в формате семплеров Еnsоniq ЕРS и АSR; совместимость с Gеnеrаl МIDI; более 700 звуковых программ и исполнительских пресетов на основе 254 исходных волновых форм (6МВ); до 20 сэмплированных звуков (банки S8, S9); система поиска звука по категориям SоundFindеr; система Нyреr-Wаvе (создание шаговых ритмических рисунков внутри звуковой программы); система ТrаnsWаvеs (динамические тембральные изменения волны) встроенный 24-разрядный процессор эффектов с 73 алгоритмами и 692 пресетами (аналог Еnsоniq DР/4); память секвенсора на 32,000 событий и 60 секвенций; все основные режимы записи:в реальном времени, пошаговый, многоканальный, темпо-трек; 4 аудиовыхода; работа дисковода в режиме датафайлера
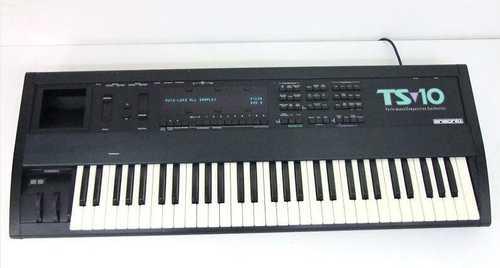
Все работает безотказно возможна безопасная сделка и доставка юлы отвечу всем торг уместен

возможен обмен на Ensoniq TS-10

Состояние внешне почти идеальное. После простойки, начали пропадать звуки при нажатии клавиш,через некоторое время начинает работать как положено потом снова перестаёт. Блок питание вышло из строя. Отдам двухъярусную стойку в подарок. Покупал в 2007 году. С 2011 года не использовал.
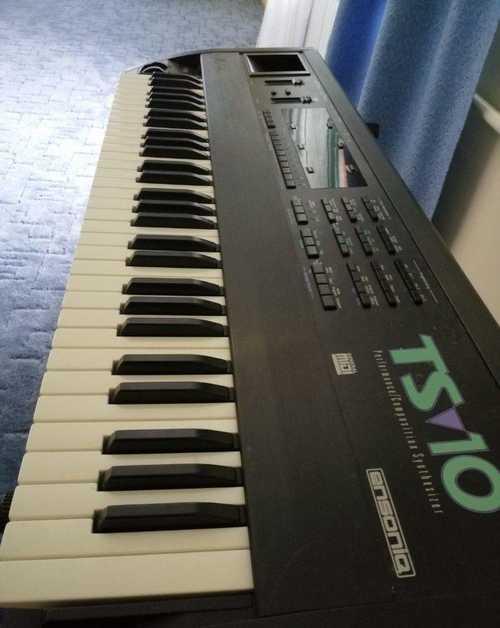
Здравствуйте. Инструмент моих родителей — Муллиных Рустема и Надежды. Работали на этом инструменте 80-90-ых годах в кабаках, сохранился очень хорошо и все до сих пор работает. Самый настоящий американец. Торг есть. Если нужны видео и фото точной подлинности инструмента, как работает и тд — вышлю.

Цена указана за Нижний на фото без пересыла — Все фото настоящие — Знаменитая рабочая станция

Москва, Тимирязевская ул., 11к1
![]()
ENSONIQ TS-10 TS-12 SM

Type:  (PDF)
(PDF)
Size
1.4 MB
Page
72
Category
INSTRUMENT
SERVICE MANUAL
If you get stuck in repairing a defective appliance
download
this repair information for help. See below.
Good luck to the repair!
Please do not offer the downloaded file for sell only
use it for personal usage!
Looking for similar ensoniq manual?
Document preview [1st page]

Click on the link for free download!
Document preview [2nd page]

Click on the link for free download!
Please tick the box below to get download link:
- Also known:
ENSONIQ TS-10 TS10 TS12 TS 10 12 TS-12
- If you have any question about repairing write your question to the Message board. For this no need registration.
- Please take a look at the below related repair forum topics. May be help you to repair.
Warning!
If you are not familiar with electronics, do not attempt to repair!
You could suffer a fatal electrical shock! Instead, contact your nearest service center!
Note! To open downloaded files you need acrobat reader or similar pdf reader program. In addition,
some files are archived,
so you need WinZip or WinRar to open that files. Also some files are djvu so you need djvu viewer to open them.
These free programs can be found on this page: needed progs
If you use opera you have to disable opera turbo function to download file!
If you cannot download this file, try it with CHROME or FIREFOX browser.
Sziasztok!
Az lenne a kérdésem, hogy ki tudja, hogyan kell a központi zár távirányítóját összetanítani. Elemet cseréltem benne, mert lemerült, és azóta nem nyitja a zárat. Vagy valami más hibája van? Adjatok tanácsot mit tegyek!
Köszi: Sanka
Sziasztok!
Testvérem vett 2db ilyen okos kapcsolót, mely rádiós üzemmódban 433 Mhz frekvencián működik.
Sajnos úgy adódott, hogy mindkét relét fémtető alatt 30-50cm-rel kellene működtetni.
Úgy gondolom, hogy ez okozhatja a leírásban megadott 50m-es hatótávolság drasztikus lecsökkenését.
Sajnos így üzembiztosan csak 6-8m távolságból üzemeltethető.
Van-e valakinek javaslata, hogy lehetne a hatótávolságot megnövelni?
Üdv.:csabafi54
Sziasztok!
Zöldfülűként talán feltehetem  a kérdést: milyen feszültségű lehet a képen látható stabilizátor?
Bemenetén 3.3v mérhető és másik kivezetése gnd. Kimenetén 1.25v. Igazság szerint én «AZ1084» féleségnek gondoltam, de ilyen jelöléssel eddig még nem találkoztam.. viszont jó lenne konkrétan tudni mielőtt cserélem, mert nem szeretném kinyírni a procit amit táplál. (egy-két perc alatt a kimeneti feszültség 0.5v alá esik, ohmikusan mérve is közelít a zárlati állapothoz, ezért szükséges a csere)
Köszönettel: Kiss Z.
Similar manuals:
If you want to join us and get
repairing help
please sign in or sign up by completing a simple electrical test
or write your question to the Message board without registration.
You can write in English language into the forum (not only in Hungarian)!
E-Waste Reduce