Нашёл у себя кое-какие мануалы для ТБ. Не помню, откуда у меня некоторые из них, но, возможно, кому-то пригодятся.
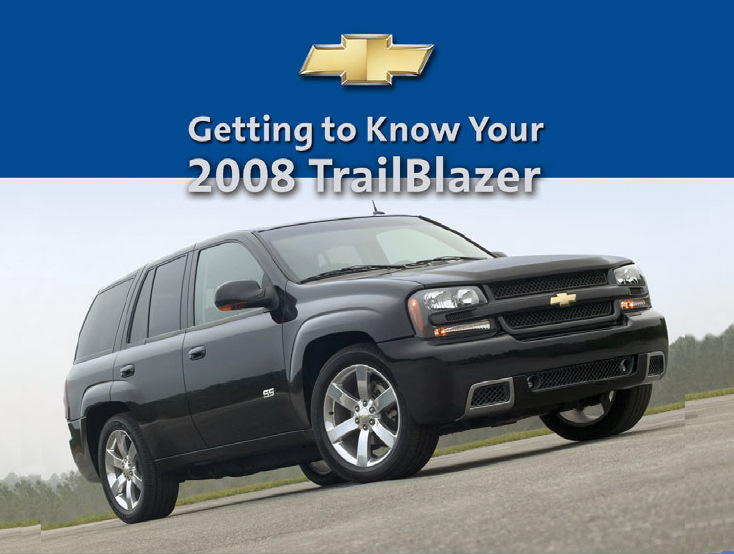
Getting to know your 2008 TrailBlazer — небольшая брошюра про основные органы управления (англ.)
2008 Chevrolet TrailBlazer owner manual — инструкция по эксплуатации, которая обычно идёт вместе с машиной, толстая увесистая книга (англ.)
Chevrolet TrailBlazer: Руководство по эксплуатации — та же инструкция, но на русском.
Service manuals — огромный набор сервисных мануалов по Isuzu Ascender, GMC Envoy, Chevrolet Trailblazer 2008 года. Подробно расписано, что и как устроено, в какой последовательности разбирать и собирать узлы и агрегаты, какие гайки с какими моментами крутить и т.д., и т.п. Цветная схема электропроводки. (англ.)
Новая книга про старый автомобиль: Руководство по ремонту и эксплуатации. Автор — Калюков А. Т. Не такая подробная, как service manuals, но зато на русском. Для машин 2002-2003 годов.
-
Contents
-
Table of Contents
-
Bookmarks
Quick Links
2007 Chevrolet TrailBlazer Owner Manual
Seats and Restraint Systems ………………….. 7
Front Seats
………………………………………. 8
Rear Seats
……………………………………… 18
Safety Belts
…………………………………….. 20
Child Restraints
Airbag System
…………………………………. 71
Restraint System Check
Features and Controls ………………………….. 93
Keys
………………………………………………. 95
Doors and Locks
Windows
……………………………………….. 107
Theft-Deterrent Systems
Starting and Operating Your Vehicle
Mirrors
………………………………………….. 132
®
OnStar
System
Universal Home Remote System
Storage Areas
……………………………….. 160
Sunroof
………………………………………… 164
……………………………….. 42
……………………. 90
……………………………. 100
………………….. 109
….. 112
…………………………….. 145
………. 149
Instrument Panel ………………………………… 165
Instrument Panel Overview
Climate Controls
Warning Lights, Gages, and
Indicators
…………………………………… 195
Driver Information Center (DIC)
Audio System(s)
Driving Your Vehicle …………………………… 299
Your Driving, the Road, and
Your Vehicle
………………………………. 300
Towing
…………………………………………. 356
Service and Appearance Care ……………… 379
Service
…………………………………………. 382
Fuel
……………………………………………… 384
Checking Things Under the Hood
All-Wheel Drive
………………………………. 434
Rear Axle
……………………………………… 434
Four-Wheel Drive
M
………………. 168
…………………………….. 185
………… 216
…………………………….. 234
……… 390
……………………………. 435
1
Chapters
Summary of Contents for Chevrolet TrailBlazer 2007

Seats and Restraint Systems
………………….. 7
Front Seats
………………………………………. 9
Rear Seats
……………………………………… 18
Safety Belts
…………………………………….. 20
Child Restraints
……………………………….. 41
Airbag System
…………………………………. 69
Restraint System Check
……………………. 88
Features and Controls
………………………….. 91
Keys
………………………………………………. 93
Doors and Locks
……………………………… 98
Windows
……………………………………….. 105
Theft-Deterrent Systems
………………….. 108
Starting and Operating Your Vehicle
……. 111
Mirrors
………………………………………….. 132
OnStar
®
System
…………………………….. 145
Universal Home Remote System
………. 149
Storage Areas
……………………………….. 161
Sunroof
………………………………………… 166
Instrument Panel
………………………………… 167
Instrument Panel Overview
………………. 170
Climate Controls
…………………………….. 187
Warning Lights, Gages,
and Indicators
…………………………….. 198
Driver Information Center (DIC)
………… 220
Audio System(s)
…………………………….. 238
Driving Your Vehicle
…………………………… 305
Your Driving, the Road, and
Your Vehicle
………………………………. 306
Towing
…………………………………………. 362
Service and Appearance Care
……………… 383
Service
…………………………………………. 386
Fuel
……………………………………………… 388
Checking Things Under the Hood
……… 394
All-Wheel Drive
………………………………. 438
Rear Axle
……………………………………… 438
2007 Chevrolet TrailBlazer Owner Manual M
1
 17:17
17:17
Chevrolet TrailBlazer — Когда ты не купил УАЗ за 500 тысяч рублей
 20:09
20:09
«CHEVROLET TRAILBLAZER» — АМЕРИКАНСКИЙ БУРГЕР
 19:49
19:49
Chevrolet trailblazer 2 — То чем так и не стал УАЗ Патриот
 08:23
08:23
Вся правда о моём бывшем! Chevrolet TRAILBLAZER LTZ 2007
 14:02
14:02
CHEVROLET TRAILBLAZER. ЭТО ВАМ НЕ KIA SORENTO PRIME. ТЕСТ- ДРАЙВ.
 06:47
06:47
Chevrolet Trailblazer 2 (2014 г.в., 2018-12-08) — Секонд Тест — б/у — тест-драйв — Главная дорога
 14:32
14:32
Купили другу Trail Blazer за 220 тысяч рублей !!!
 38:37
38:37
Chevrolet Trailblazer 2005 года — Большой тест-драйв (б/у) / Big Test Drive
Руководство по эксплуатации Содержание Как пользоваться дан…
Chevrolet trailblazer
- Изображение
- Текст
AJARA69
Руководство по эксплуатации
Содержание
Как пользоваться данным Руководством
по эксплуатации …………………………………..3
Важные меры безопасности ……………………..5
Глава 1
Приборы и органы управления ………………… 21
Глава 2
Сиденья и удерживающие системы …………. 207
Глава 3
Начало движения и рекомендации по вождению
автомобиля ……………………………………. 251
Глава 4
Ремонт и техническое обслуживание ……….. 307
Глава 5
Устранение неисправностей в пути …………. 369
Chevrolet
Trailblazer

Благодарим вас за выбор продукции General Motors. Мы сделае…
Страница 2
- Изображение
- Текст
. . . 2
Благодарим вас за выбор продукции
General Motors. Мы сделаем все возможное
для того, чтобы вы получали удовольствие
от поездок и были полностью удовлетворены
вашим автомобилем.
Руководство по эксплуатации должно
рассматриваться как неотъемлемая
принадлежность автомобиля. В случае
продажи автомобиля передайте данное
Руководство другому владельцу, чтобы он
получил важную информацию, касающуюся
приемов управления автомобилем,
безопасности и технического обслуживания.
При проектировании и производстве вашего
автомобиля применялись безопасные
для окружающей среды и легко перераба
тываемые для повторного использования
материалы. Производственные процессы,
применяемые при изготовлении вашего
автомобиля, также не наносят вреда
экологии.
Отходы производства перерабатываются,
и некоторые из них пригодны для повторного
использования. Потребление воды снижено
с целью сохранения природных ресурсов.
Вся информация, рисунки и технические
характеристики, приводимые в данном
Руководстве по эксплуатации, основаны
на последних сведениях об автомобиле,
которые имелись на момент подписания
Руководства в печать. Мы сохраняем
за собой право вносить любые изменения
в конструкцию автомобиля без предвари
тельного уведомления.
Приводимые в Руководстве по эксплуатации
рисунки носят иллюстративный характер
и не предназначены для того, чтобы точно
описывать какую либо часть вашего
автомобиля.
Пожалуйста, учтите, что дополнительное
оборудование, описываемое в данном
Руководстве по эксплуатации, не обязательно
будет установлено на купленном вами
автомобиле.
К Руководству по эксплуатации прилагается
Гарантийная и сервисная книжка. Хотя мы
считаем, что данное Руководство по эксп
луатации является достаточно полным, так
как описывает наиболее важные действия
с автомобилем, оно может быть еще более
полезным при использовании совместно
с Гарантийной и сервисной книжкой.
Важные сведения о данном Руководстве по эксплуатации

. . . Для проведения технического обслуживания и ремонта об…
Страница 3
- Изображение
- Текст
3 . . .
Для проведения технического обслужи
вания и ремонта обращайтесь к вашему
дилеру, который хорошо знает особенности
вашего автомобиля, и который обязан
принять все меры для того, чтобы вы были
полностью удовлетворены своим автомо
билем. Рекомендуется производить
у вашего дилера все сервисные операции
не только в гарантийный, но и в послега
рантийный период.
Если вы не удовлетворены качеством
проведения сервисных работ, следуйте
рекомендациям, приведенным в
Гарантийной и сервисной книжке.
ЧТОБЫ ПОСТОЯННО ПОЛУЧАТЬ
УДОВЛЕТВОРЕНИЕ ОТ АВТОМОБИЛЯ
И СОХРАНЯТЬ ЕГО ВЫСОКОЕ КАЧЕСТВО,
ПРИ РЕМОНТЕ И ТЕХНИЧЕСКОМ
ОБСЛУЖИВАНИИ ИСПОЛЬЗУЙТЕ ТОЛЬКО
ОРИГИНАЛЬНЫЕ ЗАПАСНЫЕ ЧАСТИ
КОРПОРАЦИИ GENERАL MOTORS.
ОРИГИНАЛЬНЫЕ ЗАПАСНЫЕ ЧАСТИ
ДЛЯ АВТОМОБИЛЕЙ GENERАL MOTORS
МОЖНО ОПРЕДЕЛИТЬ ПО СЛЕДУЮЩИМ
ТОРГОВЫМ МАРКАМ:
Данное Руководство по эксплуатации
позволяет вам ознакомиться с особен
ностями автомобиля и методами
обращения с ним.
Руководство по эксплуатации предназначено
для использования его в качестве
справочника, который позволит вам быстро
ознакомиться с различными функциями
вашего автомобиля и научиться управлять
им. Поэтому Руководство построено таким
образом, что сначала показывается место
расположения какого либо органа
управления, а затем приводятся сведения
по его использованию.
В Руководстве по эксплуатации также
приводятся некоторые важные сведения по
безопасности и техническому обслуживанию,
а также даются рекомендации по решению
некоторых проблем, с которыми вы можете
столкнуться при вождении.
Данное Руководство по эксплуатации
разделено на пять глав:
• Глава 1: Приборы и органы
управления
Чтобы лучше понять принцип построения
данного Руководства по эксплуатации,
представьте себе, что вы занимаете
водительское место. Ваше внимание
в первую очередь привлекает панель
управления, расположенная прямо перед
вами. Затем вы переводите взгляд вверх
и наружу на зеркала, окна и двери, затем
продолжаете осмотр, повернувшись назад,
чтобы увидеть заднюю часть салона. Далее
вы смотрите вверх на верхнюю консоль
и потолок. Содержание данного Руководства
по эксплуатации построено так, чтобы
следовать за вашим взглядом в приведенной
последовательности. Большая часть
приборов и органов управления вашего
автомобиля находится в перечисленных
выше областях. Они в первую очередь
рассматриваются в главе 1 данного
Руководства по эксплуатации.
Как пользоваться данным Руководством по эксплуатации

: Сиденья и удерживающие системы Теперь взглянем на централ…
Страница 4
- Изображение
- Текст
. . . 4
• Глава 2: Сиденья и
удерживающие системы
Теперь взглянем на центральную часть
салона вашего автомобиля: Здесь
расположены сиденья и ремни
безопасности. Информация о них,
а также о системе подушек безопасности
вашего автомобиля приводится в главе
2. В главу 2 также включена вся
необходимая информация, касающаяся
детских кресел.
• Глава 3: Начало движения
и рекомендации по вождению
автомобиля
После того, как в главах 1 и 2 вы
ознакомитесь с приборами и органами
управления вашего автомобиля,
а также с сиденьями и удерживающими
системами, в главе 3 вы найдете
инструкции по действиям, которые
нужно выполнить, чтобы начать движение
на автомобиле, и рекомендации
по управлению. Эта глава содержит
информацию о ключах и пульте
дистанционного управления замками
(дополнительное оборудование),
о замке зажигания и пуске двигателя,
а также об автоматической коробке
передач, раздаточной коробке
(дополнительное оборудование),
методах парковки, особенностях
сцепления колес с дорогой, рулевом
управлении, тормозной системе
и подвеске. В этой главе также
рассказывается об особенностях
размещения груза и буксировочных
возможностях вашего автомобиля.
• Глава 4: Ремонт и техническое
обслуживание
Данная глава, посвященная ремонту
и техническому обслуживанию:
содержит информацию о топливе;
помогает определить расположение
различных элементов в моторном
отсеке вашего автомобиля;
приводит общую информацию
о техническом обслуживании
и эксплуатационных жидкостях
для основных узлов и систем,
расположенных в моторном отсеке
(например, моторном масле, охлаж
дающей жидкости, трансмиссионном
масле, рабочей жидкости гидроуси
лителя рулевого управления,
тормозной жидкости, хладагенте
кондиционера воздуха, жидкости
стеклоомывателя, аккумуляторной
батарее);
Как пользоваться данным Руководством по эксплуатации

. . . содержит информацию о рекомендуемой величине давления…
Страница 5
- Изображение
- Текст
5 . . .
содержит информацию о рекомен
дуемой величине давления воздуха
в шинах, проверке состояния,
перестановке и замене шин;
показывает местонахождение
и описывает назначение предохра
нителей и автоматов по защите
электрических цепей вашего
автомобиля;
содержит инструкции по замене
некоторых ламп и их технические
характеристики;
содержит технические характеристики
основных узлов и данные
по заправочным емкостям.
• Глава 5: Устранение
неисправностей в пути
В данной главе приводятся
рекомендации по решению некоторых
проблем, которые могут возникнуть
в пути. В ней рассматриваются
следующие темы:
запуск двигателя от аккумуляторной
батареи другого автомобиля;
буксировка вашего автомобиля;
перегрев двигателя;
замена поврежденного колеса.
В начале каждой главы приводится ее
краткое содержание, включающее
заголовки основных разделов. Это поможет
вам найти требуемую информацию.
Как пользоваться данным Руководством по эксплуатации

. . . 6
РАМКИ «ПРЕДОСТЕРЕЖЕНИЕ»
И «ВНИМАНИЕ»
Заголовки «ПРЕДОСТЕРЕЖЕНИЕ»
И «ВНИМАНИЕ» предупреждают вас
об условиях, которые могут привести
к травмированию людей или повреждению
вашего автомобиля.
ПРЕДОСТЕРЕЖЕНИЕ
Означает, что неправильные действия
могут травмировать людей.
ВНИМАНИЕ
Означает, что неправильные действия
могут привести к повреждению вашего
автомобиля.
Положение сиденья
ПРЕДОСТЕРЕЖЕНИЕ
Запрещается регулировать положение
водительского сиденья при движении
автомобиля. Сиденье может резко
сдвинуться с места, и это приведет
к потере контроля над автомобилем.
Если при движении автомобиля спинка
сиденья сильно наклонена назад,
человек, который находится на этом
сиденье, подвергает себя опасности.
Даже если вы пристегнетесь ремнями
безопасности, они не смогут выполнить
свою защитную функцию, если спинка
сиденья сильно наклонена назад.
Ремни безопасности
ПРЕДОСТЕРЕЖЕНИЕ
Всегда пристегивайтесь ремнями
безопасности. Необходимо каждый раз
убеждаться, что ремни безопасности
правильно отрегулированы.
Не допускайте, чтобы кто либо из
ваших пассажиров ехал с непристегну
тым или неправильно отрегулированным
ремнем безопасности. Если в момент
аварии водитель или пассажиры
не будут пристегнуты ремнями безопас
ности, они могут получить серьезные
травмы или даже погибнуть. В то же
время при аналогичной аварии можно
вообще не получить травм, если
пристегиваться ремнями безопасности.
Всегда пристегивайтесь ремнем
безопасности и следите за тем, чтобы
ваши пассажиры также пристегивались
ремнями безопасности, которые должны
быть правильно отрегулированы.
Важные меры безопасности

7 . . .
ПРЕДОСТЕРЕЖЕНИЕ
Пользование неправильно отрегули
рованным ремнем безопасности может
привести к серьезным травмам.
Поясная лямка ремня должна быть
затянута достаточно низко и плотно
прижимать тазовые кости, слегка
касаясь бедер. В случае аварии сила
давления ремня будет приложена
к прочным тазовым костям, и у вас будет
меньше шансов выскользнуть из под
поясной лямки ремня. В противном
случае, если вы начнете выскальзывать
из под ремня, он будет с силой прижат
к животу. Это может привести к серьез
ным и даже смертельным травмам.
ПРЕДОСТЕРЕЖЕНИЕ
Регулируйте ремень безопасности так,
чтобы он плотно прижимался к вашему
телу. Запрещено пропускать плечевую
лямку ремня под рукой. Убедитесь, что
ремень не перекручен.
Вы можете получить серьезные травмы,
если пристегнете ремень к замку,
не предназначенному для него.
Всегда пристегивайте ремень к замку,
расположенному к вам ближе всех.
ПРЕДОСТЕРЕЖЕНИЕ
Плечевая лямка ремня безопасности
должна проходить через плечо и грудь.
Эти части тела наиболее приспособ
лены к тому, чтобы выдерживать силу
давления ремня.
ПРЕДОСТЕРЕЖЕНИЕ
Одним ремнем безопасности может
пристегиваться только один человек.
Не позволяйте двум детям пристегиваться
одним ремнем безопасности.
Статистика автотранспортных
происшествий свидетельствует о том,
что безопасность детей повышается,
когда они перевозятся на заднем
сиденье автомобиля и зафиксированы
соответствующими средствами
ограничения подвижности.
Важные меры безопасности

. . . 8
Важные меры безопасности
ПРЕДОСТЕРЕЖЕНИЕ
Беременные женщины должны
пользоваться трехточечным (плечевым
поясным) ремнем безопасности на
протяжении всего срока беременности.
При этом поясная лямка ремня должна
располагаться как можно ниже.
Подушки безопасности
ПРЕДОСТЕРЕЖЕНИЕ
Совместное действие ремней и подушек
безопасности обеспечивает наилучшую
защиту водителя и взрослых пассажиров
при аварии.
Человек, приблизившийся вплотную
или оказавшийся вблизи подушки
безопасности, при ее надувании может
получить серьезную или даже
смертельную травму.
ПРЕДОСТЕРЕЖЕНИЕ
Если дети недостаточно большие, чтобы
пользоваться ремнями безопасности,
они должны перевозиться в подходящих
для их возраста и массы детских креслах.
Присутствие подушки безопасности
не может служить заменой ремня
безопасности. Подушки безопасности
эффективны только при совместном
использовании с ремнями безопасности.

9 . . .
ПРЕДОСТЕРЕЖЕНИЕ
Подушки безопасности предназначены
для совместного использования
с ремнями безопасности. Во время
аварии, если вы не пристегнуты ремнем
безопасности, даже при срабатывании
подушки безопасности ваши травмы
могут оказаться гораздо серьезнее, чем
в случае, когда вы пристегнуты ремнем
безопасности.
Если вы окажетесь слишком близко
к надувающейся подушке безопасности,
то вы можете получить серьезную
травму. Ремни безопасности помогают
вам удержаться в оптимальном
положении при надувании подушки
безопасности в случае аварии. Водитель
должен сидеть на максимальном удалении
от рулевого колеса, которое обеспечивает
уверенное и безопасное управление
автомобилем.
В пространстве, которое проходит
подушка безопасности при надувании,
не должно находиться никаких
посторонних предметов.
ПРЕДОСТЕРЕЖЕНИЕ
При надувании подушки безопасности
воздух заполняется большим
количеством пыли. Это может вызвать
удушье у людей, страдающих астмой
и другими заболеваниями дыхательных
путей. Поэтому все люди, находящиеся
в автомобиле, должны покинуть его
сразу же, как только это станет возмож
ным. Если вы не можете выйти из авто
мобиля, откройте окно или дверь.
Дети и детские удерживающие
системы
ПРЕДОСТЕРЕЖЕНИЕ
Запрещено держать ребенка на руках
во время поездки в автомобиле.
При аварии усилие, необходимое для
удержания ребенка, увеличится, и вы
не сможете удержать его. Например,
при столкновении на скорости 40 км/ч
вес находящегося у вас на руках ребенка,
при обычных обстоятельствах равный
5,5 кг, внезапно увеличится до 110 кг.
В этом случае удержать ребенка будет
практически невозможно. Перевозите
детей в детских креслах.
Важные меры безопасности

. . . 10
Важные меры безопасности
ПРЕДОСТЕРЕЖЕНИЕ
Детское кресло, обращенное спинкой
вперед и установленное на сиденье
переднего пассажира, при срабатывании
подушки безопасности может получить
сильный удар, направленный в сторону
спинки сиденья автомобиля. При этом
ребенок, сидящий в кресле, расположен
ном спинкой вперед, может получить
серьезные травмы. Поэтому на автомо
билях, оснащенных подушкой безопас
ности переднего пассажира, необходимо
устанавливать детское кресло,
обращенное спинкой вперед, на заднем
сиденье.
ПРЕДОСТЕРЕЖЕНИЕ
Маленькие дети, которые сидят
в детских креслах, устанавливаемых
спинкой вперед, не могут безопасно
перевозиться на автомобилях,
оснащенных подушками безопасности
переднего пассажира, если эти
автомобили не имеют задних сидений.
Если же вы устанавливаете детское
кресло, расположенное спинкой назад,
на сиденье переднего пассажира,
сдвиньте это сиденье в максимально
удаленное от панели управления
положение.
Если вы оставляете свой автомобиль
ПРЕДОСТЕРЕЖЕНИЕ
Не оставляйте автомобиль с работающим
двигателем без присмотра.
Запрещено оставлять детей в автомо
биле, если ключ находится в замке
зажигания. Дети могут включить
электрические стеклоподъемники,
использовать другие органы управления
автомобиля, или даже завести двигатель
и поехать. Это может привести
к ранению и даже гибели детей, либо
людей, находящихся вне автомобиля.

Комментарии
- Manuals
- Brands
- Chevrolet Manuals
- Automobile
- TrailBlazer
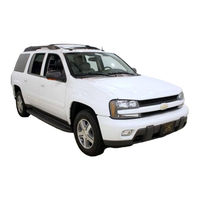
Manuals and User Guides for Chevrolet TrailBlazer. We have 4 Chevrolet TrailBlazer manuals available for free PDF download: Service Manual, Owner’s Manual, Handbook
Chevrolet TrailBlazer Service Manual (678 pages)
Brand: Chevrolet
|
Category: Automobile
|
Size: 12.32 MB
Table of Contents
-
Essential Notes before Proceeding
2
-
Safety Notice
2
-
Part Numbers
2
-
Special Tools
2
-
Precautions
3
-
Servicing Your Vehicle Safely
4
-
Do’s
4
-
Don’ts
5
-
Product View
6
-
Engine Electrical
7
-
Service Precautions
7
-
Ignition System
9
-
General Information
9
-
Coil on Plug (COP) System
9
-
Magnetic Sensor / Pick-Up Coil
9
-
Ignition Coil
10
-
Related Symptoms
10
-
Secondary Spark Test
11
-
Firing Orders
14
-
Ignition Coil-On-Plug
14
-
Removal & Installation
14
-
4.2L Engine
14
-
5.3L & 6.0L Engines
15
-
Charging System
17
-
Generator
18
-
Voltage Test
18
-
Load Test
18
-
No-Load Test
18
-
Generator Removal and Installation (4.2L Engine)
19
-
Generator Removal and Installation (5.3L & 6.0L Engines)
20
-
Generator Battery Control Module: Removal & Installation
22
-
2007
22
-
Maintenance Intervals
23
-
But the Owner’s Manual Is Different?
23
-
But the Replacement Part Is Different?
24
-
Is My Driving ‘Normal’ or ‘Severe’?
24
-
Typical Underhood Maintenance Locations for Inline-Type Engines
25
-
Typical Underhood Maintenance Locations for V or Opposing-Type Engines
25
-
Typical Body and Undervehicle Maintenance Locations
26
-
Typical Lubrications, from Left to Right: Engine Oil; Gear Oil; ATF; Wheel Bearing Grease; Brake Fluid; Chassis Grease; White Grease; and Silicone Spr
27
-
Special Tools Make Lubrication Easier, from Left to Right: Oil Suction Gun; Oil Can; Funnel; Grease Gun; and Wheel Bearing Packers
28
-
Underhood Maintenance Intervals
29
-
Body and Undervehicle Maintenance Intervals
30
-
Recommended Lubricants
31
-
Hall-Effect Device
35
-
Starting System
36
-
Battery: Removal & Installation
36
-
Starter
37
-
Testing
37
-
Starting System Voltage Drop Tests
37
-
Starter Feed Circuit
37
-
Starter Solenoid
38
-
Removal & Installation: 4.2L Engine
39
-
Removal & Installation: 5.3L & 6.0L Engines
40
-
Starter Relay: Removal & Installation
42
-
Engine Repair
43
-
Precautions
43
-
Cleanliness and Care, Shop Practice
44
-
Engine Mechanical
45
-
Camshaft: Removal & Installation (4.2L Engine)
46
-
J 44222 Installation
46
-
Camshaft Cap Removal and Installation
47
-
Camshaft Removal and Installation
48
-
Camshaft Sensor Removal and Installation
49
-
Camshaft: Removal & Installation (5.3L & 6.0L Engines)
49
-
Camshaft Sprocket Removal and Installation
50
-
Camshaft Retainer Removal and Installation
50
-
Crankshaft Balancer
53
-
Crankshaft Balancer Installer
54
-
Crankshaft Balancer Removal
55
-
Cylinder Head: Removal & Installation (4.2L Engine)
57
-
EN-48464 Installation
58
-
Cylinder Head Bolt Removal and Installation
59
-
Cylinder Head Removal and Installation
60
-
Cylinder Head Bolt Tightening Sequence
61
-
5.3L & 6.0L Engines: Left Side
64
-
Left Cylinder Head Removal and Installation
64
-
Right Side
66
-
Right Cylinder Head Removal and Installation
66
-
Drive Belt Removal and Installation (4.2L Engine)
68
-
Drive Belt Removal and Installation (5.3L & 6.0L Engines)
70
-
Drive Belt Tensioner Removal and Installation (4.2L Engine)
72
-
Accessory Drive Belt Tensioner (5.3L, 6.0L)
73
-
Drive Belt Tensioner Removal and Installation (5.3L & 6.0L Engines)
73
-
Engine Assembly: Removal & Installation (4.2L Engine)
74
-
Heater Core Hoses
75
-
Powertrain Control Module (PCM) Removal and Installation
76
-
Starter
77
-
Engine Grounds
78
-
Transmission Removal and Installation
79
-
Rear of the Engine
82
-
Engine Assembly: Removal & Installation (5.3L & 6.0L Engines)
82
-
Engine Coolant Temperature Sensor (ECT) Connector
83
-
Engine Grounds
84
-
Lift Bracket Removal and Installation
85
-
Transmission Bolts and Studs Removal and Installation
86
-
Flywheel Removal and Installation (4.2L Engine)
89
-
Flywheel Bolt Tightening Sequence
90
-
Flywheel Removal and Installation (5.3L & 6.0L Engines)
91
-
Drivebelt Idler Pulley Removal and Installation (4.2L Engine)
93
-
Drivebelt Idler Pulley Removal and Installation (5.3L Engine)
94
-
Idler Pulley
94
-
Intake Manifold: Removal & Installation (4.2L Engine)
96
-
Powertrain Control Module (PCM) Removal and Installation
96
-
Intake Manifold Removal and Installation
97
-
Intake Manifold: Removal & Installation (5.3L & 6.0L Engines)
99
-
Intake Manifold Bolt Tightening Sequence
102
-
Oil Pan
102
-
Oil Pan Removal and Installation (4.2L Engine)
103
-
Oil Pan Removal and Installation (5.3L & 6.0L Engines)
104
-
Oil Pan Removal and Installation
105
-
Oil Pump: Removal & Installation (4.2L Engine)
107
-
Oil Pump Cover
107
-
Oil Pump: Removal & Installation (5.3L & 6.0L Engines)
108
-
Crankshaft Rear Oil Seal: Removal & Installation (4.2L Engine)
110
-
Crankshaft Rear Oil Seal: Removal & Installation (5.3L & 6.0L Engines)
111
-
Camshaft Cover Removal and Installation (4.2L Engine)
112
-
Valve Rocker Arm Cover: Removal & Installation (5.3L & 6.0L Engines)
114
-
Valve Rocker Arm & Valve Lash Adjuster: Removal & Installation (4.2L Engine)
117
-
EN-47945 Valve Spring Compressor
117
-
Valve Rocker Arm & Valve Lash Adjuster: Removal & Installation (5.3L & 6.0 Engines)
118
-
Valve Rocker Arm Pivot Support
119
-
Engine Front Cover: Removal & Installation (4.2L Engine)
120
-
Engine Front Cover Center Bolt (A)
120
-
Engine Front Cover Sealer Application
121
-
Engine Front Cover Removal and Installation (3L & 6.0L Engines)
123
-
Camshaft Timing Chain, Sprocket, and Tensioner: Removal & Installation (4.2L Engine)
125
-
Exhaust Camshaft Position Actuator Removal
125
-
Intake Camshaft Sprocket Removal
126
-
Timing Chain Tensioner Removal and Installation
126
-
J 44221 Camshaft Holding Tool
127
-
Timing Chain Alignment
128
-
Timing Chain & Sprocket: Removal & Installation (5.3L Engine)
130
-
Crankshaft Sprocket Removal and Installation
130
-
Timing Chain Tensioner Removal and Installation
131
-
Crankshaft Sprocket Removal
131
-
Crankshaft Sprocket Installation
132
-
Engine Cooling
133
-
Coolant Reservoir: Removal & Installation
133
-
Coolant
134
-
Filling & Bleeding
134
-
Cooling Fan & Shroud: Removal & Installation
135
-
Fan Clutch Removal and Installation
135
-
Radiator Removal and Installation
136
-
Engine Coolant Thermostat: Removal & Installation (4.2L Engine)
138
-
Engine Coolant Thermostat: Removal & Installation (5.3L & 6.0L Engines)
139
-
Water Pump: Removal & Installation (4.2L Engine)
140
-
Water Pump Pulley Removal and Installation
140
-
Water Pump: Removal & Installation (5.3L & 6.0L Engines)
142
-
Auxiliary Heater Inlet and Outlet Hose/Pipe Removal and Installation
142
-
Water Pump Removal and Installation
143
-
Engine Exhaust
144
-
Exhaust Manifold: Removal & Installation (4.2L Engine)
144
-
Exhaust Manifold Bolt Tightening Sequence
145
-
Left Exhaust Manifold Removal and Installation (5.3L & 6.0L Engines)
146
-
Right Exhaust Manifold Removal and Installation
147
-
Catalytic Converter: Removal & Installation (4.2L Engine)
149
-
Muffler Removal and Installation
149
-
Catalytic Converter: Removal & Installation (5.3L & 6.0L Engines)
150
-
Engine Reconditioning
152
-
Determining Engine Condition
152
-
Compression Test
153
-
Screw-In Type Compression Gauge
153
-
Oil Pressure Test
154
-
Overhaul Tips
155
-
Cleaning
155
-
Scraping Head Gasket
155
-
Ring Groove Cleaner Tool
156
-
Cleaning Groove with an Old Ring
157
-
Repairing Damaged Threads
158
-
Standard Thread Repair Insert (Left), and Spark Plug Thread Insert
158
-
Disassembly
162
-
OHV Heads
162
-
Valve Spring Compressor Tool
162
-
A Small Magnet Used in Removal of Valve Locks
162
-
Valve Locks (Keepers)
163
-
O-Ring Type Seal
163
-
Umbrella/Positive Type Seal
164
-
Removing Exhaust Valve
164
-
OHC Cylinder Heads
165
-
Exploded View of a Valve, Seal, Spring, Retainer and Locks from an OHC Cylinder Head
165
-
Example of a Multi-Valve Cylinder Head with 2 Intake and 2 Exhaust Valve Ports
165
-
Cup Type Camshaft Followers
166
-
C-Clamp Type Spring Compressor and an OHC Spring Removal Tool (Center) for Cup Type Followers
166
-
Cup Type Bolt-On Bearing Caps
166
-
Rocker Arm Type Camshaft Followers
167
-
OHC Spring Tool and C-Clamp
167
-
OHC Shaft Mounted Rocker Arms
168
-
OHC Rocker Arm Type Head
168
-
Compressing the Valve Spring
170
-
Removing the Valve Rocks
170
-
Valve Spring and Retainer
171
-
Removing Valve Seal from the Gauge
171
-
Valve Spring Shim
172
-
Inspection
173
-
Valves
173
-
Springs, Retainers & Valve Locks
174
-
Spring Free-Length Check
175
-
Valve Spring Squareness Check
175
-
Valve Guides
176
-
Valve Seats
176
-
Reading Stem-To-Guide Clearance
176
-
Cylinder Head Surface Flatness
177
-
Machinist’s Straight Edge and Feeler Gauge
177
-
Diagonal Check
177
-
Camshaft & Followers
178
-
Refinishing & Repairing
178
-
Cracks & Physical Damage
178
-
Lapping the Valves
179
-
Valve Guide
179
-
Cylinder Head Surface
181
-
Cracks and Physical Damage
181
-
Assembly
182
-
OHV Engines
182
-
OHC Engines
182
-
Cup Type Camshaft Followers
182
-
Rocker Arm Type Camshaft Followers
183
-
Engine Block
184
-
Disassembly
184
-
Pushrod Engines
184
-
All Engines
184
-
Cylinder Ridge Removal
186
-
Crankshaft Bearing Alignment
186
-
Deck Flatness
186
-
Cylinder Bores
186
-
Measuring Cylinder Bore Diameter
187
-
Crankshaft
188
-
Piston & Connecting Rods
188
-
Pressed-On Pistons
188
-
Connecting Rod
189
-
Measuring the Piston’s Outed Diameter
189
-
Bearings
190
-
Oil Pump
190
-
Refinishing
191
-
Pistons & Connecting Rods
191
-
Ball Type Cylinder Hone
191
-
Front of Piston Mark
192
-
Assembly
193
-
Crankshaft
193
-
Checking Bearing Clearance with Gauging Material
193
-
Measuring Bearing Clearance Gauging Material
194
-
Measuring Crankshaft End-Play
195
-
Pistons, Rings & Connecting Rods
196
-
Checking Ring Groove Clearance
196
-
Bearing Cap Notch
197
-
Ring Top Side Marks
198
-
Piston and Rod Assembly Installation
198
-
Camshaft, Lifters & Timing Assembly
199
-
Cylinder Head(S)
199
-
Engine Covers & Components
199
-
Engine Start-Up & Break-In
200
-
Starting the Engine
200
-
Drivability & Emissions Controls
201
-
Precautions
201
-
Cleanliness and Care, Shop Practice
202
-
Emissions Controls System Overview
203
-
Emission Control System
204
-
Carbon Monoxide (CO)
205
-
Hydrocarbon (HC)
205
-
Oxides of Nitrogen (NO)
205
-
Photochemical Smog
205
-
Sulfur Oxides (Sox)
206
-
Air Pollution
206
-
Natural Pollutants
206
-
Industrial Pollutants
206
-
Automotive Pollutants
207
-
Temperature Inversion
207
-
Heat Transfer
208
-
Automative Emissions
209
-
Exhaust Gases
209
-
Hydrocarbons
209
-
Carbon Monoxide
210
-
Nitrogen
210
-
Ozone
210
-
Oxides of Sulfur
211
-
Particulate Matter
211
-
Crankcase Emissions
212
-
Evaporative Emissions
212
-
Electronic Engine Controls
214
-
MAP Sensor
214
-
FTP Sensor
214
-
Canister Purge Valve Only Vehicles
214
-
Vehicles with Canister Purge and Vent Valves
215
-
ECT Sensor
215
-
APP Sensor
215
-
CKP Sensor
216
-
CMP Sensor
216
-
Typical Crankshaft Position (CKP) Sensor
216
-
Ho2S
217
-
Typical CMP Sensor
217
-
IAT Sensor
218
-
Typical Oxygen Sensor
218
-
Knock Sensor
219
-
MAF Sensor
219
-
TP Sensor
219
-
VSS Sensor
220
-
Typical TP Sensor
220
-
Typical VSS
221
-
Evaporative Emission Canister: Removal & Installation
222
-
Evaporative Emission Canister Purge Solenoid Valve: Removal & Installation (4.2L Engine)
224
-
Evaporative Emission Canister Purge Solenoid Valve: Removal & Installation (5.3L & 6.0L Engines)
225
-
Evaporative Emission Canister Vent Solenoid Valve: Removal & Installation
227
-
Fuel Tank Pressure Sensor: Removal & Installation
228
-
Positive Crankcase Ventilation Hoses: Removal & Installation
229
-
Mass Airflow/Intake Air Temperature Sensor: Removal & Installation
230
-
Arrow )A), Mass Airflow/Intake Air Temperature Sensor
232
-
Camshaft Position Sensor: Removal & Installation (4.2L Engine)
233
-
Camshaft Position Sensor (5.3L Engine)
234
-
2003-2004
234
-
Camshaft Position Sensor Removal and Installation (5.3L & 6.0L Engines)
235
-
2005-2007
235
-
Engine Coolant Temperature Sensor: Removal & Installation (4.2L Engine)
237
-
Engine Coolant Temperature Sensor Removal and Installation (5.3L & 6.0L Engines)
238
-
Crankshaft Position Sensor: Removal & Installation (4.2L Engine)
239
-
Crankshaft Position Sensor: Removal & Installation (5.3L & 6.0L Engines)
240
-
Powertrain Control Module (PCM): Removal & Installation (4.2L Engine)
241
-
2002-2005
241
-
2006-2007
242
-
Powertrain Control Module (PCM) Removal and Installation (5.3L & 6.0L Engines)
243
-
2003 — 2004
243
-
Powertrain Control Module (PCM)
244
-
Engine Control Module (ECM): Removal & Installation (5.3L & 6.0L Engines)
245
Advertisement
Chevrolet TrailBlazer Owner’s Manual (492 pages)
2005
Brand: Chevrolet
|
Category: Automobile
|
Size: 2.9 MB
Table of Contents
-
Section 1 Seats and Restraint Systems
8
-
How to Use this Manual
2
-
Vehicle Symbols
4
-
Seats and Restraint Systems
7
-
Table of Contents
8
-
Front Seats
9
-
Power Seats
9
-
Manual Seats
9
-
Manual Lumbar
10
-
Heated Seats
10
-
Power Lumbar
10
-
Reclining Seatbacks
11
-
Head Restraints
12
-
Rear Seats
13
-
Rear Seat Operation
13
-
Returning the Seats to an Upright Position
15
-
Safety Belts
16
-
Safety Belts: They Are for Everyone
16
-
Why Safety Belts Work
18
-
How to Wear Safety Belts Properly
22
-
Driver Position
22
-
Safety Belt Use During Pregnancy
28
-
Right Front Passenger Position
29
-
Rear Seat Passengers
29
-
Rear Safety Belt Comfort Guides for Children and Small Adults
31
-
Safety Belt Pretensioners
34
-
Safety Belt Extender
34
-
Child Restraints
35
-
Older Children
35
-
Infants and Young Children
37
-
Child Restraint Systems
41
-
Where to Put the Restraint
44
-
Top Strap
45
-
Top Strap Anchor Location
47
-
Securing a Child Restraint Designed for the Latch System
50
-
Securing a Child Restraint in a Rear Outside Seat Position
50
-
Securing a Child Restraint in the Right Front Seat Position
52
-
-
-
Airbag System
56
-
Where Are the Airbags
59
-
When Should an Airbag Inflate
61
-
What Makes an Airbag Inflate
63
-
How Does an Airbag Restrain
63
-
What will You See after an Airbag Inflates
64
-
Passenger Sensing System
66
-
Servicing Your Airbag-Equipped Vehicle
70
-
Adding Equipment to Your Airbag-Equipped Vehicle
70
-
-
Restraint System Check
71
-
Checking Your Restraint Systems
71
-
Replacing Restraint System Parts after a Crash
72
-
-
-
Section 2 Features and Controls
73
-
Keys
75
-
Remote Keyless Entry System
77
-
Remote Keyless Entry System Operation
78
-
Battery Replacement
79
-
-
Doors and Locks
80
-
Door Locks
80
-
Power Door Locks
81
-
Delayed Locking
81
-
Programmable Automatic Door Locks
82
-
Programmable Unlocking Feature
83
-
Rear Door Security Locks
84
-
Lockout Protection
84
-
Liftgate/Liftglass
85
-
Liftgate Release
85
-
-
Windows
86
-
Power Windows
87
-
Power Rear Quarter Windows
88
-
Sun Visors
88
-
-
Theft-Deterrent Systems
88
-
Content Theft-Deterrent
89
-
Passlock
90
-
Testing the Alarm
90
-
-
Starting and Operating Your Vehicle
91
-
New Vehicle Break-In
91
-
Ignition Positions
91
-
Retained Accessory Power (RAP)
92
-
Starting Your Engine
93
-
Adjustable Throttle and Brake Pedal
94
-
Engine Coolant Heater
94
-
Displacement on Demand (Dod)
95
-
Automatic Transmission Operation
96
-
Four-Wheel Drive
99
-
Automatic Transfer Case
99
-
-
Parking Brake
103
-
Shifting into Park (P)
104
-
Leaving Your Vehicle with the Engine Running
105
-
-
Shifting out of Park (P)
106
-
Parking over Things that Burn
107
-
Engine Exhaust
107
-
Running Your Engine While You Are Parked
108
-
-
Mirrors
109
-
Manual Rearview Mirror
109
-
Manual Rearview Mirror with Onstar
109
-
Manual Rearview Mirror with Compass
110
-
Compass Variance
111
-
-
Manual Rearview Mirror with Onstar and Compass
112
-
Compass Display
112
-
Compass Calibration
112
-
-
Manual Rearview Mirror with Compass and Temperature
114
-
Manual Rearview Mirror with Onstar Compass, and Temperature Display
116
-
Outside Manual Mirrors
118
-
Outside Power Mirrors
118
-
Outside Curb View Assist Mirror
118
-
Outside Convex Mirror
119
-
Outside Heated Mirrors
119
-
-
Onstar System
119
-
Onstar Services
120
-
Onstar Virtual Advisor
121
-
-
Homelink Transmitter
122
-
Programming the Homelink Transmitter
123
-
Using Homelink
125
-
Gate Operator and Canadian Programming
125
-
-
-
Storage Areas
126
-
Glove Box
126
-
Overhead Console
126
-
Center Console Storage Area
127
-
Assist Handles
127
-
Luggage Carrier
127
-
Rear Compartment Storage Panel/Cover
128
-
Rear Floor Storage Lid
130
-
Convenience Net
131
-
Cargo Cover
131
-
-
Sunroof
132
-
Vehicle Personalization
133
-
Memory Seat
133
-
Easy Exit Seat
134
-
-
Chevrolet TrailBlazer Handbook (335 pages)
Brand: Chevrolet
|
Category: Automobile
|
Size: 8.58 MB
Table of Contents
-
Chevrolet Trailblazer Handbook
2
-
Table of Contents
2
-
Introduction
3
-
-
In Brief 5 in Brief
6
-
In Brief
6
-
Instrument Panel
7
-
Instrument Panel Overview
7
-
-
-
In Brief
7
-
Initial Drive Information
9
-
Unlocking the Vehicle
9
-
Remote Keyless Entry (RKE)
9
-
System
9
-
Remote Vehicle Start
9
-
Seat Adjustment
10
-
Head Restraint Adjustment
12
-
Safety Belts
13
-
Mirror Adjustment
13
-
Steering Wheel Adjustment
14
-
Exterior Lighting
14
-
Horn
15
-
Washer and Wiper Systems
16
-
Climate Controls
17
-
Transmission
18
-
Parking
19
-
Four-Wheel Drive
19
-
Getting Started
20
-
-
-
-
20 Keys, Doors, and Windows Keys, Doors, and Keys and Locks Windows
21
-
Keys and Locks
21
-
Keys, Doors, and Windows
21
-
Keys
21
-
Infocard
22
-
Remote Vehicle Start
22
-
Radio Remote Control
24
-
Manual Door Locks
25
-
Central Locking System
26
-
Lockout Protection
28
-
-
-
-
Doors
29
-
Load Compartment
29
-
-
Vehicle Security
30
-
Anti-Theft Alarm System
30
-
Immobilizer
31
-
-
Exterior Mirrors
32
-
Convex Mirrors
32
-
Power Mirrors
32
-
Folding Mirrors
33
-
Heated Mirrors
33
-
-
Interior Mirrors
34
-
Manual Rearview Mirror
34
-
Automatic Dimming Rearview
34
-
Mirror (if Equipped)
34
-
-
Power Windows
34
-
Heated Rear Window
37
-
Sun Visors
38
-
-
38 Seats and Restraints Seats and Head Restraints
39
-
Seats and Restraints
39
-
Head Restraints
39
-
-
Head Restraints
40
-
Front Seats
41
-
Seat Position
41
-
Seat Adjustment
42
-
Power Seat Adjustment
43
-
-
Rear Seats
44
-
Rear Seat Armrest
44
-
Second Row Seats
45
-
Third Row Seats
48
-
-
Safety Belts
50
-
Three-Point Safety Belt
51
-
-
Airbag System
53
-
Safety Belt Use During
53
-
Pregnancy
53
-
-
Safety Belt Care
53
-
Front Airbag System
55
-
Side Airbag System
57
-
(If Equipped)
57
-
-
When Should an Airbag
58
-
Inflate
58
-
-
How Does an Airbag
59
-
Restrain
59
-
-
What Makes an Airbag
59
-
Inflate
59
-
-
What will You See after an Airbag Inflates
60
-
Child Restraint Systems
61
-
-
Child Restraints
61
-
Servicing the Airbag-Equipped
61
-
Vehicle
61
-
-
Child Restraint Installation
63
-
Locations
63
-
-
ISOFIX Child Restraint
66
-
Systems
66
-
-
Top Tether Child Restraint
69
-
Systems
69
-
Restraint Systems
69
-
-
-
-
Storage 69 Storage Storage Glove Box Compartments
70
-
Storage Compartments
70
-
Storage
70
-
Instrument Panel Storage
70
-
Glove Box
70
-
Cupholders
71
-
Storage
71
-
Front Storage
72
-
Sunglasses Storage
72
-
Armrest Storage
73
-
Cable Route)
73
-
Rear Storage
74
-
Center Console Storage
74
-
-
-
-
Luggage/Load Locations
75
-
Load Compartment
75
-
-
Additional Storage Features
76
-
Load Compartment Cover
76
-
Lashing Eyes
78
-
-
Roof Racksystem
79
-
Roof Rack System
79
-
-
Information on Loading the Vehicle
80
-
-
80 Instruments and Controls Instruments and
81
-
Instruments and Controls
81
-
Instrument Panel Overview
83
-
Controls
84
-
Steering Wheel Adjustment
84
-
Steering Wheel Controls
85
-
Horn
85
-
Windshield Wiper/Washer
86
-
Windshield Washer
87
-
Rear Window Wiper/Washer
88
-
Outside Temperature
88
-
Clock
88
-
Power Outlets
88
-
-
Warning Lights, Gauges, and Indicators
90
-
Speedometer
90
-
Odometer
90
-
Trip Odometer
90
-
Tachometer
91
-
Fuel Gauge
91
-
Control Indicators
91
-
Engine Coolant Temperature
92
-
Gauge
92
-
Turn Signal
92
-
-
Safety Belt Reminders
92
-
Airbag and Safety Belt
94
-
Tensioner Light
94
-
-
Charging System Light
94
-
Malfunction Indicator Lamp
94
-
Brake and Clutch System
95
-
Warning Light
95
-
-
Antilock Brake System (ABS)
96
-
Warning Light
96
-
-
Four-Wheel-Drive Light
96
-
Hill Descent Control Light
96
-
Lane Departure Warning (LDW)
97
-
Light
97
-
-
Vehicle Ahead Indicator
97
-
Electronic Stability Control (ESC) Indicator Light
97
-
Electronic Stability Control
97
-
(ESC) off Light
97
-
-
Traction Control System (TCS)
98
-
Warning Light
98
-
Off Light
98
-
-
Pre-Heat Light
98
-
Tyre Pressure Monitoring
98
-
System Light
98
-
-
Engine Oil Pressure Light
99
-
Low Fuel Warning Light
99
-
Immobilizer Light
100
-
High-Beam on Light
100
-
Front Fog Lamp Light
100
-
Rear Fog Lamp Light
100
-
Lamps on Reminder
100
-
Cruise Control Light
101
-
Trailer Indicator Light
101
-
(If Equipped)
101
-
Information Displays
101
-
-
Driver Information
101
-
Center (DIC)
101
-
-
Vehicle Messages
102
-
Battery Voltage and
102
-
Warning Buzzers
102
-
Charging Messages
102
-
Messages
102
-
-
Brake System Messages
103
-
Cruise Control Messages
103
-
Door Ajar Messages
103
-
Engine Cooling System
103
-
Messages
103
-
-
Engine Oil Messages
104
-
Engine Power Messages
104
-
Fuel System Messages
104
-
Key and Lock Messages
104
-
Lamp Messages
104
-
Object Detection System
105
-
Messages
105
-
-
Ride Control System
105
-
Airbag System Messages
105
-
Anti-Theft Alarm System
105
-
Steering System Messages
105
-
Tyre Messages
106
-
Transmission Messages
106
-
Vehicle Reminder
107
-
Messages
107
-
Vehicle Speed Messages
108
-
Trip Computer
108
-
-
Advertisement
Chevrolet TrailBlazer Owner’s Manual (301 pages)
DIESEL
Brand: Chevrolet
|
Category: Automobile
|
Size: 6.49 MB
Table of Contents
-
Contents
5
-
Vehicle Data Chart
6
-
Vehicle Specific Data
7
-
Warnings
8
-
Symbols
8
-
Instrument Panel
9
-
Instrument Panel Overview
10
-
Initial Drive
12
-
Unlocking the Vehicle
12
-
Manual Seat Adjustment
12
-
Radio Remote Control
12
-
Seat Height
13
-
Power Seat Adjustment
13
-
Seat Positioning
13
-
Seat Backrests
13
-
Head Restraint Adjustment
14
-
Safety Belts
14
-
Mirror Adjustment
15
-
Steering Wheel Adjustment
15
-
Interior Mirror
15
-
Exterior Mirrors
15
-
Exterior Lighting
16
-
Headlight Flash, High Beam and Low Beam
16
-
Turn and Lane-Change Signals
16
-
Hazard Warning Flashers
17
-
Horn
17
-
Washer and Wiper Systems
17
-
Windshield Wipers
17
-
Windshield Washer System
18
-
Rear Window Wiper/Washer
18
-
Climate Controls
19
-
Demisting and Defrosting the Windows
19
-
Transmission
19
-
Heated Rear Window
19
-
Parking
20
-
Getting Started
20
-
Check before Starting
20
-
Starting Engine with the Ignition Switch
21
-
Keys and Locks
23
-
Replacement Keys
23
-
Infocard
24
-
Manual Door Locks
25
-
Battery Replacement of the Remote Control
25
-
Replacement Remote Control Unit
25
-
Inside Locking
25
-
Central Locking System
26
-
Unlocking/Locking
26
-
Central Locking Buttons
27
-
Automatic Locking
27
-
Auto Door Relock
27
-
Lockout Protection
28
-
Central Locking System Failure
28
-
Side Steps
28
-
Doors
29
-
Liftgate Opening
29
-
Liftgate Closing
29
-
Vehicle Security
30
-
Anti-Theft Alarm System
30
-
Activating
30
-
Status LED
30
-
Alarm
31
-
Auto Alarm Reactivation
31
-
Immobilizer
31
-
Convex Mirrors
32
-
Power Mirrors
32
-
Folding Mirrors
33
-
Manual Rearview Mirror
34
-
Power Windows
34
-
Manual Anti-Dazzle
34
-
Operation of Driver’s Window
35
-
Safety Function
35
-
Override Safety Function
35
-
Child Safety System for Windows
35
-
Sun Visors
36
-
Initializing the Power Windows
36
-
Seats and Restraints
37
-
Head Restraints Position
37
-
Front Seat Height Adjustment
38
-
Height Restraints on the Rear Seats
38
-
Front Seats Position
39
-
Height Adjustment Third Row Seats
39
-
Rear Seat Armrest
42
-
Armrest on Second Row Seats
42
-
Second Row Seats
43
-
Coat Hook
43
-
Easy Entry Function
43
-
Folding Back Easy Entry
45
-
Third Row Seats
46
-
Folding down Seats
46
-
Folding up Seats
47
-
Seats Positioning
48
-
Three-Point Safety Belt Fitting
49
-
Belt Force Limiters
49
-
Belt Tensioners
49
-
Height Adjustment
50
-
Removing
50
-
Airbag System
51
-
Safety Belt Use During Pregnancy
51
-
Safety Belt Care
51
-
Front Airbag System
53
-
Child Restraints
55
-
Child Restraint Systems
55
-
Market Child Restraint System Classification
55
-
Child Restraint Installation Locations
57
-
ISOFIX Child Restraint Systems Anchoring Points ISOFIX of Vehicle
60
-
Admissible Positions for Fitting an ISOFIX Child Restraint System
61
-
Top Tether Child Restraint Systems
62
-
ISOFIX Size Class and Seat Device
62
-
Storage Compartments
63
-
Instrument Panel Storage
63
-
Glove Box
64
-
Front Cupholders
64
-
Rear Cupholders
65
-
Front Storage
66
-
Sunglasses Storage
66
-
Armrest Storage
66
-
Rear Storage
66
-
Center Console Storage
67
-
Luggage/Load Locations
68
-
Load Compartment
68
-
Additional Storage Features
69
-
Load Compartment Cover
69
-
Stowing the Load Compartment
70
-
Roof Rack System
71
-
Lashing Eyes
71
-
Instruments and Controls
73
-
Controls
75
-
Steering Wheel Controls
76
-
Adjustable Wiper Interval
77
-
Outside Temperature
79
-
Clock
79
-
Power Outlets
79
-
Warning Lights, Gauges, and Indicators
80
-
Speedometer
81
-
Odometer
81
-
Tripodometer
81
-
Tachometer
81
-
Fuel Gauge
82
-
Control Indicators
82
-
Engine Coolant Temperature Gauge
82
-
Turn Signal
83
-
Safety Belt Reminders
83
-
Airbag and Safety Belt Tensioner Light
84
-
Passenger Safety Belt Reminder
84
-
Charging System Light
85
-
Malfunction Indicator Lamp
85
-
Brake and Clutch System Warning Light
85
-
Antilock Brake System (ABS) Warning Light
86
-
Hill Descent Control Light
86
-
Electronic Stability Control (ESC) Indicator Light
87
-
Electronic Stability Control (ESC) off Light
87
-
Traction Control System (TCS) Warning Light
87
-
Pre-Heat Light
88
-
Engine Oil Pressure Light
88
-
Low Fuel Warning Light
89
-
Immobilizer Light
89
-
High-Beam on Light
89
-
Front Fog Lamp Light
89
-
Information Displays
90
-
Lamps on Reminder
90
-
Cruise Control Light
90
-
Driver Information Center (DIC)
90
-
Vehicle Messages
91
-
Warning Buzzers
91
-
Battery Voltage and Charging Messages
91
-
Battery Saver Active
91
-
Brake System Messages
92
-
Cruise Control Messages
92
-
Door Ajar Messages
92
-
Engine Cooling System Messages
92
-
Engine Oil Messages
93
-
Fuel System Messages
93
-
Key and Lock Messages
93
-
Lamp Messages
93
-
Object Detection System Messages
94
-
Ride Control System Messages
94
-
Airbag System Messages
94
-
Anti-Theft Alarm System Messages
94
-
Trip Computer
95
-
Transmission Messages
95
-
Vehicle Reminder Messages
95
-
Vehicle Speed Messages
95
-
Fuel Range
96
-
Fuel Used
96
-
Timer
96
-
Outside Air Temperature
96
-
Vehicle Personalization
97
-
Battery Voltage
97
-
Speed Warning
97
-
ECO Menu
97
-
Exterior Lamp Controls
99
-
Headlamp High/Low-Beam Changer
99
-
Flash-To-Pass
100
-
Headlamp Range Adjustment
100
-
Front Fog Lamps
101
-
Rear Fog Lamps
101
-
Reversing Lamps
101
-
Interior Lighting
102
-
Misted Lamp Covers
102
-
Instrument Panel Illumination Control
102
-
Load Compartment Lamps
102
-
Courtesy Lamps
103
-
Reading Lamps
103
-
Lighting Features
104
-
Sun Visor Lamps
104
-
Entry Lighting
104
-
Exit Lighting
104
Advertisement
Related Products
-
Chevrolet TrailBlazer EXT
-
Chevrolet TRAILBLAZER 2021
-
Chevrolet Trailblazer 2020
-
Chevrolet Traverse
-
Chevrolet Trax 2016
-
Chevrolet Traverse 2014
-
Chevrolet Traverse 2015
-
Chevrolet Traverse 2018
-
Chevrolet TRAX 2018
-
Chevrolet Traverse 2019
Chevrolet Categories
Automobile
Trucks
Car Navigation system
Car Video System
Car Receiver
More Chevrolet Manuals