
ENGLISH
Р
УCCKИЙ
DVD/CD RECEIVER
ПРИЕМНИК ДЛЯ ВОСПРОИЗВЕДЕНИЯ ДИСКОВ DVD И КОМПАКТ-ДИСКОВ
KD-AVX2
For installation and
connections, refer to the
separate manual.
Указания по установке
и выполнению
соединений приводятся
в отдельной инструкции.
INSTRUCTIONS
ИНСТРУКЦИИ ПО ЭКСПЛУАТАЦИИ
LVT1455-005A
[EE]
В соответствии с Законом Российской Федерации “О защите прав
потре бителей” срок службы (годности) данного товара “по истечении
которого он может представлять опасность для жизни, здоровья
потребителя, причинять вред его имуществу или окружающей среде”
составляет семь (7) лет со дня производства. Этот срок является временем,
в течение которого потребитель данного товара может безопасно им
пользоваться при условии соблюдения ин струк ции по эксплуатации
данного товара, проводя необходимое обслуживание, включающее замену
расходных материалов и/или соответствующее ремонтное обеспечение в
специализированном сервисном центре.
Дополнительные косметические материалы к данному товару,
поставляе мые вместе с ним, могут храниться в течение двух (2) лет со дня
его производства.
Срок службы (годности), кроме срока хранения дополнительных
космети ческих материалов, упомянутых в предыдущих двух пунктах, не
затрагивает никаких других прав потребителя, в частности, гарантийного
свидетельства JVC, которое он может получить в соответствии с законом
о правах потребителя или других законов, связанных с ним.
SRC
D
MENU
7 / BACK
KD-AVX2
DISP
A
ENT
BAND
MODE
MENU
ASPECT
ZOOM
ATT
SOURCE
DISC+
DISC–
DVD / RECEIVER CONTROL
EXTRA MONITOR CONTROL
+10
–10
1
2
3
4
5
6
7
8
0
9
–100
BAND
OSD
MENU
TOP M
SETUP
RM-RK240
RETURN
ENTER
DUAL
SHIFT
VOL
2nd VOL
+100
DIRECT
ASPECT
SURROUND
T/P
ASPECT
For canceling the
display demonstration,
see page 10.
Информацию
об отмене
демонстрации
функций дисплея
см. на стр. 10.
Cover_KD-AVX2[EE]_005A_f.indd 2
Cover_KD-AVX2[EE]_005A_f.indd 2
2/3/06 12:35:15 PM
2/3/06 12:35:15 PM
Инструкция и руководство для
JVC KD-AVX2  на русском на английском


120 страниц подробных инструкций и пользовательских руководств по эксплуатации
 02:06
02:06
Дешевый способ подключить плеер к JVS KD-AVX2
 07:37
07:37
JVC KD AVX2 DVD-audio 5.1(24/96) MLP
 15:43
15:43
MERCEDES VITO V CLASS V220CDI W638|УСТАНОВИЛ МАГНИТОЛУ JVC KD-AVX2|ПУЛЬТ УПРАВЛЕНИЯ НА РУЛЬ RM-RK39
 03:53
03:53
Настройки звука JVC KD AVX2
 08:23
08:23
JVC AVX2 Testing HI-END CAR RADIO.avi
 01:39
01:39
DVD-ресивер со встроенным ЖК-дисплеем JVC KD-AVX2
 11:22
11:22
JVC KD AVX2 звук DVD-audio (2.1)(24bit/192kHz),(5.1)(24bit/96kHz)
 02:52
02:52
JVC kd-avx2 DVD-Video ,DVD-A , DTS-A (multicanal)
ENGLISH
Р
УCCKИЙ
DVD/CD RECEIVER
ПРИЕМНИК ДЛЯ ВОСПРОИЗВЕДЕНИЯ ДИСКОВ DVD И КОМПАКТ-ДИСКОВ
KD-AVX2
For installation and
connections, refer to the
separate manual.
Указания по установке
и выполнению
соединений приводятся
в отдельной инструкции.
INSTRUCTIONS
ИНСТРУКЦИИ ПО ЭКСПЛУАТАЦИИ
LVT1455-005A
[EE]
В соответствии с Законом Российской Федерации “О защите прав
потре бителей” срок службы (годности) данного товара “по истечении
которого он может представлять опасность для жизни, здоровья
потребителя, причинять вред его имуществу или окружающей среде”
составляет семь (7) лет со дня производства. Этот срок является временем,
в течение которого потребитель данного товара может безопасно им
пользоваться при условии соблюдения ин струк ции по эксплуатации
данного товара, проводя необходимое обслуживание, включающее замену
расходных материалов и/или соответствующее ремонтное обеспечение в
специализированном сервисном центре.
Дополнительные косметические материалы к данному товару,
поставляе мые вместе с ним, могут храниться в течение двух (2) лет со дня
его производства.
Срок службы (годности), кроме срока хранения дополнительных
космети ческих материалов, упомянутых в предыдущих двух пунктах, не
затрагивает никаких других прав потребителя, в частности, гарантийного
свидетельства JVC, которое он может получить в соответствии с законом
о правах потребителя или других законов, связанных с ним.
SRC
D
MENU
7 / BACK
KD-AVX2
DISP
A
ENT
BAND
MODE
MENU
ASPECT
ZOOM
ATT
SOURCE
DISC+
DISC–
DVD / RECEIVER CONTROL
EXTRA MONITOR CONTROL
+10
–10
1
2
3
4
5
6
7
8
0
9
–100
BAND
OSD
MENU
TOP M
SETUP
RM-RK240
RETURN
ENTER
DUAL
SHIFT
VOL
2nd VOL
+100
DIRECT
ASPECT
SURROUND
T/P
ASPECT
For canceling the
display demonstration,
see page 10.
Информацию
об отмене
демонстрации
функций дисплея
см. на стр. 10.
Cover_KD-AVX2[EE]_005A_f.indd 2
Cover_KD-AVX2[EE]_005A_f.indd 2
2/3/06 12:35:15 PM
2/3/06 12:35:15 PM

English how to forcibly eject a disc, How to reset your unit
Страница 2
- Изображение
- Текст
2
ENGLISH
How to forcibly eject a disc
If a disc cannot be recognized by the receiver
or cannot be ejected, ejects the disc as
follows.
“NO EJECT?” (or “EJECT OK?”) and
“EMERGENCY EJECT?” appear on the
monitor.
Press
5 / ∞ repeatedly to select
“EMERGENCY EJECT?”, then press ENT.
• If this does not work, reset your receiver.
• Be careful not to drop the disc when it ejects.
How to reset your unit
This will reset the
microcomputer. Your preset
adjustments will also be
erased.
Thank you for purchasing a JVC product.
Please read all instructions carefully before operation, to ensure your complete understanding and to
obtain the best possible performance from the unit.
Temperature inside the car….
If you have parked the car for a long time in hot
or cold weather, wait until the temperature in
the car becomes normal before operating the
unit.
For safety….
• Do not raise the volume level too much, as
this will block outside sounds, making driving
dangerous.
• Stop the car before performing any
complicated operations.
IMPORTANT FOR LASER PRODUCTS
1. CLASS 1 LASER PRODUCT
2. CAUTION: Do not open the top cover. There are no user serviceable parts inside the unit; leave
all servicing to qualified service personnel.
3. CAUTION: Visible and invisible laser radiation when open and interlock failed or defeated.
Avoid direct exposure to beam.
4. REPRODUCTION OF LABEL: CAUTION LABEL, PLACED OUTSIDE THE UNIT.
This product incorporates copyright
protection technology that is protected
by U.S. patents and other intellectual
property rights. Use of this copyright
protection technology must be authorized
by Macrovision, and is intended for home
and other limited viewing uses only unless
otherwise authorized by Macrovision.
Reverse engineering or disassembly is
prohibited.
AVX2EE.indb 2
AVX2EE.indb 2
06.2.9 1:09:20 PM
06.2.9 1:09:20 PM

3
ENGLISH
Caution on volume setting:
Discs produce very little noise compared
with other sources. Lower the volume
before playing a disc to avoid damaging
the speakers by the sudden increase of the
output level.
WARNINGS:
• DO NOT install any receiver in locations
where;
– it may obstruct the steering wheel and
gearshift lever operations, as this may
result in a traffic accident.
– it may obstruct the operation of safety
devices such as air bags, as this may
result in a fatal accident.
– it may obstruct visibility.
• DO NOT operate any receiver while
manipulating the steering wheel, as this
may result in a traffic accident.
• The driver must not watch the monitor
while driving.
If the driver watches the monitor while
driving, it may lead to carelessness and
cause an accident.
• The driver must not put on the headphones
while driving. It is dangerous to shut off the
outside sounds while driving.
• If you need to operate the receiver while
driving, be sure to look ahead carefully or
you may be involved in a traffic accident.
• If the parking brake is not engaged,
“Parking Brake” flashes on the monitor,
and no playback picture will be shown.
– This warning appears only when the
parking brake wire is connected to the
parking brake system built in the car
(refer to the Installation/Connection
Manual).
Characters shown on the monitor
In addition to the roman alphabet (A – Z,
a – z), the following characters will be used
to show the various information on the
monitor.
• You can also use the following characters
to assign titles (see page 45).
Numbers and symbols
Cautions on the monitor:
• The monitor built in this receiver has
been produced with high precision, but
it may have some ineffective dots. This is
inevitable and is not malfunction.
• Do not expose the monitor to direct
sunlight.
Lower case (Cyrillic alphabet)
Upper case (Cyrillic alphabet)
AVX2EE.indb 3
AVX2EE.indb 3
06.2.9 1:09:37 PM
06.2.9 1:09:37 PM

4
ENGLISH
Discs you can play
You can play back the following discs—12 cm
and 8 cm —on this receiver:
• DVD Video: Recorded in PAL color system
with Region Code “5” (see below).
– DVD-R/DVD-RW recorded in the DVD-
Video format can also be played.
• DVD Audio
• Video CD (VCD)/audio CD
• MP3/WMA/WAV/JPEG/MPEG1,2/DivX:
Recorded either in CD-R/CD-RW or DVD-
R/DVD-RW/+R/+RW/DVD-ROM.
– CD-R/CD-RW: Compliant with ISO 9660
Level 1, ISO 9660 Level 2, Romeo, and
Joliet.
–
DVD-R/DVD-RW/+R/+RW/DVD-ROM:
Compliant with UDF-Bridge Format*
1
.
• It is possible to play back finalized +R/+RW
(DVD Video format only) discs. However the
use of +R double layer disc on this unit is not
recommended.
• DVD-R recorded in multi-border format is
also playable (except for dual layer discs).
On some discs, the actual operations may be
different from what is explained in this manual.
Note on Region Code:
DVD players and DVD Video discs have
their own Region Code numbers. This
receiver can only play back DVD discs whose
Region Code numbers include “5”.
Examples:
If you insert a DVD Video disc of an
incorrect Region Code
“Region Error” appears on the monitor on
the unit and the disc ejects.
“REGION CODE ERROR” also appears on
the external monitor.
Discs cannot be played back
DVD-ROM (data), DVD-RAM, DVD-R/DVD-
RW recorded in the DVD-VR format, CD-
ROM, CD-I (CD-I Ready), Photo CD, etc.
• Playing back these discs will generate noise
and damage the speakers.
Caution for DualDisc playback
• The Non-DVD side of a “DualDisc” does
not comply with the “Compact Disc Digital
Audio” standard. Therefore, the use of Non-
DVD side of a DualDisc on this product may
not be recommended.
*
1
A hybrid file system used to provide
compatibility with ISO 9660 for accessing
any type of files on the disc. (UDF stands for
Universal Disk Format.)
“DVD Logo” is a trademark of DVD Format/
Logo Licensing Corporation registered in the US,
Japan and other countries.
Introduction—Playable discs
AVX2EE.indb 4
AVX2EE.indb 4
06.2.9 1:09:37 PM
06.2.9 1:09:37 PM

5
ENGLISH
Contents
Control panel …………………………. 6
Remote controller —
RM-RK240
……. 7
Getting started ……………………….. 10
Radio operations …………………….. 12
FM RDS operations …………………… 15
Disc operations ……………………….. 18
Unique disc functions ……………….. 23
Disc surround playback …………….. 25
On-Screen disc operations …………. 27
Other disc operations ……………….. 31
Dual Zone operations ……………….. 33
AV Menu settings …………………….. 34
Other main functions ……………….. 45
CD changer operations ……………… 46
DAB tuner operations ………………….. 48
External component operations ……… 53
iPod®/D. player operations ……………. 54
Maintenance ………………………….. 56
Language codes ………………………. 57
More about this receiver …………… 58
Troubleshooting ……………………… 63
Specifications …………………………. 67
How to read this manual
The following methods are used to make the
explanations simple and easy-to-understand:
• Some related tips and notes are explained
in “More about this receiver” (see pages 58
– 62).
• Button operations are mainly explained
with the illustrations as follows:
Press briefly.
Press repeatedly.
Press either one.
Press and hold until your
desired response begins.
Press and hold both
buttons at the same time.
AVX2EE.indb 5
AVX2EE.indb 5
06.2.9 1:09:38 PM
06.2.9 1:09:38 PM

6
ENGLISH
SRC
D
MENU
7 / BACK
KD-AVX2
DISP
A
ENT
BAND
ASPECT
T/P
r
t
y
u
i
1
7
2
5
8
9
p
q
e
4
6
w
3
1
(standby/on attenuator) button
2 • +/– (volume +/–) button
• SRC (source) button
• DISP (D: display) button
3 Remote Sensor
4 Monitor
5 •
5 (up) / ∞ (down) buttons
•
4/¢ buttons
6 MENU button
7 ASPECT (A) button
8 T/P button
9 •
0 (eject) button
• (angle) button
p Reset button
q • BAND button
•
BACK
button
•
7 (stop) button
w • ENT (enter) button
•
3 (play) button
e
(control panel release) button
Monitor indications
r Source indicator
t Main display
y Clock display
Also indicates volume level when adjusting
volume.
u Status indicators
i Alert information area
Also indicates volume level bar when
adjusting volume.
Parts identification
Monitor
indications
Ex.:
Source screen on
JPEG playback
Control panel
AVX2EE.indb 6
AVX2EE.indb 6
06.2.9 1:09:38 PM
06.2.9 1:09:38 PM

Remote controller — rm-rk240, Remote controller, English
Installing the lithium coin battery (cr2025), How to detach/attach the control panel, How to change the control panel angle
- Изображение
- Текст
7
ENGLISH
Remote controller —
RM-RK240
Installing the lithium coin battery
(CR2025)
Before using the remote controller:
• Aim the remote controller directly at the
remote sensor on the receiver. Make sure
there is no obstacle in between.
• Do not expose the remote sensor to strong
light (direct sunlight or artificial lighting).
Remote
sensor
How to detach/attach the control panel
Detaching…
Attaching…
How to change the control panel angle
Angle 4
Angle 3
Angle 1
Angle 2
Caution: Do not insert your finger behind the control panel.
AVX2EE.indb 7
AVX2EE.indb 7
06.2.9 1:09:39 PM
06.2.9 1:09:39 PM

8
ENGLISH
IMPORTANT:
If Dual Zone is activated (see page 33),
the remote controller only functions for
operating the DVD/CD player.
MONITOR CONTROL
1 Monitor control buttons*
1
• (standby/on), MODE, ASPECT,
MENU, and .
DVD/RECEIVER CONTROL
2
(standby/on attenuator) button
• Turns on and off the power and also
attenuates the sound.
3 SOURCE button
• Selects the source.
4 BAND button
• Selects the FM/AM/DAB bands.
5 ASPECT button
• Change the aspect of the monitor on the
unit when playing back DVD, VCD, etc.
6 DUAL button
• Activate and deactivate Dual Zone.
7 VOL + / – buttons
• Adjusts the volume level.
• Also function as 2nd VOL +/– buttons
when pressed with SHIFT button.
8 TOP M (menu) button*
2
• Display the DVD, DVD Audio, DivX, and
VCD*
3
disc menu.
9 SHIFT button
p Basic disc operation buttons*
4
:
7 (stop), 3 (play), 8 (pause)
•
3 (play) also function as ZOOM button
when pressed with SHIFT button.
q Advanced disc operation/tuner operation
buttons*
5
For advanced disc operations:
•
5 / ∞
– Select the titles (for DVD), groups (for
DVD Audio), or folders (for MP3/
WMA/WAV/JPEG/MPEG/DivX).
•
4 / ¢ (reverse skip/forward skip)
•
1 / ¡ (reverse search/forward
search)*
6
Warning:
• Do not install any battery other than
CR2025 or its equivalent; otherwise, it may
explode.
• Store the battery in a place where children
cannot reach to avoid risk of accidents.
• To prevent the battery from over-heating,
cracking, or starting a fire:
– Do not recharge, short, disassemble, or
heat the battery or dispose of it in a fire.
– Do not leave the battery with other
metallic materials.
– Do not poke the battery with tweezers or
similar tools.
– Wrap the battery with tape and insulate
when throwing away or saving it.
The receiver is equipped with the steering wheel
remote control function.
• See the Installation/Connection Manual
(separate volume) for connection.
Main elements and features
MODE
MENU
ASPECT
ZOOM
ATT
SOURCE
DISC+
DISC–
DVD / RECEIVER CONTROL
EXTRA MONITOR CONTROL
+10
–10
1
2
3
4
5
6
7
8
0
9
–100
BAND
OSD
MENU
TOP M
SETUP
RM-RK240
RETURN
ENTER
DUAL
SHIFT
VOL
2nd VOL
+100
DIRECT
ASPECT
SURROUND
* Not used as the SETUP button for this model.
AVX2EE.indb 8
AVX2EE.indb 8
06.2.9 1:09:40 PM
06.2.9 1:09:40 PM

9
ENGLISH
For FM/AM tuner operations:
•
5 / ∞
– Changes the preset stations.
•
4 / ¢
– Functions to search for stations.
Press briefly: auto search
Press and hold: manual search
For DAB tuner operations:
•
5 / ∞
– Changes the preset channels.
•
4 / ¢
– Changes the services if pressed briefly.
– Changes the channels if pressed and
held.
For iPod/D. player operations:
•
5 / ∞
∞: Pauses/stops or resumes playback.
5: Enters the main menu of iPod/D.
player. (Now
5 / ∞/4 / ¢ work as
the menu selection buttons)*
7
•
4 / ¢ (in menu selecting mode)
– Selects an item if pressed briefly.
(Then,
press
∞ to confirm the
selection.)
– Skips 10 items at a time if pressed and
held.
w OSD button
• Display the on-screen bar.
• Also function as the DIRECT button
when pressed with SHIFT button.
– You can directly select titles (for DVD),
groups (for DVD Audio) or folders
(for MP3/WMA/WAV/MPEG/DivX)
using the number buttons (see the right
column and page 22).
e MENU button*
2
• Display the DVD, DivX, and VCD*
2
disc
menu. (Not functions for the DVD Audio
disc.)
r Menu operation buttons*
2
•
Cursor
(
% , fi , @ , #) and ENTER
•
% / fi : Also function as DISC+/– buttons
when the source is “CD-CH”.
t RETURN button*
2
How to select a number
To select a number from 0 – 9:
To select a number greater than 9:
• +100/–100 buttons used for searching track
number greater than 99 (not available for
CD/VCD/DVD/DVD audio).
y Special function buttons
•
DVD/VCD/DivX: (audio)
•
DVD/DivX: (subtitle)
•
DVD: (angle)
• Also function as the SURROUND
button when pressed with SHIFT button.
– You can change the surround mode (see
page 26).
*
1
Controllable only if your monitor is one of the
JVC monitors — KV-MR9010 or
KV-MH6510.
*
2
Th ese buttons function as the number buttons
when pressed with SHIFT button.
*
3
Only when PBC is not in use.
*
4
Not used for CD changer operations.
*
5
Th ese buttons function as the +10/–10 and
+100/–100 buttons when pressed with SHIFT
button.
*
6
Not used for JPEG operations. No sound can
be heard (DVD/VCD/MPEG/DivX).
*
7
5: Returns to the previous menu.
∞: Confi rms the selection.
AVX2EE.indb 9
AVX2EE.indb 9
06.2.9 1:09:41 PM
06.2.9 1:09:41 PM

Getting started, Basic operations, Canceling demonstration and setting the clock
Страница 10
- Изображение
- Текст
10
ENGLISH
~
Turn on the power.
Ÿ
You cannot select some sources if they
are not ready.
!
For FM/AM tuner
For DAB tuner
⁄
Adjust the volume.
@
Adjust the equalizer as you want.
(See pages 42.)
To drop the volume in a moment (ATT)
To restore the sound,
press it again.
To turn off the power
Basic operations
SRC
D
DISP
SRC
D
Canceling demonstration and setting
the clock
1
2
Select “Setup”, then,
1 Select “Display”, “Demonstration”, then
“Off” to cancel demonstration.
2 Select “Clock”, “Time Set”, and go to the
next step to set the clock.
3
Set the hour and minute.
1 Select “Hour”, then adjust the hour.
2 Select “Minute”, then adjust the minute.
MENU
Getting started
7 / BACK
BAND
Volume level indicator
AVX2EE.indb 10
AVX2EE.indb 10
06.2.9 1:09:42 PM
06.2.9 1:09:42 PM

Комментарии
Главная > Головные устройства > Магнитола JVC KD-AVX2
JVC AVX2 руководство, отзывы и характеристики
| Руководство пользователя: | Формат: | Размер: | Язык: | Скачать: |
| Магнитола JVC KD-AVX2 | 5.10 MB | English Русский |
 |
Автомагнитола JVC KD-AVX2 характеристики
| Тип устройства | Дисковая |
| Монтажный размер | 1DIN |
| Количество каналов | 4 канала |
| Мощность на канал | 50 |
| Отношение сигнал/шум | 95 |
| Разрядность ЦАП | 24 бит |
| Диапазон частот | 40 Гц — 20 кГц |
| Дисплей | активная TFT матрица |
| Цветной дисплей | да |
| Тип носителей | CD-R CD-RW DVD |
| Формат носителей | MP3 / +WMA / CD-Audio DVD |
| Съёмная панель | + / цвет — чёрный / |
| Диапазоны | FM /AМ |
| RDS | да |
| Радиотекст | да |
| Количество полос эквалайзера | 7 |
| Регулировка басов | нет |
| Регулировка высоких частот | нет |
| Функция усиления баса | нет |
| Пульт ДУ | да |
| Управление CD-чейнджером | да |
| Управление ТВ-тюнером | да |
| Приглушение звука | да |
| Линейный выход | + / 2 выхода / |
| Подключение АС | RCA |
| Линейный вход | да |
| Линейный вход AV | да |
Автомагнитола JVC KD-AVX2 отзывы
Преимущества:
- устройство работает отлично;
- стильно смотрится в автомобиле;
- очень мощный и чистый звук;
- много настроек звука;
- удобное интеллектуальное управление;
- хорошо читает разные форматы;
- отлично и быстро считывает диски;
- достойное видео;
- понимает русские буквы;
- очень удобный пульт дистанционного управления;
- удобная регулировка звука;
- есть возможность подключения камеры и регистратора;
- яркий, хороший экран;
- много функций и настроек;
- красивый внешний вид;
- удобно выбирать треки с диска;
- простая, надежная и качественная техника.
Недостатки:
- нет usb входа;
- нет Blouetooth.
Магнитола JVC EXAD KD-AVX2 отзывы составлены на базе 7 отзывов пользователей в Яндекс Маркет.
JVC KD-AVX2 руководство пользователя. Как скачать руководство по эксплуатации?
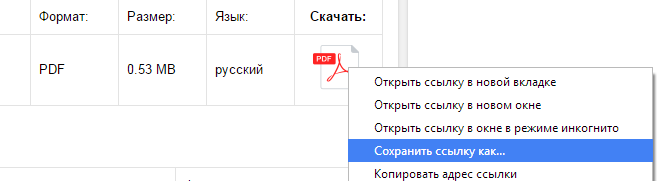
Руководство по эксплуатации к EXAD KD-AVX2 легко скачивается, в начале страницы перед Вами будет таблица:

Нажимайте правой кнопкой на изображении PDF, после чего ищите в списке «Сохранить как», далее сохраняете на Вашем ПК автомагнитола JVC KD-AVX2 инструкция на русском языке, например:
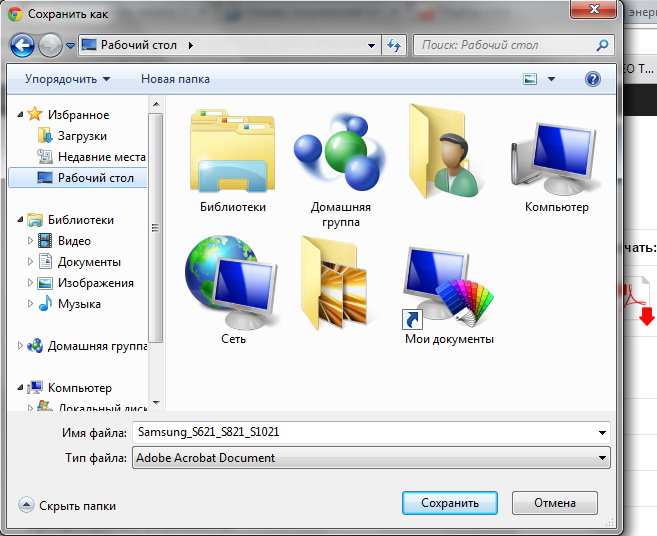
И последний шаг, выбираете папку, в которой желаете сохранить магнитола JVC KD-AVX2 инструкция на русском языке, например на рабочем столе:
Надеемся, у Вас получилось найти инструкция по эксплуатации автомагнитолы JVC, скачать и успешно ею воспользоваться. Желаем Вам приятного пользования Вашим устройством от компании JVC.
-
Contents
-
Table of Contents
-
Troubleshooting
-
Bookmarks
Quick Links
DVD/CD RECEIVER
RECEPTOR CON DVD/CD
RÉCEPTEUR DVD/CD
For canceling the display demonstration, see page 10.
Para cancelar la demonstración en pantalla, consulte la página 10.
Pour annuler la démonstration des affichages, référez-vous à la page 10.
For installation and connections, refer to the separate manual.
Para la instalación y las conexiones, refiérase al manual separado.
Pour l’installation et les raccordements, se référer au manuel séparé.
EXTRA MONITOR CONTROL
MODE
ASPECT
MENU
DVD / RECEIVER CONTROL
ZOOM
ATT
+10
SOURCE
–100
+100
BAND
–10
DIRECT
DUAL
ASPECT
OSD
1
2
3
VOL
DISC+
TOP M
MENU
2nd VOL
4
5
6
ENTER
7
8
9
DISC–
SETUP
RETURN
0
SURROUND
SHIFT
RM-RK240
INSTRUCTIONS
MANUAL DE INSTRUCCIONES
MANUEL D’INSTRUCTIONS
KD-AVX2
SRC
D
DISP
For customer Use:
Enter below the Model
No. and Serial No. which
are located on the top or
bottom of the cabinet.
Retain this information for
future reference.
Model No.
Serial No.
KD-AVX2
KD-AVX2
KD-AVX2
ASPECT
MENU
A
7 / BACK
BAND
ENT
LVT1454-001A
[J]
Chapters
Troubleshooting
Summary of Contents for JVC KD-AVX2
Страницы и текст этой инструкции
 Инструкция автомагнитолы JVC KD-AVX2
 Информация отображена на картинке
 Информация отображена на картинке
 Информация отображена на картинке
 Информация отображена на картинке
Как использовать наш сайт инструкций OnlineManuals.ru
Наша цель состоит в том, чтобы предоставить вам быстрый доступ к содержанию инструкции для автомагнитолы JVC KD-AVX2.
С помощью онлайн просмотра, Вы можете быстро просмотреть содержимое инструкции и найти решение проблемы с автомагнитолы JVC KD-AVX2.
Для Вашего удобства
Если листать руководство пользователя автомагнитолы JVC KD-AVX2 прямо на сайте, не очень удобно для Вас, есть два возможных решения:
• Просмотр в полноэкранном режиме — легко просмотреть руководство пользователя (без загрузки его на свой компьютер), Вы можете использовать режим полноэкранного просмотра.
Для просмотра инструкции пользователя автомагнитолы JVC KD-AVX2 на полном экране, используйте кнопку «Открыть в Pdf-viewer».
• Загрузка на компьютер — Вы можете также скачать Инструкция автомагнитолы JVC KD-AVX2 на свой компьютер и сохранить его в файлах.
Многие люди предпочитают читать документы не на экране, а в печатной версии.
Возможность печати руководства пользователя также была предусмотрена на нашем сайте,
и вы можете использовать ее, нажав на иконку «печать» в Pdf-viewer.
Нет необходимости печатать все руководство автомагнитолы JVC KD-AVX2, можно выбрать только нужные страницы инструкции.
Магнитолы JVC KD-AVX2 — инструкция пользователя по применению, эксплуатации и установке на русском языке. Мы надеемся, она поможет вам решить возникшие у вас вопросы при эксплуатации техники.
Вы можете скачать инструкцию к JVC KD-AVX2 по ссылке ниже, если не хотите ждать загрузки. Если остались вопросы, задайте их в комментариях после инструкции.
«Загружаем инструкцию», означает, что нужно подождать пока файл загрузится и можно будет его читать онлайн. Некоторые инструкции очень большие и время их появления зависит от вашей скорости интернета.
Остались вопросы?
Не нашли свой ответ в руководстве или возникли другие проблемы? Задайте свой вопрос в форме ниже с подробным описанием вашей ситуации, чтобы другие люди и специалисты смогли дать на него ответ. Если вы знаете как решить проблему другого человека, пожалуйста, подскажите ему

Часто задаваемые вопросы

Как посмотреть инструкцию к JVC KD-AVX2?
Необходимо подождать полной загрузки инструкции в сером окне на данной странице или скачать кликнув по специальной кнопке.
Руководство на русском языке?
Все наши руководства представлены на русском языке или схематично, поэтому вы без труда сможете разобраться с вашей моделью
Как можно распечатать инструкцию?
Скачайте ее по специальной кнопке над формой чтения на ваше устройства и отправьте на печать.