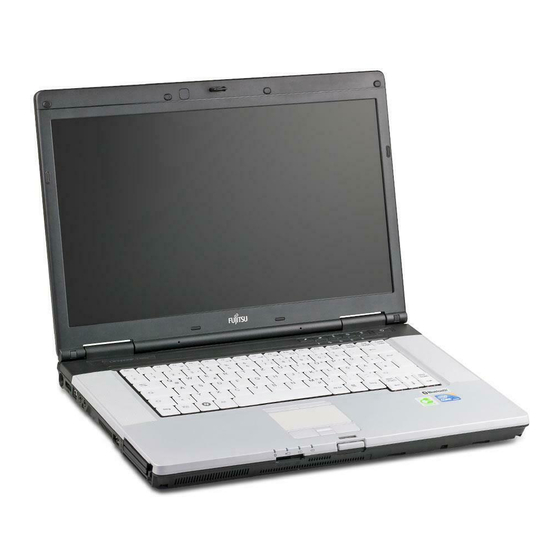
инструкцияFujitsu Lifebook E780

User’s Guide
Learn how to use your Fujitsu
LifeBook E780 notebook
Guide d’utilisation
Découvrez comment utiliser
votre ordinateur portable
Fujitsu LifeBook E780
Посмотреть инструкция для Fujitsu Lifebook E780 бесплатно. Руководство относится к категории Ноутбуки, 8 человек(а) дали ему среднюю оценку 8.6. Руководство доступно на следующих языках: английский. У вас есть вопрос о Fujitsu Lifebook E780 или вам нужна помощь? Задайте свой вопрос здесь
- LifeBook E780 User Guide
Главная
| Fujitsu | |
| Lifebook E780 | VFY:E7800MF011FR | |
| Ноутбук | |
| 4049699259760 | |
| английский | |
| Руководство пользователя (PDF) |
Процессор
| Семейство процессоров | Intel® Core™ i3 |
| Модель процессора | i3-330M |
| Частота шины процессора | — MHz |
| Чипсет материнской платы | Intel® QM57 Express |
| Скорость передачи данных системной шины | 2.5 GT/s |
| Тактовая частота процессора | 2.13 GHz |
| Тип кэша процессора | Smart Cache |
| Кеш-память процессора | 3 MB |
| Сокет процессора | BGA 1288 |
| Количество ядер процессора | 2 |
| Потоки процессора | 4 |
| Технологический процесс | 32 nm |
| Операционные режимы процессора | 64-разрядный |
| Пошаговое выполнение | C2 |
| Тип шины | DMI |
| Кодовое название процессора | Arrandale |
| ECC-память поддерживается процессором | Нет |
| TDP | 35 W |
| Серии процессора | Intel Core i3-300 Mobile Series |
| Паритет FSB | Нет |
| Максимальное количество полос PCI Express | 16 |
| Версия PCI Express слотов | 2.0 |
| Конфигурации последовательной шины периферии PCI Express | 1×16 |
| Т-соединение | 105 °C |
| Количество Транзисторов для Обработки | 382 M |
| Соотношение шины/ядра | 16 |
| Размер Обработки Кристаллов | 81 mm² |
| Производитель процессора | Intel |
| Поколение процессора | Процессор Intel® Core™ i3 3-го поколения |
Устройства хранения данных
| Полный объем хранения | 320 GB |
| Интерфейс жесткого диска | SATA |
| Скорость вращения шпинделя | 5400 RPM |
| Встроенный кардридер | Да |
| Тип оптического привода | DVD Super Multi |
Экран
| Диагональ экрана | 15.6 « |
| Разрешение экрана | 1366 x 768 пикселей |
| Поверхность дисплея | Матовый |
| LED подсветка | Да |
| Собственное форматное соотношение | 16:9 |
Память
| Оперативная память | 2 GB |
| Тип внутренней памяти | DDR3-SDRAM |
| Конфигурация памяти (слоты х емкость) | 1 x 2 GB |
| Максимальная внутренняя память | 8 GB |
| Тактовая частота памяти | 1066 MHz |
Аудио
Камера
| Разрешение фронтальной камеры (числовое) | 1.3 MP |
Прочие свойства
| Внутренний модем | Да |
| Беспроводная технология | 802.11 b/g/n |
| Скорость модема | 56 кбит/с |
| Тип модема | V.92 MDC1.5 |
| Функция Wake-on-LAN | Да |
| Соответствие промышленным стандартам | WMI, PXE, BootP |
| Сетевой адаптер в комплекте | Да |
| ИК-порт | Нет |
| Порт входа TV | Нет |
| Пароль для защиты жесткого диска | Да |
| Тип | ПК |
Сеть
| Bluetooth | Да |
| Версия Bluetooth | 2.1+EDR |
| Характеристики сети | Gigabit Ethernet, WLAN |
программное обеспечение
| Установленная операционная система | Windows 7 Professional |
| Поставляемое ПО | Adobe Acrobat ReadernApplication PanelnDisplay ManagernShockSensor UtilitynPower Saving UtilitynWireless Selector UtilitynEasyGuidenNero Essentials SnNorton Internet Security |
| Альтернативная операционная система в комплекте | Windows XP Professional |
| ПО с ограниченным сроком использования | Symantec Norton Internet Security |
Батарея
| Емкость батареи | 5200 mAh |
| Время работы батареи (макс) | 7 h |
| Количество элементов аккумулятора | 6 |
Порты и интерфейсы
| ExpressCard слот | Да |
| Количество портов VGA (D-Sub) | 1 |
| Количество последовательных портов | 1 |
| Количество параллельных портов | 0 |
| Количество портов PS/2 | 0 |
| Количество портов Ethernet LAN ( RJ-45) | 1 |
| Порты FireWire | 1 |
| Выход TV | Нет |
| Количество портов USB 2.0 | 4 |
| Порты модема (RJ-11) | 1 |
| Линейные выходы наушников | 1 |
| Линейный вход микрофона | Да |
| Порт выхода S/PDIF | Нет |
| Порт DVI | Нет |
| Количество слотов CardBus PCMCIA | 1 |
| Слот SmartCard | Да |
| Тип слота CardBus PCMCIA | Тип II |
| Разъем докстанции | Да |
| Количество HDMI портов | 0 |
| Количество портов eSATA | 1 |
| Тип зарядного порта | Гнездо для постоянного тока |
Безопасность
| Слот кабельной блокировки | Да |
| Сканер отпечатков пальцев | Да |
| Тип защиты паролем | BIOS |
| Тип слота кабельной блокировки | Kensington |
Вес и размеры
| Вес | 2700 g |
| Глубина | 255 mm |
| Высота | 36 mm |
| Ширина | 372 mm |
Клавиатура
| Нажатие клавиши клавиатуры | 2.7 mm |
| Размер клавиш клавиатуры | 19 mm |
| Число клавиш клавиатуры | 86 |
| Манипулятор | Cенсорная панель |
Условия эксплуатации
| Диапазон относительной влажности при эксплуатации | 20 — 85 % |
| Диапазон температур при эксплуатации | 5 — 35 °C |
Энергопитание
| Время работы с дополнительной второй батареей | 11 h |
| Рассеиваемая мощность адаптера переменного тока | 80 W |
| Выходной ток адаптера | 4.22 A |
| Выходное напряжение адаптера переменного тока | 19 V |
| Входное напряжение адаптера переменного тока | 100 — 240 V |
Графический адаптер
| Модель дискретного графического адаптера | Intel® HD Graphics |
| Модель встроенного графического адаптера | Intel® HD Graphics |
| Базовая частота встроенного графического адаптера | 500 MHz |
| Динамическая частота встроенного графического адаптера (макс.) | 667 MHz |
| Встроенный графический адаптер | Да |
| Дискретный графическоо адаптер | Да |
| Ряд встроенных графических адаптеров | Intel® HD Graphics |
Особые свойства процессора
| Технология Intel My WiFi | Нет |
| Технология Intel Anti-Theft | Нет |
| Технология Intel Hyper-Threading | Да |
| Технология Intel Turbo Boost | Нет |
| Технология Intel Wireless Display (WiDi) | Нет |
| Технология Enhanced Intel SpeedStep | Да |
| Intel Clear Video HD Technology | Да |
| Технология Intel Clear Video | Да |
| Intel® InTru™ 3D Technology | Нет |
| Intel® Insider™ | Нет |
| Intel® Quick Sync Video Technology | Нет |
| Intel Flex Memory Access | Да |
| Intel Smart Cache | Да |
| Intel AES New Instructions | Нет |
| Intel Trusted Execution Technology | Нет |
| Intel Enhanced Halt State | Да |
| Intel VT-x with Extended Page Tables (EPT) | Да |
| Intel Demand Based Switching | Нет |
| Технология Intel® Clear Video для мобильных интернет-устройств (Intel CVT for MID) | Да |
| Intel® 64 | Да |
| Execute Disable Bit | Да |
| технологии термомониторинга | Да |
| Размер корпуса процессора | rPGA 37.5x 37.5, BGA 34×28 mm |
| Поддерживаемые наборы команд | SSE4.1, SSE4.2 |
| Код процессора | SLBNF |
| Расширение Физических Адресов (PAE) | Да |
| Расширение Физических Адресов (PAE) | 36 бит |
| Конфигурация Центрального Процессора (макс.) | 1 |
| Доступные встроенные опции | Нет |
| литография Graphics & IMC | 45 nm |
| Технология Intel Virtualization for Directed I/O (VT-d) | Нет |
| Технология Визуализации (VT-x) Intel | Да |
| Бесконфликтный процессор | Нет |
| Intel Dual Display Capable Technology | Да |
| Intel FDI Technology | Да |
| Intel Rapid Storage Technology | Нет |
| Intel Fast Memory Access | Да |
| ID ARK процессора | 47663 |
| Состояние бездействия | Да |
показать больше
Не можете найти ответ на свой вопрос в руководстве? Вы можете найти ответ на свой вопрос ниже, в разделе часто задаваемых вопросов о Fujitsu Lifebook E780.
Не нашли свой вопрос? Задайте свой вопрос здесь
-
Contents
-
Table of Contents
-
Troubleshooting
-
Bookmarks
Quick Links
System
Operating Manual
LIFEBOOK E780
Related Manuals for Fujitsu LIFEBOOK E780
Summary of Contents for Fujitsu LIFEBOOK E780
-
Page 1
System Operating Manual LIFEBOOK E780… -
Page 2
Are there ..any technical questions or problems? Please contact: • our Hotline/Service Desk (see Service Desk list or visit: «http://ts.fujitsu.com/support/servicedesk.html») • your sales partner • your sales office Latest information about our products, useful tips, updates etc. is available on our website: «http://ts.fujitsu.com»… -
Page 4
Brand names may be protected trademarks of the respective manufacturer and/or protected by copyright. Their use by third parties for their own purposes could represent a violation of the rights of the owner. For more information, see «http://ts.fujitsu.com/terms_of_use.html» Order No. Fujitsu Technology Solutions GmbH: A26391-K310-Z200-1-7619, edition 1… -
Page 5
LIFEBOOK E780 Operating Manual Innovative technology Ports and operating elements Important notes First-time setup of your device Working with the notebook Security functions Connecting external devices Removing and installing components during servicing Settings in BIOS Setup Utility Troubleshooting and tips Technical data Manufacturer’s notes… -
Page 6
All other trademarks referenced are trademarks or registered trademarks of their respective owners, whose protected rights are acknowledged. Copyright © Fujitsu Technology Solutions GmbH 2009 All rights reserved, including rights of translation, reproduction by printing, copying or similar methods, in part or in whole. -
Page 7: Table Of Contents
Using the power-management features ……….. 40 Fujitsu Technology Solutions…
-
Page 8
Connecting FireWire devices …………. 69 Fujitsu Technology Solutions… -
Page 9
100W mains adapter …………..91 Fujitsu Technology Solutions… -
Page 10
Index …………….. . 99 Fujitsu Technology Solutions… -
Page 11: Innovative Technology
The Windows drivers for your device can be found on our Internet website. The factory installation of your device does not support any other operating system. Fujitsu Technology Solutions accepts no liability whatsoever if any other operating system is used.
-
Page 12: Notational Conventions
Names of CDs, DVDs and titles or designations of other materials, e.g.: «CD/DVD Drivers & Utilities» or «Safety» Manual indicates a key on the keyboard, e.g: indicates terms and texts that are emphasised or highlighted, e.g.: Do This font not switch off the device Fujitsu Technology Solutions…
-
Page 13: Ports And Operating Elements
9 = Fingerprint sensor (* optional) 3 = TouchStick (* optional) 10 = Touchpad buttons 4 = Microphones 11 = Memory card slot 5 = Keyboard 12 = Status indicators 6 = Application buttons 13 = Touchpad 7 = ON/OFF switch Fujitsu Technology Solutions…
-
Page 14
9 = SmartCard reader 5 = Headphones port Right side 1 = ON/OFF switch for radio components 4 = Module bay with optical drive 2 = USB ports 5 = Eject lever for module 3 = Kensington Lock Fujitsu Technology Solutions… -
Page 15
3 = VGA monitor port 6 = DisplayPort Underside 1 = Hard disk service compartment 4 = Memory service compartment 2 = Battery lock 5 = Port for Port Replicator 3 = Rechargeable battery 6 = Ventilation slot cover Fujitsu Technology Solutions… -
Page 16: Important Notes
(e.g. petrol station, paintshops), as the transmitted radio waves can cause an explosion or a fire. For information on how to switch radio components on and off, see chapter «Switching the wireless components on and off», Page Fujitsu Technology Solutions…
-
Page 17: Energy Saving
► Enquire with the corresponding government office of the country you will be travelling in as to whether you may operate the radio component integrated in your notebook there (see also «CE marking», Page 93). Fujitsu Technology Solutions…
-
Page 18: Notebook: Transporting
The surface can be cleaned with a dry cloth. If particularly dirty, use a cloth which has been moistened in mild domestic detergent and then carefully wrung out. To clean the keyboard and the touchpad, if available, you can use disinfectant wipes. Ensure that no liquid enters the device. Fujitsu Technology Solutions…
-
Page 19: First-Time Setup Of Your Device
► Unpack all the individual parts. Packaging Transport ► Check your device for any visible damage which may have occurred during transportation. You may need the packaging in the future, if you need to transport your device. Fujitsu Technology Solutions…
-
Page 20: Selecting A Location
► Connect the power cable (1) to the mains adapter. ► Plug the mains cable (2) into a mains outlet. ► Connect the mains adapter cable (3) to the DC jack (DC IN) of the device. Fujitsu Technology Solutions…
-
Page 21: Switching On The Device For The First Time
► During installation, follow the instructions on screen. If a Windows operating system is installed on your device, you will find more information on the system and drivers, help programmes, updates, manuals etc. on the device or on the Internet at «http://ts.fujitsu.com/support». Fujitsu Technology Solutions…
-
Page 22: Working With The Notebook
The indicator is illuminated: The notebook is switched on. • The indicator flashes (1 second on/1 second off): The notebook is in power saving mode. • The indicator is not illuminated: The notebook is switched off or is in Save-to-Disk mode. Fujitsu Technology Solutions…
-
Page 23
0% and 12% of maximum capacity. • The indicator flashes red (1 second on/1 second off). Malfunction. • The indicator is not illuminated: The first battery is not installed or is not charged. Fujitsu Technology Solutions… -
Page 24
Scroll Lock indicator Indicator ScrollLock Indicator ScrollLock The indicator is illuminated: The key combination has been pressed. The effect that this key has varies between applications. Fujitsu Technology Solutions… -
Page 25: Switching On The Notebook
(e.g. in Windows via the Start menu by clicking Start Symbol – Shut Down – OK). Notebook ► If the notebook is not switched off automatically, press the ON/OFF switch for approx. five seconds. ► Close the LCD screen. Fujitsu Technology Solutions…
-
Page 26: Keyboard
The illustrations shown below may differ from your actual device. Alt Gr Description Backspace key The Backspace key deletes the character to the left of the cursor. Backspace Backspace Tab key The Tab key moves the cursor to the next tab stop. Tabkey Fujitsu Technology Solutions…
-
Page 27
The cursor keys move the cursor in the direction of the arrow, i.e. up, down, left, or right. Cursor keys Cursor controlkeys Start key The Start key opens the Windows Start menu. Startkey Menu key The Menu key invokes the menu for the marked item. Fujitsu Technology Solutions… -
Page 28: Virtual Numeric Keypad
► Press and hold the first key in the combination. ► While holding the first key down, press the other key or keys in the combination. The key combination Ctrl Alt Gr Ctrl can be used on external keyboards that do not not feature a key. Fujitsu Technology Solutions…
-
Page 29
If an external monitor is connected, the monitor on which the output is to be displayed can be selected with this key combination. You can opt to use: • just the notebook’s LCD screen • just the external monitor • both the LCD screen and the external monitor Fujitsu Technology Solutions… -
Page 30: Country And Keyboard Settings
Country and keyboard settings If you want to change the country and keyboard settings, proceed as follows: ► Enter the settings by clicking Start – (Settings) – Control Panel – Time, Regional and Language Options. Fujitsu Technology Solutions…
-
Page 31: Application Keys
With the I key, you can obtain further information about your notebook. Wireless Components key This application key is used to start the WirelessSelector software. The wireless components that have been activated in the BIOS Setup can be switched on and off individually. Fujitsu Technology Solutions…
-
Page 32: Programming The Application Keys
Touchpad ► Press down gently with your finger on the TouchStick. If you want to move the pointer to the left for example, press down gently on the left side of the TouchStick. The pointer will move. Fujitsu Technology Solutions…
-
Page 33: Selecting An Item
► Select the desired object and hold down the left TouchStick/touchpad button. ► Drag the object to the desired position. ► Lift your finger from the touchpad. ► Lift your finger from the TouchStick. The item will be moved. Fujitsu Technology Solutions…
-
Page 34: Lcd Screen
LCDscreen Notes High-quality TFT displays are installed in notebooks from Fujitsu Technology Solutions GmbH. For technical reasons, TFT monitors are manufactured for a specific resolution. An optimal, clear picture can only be ensured with the correct resolution intended for the relevant TFT monitor. A monitor resolution which differs from the specification can result in an unclear picture.
-
Page 35: Webcam
Further information on use of the webcam and additional settings can be found in the help function of the program which uses the webcam. If you wish to carry out a function test with your webcam, you can use the corresponding test software available at «http://ts.fujitsu.com/support/». Fujitsu Technology Solutions…
-
Page 36: Rechargeable Battery
If you do not use the batteries for long periods, remove them from the notebook. Never store the batteries in the device. Removing and installing the battery Only use rechargeable batteries approved by Fujitsu Technology Solutions for your notebook. Never use force when fitting or removing a battery.
-
Page 37: Removing A Battery
Working with the notebook Removing a battery ► Prepare for removal, see chapter «Preparing to remove components», Page ► Press the two unlocking levers (1). ► Remove the battery from the battery compartment (2). Fujitsu Technology Solutions…
-
Page 38: Module
To replace a module, simply click on the corresponding icon in the task bar and then on Exit or Select — Exit. The module can now be removed without any further actions being necessary. Fujitsu Technology Solutions…
-
Page 39: Removing A Module
Working with the notebook Removing a module Module Drive WeightSaver ► Pull the unlocking lever in the direction of the arrow (1). ► Now pull the module out of the module bay (2). Fujitsu Technology Solutions…
-
Page 40: Installing A Module
Avoid storing a data carrier in areas subject to high temperatures or humidity. You may use both 8-cm and 12-cm data carriers in the optical drive. When using a data carrier of lesser quality, vibrations and reading errors may occur. Fujitsu Technology Solutions…
-
Page 41: Cd/Dvd Indicator
► Place the data carrier in the drive tray with the printed side facing upwards. ► Remove a data carrier that has been inserted. ► Push in the drive tray until you feel it lock into place. Fujitsu Technology Solutions…
-
Page 42: Manual Removal (Emergency Removal)
Do not use any cleaning liquids! Ensure that no liquid enters the device. To avoid overheating of the device, do not remove the ventilation slot cover when the device is switched on. ► Prepare for removal, see chapter «Preparing to remove components», Page Fujitsu Technology Solutions…
-
Page 43
► Clean the dust chamber with a dry brush. ► Insert the ventilation slot cover into the slot (1) at an angle as shown, and ensure that you feel it click into place. ► Complete the removal, see chapter «Finishing component removal», Page Fujitsu Technology Solutions… -
Page 44: Using The Power-Management Features
If you do not intend to use your notebook for a long period of time: ► Exit power saving mode if necessary via the mouse or keyboard or by switching on the notebook. ► Close all opened programs and completely shut down the notebook. Fujitsu Technology Solutions…
-
Page 45: Memory Cards
The label should be facing upward. Do not apply excessive force, as otherwise the delicate contact surfaces could be damaged. Memory card Depending on the particular type used, the memory card may protrude slightly from the slot. Fujitsu Technology Solutions…
-
Page 46: Removing The Memory Card
Wait for the dialogue box which tells you that it is now safe to remove the memory card. ► On devices with card locking: Press on the storage card (1). Memory card The storage card is released and can now be removed. ► Pull the storage card out of the slot (2). Fujitsu Technology Solutions…
-
Page 47: Pc Cards And Expresscards
Do not use excessive force. Depending on the type, the card may protrude slightly from the slot. Please see the documentation relating to the card for driver installation instructions. Fujitsu Technology Solutions…
-
Page 48: Removing The Card
If you attach an external microphone, the built-in microphone is disabled. When you connect headphones or external speakers, the built-in speakers are disabled. Information on connecting headphones and a microphone can be found «Connecting external devices», Page Fujitsu Technology Solutions…
-
Page 49: Integrated 56K Modem
Multifrequency (MFC) dialling: Belgium, Denmark, Germany, Finland, France, Greece, Great Britain, Holland, Ireland, Iceland, Italy, Luxembourg, Norway, Austria, Portugal, Sweden, Switzerland and Spain. Pulse dialling: Belgium, France, Holland and Italy. Also in: Poland, Slovenia, South Africa and Hungary. Fujitsu Technology Solutions…
-
Page 50: Connecting Notebook Modem To Telephone Wall Socket
► Connect the modem cable to the modem port of the notebook (1). Modem ► Plug the modem cable (2) into the country-specific telephone adapter (3). ► Connect the modem cable to your telephone wall socket (4). Fujitsu Technology Solutions…
-
Page 51: Sim Card
► Press on the edge of the SIM card so that it jumps up slightly out of the slot. ► Pull the SIM card out of the slot in the direction of the arrow (2). ► Complete the removal, see chapter «Finishing component removal», Page Fujitsu Technology Solutions…
-
Page 52: Wireless Lan/ Bluetooth (Device-Dependent) / Umts (Device-Dependent)
Working with the notebook Wireless LAN/ Bluetooth (device-dependent) / UMTS (device-dependent) The installation of a radio components not approved by Fujitsu Technology Solutions will invalidate the certifications issued for this device. Switching the wireless components on and off Before switching on your device for the first time, the on/off switch for radio components must be in the «ON»…
-
Page 53: Setting Up Wlan Access
The optional UMTS module is ready for use immediately. If you have not ordered a UMTS module, you can purchase the accessories for UMTS reception from specialised dealers or from your Fujitsu Technology Solutions dealer. You will find information on establishing the connection with the UMTS network in the documentation for the hardware used.
-
Page 54: Your Port Replicator (Optional)
6 = VGA monitor port of the notebook 7 = DVI monitor port 16 = ON/OFF switch 8 = DisplayPort 17 = Unlocking lever 9 = e-SATA port 10 = USB ports Fujitsu Technology Solutions…
-
Page 55: Connecting The Notebook To The Port Replicator
► Position the notebook so that it is in line with the back edge and the positioning aid of the Port Replicator. ► Push the centre of the notebook in the direction of the arrow (2) onto the Port Replicator until it is felt to engage. Fujitsu Technology Solutions…
-
Page 56: Connecting The Mains Adapter To The Port Replicator
If the notebook cannot be shut down properly, press the ON/OFF button on the Port Replicator for approx. four seconds. The notebook will switch off. Any unsaved data may however be lost. Fujitsu Technology Solutions…
-
Page 57: Disconnecting The Notebook From The Port Replicator
► Switch the notebook off. ► Pull the unlocking lever in the direction of the arrow (1), until you hear the notebook unlatch. ► Lift off the notebook (2). Fujitsu Technology Solutions…
-
Page 58: Security Functions
The fingerprint sensor can record an image of a fingerprint. With additional fingerprint software, this image can be processed and used instead of a password. ► You must install the fingerprint software in order to be able to use the fingerprint sensor (1). Fujitsu Technology Solutions…
-
Page 59: Using A Kensington Lock
Utility, while the user password only provides some of the functions. You can only set a user password if a supervisor password has already been assigned. Please refer to the «»Settings in BIOS Setup Utility», Page 78 section for a description of how to call up and operate the BIOS Setup Utility. Fujitsu Technology Solutions…
-
Page 60: Password Protection For Booting Of The Operating System
Password protection for booting of the operating system With the supervisor password you have set in the BIOS Setup Utility (see section «Setting supervisor and user password», Page 56), you can also prevent booting of the operating system. Operating system Fujitsu Technology Solutions…
-
Page 61: Password Protection For The Hard Disk
► From the Exit menu, choose the option Exit Saving Changes. ► Press the Enter key and select Yes. The notebook reboots and your hard disk is now protected with a password. The system will ask you to enter the password when the notebook is restarted again. Fujitsu Technology Solutions…
-
Page 62: Deactivating Hard Disk Protection
If you do not want to change any other settings you can exit the BIOS Setup. ► From the Exit menu, choose the option Exit Saving Changes. ► Press the Enter key and select Yes. The notebook will restart and the settings will be adopted. Fujitsu Technology Solutions…
-
Page 63: Owner Information (Device-Dependent)
► Select Enabled to activate the Virus Warning function. ► From the Exit menu, choose the option Exit Saving Changes. ► Press the Enter key and select Yes. The notebook will restart and the settings will be adopted. Fujitsu Technology Solutions…
-
Page 64: Smartcard Reader
In order to be able to take advantage of all the security features of your notebook, you will need a CardOS SmartCard from Fujitsu Technology Solutions. The SmartCard can only be used with a PIN, offering maximum protection even if you lose the SmartCard.
-
Page 65: Smartcard As Software Protection (Smartcase ™ Logon+)
► Pull the SmartCard out of the notebook during your work session. A window appears stating that the system is locked. ► When you want to continue with your work, insert the SmartCard and enter your PIN. You will automatically return to your opened documents. Fujitsu Technology Solutions…
-
Page 66: Trusted Platform Module (Tpm) (Device-Dependent)
Smart Security API 4.1 is middleware which supports the entire Security API range of mobile and stationary clients from Fujitsu Technology Solutions. Independent of the TPM hardware, it is needed by everyone who uses a PKI Smart Security environment for identification purposes.
-
Page 67: Enabling Tpm
► Mark the TPM Security Chip Setting field and press the Enter key. ► Select Disabled to deactivate the TPM. ► From the Exit menu, choose the option Exit Saving Changes. ► Press the Enter key and select Yes. Your notebook will now restart and TPM will be disabled. Fujitsu Technology Solutions…
-
Page 68: Connecting External Devices
Disconnecting devices from the notebook 1. Turn off your notebook and all external devices. 2. Unplug your notebook and all devices from the mains sockets. 3. Disconnect the cables for your external devices following the instructions. Devices Peripheraldevices Fujitsu Technology Solutions…
-
Page 69: Connecting An External Monitor
«Key combinations», Page You can display the same picture on the external monitor and the notebook LCD monitor simultaneously. If you wish to operate the monitor via a DVI port, use the optional Port Replicator available for your notebook. Fujitsu Technology Solutions…
-
Page 70: Connecting External Devices To The Parallel Or Serial Port
The devices connected to the parallel or serial port require drivers. Your operating system already includes many drivers. If the required drive is missing, install it. Current drivers are usually available on the Internet or will be supplied on a data medium. Fujitsu Technology Solutions…
-
Page 71: Connecting Usb Devices
Additional information can be found in the documentation for the USB devices. ► Connect the data cable to the external device. ► Connect the data cable to a USB port of the notebook. Device drivers USB devices will be automatically recognised and installed by your operating system. Fujitsu Technology Solutions…
-
Page 72: Connecting An External Sata Hard Disk (Esata)
► Left-click on the symbol to remove hardware safely. ► Select the device which you want to shut down and remove. ► Press the «Enter» key. Wait for the dialogue box which tells you that it is now safe to remove the device. Fujitsu Technology Solutions…
-
Page 73: Connecting Firewire Devices
The microphone port/Line In allows you to connect an external microphone, a MiniDisc player, MP3 player, CD player or a tape deck to your notebook. ► Connect the audio cable to the external device. ► Connect the audio cable to the microphone port/Line In of the notebook. Fujitsu Technology Solutions…
-
Page 74: Headphone Port
If you purchase a cable from a retailer, please note the following information: The headphone port on your notebook is a «3.5 mm jack socket». If you want to connect headphones or a speaker you will need a «3.5 mm jack plug». Fujitsu Technology Solutions…
-
Page 75: Removing And Installing Components During Servicing
The equipment and tools you use must be free of static charges. • Remove the power plug from the mains supply before inserting or removing boards containing ESDs. • Always hold boards with ESDs by their edges. • Never touch pins or conductors on boards fitted with ESDs. Fujitsu Technology Solutions…
-
Page 76: Preparing To Remove Components
Otherwise, there is a risk of suffering burns! As some components are exposed that are sensitive to static electricity, please take note of chapter «Notes on installing and removing boards and components», Page Fujitsu Technology Solutions…
-
Page 77: Removing A Cover
Removing memory modules ► Carefully push the two mounting clips outwards (1). Memory expansion Memory module The memory module snaps upwards (2). ► Pull the memory module out of its slot in the direction of the arrow (3). Fujitsu Technology Solutions…
-
Page 78: Installing A Memory Module
If you remove more than one component at the same time, keep the screws for the individual components separate from each other and make sure that you use the correct screws. If you install the wrong screws, components may be damaged. ► Tighten the screw (2). Fujitsu Technology Solutions…
-
Page 79: Removing And Installing The Hard Disk
Keep the screws in a safe place. If you are removing more than one component at the same time, store the screws for the individual components separately from each other. If you install the wrong screws, components may be damaged. ► Lift the cover off the notebook (2). Fujitsu Technology Solutions…
-
Page 80: Removing A Hard Disk
► Remove the screw (1). ► Lift the hard disk out of the hard disk compartment (2). Installing a hard disk ► Place the hard disk into the hard disk compartment (1). ► Tighten the screw (2). Fujitsu Technology Solutions…
-
Page 81: Attaching The Cover
► Install the battery again (see «Installing a battery», Page 34). ► Turn the notebook the right way up again and place it on a flat surface. ► Reconnect the cables that you disconnected before. Fujitsu Technology Solutions…
-
Page 82: Settings In Bios Setup Utility
► Select the option you want to change with the cursor keys ↑ ↓ ► Press the Enter key. ► Press the key to exit the selected menu. ► For future reference, make a note of the changes you have made (for example, in this manual). Fujitsu Technology Solutions…
-
Page 83: Exiting Bios Setup Utility
► If you want to exit BIOS Setup Utility with these settings, choose Exit Saving Changes and Yes. Save Changes and Power Off ► To save the changes and switch off your device, select Save Changes and Power Off and Yes. The changes are saved. Your device is shut down. Fujitsu Technology Solutions…
-
Page 84: Troubleshooting And Tips
PC if you are running processor-intensive gaming software, e.g. games with intensive 3D graphics. Updating your hardware with drivers which have not been approved by Fujitsu Technology Solutions may result in performance losses, data losses or malfunction of the equipment. A list of approved drivers and current BIOS versions can be downloaded from: «http://ts.fujitsu.com/support/downloads.html»…
-
Page 85: Help If Problems Occur
The SystemDiagnostics program is already installed on devices which were delivered with a Windows operating system. ► To start the SystemDiagnostics program, click on Startsymbol — Program — Fujitsu — SystemDiagnostics. ► If a problem is found during a test run, the SystemDiagnostics program outputs a code (e.g.
-
Page 86: The Notebook’s Date Or Time Is Incorrect
«Key combinations», Page The LCD screen is difficult to read LCDscreen LCDscreen Cause Troubleshooting Reflected glare ► Turn the notebook or alter the tilt of the LCD screen. ► Increase the brightness of the screen. Fujitsu Technology Solutions…
-
Page 87: The External Monitor Remains Blank
Change the following setting: ► Set the screen resolution: Set the screen resolution as described in the documentation for your operating system. ► Select monitor: Select monitor 1 or 2 as described in the documentation for your operating system. Fujitsu Technology Solutions…
-
Page 88: The Notebook Cannot Be Started
(by restarting the operating system or switching the device off and back on again). The battery is dead. ► Charge the battery. ► Insert a charged battery. ► Connect the mains adapter to the notebook. Fujitsu Technology Solutions…
-
Page 89: The Printer Does Not Print
► Further information on using the radio component can be found in the help files. Acoustic warnings Acoustic warnings Error message: Troubleshooting Cause A beep sounds every few seconds ► Charge the battery. The battery is almost flat. Fujitsu Technology Solutions…
-
Page 90: Error Messages On The Screen
Press <F1> to resume, <F2> to SETUP operating system. This error message appears if an error occurs ► Press the function key to access the during the self-test before starting the operating system. BIOS Setup. Fujitsu Technology Solutions…
-
Page 91
System battery is dead — Replace and run SETUP service centre. ► Contact your sales outlet or our customer System cache error — Cache disabled service centre. ► Contact your sales outlet or our customer System timer error service centre. Fujitsu Technology Solutions… -
Page 92: Technical Data
Technical data Technical data Notebook Technicaldata LIFEBOOK E780 LIFEBOOK E780 Device (external graphics) (internal graphics) Processor Intel Core i5, i7 Main memory Maximum 8 Gbyte DDR3 SDRAM 2 slots for 2 GByte or 4 GByte modules Possible modules • Second battery •…
-
Page 93
USB port 4 x USB 2.0 eSATA port Docking port Ambient conditions Environment class 3K2 DIN IEC 721 Mechanical class 7M2 DIN IEC 721 Temperature Operation 5 °C … 35 °C Transportation -15 °C … 60 °C Fujitsu Technology Solutions… -
Page 94: Port Replicator (Optional)
-15 °C … 60 °C Rechargeable battery You can find information on the batteries used in your device at «http://ts.fujitsu.com/support». 6-cell rechargeable 8-cell rechargeable battery battery Rated voltage 10.8 V 14.4 V Rated capacity 56 Wh 83 Wh Fujitsu Technology Solutions…
-
Page 95: Mains Adapter
An additional mains adapter or power cable can be ordered at any time. 100W mains adapter Technicaldata Rated voltage 100 V to 240 V (automatic) Max. rated current 5.27 A An additional mains adapter or power cable can be ordered at any time. Fujitsu Technology Solutions…
-
Page 96: Manufacturer’s Notes
The «Declarations of Conformity» concerning the device can be found at our Internet address: «http://ts.fujitsu.com». Fujitsu Technology Solutions hereby declares that your device is in compliance with the essential requirements and other relevant provisions of Directive 1999/5/EC. Fujitsu Technology Solutions…
-
Page 97: Ce Marking
Federal Communications Commission (FCC) of the USA. Although it is not explicitly forbidden to travel in the US trading area carrying this device, to avoid trouble at customs clearance, Fujitsu Technology Solutions GmbH recommends not to bring this device into the US trading area.
-
Page 98
Places where telephones are specifically installed to alert emergency authorities such as fire, police or medical assistance personnel. • Hospital rooms, residential health care facilities, convalescent homes and prisons. • Hotel, motel or apartment lobbies. • Stores where telephones are used by patrons to order merchandise. Fujitsu Technology Solutions… -
Page 99: Doc (Industry Canada) Notices
Repairs to telecommunication equipment should be made by a Canadian authorised maintenance facility. Any repairs or alterations not expressly approved by Fujitsu or any equipment failures may give the telecommunication company cause to request the user to disconnect the equipment from the telephone line.
-
Page 100: Fcc Regulatory Information For Notebooks With Radio Device
Les réparations de l’équipement de télécommunications doivent être effectuées par un service de maintenance agréé au Canada. Toute réparation ou modification, qui n’est pas expressément approuvée par Fujitsu, ou toute défaillance de l’équipement peut entraîner la compagnie de télécommunications à exiger que l’utilisateur déconnecte l’équipement de la ligne téléphonique.
-
Page 101
In cases in which the policy regarding use of radio devices in specific environments is not clear (e.g., airports, hospitals, chemical/oil/gas industrial plants, private buildings), obtain authorization to use these devices prior to operating the equipment. Regulatory Information/Disclaimers Fujitsu Technology Solutions… -
Page 102
(1) this device may not cause harmful interference, and (2) this device must accept any interference received, including interference that may cause undesirable operation. Modifications not expressly authorised by Fujitsu Technology Solutions may invalidate the user’s right to operate this equipment. Fujitsu Technology Solutions… -
Page 103: Index
80 CD/DVD indicator 14, 31 Error messages on the screen 80 CD/DVD: ESD 65 manual emergency removal 32 Ethernet LAN 43 CE marking 87 ExpressCard 37 Charging capacity, battery 26 External devices Cleaning 8 Connecting 60 Components Fujitsu Technology Solutions…
-
Page 104
Power-on indicator 12 Module bay 28 Scroll Lock 14 Modules 28 Inserting Monitor a data carrier 31 connecting 59 drifting display 77 remains blank 77 Monitor port Kensington MicroSaver 49 see VGA connection socket 59 Keyboard 16 cleaning 8 Fujitsu Technology Solutions… -
Page 105
PC-card, see PC card 37 Shift+Tab 20 PCMCIA, see PC card 37 Sleep mode Peripheral devices activating 19 connecting 58 Slot disconnecting 58 Memory cards 35 Port Replicator Start key 17 Connecting a notebook 45 Status indicator panel 12 Fujitsu Technology Solutions… -
Page 106
19 Removing 29 executing commands 23 Wireless LAN moving the pointer 22 Switching off module 42 selecting an item 23 Switching on module 42 TPM 56 Wireless LAN: Transport safety notes 6 Transport damage 9 Transportation 7–8 Fujitsu Technology Solutions…
- Manuals
- Brands
- Fujitsu Manuals
- Laptop
- Lifebook E780
Manuals and User Guides for Fujitsu Lifebook E780. We have 3 Fujitsu Lifebook E780 manuals available for free PDF download: User Manual, Operating Manual, Getting Started
Fujitsu Lifebook E780 User Manual (418 pages)
Fujitsu Lifebook E780: User Guide
Brand: Fujitsu
|
Category: Laptop
|
Size: 5.74 MB
Table of Contents
-
English
7
-
Recycling Your Battery
6
-
Table of Contents
7
-
Preface
14
-
About this Guide
14
-
Conventions Used in the Guide
14
-
Fujitsu Contact Information
15
-
-
-
Chapter 1 Getting to Know Your Lifebook
17
-
Overview
17
-
Locating the Controls and Connectors
18
-
Top Components
19
-
Left-Side Panel Components
21
-
Right-Side Panel Components
24
-
Back Panel Components
26
-
Bottom Components
28
-
-
Status Indicator Panel
30
-
Power Indicator
30
-
Battery Charge Indicator
31
-
Battery Level Indicators
31
-
Security Indicator
32
-
Hard Drive/Optical Drive Access Indicator
32
-
Numlk Indicator
32
-
-
Keyboard
34
-
Using the Keyboard
34
-
-
Touchpad Pointing Device
37
-
Clicking
38
-
Double-Clicking
39
-
Dragging
39
-
Touchpad Control Adjustment
39
-
Scrolling
40
-
Optional Quick Point Feature
40
-
-
Volume Control
41
-
Flexible Bay Devices
42
-
Lifebook Security/Application Panel
44
-
Setting up Your Lifebook Security Panel
44
-
Passwords
45
-
Operating Your Lifebook Security/Application Panel
46
-
Precautions
47
-
Uninstalling the Security Panel Application
48
-
Launching Applications with the Security/Application Panel
49
-
-
-
Chapter 2 Getting Started with Your Lifebook
52
-
Power Sources
52
-
Display Panel
54
-
Opening the Display Panel
54
-
Adjusting Display Panel Brightness
55
-
Using the Keyboard
55
-
Using the Power Options (Windows Vista/7)
55
-
Using the Windows Mobility Center (Windows Vista/7)
55
-
Using Power Management to Control Brightness (Windows 7)
55
-
Closing the Display Panel
56
-
-
Starting Your Lifebook Notebook
57
-
Power on
57
-
Boot Sequence
58
-
Hard Disk Drive Passwords
58
-
BIOS Setup Utility
58
-
Booting the System
60
-
Starting Windows the First Time
60
-
Registering Your Lifebook Tablet PC with Fujitsu
61
-
Installing Click Me
61
-
Fujitsu Driver Update Utility
62
-
-
Power Management
63
-
Power/Suspend/Resume Button
63
-
Sleep Mode
63
-
Hibernate Feature
64
-
Windows Power Management
65
-
Restarting the System
65
-
Powering off
66
-
-
-
Chapter 3 User-Installable Features
68
-
Lithium Ion Battery
68
-
Recharging the Batteries
69
-
Replacing the Battery
71
-
-
Optical Drive
73
-
Media Player Software
74
-
Loading Media on Your Drive
74
-
Removing Media
76
-
Emergency Optical Drive Tray Release
77
-
Using the Media Player Software
77
-
Using Media Player on Battery Power
78
-
-
Memory Stick/Secure Digital Cards
80
-
Installing Memory Stick/Sd Cards
81
-
Removing a Memory Stick/Sd Card
81
-
-
PC Cards/Expresscards
82
-
Installing PC Cards
83
-
Removing PC Cards
83
-
Installing Expresscards
84
-
Removing Expresscards
85
-
Smart Card Reader
86
-
-
Memory Upgrade Module
87
-
Installing Memory Upgrade Modules
87
-
Removing a Memory Upgrade Module
89
-
Checking the Memory Capacity
90
-
-
Device Ports
91
-
Modem (RJ-11) Telephone Jack
91
-
Internal LAN (RJ-45) Jack
92
-
E-SATA Port
93
-
Displayport
93
-
Port Replicator Connector
93
-
Serial Port
94
-
Universal Serial Bus Ports
94
-
IEEE 1394 Port
95
-
Headphone Jack
96
-
Microphone Jack
96
-
External Video Port
97
-
-
-
Chapter 4 Troubleshooting Your Lifebook
98
-
Troubleshooting
98
-
Identifying the Problem
98
-
Specific Problems
100
-
-
Audio Problems
101
-
Optical Drive Problems
101
-
Port Replicator Problems
102
-
Floppy Disk Drive Problems
102
-
Hard Drive Problems
103
-
Keyboard or Mouse Problems
103
-
Memory Problems
104
-
Modem Problems
104
-
Serial, USB Problems
104
-
Power Failures
105
-
Shutdown and Startup Problems
107
-
Video Problems
108
-
Miscellaneous Problems
110
-
Power on Self Test Messages
111
-
Modem Result Codes
115
-
-
Restoring Your Pre-Installed Software
116
-
Re-Installing Individual Drivers and Applications
116
-
Restoring the Operating System for Windows
117
-
Automatically Downloading Driver Updates
120
-
-
Care and Maintenance
122
-
Caring for Your Lifebook Notebook
122
-
Cleaning Your Lifebook Notebook
124
-
Cleaning the Dust Filter Cover
125
-
Storing Your Lifebook Notebook
126
-
Traveling with Your Lifebook Notebook
127
-
Batteries
128
-
Media Care
129
-
-
-
System Specifications
131
-
Specifications
131
-
Configuration Label
131
-
Microprocessor
132
-
Chipset
132
-
Memory
132
-
Video
132
-
Audio
133
-
Mass Storage Device Options
133
-
Modular Bay Devices
134
-
-
Features
134
-
Device Ports
135
-
Keyboard
136
-
Power
137
-
Dimensions and Weight
137
-
Environmental Requirements
137
-
Popular Accessories
138
-
Pre-Installed Software
138
-
Learning about Your Software
139
-
-
Glossary
142
-
Regulatory Information
155
-
-
Appendix A: WLAN User’s Guide
160
-
Fcc Regulatory Information
160
-
Regulatory Notes and Statements
160
-
Before Using the Optional Wireless LAN
163
-
Wireless LAN Devices Covered by this Document
163
-
Characteristics of the WLAN Device
163
-
Wireless LAN Modes Using this Device
164
-
Deactivating/Disconnecting the WLAN Device
166
-
Deactivation Using the Wireless Device On/Off Switch
167
-
Disconnection Using the Icon in the Taskbar
167
-
Activating the WLAN Device
167
-
-
Configuring the Wireless LAN
168
-
Configuring the WLAN Using Windows Vista and Windows 7
168
-
Configuring the WLAN Using Windows XP
169
-
Connection to the Network
169
-
-
Troubleshooting the WLAN
170
-
Troubleshooting
170
-
-
WLAN Specifications
172
-
Specifications
172
-
-
Using the Bluetooth Device
174
-
What Is Bluetooth
174
-
Where to Find Information about Bluetooth
174
-
-
-
Appendix B: Fingerprint Sensor Device
176
-
Introducing the Optional Fingerprint Sensor Device
176
-
Getting Started
177
-
Installing Omnipass
177
-
User Enrollment
180
-
Using Omnipass
182
-
Configuring Omnipass
188
-
Omnipass Control Center
190
-
Troubleshooting
192
-
-
Index
194
-
-
-
Français
203
-
Préface
211
-
À Propos de Ce Guide
211
-
Conventions Utilisées Dans Ce Guide
211
-
Coordonnées Pour Contacter Fujitsu
212
-
-
-
Présentation de Votre Ordinateur Lifebook
214
-
Aperçu Général
214
-
Emplacement des Commandes Et des Connecteurs
215
-
Composants Supérieurs
216
-
Composants Sur Le Côté Gauche de L’ordinateur
218
-
Composants Sur Le Côté Droit de L’ordinateur
221
-
Composants de la Face Arrière
222
-
Composants Sous L’ordinateur
225
-
-
Tableau de Voyants D’état
227
-
Voyant D’alimentation
227
-
Voyant de Charge des Batteries
228
-
Voyant de Niveau de Charge
228
-
Voyant de Sécurité
229
-
Voyant D’accès Au Disque Dur/Lecteur Optique
229
-
Voyant de Verrouillage du Pavé Numérique (Verr Num)
230
-
Voyant Verrouillage des Majuscules (Verr Maj)
230
-
Voyant de Verrouillage du Défilement (Verr Défil)
230
-
-
Clavier
231
-
Utilisation du Clavier
231
-
-
Pavé Tactile Touchpad
234
-
Cliquer
235
-
Double-Cliquer
236
-
Glisser
236
-
Réglage des Commandes du Pavé Tactile Touchpad
236
-
Défiler
237
-
Commande Quick Point en Option
237
-
-
Réglage du Volume
238
-
Périphériques Pour Le Compartiment Multifonction
239
-
Tableau de Sécurité Et D’applications Lifebook
241
-
Configuration de Votre Tableau de Sécurité Lifebook
241
-
Mots de Passe
242
-
Utilisation du Tableau de Sécurité Et D’applications de Votre Lifebook
244
-
Mises en Garde
245
-
Désinstallation de L’application Tableau de Sécurité
245
-
Lancement D’applications Avec Le Tableau de Sécurité Et D’applications
247
-
-
-
Première Mise en Marche de Votre Ordinateur Portable Lifebook
250
-
Sources D’alimentation
250
-
-
Écran
252
-
Ouverture de L’écran
252
-
Réglage de la Luminosité de L’écran
253
-
Utilisation du Clavier
253
-
Utilisation des Options D’alimentation (Windows Vista/7)
253
-
Utilisation du Centre de Mobilité Windows (Windows Vista/7)
253
-
Utilisation de la Gestion de L’alimentation Pour Contrôler la Luminosité de L’écran (Windows 7)
254
-
Fermeture de L’écran
254
-
-
Démarrage de Votre Ordinateur Portable Lifebook
255
-
Mise Sous Tension
255
-
Procédure D’amorçage
256
-
Mots de Passe D’accès Au Disque Dur
256
-
Utilitaire de Configuration du BIOS
257
-
Démarrage du Système
258
-
Premier Démarrage de Windows
258
-
Enregistrement de Votre PC Tablette Lifebook Chez Fujitsu
260
-
Installation de Click Me
260
-
Utilitaire de Mise À Jour des Pilotes Fujitsu Driver Update
261
-
-
Gestion de L’alimentation
262
-
Bouton D’alimentation/Veille/Reprise
262
-
Mode Sommeil
263
-
Fonction de Veille Prolongée
264
-
Gestion de L’alimentation Dans Windows
265
-
Redémarrage du Système
265
-
Mise Hors Tension
266
-
-
Options Installables Par L’utilisateur
268
-
Batterie Au Lithium-Ion
268
-
Procédure de Recharge des Batteries
269
-
Remplacement de la Batterie
271
-
-
Lecteur Optique
273
-
Logiciels du Lecteur Multimédia
274
-
Installation D’un Disque Dans Votre Lecteur
275
-
Retrait D’un Disque
276
-
Ouverture D’urgence du Plateau
277
-
Utilisation des Logiciels du Lecteur Multimédia
277
-
Utilisation du Lecteur Multimédia Avec Alimentation Par Batterie
279
-
-
Cartes Mémoire Memorystick/Secure Digital
281
-
Installation D’une Carte Memory Stick Ou SD
282
-
Retrait D’une Carte Memory Stick/Sd
282
-
-
Cartes PC Card/Expresscard
283
-
Installation D’une Carte PC Card
284
-
Retrait D’une Carte PC Card
284
-
Installation D’une Carte Expresscard
285
-
Retrait D’une Carte Expresscard
287
-
Lecteur de Carte Smart Card (Carte Intelligente)
288
-
-
Module de Mémoire Additionnelle
289
-
Installation des Modules de Mémoire Additionnelle
290
-
Retrait D’un Module de Mémoire Additionnelle
292
-
Vérification de la Capacité de Mémoire
293
-
-
Ports de Périphériques
294
-
Prise de Téléphone Modem (RJ-11)
294
-
Prise de Réseau Local (RJ-45) Interne
296
-
E-SATA Port
297
-
Port D’affichage
297
-
Connecteur Pour Duplicateur de Ports
297
-
Port Série
298
-
Ports USB
299
-
Port IEEE 1394
301
-
Prise D’écouteurs
302
-
Prise de Micro
302
-
Port VIDéo Externe
303
-
-
-
Dépannage de Votre Lifebook
304
-
Dépannage
304
-
Identification du Problème
304
-
Problèmes Spécifiques
306
-
Messages de L’auto-Diagnostic de Mise Sous Tension
322
-
Codes de Résultat du Modem
327
-
-
Restaurer Vos Logiciels Préinstallés
328
-
Réinstallation des Applications Et Pilotes Individuels
328
-
Restauration du Système D’exploitation Pour Les Systèmes Windows
329
-
Téléchargement Automatique des Mises À Jour de Pilotes
333
-
-
-
Chapitre 5 Entretien
335
-
Entretien de Votre Ordinateur Portable Lifebook
335
-
Nettoyage de Votre Ordinateur Portable Lifebook
337
-
Cran Acl
338
-
Nettoyage du Couvercle du Filtre Anti-Poussière
339
-
Rangement de Votre Ordinateur Portable Lifebook
340
-
Voyager Avec Votre Ordinateur Portable Lifebook
341
-
Batteries
342
-
Entretien de Votre Lecteur Multimédia
343
-
-
Spécifications Techniques
345
-
Spécifications Techniques du Système
345
-
Étiquette de Configuration
345
-
Microprocesseur
346
-
Puce
346
-
Mémoire
346
-
VIDéo
346
-
Audio
347
-
Options de Mémoire de Masse
348
-
Périphériques de Baie Modulaire
348
-
Caractéristiques Techniques
348
-
Ports de Périphériques
349
-
Clavier
350
-
Alimentation
351
-
Dimensions Et Poids
352
-
Environnement D’exploitation
352
-
Accessoires Préférés des Utilisateurs
352
-
Logiciels Préinstallés
353
-
Apprendre À Utiliser Vos Logiciels
353
-
-
Glossaire
358
-
Renseignements Sur la Réglementation
371
-
-
-
Annexe A : Guide D’utilisation de la Carte de Réseau Local Sans Fil
379
-
Avant D’utiliser la Carte Réseau Sans Fil en Option
379
-
Cartes Réseau Sans Fil Présentées Dans Ce Document
379
-
Caractéristiques de la Carte Réseau Sans Fil
379
-
Modes de Réseau Sans Fil Compatibles Avec Cette Carte
380
-
-
Désactivation/Déconnexion de la Carte Réseau Sans Fil
382
-
Désactivation Avec Le Commutateur de Dispositif Sans Fil
383
-
Désactivation Par L’ICône Dans la Zone de Notification
383
-
Activation de la Carte Réseau Sans Fil
384
-
Configuration de la Carte Réseau Sans Fil
385
-
Configuration du Réseau Local Sans Fil Avec Windows Vista Et Windows 7
385
-
Configuration du Réseau Local Sans Fil Avec Windows XP
386
-
Procédure
386
-
Connexion Au Réseau
386
-
-
Dépannage de la Carte Réseau Sans Fil
387
-
Spécifications de la Carte Réseau Sans Fil
389
-
Utilisation de Bluetooth
391
-
Présentation de Bluetooth
391
-
Sources D’informations Supplémentaires Sur Bluetooth
391
-
-
Utilisation D’un Périphérique UWB
393
-
Que Signifie L’expression « Certifié Wireless USB
393
-
Utilisation D’un Périphérique Certifié Wireless USB
393
-
-
-
Annexe B : Capteur D’empreintes Digitales
394
-
Présentation du Capteur D’empreintes Digitales Optionnel
394
-
Première Mise en Marche
395
-
Installation D’omnipass
396
-
Enregistrement des Utilisateurs
398
-
Utilisation D’omnipass
402
-
Configuration D’omnipass
408
-
Centre de Contrôle Omnipass
410
-
Dépannage
412
-
-
Index
414
-
-
Advertisement

Fujitsu Lifebook E780 Operating Manual (106 pages)
LIFEBOOK E780
Brand: Fujitsu
|
Category: Laptop
|
Size: 1.68 MB
Table of Contents
-
Table of Contents
7
-
Innovative Technology
11
-
Further Information
11
-
Notational Conventions
12
-
-
Ports and Operating Elements
13
-
Important Notes
16
-
Safety Notes
16
-
Additional Safety Notes for Devices with Radio Components
16
-
Energy Saving
17
-
Energy Saving under Windows
17
-
-
Travelling with Your Notebook
17
-
Before You Travel
17
-
Notebook: Transporting
18
-
-
Cleaning the Notebook
18
-
-
First-Time Setup of Your Device
19
-
Unpacking and Checking the Device
19
-
Selecting a Location
20
-
Mains Adapter Connecting
20
-
Switching on the Device for the First Time
21
-
-
Working with the Notebook
22
-
Status Indicators
22
-
Switching on the Notebook
25
-
Notebook: Switching off
25
-
Keyboard
26
-
Virtual Numeric Keypad
28
-
Key Combinations
28
-
Country and Keyboard Settings
30
-
-
Application Keys
31
-
Programming the Application Keys
32
-
-
Touchpad and Touchpad Buttons
32
-
Moving the Pointer
32
-
Selecting an Item
33
-
Executing Commands
33
-
Dragging Items
33
-
-
LCD Screen
34
-
Webcam
35
-
Rechargeable Battery
36
-
Charging, Caring for and Maintaining the Battery
36
-
Removing and Installing the Battery
36
-
Removing a Battery
37
-
-
Module
38
-
Removing a Module
39
-
Installing a Module
40
-
-
Optical Drive
40
-
Handling Data Carriers
40
-
CD/DVD Indicator
41
-
Inserting or Removing a Data Carrier
41
-
Manual Removal (Emergency Removal)
42
-
-
Removing and Fitting the Dust Removal Cover (Ventilation Slot Cover)
42
-
Using the Power-Management Features
44
-
Memory Cards
45
-
Supported Formats
45
-
Inserting the Memory Card
45
-
Removing the Memory Card
46
-
-
PC Cards and Expresscards
47
-
Inserting the Card
47
-
Removing the Card
48
-
-
Loudspeakers and Microphones
48
-
Integrated 56K Modem
49
-
Connecting Notebook Modem to Telephone Wall Socket
50
-
-
SIM Card
51
-
Inserting the SIM Card
51
-
Removing a SIM Card
51
-
-
Wireless LAN/ Bluetooth (Device-Dependent) / UMTS (Device-Dependent)
52
-
Switching the Wireless Components on and off
52
-
Setting up WLAN Access
53
-
Access Via UMTS
53
-
-
Ethernet and LAN
53
-
Your Port Replicator (Optional)
54
-
Ports on the Port Replicator
54
-
Connecting the Notebook to the Port Replicator
55
-
Connecting the Mains Adapter to the Port Replicator
56
-
Switching on the Notebook Via the Port Replicator
56
-
Switching off Notebook Via Port Replicator
56
-
Disconnecting the Notebook from the Port Replicator
57
-
-
-
Security Functions
58
-
Configuring the Fingerprint Sensor
58
-
Using a Kensington Lock
59
-
Configuring Password Protection in BIOS Setup Utility
59
-
Protecting BIOS Setup Utility (Supervisor and User Password)
59
-
Password Protection for Booting of the Operating System
60
-
-
Password Protection for the Hard Disk
61
-
Activating Hard Disk Protection
61
-
Deactivating Hard Disk Protection
62
-
-
Boot from Removable Media
62
-
Owner Information (Device-Dependent)
63
-
Virus Warning (Device-Dependent)
63
-
Smartcard Reader
64
-
Inserting the Smartcard
64
-
Smartcard as Software Protection (Smartcase ™ Logon+)
65
-
-
Trusted Platform Module (TPM) (Device-Dependent)
66
-
Enabling TPM
67
-
Disabling TPM
67
-
-
-
Connecting External Devices
68
-
Connecting an External Monitor
69
-
Connecting External Devices to the Parallel or Serial Port
70
-
Port Settings
70
-
Device Drivers
70
-
-
Connecting USB Devices
71
-
Connecting an External SATA Hard Disk (Esata)
72
-
Safe Removal of Esata and USB Devices
72
-
-
Connecting Firewire Devices
73
-
Connecting External Audio Devices
73
-
Microphone Port / Line in
73
-
Headphone Port
74
-
-
-
Removing and Installing Components During Servicing
75
-
Notes on Installing and Removing Boards and Components
75
-
Preparing to Remove Components
76
-
Installing and Removing Memory Expansion
76
-
Removing a Cover
77
-
Removing Memory Modules
77
-
Installing a Memory Module
78
-
Attaching the Cover
78
-
-
Removing and Installing the Hard Disk
79
-
Removing a Cover
79
-
Removing a Hard Disk
80
-
Installing a Hard Disk
80
-
Attaching the Cover
81
-
-
Finishing Component Removal
81
-
-
Settings in BIOS Setup Utility
82
-
Starting the BIOS Setup Utility
82
-
Operating BIOS Setup Utility
82
-
Exiting BIOS Setup Utility
83
-
Exit Saving Changes — Save Changes and Exit BIOS Setup Utility
83
-
Exit Discarding Changes — Discard Changes and Exit BIOS Setup Utility
83
-
Load Setup Defaults — Copy Standard Entries
83
-
Discard Changes — Discard Changes Without Exiting the BIOS Setup Utility
83
-
Save Changes — Save Changes Without Exiting the BIOS Setup Utility
83
-
Save Changes and Power off
83
-
-
-
Troubleshooting and Tips
84
-
Help if Problems Occur
85
-
Restoring the Hard Disk Contents under Windows
85
-
The Notebook’s Date or Time Is Incorrect
86
-
When Certain Characters Are Entered on the Keyboard, Only Numerals Are Written
86
-
The Notebook’s LCD Screen Remains Blank
86
-
The LCD Screen Is Difficult to Read
86
-
The External Monitor Remains Blank
87
-
The External Monitor Is Blank or the Image Is Unstable
87
-
The Notebook Cannot be Started
88
-
The Notebook Stops Working
88
-
The Printer Does Not Print
89
-
The Radio Connection to a Network Does Not Work
89
-
Acoustic Warnings
89
-
Error Messages on the Screen
90
-
-
Technical Data
92
-
Notebook
92
-
Port Replicator (Optional)
94
-
Rechargeable Battery
94
-
Mains Adapter
95
-
Mains Adapter 80W
95
-
-
-
Manufacturer’s Notes
96
-
Energy Star
96
-
Disposal and Recycling
96
-
Declarations of Conformity
96
-
CE Marking
97
-
Regulatory Notices
97
-
Regulatory Information for Notebooks Without Radio Device
97
-
DOC (Industry CANADA) Notices
99
-
FCC Regulatory Information for Notebooks with Radio Device
100
-
-
-
Index
103

Fujitsu Lifebook E780 Getting Started (13 pages)
Lifebook Notebook Fujitsu
Brand: Fujitsu
|
Category: Laptop
|
Size: 2.34 MB
Table of Contents
-
Getting Started
1
-
Initial Start-Up
3
-
Registering Your Lifebook Notebook
3
-
Common Indicators
4
-
Restoring Your System
4
-
Status Display Panel
4
-
Popular Accessories
7
-
Contenu de la Boîte
8
-
Démarrage Initial
9
-
Enregistrement de Votre Ordinateur Lifebook
9
Advertisement
Advertisement
Related Products
-
Fujitsu LIFEBOOK E782
-
Fujitsu LIFEBOOK E781
-
Fujitsu LifeBook E7010
-
Fujitsu Lifebook E751
-
Fujitsu LifeBook E752
-
Fujitsu LIFEBOOK E744
-
Fujitsu LIFEBOOK E734
-
Fujitsu LIFEBOOK E743
-
Fujitsu LIFEBOOK E733
-
Fujitsu lifebook e736
Fujitsu Categories
![]()
Air Conditioner
![]()
Laptop
Server
![]()
Scanner
![]()
Storage
More Fujitsu Manuals
- Инструкции и руководства
- Бренды
- Fujitsu
- LIFEBOOK E780
![]()
Модели
VFY:E7800MF051ITПоказать ещё
, VFY:E7800MXP41DE/B, VFY:E7800MF021FR, VFY:E7800MF021GB, VFY:E7800MXP40NC, VFY:E7800MF011FR, VFY:E7800MF031GB, VFY:E7800MF021NC, VFY:E7800MF041GB, LKN:E7800M0003FR, VFY:E7800MF011IT, VFY:E7800MXP41NC, VFY:E7800MF011GB, VFY:E7800MF061GB, VFY:E7800MF011NC, VFY:E7800MF021IT, VFY:E7800MF011NL, VFY:E7800MF041NL, VFY:E7800MF021NL, VFY:E7800MXP41FR, VFY:E7800MF011ES, VFY:E7800MF061NL, VFY:E7800MXP41DE/1, VFY:E7800MF051FR, VFY:E7800MF061FR, VFY:E7800MF021DE/SP1, VFY:E7800MF011DE/SP1, VFY:E7800MF051DE, VFY:E7800MXP51BE, VFY:E7800MF051BE, VFY:E7800MF041BE, VFY:E7800MXP51NL, LKN:E7800M0048FR, VFY:E7800MXP51FR, VFY:E7800MF091FR, LKN:E7800M0187DE
Скрыть
Техническая Спецификация (English)Техническая Спецификация (English)Техническая Спецификация (English)Техническая Спецификация (English)Техническая Спецификация (English)Техническая Спецификация (English)Техническая Спецификация (English)Техническая Спецификация (English)Техническая Спецификация (English)Техническая Спецификация (English)Техническая Спецификация (English)Техническая Спецификация (English)Листовка (English)Листовка (English)Листовка (English)Листовка (English)Листовка (English)Листовка (English)Листовка (English)Листовка (English)Листовка (English)Листовка (English)Листовка (English)Листовка (English)Листовка (English)Листовка (English)Листовка (English)Листовка (English)Листовка (English)Листовка (English)Листовка (English)Листовка (English)Листовка (English)Техническая Спецификация (English)Техническая Спецификация (English)Техническая Спецификация (English)Техническая Спецификация (English)Техническая Спецификация (English)Техническая Спецификация (English)Техническая Спецификация (English)Техническая Спецификация (English)Техническая Спецификация (English)Техническая Спецификация (English)Техническая Спецификация (English)Техническая Спецификация (English)Техническая Спецификация (English)Техническая Спецификация (English)Техническая Спецификация (English)Техническая Спецификация (English)Техническая Спецификация (English)Техническая Спецификация (English)Техническая Спецификация (English)Техническая Спецификация (English)Техническая Спецификация (English)Техническая Спецификация (English)Техническая Спецификация (English)Листовка (English)
Смотреть руководство для Fujitsu Lifebook E780 ниже. Все руководства на ManualsCat.com могут просматриваться абсолютно бесплатно. Нажав кнопку «Выбор языка» вы можете изменить язык руководства, которое хотите просмотреть.

MANUALSCAT | RU
Вопросы и ответы
У вас есть вопрос о Fujitsu Lifebook E780, но вы не можете найти ответ в пользовательском руководстве? Возможно, пользователи ManualsCat.com смогут помочь вам и ответят на ваш вопрос. Заполните форму ниже — и ваш вопрос будет отображаться под руководством для Fujitsu Lifebook E780. Пожалуйста, убедитесь, что вы опишите свои трудности с Fujitsu Lifebook E780 как можно более детально. Чем более детальным является ваш вопрос, тем более высоки шансы, что другой пользователь быстро ответит на него. Вам будет автоматически отправлено электронное письмо, чтобы проинформировать вас, когда кто-то из пользователей ответит на ваш вопрос.
Fujitsu Lifebook E780 Ищу руководство на русском, а то как то не понятно. что за огоньки спереди и кнопки с огоньками возле экрана. Буду крайне признателен. Спасибо.
Юрий2018-03-17
Задать вопрос о Fujitsu Lifebook E780
- Бренд:
- Fujitsu
- Продукт:
- Ноутбуки
- Модель/название:
- Lifebook E780
- Тип файла:
- Доступные языки:
- английский, французский