-
Contents
-
Table of Contents
-
Troubleshooting
-
Bookmarks
Related Manuals for HORIBA ABX Micros 60

Summary of Contents for HORIBA ABX Micros 60
-
Page 1
ABX Micros User manual P/n: RAB042FEN HORIBA ABX Rue du caducée — Parc Euromédecine 34184 MONTPELLIER Cedex 4 — FRANCE… -
Page 2
V1.6 UL correction 01/09/03 RAH986AA V1.6 CE IVD Norms Intro, 1 16/09/03 RAN153AA V1.6 HORIBA ABX 09/03/05 10.1. Corrections associated to RAN252AA V1.7.0 V1.7.0. Software version, page Intro- 15/06/06 duction-16 ◆ This document applies to the latest higher software version. -
Page 3: Introduction
The information in this manual is distributed on an «As Is» basis, without warranty. While every pre- caution has been taken in the preparation of this manual, HORIBA ABX will not assume any liability to any persons or entities with respect to loss or damage, caused or alleged to be caused directly or indirectly by not following the instructions contained in this manual, or by using the computer soft- ware and hardware products described herein in a manner inconsistent with our product labeling.
-
Page 4: Warning And Precautions
— The user always operates with full knowledge and appreciation of instrument warnings, alarms and flags. — Always refer to labeling and HORIBA ABX instructions in order to avoid to compromise system integrity. ◆ The instrument must be operated as instructed in the user manual. Any other use might compro- mise system integrity and might be hazardous for the operator.
-
Page 5: Working Conditions
ABX Micros is designed for safety from voltages surges according to INSTALLATION CATEGORY II and POLLUTION DEGREE 2 (IEC 61010-1) Please contact your local HORIBA ABX rep- resentative for information regarding operation locations, when it does not comply with the rec- ommended specifications.
-
Page 6
It should be disposed of, in accordance with local legislation, and should be treated as being con- taminated with blood. The appropriate biological precautions should be taken. If any doubt, please contact your HORIBA ABX representative service depart- ment. 6 — RAB042FEN — User Manual -… -
Page 7
In accordance with the European Directive (2002/96/CE, known also as W.E.E.E) instruments having the above symbol, and sold into a European country by HORIBA ABX or an authorised representative must be disposed of and recycled correctly at the end of its useful life. -
Page 8: Graphics And Symbols
ABX Micros 4. Graphics and symbols Switch off position Switch on position Alternating current Manufacturer This product conforms to the In Vitro Diagnostic Medical EEC Standards and Directives na- Device med in the Declaration of Conformity. Caution, consult accompanying Biological risks documents Reagent Fragile, handle with care…
-
Page 9: Labels
Miniclean: Connect the Blue tubing marked with a «MINICLEAN» label to a straw and place it into the Miniclean reagent container. RS-232 output connection: Used only by HORIBA ABX qualified Engineers. Printer connection: Do not connect any printer which has not been recommended by a HORIBA ABX qualified Engineer. 5.3. «Biological risks» label This label is located on the left side cover Fig.
-
Page 10
ABX Micros Consider all specimens, reagents, calibrators, controls, etc… that contain hu- man blood or serum as potentially infectious ! Use established, good laborato- ry working practices when handling specimens. Wear protective gear, gloves, lab coats, safety glasses and/or face shields, and follow other bio-safety prac- tices as specified in OSHA Blood Borne Pathogens Rule (29 CFR part 1910. -
Page 11: Intended Use
Introduction Intended use 5.5. Identification Label Fig. 3: Identification label 6. Intended use ABX Micros OS/OT is a fully automated (Microprocessor controlled) Hematology an- alyzer used for in-vitro diagnostics testing of Whole Blood specimens and Whole Blood component concentrates. Important: When analyzing Whole Blood component concentrates, you must consider the Linear Range of the component parameter and its associated pa- rameters if any.
-
Page 12
ABX Micros A Printer that prints out results and Distribution curves. A Smart Card Reader (optional) for Quality Control result records and Patient result records. A Barcode reader (optional) for a direct entry of the Alphanumerical identifications. ABX Micros Models Available: This instrument is available in the following different models: ◆… -
Page 13: Abx Micros
Introduction Installation 8. Installation An HORIBA ABX representative will install your instrument, software, and printer. 8.1. Package contents ABX Micros A thorough inspection is carried out on the before sending it. We, nev- ertheless, recommend checking the total system as soon as it is received to report any anomalies to the carrier.
-
Page 14
ABX Micros 8.2. Reagent connections (See Section 6, 1.2. Reagent connections, page 6-4) 14 — RAB042FEN — User Manual — ABX Micros… -
Page 15: Table Of Contents
Introduction User manual contents 9. User manual contents Introduction ………….. Introduction-2 Warning and precautions…………….Introduction-4 Working conditions …………….. Introduction-5 Graphics and symbols …………….Introduction-8 Labels ………………..Introduction-9 Intended use………………Introduction-11 Presentation ………………Introduction-11 Installation………………Introduction-13 User manual contents …………….Introduction-15 User manual modifications …………..
-
Page 16
ABX Micros 10. User manual modifications 10.1. Corrections associated to V1.7.0. Software version V1.7.0 Version # update …………..Chap Introduction-2 declaration of conformity removed…………Chap Introduction-3 weee directive …………….. Chap Introduction-8 Identification Label modified…………Chap Introduction-11 PRP specification removed…………..Chap Introduction-11 Installation procedure removed (technical manual) ……Chap Introduction-13 Package content modification …………Chap Introduction-13 addition alphalyse 360……………… -
Page 17
Specifications Section 1. Specifications Contents 1. Technical Specifications (V1.7) ……………1-3 1.1. Parameters ………………..1-3 1.2. Throughput Analysis …………….. 1-4 1.3. Memory Capacity (Smart Cards) …………..1-5 1.4. Statistics and Quality Control …………..1-5 1.5. Reagents ………………..1-5 1.6. Calibration ………………..1-5 1.7. -
Page 18
ABX Micros 4.3.14. MON % (Monocyte Percentage) …………1-18 4.3.15. GRA # (Granulocyte count Absolute Number) ……..1-18 4.3.16. GRA % (Granulocyte Percentage ) ………… 1-18 5. Reagent Specifications …………….. 1-19 6. Reagent Consumption ……………… 1-20 7. Waste Handling Procedure …………….1-20 2 — RAB042FEN — User Manual — ABX Micros… -
Page 19: Technical Specifications (V1.7.0)
Specifications Technical Specifications (V1.7.0) 1. Technical Specifications (V1.7.0) ◆WBC, RBC, and PLT Histograms ◆Quantitative Flags ◆Parameter selection by choice of Software Note: The ABX Micros performs automated blood counts and requires no man- ual operations for aspirating blood, dilutions, measuring, calculations, print-outs, and computer transfer of data.
-
Page 20: Throughput Analysis
ABX Micros Tab.1-3: ABX Micros — 16 parameters 16 parameters Red blood cells Hemoglobin Hematocrit Mean Corpuscular Volume Mean Corpuscular Hemoglobin MCHC Mean Corpuscular Hemoglobin Concentration Red cell Distribution Width Platelets Mean Platelet Volume WBC, RBC, and PLT Distribution Curves Tab.1-4: ABX Micros — 18 parameters…
-
Page 21: Memory Capacity (Smart Cards)
Specifications Technical Specifications (V1.7.0) 1.3. Memory Capacity (Smart Cards) ◆Last sample «ONLY» …….Internal Memory capacity ◆60 samples ……..Memory Smart Card option ◆99 samples ……..Quality Control Smart Card option 1.4. Statistics and Quality Control ◆Extended Quality Control package (Optional). ◆Quality Control Smart Card option. 1.5.
-
Page 22: Physical Specifications
ABX Micros 1.9. Display ◆LCD Screen: ……… 2 Lines of 40 characters, backlighted 1.10. Barcode Reader Options ◆EAN 8, EAN 13, C 39, C 128, ITF (2of5), CODABAR, STF, and ◆C 93 with or without Checksum. 2. Physical Specifications 2.1. Power Requirements ◆Power supply: ……
-
Page 23: Dilution Ratios
Specifications Physical Specifications 2.6. Dilution Ratios ◆WBC: ………..Approximately 1/250 ◆RBC/PLT: ……..Approximately 1/15000 2.7. Counting Aperture Diameter ◆WBC: ………..80µm ◆RBC:……….50µm 2.8. Hemoglobin Measurement ◆Performed in the WBC/HGB Chamber ◆Light source: LED (Light Emiting Diode) at wavelength 550nm ABX Micros — User Manual — RAB042FEN — 7…
-
Page 24: Summary Of Performance Data
ABX Micros 3. Summary of Performance Data 3.1. Precision (Reproducibility)* ABX Micros was initially calibrated with Minocal Calibrator (Lot N° MCAL 325 Expiry Date: 11-05-2002). Three levels of ABX Minotrol 16 control material (Lot N°: M243) were run in duplicate twice daily for 20 days.
-
Page 25: Precision Claims
Specifications Summary of Performance Data Tab.1-6: MINOTROL 16 Within run CV% of run CV% of Daily Total impreci- Parameter Control means means sion (CV%) 1.19 1.01 0.96 1.46 M243 High 1.39 1.11 1.46 1.93 M243 Normal 3.06 1.68 1.93 3.13 M243 Low 0.62 0.78…
-
Page 26: Precision (Repeatability)
ABX Micros 3.3. Precision (Repeatability) Based on 20 consecutive samplings from 1 Fresh Normal Whole Blood, without any alarms. Tab.1-8: Precision Table: N = 20 Test Level Parameters <2.5% 10.0 x 10 /µL <2.0% 5 x 10 /µL <1.5% 15 g /dL <2.0% 45 % <5.0%…
-
Page 27: Carry-Over
Specifications Summary of Performance Data 3.5. Carry-over Carry-over was tested by analyzing samples with «High Concentrations» of WBC’s, RBC’s, HGB, and PLT’s. Each sample was analyzed in triplicate, followed by 3 background cycles. The % Carry-over is calculated by using the following formula: Carry-over = (Background1 — Background3)/(Sample3 — Background3) X 100 Parame Tab.1-10:…
-
Page 28: Accuracy
ABX Micros 3.7. Accuracy The Accuracy performance was proven by analyzing approximately 200 patient specimens on the ABX Micros along with a commercially available Reference Analyzer, located in 3 differ- ent locations throughout the United States. The following table summarizes the data: Tab.1-12: Site 1 Site 2…
-
Page 29: Limitations
Limitations 4. Limitations Whilst every effort is taken by HORIBA ABX to investigate and indicate all known inter- ference’s, it is by no means possible to guarantee that all interference’s have been iden- tified. At all times, results should be validated and communicated only once all information relating to the patient has been assessed and taken into account.
-
Page 30: Anti-Coagulants And Their Effects (On Whole Blood)
Anti-Coagulants used in blood collection may vary in the effects of changing the char- acteristics of the blood components. Caution is advised when selecting an anti-coagu- lant for analysis on the ABX Micros 60. ◆EDTA: Amoung the EDTA salts, EDTA K…
-
Page 31: Wbc White Blood Cells (Leukocytes)
Specifications Limitations Agglutinated Red Blood cells — May cause a falsely low RBC count. Blood samples containing the agglutinated Red blood cells may be identified by observing abnormal MCH and MCHC values, as well as examination of a stained blood smear. Cold Agglutinins — IgM Immunoglobulins which are elevated in Cold Agglutinins disease, may lower RBC and PLT counts and increase the MCV.
-
Page 32: Hgb (Hemoglobin)
ABX Micros 4.3.4. HGB (Hemoglobin) Turbidity of the Blood sample — Any number of physiologic and/or theraputic factors may produce falsely elevated Hemoglobin results. To obtain accurate HGB results when increased turbidity of the blood sample occurs, determine the cause of the turbidity and follow the appropriate Method below: Elevated WBC: An extremely elevated WBC will cause excessive light scatter from the L.E.D.
-
Page 33: Plt (Platelets)
Specifications Limitations Nutritional Deficiency or Blood Transfusion — May cause elevated RDW results due to Iron, Vitamin B12, or Folate conditions. High RDW’s may also be present from Bi-modal RBC distribution from Transfused Blood. This will be detected by the RBC Histogram showing 2 distinctive peaks on the distribution curve.
-
Page 34: Lym # (Lymphocyte Count Absolute Number)
ABX Micros 4.3.11. LYM # (Lymphocyte count Absolute Number) The Lymphocyte count is derived from the WBC count. The presence of Nucleated Red Blood cells (NRBC), certain Parasites, and erythrocytes that are resistant to the Lysing action, may interfer with an accurate LYM # count.
-
Page 35: Reagent Specifications
Contact your local HORIBA ABX center for all information regarding the recommended products. The HORIBA ABX reagents specified for this instrument have been approved in accordance with the European Directive 98/79/CE (Annex III) for in-vitro medical devices. Refer to Reagent Leaflets for all reagent specifications.
-
Page 36: Reagent Consumption
ABX Micros 6. Reagent Consumption Reagent consumption is given in millimiters (ml). It has been calculated from an average on 100 cycles for a specific program version. Program version: V1.7.0 Consumption(ml per cycleCycleMinidilLyse Miniclean Minoclair Tab.1-13: Reagent Consumption Cycle Diluent Lyse Cleaner Minoclair…
-
Page 37: Section 2. Description & Technology
Description & Technology Section 2. Description & technology Contents 1. Description ………………..2-2 1.1. Overview ………………..2-2 1.2. Front view (covers opened) …………… 2-2 1.3. Left side view (covers opened) …………..2-3 2. Technology ………………..2-3 2.1. Sampling ………………..2-3 2.2. Dilutions ………………..2-4 2.2.1.
-
Page 38: Description
ABX Micros 1. Description 1.1. Overview LCD screen display Key pad control panel Smart card reader (optional) Reagent compartment Sample probe and analysis Start bar 1.2. Front view (covers opened) Carriage Assembly Sample probe and Analysis Start bar WBC/HGB Chamber RBC Chamber 2 — RAB042FEN — User Manual — ABX Micros…
-
Page 39: Left Side View (Covers Opened)
Description & Technology Technology 1.3. Left side view (covers opened) Diluent Temperature Sensor Liquid Syringe Valve Block Vacuum/Waste Chamber 2. Technology 2.1. Sampling Blood Collection tube cap is removed The Tube is placed beneath the sample probe. The Tube is move upwards and the sample probe enters into the blood. The Manual sample bar is pressed and aspiration of 10µl of Blood occurs.
-
Page 40: Dilutions
ABX Micros 2.2. Dilutions 2.2.1. WBC/HGB Tab.2-1: WBC/HGB Dilution WBC/HGB Dilution Initial blood volume 10.0µl Volume of ABX Minidil LMG 2.1 ml Volume of ABX lyse 0.52 ml Final dilution ratio 1/260 Tab.2-2: WBC Measurement WBC Measurement Method Impedance Aperture diameter 80 µm Count Vacuum -200mb…
-
Page 41: Cbc Measurement Principles
Description & Technology Technology Tab.2-5: RBC/PLT measurement RBC/PLT measurement Count Vacuum -200mb Count period 2 x 5 seconds Temperature reaction ambient 28.3µl of diluted blood is aspirated from the WBC chamber. The needle carriage assembly moves to the right over the RBC/PLT chamber. 2.0ml of Diluent and the 28.3µl of diluted blood is injected into the RBC/PLT chamber from the inner sample probe.
-
Page 42
ABX Micros As the blood cells pass through the aperture, they create resistance (Impedence) in the electronic field between the two electrodes. Since the current is constant and remains unchanged, the larger the cell is, the «more» resistance it has. The smaller the cell is, the «less» resistance it has. The voltage which measures the cells is proportional to the cell size. -
Page 43: Hgb
Description & Technology Technology Number of cells Cell size Fig.2-4: RBC Pulses electronically calculated and smoothed: RBC Distribution curve Number of cells Cell size Fig.2-5: PLT pulses electronically calculated and smoothed: PLT distribution curve RBC Histogram: is an electronic Distribution and mathematical calculation of the RBC’s placed into 256 Channels of volumetric sizing from 30fl to 300fl.
-
Page 44: Hct
ABX Micros 2.3.3. HCT The Hematocrit is a combination measurement of electronic pulses and mathematical calculations. All the RBC pulses are grouped into various sizes. Each group pulse height is then averaged. all the pulse height averages are then averaged one final time for a mean average of all the RBC pulse heights.
-
Page 45: Pdw
Description & Technology Technology 2.3.8. PDW The PDW (Platelet Distribution Width) is calculated from the Platelet Histogram/ Distribution curve. The PDW is represented by the width of the curve between 15% of the number of platelets starting from the Low Threshold 2fl (S1) and 15% of the number of platelets begining with the Variable High Threshold (S2).
-
Page 46
ABX Micros When the Lyse reagent reacts with the Granulocytes, it has a limited reaction due to a molecule in their cytoplasmic structure which protects them from shrinking action of the lyse. This inturn makes the Granulocytes the larger of the WBC sub-populations in the cell differentiation. After the Differential lysing action, the ABX Micros analyses the height of each elec-… -
Page 47: Section 3. Workflow
Workflow Section 3. Workflow Contents 1. Startup checks ………………..3-2 1.1. Reagent level checks …………….3-2 1.1.1. Bottled units ………………. 3-2 1.1.2. Minipack Units …………….. 3-2 1.2. Printer Power and On-line Checks ………….. 3-2 1.3. Instrument Startup ……………… 3-2 1.4. Blood Sample Collection …………….3-3 2.
-
Page 48: Startup Checks
ABX Micros 1. Startup checks 1.1. Reagent level checks 1.1.1. Bottled units Individual reagents: first thing prior to Startup is checking the levels of each reagent before oper- ating the system. If a reagent level is «Low», replace the reagent and prime the new reagent using the following steps through the instrument menus.
-
Page 49: Instrument Startup
Workflow Startup checks 1.3. Instrument Startup Power «ON» the instrument by pressing the ON/ OFF switch, located on the back, lower center of the rear panel. The LCD display will show the following: Screen display Please wait for 3 Min This indicates an instrument warm-up period for the internal electronics.
-
Page 50: Daily Quality Control & Calibration Verification
, page 4-2 in order to perform the Control sample run. General recommendations on calibration The calibration on HORIBA ABX instruments is an exceptional procedure, which must be carried out particularly in case of certain technical interventions (installation, mainte- nance, service intervention). The calibration should not be carried out to compensate a drift on a result due for example to a clogging of the instrument.
-
Page 51: Sample Selection And Identification
Barcode Reader must be configured on the main circuit board of the ABX Micros 60. If you require a barcode reader for sample identification, please con- tact your local HORIBA ABX Service Representative for installation and setup of this de- vice.
-
Page 52
ABX Micros Once the Identification has been entered, a message will appear on the LCD display stating «Press the sampling bar», press the manual sampling bar or press the «Startup» key on the front panel of ABX Micros to start the analysis cycle. 6 — RAB042FEN — User Manual — ABX Micros… -
Page 53: Running Samples
Workflow Running Samples 4. Running Samples 4.1. Preliminaries Run the Quality Control blood, all 3 levels and verify that the results are within their specified limits (see Section 4, 1. Quality Control , page 4-2). Mix the blood sample gently and thoroughly. 4.2.
-
Page 54: End Of The Day Rinsing
ABX Micros 4.5. End of the day rinsing It is necessary to run a Standby/Shutdown cycle at the end of each day. Shutdown cycle Press the «Standby» key on the front panel ABX Micros performs a complete cleaning with the enzymatic detergent (Miniclean) and puts the system into a Standby mode.
-
Page 55: Results
Workflow Results 5. Results When an analysis cycle has been complete, results are displayed and printed out according to the Setup of the Instrument. 5.1. ABX Micros OS/OT8 5.1.1. Displayed Results The Parameter results are displayed on the LCD screen once the analysis cycle is complete. 5.1.2.
-
Page 56: Results Printout
ABX Micros 5.1.4. Results Printout 5.1.4.1. US Mode RESULTS DATE : 01/20/2006 TIME : 09:25 ID : SMITH_1234567 SEQ. # : 27 STARTUP PASSED Plt Flags : WBC : 10.0 10 / mm MCV :90 µm RBC : 4.90 10 / mm MCH : 30.6 Pg HGB : 15.0 g/dl…
-
Page 57
Workflow Results 5.1.4.2. Standard Mode RESULTS DATE : 01/20/2006 TIME : 09:25 RUN # : 12345 SEQ. # : 27 STARTUP PASSED Plt Flags : WBC : 10.0 10 / mm MCV :90 µm RBC : 4.90 10 / mm MCH : 30.6 Pg HGB : 15.0 g/dl MCHC : 34.1 g/dl… -
Page 58: Abx Micros 60 Cs/Ct16
ABX Micros 5.2. ABX Micros OS/OT16 5.2.1. Displayed Results The first group of Parameter results are as displayed on the LCD screen once the analysis cycle is complete. The second group of parameter results can be displayed as follows: Parameter results review «RESULTS»…
-
Page 59: Result Printout (Us Mode Example)
Workflow Results 5.2.4. Result printout (US mode example) RESULTS DATE : 01/20/2002 TIME : 09:25 ID : SMITH_1234567 SEQ. # : 27 STARTUP PASSED PLT Flags : WBC : 7.5 10 / mm (3.5-10.0) 90 µm (80-100) RBC : 4.90 10 / mm (3.80-5.80) 30.6 Pg…
-
Page 60: Flags
ABX Micros 5.3. ABX Micros OS/OT18 ABX Micros OS/OT18 has all the same characteristics as the ABX Micros OS/OT16 with the exception of 2 parameters, PCT and PDW which are reported on the ABX Mi- cros OS/OT18 results 6. Flags These Instrument flags and alarms can be classified in 5 different groups: Results exceeding normal limits: See “6.1.
-
Page 61: Results Rejected
Workflow Flags Tab.3-2: Printed and host transmitted results Linearity Parameters Visible Range > Visible Range limits WBC(x10 «result» «result»+ «D» —.— + D —.— + O RBC(x10 «result» «result»+ «D» —.— + D —.— + O PLT(x10 «result» «result»+ «D» —.— + D HGB>2g/dL —.— + O…
-
Page 62: Morphology Flags
ABX Micros 6.3. Morphology Flags 6.3.1. Flags on PLT Distribution curve The PLT Histogram has 128 channels between 2fl and 30fl. A mobile Threshold (Positioned to 25fl by default) moves according to the Microcyte population present in the Platelet analysis area. The PLT flags are as followed: An excessive presences of cells to the right of the Threshold area (25fl) will trigger the «MIC»…
-
Page 63
Workflow Flags ◆Neutrophil polynucleose This flag corresponds to the number of cells counted in the detection zone in comparison to the total number of Granulocytes. The «G2» flag indicates an excessive number of cells in the (220fl to 250fl zone). This flag makes it possible to follow an abnormal Granulocyte peak displacement. -
Page 64
ABX Micros 18 — RAB042FEN — User Manual — ABX Micros… -
Page 65: Section 4. Quality Assurance
Quality Assurance Section 4. Quality Assurance Contents 1. Quality Control ………………..4-2 1.1. Functions ………………..4-2 1.2. Q.C — Automatic (With Q.C. Smart Card) …………4-2 1.2.1. QC Smart card messages …………..4-3 1.2.2. Select Operator …………….4-3 1.2.3. Select commercial control level …………4-3 1.2.4.
-
Page 66: Quality Control
1 — A Q.C. card that has expired 2 — A Memory Card If you have the correct card and have error messages, contact your local HORIBA ABX Technical Support Representative for further instructions regarding this issue. 2 — RAB042FEN — User Manual -…
-
Page 67: Qc Smart Card Messages
It is mandatory to verify that the Quality Control Smart card being used matches the instrument type (ABX Micros 60) the Lot #, and expiration date of the Quality Control material being used for this program! 1.2.1.
-
Page 68: Running Control Blood
ABX Micros 1.2.4. Running Control blood Verify that the lot number on the screen matches the lot # on the Commercial control blood. Once the Control blood has equilibrated to room temperature, Gently and thoroughly mix the lev- el. Follow the product instructions that come with the control kit for proper mixing. Remove the cap and place the vial beneath the sample probe, raise the vial upwards so that the sample probe enters into the blood.
-
Page 69: Qc Results
Quality Assurance Quality Control 1.2.5. QC results When the control analysis cycle is complete, the results are displayed. QC results review Use the «Up» and «Down» arrow keys to scroll through the results. The control results are printed out as indicated: DATE : 01/20/2006 TIME : 09:25 LOT # : M211…
-
Page 70
ABX Micros ◆If a third counting sequence is initiated during the analysis cycle, and a specific parameter is in question, a dollar sign ($) or a star (*) will be shown on the display next to the parameter and the run will automatically be Rejected. You «MUST» rerun the control blood if the display indicates: «RUN REJECTED. -
Page 71: Analysis (Without Q.c. Smart Card)
Quality Assurance Quality Control 1.2.6.3. Exiting Q.C. Automatic If the operator needs to Exit Q.C. at any time before all levels of control bloods are analyzed, it is possible to do so by following these simple steps: Wait until the cycle of the control level blood being analyzed is complete. Exiting QC automatic Press the «Esc»…
-
Page 72: Statistics (Only With Q.c. Smart Card)
ABX Micros Insert the Q.C. Smart Card into the reader with a firm push until it «clicks» into place. Printing targets Main Menu 2- QC 3- Print targets «Lot#» and «Exp Date» are displayed Press «Enter» key The printout will show Low limit and High limit for each parameter, for each assayed level of control. HIGH, NORMAL,and LOW.
-
Page 73: Graphs (Only With Q.c. Smart Card)
Quality Assurance Quality Control Maintain a copy of these results each month for Quality Control Analysis verification. Q.C. NORMAL LOT#: M211 TIME: 07:31 EXP DATE :02/20/06 DATE: 03/01/06 DATE TIME MCHC 01/03/06 09:57 OP. 2 4.58 13.6 36.3 29.7 37.5 01/04/06 08:23 OP.
-
Page 74
ABX Micros Levey-Jennings charts are printed out with the following information included: File Name (Blood Level), Lot # of the Control, Expiration date of the control, Date and Time of the print data request, the Parameter Name, and the Parameter graph with 40 total data points. Below each graph, the Ref- erence Assay Mean, Upper, and Lower limits, the Actual Mean results of the total control runs, the Standard Deviation value, and the Percent Coefficient of Variation. -
Page 75: Calibration
2. Calibration 2.1. General recommendations The calibration on HORIBA ABX instruments is an exceptional procedure, which must be carried out particularly in case of certain technical interventions (installation, maintenance, service interven- tion). The calibration should not be carried out to compensate a drift on a result due for example to a clogging of the instrument.
-
Page 76: Change Lot Number
ABX Micros Accessing the calibration function Main Menu 3- Calibration 1- Autocalibration Select one of the 4 operators (O.P) defined in Section 5, 4.1. Changing Operator , page 5-10 Press «Enter» Key 2.2.1. Change lot number From the previous screen (See “2.2.
-
Page 77: Running Calibrator
The system will automatically re-set itself to rerun that sample. If you acquire 3 rejects continuously on the same number sample, abort calibration and contact your local HORIBA ABX Technical Support representative! Place the cap back onto the vial, gently and thoroughly mix the material for the next calibration sample run.
-
Page 78: Verify Calibration
ABX Micros 2.2.7. Verify Calibration Once the calibration is complete and has Passed the Calibration criteria, Press the «Esc» key until you have returned to the Main Menu. Run the remaining Calibrator material 3 times as a regular patient analysis. (Remember to gently and thoroughly mix the material between each sample run.) When each cycle is complete, record the results.
-
Page 79: Calibration Passed
Quality Assurance Calibration 2.2.8. Calibration Passed In order for ABX Micros to «Pass» Calibration, the data must meet the statistical criteria which contain 2 conditions. The Coefficient of Variations must be within their limits as indicated “Tab.4-1: Coefficient of vari- ation limits, page 15”.
-
Page 80: Calibration Failed
«OK» on the other parameters, Calibration will not take place. When the calibration fails, the operator may restart the calibration again or call your local HORIBA ABX Technical Support representative for further instructions. On the screen display: Rejected and saved coefficients can be displayed by using the «Up» and «Down»…
-
Page 81: Rdw Calibration
RDW determination. The Mean and Standard Deviation are then calculated from that population analyzed. The same 100 samples are then analyzed on the ABX Micros 60. A population Mean is calculated and then compared to the known calculated Mean from the comparison instrument. The RDW calibration coef-…
-
Page 82: Calibration Coefficients
Should any variation of Quality Control results outside the Assayed ranges occur after calibration, it is Highly suggested that you contact your local HORIBA ABX Tech- nical Support Representative before Manually editing the calibration coefficients! 2.2.13.
-
Page 83: Calibration Coefficient Limits
1.41 1.13 1.25 1.25 If any of the calibration coefficients are out of their specified ranges after calibrating the ABX Mi- 60, contact your local HORIBA ABX Technical Support Representative. cros ABX Micros — User Manual — RAB042FEN — 19…
-
Page 84
ABX Micros 20 — RAB042FEN — User Manual — ABX Micros… -
Page 85: Section 5. Setup
Setup Section 5. Setup Contents 1. Setup overview ………………..5-2 2. Results Options ……………….5-3 2.1. Reprint Results ………………5-3 2.2. Printout ………………..5-4 2.3. Units …………………. 5-4 2.4. Printer Selection ………………5-5 2.5. Temperature Printout …………….5-5 2.6. Print Limits ……………….. 5-6 2.7.
-
Page 86: Setup Overview
ABX Micros 1. Setup overview ABX Micros has several operator options in this section. ◆Specific Laboratory limits (see “3. Laboratory Limits , page 7”) ◆Date and time formats (see “5. Date and Time , page 15”) ◆Results format (see “2. Results Options , page 3”) ◆RS 232 options (see “6.
-
Page 87: Results Options
◆To select the Patient Parameter limits to be printed out (“2.6. Print Limits , page 6”) ◆To select the LMG’s (Lymphocytes, Monocytes, and Granulocytes) to be printed out (Available only for ABX Micros 60-0S/0T16 0S/0T18 parameter analyzers)“2.7. Print LMG Re- sults , page 6”…
-
Page 88: Units
ABX Micros The last results in memory will automatically printout with the following information: ◆Date and Time, ◆the associated Identification, ◆Sample run and Sequence Number, ◆Possible flags if any, ◆the Histograms (if selected in the setup). 2.2. Printout This function will disable/enable the printout of the WBC, RBC, and PLT Histograms. Selecting histograms for printout Main menu 5- Setup…
-
Page 89: Printer Selection
Setup Results Options Tab.5-2: System units Parameters Standard International 1 International 2 µm LYM % LYM # MON % MON # GRA % GRA # 2.4. Printer Selection This sub-menu allows the selection of the printer to be used along with the ABX Micros 4 basic different model types of printers specifically designed to operate with the ABX Micros…
-
Page 90: Print Limits
Press the «Enter» key: a ( * ) indicates the current state 2.7. Print LMG Results This sub-menu will enable/disable the printing of the 3 part Differential parameters on the results printout. This Menu function is available «Only» on ABX Micros 60-16 and 18 parameter systems. Printing LMG results Main menu…
-
Page 91: Laboratory Limits
Setup Laboratory Limits 3. Laboratory Limits Laboratory Limits are commonly known as normal patient ranges. These Limits will vary with popu- lation and/or geographical location. The default limits set on the ABX Micros are based on a study of normal, healthy, and drugfree individuals. Your limits may vary based upon the appli- cations for intended use.
-
Page 92: Print Limits
ABX Micros 3.3. Print Limits This Chg Lab Limits sub-menu allows the operator to print out the current Laboratory Limits and Morphology Flag values. Changing Laboratory limits Main menu 5- Setup 2- Chg Lab Limits 3- Prt Limits Press the «Enter» Key The current Laboratory Limits will automatically print out as shown in “Fig.5-1: Laboratory limits printout, page 8”…
-
Page 93: Morphology Flag Limits
Setup Laboratory Limits 3.4. Morphology Flag Limits The factory «default» flag values programmed on the ABX Micros were set, based on a study of normal cell populations. These Default values can be adjusted to accommodate specific populations and/or geographical locations based on those spe- cific studies.
-
Page 94: Special Functions
ABX Micros 4. Special Functions The «Special» sub-menu will allow the operator to access and edit some of the following sub-menu functions, such as: ◆“4.1. Changing Operator , page 10” ◆“4.2. Changing (the User) Password , page 10” ◆“4.3. Choosing Startup Cycle, page 11” ◆“4.4.
-
Page 95: Choosing Startup Cycle
Setup Special Functions 4.3. Choosing Startup Cycle The «Startup» cycle is used daily, prior to any normal operation to ensure that detergent from the «Standby» cycle is completely rinsed out of the system. It includes a Background count which must be verified prior to any analysis of samples. This is nec- essary to ensure that there are «No»…
-
Page 96: Printing Instrument Configuration
ABX Micros Setting Autocleaning frequency Main Menu 5- Setup 3- Special Press the «Enter» key Enter system default Password <123> (or the one defined by the operator). Press the «Enter» key 4- Clean freq Enter the number of the analysis cycles to be run before cleaning Press the «Enter»…
-
Page 97
Setup Special Functions Date and Time of print request. Laboratory Limits and Flag values. Instrument Configuration heading. Date and Time of print request. Last operator to use Quality Control. Latest Calibration Lot Number The most current Calibration Coefficients and last calibrator Target values The most current RDW calibration coeff. -
Page 98: Date And Time
ABX Micros 4.6. Setting buzzer cycle end This sub-menu allows the operator to set an audible tone «Beep» when the analysis cycle is complete: Setting buzzer Main Menu 5- Setup 3- Special Press the «Enter» key Enter system default Password <123> (or the one defined by the operator). Press the «Enter»…
-
Page 99: Host Computer Options
Setup Host Computer Options 5.1. Change Time Changing time Main Menu 5- Setup 4- Date and Time 1- Chg. Time Enter the Hours (set for 24 hr.) then press the Decimal ( . ) key. Now enter the Minutes. Press the «Enter» key to save. 5.2.
-
Page 100: Host Communications
ABX Micros 6.1. Host Communications 4 different Output formats are available: Format ARGOS, No character identifiers Format R&D, No character identifiers Format ABX, with character identifiers TR OFF, Transmission Off. Setting output format Main Menu 5- Setup 6- Host options 1- Host Comm.
-
Page 101: Barcode Setup
Setup Barcode Setup 7. Barcode Setup This sub-menu will allow the operator to select the types of Barcode labels to be read by the reader. Turning the Checksum «ON» or «OFF» gives the operator this capability once the Barcode reader has been installed correctly.
-
Page 102: Running Patient Samples
ABX Micros make sure that the Memo card sub-menu is selected for 2 — MEMO-OFF. If the STANDARD ID Mode (see “4.7. Choosing sample identification mode , page 14”) was previously selected before turning the memo card function «On», the ID mode will automatically change to US mode 8.2.
-
Page 103: Reprint One Result
Setup Memory Card Choosing transmission mode Main menu 5- Setup 7- Memo Card 2- Transmission. Select: 1- Printer in order to transmit the memory card results to the connected printer or 2- Host comp. in order to send the results to the external host computer via RS232 port Press the «Enter»…
-
Page 104: Reprint All Results (Tr. All)
ABX Micros ◆PRINT LIMITS, Yes or No ◆PRINT LMG’s, Yes or No Proceed as follows: Place the Memory card in the reader. Printing One Result Main menu 5- Setup 7- Memo Card 4- TR. One Press the «Enter» key Enter the MEMO number next to the sample ID number of the sample results to print (the MEMO number must be known previously) Press the «Enter»…
-
Page 105: Clear Card (Erasing All Results From The Card)
Setup Memory Card Printing from to Main menu 5- Setup 7- Memo Card 6- TR. From To 1- Begin and press the «Enter» key Enter the wished starting Memo Number Press the «Enter» key 2- End and press the «Enter» key Enter the Ending Memo Number Press the «Enter»…
-
Page 106
ABX Micros 22 — RAB042FEN — User Manual — ABX Micros… -
Page 107: Section 6. Maintenance & Troubleshooting
Maintenance & Troubleshooting Section 6. Maintenance & Troubleshooting Contents 1. Maintenance ………………..6-2 1.1. Daily Maintenance ………………6-2 1.1.1. Startup and Standby Cycles …………..6-2 1.1.2. Automatic Cleaning …………….6-2 1.1.3. General Cleaning of the Instrument …………. 6-3 1.2. Reagent connections …………….6-4 1.2.1.
-
Page 108: Maintenance
ABX Micros 1. Maintenance One of the principle factors contributing to accurate and reliable results is a well-maintained instru- ment. The ABX Micros is designed to keep this maintenance automatically to a minimum providing that the operator is aware of its schedule. This section of the manual will describe the daily and periodic maintenance procedures.
-
Page 109: General Cleaning Of The Instrument
— Active on Aspergillus fumigatus — Active on Mycobacterium tuberculosis (B.K) — Antiviral (VIH, HBV and rotavirus) Product Example validated by HORIBA ABX: ANIOS detergent disinfectant ; WIP’ANIOS ; ref: 1316.424 Please also refer to the W.H.O (World Health Organization) guidelines: «Labo- ratory Biosafety Manual, 2nd edition», for further information.
-
Page 110: Reagent Connections
ABX Micros Please also refer to the W.H.O (World Health Organization) guidelines: «Labo- ratory Biosafety Manual, 2nd edition», for further information. 1.2. Reagent connections 1.2.1. Bottle connections Lyse and cleaning reagents are placed inside the reagent compartment (see “Fig.6-1: Reagent bottles, page 4”).
-
Page 111: Reagent Pack Connection
Maintenance & Troubleshooting Maintenance Fig.6-2: Opening Install the Alphalyse 360 as shown on “Fig.6-3: Alphalyse 360 installation, page 5”. Fig.6-3: Alphalyse 360 installation 1.2.3. Reagent pack connection Remove the reagent output protections, as well as the waste input protection (“Fig.6-4: Protections, page 6”).
-
Page 112
ABX Micros Fig.6-4: Protections Install the pack into the compartment of the instrument (“Fig.6-5: Pack installation, page 6”). Push the pack down in order to plug correctly the pack on the male connectors. Fig.6-5: Pack installation The free male connector must be plugged on the pack upper valve in order to receive the waste liq- uids (“Fig.6-6: Waste connector, page 6”). -
Page 113: Diluent & Waste Connection
Maintenance & Troubleshooting Maintenance In order to avoid leak problems it is recommended not to unplug several times the same reagent pack. 1.2.4. Diluent & Waste connection Connect the diluent container using the diluent straw and a 3 x 6 cristal tube (1 meter maximum) on the diluent input located at the bottom of the instrument rear panel.
-
Page 114: Service Functions
ABX Micros 1.3. Service Functions Several service functions are available for the operator to clean and check the instrument. 1.3.1. Menu Service overview Tab.6-1: MenuService overview SERVICE 1- Backflush 2- Drain chambers 3- Prime Bottle Unit 1- All reagents 2- Diluent 3- Lyse 4- Cleaner Pack unit…
-
Page 115: Backflush
Maintenance & Troubleshooting Maintenance Fig.6-8: Door Unscrew the 3 cover fixation screws (A) and loosen the 2 screws (B) under the reagent flap (“Fig.6- 9: Cover, page 9”). Remove the cover: pull it backward and lift it up to the rear of the instrument. Fig.6-9: Cover 1.3.3.
-
Page 116: Troubleshooting
ABX Micros If you cannot see any micro-bubbles moving through tubing or in the chambers, the aperture may still be blocked. In this case, perform a Concentrated Cleaning Section 6, 1.3.6. Concentrated Clean- ing, page 6-11. 1.3.4. Drain Chambers This service function will allow the operator to check for proper chamber draining and to maintain some of the parts of the hydraulic manifold as it flushes waste out of the instrument.
-
Page 117: Concentrated Cleaning
Maintenance & Troubleshooting Maintenance When priming reagents or pack, verify that Reagent is being primed. View the Chambers for reagent priming. Verfiy that reagent is coming in and draining out of the chambers when a cycle is initiated. Verify that there are No Air Bubbles in the reagent lines when priming.
-
Page 118
ABX Micros 1- Check Sensors: Needle and Carriage. This allows the operator to check the homing sensors of the sample probe and the sample carriage “1.3.7.1. Check sensors test, page 12” 2- Needle U/D: This allows the operator to check the Up and Down movement of the sample probe. -
Page 119: Instrument Cycles
6- Cycles Use the «Up» and «Down» arrows 1.5. Technician Functions This Service function allows the operator to work with HORIBA ABX Technical Support in resolving, checking, and/or adjusting some technical operations on ABX Micros This Service Menu is mainly used by the Engineers to make adjustment in the technical areas of the analyzer.
-
Page 120: Unblocking The Sample Probe
ABX Micros ◆No results on all parameters in any analysis mode ◆Possible high backgrounds on Startup Required Tools ◆5ml or 10ml syringe ◆Absorbant paper ◆5 inch small diameter tubing ◆Small paper cup Required Products ABX MINOCLAIR 0.5L (P/n: 0401005), or bleach containing 12% active chlorine Intervention time Approximately 15 minutes Frequency…
-
Page 121: Replacing The Sample Probe
Maintenance & Troubleshooting Maintenance Hold the Sample probe mounting bracket on the upper right edge and move the sample probe upwards until the tip of the sample probe is about 1 inch below the rinsing block. Press the «Startup» key and verify that the background results are within their limits. Re-run the Quality Controls to verify correct results.
-
Page 122: Extended Concentrated Cleaning
ABX Micros 1.8. Extended Concentrated Cleaning Concerns ◆RBC/PLT Chamber and Aperture cleaning ◆WBC/HGB Chamber and Aperture cleaning Required Tools 5ml or 10ml syringe Required Products ABX MINOCLAIR 0.5L (P/n: 0401005), or bleach containing 12% active chlorine Intervention Time Approximately 30 minutes Specific Kits or Consumable products None Procedure…
-
Page 123: Troubleshooting
Maintenance & Troubleshooting Maintenance If the problem still persists after the second cleaning, call your local HORIBA ABX Technical Support Representative. ABX Micros — User Manual — RAB042FEN — 17…
-
Page 124: Overview
If replacing the reagents performing a concentrated cleaning procedure does not correct the background count problem, call your local HORIBA ABX Technical Support Representative for further instructions. 18 — RAB042FEN — User Manual -…
-
Page 125: Precision
Maintenance & Troubleshooting Troubleshooting 2.2.3. Precision ◆In order to verify the precision of the instrument, it is recommended to run a Fresh, Normal Whole blood sample (10) times, mixing between each analysis cycle. ◆After all 10 run are complete, calculate the Coefficient of Variation percentage (CV %). ◆Compare the CV % results with those listed (See Section 1, 3.3.
-
Page 126: Problems On All Parameters
Blocked sample probe descibed in Section 6, Probe Cleaning , page 6-14 No results in analysis Possible defective Pre-amp on Main Call HORIBA ABX technical support for Board Assistance Perform a Concentrated cleaning Possible dirty Apertures “1.3.6. Concentrated Cleaning, page 11”, re-run sample…
-
Page 127: Problems On Rbc/Plt Parameters Only
“1.3.6. Concentrated Cleaning, page 11”, re-run sample No results in analysis Check for diluent delivering into cham- Has Diluent been delivered correctly ber, call HORIBA ABX Technical into RBC chamber? support Perform a Concentrated cleaning Possible dirty Aperture “1.3.6. Concentrated Cleaning, page 11”, re-run sample…
-
Page 128: Problems On Wbc/Hgb Parameters Only
Possible leakage from syringe block HORIBA ABX Technical support Check and/or replace reagent(s) if Possible contaminated reagent(s) necessary Possible bad HGB blank reference Call HORIBA ABX Technical support for voltage assistance Perform a concentrated cleaning Possible dirty apertures “1.3.6. Concentrated Cleaning, page 11”, re-run sample…
-
Page 129: Troubleshooting System Operations
Power On unit and/or plug in power cord is disconnected from power cord to power source source No Power to the unit Call HORIBA ABX Technical support for Possible blown power fuses assistance Possible disconnection of cable to Call HORIBA ABX Technical support for…
-
Page 130: Troubleshooting Specific Error Messages
Remove and flush out sample probe Section 6, 1.7. Manual Probe Cleaning , page 6-14. Re-run Startup Failed startup Check syringe block for leakage and call HORIBA ABX Technical support Possible electronic interferences. Call HORIBA ABX Technical support for assistance Check and/or replace reagent(s) Perform a concentrated cleaning “1.3.6.
-
Page 131: Menu/Overview
Minimum and Maximum values are displayed with the corresponding error message! Cor- rect your value to be within the specified ranges given. If unable to be within the range specified, call your local HORIBA ABX Technical Support Representative. 3. Menu/Overview Tab.6-7: Menu «RESULTS»…
-
Page 132
ABX Micros Tab.6-8: Menu «QC» 4- Statistics QC Smart card menu Select OP. lot # Select level (1- Low, 2- Normal, 3- High) 5- Graphs QC Smart card menu Select OP. lot # Select level (1- Low, 2- Normal, 3- High) Tab.6-9: Menu «CALIBRATION»…
|
Электроника и Медтехника
|
|
|
| © 2003 — 2019 Электроника и Медтехника |
|
Хранилище файлов |
Правила добавления:
Внимание !!!
Перед тем как загрузить файл, убедитесь, что его нет в «Хранилище файлов» для этого воспользуйтесь поиском.
При добавлении файлов в поле «Название материала» указываем марку аппарата, так как на шильдике или по паспорту.
В поле «Краткое описание» пишем что-это: схема; сервис мануал; руководство по эксплуатации и т.д. Также напишите формат материала, какой программой он сделан.
За сохранность и работоспособность файлов(ссылок) загруженных на сторонние файловые хостинги, Администрация сайта ответственности не несет.
Для загрузки файлов в «Хранилище» воспользуйтесь архиватором WinRAR или 7-Zip, максимальный объем загружаемого файла должен быть не более 15Mb.
Администрация сайта оставляет за собой право удалять и редактировать файлы.
Компания HORIBA ABX, ранее ABX Diagnostics, была основана в 1983 году. Сейчас компания является европейским лидером в производстве автоматических гематологических анализаторов и входит в пятерку мировых лидеров. Оборудование HORIBA ABX работает в 25000 лабораторий в 140 странах мира.
В июне 1996 года компания ABX вошла в состав японской корпорации HORIBA Group. После объединения, компания ABX создала собственную сеть распространения в Европе, расширила свое присутствие на мировом рынке и открыла дочерние компании в США, Бразилии и Польше. К концу 1998 года, компания ABX перешла на новый уровень развития с выходом на рынок биохимических анализаторов, приобретя у компании Roche (Рош) права на распространение и обслуживание биохимических анализаторов «Mira» на территории Европы. Эта сделка была первым шагом в трехэтапном плане по полноценному выходу компании ABX на мировой рынок биохимии к 2003 году.
В 2003 году компания ABX произвела 6.000 гематологических анализаторов и 4.000 тонн реагентов. На сегодняшний день каждый четвертый из проданных в мире гематологических анализаторов был произведен компанией ABX в. Монпелье (Франция).
Самый популярный в России полностью автоматический гематологический анализатор Horiba ABX Micros 60, производства французской компании Horiba Medical, имеющий безупречную репутацию, проверенную временем. Предназначен для небольших и средних лабораторий, способен с легкостью справиться с потоком исследований в крупных медицинских центрах посредством проведения качественных и количественных исследований крови. Высокое быстродействие, легкость в настройках, в работе и в обслуживании, точность, надежность, минимальные объемы проб и потребления реактивов — вот те основные требования, которые предъявляют специалисты, работающие в современных лабораториях к системам гематологического анализа. Благодаря сочетанию метода иммунотурбодиметрии и кондуктометрии анализатор являет собой выход на новый уровень диагностирования различных заболеваний.
Анализаторы используются для подсчета клеток крови кондуктометрическим методом. Метод основан на изменении полного сопротивления калибровочной апертуры, помещенной в электролит с постоянным током, проходящим между двумя электродами, расположенными по обеим сторонам апертуры. Вакуум, создающийся у краев апертуры, заставляет клетки продвигаться через, апертуру. Каждая клетка вытесняет свой объем электролита, тем самым повышая полное электрическое сопротивление апертуры (активное сопротивление). Прохождение каждой клетки регистрируется в виде импульса, амплитуда которого пропорциональна объему клетки. Определение гемоглобина производится спектрофотометрическим методом.
Особенности:
- Процедура измерения осуществляется при помощи одной кнопки;
- Принцип измерения — электрическое сопротивление;
- Производительность: 60 проб в час;
- 8 (CBC) или 18 (LMG) — параметровый автомат, дифференциация лейкоцитов на 3 субпопуляции;
- Минимальный объем крови для проведения анализа: 50 мкл;
- Объём образца используемый при измерении: 10 мкл;
- Возможность использования открытых или закрытых пробирок (open/ closed tubes);
- Использование 3 — 5 мл открытых или закрытых пробирок в специальном держателе с EDTA;
- Использование трех реагентов (разбавитель, лизирующий реагент, промывающий реагент);
- Использование одной емкости для отходов и реагентов;
- Автоматическая очистка пробоотборника;
- Автоматическая промывка анализатора после каждого измерения;
- Автоматическая калибровка и калибровка по программе смарт-карты;
- Контроль качества происходит по файлам контроля качества смарт-карт КК (31 контроль 3 уровней);
- Низкий уровень шума (отсутствует компрессор);
- Не требует ежедневного обслуживания;
- Буквенно-цифровая идентификация пациента (имя пациента, номер последовательности, бар-код);
- Возможность сохранения во встроенной памяти последнего результата, результатов исследований, контролей качества, параметров калибровки;
- Программное обеспечение на русском языке;
- Дополнительное программное обеспечение Micros позволяет обрабатывать и хранить измеряемые анализатором данные на внешнем компьютере;
- Жидкокристалический дисплей: 2 строки по 40 символов;
- Наличие встроенного принтера;
- Возможность использования внешнего принтера на обычной бумаге;
- Возможность подключения считывателя штрих-кодов;
- Наличие интерфейса RS — 232.
Измеряемые параметры:
- Эритроциты (RBC);
- Лейкоциты (WBC);
- Тромбоциты (PLT);
- Гемоглобин (Hb);
- Гематокрит (HCT);
- Средний объем эритроцитов (MCV);
- Среднее содержание гемоглобина в эритроците (MCH);
- Средняя концентрация гемоглобина в эритроците (MCHC);
- Анизоцитоз эритроцитов (RDW);
- Анизоцитоз тромбоцитов (PDW);
- Средний объем тромбоцитов (MPV);
- Тромбокрит (PCT);
- Лимфоциты (LYM);
- Моноциты (MON);
- Гранулоциты (GRA);
- Гистограммы распределения эритроцитов, лейкоцитов и тромбоцитов.
Методы измерения и расчета:
- Для WBC, RBC, PLT: изменение импеданса (кондуктометрический метод);
- Для HGB: спектрофотомерия;
- Для HCT: целочисленное интегрирование;
- Для LYM%, MON%, GRA%: изменение импеданса;
- Для MCV, MCH, MCHC, RDW, MPV, LYM#, MON#, GRA#, PCT, PDW: расчет по сохраненным результатам прямых измерений;
- Разведения: для измерения WBC 1/ 250, для измерения RBC/ PLT 1/ 15 000.
Дополнительное оборудование:
- Миксер Duo-Mix;
- Источник бесперебойного питания;
- Принтер.
| Сенсорный дисплей | Нет |
| Дифференцировка лейкоцитов | 3 субпопуляции |
| Производительность, тестов/час | 60 |
| Минимальный объем пробы, мкл | 10 |
| Режим работы | Открытая пробирка, Закрытая пробирка |
| Автоподатчик | Нет |
| Принтер | Встроенный |
| Подключение к ЛИС | Да |
| Считыватель штрих-кода | Внешний, Встроенный |
| Подсчет ретикулоцитов | Нет |
| Модуль подготовки и окрашивания мазков | Нет |
- Условия эксплуатации: от + 18 до + 30 ºС, с максимальной относительной влажностью воздуха 95%;
- Уровень шума: 53 дБ;
- Электропитание: 110 — 220 В, 50 Гц;
- Максимальная потребляемая мощность: 110 ВА;
- Программное обеспечение: оригинальное, разработанное HORIBA ABX, установлено на Flash EPROM;
- Вывод данных: печать на внешний принтер;
- Размеры: 42 х 36 х 32 см;
- Вес: 14 кг.
Анализатор гематологический автоматический ABX MICROS 60, варианты исполнения ABX MICROS 60 OТ, ABX MICROS 60 СТ, с принадлежностями I. Состав:
1. Анализатор.
2. Кабель питания — 1 шт.
3. Руководство по эксплуатации на CD-ROM — 1 шт.
4. Краткая инструкция пользователя на бумажном носителе — 1 шт.
5. Инструкция по выбору языка на бумажном носителе — 1 шт.
6. Информация по безопасности на бумажном носителе — 1 шт.
7. Трубка для отходов — 3 шт.
8. Трубка соединительная для подачи реагентов 2 м х 1,52 мм — 1 шт.
9. Трубка соединительная для подачи реагентов 3 м х 6 мм — 1 шт.
10. Трубка соединительная для подачи реагентов 2 м х 2,28 мм — 1 шт.
11. Трубка для подключения реагентов — 3 шт.
12. Крышка для реагентов с отверстием — 2 шт.
13. Пробка резиновая с двумя отверстиями — 1 шт.
14. Ключ для открывания контейнера с реагентом — 1 шт.
15. Коннектор для подключения реагентов, размер 3 мм — 2 шт.
16. Уплотнительное кольцо поршня вакуума — 1 шт.
17. Уплотнительное кольцо прокалывающей иглы — 2 шт.
18. Уплотнительное кольцо поршня разбавителя — 1 шт.
19. Уплотнительное кольцо поршня лизина — 3 шт.
20. Уплотнительное кольцо поршня пробы — 3 шт.
II. Принадлежности:
1. Пробоотборник — 1 шт. (каталожный номер GBC069AS — для варианта исполнения ABX MICROS 60 OТ, каталожный номер GBC052AS — для варианта исполнения ABX MICROS 60 СТ).
2. Пылезащитный чехол для анализатора — 1 шт.
3. Контейнер для отходов, 5 л — 1 шт.
4. Т-образный переходник пластиковый — 4 шт.
5. Смазка, 100 мл — 1 шт.
6. Силиконовая смазка для гидравлической системы, 2,5 мл — 1 шт.
7. Предохранитель, 1 А — не более 10 шт.
8. Ключ шестигранный Г-образный 1,5 мм — 1 шт.
9. Ключ шестигранный Г-образный 2 мм — 1 шт.
10. Ключ шестигранный Г-образный 2,5 мм — 1 шт.
11. Ключ Г-образный звездочка Т-10 — 1 шт.
12. Ключ для открывания дверцы анализатора — 1 шт.
13. Отвертка c шестигранной сферической головкой 2,5 мм х 100 мм — 1 шт.
14. Карта памяти для анализатора — 1 шт.

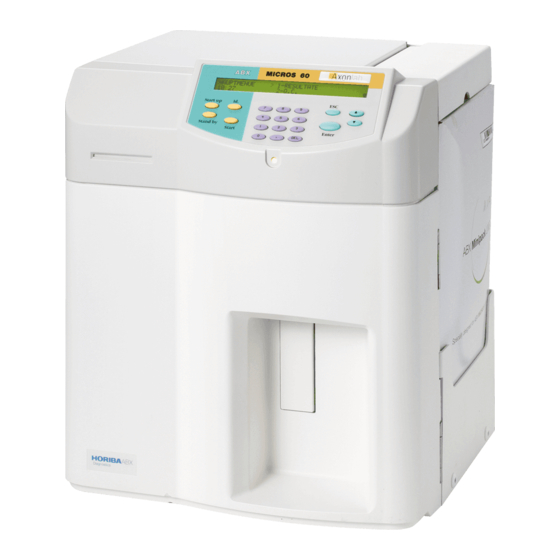
![]()
Гематологические анализаторы ABX Micros 60 — это полностью автоматические медицинские приборы для измерения параметров крови, которые являют собой выход на новый уровень диагностирования различных заболеваний.
Под заказ
- Описание
- Характеристики
- Дополнительно
- Видео
- Реагенты
Гематологические анализаторы ABX Micros 60 — это полностью автоматические медицинские приборы для измерения параметров крови, которые являют собой выход на новый уровень диагностирования различных заболеваний.
Гематологические анализаторы ABX Micros 60 – это полностью автоматические медицинские приборы для измерения 8 или 18 параметров крови, предназначенные для измерений счетной концентрации лейкоцитов и эритроцитов кондуктометрическим методом, а также массовой концентрации гемоглобина спектрофотометрическим методом. Благодаря сочетанию метода иммунотурбодиметрии и кондуктометрии гематологические анализаторы ABX Micros 60 являют собой выход на новый уровень диагностирования различных заболеваний.
Описание
Анализаторы используются для подсчета клеток крови кондуктометрическим методом. Метод основан на изменении полного сопротивления калибровочной апертуры, помещенной в электролит с постоянным током, проходящим между двумя электродами, расположенными по обеим сторонам апертуры. Вакуум, создающийся у краев апертуры, заставляет клетки продвигаться через, апертуру. Каждая клетка вытесняет свой объем электролита, тем самым повышая полное электрическое сопротивление апертуры (активное сопротивление). Прохождение каждой клетки регистрируется в виде импульса, амплитуда которого пропорциональна объему клетки. Определение гемоглобина производится спектрофотометрическим методом.
Анализаторы позволяют определять нормальные параметры клеток крови пациентов и сигнализировать о патологических результатах, которые требуют дополнительных исследований. На основании полученных результатов вычисляются 18 параметров образца крови моделей Micros 60 OT, а также выполняется построение гистограмм для использования в диагностике in vitro. Отличительной способностью моделей АВХ Micros ES 60 является наличие встроенной автоматической системой управления основными узлами. Модели ОТ и СТ отличаются между собой способом забора проб.
Особенности ABX Micros 60
- процедура измерения осуществляется при помощи одной кнопки;
- 8 (CBC) или 18 (LMG) – параметровый автомат, дифференциация лейкоцитов на 3 субпопуляции;
- возможность забора крови из закрытых или открытых пробирок;
- автоматическая очистка и обработка иглы пробоотборника;
- возможность автоматической калибровки;
- использование трех реагентов – разбавителя, лизирующего реагента и промывки;
- возможность сохранения во встроенной памяти последнего результата, результатов исследований, контролей качества, параметров калибровки;
- использование 3 – 5 мл открытых или закрытых пробирок в специальном держателе с EDTA;
- использование одной емкости для отходов и реагентов;
- два месяца работы анализатора на стартовом наборе при проведении 15-20 анализов в день.
|
Диапазоны измерений:
|
|
|
Пределы допускаемой относительной погрешности анализатора при измерении:
|
|
|
Масса, кг, не более |
17 |
|
Габаритные размеры, мм, не более |
430х 360×360 |
|
Пропускная способность тестов в час, не менее |
60 |
|
Потребляемая мощность от сети, В А, не более |
150 |
|
Питание от сети переменного тока частотой, Гц |
50/60 |
|
Напряжение от сети переменного тока, В |
От 100 до 240 (+/-10%) |
|
Средний срок службы, лет |
5 |
|
Средняя наработка до метрологического отказа, час |
10 000 |
|
Условия эксплуатации:
|
|
Комплектность
- аналитический блок;
- кабель питания;
- сетевой адаптер;
- комплект соединительных трубок;
- руководства по эксплуатации;
- методика поверки МП 242-1385-2012;
- расходные и контрольные материалы поставляются по требованию заказчика. (Реагенты должны быть рекомендованы производителем анализатора).
Две версии анализатора ABX Micros 60
| Модель анализатора |
Измеряемые параметры |
| ABX MICROS 60 OT8 на 8 параметров |
|
| ABX MICROS 60 OT18 на 18 параметров |
|
Программное обеспечение
Анализаторы имеют встроенное программное обеспечение. Программное обеспечение используется для контроля процесса работы анализатора, выполнения и просмотра результатов измерений, изменения настроечных параметров анализатора, просмотра памяти данных и т.д. Основные функции программного обеспечения: управление работой анализатора, обработка, хранение и передача результатов измерений.
Программное обеспечение анализатора имеет древовидную структуру меню и защищено на аппаратном уровне (опломбирование) от несанкционированной подмены программного модуля. Программное обеспечение идентифицируется при включении анализатора путем вывода на экран номера.
Идентификационные данные
*Ц.И. — цифровой идентификатор ПО
|
Наименование ПО |
Идентификационное наименование ПО |
Номер версии ПО |
Ц.И. |
Алгоритм вычисления Ц.И. |
|
Micros |
2.1.0.2a |
2.1.0.2a |
2EEB64A2 |
CRC-16 |
Защита ПО от преднамеренных и непреднамеренных изменений соответствует уровню «С» по МИ 3286-2010.
При нормировании метрологических характеристик учтено влияние программного обеспечения.
Поверка
Поверка осуществляется по методике поверки МП 242-1385-2012 «Анализаторы гематологические автоматические Micros, моделей Micros 60 OT, Micros 60 CT, АВХ Micros ES 60 ОТ, АВХ Micros ES 60 СТ. Методика поверки», утвержденной ГЦИ СИ ФГУП «ВНИИМ им. Д.И. Менделеева», в июне 2012 г.
Основные средства поверки: ГСО 9624-2010 Состава форменных элементов крови- «ГЕМАТОЛОГИЧЕСКИЙ КОНТРОЛЬ» (комплект ГК-ВНИИМ)».
Сведения о методах измерений
Методика измерений изложена в руководстве по эксплуатации «Анализаторы гематологические автоматические Micros, моделей Micros 60 OT, Micros 60 CT, АВХ Micros ES 60 ОТ, АВХ Micros ES 60 СТ».
Нормативные и технические документы:
- ГОСТ Р 50444-92 Приборы, аппараты и оборудование медицинские. Общие технические условия;
- ГОСТ Р 51530-99 Безопасность электрических контрольно-измерительных приборов и лабораторного оборудования;
- ГОСТ Р 51522-99 Совместимость технических средств электромагнитная. Электрическое оборудование для измерения, управления и лабораторного применения. Требования и методы испытаний;
- Техническая документация фирмы «HORIBA ABX S.A.S», Франция.
Обзор и подробное описание анализатора ABX Micros 60
Калибровка анализатора ABX Micros 60
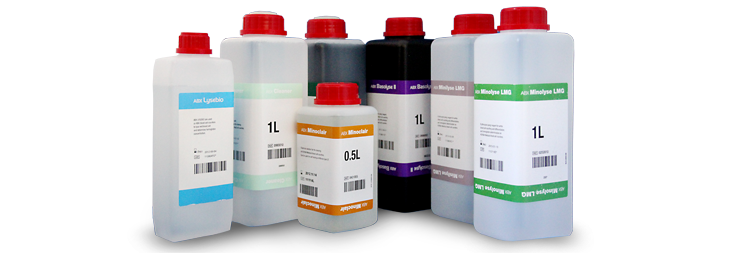
Для корректной работы гематологического анализатора следует использовать только высококачественные реагенты.
Horiba ABX (Франция) предоставляет для Вас все необходимые реагенты.
Все нижеперечисленые реагенты зарегистрированы в «Agence du Medicament» и соответствуют требованиям, предъявляемым к лабораторным реагентам, используемым для гематологических анализов.
Эти реагенты используются только для in vitro диагностики.
Реагенты
|
Наименование |
Кат.№ |
Упаковка |
|
ЭйБиИкс Альфалайс, Лизирующий реагент |
0906004 |
0,4 л |
|
ЭйБиИкс Базолайз, Лизирующий реагент |
0204050 |
5 л |
|
ЭйБиИкс Базолайз 2, Лизирующий реагент |
0906003 |
1 л |
|
ЭйБиИкс Дилюент, Реагент для разведения |
0901020 |
20 л |
|
ЭйБиИкс Изонофикс, Лизирующий реагент |
0206010 |
1 л |
|
ЭйБиИкс Клинер, Реагент для промывания |
0903010 |
1 л |
|
ЭйБиИкс Лайзбио, Лизирующий реагент |
0906013 |
0,4 л |
|
ЭйБиИкс Лейкодифф, Лизирующий реагент |
0206013 |
1 л |
|
ЭйБиИкс Минидил ЛМГ, Реагент для разведения |
0802020 |
20 л |
|
ЭйБиИкс Минилайз ЛМГ, Лизирующий реагент |
0702010 |
1 л |
|
ЭйБиИкс Минипак ЛМГ, Контейнер с реагентами |
0602050 |
4,2 л |
|
ЭйБиИкс Миноклер, Депротеинизатор |
0401005 |
0,5 л |
|
ЭйБиИкс Ретикс, Флуоресцентный краситель |
0904005 |
0,5 л |
|
ЭйБиИкс СиЭрПи Реа, Набор для определения С-реактивного белка |
0501015 |
— |
|
ЭйБиИкс СиЭрПи Стд, Калибратор |
0501016 |
2 фл. x 2 мл |
|
ЭйБиИкс СиЭрПи Трол (Контроль, низкий) |
0501017 |
2 мл |
|
ЭйБиИкс СиЭрПи Трол (Контроль, высокий) |
0501019 |
2 мл |
|
ЭйБиИкс Флюоцит, Флуоресцентный краситель |
0904011 |
0,5 л |
Смотрите также
Информация
Каталог
Почему мы
Контакты
- ООО «АРНА МЕДИКАЛ»
- Адрес: 196650, Санкт-Петербург, Колпино, ул. Финляндская, д.34, лит.А
- 8 (812) 678-97-87
Гематологический анализатор micros 60
Micros 60 — самая популярная в России модель из серии автоматических гематологических анализаторов производства французской компании Horiba ABX, имеющая безупречную репутацию, проверенную временем.
Надёжный, удобный, простой в работе и обслуживании, высокопроизводительный анализатор, предназначенный для небольших и средних лабораторий, способный с легкостью справиться с потоком исследований в крупных медицинских центрах.
Измеряемые параметры Micros 60
- Эритроциты (RBC)
- Лейкоциты (WBC)
- Тромбоциты (PLT)
- Гемоглобин (HGB)
- Гематокрит (HTC)
- Средний объем эритроцитов (MCV)
- Среднее содержание гемоглобина в эритроците (MCH)
- Средняя концентрация гемоглобина в эритроците (MCHC)
- Анизоцитоз эритроцитов (RDW)
- Анизоцитоз тромбоцитов (PDW)
- Средний объем тромбоцитов (MPV)
- Тромбокрит (PCT)
- Лимфоциты
- Моноциты
- Гранулоциты
- Гистограммы распределения эритроцитов, лейкоцитов и тромбоцитов
Техническое обслуживание Micros 60
Для стабильной работы анализатора и получения точных результатов измерения необходимо проводить процедуры обслуживания в установленные сроки в полном объеме.
Использование неоригинальных компонентов и реактивов оказывает значительное влияние на общую работоспособность системы.