- Manuals
- Brands
- MIMAKI Manuals
- Printer
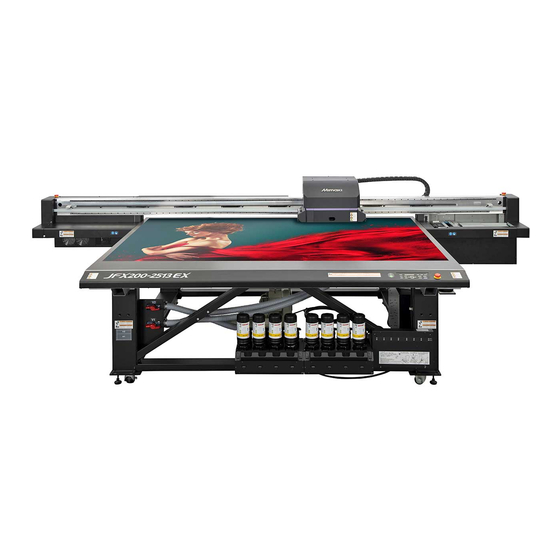
- JFX200-2513EX
- Operation manual
-
Contents
-
Table of Contents
-
Troubleshooting
-
Bookmarks
Quick Links
You can also download the latest manual from our website.
MIMAKI ENGINEERING CO., LTD.
https://mimaki.com/
D203431-12
Original instructions
Related Manuals for MIMAKI JFX200-2513EX
Summary of Contents for MIMAKI JFX200-2513EX
-
Page 1
You can also download the latest manual from our website. MIMAKI ENGINEERING CO., LTD. https://mimaki.com/ D203431-12 Original instructions… -
Page 2: Table Of Contents
TABLE OF CONTENTS Foreword……………… vi For Safe Operation …………… viii Symbols ……………….. viii Warnings and Precautions for Use ………… ix Installation Precautions…………… xiv Warning Labels……………. xvi Chapter 1 Before Use Usage Restrictions…………… 1-2 Usage Restrictions……………. 1-2 User Restrictions ……………. 1-2 Area Restrictions ……………. 1-2 Installing this Machine …………..
-
Page 3
Turning the Power On/Off………… 2-3 Turning the power on…………….. 2-3 Turning off the power…………….. 2-3 Setting up the Media………….. 2-5 Setting up the Media……………. 2-5 Move the illumination position of the UV lamp…… 2-8 The best position of the UV lamp for printing…….. 2-8 Adjusting the UV Lamp Position ………… -
Page 4
Nozzle Check Menu………….. 3-33 Nozzle Check Menu List ………….. 3-33 Printing Nozzle Check Flow…………. 3-33 Print Operations During «Nozzle Missing» Judgment and Error Occurrence ……………… 3-34 Printing Nozzle Check Settings ………… 3-34 Auto Nozzle Recovery Settings ………… 3-36 Judgment Condition Settings………… 3-36 Resetting to Default Settings …………. -
Page 5
Flushing Filter ……………. 4-42 Replacing the Flushing Filter ………… 4-42 Replacing the flushing filter before the replacement message is displayed……………… 4-42 Chapter 5 Troubleshooting Troubleshooting ……………. 5-2 Power does not turn on………….. 5-2 Machine does not start printing………… 5-2 Image quality is poor……………. 5-2 Nozzle is clogged……………. -
Page 6: Foreword
Foreword Congratulations on your purchase of UV inkjet printer JFX200-2513EX. JFX200-2513EX is a UV inkjet printer that supports high speed and high image quality, printing with UV ink. l DISCLAMER OF WARRANTY THIS LIMITED WARRANTY OF MIMAKI SHALL BE THE SOLE AND EXCLUSIVE WARRANTY AND IS IN LIEU OF ALL OTHER WARRANTIES, EXPRESS OR IMPLIED, INCLUDING, BUT NOT LIMITED TO, ANY IMPLIED WARRANTY OF MERCHANTABILITY OR FITNESS.
-
Page 7
• Plug the power cord of this printer into an outlet which is isolated from power circuits connected to the television set or radio. Reproduction of this manual is strictly prohibited. All Rights Reserved. © 2019 MIMAKI ENGINEERING Co., Ltd. -
Page 8: For Safe Operation
For Safe Operation For Safe Operation Symbols This manual uses symbols to explain the precautions during use. The indicated symbols differ depending on the contents of the caution. Please understand the meaning of each symbol to use this machine safely and correctly.
-
Page 9: Warnings And Precautions For Use
For Safe Operation Warnings and Precautions for Use l If a problem occurs • If someone swallows ink or cleaning solution by mistake, keep him or her quiet and take them to see a doctor immediately. Do not let allow the person to swallow the vomit. •…
-
Page 10
For Safe Operation • If an ink bottle is moved from a cold place to a warmer place, let it sit for at least three hours before use. • Open the ink bottle just before use and use it up as soon as possible. If the bottles are left open for a long time, the printing quality may degrade. -
Page 11
For Safe Operation • Never use an LED UV unit or UV power supplies other than those recommended by us. Using products besides those recommended by us can cause fire or damage to the equipment. Malfunctions caused due to the use of non-recommended products is out of the scope of warranty, and our company does not assume any responsibility for the same. -
Page 12: Power Supply
For Safe Operation • The included power cable set is for use with this machine only. It cannot be used with other electronic devices. Also, please do not use any power cable set other than the one provided with this machine. Doing so may cause fire or electric shocks.
-
Page 13: Handling Media
For Safe Operation • Using this machine in a low temperature environment can sometimes cause the vacuum to emit a high- pitched sound, but this is not a malfunction. l Anti freezing liquid • Use our exclusive anti freezing liquid. Using any other anti freezing liquid can cause the cooling system to malfunction.
-
Page 14: Installation Precautions
For Safe Operation l Maintenance • To prevent electric shocks during maintenance, always turn the main power switch off, and remove the power plug. Depending on the device, the condenser may require one minute to discharge. After turning the main power switch off and removing the power plug, wait three minutes before working. •…
-
Page 15
For Safe Operation • Places exposed to direct sunlight • Places that are not level • Places where vibrations occur • Places directly exposed to air flow from an air conditioner, etc. • Places where fire is used • Places with lots of dust •… -
Page 16: Warning Labels
Warning Labels Warning Labels The following warning labels are affixed to this machine. Fully understand the contents of the warning labels. If a warning label becomes illegible due to dirt or peels off, purchase a new one from your local distributor or our sales office.
-
Page 17
Warning Labels Order No. Label M909381 M903330 M906115 M902663 M905980 M916117 M909385 M903281 xvii… -
Page 18
Warning Labels Order No. Label M907935 xviii… -
Page 19: Chapter 1 Before Use
Chapter 1 Before Use This chapter This chapter explains what you need to know before use, such as the name of each part of this machine and its installation method. Usage Restrictions ………1-2 Connecting the Cables ……..1 -15 Usage Restrictions ……..1-2 Connecting the USB Cables ….1-15 User Restrictions……..
-
Page 20: Usage Restrictions
Chapter 1 Before Use Usage Restrictions Usage Restrictions This machine can be dangerous due to parts that move at high speeds, parts with high temperature and UV curing units. This machine is to be used only by those having complete understanding of dangers associated with these parts.
-
Page 21: Installing This Machine
Model Width Depth Height Gross weight JFX200-2513EX 4400 mm 2450 mm 1250 mm 600 kg • A service engineer will perform installation work of this machine. At this time, he/she will contact you and explain about the usage and the installation of this machine.
-
Page 22: Fixing This Machine
Chapter 1 Before Use Fixing This Machine The legs of the machine have level feet to fix the machine. Before turning on the power, make sure that the printer body is fixed with the leveling feet. The printer body may start moving during operation if it is not fixed with the leveling feet. •…
-
Page 23: Avoid These While Operating The Printer
Chapter 1 Before Use Avoid These While Operating the Printer Doing the things mentioned below when the printer is in operation might result in an injury. l Do not put your hands or any object on the table Do not put your hands on the movement channel of the carriage when the power is on. Also, do not put anything on the table other than the printing paper.
-
Page 24
Chapter 1 Before Use l Be careful not to get your hands pinched in the gap between the Y-bar and the carriage There is a risk of a person getting handicapped due to crushing or shearing if their hands or other body parts get caught between the Y-bar and the carriage. -
Page 25
Chapter 1 Before Use l Keep your hands away from the Y-bar and the carriage when the power is on There is a risk of hands getting crushed due to the movements of Y-bar and carriage. Keep your hands or other body parts away from this area and the printing range when the power is on. l Be careful not to get your hands caught in the carriage or the maintenance station portion Do not put your hands in the carriage or the maintenance station portion. -
Page 26
Chapter 1 Before Use l Be careful about belt winding malfunction Be careful not to get your hands dragged into the Y-bar belt. There is a risk of hurting your hands or objects getting sucked. l Do not place any object in front of the exhaust port of suction vacuum The object may get deformed due to the heat released from the exhaust port. -
Page 27
Chapter 1 Before Use l Be careful not to accidentally press the key panel switch by mistake Pressing this switch accidentally may cause sudden operation leading to an unexpected accident. l Be careful not to look directly at the UV light Do not directly look at the UV light. -
Page 28
Chapter 1 Before Use l Pay attention to following when replacing the ink • To prevent the ink from sticking to your hands or eyes when it splashes, be sure to wear the included safety glasses and gloves. • Do not pull the ink cover too much. Pulling it too much might damage the tubes and cables. -
Page 29: Names Of Parts And Functions
Chapter 1 Before Use Names of Parts and Functions Front Side of this Machine Power button Turns on/off the power to this machine. Carriage The carriage is provided with the ink heads for printing. Waste ink tank Waste ink gathers in this tank. Suction valve Operation panel Switched when setting the media.
-
Page 30: Operation Panel
Chapter 1 Before Use Operation Panel Use the operation panel to perform settings for printing or operate this machine. [ADJUST] key [VACUUM] key Performs the adjusting functions Press to attach the media on the such as drop position correction. table. [UP] key POWER Lamp [MAINT.] key…
-
Page 31: Carriage
Chapter 1 Before Use Carriage The carriage is provided with the heads for printing and LED UV unit. • Do not look at the light emitted from the LED UV with a naked eye when lit. • Do not touch the LED UV unit when the LED is lit or just after it is set off. You may suffer serious burns, as the unit is very hot.
-
Page 32
Chapter 1 Before Use There is one stop switch on the front side of the machine, and one each on the left and right edge of the Y- bar. When you press the stop switch to stop this machine, follow the procedure given below to release it. (1) Resolve the fault. -
Page 33: Connecting The Cables
Chapter 1 Before Use Connecting the Cables Connecting the USB Cables Connect this machine to the PC using a USB 2.0 interface cable. • Your RIP must be compatible with the USB 2.0 interface. • If the USB 2.0 interface isn’t attached to the PC, contact your nearest RIP manufacturer or our sales office. USB cable Notes on USB 2.0 Interface •…
-
Page 34: Connecting Power Supply Cable
Chapter 1 Before Use Use a USB cable shorter than 5 m. If a longer cable is required, use a commercially available USB 2.0 repeater cable. l Removing a USB Memory If a USB memory module is inserted in the personal computer to which the machine is connected, click [Stop] in the [Safely Removing Hardware] window.
-
Page 35: Connecting A Lan Cable
Chapter 1 Before Use Connecting a LAN Cable Observe the following precautions when connecting the LAN cable. • Make sure you push it in firmly until you hear a clicking sound. • Do not plug or unplug the cable while data is being transferred. LAN cable Printing Data via a Network If you want to print data via a network, you must construct the network in the following environment.
-
Page 36
Chapter 1 Before Use l Connecting through switching hubs Printing cannot be done unless the PCs and devices connected to the printer are 1000BASE-T. After connecting, check the following: 1. Check the printer screen display. – From the LOCAL screen or MEDIA DETECT screen, press the [ENTER] key several times to display the information screen. -
Page 37: Ink Bottles
Chapter 1 Before Use Ink Bottles Types of Usable Inks Following inks can be used with this machine. 4-color + white + clear model Uses one bottle each of cyan, magenta, yellow, and black and two bottles each of clear and white (LUS150, LH100, LUS120) 4-color + white + clear + primer model Uses one bottle each of cyan, magenta, yellow, black, clear, and primer…
-
Page 38
Chapter 1 Before Use Remove the cap of the ink bottle. • When using LUS-150, remove the cap and open the seal attached to the bottle with a cutter. When opening the seal, cut a circle as shown in the following figure. Make sure that the seal does not fall into the bottle. -
Page 39
Chapter 1 Before Use Use a fastening jig to close the specialized cap. Fastening jig Align with each other the arrows shown on the fastening jig • Tighten the fastening jig until the arrows shown on it get aligned with each other. •… -
Page 40
Chapter 1 Before Use Set the ink bottle over the tank. • Move the tank lever completely to the right and set the ink bottle. • Never rotate the ink bottle after setting it over the tank. Doing so may result in ink leakage. Lever Turn the tank lever from right to left. -
Page 41: Replacing An Ink Bottle
Chapter 1 Before Use Insert the Ink IC chip. • Insert the Ink IC chip with its metal part on the left. Inserting an Ink IC chip with its wrong side inward may damage the Ink IC chip or cause it to malfunction. •…
-
Page 42
Chapter 1 Before Use When [INK END] is displayed Turn the tank lever from left to right edge. • Make sure not to rotate the ink bottle. Doing so may result in ink leakage. Lift the ink bottle vertically. • When the ink bottle is removed from the tank, make sure that the light-blocking cover is shut. If the lid is not shut, close it manually. -
Page 43
Chapter 1 Before Use Wipe off the ink adhering to the bottom of the cap with the wiping filter. Cap wiping part Keep the bottle in an upright position and remove any ink adhering to the cap surface by using a disposable wipe such as KimWipe. Remove the cap from the used ink bottle. -
Page 44: If The Light-Blocking Cover Comes Off
Chapter 1 Before Use If the light-blocking cover comes off When the light-blocking cover comes off, light penetrating into the tank may cause the ink to harden. Perform the following steps to reattach the light-blocking cover: Insert the light-blocking cover (one nub) into the cover insertion hole on the tank. While pressing the cover into the cap insertion hole as explained in Step 1, insert the other nub into the other insertion hole.
-
Page 45: Ink Expiration Date
Chapter 1 Before Use Ink bottle lamp status Description No error Blinks in red Only a small amount of ink is remaining (near end) or the ink is one month past its expiration date. It needs to be replaced soon. Lights in red Ink bottle cannot be used either because it is empty or because of some ink error.
-
Page 46: Precautions On Handling Ink Bottles
• Do not shake the ink bottle too vigorously. Vigorous shaking may cause the ink to leak from the bottle. • Never refill an ink bottle. This may cause malfunction. Mimaki bears no responsibility for problems caused by such refilling.
-
Page 47: Media
Chapter 1 Before Use Media Usable media sizes and notes for handling are described below. Usable media sizes Item name JFX200-2513EX Maximum width 2500mm Maximum length 1300mm Maximum print width 2500mm Thickness 50mm or less Weight 325kg or less *1. Roughly 50 kg per 1 m Storing Media Store the media in a dust-proof place with no direct sunlight.
-
Page 48: Notes Regarding Work Environment, Etc
Chapter 1 Before Use Notes Regarding Work Environment, etc. The frequency of configuring print settings and conducting maintenance is largely influenced by the work environment in which printing is performed and the conditions of the used media. Make sure that you have completely understood the following items before using this machine.
-
Page 49: Chapter 2 Basic Usage
Chapter 2 Basic Usage This chapter This chapter explains how to prepare ink/media for printing and the procedures and configuration to be done before printing. Operation flow ……….2-2 Test printing……….. 2 -11 Examples of Plotting Failure ….2-11 Turning the Power On/Off ……2-3 Relation between the head layout and the Turning the power on ……..
-
Page 50: Operation Flow
Chapter 2 Basic Usage Operation flow Turn power On/Off «Turning the Power On/Off» (P. 2-3) Set up the Media «Setting up the Media» (P. 2-5) Move the illumination position of the UV lamp «Move the illumination position of the UV lamp» (P. 2-8) Test printing «Test printing»…
-
Page 51: Turning The Power On/Off
Chapter 2 Basic Usage Turning the Power On/Off Turning the power on Press the power button. • Press the power button located on the left side of the operation panel. Power button • When the power is turned on, the firmware version is displayed. JFX200EX Start-up Ver 1.00…
-
Page 52
Chapter 2 Basic Usage Press the power button to turn off the power. • The power button lamp goes off. • When using this machine again, press the power button and wait until the green lamp is lit. Power button Precautions on turning off the power l Do not pull out the power cord from the power outlet. -
Page 53: Setting Up The Media
Chapter 2 Basic Usage Setting up the Media This machine can be used with a leaf media. For usable media, see «Usable media sizes» (P. 1-29) . Setting up the Media • If a suction hole within the suction area is not covered by the media, lay out a thin sheet material such as paper, film or tape to cover the hole.
-
Page 54
Chapter 2 Basic Usage Suction Area The following figure shows the suction area. Origin sticker Print origin Provided at the four corners of the table. • To change the point of origin, see «Changing the Point of Origin» (P. 3-2). -
Page 55
Chapter 2 Basic Usage Media Guide Holes The table edges (both top and bottom) are provided with guide holes for inserting the layout pins provided with the printer. Use these guide holes to keep the media straight. • A commercially available M3 screw can be used instead of the positioning pin provided with the printer. In that case, screws can be used to secure the media to both the left and front sides of the table. -
Page 56: Move The Illumination Position Of The Uv Lamp
Chapter 2 Basic Usage Move the illumination position of the UV lamp For printing by using this machine, the position of the LED UV needs to be changed in accordance with the ink being used (color ink or special color ink). This machine gives you an option to select one of the following five types of printing methods: •…
-
Page 57
Chapter 2 Basic Usage Ink set Ink type Printing method Print Ink layer Image Lamp layer position (mm) CMYK CMYK CMYK 3-layer Cl CMYK CMYK CMYK 6C+4SP LH-100 Single CMYKLmLc layer LUS-150 2-layer CMYKLmLc CMYKLmLc CMYKLmLc 3-layer Cl CMYKLmLc *1. The above mentioned settings should be followed when prioritizing the image quality and the lamp position should be changed during printing. (The machine stops before clear printing and a warning is displayed on the Raster Link) If it is not possible to change the lamp position during printing, then set the lamp position to 0 mm before printing. -
Page 58: Adjusting The Uv Lamp Position
Chapter 2 Basic Usage Adjusting the UV Lamp Position This section describes how to move the UV lamps located on either side of the carriage. Loosen the screw of the lamp to be moved and slide the lamp to change its position. Align the tip of the arrow with the scale.
-
Page 59: Test Printing
Chapter 2 Basic Usage Test printing Print the test pattern to make sure that there are no ink discharge problems such as clogged nozzle (blurred print or missing nozzles). Examples of Plotting Failure Discharge failure of the head (head nozzle) due to dust is a typical example of plotting failure. Periodically check the condition of the nozzle before output or during output to avoid using it in defective state.
-
Page 60: Relation Between The Head Layout And The Test Patterns
Chapter 2 Basic Usage Relation between the head layout and the test patterns The following figure shows the relation between head layout and the positions of the printed test pattern. Head 1 Head 2 Head 3 ● 4C + 4SP Head 1 Head 2 pattern…
-
Page 61: Taking A Test Print
Chapter 2 Basic Usage Taking a Test Print Print the test pattern to make sure that there are no ink discharge problems such as clogged nozzle (blurred print or missing nozzles). The test pattern alignment direction can be selected for each test printing from the following two types. Select the direction suitable for your printing job.
-
Page 62
Chapter 2 Basic Usage Press the [ENTER] key. • Start the test print. **PRINT** PLEASE WAIT • Once the printing is completed, the display returns to the Step 1. TEST PRINT (FEED DIR.) [ENT] Check the print results. • Under normal circumstances, the operations end here. •… -
Page 63: Head Cleaning
Chapter 2 Basic Usage Head Cleaning Check the printed test pattern results and perform cleaning depending on the symptoms. Head cleaning can be done in three ways. Use them based on the pattern print results. Press the [CLEANING] key in LOCAL mode. CLEANING SOFT [ENT]…
-
Page 64
Chapter 2 Basic Usage l If the image quality does not improve even after head cleaning • Clean the wiper and ink cap. «Cleaning wiper and cap» (P. 4-5) • Perform the nozzle recovery settings. «When Nozzle Clogging Cannot Be Solved» (P. 4-18) 2-16… -
Page 65: Printing The Data
Chapter 2 Basic Usage Printing the Data Starting a Printing Operation Set the media • «Setting up the Media» (P. 2-5) (1) Open or close the suction valve according to the media size. (2) Press the [VACUUM] key to turn on the VACUUM lamp and adsorb the media. Press the [REMOTE] key in LOCAL.
-
Page 66: Aborting A Printing Operation
Chapter 2 Basic Usage Remove the media after the completion of printing. (1) Move the Y-bar outside the table. «Moving the Y-bar» (P. 2-18) (2) Press the [VACUUM] key to turn off suction. (3) Take out the media. • The media may get lifted and the print may get aborted due to the heat generated by the LED UV during printing.
-
Page 67
Chapter 2 Basic Usage Press the [ENTER] key. VIEW MOVE START <ent> Press the key. VIEW SET VIEW POS Press the [ENTER] key. SET VIEW POS **** mm By pressing the keys, set the position to which the Y-bar is to be moved. •… -
Page 68
Chapter 2 Basic Usage 2-20… -
Page 69: Chapter 3 Convenient Usage
Chapter 3 Convenient Usage This chapter This chapter explains the operation procedures and various settings for convenient use of this machine. Changing the Point of Origin ……3-2 Ionizer Settings……….3 -20 Using JOG Keys to Change the Print Origin AUTO CLEANING Settings ……3 -21 …………..
-
Page 70: Changing The Point Of Origin
Chapter 3 Convenient Usage Changing the Point of Origin The factory setting of point of Origin can be changed. It can be changed in one of the two ways. Changing with the JOG keys Changing from «ORIGIN» in the [FUNCTION] menu Media Light pointer mark Table…
-
Page 71: Using Function Menu To Change The Print Origin
Chapter 3 Convenient Usage Using FUNCTION menu to Change the Print Origin When setting an exact origin, set the X and Y coordinates of the origin from the FUNCTION menu. When the origin is set by using this option, the set value becomes the point of origin (0.0). Press the [FUNCTION] key in LOCAL.
-
Page 72: Registering The Media Thickness
Chapter 3 Convenient Usage Registering the Media Thickness Register the thickness of the media to be set. You can register the thickness in the following three methods. • Registering the thickness manually • Selecting with [UP] [DOWN] keys • Checking the thickness automatically Registering the Media Thickness Manually Press the [FUNCTION] key in LOCAL.
-
Page 73: Automatic Checking Of The Media Thickness
Chapter 3 Convenient Usage Press the [ENTER] key. ORIGIN SETUP ORIGIN SETUP HEAD GAP = 1.2 MEDIA THICKNESS = *.* mm Automatic Checking of the Media Thickness Media thickness is automatically checked by the gap pin located at the center of the carriage. Set the media.
-
Page 74: Head Gap Value
Chapter 3 Convenient Usage HEAD GAP Value Set the head gap (height from media to head nozzle surface). When the head is to be moved onto the platen for operations such as printing or maintenance, it moves while keeping the head gap at the pre-set value. The upper limit of head gap varies depending on the thickness of the media.
-
Page 75: Checking The Head Gap Value
Chapter 3 Convenient Usage Checking the Head Gap Value Perform the following operations when you want to check the currently set head gap value. Press the [ENTER] key in LOCAL. Press the [ENTER] key several times to display [HEAD GAP]. •…
-
Page 76: List Of Functions
Chapter 3 Convenient Usage List of Functions This section outlines the various functions and describes their settings. • Default «HOST» function The value specified in the RIP software runs this function. When a value other than «HOST» is specified, the specified value is used instead of waiting for instructions from the RIP software. Note that some functions may not be available depending on the RIP software used.
-
Page 77: Adjusting The Bidirectional Print Drop Position
Chapter 3 Convenient Usage Adjusting the Bidirectional Print Drop Position If you change the printing conditions (such as media thickness and head height), do the following to correct the ink drop position for bidirectional printing (Bi) to acquire the proper printing results: Correcting the Drop Position Set the media and set the print origin.
-
Page 78
Chapter 3 Convenient Usage Press to correct the drop position from pattern 1 onwards. • Corrected value: -40.0 to 40.0 PATTERN 1 • The position at which the outward feed line and the return feed line become one straight line is the correction value. -
Page 79: Setting Logical Seek
Chapter 3 Convenient Usage Setting LOGICAL SEEK The head operations differ depending on the LOGICAL SEEK settings. • LOGICAL SEEK settings cannot be specified in RasterLink. When the machine setting is «HOST» the printing operation is performed considering that the LOGICAL SEEK is «ON». Machine width Media Head movement when…
-
Page 80
Chapter 3 Convenient Usage Press to select the value to be set. • Available settings: HOST/ON/OFF LOGICAL SEEK : ON Press the [ENTER] key. SETUP LOGICAL SEEK [ENT] Press the [END] key several times to end the operation. 3-12… -
Page 81: Setting Uv Level
Chapter 3 Convenient Usage Setting UV LEVEL Set the UV LED irradiation pattern to be used and illumination intensity to be maintained during printing. Press the [FUNCTION] key in LOCAL. FUNCTION VIEW [ENT] Press to select [SETUP], and press the [ENTER] key. SETUP DROP.POScorrect [ENT]…
-
Page 82
Chapter 3 Convenient Usage Press to select the scanning direction, and press the [ENTER] key. • Available settings: Bi (bidirectional)/Uni (unidirectional) UV LEVEL : Bi Press to select the printing pattern, and press the [ENTER] key. • Available settings: PATTERN 1, 2, and onwards/NO PRINT •… -
Page 83: Reducing Stripes Between Passes
Reducing Stripes Between Passes MAPS Function If the feed lines do not disappear even after performing media feed correction, use the MAPS (Mimaki Advanced PassSystem) function to disperse the pass boundary to make the feed lines less visible. With this machine, you can use the MAPS2 function.
-
Page 84
Chapter 3 Convenient Usage Press to select «AUTO» or «MANUAL». • AUTO: Settings are performed automatically according to the printing conditions. • MANUAL: You can adjust the settings manually. MAPS 2 : MANUAL • If the feed stripes and uniformity of density are not improved by AUTO settings, adjust using MANUAL settings. -
Page 85
Chapter 3 Convenient Usage Press to set the [SPOT]. • AUTO: Patterns are set automatically depending on the printing conditions. • PATTERN 1 to 5: The pattern that you select is printed. < SPOT > PATTERN: 1 Press the [ENTER] key. •… -
Page 86
Chapter 3 Convenient Usage Press to set the [TYPE/LV.]. • TYPE1 10 to 100%: Set a value according to the printing conditions. • TYPE2 10 to 100%: Set a value according to the printing conditions. < CLEAR TYPE/LV.: AUTO • The effects of MAPS2 differ depending on the images to be printed. Change print patterns, and check the effects in advance before using the MAPS2 function. -
Page 87: Work Change Settings
Chapter 3 Convenient Usage WORK CHANGE Settings Set whether to return to LOCAL mode or keep the REMOTE mode after online plotting is complete. Press the [FUNCTION] key in LOCAL. FUNCTION VIEW [ENT] Press to select [SETUP]. FUNCTION SETUP [ENT] Press the [ENTER] key.
-
Page 88: Ionizer Settings
Chapter 3 Convenient Usage Ionizer Settings Set the operations when the optional ionizer is installed. • These settings are not displayed if the optional ionizer is not installed. If this setting is not displayed even though the ionizer is installed, contact your local distributor, or our sales office or call center. Press the [FUNCTION] key in LOCAL.
-
Page 89: Auto Cleaning Settings
Chapter 3 Convenient Usage AUTO CLEANING Settings You can set this function so that it counts the number of printed files or printed length after printing is complete, performs cleaning automatically if required. The machine can deliver stable output if its heads are always kept clean. Press the [FUNCTION] key in LOCAL.
-
Page 90
Chapter 3 Convenient Usage Press to set a cleaning type. • Available settings: NORMAL/SOFT/HARD TYPE : NORMAL Press the [ENTER] key. Press the [END] key several times to end the operation. • Depending on the state of the head, there are cases in which the print defects are not corrected even after running this function. -
Page 91: Setting Nozzle Surface Cleaning Frequency
Chapter 3 Convenient Usage Setting Nozzle Surface Cleaning Frequency This function automatically cleans the nozzle face of the head and removes the ink droplets clinging to the nozzle face before or during printing. Press the [FUNCTION] key in LOCAL. FUNCTION VIEW [ENT] Press…
-
Page 92: Other Settings
Chapter 3 Convenient Usage Other Settings Change the settings according to the method of usage. Press the [FUNCTION] key in LOCAL. FUNCTION VIEW [ENT] Press to select [SETUP]. FUNCTION SETUP [ENT] Press the [ENTER] key. SETUP DROP.POScorrect [ENT] Press to select the item you want to set. •…
-
Page 93: Machine Settings
Chapter 3 Convenient Usage Machine Settings These are various settings to help you use this machine comfortably. The following settings can be configured for the machine. Item Set value Details AUTO Power-off NONE/10 to 30 If are no operations or a set time, the power to 600 min turns off automatically.
-
Page 94: Time Settings
Chapter 3 Convenient Usage Press to select [MACHINE SETUP]. FUNCTION MACHINE SETUP [ENT] Press the [ENTER] key twice. AUTO Power-off 30min Press to set the time when you want the power to turn off. • Available settings: None, 10 to 600 min AUTO Power-off 60min Press the [ENTER] key.
-
Page 95: Unit Settings
Chapter 3 Convenient Usage Press to enter time. • Selecting Year/Month/Day/Time: Select using • Inputting Year/Month/Day/Time: Input using Press the [ENTER] key. • The entered time is displayed. TIME 2018.10.05 15:30:00 Press the [END] key several times to end the operation. •…
-
Page 96: Key Buzzer Settings
Chapter 3 Convenient Usage Press to select a unit for length. • Available settings: mm/inch Press the [ENTER] key. MACHINE SETUP UNIT [ENT] Press the [END] key several times to end the operation. Key Buzzer Settings You can turn off the buzzer that sounds when you press a key. Press the [FUNCTION] key in LOCAL.
-
Page 97: Language Settings
Network Settings You can configure network settings in the «Network Configurator» tool, which allows you to configure the network settings of Mimaki products. To download the Network Configurator, go to «Drivers/Utilities» on the Mimaki Engineering downloads page (https://mimaki.com/download/). Press the [FUNCTION] key in LOCAL.
-
Page 98
Chapter 3 Convenient Usage Press to select [NETWORK] and press the [ENTER] key. MACHINE SETUP NETWORK [ENT] Press the [ENTER] key. • [Check IP ADDR.] is selected. • This displays the IP address the machine is currently using. • After checking, press the [ENTER] key. NETWORK Check IP ADDR. -
Page 99: External Stop I/F
Chapter 3 Convenient Usage Press the [END] key several times to end the operation. • To reflect the new network settings, turn the power off and back on. External Stop I/F In this machine, you can connect External Stop I/F to the I/F in the figure below (SMP-02V-BC). External Stop I/F (SMP-02V-BC) Printer side…
-
Page 100
Chapter 3 Convenient Usage Press to select [EXE I/F]. MACHINE SETUP EXE I/F [ENT] Press the [ENTER] key. EXE I/F : OFF Press to select «ON» or «OFF». • ON: Use External Stop I/F. • OFF: Do not use External Stop I/F. EXE I/F : ON Press the [ENTER] key. -
Page 101: Nozzle Check Menu
Chapter 3 Convenient Usage Nozzle Check Menu This configures the operations related to Nozzle Missing check function. Nozzle Check Menu List Item Set value Details Printing Check ON/OFF Set this to on if you want to perform nozzle check when starting online «Printing Nozzle Check Settings»…
-
Page 102: Print Operations During «Nozzle Missing» Judgment And Error Occurrence
Chapter 3 Convenient Usage Auto nozzle recovery → judgment If more missing nozzles than the «Judgment Condition» are still detected in the last judgment, it is judged that printing cannot continue, and printing stops. – This applies when «AUTO NOZZLE RECOVERY» is set to «ON». Nozzle missing judgment Finally, if more missing nozzles than the «Judgment Condition»…
-
Page 103
Chapter 3 Convenient Usage Press to select the setting item and press the [ENTER] key. • Available settings: LENGTH/FILE • LENGTH: The nozzle is checked once a certain set length has been printed. • FILE: The nozzle is checked once a certain number of files have been printed. SETUP FILE Press… -
Page 104: Auto Nozzle Recovery Settings
Chapter 3 Convenient Usage Auto Nozzle Recovery Settings Press the [FUNCTION] key in LOCAL. FUNCTION VIEW [ENT] Press to select [NOZZLE CHECK]. FUNCTION NOZZLE CHECK [ENT] Press to select [AUTO NOZZLE RECOVERY]. NOZZLE CHECK : AUTO NOZZLE RECOVERY Press to select «ON» and press the [ENTER] key. •…
-
Page 105
Chapter 3 Convenient Usage Press to select the setting value and press the [ENTER] key. • Available settings: 1 to 64 • Each time you press the [ENTER] key, the target color changes. • The displayed color differs according to the ink set. Press the [END] key to end the operation. -
Page 106: Resetting To Default Settings
Chapter 3 Convenient Usage Resetting to Default Settings The details set in [SETUP] [MAINTENANCE] and [MACHINE SETUP] are returned to factory default settings. Press the [FUNCTION] key in LOCAL. FUNCTION VIEW [ENT] Press to select [MACHINE SETUP]. FUNCTION MACHINE SETUP [ENT] Press the [ENTER] key.
-
Page 107: Confirming Machine Information
Chapter 3 Convenient Usage Confirming Machine Information You can check the information of this machine. The following items can be checked as the machine information. Item Details USAGE WIPING This displays the usage status of the machine. «Checking Machine Usage PRINT LENGTH Status»…
-
Page 108: Checking Version Information
Displays the date of occurrence [00000] 2018/07/19 22:13:00 Error details are displayed in ERROR 12a ***** HDC SPEED Version Displays the version information such as F/W JFX200-2513EX V1.00 MRL-III V2.20 Displaying other information Press the [ENTER] key in LOCAL. ***INK MMCCYYKK REMAIN…
-
Page 109
• Warning display (for warning) WARNING REPLACE WIPER [MNT] • Serial No. SERIAL NO. : ******** • Version JFX200-2513EX V1.00 MRL-III V2.20 • Main PCB Information MAIN PCB EPL3B • Nozzle recovery Press the [MAINT.] key to check the details… -
Page 110
Chapter 3 Convenient Usage 3-42… -
Page 111: Chapter 4 Maintenance
Chapter 4 Maintenance This chapter This chapter explains the necessary items for comfortable use of this machine, such as methods of daily maintenance and ink cartridge maintenance. Daily maintenance ……….4-2 Automatic Maintenance Function ….4 -30 Precautions for maintenance ….4-2 Setting the refresh intervals …..4-30 About Washing Liquid …….
-
Page 112: Daily Maintenance
Chapter 4 Maintenance Daily maintenance Conduct the machine maintenance periodically or depending on the operation frequency of the machine, in order to use it for a long time while maintaining its accuracy. Precautions for maintenance Pay attention to the following items when maintaining this machine. •…
-
Page 113: Maintenance Of Machine Exterior
Chapter 4 Maintenance Maintenance of Machine Exterior Depending on the usage environment, trash and dust may stick to the exterior of the main unit. To prevent dust from entering the head moving part, soak a soft piece of cloth in water, wring it tightly and then wipe off the dust.
-
Page 114: Lm Guide Cleaning
Chapter 4 Maintenance Remove the bottle wiping filter. Bottle wiping filter Attach a new Bottle Wiping Filter (PN: SPC-0820). LM guide cleaning When the LM guide gets dirty, wipe it off with a soft, dry cloth. • Do not wipe with ethanol. LM guide Ionizer Maintenance Follow the instruction manual when performing ionizer (option) maintenance.
-
Page 115: Maintaining The Capping Station
Chapter 4 Maintenance Maintaining the Capping Station Maintain the ink cap and wiper in the capping station. (STATION MAINT.) The ink cap and wiper function as described below. • Wiper: Wipes off any ink on the head nozzle • Ink cap: Prevents the clogging of head nozzles due to dryness As you use this machine, the wiper and ink cap start getting dirty from ink and dust.
-
Page 116
Chapter 4 Maintenance Press the [ENTER] key. • Carriage moves onto the table. Moving carriage Remove the wiper. • Pull out the wiper by holding the protrusions at both the ends. Protrusion Clean the wiper and the bracket. • Wipe off any ink on the wiper and the bracket using a clean stick soaked in washing liquid. Wipe it off properly so that there is no residual washing liquid. -
Page 117
Chapter 4 Maintenance Clean the wiper cleaner. • Clean the tip of the wiper cleaner with a clean stick. Wiper cleaner • Lift the wiper cleaner up and clean the ink adhering to the inside with a clean stick. • Clean around the wiper cleaner. •… -
Page 118
Chapter 4 Maintenance Return the wiper to its original position. • Insert the wiper by holding both the ends. Protrusion Clean the cap rubber and cap rubber cover. • Wipe off any ink on the cap rubber and the cap rubber cover using a clean stick soaked in washing liquid. -
Page 119
Chapter 4 Maintenance Performing station maintenance without [MAINT.] key You can select [STATION MAINT.] using the [FUNCTION] key under LOCAL, without pressing the [MAINT.] key. Press the [FUNCTION] key in LOCAL. Press to select [MAINTENANCE]. Press the [ENTER] key twice. •… -
Page 120: Cleaning The Ncu
Chapter 4 Maintenance Cleaning the NCU Ink and dust adhere to the NCU. The NCU cannot operate normally if there is ink or dust adhering to it. Press the [MAINT.] key in LOCAL. CARRIAGE OUT [ENT] Press the [ENTER] key. MOVE POSITION : STATION MAINT.
-
Page 121: Cleaning Around The Station
Chapter 4 Maintenance Cleaning around the station We recommend that you clean the machine often to maintain the quality of the machine and the images. • Clean the area around the station twice a week (frequency of cleaning differs depending on the usage frequency of the printer).
-
Page 122: Washing The Ink Discharge Passage
Chapter 4 Maintenance Wipe off any ink on the flushing unit or the shutter. • Wipe off the ink using a clean stick soaked in washing liquid. Wipe it off properly so that there is no residual washing liquid. Flushing filter Flushing unit Shutter •…
-
Page 123: When The Machine Is Not Used For A Long Time
Chapter 4 Maintenance Take washing liquid in a dropper and fill the cap with it until it is full. • Fill the cap with washing liquid until it is about to overflow. Press the [ENTER] key. • After the dry suction operation is performed for 30 seconds, the display returns to Step 2. DISWAY WASH PLEASE WAIT When the Machine Is Not Used For a Long Time…
-
Page 124
Chapter 4 Maintenance Clean the wiper and the bracket. (1) Pull out the wiper by holding the protrusions at both the ends. (2) Use a clean stick soaked in washing liquid. • Wipe it off properly so that there is no residual washing liquid. (3) Hold the wiper by the protrusions at both the ends and push it back to the original position. -
Page 125
Chapter 4 Maintenance Take washing liquid in a dropper and fill the cap with it until it is full. • Fill the cap with washing liquid until it is about to overflow. Press the [ENTER] key. • This will clean the nozzles. •… -
Page 126: Maintenance Of Head Surroundings
Chapter 4 Maintenance Maintenance of Head Surroundings Extremely minute mechanisms are used for the head, and therefore proper care must be taken when performing maintenance. Some gel-like ink or dust may be stuck in the bottom part of the slider and around the head. Rub it off using a clean stick or another similar tool.
-
Page 127: Cleaning Led Uv Unit
Chapter 4 Maintenance Wipe any ink on the sides of the head and carriage using a clean stick. • Never rub the nozzle part. Clean the side of the head (dark gray part) Nozzle part (Never touch) with a clean stick. Clean using a clean stick.
-
Page 128: When Nozzle Clogging Cannot Be Solved
Chapter 4 Maintenance When Nozzle Clogging Cannot Be Solved If the nozzle clogging is not resolved even after head cleaning «Head Cleaning» (P. 2-15) is implemented, execute the following functions. HEAD FILLUP • Fill the head with ink. Filling with ink from the sub tank to the head NOZZLE WASH •…
-
Page 129: Washing Of Head Nozzle
Chapter 4 Maintenance Washing of head nozzle Wash the head nozzle to prevent them from getting clogged due to the hardened ink. Check these items in advance Is [INK END] displayed? • The ink is absorbed during washing. If the ink end is detected at this time, washing cannot be performed.
-
Page 130
Chapter 4 Maintenance Press the [ENTER] key. CAP CLEANING COMPLETED (NEXT) [ENT] • [COMPLETED (NEXT): ENT] is displayed on the screen until the cleaning of the cap is complete. Press the [ENTER] key after Step 6 is complete. If you press the [ENTER] key before the cleaning is complete, the machine moves to the next washing step. -
Page 131: Performing Air Purge
Chapter 4 Maintenance Press the [ENTER] key. • This will absorb the washing liquid filled in the cap. • The screen on the right is displayed while the cleaning liquid is still left in the cap. • After the duration has passed, the display returns to Step 2. PLEASE WAIT **CLEANING** 00 : 00…
-
Page 132
Chapter 4 Maintenance Open the maintenance cover. Maintenance cover • After the work is complete, quickly attach the removed cover. If you leave it removed for a long time, ultra-violet rays may affect the ink. Press the [ENTER] key. SET TOOL COMPLETED [ENT] •… -
Page 133
Chapter 4 Maintenance 6-Color + W Y Lm Cl W Cl W K Lc • Turn the cap 30° counterclockwise and then remove it. • Ink is stuck on the removed cap. Temporarily place it on a paper towel, etc. to avoid contamination of the surrounding area. -
Page 134
Chapter 4 Maintenance Press the [ENTER] key. AIR PG. START [ENT] Release the colored ink or the air mixed in the ink. • When you press the [ENTER] key, the machine goes into a state of atmospheric release and the ink comes out vigorously. -
Page 135: Nozzle Recovery Function
Chapter 4 Maintenance NOZZLE RECOVERY Function If nozzle clogging cannot be improved at the specified points, other good nozzles can be used as alternatives (nozzle recovery) for printing. The structure of the head is as shown in the following figure. With the nozzle recovery function, you can set nozzle recovery by specifying the nozzle lines for H1-3 (heads 1-3) respectively.
-
Page 136
Chapter 4 Maintenance Press the [ENTER] key to start printing. • The nozzle pattern is printed. • When you select [ENTRY] in Step 2, the machine moves to the nozzle line selection step (Step 5) without printing the nozzle pattern. **PRINT** PLEASE WAIT •… -
Page 137
Chapter 4 Maintenance Target for nozzle recovery No registration No registration Press the [END] key several times to end the operation. • Up to 10 nozzles can be registered for each nozzle line. • Time required for printing does not change even if you use this function. •… -
Page 138
Chapter 4 Maintenance Select [NOZZLE RECOVERY] of the MAINTENANCE menu. (1) Press the [FUNCTION] key in LOCAL. (2) Press to select [MAINTENANCE], and press the [ENTER] key. (3) Press to select [NOZZLE RECOVERY]. (4) Press the [ENTER] key. Press to select [CHECK BEFORE PRINT], and press the [ENTER] key. NOZZLE RECOVERY : CHECK BEFORE PRINT Press… -
Page 139
Chapter 4 Maintenance Press the [ENTER] key. Press the [END] key several times to end the operation. 4-29… -
Page 140: Automatic Maintenance Function
Chapter 4 Maintenance Automatic Maintenance Function To use this machine comfortably, you can set the various maintenance functions to be run automatically. Here, set performing intervals of various automatic maintenance functions. Issues such as ink clogging can be avoided by performing automatic maintenance periodically. (Automatic maintenance function) For automatic maintenance function, you can make the following settings.
-
Page 141: Setting The Cleaning Interval
Chapter 4 Maintenance Press the [END] key several times to end the operation. Setting the Cleaning Interval Cleaning type and the interval between each cleaning operation are set. Select [AUTO MAINT.] of the MAINTENANCE menu. (1) Press the [FUNCTION] key in LOCAL. (2) Press to select [MAINTENANCE], and press the [ENTER] key.
-
Page 142: Replacement Of Consumables
Chapter 4 Maintenance Replacement of Consumables Replacing the wiper The wiper is a consumable good. If the message on the right is displayed, replace the wiper as soon as possible. Also, wipe the ink sticking to the lower surface of the slider. <LOCAL>…
-
Page 143: Replacing Carriage Filters
Chapter 4 Maintenance Insert a new wiper • Insert the wiper by holding the protrusions at both the ends. Protrusion Press the [ENTER] key. • After its initial operation, the machine returns to LOCAL. *Being Initialized* PLEASE WAIT Replacing Carriage Filters Replace the filters once every 1 or 2 weeks.
-
Page 144: Disposing The Waste Ink
Chapter 4 Maintenance Install the new carriage filter (PN : SPC-0851). New carriage filter • Carriage filters are on the left, right, and back side of the carriage. Replace all the filters at same time. Once the replacement is complete, press the [ENTER] key. Disposing the Waste Ink The ink used in head cleaning and other functions is stored in the waste ink tank on the lower right side of the machine.
-
Page 145: Disposing Of Waste Ink
Chapter 4 Maintenance Disposing of Waste Ink • When disposing of the waste ink from the waste ink tank, be sure to wear the included safety glasses and gloves. Otherwise you may get ink in your eyes. • Do not replace the waste ink tank while this machine is in operation (printing or cleaning). •…
-
Page 146
Chapter 4 Maintenance Move the waste ink to a separate polyethylene tank and return the emptied waste ink tank to its original position. (1) As shown in the figure, move the waste ink collected in the waste ink tank to a separate polyethylene tank. -
Page 147: Replacing The Waste Ink Tank Before The Waste Ink Tank Confirmation Message Is Displayed (1)
Chapter 4 Maintenance Select [InkTankExchange] from the MAINTENANCE menu. (1) Press the [FUNCTION] key in LOCAL. (2) Press to select [MAINTENANCE], and press the [ENTER] key. (3) Press to select [InkTankExchange]. MAINTENANCE InkTankExchange [ENT] Press the [ENTER] key to release. InkTankExchange EXCHANGE [ENT]…
-
Page 148: Replacing The Waste Ink Tank Before The Waste Ink Tank Confirmation Message Is Displayed (2)
Chapter 4 Maintenance Press to set the «Level» to «0%». Check waste ink Level : 0% (0.0L) Press the [ENTER] key. Replacing the waste ink tank before the waste ink tank confirmation message is displayed (2) Set the waste ink information to 0% in the MAINTENANCE menu. Empty the waste ink tank.
-
Page 149: About Refilling The Cooling Water
• Dispose of the wastewater mixed with antifreeze pursuant to the regulations of your region. l Precautions for handling antifreeze liquid • Always use an anti freezing liquid recommended by Mimaki. The cooling device may malfunction if any other product is used. (Supplied antifreeze liquid: 1000 cc x 1) •…
-
Page 150: Refilling The Coolant
Chapter 4 Maintenance • When handling the anti freezing liquid, be sure to wear the included safety glasses and gloves. • Prepare a tank with a cap for moving the waste water from the cooling water tank. • The following error message is displayed when water in the cooling water tank is low. In this case, replace the water in the same way as shown in Refilling the Coolant.
-
Page 151
Chapter 4 Maintenance Remove the water supply/drainage cap. Water supply/ drainage Air purge Prepare mixed water solution (antifreeze liquid:1, water: 2) in the provided container and fill it into the provided syringe. Fill the mixed water solution until the buzzer sound stops. •… -
Page 152: Flushing Filter
Chapter 4 Maintenance Flushing Filter Tools required for • F-200/LF-200 Washing Liquid (PN : • Safety glasses replacement SPC-0568) • Waste cloth • Gloves • Be sure to wear the included safety glasses and gloves when performing replacement. As there is ink absorbed in the flushing filter, it may get in your eyes. Replacing the Flushing Filter The flushing filter needs to be replaced periodically.
-
Page 153
Chapter 4 Maintenance Press to select [FLUSHING FILTER]. STATION MAINT. [ENT] FLUSHING FILTER Press the [ENTER] key. CARRIAGE OUT START [ENT] Press the [ENTER] key. FILTER REPLACE COMPLETED [ENT] • [COMPLETED :ENT] is displayed on the screen until the filter replacement is complete. Press the [ENTER] key after Step 5 is complete. -
Page 154
Chapter 4 Maintenance 4-44… -
Page 155: Chapter 5 Troubleshooting
Chapter 5 Troubleshooting This chapter This chapter explains how to deal with suspected failures and solutions based on the error numbers indicated on the display. Troubleshooting……….5-2 If the message «SHAKE WHITE INK Power does not turn on ……5-2 BOTLES» is displayed……..5-4 Machine does not start printing ….
-
Page 156: Troubleshooting
Chapter 5 Troubleshooting Troubleshooting Check again before deciding the trouble as malfunction. If there is no improvement even after troubleshooting, contact your local distributor, or our sales office or call center. Power does not turn on In most of the cases, the power does not turn on due to improper connection of the power cable for the machine or the computer.
-
Page 157: Nozzle Is Clogged
Chapter 5 Troubleshooting Problem Solution Set a shorter interval for the interval wiping operation. «Setting Nozzle Surface Cleaning Frequency» (P. 3-23) Nozzle is clogged Nozzle discharge may become unstable depending on the surrounding temperature or if the machine is not used for a long time.
-
Page 158: Ink Leakage
Chapter 5 Troubleshooting Press the [ENTER] key in LOCAL mode. LUS-150 CMWWYKClCl REMAIN 34567899 Press the [ENTER] key. NON INK IC CMWWYKClCl • Details of the ink bottle error are displayed. • When multiple ink bottle defects occur, they will be displayed in order if you press the [ENTER] key Ink leakage If the ink starts leaking, switch off the main power, disconnect the power plug, and contact your local distributor, or our sales office or call center.
-
Page 159: If An Error Related To The Sub Tank Occurs
Chapter 5 Troubleshooting Set the ink bottle over the tank, and turn the tank lever from right to left. • Move the tank lever completely to the right and set the ink bottle. Lever • Never rotate the ink bottle after setting it over the tank. Doing so may result in ink leakage. Press the [ENTER].
-
Page 160: If Pressure Abnormality Occurs
Chapter 5 Troubleshooting Press the [ENTER] key. • Automatic discharge and filling operations are performed. **FILL UP** PLEASE WAIT • Perform cleaning once the filling is complete. **CLEANING** PLEASE WAIT Press the [END] key several times to end the operation. If pressure abnormality occurs The pressure controlled in the machine may exceed the control range due to environment and aging.
-
Page 161
Chapter 5 Troubleshooting Press the [ENTER] key. • Sensor adjustment starts. **ADJUSTING** PLEASE WAIT Rotate the adjustment screw of the throttle valve to adjust pressure to its proper value. • Proper value of negative pressure: -2.70 kPa • Proper value of positive pressure: -15.00 kPa •… -
Page 162: Warning/Error Message
Chapter 5 Troubleshooting Warning/Error Message When an abnormality occurs, the buzzer rings and the display shows a corresponding message. Take measures according to the message. Warning message Errors when performing operations Message Cause Solution CAN’T OPERATE An ink error occurred. •…
-
Page 163
Chapter 5 Troubleshooting Message Cause Solution <LOCAL> There is a small amount of • Press the [ENTER] key to check ink in the supply unit. the corresponding ink bottle. INK NEAR END [ENT] Ink is nearly used up. <LOCAL> Failure to refill ink in the •… -
Page 164: Error Message
Chapter 5 Troubleshooting Message Cause Solution INK COLOR The color of ink in the ink • Check the color of the ink bottle for bottle is of a different type which the warning occurred. : —- YYKK than the currently supplied ink.
-
Page 165
Chapter 5 Troubleshooting Message Cause Solution ERROR 129 Dead battery of internal • Contact your local distributor, our clock has been detected. sales office, or service center. BATTERY EXCHANGE ERROR 130 Head data transfer error • Turn off the power on the machine occurred. -
Page 166
Chapter 5 Troubleshooting Message Cause Solution ERROR 18e An error occurred in the flushing control. FLS NOT COMP [1 2 _ _] ERROR 18f An error occurred in the head voltage control. OFFSET START [1 2 _ _] ERROR 18f OFFSET END [1 2 _ _] ERROR 19d An error occurred in the… -
Page 167
Chapter 5 Troubleshooting Message Cause Solution ERROR 617 Liquid level sensor • Turn off the power on the machine abnormality of the sub tank and turn it on after a while. SUB TANK: 1 2 3 4 5 6 7 8 9 10 11 12 has been detected. -
Page 168
Chapter 5 Troubleshooting Message Cause Solution ERROR 716 Abnormality in ink heater • Turn off the power on the machine temperature. and turn it on after a while. InkHeaterRTmp: 12 When power is ON, the screen for ERROR 716 selecting whether to control the ink InkHeaterFTmp: 12 heater is displayed. -
Page 169: Chapter 6 Appendix
Chapter 6 Appendix This chapter This chapter lists specifications and functions of this machine. Specifications ……….6-2 Accessories Information ……..6 -4 Machine specifications ……6-2 Order of Ink Bottles ……… 6 -5 Ink specifications……..6-3 Inquiry Sheet ……….. 6 -6…
-
Page 170: Specifications
Chapter 6 Appendix Specifications Machine specifications Item Specifications Print head Method Drop-on-demand piezoelectric print heads Specifications 3 heads: 2 heads staggered on color 2 in line, special color 1 in line Printing conditions 4-color + white + clear 300 × 300HQ: Bi/Uni 4/8 pass (scan ×…
-
Page 171: Ink Specifications
1 to 60°C (storage permitted only for 120 hours or less if the temperature is 60°C and one month or less if the temperature is 40°C) • Do not use any ink other than the MIMAKI designated ink. Also, do not disassemble the ink bottles or refill or replenish their ink.
-
Page 172: Accessories Information
Chapter 6 Appendix Accessories Information Part name Part No. Part name Part No. Waste ink tank SL SPA-0197 Air filter kit SPA-0209 Bottle tightening jig kit SPA-0232 Layout pin kit SPA-0234 Electrode Needle cleaning KIT SPA-0237 Replacement Filter for Electrode Needle SPA-0238 cleaning KIT Inside electrode wall cleaning KIT…
-
Page 173: Order Of Ink Bottles
Chapter 6 Appendix Order of Ink Bottles The order of the set ink bottles differs depending on the ink set used. Ink set Ink distribution 4-color + white ink + clear 4-color + white ink + primer + clear 6-color + white ink + clear…
-
Page 174: Inquiry Sheet
Chapter 6 Appendix Inquiry Sheet Use this sheet for inquiries regarding printer malfunctions and abnormal operations. Fill in the following required fields and fax the sheet to our sales office. Company Name Contact Personnel Name Contact No. Printer Model Name Your OS Machine Information Error message…
-
Page 175
JFX200-2513EX Operation Manual May, 2019 MIMAKI ENGINEERING CO.,LTD. 2182-3 Shigeno-otsu, Tomi-shi, Nagano 389-0512 JAPAN D203431-12-22052019… -
Page 176
© MIMAKI ENGINEERING CO., LTD.2019 FW : 1.10…
-
Инструкции по эксплуатации
1

Mimaki JFX200-2513 инструкция по эксплуатации
(138 страниц)
- Языки:Английский
-
Тип:
PDF -
Размер:
9.63 MB
Просмотр
На NoDevice можно скачать инструкцию по эксплуатации для Mimaki JFX200-2513. Руководство пользователя необходимо для ознакомления с правилами установки и эксплуатации Mimaki JFX200-2513. Инструкции по использованию помогут правильно настроить Mimaki JFX200-2513, исправить ошибки и выявить неполадки.

Струйный УФ-принтер Mimaki JFX550-2513

Обслуживание
Чтобы гарантировать точную работу в течение многих лет, периодически обслуживайте этот продукт в зависимости от частоты использования.
Внимательно прочтите меры предосторожности по техническому обслуживанию, прежде чем обслуживать данное изделие.
Меры предосторожности при обслуживании
- Эта машина включает в себя детали, которые необходимо периодически заменять. Поэтому мы рекомендуем заключить договор на техническое обслуживание. Очистите эту машину и замените расходные материалы, чтобы предотвратить дефекты качества и несчастные случаи.
предупреждение
- Периодически чистите. Мусор и пыль будут скапливаться на электрических компонентах при длительном использовании машины. Существует риск отказа, поражения электрическим током или возгорания из-за утечки тока.
- Не очищайте обдувом, например, избегайте использования воздуходувок. Это может привести к отказу, поражению электрическим током или возгоранию машины, если частицы или пыль из воздуха попадут внутрь электрических компонентов.
Протрите мягкой тканью, смоченной в разбавленном моющем средстве и тщательно выжатой. Для уборки также можно использовать пылесос. - Не допускайте попадания жидкостей внутрь изделия. В противном случае существует риск выхода из строя, поражения электрическим током или возгорания.
осторожность
- Блок УФ-светодиодов сильно нагревается. Не прикасайтесь к устройству, пока оно не остынет после выключения светодиода.
- При сильном загрязнении протрите мягкой тканью, смоченной в разбавленном моющем средстве и тщательно выжатой.
- Обратите особое внимание на вентиляцию и обязательно надевайте защитные очки, перчатки и маску при работе с чернилами, жидкостью для обслуживания, отработанными чернилами или другими растворами, используемыми в этом аппарате. Вытекающие чернила могут прилипнуть к коже или попасть в глаза или рот.
уведомление
- Никогда не прикасайтесь к поверхности сопла печатающей головки. Не допускайте попадания воды или спирта на поверхность печатающего сопла. Это повысит риск отказа машины или дефектов печати (например, засорение или отклонение сопла).
- Не используйте ватные палочки для чистки вокруг головки или каретки. Волокна от ватных палочек могут прилипнуть к поверхности сопла головки и привести к дефектам печати (например, к засорению или отклонению сопла).
- Следите за тем, чтобы чернила или жидкость для обслуживания не попали на крышки. Воздействие брызг чернил или ремонтной жидкости может повредить или деформировать крышку.
- Не используйте бензин, растворитель или любые химические вещества, содержащие абразивы. Использование этих химикатов может привести к повреждению или деформации деталей.
- Не перемещайте каретку вручную. Чтобы переместить каретку, используйте функцию выдвижения каретки в меню.
Время обслуживания
| тайминг | Товары |
| В конце рабочего дня | Очистите стеклоочиститель и кронштейн стеклоочистителя. «Чистка дворников»(Стр.6) |
| Очистите стеклоочиститель. «Чистка дворников»(Стр.6) | |
| Очистите резиновую заглушку. «Чистка резиновой крышки»(Стр.8) | |
| Очистите НКУ. «Чистка НБУ»(Стр.9) | |
| Очистите нижнюю часть УФ-светодиода lamp. «Низ вагона Очистка »(Стр.10) | |
| Очистите нижнюю часть каретки. «Чистка днища вагона»(Стр.10) | |
| В конце рабочей недели | Очистите канал выпуска чернил. «Очистка канала выпуска чернил»(Стр.12) |
| Очистите территорию вокруг станции. «Уборка территории станции»(Стр.8) | |
| Чистить стол. «Уборка стола»(Стр.13) | |
| Очистите крышку и Y-образную планку. «Внешняя очистка (например, крышка, Y-образный стержень)»(Стр.13) | |
| Проверьте уровень отработанных чернил в контейнере для отработанных чернил. | |
| Периодически | Встряхните бутылку с чернилами. «Уход за чернилами»(Стр.6) |
Инструменты, необходимые для обслуживания
Чтобы заказать сменные расходные материалы, обратитесь к местному дилеру или в наш сервисный центр. Для получения дополнительной информации о расходных материалах см. webсайт. https://mimaki.com/supply/inkjet.html
Не храните этот продукт в местах, доступных для детей.
Выполнение технического обслуживания
Обслуживание чернил
Если компоненты чернил осаждаются, плотность чернил может стать неравномерной. Мы рекомендуем периодически встряхивать бутылку с чернилами, чтобы обеспечить однородность печати.
- УФ-чернила: один раз в месяц.
- Белая краска: один раз в день.
Встряхните бутылку с чернилами
Медленно встряхните бутылочку с чернилами влево и вправо не менее 20 раз.
- Плотно затяните крышку флакона с чернилами, затем медленно встряхните флакон слева направо, чтобы убедиться, что чернила переместились внутрь, придерживая крышку флакона с чернилами бумажным полотенцем.

- Медленно встряхните. Если бутылку встряхнуть слишком сильно, чернила могут вытечь или воздух, смешанный с чернилами, может вызвать засорение сопла.
- Если бутылка с чернилами частично использована, медленно наклоняйте ее, пока бутылка с чернилами не встанет вертикально.

Очистка дворников
Салфетка удаляет чернила, прилипшие к поверхности сопла печатающей головки. Продолжение использования грязной салфетки может привести к тому, что салфетка, к которой прикреплены засохшие чернила и пыль, будет тереться о поверхность сопла, что приведет к дефектам печати.
(например, засорение или отклонение сопла).
Будьте осторожны, чтобы не оставить фрагменты чистящей палочки при очистке. Эти фрагменты увеличивают риск дефектов печати (например, засорение или отклонение сопла).
- В МЕНЮ на сенсорной панели коснитесь [ОБСЛУЖИВАНИЕ].
Отображается меню обслуживания. - Коснитесь [Ежедневное обслуживание] > [Ежедневное обслуживание станции]..
Каретка движется по столу. - Снимите дворник.
Удерживая выступы с обеих сторон кронштейна стеклоочистителя, вытяните стеклоочиститель.
- Очистите стеклоочиститель и кронштейн.
Сотрите прилипшие чернила и пыль чистящей палочкой, смоченной жидкостью для ухода. Вытрите жидкость для ухода. Убедитесь, что ничего не осталось.
- Очистите стеклоочиститель.
Сотрите прилипшие чернила и пыль чистящей палочкой, смоченной жидкостью для ухода. Вытрите жидкость для ухода. Убедитесь, что ничего не осталось.
- Установите стеклоочиститель в исходное положение.

- Коснитесь [Готово] > [Конец] после завершения очистки.


Очистка резиновой крышки
Резиновый колпачок предохраняет поверхность сопла печатающей головки от высыхания. Продолжение использования грязного колпачка может повлиять на впитывание чернил и привести к дефектам печати (например, засорению сопла, искривлению).
• Будьте осторожны, чтобы не оставить фрагменты чистящей палочки при очистке. Эти фрагменты увеличивают риск дефектов печати (например, засорение или отклонение сопла).
- В МЕНЮ на сенсорной панели коснитесь [ОБСЛУЖИВАНИЕ].
Отображается меню обслуживания. - Коснитесь [Ежедневное обслуживание] > [Ежедневное обслуживание станции]..
Каретка движется по столу. - Очистите резиновую заглушку.
Сотрите прилипшие чернила и пыль чистящей палочкой, смоченной жидкостью для ухода. Вытрите жидкость для ухода. Убедитесь, что ничего не осталось.
- Коснитесь [Готово] > [Конец] после завершения очистки.

Уборка территории станции
Продолжение использования в грязном состоянии может препятствовать попаданию чернил в контейнер для отработанных чернил или вызывать трение засохших чернил и прилипшей пыли о поверхность сопла головки, что приводит к дефектам печати (например, засорению сопла, отклонению).
- В МЕНЮ на сенсорной панели коснитесь [ОБСЛУЖИВАНИЕ].
Отображается меню обслуживания. - Коснитесь [Еженедельное обслуживание] > [Еженедельное обслуживание станции].
Каретка движется по столу. - Очистите лоток стеклоочистителя.
Сотрите прилипшие чернила и пыль чистящей палочкой, смоченной жидкостью для ухода. Вытрите жидкость для ухода. Убедитесь, что ничего не осталось.
Соскребите засохшую краску шпателем или подобным инструментом.
- Очистите область вокруг промывочного фильтра и поверхность заслонки.
Сотрите прилипшие чернила и пыль чистящей палочкой, смоченной жидкостью для ухода. Вытрите жидкость для ухода. Убедитесь, что ничего не осталось.
Соскребите засохшую краску шпателем или подобным инструментом.
- Коснитесь [Готово] > [Конец] после завершения очистки.


Очистка NCU
NCU использует датчик для контроля капель чернил, выбрасываемых из сопел печатающей головки. Продолжение использования грязного NCU может помешать правильной работе функции проверки форсунок.
• Будьте осторожны, чтобы не оставить фрагменты чистящей палочки при очистке. Эти фрагменты увеличивают риск дефектов печати (например, засорение или отклонение сопла).
- В МЕНЮ на сенсорной панели коснитесь [ОБСЛУЖИВАНИЕ].
• Отображается меню обслуживания. - Коснитесь [Ежедневное обслуживание] > [Ежедневное обслуживание станции].
• Каретка перемещается по столу. - Очистите НКУ.
• Сотрите налипшие чернила и пыль чистящей палочкой, смоченной жидкостью для ухода. Вытрите жидкость для ухода. Убедитесь, что ничего не осталось. Вставьте чистящую палочку до линии, показанной на рисунке.
- Коснитесь [Готово] > [Конец] после завершения очистки.
 Вставьте чистящую палочку до линии, показанной на рисунке.
Очистка днища каретки
Нижняя сторона каретки покрывается чернилами, которые стираются салфеткой. Продолжение использования грязной нижней части каретки приведет к тому, что засохшие чернила и пыль попадут на носитель, что приведет к загрязнению отпечатков.
В печатающей головке используется чрезвычайно тонкий механизм. Будьте очень осторожны при обращении с ним.
• Будьте осторожны, чтобы не оставить фрагменты чистящей палочки при очистке. Эти фрагменты увеличивают риск дефектов печати (например, засорение или отклонение сопла).
- В МЕНЮ на сенсорной панели коснитесь [ОБСЛУЖИВАНИЕ].
Отображается меню обслуживания. - Коснитесь [Ежедневное обслуживание] > [Обслуживание головки].
Каретка перемещается в помещение для обслуживания. - Сдвиньте крышку обслуживания с левой стороны Y-образного стержня.
Поднимите рычаг и сдвиньте его влево.
- Очистите УФ-светодиод lamp.
Сотрите прилипшие чернила и пыль чистящей палочкой, смоченной жидкостью для ухода. Вытрите жидкость для ухода. Убедитесь, что ничего не осталось.
- Очистите область вокруг печатающей головки.
Сотрите прилипшие чернила и пыль чистящей палочкой, смоченной жидкостью для ухода. Вытрите жидкость для ухода. Убедитесь, что ничего не осталось. - После завершения очистки сдвиньте крышку обслуживания с левой стороны Y-образного стержня, чтобы закрыть ее.

- Коснитесь [Готово] > [Конец].


Очистка выпускного канала чернил
Регулярно прочищайте выпускной канал чернил, чтобы предотвратить засорение выпускного канала чернил под колпачком.
- В МЕНЮ на сенсорной панели коснитесь [ОБСЛУЖИВАНИЕ].
Отображается меню обслуживания. - Коснитесь [Еженедельное техническое обслуживание] > [Очистить канал подачи чернил].
Каретка движется по столу.
Всасывающий насос начнет работать. - Нанесите жидкость для обслуживания на колпачки.
С помощью шприца наберите и нанесите на колпачки поддерживающую жидкость.
- Коснитесь [Готово].
Техническая жидкость выливается из трубки насоса (канал слива чернил под крышкой). Вагон возвращается на станцию.

Уборка стола
Продолжение использования грязного стола приведет к тому, что засохшие чернила и прилипшая пыль будут тереться о поверхность сопла головки, что приведет к дефектам печати (например, засорение сопла, отклонение).
Чернила, оставшиеся на столе в течение длительного времени, трудно удалить даже с помощью этанола или растворителей.
- Отключите основное питание перед выполнением работ по техническому обслуживанию.

- Часто удаляйте пыль или твердые частицы с помощью мягкой щетки, сухой ткани или бумажного полотенца.
- Пыль и мусор будут скапливаться на таких деталях, как канавки стола и отверстия для винтов. Используйте щетку с мягкой щетиной для удаления пыли и мусора.
- При сильном загрязнении протрите мягкой тканью, смоченной в разбавленном моющем средстве и тщательно выжатой.
- Не допускайте попадания жидкостей внутрь изделия. В противном случае существует риск выхода из строя, поражения электрическим током или возгорания.

Внешняя очистка (например, крышка, Y-образная планка и т. д.)
- Отключите основное питание перед выполнением работ по техническому обслуживанию.

- При сильном загрязнении протрите мягкой тканью, смоченной в разбавленном моющем средстве и тщательно выжатой.
- Не допускайте попадания жидкостей внутрь изделия. В противном случае существует риск выхода из строя, поражения электрическим током или возгорания.

Руководство по ЛМ
Вытрите пыль с левого и правого концов поверхности направляющей LM мягкой сухой тканью.
Направляющая LM смазывается. Никогда не протирайте растворителями, такими как этанол. Сотрите все излишки или
капающей смазки мягкой сухой тканью.
Замена расходных материалов
Чтобы заказать сменные расходные материалы, обратитесь к местному дилеру или в наш сервисный центр.
Для получения дополнительной информации о расходных материалах см. webсайт. https://mimaki.com/supply/inkjet.html
- При утилизации продукта обратитесь к оператору по утилизации промышленных отходов или утилизируйте продукт в соответствии с местными законами и правилами.
- Не храните этот продукт в местах, доступных для детей.
Замена стеклоочистителя
Этот продукт ведет подсчет количества циклов очистки. Как только будет достигнуто указанное значение, на сенсорной панели появится надпись «0605 ЗАМЕНИТЕ СТЕКЛООЧИСТИТЕЛЬ». Замените грязные или деформированные дворники на новые.
- В МЕНЮ на сенсорной панели коснитесь [ОБСЛУЖИВАНИЕ].
Отображается меню обслуживания. - Коснитесь [Заменить детали] > [Заменить стеклоочиститель].
Каретка движется по столу. - Снимите дворник.
Удерживая выступы с обеих сторон кронштейна стеклоочистителя, вытяните стеклоочиститель.
- Очистите стеклоочиститель.
«Очистка стеклоочистителей» (стр. 6) - Установите новый дворник.

- Коснитесь [Готово] > [Конец] после завершения замены.
Счетчик использования стеклоочистителей сбрасывается.


Замена фильтра каретки
Проверьте фильтры тумана и замените их, если они сильно загрязнены.
Отключите основное питание перед выполнением работ по техническому обслуживанию.
- Снимите крышки фильтров каретки.
Выверните винты, затем снимите крышки фильтров.
- Установите новые фильтры.
- Установите крышки фильтров.
Слева и справа от каретки: Совместите выступы в нижней части крышки фильтра с крышкой каретки, затем закрепите винтами.
Задняя часть каретки: будьте осторожны, чтобы не уронить крышку фильтра.

Замена промывочного фильтра
Машина подсчитывает количество чернил, использованных при промывке. При достижении заданного значения на сенсорной панели появляется СИГНАЛИЗАЦИЯ СИСТЕМЫ. Используйте это как руководство по замене промывочного фильтра.
- В МЕНЮ на сенсорной панели коснитесь [ОБСЛУЖИВАНИЕ].
Отображается меню обслуживания. - Коснитесь [Заменить детали] > [Заменить промывочный фильтр].
Каретка движется по столу. - Снимите промывочный фильтр.

- Очистите место вокруг промывочного фильтра.
• «Уборка территории станции» (стр.
- Установите новый промывочный фильтр.
- Коснитесь [Готово] > [Конец] после завершения замены.
• Это сбрасывает объем промывки чернил.


Замена чернильной прокладки NCU
Если необходимо заменить чернильную прокладку NCU, на сенсорной панели появится надпись «0657 Проверьте отработанные чернила NCU». Используйте это как руководство для замены.
- В МЕНЮ на сенсорной панели коснитесь [ОБСЛУЖИВАНИЕ].
Отображается меню обслуживания. - Коснитесь [Заменить детали] > [Заменить абсорбент NCU].
Вагон движется по столу, и станция поднимается. - Снимите поддон для чернил NCU.
Сдвиньте вперед, чтобы удалить.
- Удалите чернильную прокладку из поддона для чернил NCU.

- Очистите поддон для чернил NCU.
- Установите новую чернильную подушку NCU.
- Установите поддон для чернил NCU.
Вставьте до щелчка и убедитесь, что выступы зафиксированы. - Коснитесь [Готово] > [Конец] после завершения замены.
Это сбрасывает счетчик чернил NCU.


Замена фильтра для протирки чернил в бутылке
Проверьте протирочные фильтры для чернил в бутылках и замените их, если они сильно загрязнены.
- Снимите салфетки с фильтрами.

- Очистите корпус фильтра очистки.
- Установите новые фильтры очистки.

Замена емкости для отработанных чернил
Чернила, используемые во время очистки печатающей головки и других процессов, собираются в контейнере для отработанных чернил в правом нижнем углу устройства.
Аппарат подсчитывает количество слитых чернил. Как только заданное значение будет достигнуто, «0604 CHECK
WASTE BOTTLE» появится в SYSTEM ALARM на сенсорной панели. Используйте это руководство по замене контейнера для отработанных чернил.
- Для 2.6-литрового бака заданный уровень составляет 80 % (2.1 литра).
- Продолжение использования устройства без утилизации отработанных чернил может привести к переливу отработанных чернил из контейнера для отработанных чернил. Примерно раз в неделю визуально проверяйте уровень чернил в контейнере для отработанных чернил.
- Обратите особое внимание на вентиляцию и обязательно надевайте защитные очки, перчатки и маску при работе с чернилами, жидкостью для обслуживания, отработанными чернилами или другими растворами, используемыми в этом аппарате. Вытекающие чернила могут прилипнуть к коже или попасть в глаза или рот.
- В МЕНЮ на сенсорной панели коснитесь [ОБСЛУЖИВАНИЕ].
Отображается меню обслуживания. - Коснитесь [Другое обслуживание] > [Замените емкость для отработанных чернил].
- Откройте защитный кожух контейнера для отработанных чернил.
Выверните винт, чтобы открыть защитный кожух контейнера для отработанных чернил.
- Возьмитесь за ручку резервуара для отработанных чернил и выдвиньте его.
- Прикрепите крышку к снятому контейнеру для отработанных чернил и используйте ленту, чтобы предотвратить утечку отработанных чернил.
 При утилизации продукта обратитесь к оператору по утилизации промышленных отходов или утилизируйте продукт в соответствии с местными законами и правилами.
 - Установите новый контейнер для отработанных чернил.
- Закройте крышку контейнера для отработанных чернил.

- Коснитесь [Готово] > [Конец] после завершения замены.
Уровень отработанных чернил будет сброшен.

 При утилизации продукта обратитесь к оператору по утилизации промышленных отходов или утилизируйте продукт в соответствии с местными законами и правилами.
Долив охлаждающей воды (в смеси с антифризом)
Блок УФ-светодиодов нагревается при использовании. Охлаждающая вода (в смеси с антифризом) используется для охлаждения данного устройства. Как только заданное значение будет достигнуто, «0705 НЕДОСТАТОК ВОДЫ» появится в СИСТЕМНОЙ СИГНАЛИЗАЦИИ при касании.
панели, и раздастся звуковой сигнал. Заполните бак охлаждающего устройства охлаждающей водой, смешанной с антифризом (1 часть антифриза на 2 части воды). Для заполнения бака требуется около 500 мл антифризной смеси.
- Используйте только специальную антифризную жидкость Mimaki Engineering. Использование другой антифризной жидкости может привести к сбоям или снижению качества печати.
- Позаботьтесь о том, чтобы исключить любые источники воспламенения, такие как статическое электричество или искры от ударов.
- Ненужную незамерзающую жидкость следует утилизировать следующим образом:
(1) Засыпать опилками или тряпками и сжечь.
(2) Заключить договор субподряда с лицензированным подрядчиком по утилизации промышленных отходов, объяснив, что именно подлежит удалению.

- Смешайте 1 часть антифриза с 2 частями воды в контейнере (прилагается).
Меры предосторожности при работе с водой, смешанной с антифризом (1) Используйте воду, соответствующую следующим условиям.
Содержание кальция: 10 мг/л (1 мг/100 мл) или менее
Жесткость: 60 мг/л или менее
Дистиллированная вода или очищенная вода
(2) Не храните воду, смешанную с антифризом.
(3) Избыток смеси антифриза следует использовать в течение одной недели; впрыскивание в устройство антифризной смеси, изготовленной более одной недели, может привести к неисправности. - Перелейте смесь антифриза в шприц (прилагается).
- В МЕНЮ на сенсорной панели коснитесь [ОБСЛУЖИВАНИЕ].
Отображается меню обслуживания. - Коснитесь [Другое техническое обслуживание] > [Залейте охлаждающую воду].
Появится диалоговое окно.
Во время перехода экрана Y-бар перемещается к началу таблицы. Никогда не приближайтесь к основному блоку, пока Y-образная планка не остановится. - Снимите заглушки для подачи воды и продувки воздухом.
 Впрысните смесь воды и антифриза.
 Зуммер прекратится после того, как вы введете около 500 мл смеси.
- После прекращения звукового сигнала введите еще 100 мл смеси.
Не вводите более 100 мл смеси. Впрыскивание большего количества может привести к переполнению резервуара. - После завершения инъекции замените колпачки.
 Впрысните смесь воды и антифриза.
 Зуммер прекратится после того, как вы введете около 500 мл смеси.
Документы / Ресурсы
Message
E R ROR 3 0 4
U S B
I N I T E R R
E R ROR 3 0 5
U S B T I ME OU T
E R ROR 4 0 1
MO T OR X
E R ROR 4 0 2
MO T OR Y
E R ROR 4 0 3
X C U R R E N T
E R ROR 4 0 4
Y C U R R E N T
E R ROR 4 4 4
Y MO T OR B R U S H
E R ROR 5 0 5
ME D I A J AM
E R ROR 5 0 9
HDC POS CN T
E R ROR 5 0 a
Y OR I G I N
E R ROR 5 0 f
L — S C A L E B L A C K
E R ROR 5 1 0
X OR I G I N
E R ROR 5 1 9
N E G A T I V E P . S E N S OR
E R ROR 5 1 a
P O S I T I V E P . S E N S OR
E R ROR 6 1 7
S U B T A N K S N N : 1 2 3 4 5 6 7 8
E R ROR 6 1 8
T A N K l e v e l H
: 1 2 3 4 5 6 7 8
E R ROR 6 1 9
T A N K l e v e l L
: 1 2 3 4 5 6 7 8
E R ROR 6 1 a
O V E R F L OW
: 1 2 3 4 5 6 7 8
5-14
Cause
USB device initialization failure.
Occurrence of a time out error on a
USB device.
An excessive load was applied to the X
motor.
An excessive load was applied to the Y
motor.
An error due to an excessive current of
the X motor was detected.
An error due to an excessive current of
the Y motor was detected.
Time to replace the brush of Y motor
has come.
The media jam occurs.
A HDC position counter error occurred.
Y-origin could not be detected.
Abnormal linear scale.
X-origin could not be detected.
The value of the negative pressure
sensor is abnormal.
The value of the positive pressure sen-
sor is abnormal.
The liquid level sensor abnormality of
the sub tank has been detected.
Though a certain amount was con-
sumed, there is no change in the sub
tank sensor High.
Though a certain amount was con-
sumed, there is no change in the sub
tank sensor Low.
Overflow from the sub tank has been
detected.
Solution
• Turn off the main power to the machine
and turn it on after a while.
If the same error message appears again,
contact your local distributor to call for ser-
vice.
• The brush of Y motor shall be replaced.
Contact a distributor in your district, our
office, or our call center.
• Remove the media and reset it.
• Turn off the main power to the machine
and turn it on after a while.
If the same error message appears again,
contact your local distributor to call for ser-
vice.
• Perform «PRESSURE ADJUST» (
7) of the maintenance. If you cannot adjust
it to the normal value, or, even if you per-
form, it may be displayed, contact your
local distributor to call for service.
• Turn off the main power to the machine
and turn it on after a while.
If the same error message appears again,
contact your local distributor to call for ser-
vice.
• Perform «SUB TANK» (
maintenance. Even if you performed this,
when the message is displayed, contact
your local distributor to call for service.
P.5-
P.5-6) of the