- Home
- Инструкции
- Автоматика для ворот
- NICE
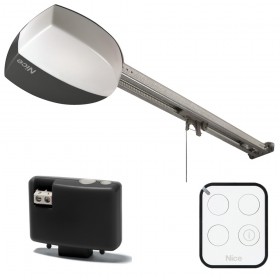
- SPIN 10KCE
![]() Автоматика для секционных ворот NICE SPIN 10KCE инструкция по эксплуатации и монтажу на русском языке в формате pdf, размер файла 676.8 Kb. Используйте кнопки «Скачать инструкцию» или «Открыть в новом окне» (документ откроется в новом окне или вкладке браузера). Функция просмотра доступна при наличии плагина Adobe Acrobat в вашем браузере.
Автоматика для секционных ворот NICE SPIN 10KCE инструкция по эксплуатации и монтажу на русском языке в формате pdf, размер файла 676.8 Kb. Используйте кнопки «Скачать инструкцию» или «Открыть в новом окне» (документ откроется в новом окне или вкладке браузера). Функция просмотра доступна при наличии плагина Adobe Acrobat в вашем браузере.
NICE SPIN 10KCE инструкция
Язык: Русский
Размер : 676.8 Kb
Формат файла: pdf
Добавлен: 19.06.2013
Руководство по установке и использованию
Предварительный просмотр

Информация, описание, технические характеристики изделия
Описание и информация о технических характеристиках по данному изделию пока что отсутствует. Содержание во всех разделах сайта периодически обновляется. Попробуйте зайти на страницу позже.
Отзывы по оборудованию и комментарии к материалу
Здесь можно оставить свои отзывы по оборудованию «NICE SPIN 10KCE — Секционные ворота», а также написать комментарии к материалу.
- Описание
-
Подробности
Серия электромеханических приводов Nice SPIN22BDKCE предназначены для автоматизации секционных ворот максимальной площадью до 10,5м2 и высотой ворот до 3,4м. Направляющая рейка поставляется с зубчатым ремнем.
Привод обладает множеством достоинств:
- быстрый монтаж;
- тихая работа привода благодаря использованию армированного ремня;
- встроенная сигнальная лампа, которая используется как для освещения;
- режим энергосбережения;
- плавный старт и остановка;
- возможность подключения элементов безопасности;
- функция автоматического закрытия;
- Режим проветривания помещения.
- Характеристики
-
Дополнительная информация
Артикул (SKU) SPIN22BDKCE Вес, КГ. 5.0000 Бренд Nice Тип электропривода Потолочный Максимальная высота ворот, м 3,4 Максимальная площадь ворот, м2 10,5 Диапазон рабочих температур, °С -20..+55С Максимальная потребляемая мощность, Вт 270 Напряжение питания двигателя 24 В постоянного тока Интенсивность использования Малая интенсивность Частота использования 50 циклов / день Максимальная масса полотна, кг Нет Максимальный крутящий момент, Нм Нет Комплектация Комплект Класс защиты IP40 - Отзывы
- Инструкции
-
Вложения товара
Инструкция к приводу SN6021 (SPIN23BDKCE/SPIN22BDKCE), SN6031, SN6041 Скачать (pdf 2.14 MB)
Похожие товары
-
Nice SPIN23BDKCE автоматика для секционных ворот
18 500,00 руб. -
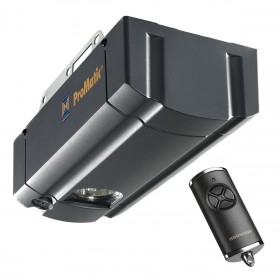
HORMANN ProMatic автоматика для секционных ворот
25 200,00 руб. -
Doorhan Sectional-1000 PRO автоматика для секционных ворот
11 780,00 руб. -
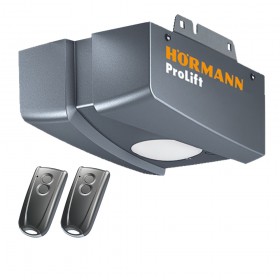
HORMANN ProLift 700 автоматика для секционных ворот
17 700,00 руб.


- Manuals
- Brands
- Nice Manuals
- Garage Door Opener
- SN6011
- Instructions and warnings for installation and use
-
Contents
-
Table of Contents
-
Troubleshooting
-
Bookmarks
Quick Links
Nice
SN6011
For garage doors
EN — Instructions and warnings for installation and use
Related Manuals for Nice SN6011
Summary of Contents for Nice SN6011
-
Page 1
Nice SN6011 For garage doors EN — Instructions and warnings for installation and use… -
Page 3: Table Of Contents
CONTENTS GENERAL WARNINGS: SAFETY — INSTALLATION — USE 1 — PRODUCT DESCRIPTION AND INTENDED USE 2 — OPERATING LIMITS 3 — INSTALLATION 3.1 — Gearmotor installation 3.2 — Assembling the guide provided 3.3 — Assembling the SNA30 and SNA30C guide 3.4 — Fastening the gearmotor to the guide 3.5 — Fastening the gearmotor to the ceiling 4 — ELECTRICAL CONNECTIONS…
-
Page 5: General Warnings: Safety — Installation — Use
GENERAL WARNINGS: SAFETY — INSTALLATION — USE (instructions translated from Italian) WARNING Important safety instructions. Observe all the instructions as improper installation may cause serious damage WARNING Important safety instructions. It is important to comply with these instructions to ensure personal safety. Store these instructions •…
-
Page 6
4 – English… -
Page 7: Product Description And Intended Use
3.5 m 2.8 m Warning! Any other use or use with dimensions greater than those specified is considered non-conforming. Nice declines all liability for damage and injury resulting from non-conforming use. The measurements shown in Table 2 are purely indicative and are used for a general estimate only. The actual suitability of SPIN for automating a specific door depends on the degree of door leaf balancing, guide friction and other aspects, including occasional circumstances such as wind pressure or the presence of ice, which could obstruct the door’s movement.
-
Page 8: Installation
INSTALLATION 3.1 — Gearmotor installation Important! Before installing the gearmotor, check Chapter 2, the contents of the package to verify the materials and the overall dimensions of the gearmotor (Figs. 1 and 2). Warning! The door must be able to move with ease. Limit to be observed (in accordance with EN 12604): — private use = 150 N maximum — industrial/commercial use = 260 N maximum 2970 mm…
-
Page 9: Assembling The Guide Provided
Before proceeding with the installation, check the overall dimensions of the gearmotor (Fig. 1). If the door to be automated is an overhead type, check the distance E in Fig. 2, that is, the minimum distance between the upper side of the guide and the maximum point reached by the upper edge of the door.
-
Page 10: Assembling The Sna30 And Sna30C Guide
Fasten the belt guide D to the upper motor carriage E using the screw (V6x18) and relative washer (M6) Attach the upper motor carriage E to the lower carriage C and transfer the entire carriage into the guide Assemble the three pieces of the guide by attaching them vigorously onto the connection brackets F, with the aid of a hammer The guides must slide into the brackets…
-
Page 11: Fastening The Gearmotor To The Guide
3.4 — Fastening the gearmotor to the guide Join the SPIN gearmotor to the end of the guide B and secure it with the 4 screws (V6.3×38) The motor can be rotated in three different positions 3.5 — Fastening the gearmotor to the ceiling On the basis of distances A and B, mark along 2970 mm 380 mm…
-
Page 12
Using a ladder, lift the gearmotor until the brackets touch the ceiling. Mark the drilling points and then put the gear- motor back on the ground Drill the surface on the marked points then, us- ing a ladder, lift the gearmotor until the brack- ets lie against the drilled holes and secure it with screws and plugs suited to the material Ensure that the guide lies perfectly horizontal,… -
Page 13: Electrical Connections
Manually open the door to the desired posi- tion. Shift the rear mechanical stop Q, then place it alongside the motor carriage and lock it by vigorously tightening screw P Try to move the door manually. Check that the motor carriage slides smoothly without any friction on the guide and that manual ma- noeuvre does not require excessive force.
-
Page 14: Electrical Cable Connections
7 — 8 FLASH — on this output it is possible to connect a Nice warning light (for the relevant models see Chapter 13 — Technical specifications). During the manoeuvre the light flashes at intervals of 0.5 seconds on and 0.5 seconds off.
-
Page 15: Starting The Automation And Checking The Connections
STARTING THE AUTOMATION AND CHECKING THE CONNECTIONS 5.1 — Connecting the automation to the mains electricity To connect SPIN to the main electricity, simply insert the plug into a power outlet; if necessary, use a common adapter if the plug version is not compatible the available socket.
-
Page 16: Commissioning
If the dangerous situations caused by the movement of the door have been safeguarded by limiting the force impact, the user must measure the impact force according to the EN 12445 standard. If the adjustment of the ‘Speed’ and control of the ‘Motor Force’ are used to assist the system for the reduction of the impact force, try to find the adjustment that gives the best results.
-
Page 17: Programming
PROGRAMMING 7.1 — Programming keys A number of programmable functions are available on the SPIN control unit; they can be adjusted using 4 keys on the control unit and are dis- played with 4 LEDs: L1, L2, L3, R. The default settings should satisfy most requirements, but can be modified at any time using the appropriate programming procedure; see Paragraph 7.6.
-
Page 18: Checking The Door Movement
Wait for the control unit to complete the acquisition phase: closing, opening and closing again of the door Press and release the Open key to perform a complete opening manoeuvre Press and release the Close key to perform a complete closing manoeuvre •…
-
Page 19: Programming The Level 1 Functions
Phototest / Electric lock This function allows the user to enable output 6 of the terminal board for operation with the Phototest or with the electric lock. The factory setting of output 6 is with the “phototest” function enabled (L2 LED off). Alternatively, the output can be programmed on the SPIN control unit to control an electric lock (LED L2 lit).
-
Page 20: Level 2 Functions (Adjustable Parameters)
7.6.3 — Level 2 functions (adjustable parameters) Table 12 — Functions of the programming upon start-up procedure Function Level Value Description High When the variable sensitivity is enabled, it can be set to 3 different activation thresholds. The “High” Variable sensitivity Medium variable sensitivity is most suited to small-size correctly balanced doors.
-
Page 21: Transmitter Memorisation
Wait 10 seconds to exit the programming mode following the expiry of the maximum time limit 10 s Steps 06 and 10 can be repeated during the same programming phase to modify multiple parameters Table 15 — Standard programming procedure Press and hold the Set key for roughly (seconds) LED L1 starts flashing, release Set…
-
Page 22: Mode 2 Memorisation Procedure
7.7.4 — Mode 2 memorisation procedure Example Table 19 — Mode 2 memorisation procedure Press and release the radio button on the control unit for a number of times corresponding to the desired command (1…4 — Table 18) 1…4 Make sure that LED R on the control unit emits a number of flashes equal to the number of the desired command (1…4) 1…4 Within 10 seconds press the desired button on the transmitter to be memorised, holding it down for at…
-
Page 23: Adding Or Removing Devices
FURTHER INFORMATION 8.1 — Adding or removing devices It is possible to add or remove devices at any time; in particular, various types FLASH of devices can be connected to the STOP input, as described in the following 12V 21W PHOTOTEST/ paragraphs;…
-
Page 24: Electric Lock
8.2 — Electric lock The “phototest” output is active by default for the “phototest” function. Alternatively, the output can be programmed to control an electric lock. When the opening manoeu- vre starts, the output is activated for 2 seconds; in this way an electric lock can be connected. The output is not activated during the closing manoeuvre and, therefore, the electric lock must reset mechanically.
-
Page 25: Diagnostics
DIAGNOSTICS Certain devices emit special signals showing the operating status or any malfunction. 9.1 — Warning light signals and courtesy light During the manoeuvre the flashing light flashes once every second; when a fault occurs, the flashes become more frequent and are repeated twice with a 1-second pause in between.
-
Page 26
Table 24 — Terminal LEDs (Fig. OK LED Cause Solution Fault Make sure there is power supply; check to see whether the fuses are blown; if necessary, identify the reason for the failure then replace them with others of the same type. Serious fault Try switching off the control unit for a few seconds;… -
Page 27: Troubleshooting
TROUBLESHOOTING Table 24 contains useful instructions to help you solve malfunctions or errors that may occur during the installation stage or in case of fault. Table 26 — Troubleshooting Problem Solution The radio transmitter does not control the door Check to see if the transmitter batteries are exhausted and replace them if necessary. and the LED on the transmitter does not light The radio transmitter does not control the door — Check whether the transmitter has been memorised correctly in the radio receiver.
-
Page 28: Maintenance
TECHNICAL SPECIFICATIONS All technical specifications stated herein refer to an ambient temperature of 20°C (± 5°C). • Nice S.p.A. reserves the right to modify its products at any time when deemed necessary, while nonetheless maintaining their intended use and functionality.
-
Page 29
Guide contained in SNA30 SNA30C SPIN10KCE Type 3-piece galvanised steel pro- single galvanised steel profile single galvanised steel profile file Guide length 3.15 m 3.15 m 3.05 m Guide height 35 mm 35 mm 35 mm Useful stroke 2.6 m 2.6 m 2.5 m Belt/chain length… -
Page 30: Ec Declaration Of Conformity
“partly completed machinery” Note — The contents of this declaration correspond to that stated in the official document filed in the offices of Nice S.p.A. and, in particular, the latest version thereof available prior to the printing of this manual. The text herein has been re-edited for editorial purposes. A copy of the original declaration can be requested from Nice S.p.A.
-
Page 31: User Guide (To Be Delivered To The End User)
USER GUIDE (to be handed to the end user) This user guide should be stored and handed to all users of the automation. WARNINGS • Keep at a safe distance from the moving door until it is completely open or closed; do not transit through the door until it is completely open and has come to a standstill.
-
Page 32
30 – English… -
Page 33
English – 31… -
Page 34
Nice S.p.A. Via Pezza Alta, 13 31046 Oderzo TV Italy www.niceforyou.com info@niceforyou.com…
 OK LED Cause Solution Fault Make sure there is power supply; check to see whether the fuses are blown; if necessary, identify the reason for the failure then replace them with others of the same type. Serious fault Try switching off the control unit for a few seconds;…
-
#1
Инструкция Nice Spin с блоком упр. SNA2
стр. 16 п. 4.3 Определение позиций открытия и закрытия ворот.
п1 Перевести в ручной режим??? что за каретка, та которая на рейке со шнурком?
п. 4 каретка одна будет бегать по рейке или с воротами?
п.5 и 6 дёргать за шнурок на который на приводе???
-
Nice-Spin.pdf
701 KB
· Просмотры: 350
-
#2
Перевести в ручной режим???
Прицепить ворота к каретке
п.5 и 6 дёргать за шнурок на который на приводе???
там нитка болтается соединенная с кнопкой
-
#3
Прицепить ворота к каретке
смутило в инструкции: отключить каретку
там нитка болтается соединенная с кнопкой
нитку видел
-
#4
а как стереть программу? в инструкции не нашёл этого
-
#5
Это тайный сговор Найса с установщиками — написать инструкцию так, чтобы никто не понял
А чего там тереть — запускаешь настройки по новой
-
#6
Это тайный сговор Найса с установщиками — написать инструкцию так, чтобы никто не понял
скорее Найса, он ни с кем не советуется
-
#7
Если память не изменяет, сбросить настройки можно, удерживая одновременно кнопки «вверх» и «вниз».
-
#8
Если память не изменяет, сбросить настройки можно, удерживая одновременно кнопки «вверх» и «вниз».
А он в ответ» Что угодно, Господин ?»

mixa
Квалифицированный специалист
-
#9
Отключить питание. Удерживая верх и низ подать питание…
-
#10
Отключить питание. Удерживая верх и низ подать питание…
возврат к заводским настройкам?
mixa
Квалифицированный специалист
-
#11
Полный сброс, кроме радиомодуля.
-
#12
Значит шайтан какой то с приводом, позвонил заказчик опять при открытии /закрытии ворота идут на реверс и каждый раз в новых точках, этот глюк появился как 2 недели. Приехал повторно к заказчику. Ворота Алютех с пруж. растяжения, стоят 5 лет, 7м2, ходят легко, при программировании привод также останавливался в разных точках, не заканчивая программу. С третьей попытки полностью завершил программу настройки. Напруга 245-250. Приутомил меня этот Nice. Дело в напруге или блок глючит?
-
#13
Проверь, не почернел ли большой резистор ну и кондеры заодно….
-
#14
Проверь, не почернел ли большой резистор ну и кондеры заодно….
до платы не добирался, в корпусе, да и заказчик дёргался, пусть везёт в Nice на диагностику
-
#15
до платы не добирался, в корпусе, да и заказчик дёргался, пусть везёт в Nice на диагностику
может напруга? рядом как раз соседи режут и сварка целыми днями, как они закончили шуметь, то привод сразу настроился без проблем
-
#16
Ставь стабилизатор и не парься.
-
#17
при открытии /закрытии ворота идут на реверс и каждый раз в новых точках
Была подобная проблема, но не с Найсом, а с AN-Motorsом. И кнопку откидывали, и датчик калитки отключали. В общем после пары выездов его поменяли, но через день проблема повторилась  .
.
В общем собака оказалась зарыта в рейке: звездочка в основании каретки вращалась очень туго (натяжку цепи проверяли — все в норме). Почистили, смазали и забыли…
-
#18
Была подобная проблема, но не с Найсом, а с AN-Motorsом. И кнопку откидывали, и датчик калитки отключали. В общем после пары выездов его поменяли, но через день проблема повторилась
В общем собака оказалась зарыта в рейке: звездочка в основании каретки вращалась очень туго (натяжку цепи проверяли — все в норме). Почистили, смазали и забыли…
с натяжкой игрались, всё нормально не перетянута. Капризный привод
-
#19
с натяжкой игрались, всё нормально не перетянута. Капризный привод
в том то и дело, что с натяжкой все было ОК.. Пока вручную, с помощью шестигранника не догадались звездочку покрутить, каких только танцев с бубнами не исполнили…
-
#20
Кто там вопит про Дорхан? ставим потолочники Дорхан и забываем навсегда.
Главная » Инструкции » Автоматика для ворот » NICE
![]()
NICE SPIN10KCE Привод для секционных ворот — Инструкция по установке и эксплуатации (RU) в формате pdf. Руководства по установке, настройке и эксплуатации оборудования.
Дата добавления: 15.10.2012
Размер файла: 676.8 Kb
Формат файла: pdf
Просмотров: 1908
Загрузок: 385
Дополнительная информация
По данному материалу пока нет информации.
Отзывы и комментарии
Отзывы и комментарии к материалу «NICE SPIN10KCE Привод для секционных ворот — Инструкция по установке и эксплуатации (RU)».
Кто вы? человек робот
Требуется руководство для вашей Nice SN6021 Устройство для открывания гаражных ворот? Ниже вы можете просмотреть и загрузить бесплатно руководство в формате PDF. Кроме того, приведены часто задаваемые вопросы, рейтинг изделия и отзывы пользователей, что позволит оптимально использовать ваше изделие. Если это не то руководство, которое вы искали, – свяжитесь с нами.
Ваше устройство неисправно, и в руководстве отсутствует решение? Перейдите в Repair Café для получения бесплатных ремонтных услуг.
Руководство

Рейтинг
Сообщите нам, что вы думаете о Nice SN6021 Устройство для открывания гаражных ворот, оставив оценку продукта. Хотите поделиться вашими впечатлениями от данного изделия или задать вопрос? Вы можете оставить комментарий в нижней части страницы.
Довольны ли вы данным изделием Nice?
Да Нет
Будьте первым, кто оценит это изделие
0 голоса