When you are new to Night of the Dead you might be overhelmed buy the different build menues and crafting tables. While the ingame tutorial picks you up from the start and teaches you what to craft next sometimes, a real beginners tutorial is what a lot of our readers have been looking for. So here it is – The first Beginners Guide from Nightofthedead.org
At the very beginning:
- Use your knife to gather resources from bushes and small trees.
- Pick up small stones.
- Go to your inventory screen (TAB key) and craft a Felling axe (for chopping down trees), a Pickaxe (for quarry work, mining ore) and a Claw hammer (to dismantle buildings, traps)
Use your knife to kill zombies. Use the slash and avoid tactic. Hit them with your knife then fall back or move sidewards to avoid getting hit by their attacks. Apple
Don’t approach large groups of zombies at the beginning. You can do that later as soon as you have manufactured your first bow at the equipment table or upgraded your melee skill tree (research table) and found or crafted a better weapon.
The axe and other tools are capable of chopping down zombies as well. But remember, these tools aren’t made for fighting and therefore are slow in terms of attack speed and don’t deal much damage as well. You’ll be better off using the knife at first!
Gather resources for your first build
Have a look for cars and brake them (break them – F key). You will need these resources for building your base.
Have a look for paper card boxes. These contain cloth and research material, which is very important to upgrade your skill tree.
Break metal barrels on your way to obtain some metal.
Chop down trees and bushes with your Felling Axe to obtain Logs, Tree Branches, Vines, Seeds (used as a bait in animal traps), Fruits and Leaves
Use your Pickaxe to mine some stone material like Boulder and Stone from common rocks (grey rocks). The grey rocks with yellow spots contain Lime Stone as a plus besides Boulder and Stone. If you manage to find black rocks mine them for iron and copper ore. They might also contain Gun Powder or a Piece of Iron.
Hit Point Management
Your Life points or Hit Points are marked with a cross symbol and they are correlating with your Condition Bar (Heart symbol). The Strengh Bar (Biceps symbol) correlates to your condition bar as well. So always keep your condition at max.
You have to understand the simple mechanic of the Condition Bar limiting your Health Points as well as your Strength. With simple food that is edible in an unprocessed state (like fruits, white mushrooms for example) you can only raise your health to the maximum amount limited by your condition.
You can regain condition by eating more or less healthy food. The best way to regain a lot of health and condition simultaneously is to eat an energy bar from your inventory by right clicking on it. They look like snickers and can be found within houses. But don’t waste them at the beginning. They are very useful in fights or at the night time, when hordes of zombies are attacking you. So use them only if needed!
At day time it is best to regain condition by eating meals or meat. To produce meals, you need to have the Cooking table. Here you can cook meals by processing mixed mushrooms, chunks of meat and so on.
Building Tutorial for your first base
As the first nights aren’t that hard to complete, you may just build a temporary base and use it until you find a much better spot within the first 2 days. So don’t by too choosy. By using the Claw hammer you can dismantle structures again later.
Now start building your base within some smaller building. This gives you some kind of a safe spot as the zombies can’t (yet) break the walls of existing buildings. Unfortunately they can hit and attack through walls. Remember to place your crafting tables and storage boxes out of reach from the zeds so keep some distance between your buildings and the outer walls.
By placing some items near walls, this tactic can also be used to collect groups of zombies at certain spots that can be defended from a distance and/or placement of traps at the outside of the outer walls. Remember, the goal of the zombies is to eat your brain so the positioning of your character might have a significant influence on which path the zombies choose.
Build crafting benches
Build a Material production table (build menu – B key – click on the anvil and hammer symbol, choose Craft and click on Material Production Table)
The Material Bench is needed to process natural materials like wooden logs to trimmed logs, wooden planks and lumbers. You can also craft Tree Branches from Vines. These are the most important materials at the beginning. You need them to build your base, traps and in the case of Tree Branches as well for reloading the traps that have a limited amount of attacks.
Build an Equipment production table (build menu – B key – click on the anvil and hammer symbol, choose Equipment and build the Equipment Production Table)
Once build, use it to craft your first bow. Drag it with your mouse to put it in the quick use slot while you are in your inventory screen (TAB key).
Craft arrows for your bow. You can craft bows in the handmade build menu that is showed on the right side of your inventory screen. You need small stones and tree branches to craft arrows.
At the very beginning 30 arrows are enough for the first night. Remember to regain your arrows from killed enemies and animals by pressing T key (Take all) or F key to pick up single arrows. You are now able to fight zombies from a distance, which makes it much easier to clear crowded areas. Shoot the zombies from far away and keep attacking them until they come too close. Run away from them and keep attacking until they are down. On lower difficulties, the bow is even capable of cleaning houses and other buildings (where the good loot is at).
These two tables are the most important ones at first. You need more crafting tables afterwards but it’s best to start building some basic traps that hinder the zombies from getting in to your base and destroy everything in their way. So gather more resources if you already ran out of the most common ones like logs, tree branches, vines, or cloth. You need cloths to produce ropes on your Crafting Table and ropes are needed to build even the simplest kinds of traps. So building a Crafting Bench soon is a good way to go once you have enough resources. But lets focus on defending the base first.
If you ran out of cloth already go loot some cars or paper card boxes. You might as well kill some zombies, they sometimes drop bags which contain Research material and Cloth.
Defend your Base / Trap Building
To defend your base on lower difficulties, you can do so by only using Barbed Fence melee traps in the first nights. Try to build some kind of labyrinth where the zombies have to march through in order to get to you or your base. In the current state of the game, the zombies usually don’t attack these traps as long as there is a way to get to you or into your base. Remember, zombies aren’t that bright. If you make your labyrinth to obscure, they might attack the barriers and break through at a point which is too close to your entrance.
Even if your building of choice has a door, build a Door Wall (Build menu – B Key – click on the house symbol, choose Wall and build the second door) behind the original door. This way you can close the door from within if the zombies somehow manage to pass your trap area in front of the house. As long as you have enough tree branches in your inventor, you can keep repairing the door from the inside of your base to gain time. If this happens, prepare yourself to open the door as soon as your weapon is ready and your health is full to fight off the horde. You might even as well place some additional traps within your base once the horde has reached your door. So always keep a stack of trimmed logs, lumber, nails, rope, tree branches, vines at night to be capable of building some basic traps at night.
For more security, you can place some Barbed Fence melee traps within your house as well but remember, you get hurt by getting in contact with this kind of traps. Some other traps like Pendulum or compressor only spin when a zombie is close but you usually can’t place them within smaller buildings regarding to the limited height indoors. If you have enough material try to build the Cutter trap or Spiked floor trap inside.
This is it. Your base is safe for the first nights on easy difficulty and now its up to you to explore the island and make a fortress out of your base. Enjoy this well made game!
Your next steps…
- Build a Cooking Station! Because unprepared food just replenishes your health bar but not your condition. Since max health and condition is linked together like I mentioned earlier in this Tutorial, you should build a Cooking Station as soon as possible. This way you can roast Small meat from rabbits, foxes or Bird meat and regain Health and Condition at the same time!
- Build some basic Animal traps! These are very helpful at the beginning to gather packages of Small meat as well as Rabbit Skins. Rabbis Skins are used to make processed leather which is needed to upgrade Chests or build some items later on in the game. You can’t start soon enough to keep a stock on these (Alpha Version of the Game). To build a Small animal trap you need nothing more than 1 Boulder (Pickaxe + Rock), 4x Tree branch, 2x Seed and 20 Leaves. You should have these already gathered by cutting down trees and bushes. I would recommend about 3-4 Small animal traps around your base.
- Build a Crafting Table because you need to process a lot of raw material into processed materials or goods later on in the game. So build this table as soon as your base is safe and you have enough resources. With the materials and products crafted here, you soon will be able to build more advanced traps. Since you need Gear and a Trap machine for building better traps, the Crafting Bench is essential to keep progressing.
- Upgrade your crafting table as soon as possible. By reaching level II you can process leaves and obtain research material by dooing so. Leaves are a very common item, as they are obtained as a byproduct (trees, bushes)
- Upgrade your skill tree at the research table. Research Porter and Scavenger Skill Tree ASAP. With Porter you can collect more items by increasing the max amount of carried items while Scavenger Skill tree will help you a lot in terms of gathering resources faster. Forest Worker skill tree is important even so for gathering wood based materials.
- Upgrade your Builder skill tree to save resources like wood and stone based materials when building items and traps.
- Get more Research material to be able to level your Skill tree even further. Loot cars, laptops in the Science center and get the upgrade which enables you to produce Research material from Leaves.
- Always keep your stack of a tree branches at a high amount. This way you can repair and reload traps while the zombie wave is ongooing. Stay safe at night.
- Have energy bars in your quick slot to regain health and condition immediately if needed in fights.
- Have roasted meat or other meals ready that regain condition and health.
Best day to day routine
Early morning
Repair and reload all traps. Lonesome zombies as well as some zombie groups might arrive at your base, even at daytime.
Rebuild traps that have been destroyed or change your build setup to a more stable one.
Gather meat and resources from your animal traps. Reload them with seeds.
Morning
Go for the loot, scout the map and go to places that have not been looted yet.
Break into every car, truck that you see and take valuable resources with you.
Clear buildings from zombies to get your hands on high value loot like weapons and energy bars.
Hunt deer, wolves, boars and take their resources with you.
Afternoon
Return to your base area. Check your animal traps, skin trapped animals and reload the traps.
Gather raw materials by chopping down trees, bushes. Use the axe for this.
Gather more materials from rocks. Use your pickaxe to obtain iron and copper ore.
Evening
Build new traps, change your setup, craft ammunition, restock treebranches and repair and reload all traps. Harvest your fruits and vegetables if you already have the farm build and prepare meals at the Cooking station. Turn on the radio, sit down in your chair and relax until the horde comes after you.
Use these helpful tips and tricks to take down zombies, craft deadly weapons, hone your skills, and defend your base in Night of the Dead.

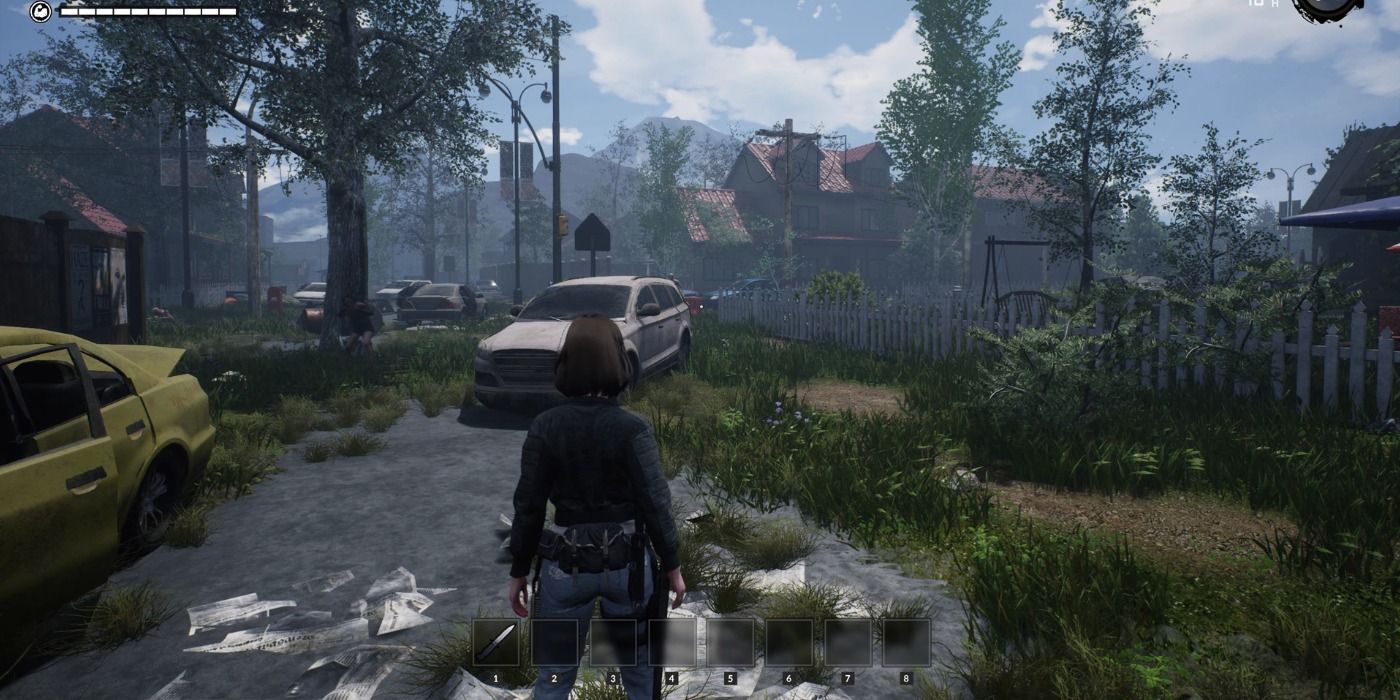
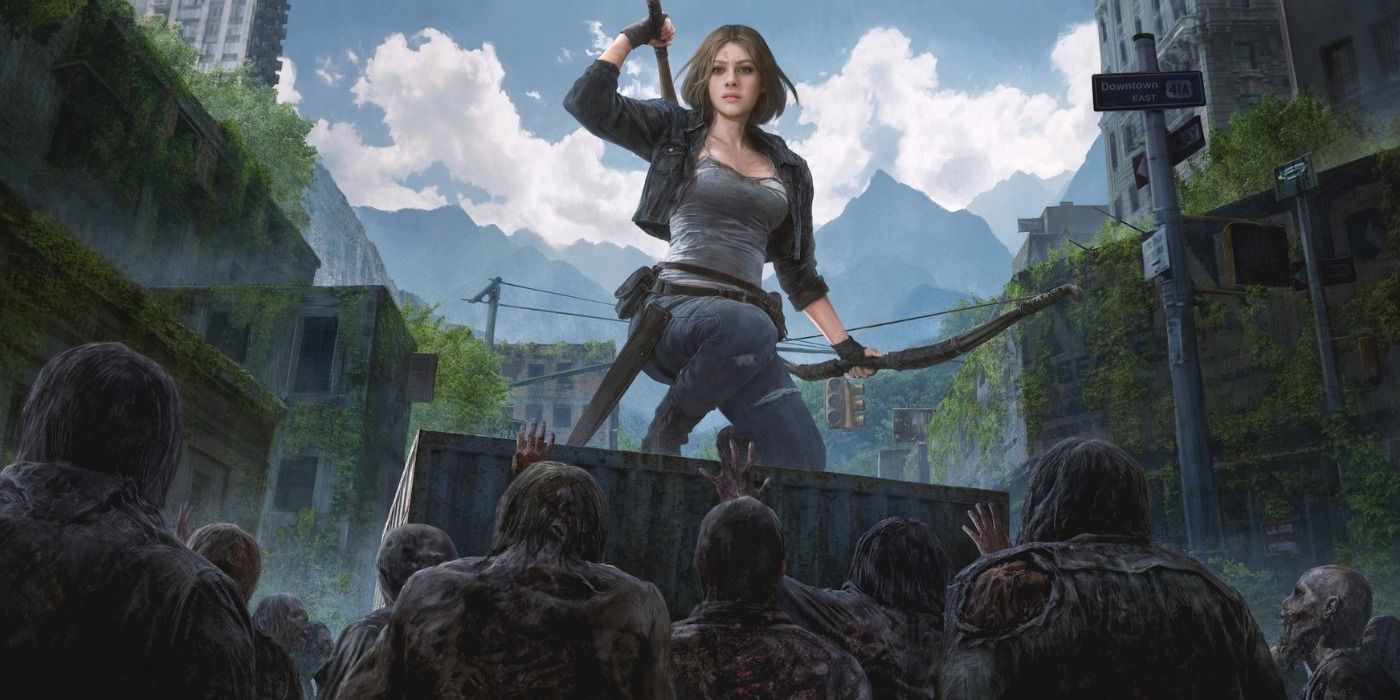
Night of the Dead is a zombie horror survival game, similar to 7 Days to Die or Dying Light. Players will control the game’s protagonist, Lucy after she wakes up from an experiment to find that she is trapped in a zombie-infested city. To survive, players will need to craft tools and weapons, build fortresses, and fight off the waves of zombies that will attack them.
Players can join their friends to play online co-op with up to four participants, or they can play alone. With so many different mechanics, players will need every advantage they can get to defeat the hordes of zombies coming their way. Lucy will have to explore the area to collect resources and hack and slash her way to victory. There is a tutorial that will show players how the mechanics work at the beginning of the game, but after all the tasks are complete they’re on their own. Coming up with a solid strategy is important for players who want to escape the area.
Crafting in Night of the Dead
To find resources, players can break down almost every item on the map, from trees to cars, to crates. Players will also be able to find weapons hidden in buildings, or craft them from the materials they find. Many of these weapons, such as the ax, serve two purposes, making them vital for harvesting crafting materials and defending Lucy and her fortress. Once they craft the Equipment Production Table, players will be able to create more complex weapons from the resources they’ve gathered. Try to craft a variety of weapons to fill the inventory, as all of them will come in handy to battle the blood-thirsty zombies.
Building in Night of the Dead
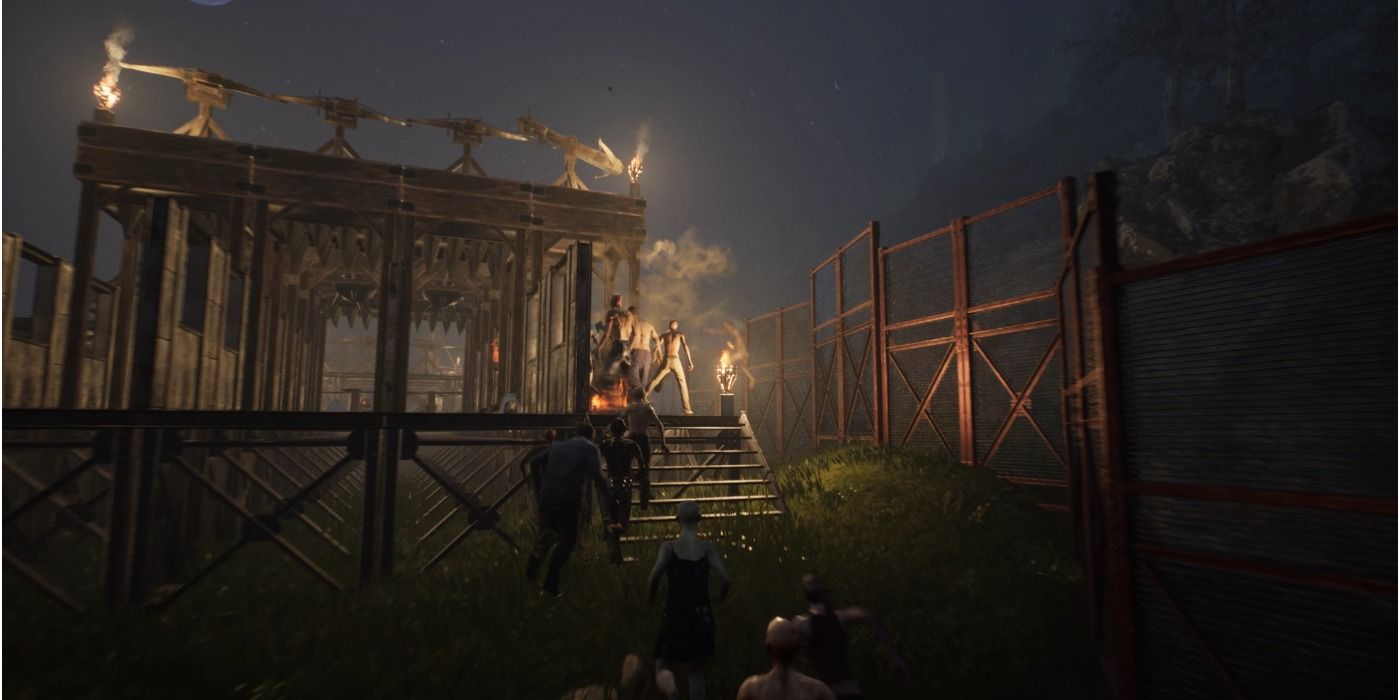
Once the player has collected enough resources and crafted the necessary tools, they can begin the process of building a fortress. This will require them to collect a lot of wood from nearby trees using the axe. Build during the day when zombies are less likely to attack, and defend the fortress at night. Now, players will be able to build a proper structure to defend from the waves of zombies. Try out different fortress layouts to see what works best for each playstyle. Players can also build traps in or around the area to entice zombies to their death. They won’t know what hit them when a spiked wrecking ball swings into their faces. Some players recommend making trap corridors that will pick off zombies before they finally reach Lucy. If zombies have been attacking a fortress for a long time, its defenses will start to deteriorate. Players will need to repair their defenses using crafting materials after the nightly wave of zombies is over, so that they are ready for the next attack. Weak defenses make it much easier for zombies to mob Lucy once there is nothing in their way.
Combat in Night of the Dead

Players will be able to use ranged and melee weapons to defend themselves and their fortresses from zombies. Axes and other melee weapons can deal a lot of damage close up, but ranged weapons like guns or bows will come in handy while players are defending their fortresses. As many zombies don’t come out during the day, players can enter deserted buildings to find some during the waking hours to collect materials or try out new weapons. While they aren’t being attacked, players should make the most of their time before the next wave of zombies hits. At night, the zombies will be drawn to the player. Players can either set their traps and wait in their heavily guarded fortress to take them out or wander out into the unknown to start a gruesome bloodbath while risking their own health. Avoid taking on large groups of zombies; try to focus on one at a time and use a “light, light, heavy” combo attack to take them down.
Like many other zombie survival games, Night of the Dead has multiple types of zombies that react differently to players and may be more difficult to kill. The Butcher is one of these special zombies. He will throw cleavers at the player to attack them and explode once he has been defeated. Players should steer clear of higher-level zombies like this until they have completed multiple upgrades on their weapons.
Skills and Upgrades in Night of the Dead
While looting the area, players will have found research material in various items. Research Material can be used to make upgrades or to add skills or perks to Lucy’s arsenal. Skills like Gatherer, Porter, and Looter can make looting, and therefore crafting, go much smoother. These skills will make players loot and gather resources quicker, while also adding more room in their inventory to store crafting materials and weapons. Blacksmith is another perk that allows players to craft quicker, which will come in handy during intense combat.
Upgrading equipment can also make them gather resources quicker by dealing more damage. Players can also upgrade their ammo, food, and resources bags to carry more items with them. These upgrades, paired with the Porter skill, can help players keep necessary materials close by while defending their base.
Using crafting, combat, and upgrade strategies can greatly impact how long a player can survive in Night of the Dead. Now that players can craft strong weapons, build a defendable fortress, and unlock skills that can help their gameplay, there is no way that a zombie will be able to take them down.
MORE: How to Unlock Electricity in 7 Days to Die (The Easy Way)
Night of the Dead is now available in Early Access on PC.
Обновлено: 21.04.2023
Beginners Guide: Tutorial for beginners
At the very beginning:
- Use your knife to gather resources from bushes and small trees.
- Pick up small stones.
- Go to your inventory screen (TAB key) and craft a Felling axe (for chopping down trees), a Pickaxe (for quarry work, mining ore) and a Claw hammer (to dismantle buildings, traps)
Use your knife to kill zombies. Use the slash and avoid tactic. Hit them with your knife then fall back or move sidewards to avoid getting hit by their attacks. Apple
Gather resources for your first build
Use your Pickaxe to mine some stone material like Boulder and Stone from common rocks (grey rocks). The grey rocks with yellow spots contain Lime Stone as a plus besides Boulder and Stone. If you manage to find black rocks mine them for iron and copper ore. They might also contain Gun Powder or a Piece of Iron.
Hit Point Management
Your Life points or Hit Points are marked with a cross symbol and they are correlating with your Condition Bar (Heart symbol). The Strengh Bar (Biceps symbol) correlates to your condition bar as well. So always keep your condition at max.
You have to understand the simple mechanic of the Condition Bar limiting your Health Points as well as your Strength. With simple food that is edible in an unprocessed state (like fruits, white mushrooms for example) you can only raise your health to the maximum amount limited by your condition.
At day time it is best to regain condition by eating meals or meat. To produce meals, you need to have the Cooking table. Here you can cook meals by processing mixed mushrooms, chunks of meat and so on.
Building Tutorial for your first base
By placing some items near walls, this tactic can also be used to collect groups of zombies at certain spots that can be defended from a distance and/or placement of traps at the outside of the outer walls. Remember, the goal of the zombies is to eat your brain so the positioning of your character might have a significant influence on which path the zombies choose.
Build crafting benches
At the very beginning 30 arrows are enough for the first night. Remember to regain your arrows from killed enemies and animals by pressing T key (Take all) or F key to pick up single arrows. You are now able to fight zombies from a distance, which makes it much easier to clear crowded areas. Shoot the zombies from far away and keep attacking them until they come too close. Run away from them and keep attacking until they are down. On lower difficulties, the bow is even capable of cleaning houses and other buildings (where the good loot is at).
If you ran out of cloth already go loot some cars or paper card boxes. You might as well kill some zombies, they sometimes drop bags which contain Research material and Cloth.
Defend your Base / Trap Building
This is it. Your base is safe for the first nights on easy difficulty and now its up to you to explore the island and make a fortress out of your base. Enjoy this well made game!
Best day to day routine
Early morning
Repair and reload all traps. Lonesome zombies as well as some zombie groups might arrive at your base, even at daytime.
Rebuild traps that have been destroyed or change your build setup to a more stable one.
Gather meat and resources from your animal traps. Reload them with seeds.
Morning
Go for the loot, scout the map and go to places that have not been looted yet.
Break into every car, truck that you see and take valuable resources with you.
Clear buildings from zombies to get your hands on high value loot like weapons and energy bars.
Hunt deer, wolves, boars and take their resources with you.
Afternoon
Return to your base area. Check your animal traps, skin trapped animals and reload the traps.
Gather raw materials by chopping down trees, bushes. Use the axe for this.
Gather more materials from rocks. Use your pickaxe to obtain iron and copper ore.
Evening
Build new traps, change your setup, craft ammunition, restock treebranches and repair and reload all traps. Harvest your fruits and vegetables if you already have the farm build and prepare meals at the Cooking station. Turn on the radio, sit down in your chair and relax until the horde comes after you.
Night Of The Dead
Участники 509
Фотоальбомы 2

Скриншоты игроков.
Основной альбом.
Информация
Люси просыпается от человеческого эксперимента и попадает в ловушку в городе, полном зомби. Она должна пережить ночные волны зомби и общаться с группой выживших, чтобы сбежать из изолированной области.
Выживайте, исследуя огромный остров, где все интерактивно и покрыто зомби.
Показать полностью.
— Стройте и улучшайте базы, используя материалы, полученные путем вырубки деревьев, добычи камней и сбора артефактов.
— Добывайте еду через охоту и сельское хозяйство, готовьте и ешьте.
— Стройте крепости и ловушки, чтобы направлять движения зомби и защищать стекающиеся волны зомби.
— Собирайте различные предметы, оружие и костюмы, обыскивая дом.
— Создавайте различные предметы и оборудование, чтобы выжить в суровых условиях и зомби.
— Найдите подсказки в журналах и сбегите с острова.
Руководство по достижениям Night of the Dead

- Этот довольно очевиден, но его все еще сложно завершить. Вы можете попросить друга помочь вам с этим, так как вам нужна обработанная кожа для обновления сборок перед побегом (но вы не можете убить или снять шкуру с кроликов (или любых других животных для этого)), найдите сервер со всем уже исправлено, поэтому вам просто нужно бежать в аэропорт и сбежать, или искать достижение в дискуссионном форуме здесь, в Steam, и вы найдете файл сохранения в комментариях, который вы можете загрузить и поместить в свои собственные файлы, загрузить игру и побег.
Убить или быть убитым
- Это довольно понятно.
- Это тоже довольно понятно.
- Это довольно понятно.
- На самом деле вам не нужно убивать 50 разных игроков, просто объединитесь с другим игроком и убейте этого человека 50 раз.
- Волк, птица, медведь, свинья, кабан или олень. Убивайте все, что хотите. Все они считаются животными.
- Повторите предыдущий 500 раз.
- Умрите один раз, просто наткнитесь на волка, медведя или зомби, плавание в воде тоже работает, или прыгните со скалы.
- Просто продолжайте сталкиваться с вещами, которые могут вам навредить.
Потребляйте и готовьте
- Это довольно понятно.
- Ешьте все, что хотите: фрукты, мясо, батончики и т. Д.
- Нажмите «B», выберите второй вариант сверху, перейдите в «приготовление пищи» и постройте кастрюлю. В кастрюле вы можете готовить такие блюда, как вареные яйца и жареное мясо. Приготовьте 5 блюд, это не обязательно должны быть разные. Вы можете быть разборчивым в еде, не попадая в затруднительное положение.
- То же, что и выше, только еще немного готовки.
- Ешьте желтые грибы, пока не умрете. Легкий.
- Это довольно понятно. Просто убивайте животных и ешьте сырое мясо.
- Не ешьте энергетические батончики, пока не найдете все журналы и детали для «коммуникативной штуки», не почините ее и не «сбежите».
- Это довольно понятно. Тебе придется стать мясником на полставки.
Читайте также:
- В каком веке был построен дом мудрости
- Варианты дизайна дома в хоум эскейп
- Для железобетонных плит перекрытий предельным состоянием по огнестойкости является
- Глав сваи подъем домов
- Бакелитовая фанера фбс производство
| ATTENTION | |
|
Want your guide to be placed in this page? Then check with an Administrator first. |
Ryan’s Demolitions Guide[]
Basic Stats[]
Base Life: 200
Base shields: 100
Base armor: 2
Base shield armor: 1
Base shield regen: 2.5
Before we get started: Remember that it you decide to skill fortitude, you are a shield tank, and it is important that your Medic gets nano shield before nano weave and XS-4 Armor goes to you if found. If you go explosives, remember you are a caster dps, never take anything before your tank and high dps classes get, the only item you have priority on is the High Explosive Ammo. If an Arc Reactor is found, it should go to you after a medic has one regardless of tree.
Innate Abilities[]
Sap: Stuns a target for 7 seconds, reduced time on bosses, stun will break if fired upon.
Retrieve Mines: Grabs a target mine and puts it back into the stack. Can pick up allied mines.
Expertise: Because he has wired many explosives, he has the knowledge to hack the auto turrets at the armory.
Bomb Suit: Demolitions wears a suit to nullify the effect of explosions, therefore he is 8 times more resistant to rating loss from hits.
Talent Trees[]
Explosives[]

Tier 1[]
Mines
- Level 1: 15 Max charges, mines deal 40 damage
- Level 2: 30 Max charges, mines deal 60 damage
- Level 3: 45 Max charges, mines deal 80 damage
This is the skill you will be using the most, it can almost insta kill any boss with a large enough minefield.
Build Mines
- Level 1: Builds 2 mines
- Level 2: Builds 4 mines
- Level 3: Builds 6 mines
As mines do run out, this skill rebuilds them.
Tier 2[]
Satchel
- Level 1: Deals 135 damage in a radius
- Level 2: Deals 270 damage in a radius
One of the most TK causes in he game, I would suggest not to get this skill.
Fire Vulnerability
- Level 1: Targets in an area will take 50% more damage from fire weapons
- Level 2: Targets in an area will take 100% more damage from fire weapons
This increases the effectiveness of you skills, Laser Rifles, Flamethrowers, and the feared Commando’s nuke.
Tier 3[]
Armageddon
- Level 1: Places a charge at a target area with a remote detonation, when detonated it will take 5 seconds to arm itself and during this time zombies and marines in its blast zone will be slowed, after it is finished arming, it will explode dealing 550 damage in its blast zone, after the explosion it will leave an aftermath which will do 35 damage per second to anyone who gets into its blast radius.
Fortitude[]

Tier 1[]
Spiked armor
- Level 1: Deals 5 damage to attackers, adds 5 base shields, and adds 1 shield armor
- Level 2: Deals 10 damage to attackers, adds 5 base shields, and adds 2 shield armor
- Level 3: Deals 15 damage to attackers, adds 5 base shields, and adds 4 shield armor
Pretty straight forward, very helpful in Nightmare Mode and in Veteran Mode.
I’m Your Father
- Level 1: Provokes zombies to attack Demolitions for 4 seconds, attacks deal 15% less damage
- Level 2: Provokes zombies to attack Demolitions for 6 seconds, attacks deal 30% less damage
- Level 3: Provokes zombies to attack Demolitions for 8 seconds, attacks deal 45% less damage
Basicly like taunt, same mechanics, but better and saves more lives.
Tier 2[]
Look!
- Level 1: Zombies in 5 radius stare at a target unit for 1 second, 50% chance for affected zombies to attack target
- Level 2: Zombies in 5 radius stare at target unit for 2 seconds, 50% chance for affected zombies to attack target
This is a distraction to buy you some time during time to die’s cooldown or to seek medical aid.
Sadist
- Level 1: Gains 2 health and 1 shield for every unit killed
- Level 2: Gains 4 health and 2 shield for every unit killed
Helpful when taking down mobs, a good demolitionist can run into battle and emerge unharmed or even healed.
Tier 3[]
Time To Die
- Level 1: Demo gains 15 Armor, 50% increased attack speed, movement speed increased by 25%, deals a 200 damage AOE which also stuns units for 1 second, this repeats every 3 seconds, lasts 20 seconds.
The ultimate, a very strong one indeed, this is what makes demolitions capable of tanking almost everything.
Talent Builds for the Explosives Demolitions[]
Build 1[]
- 1: Mines
- 2: Mines
- 3: Mines
- 4: Build Mines
- 5: Build Mines
- 6: Build Mines
- 7: Satchel
- 8: Satchel
- 9: Armageddon
This build has the advantage of early mines, you will have giant minefields for bosses and mobs, however satchel is pretty much useless when you get Armageddon.
Build 2[]
- 1: Mines
- 2: Mines
- 3: Mines
- 4: Build Mines
- 5: Fire Vulnerability
- 6: Fire Vulnerability
- 7: Build Mines
- 8: Build Mines
- 9: Armageddon
This build has the full power of your land mines, Fire Vulnerability to anything that dares to walk through your mine field will suffer greatly, however, if you run out of mines, you will be the one suffering.
Build 3[]
- 1: Mines
- 2: Mines
- 3: Mines
- 4: Build Mines
- 5: Fire Vulnerability
- 6: Build Mines
- 7: Build Mines
- 8: Fire Vulnerablility
- 9: Armageddon
I find this the best build, you get the increased damage for mines from Fire Vulnerability, and if you do run out of mines, you won’t feel that much pain as you rebuild them.
Build 4[]
- 1: Mines
- 2: Build Mines
- 3: Build Mines
- 4: Build Mines
- 5: Mines
- 6: Mines
- 7: Fire Vulnerability
- 8: Fire Vulnerability
- 9: Armageddon
This build, if you do the math, does more mine damage than any of the listed builds, this is because you have 3 times the damage of 1/2 of a level 3 mine due to build mines. Fire Vulnerability is always helpful when increasing damage from your mines.
Other things to remember when building a explosives demolitions: satchel has no reduced friendly fire, it can kill your whole team.
Talent Builds for the Fortitude Demolitions[]
Build 1[]
- 1: Spiked Armor
- 2: Spiked Armor
- 3: Spiked Armor
- 4: I’m Your Father
- 5: Look!
- 6: Sadist
- 7: I’m Your Father
- 8: I’m Your Father
- 9: Time To Die
This build has the power to hold off mobs very well but lack of 3 I’m Your Father will give the demolitions a hard time when tanking bosses and luring.
Build 2[]
- 1: I’m Your Father
- 2: I’m Your Father
- 3: I’m Your Father
- 4: Spiked Armor
- 5: Sadist
- 6: Sadist
- 7: Spiked Armor
- 8: Spiked Armor
- 9: Time To Die
This build will help in all types of tanking. Mob tanking, boss tanking, and luring. The early 3 I’m Your Father will help to keep zombies off of face tankers. The only flaw in this build is that you lack a distraction if you are in mortal danger.
Build 3[]
- 1: Spiked Armor
- 2: Spiked Armor
- 3: Spiked Armor
- 4: I’m Your Father
- 5: Look!
- 6: Look!
- 7: I’m Your Father
- 8: I’m Your Father
- 9: Time to Die
This build has the distractions needed in case of a freak injury, however, when you are surrounded with no where to run and at low health, look! Won’t be as much help as sadist unless your team/medic reacts fast enough.
Build 4[]
- 1: Spiked Armor
- 2: Spiked Armor
- 3: Spiked Armor
- 4: I’m Your Father
- 5: Sadist
- 6: I’m Your Father
- 7: Sadist
- 8: I’m Your Father
- 9: Time To Die
This build is one used mainly for nightmare tanking, you don’t need level 3 I’m Your Father that early in the game if you’re playing it EU style and even in NA style, the team will usually have a experienced commando, whom kills everything who dares to strike you. Also level 3 Spiked Armor is useful to kill off charging Ghouls and such.
Build 5[]
- 1: I’m Your Father
- 2: Spiked Armor
- 3: I’m Your Father
- 4: I’m Your Father
- 5: Look!
- 6: Sadist
- 7: Spiked Armor
- 8: Spiked Armor
- 9: Time To Die
Also for Nightmare tanking, the early I’m Your Father helps with preventing anyone but yourself from getting hit. The small pseudo-stun from Look! helps you or allies get out of sticky situations, and sadist helps in mob tanking. After that, your shields are practically immortal, as them breaking is rare.
Strategies and Tactics[]
3…2…1… BOOM![]
Laying a giant Minefield for an expected boss that will injure it badly. Careful as if an ally gets caught between the boss and the mines, things might get dark. Also, do not place them right in front of the boss or else if they spawn they will attack the Mines instead of running into them.
I’ll Place You Here and You There…[]
Using Mines to scout, for example, placing a few mines at every hex during the Bio-Domes so you know where the civs are.
AND RUN![]
Placing a Satchel under you and staying on it to lure a mob, and then running away just at it explodes. Warning, for experienced players only, or for Korean people.
Note: It also works with Armageddon, it is just harder to pull off.
Fanning Out the Mines[]
Sometimes clustering a ball of mines is bad, it works great against bosses but not so much for mobs, fanning out the mines, aka spreading them will help you kill more zombies than a ball, if it doesn’t outright kill, it will injure badly.
FV all the things![]
Do it, it increased the damage of all your skills, and the commando’s nuke, see a mob charging at your mines? FV them, they’ll have a very, very low chance of surviving that.
Chain of Death[]
To deal with charging Zombies on Nightmare and with fast zombies such as Ghouls, you sometimes need to make a line of Mines in front of you, so your mines will have an advantage.
I’m Your Father[]
Spam it during any type of tanking, and I mean SPAM, it has no cool down and reduces damage by 45%. This is also another reason why Demolitions can tank the Queen.
Look! A Bird![]
Using Look! to create semi tanks for you are perfect, if you are out on Shields and one good whack will kill you, use Look! To create a mini tank to save you. It is also used to save Lives, if someone’s getting mauled, use Look! to clear a high priority unit with their own type, not to mention it also makes a neat mini tank so you can rush in and taunt to save whoever was face tanking.
Class Synergy[]
The Xploder Demolition[]
Delta Commando[]
Works very well, the Commando can Gravity Grenade units for the Demolitionist to Satchel or Fire Vulnerability. Also the Delta Commando can drag units or bosses into the demolition’s mines. A perfect example of this is that a Demolition lays a Minefield large enough to one shot Erebos phase 1. However, nothing is preventing Erebos from destroying some Mines. A Delta Commando can use The Horror on Erebos which will disable all attacks, and then the Commando will use Gravity Grenade to drag Erebos into the Mines.
The Fortitude Demolition[]
Forward Observers[]
A little strange but still useful none the less, a Fortitude Demolitions can use Look! to ball up units for a artillery strike or an air strike, however, it is not always prone to work and because they are not in the same storyline, it is incredibly rare to see this.
Medic[]
A friend to tanks and the Demolitions is no stranger, a good Medic with a good Demolitions can tank the Queen on Nightmare Mode due to Nano Shield’s shield buffing power. I still have to meet a Demolitions who doesn’t like Nano Shield.
Surveillance Recon[]
The Recon’s Reaper MK-1 Drone has a very helpful skill that every demolitions would enjoy, and that’s protect. Protect for those of you who don’t know adds 200 Shields to the selected target. With nano shield and protect, the Demolitions can have over 400 Shields!
Delta Commando[]
Very strange combo but a useful one nonetheless, a Commando can ball up a small group of lesser Zombies and have the Demolitions run in and beat everything to death and in doing so regains some Health lost in battle or he can use Time to Die and charge in with his scary armor of fire and fury.
Additional Tips[]
Weapons/Skills that Fire Vulnerablility boosts[]
- Commando’s Nuke — Greatly feared among men and zombie alike, you can boost damage up to 2400.
- Rifleman’s Grenade — Also feared by, but not as effective.
- All your Explosives tree skills — Armageddon with this is practically a nuke packed into a bomb.
- Flamethrower — «If your not using the flamethrower in Easy Company, then your doing it wrong.» ~NiteShade
- Laser Rifle — Useful only for the Queen, and with a Commando you should be doing it anyway, it boosts Nuke damage and he should always get a Laser Rifle.
What you should use Look! on[]
- High priority units — Slashers, Agrons etc.
- Huggers — Huggers are never alone and it’s always fun to see it die by its own kind.
- Another Tank: If your life is hitting 1-50 then you should use look! On another tank to save yourself. It is also helpful to save allies if you are in need of medical aid.
Credits[]
- The NotD Wiki and all who edited it: Helped in getting the right numbers.
- Marloe/Marloelikeswaffles: a lot of the techniques here came from his original guide.
- Anyone who suggested ideas to my guide: Helped a lot
- Anyone who likes Demolitions: GO DEMO!!!!

Contents
- Guide to Basic Mechanics
- Introduction
- Section 1: First Minutes
- Section 2: Combat and Basic Evasion
- Section 3: The First Day
- Section 4: Upgrades, Skills and Perks
- Section 5: Base Building
Guide to Basic Mechanics
Introduction
A Brief Description of the Core Gameplay
I’ll begin with making it clear this is not an Open World Survival Sandbox Builder as many believe. NotD at its core gameplay is a classic Tower Defence game. NotD scopes on classic Tower Defence mechanics and expands on it in several manners. so what the devs have done is blended genres into something a little different, could refer to it as an Open World Tower Defence Sandbox.
Time Management and its Importance
This is the main ingredient to all aspects within the realm of NotD, with this i mean that you have to use every second outside of the Horde fight towards Recovering, Repairing and Restocking. take a minute to plan out your day; choose a route to Explore and Loot, gather necessary materials, and repair/build your base. by dedicating you day based on priority you can easily manage your days by Explore/Loot, Gather/Craft, and Repair/Build. dedicate a third of each day to these 3 activities, i find this order of operation works best for me but always up to the player to change it up just because.
This will be the basic structure of your gameplay loop and utilises as effectively as you need. easily adaptable by simply focusing more time one activity or another.
By keeping all this in mind as you start will help you better prepare for your playthrough, at first it seems impossibly slow, but as you make progress you see that feeling start to wane. lastly, this is a Tower Defence game and should be approached as such.
Lastly, if you are finding the difficulty you chose too hard, dial it back a difficulty level, you have 8 levels of difficulty as an option for a reason. Now onward to gameplay topics and tips.
Section 1: First Minutes
What to do at the start
So after you fist spawn into the world your tutorial will pop up prompting you do perform some basic tasks. do each task up to “The Foundation” but don’t complete this task just yet, it’ll make more sense later in the guide.
The tutorial already explains Research Material and looting Boxes, Metal Barrels and Cars for various materials. From those sources you will find Research Materials, Iron Pieces, and various others necessary for crafting later on. gathering Research Material should be your top priority at this time, even above a better weapon. Research material is how you progress and get stronger as it unlocks upgrades, skills,and perks that aid the player greatly when gathering, looting and building.
As you travel along the road you will see a few rural POIs, clear and loot these right away as they can be managed with only your Knife. These POIs will contain many items you can’t currently craft but will be necessary for completing some of the tutorial tasks. As i said don’t worry about these zeds too much, you can kite them out easily and use nothing more than your Knife and a few evasion methods that i will cover in a later section.
Don’t worry about the tutorial once you’ve reached “Build a Pendulum” task, build your initial base first and once you want to start putting defences in place continue with the tutorial. It doesn’t add anything to character progression at this point, other than building up your defences but this early in the game its not that urgent.
Section 2: Combat and Basic Evasion
Actually combat isn’t all that complex, after all they are only zombies lol. It feels similar to the combat in How to Survive if any of you have played that game/franchise. Combo attacks again are fairly simply (light atk, light atk, heavy atk) and theres no blocks or kicks available currently. Evasions come down to basic strafing or Hit and Run tactics. Be aware though that 1 or 2 zeds on their own are very manageable, groups of 5 or more are not at all and you will become overwhelmed quickly. Tanking zeds will also get you into trouble, you may not necessarily die but you won’t be in very good shape afterward.
One more thing to note is that there are Special Zeds roaming about, i suggest avoiding contact and engagements until you have at least a couple upgrades for your Bow/Crossbow or a Rifle and a good supply of ammo. Specials in particular to avoid and are easy to spot are the Butcher (one found outside of the High School), he throws Cleavers at you and another is basically made of burning embers, hes very dangerous and once killed will explode. Give this guy a very wide berth, when exploring into the first residential area theres behind the industrial building where the blue bus is.
Thats the basics for combat, as updates are release i sincerely hope they expand on this system far more than it currently offers. Dodge or Kick would be nice.
Section 3: The First Day
Alright with all the more technical aspects covered, on with getting started and to the fun bits. Once you spawn in and complete the tutorial as covered in Section 1. Focus the first half of your day to looting the streets and rural POIs, for the other half chop only trees and bushes until you have about 30 or so logs, should keep you going along with the materials you looted from the POIs to start your base. This is why i said to stop the tutorial at ‘The Foundation” task. Complete the next few base building/upgrade tasks and stop again at either “The Pendulum” or “The Cutter” trap building tasks as these aren’t needed yet.
Again the gameloop formula is simple, how you organise and prioritise importance is what makes the difference. I’ve given a basic Time Management formula to use; Explore/Loot, Gather/Craft, and Repair/Build. You can further tune your days based on necessity. You don’t even necessarily have to follow that specific order either, i’ve only ordered like that for logical effectiveness.
Section 4: Upgrades, Skills and Perks
Research Material and where to spend it
Now its time to spend all that Research Material you looted earlier. Skills/Perks and Upgrades are very important in advancing, they ultimately govern time invested in specific actions. The first Skill/Perks you should unlock will be Gather, Porter and Looter as these will allow the player to spend less time focused on any one activity by increasing resource damage, inventory space and looting speed. Next should be Blacksmith as it grants the ability to craft Upgrades for your equipment, then either spend or save any remaining Research Material.
Be sure to read each Skill/Perk to understand what they actually do, not what they sound like they do.
Equipment and Upgrades
Another rather simple and effective system much like the Skill/Perks system. Each tier of upgrade provides more Damage output towards Resource Nodes (trees, rocks, iron ore) thus reducing the time it takes to gather. There are many upgrades capping out at 10, you will eventually be one hitting any resource node at some point. These Upgrades are just as important in time management as the Skills/Perks.
Bag Upgrades increase the total capacity of their respective category (resources, food and ammo) and are most effective when the Porter perks are unlocked. These should also be among your top priorities.
Section 5: Base Building
Not much to say here, this is strictly player preference. Theres many strategies that base defence can take on, again this is up to the player in the end. What i do suggest though is building Trap Corridors leading to a central Killbox Arena. Other than that get creative, would love to see some crazy gauntlets.