Данная лицензия не предназначена для продажи этого Руководства и Вы не становитесь владельцем этого Руководства после приобретения любого продукта, загрузки и/или использования. Nikon сохраняет за собой право владения данным Руководством и, следовательно, всеми копиями и все соответствующие права, относящиеся к интеллектуальной собственности, и сохраняет за собой все права, которые явно не предоставлены Вам в рамках данного Соглашения. Данное Соглашение представляет собой полное и эксклюзивное соглашение, устное и письменное, между Вами и Nikon.
1. РУКОВОДСТВО
Руководство предназначено для клиентов, которые приобрели наши продукты. Мы можем не иметь возможности ответить на запрос физических лиц, которые не приобрели наши продукты. Пожалуйста, имейте в виду, что данное руководство и контактная информация, указанные здесь, могут быть изменены без уведомления.
Данное Руководство защищено Законом об авторском праве Японии и международными законами об авторском праве и международными договорами. Вам необходимо воспроизвести на каждой копии уведомление об авторском праве Nikon и любую другую информацию о праве собственности, которые присутствовали на оригинале.
2. ОГРАНИЧЕНИЯ
Кроме случаев, когда в данном Соглашении указано иное, нельзя делать или передавать копии данного Руководства другим или передавать в электронной форме Руководство с одного компьютера на другой по сети. НЕЛЬЗЯ ИЗМЕНЯТЬ ИЛИ УДАЛЯТЬ ЛЮБЫЕ УВЕДОМЛЕНИЯ ОБ АВТОРСКОМ ПРАВЕ, ТОРГОВОЙ МАРКЕ ИЛИ ДРУГИЕ ЗАЩИТНЫЕ УВЕДОМЛЕНИЯ, СОДЕРЖАЩИЕСЯ В ДАННОМ РУКОВОДСТВЕ. НЕЛЬЗЯ ПРИСВАИВАТЬ ИЛИ ИНЫМ ОБРАЗОМ ИЗБАВЛЯТЬСЯ, МОДИФИЦИРОВАТЬ, НАСТРАИВАТЬ, ПЕРЕВОДИТЬ, АРЕНДОВАТЬ, БРАТЬ В НАЕМ, ЗАНИМАТЬ, ПЕРЕПРОДАВАТЬ, РАСПРОСТРАНЯТЬ, ПЕРЕДАВАТЬ ПО СЕТИ ИЛИ СОЗДАВАТЬ ИЛИ ИМЕТЬ СОЗДАННЫЕ ПРОИЗВОДСТВЕННЫЕ РАБОТЫ, ОСНОВАННЫЕ НА ДАННОМ РУКОВОДСТВЕ ИЛИ ЛЮБОЙ ЧАСТИ ТАКОВОГО.
3. ОГРАНИЧЕННАЯ ГАРАНТИЯ И ОТКАЗ
В НАИБОЛЬШЕЙ СТЕПЕНИ, РАЗРЕШЕННОЙ В СИЛУ ДЕЙСТВУЮЩЕГО ЗАКОНОДАТЕЛЬСТВА, ДАННОЕ РУКОВОДСТВО ПРЕДОСТАВЛЕНО НА ОСНОВЕ ПРИНЦИПА «КАК ЕСТЬ», БЕЗ ГАРАНТИИ В ЛЮБОЙ ФОРМЕ, И КОМПАНИЯ NIKON, ЕЕ СОТРУДНИКИ, РАСПРОСТРАНИТЕЛИ, ДИЛЕРЫ И АГЕНТЫ ПРЯМО НЕ ПРИЗНАЮТ ЛЮБУЮ ГАРАНТИЮ В ЛЮБОЙ ФОРМЕ, ВЫРАЖЕННУЮ ИЛИ ПОДРАЗУМЕВАЕМУЮ, ВКЛЮЧАЯ, НО НЕ ОГРАНИЧИВАЯСЬ, ЛЮБОЙ ПОДРАЗУМЕВАЕМОЙ ГАРАНТИЕЙ ПРИГОДНОСТИ ДЛЯ ТОРГОВЛИ, ПРИГОДНОСТИ ДЛЯ ОПРЕДЕЛЕННОГО НАЗНАЧЕНИЯ ИЛИ ОТСУТСТВИЯ НАРУШЕНИЙ. В НАИБОЛЬШЕЙ СТЕПЕНИ, РАЗРЕШЕННОЙ В СИЛУ ДЕЙСТВУЮЩЕГО ЗАКОНОДАТЕЛЬСТВА, КОМПАНИЯ NIKON, ЕЕ СОТРУДНИКИ, РАСПРОСТРАНИТЕЛИ, ДИЛЕРЫ И АГЕНТЫ НЕ ГАРАНТИРУЮТ ИСПОЛНЕНИЕ ИЛИ РЕЗУЛЬТАТЫ, КОТОРЫЕ ВЫ МОЖЕТЕ ПОЛУЧИТЬ ИЗ ДАННОГО РУКОВОДСТВА, ИЛИ ЧТО ДАННОЕ РУКОВОДСТВО БУДЕТ СООТВЕТСТВОВАТЬ ВАШИМ ТРЕБОВАНИЯМ ИЛИ ЧТО РАБОТА РУКОВОДСТВА БУДЕТ БЕСПЕРЕБОЙНОЙ, БЕЗОШИБОЧНОЙ ИЛИ НЕ БУДЕТ СОДЕРЖАТЬ ВИРУСОВ. В НАИБОЛЬШЕЙ СТЕПЕНИ, РАЗРЕШЕННОЙ В СИЛУ ДЕЙСТВУЮЩЕГО ЗАКОНОДАТЕЛЬСТВА, НИ КОМПАНИЯ NIKON, НИ ЕЕ СОТРУДНИКИ, РАСПРОСТРАНИТЕЛИ, ДИЛЕРЫ И АГЕНТЫ НЕ ДОЛЖНЫ НЕСТИ ПЕРЕД ВАМИ ОТВЕТСТВЕННОСТЬ ЗА ЛЮБЫЕ КОСВЕННЫЕ, ПОСЛЕДУЮЩИЕ ИЛИ НЕПРЕДНАМЕРЕННЫЕ УБЫТКИ, ПОТЕРИ ИЛИ ИЗДЕРЖКИ ЛЮБОГО ТИПА, БУДЬ ТО ПОТЕРЯ ПРИБЫЛИ, ПЕРЕРЫВ В ДЕЯТЕЛЬНОСТИ ИЛИ ИНЫМ СПОСОБОМ ВОЗНИКАЮЩИЙ ИЛИ ЯВЛЯЮЩИЙСЯ СЛЕДСТВИЕМ ДАННОГО РУКОВОДСТВА, ВЫЗВАННЫЙ КАКИМ-ЛИБО СПОСОБОМ, ДАЖЕ ЕСЛИ КОМПАНИЯ NIKON, ЕЕ СОТРУДНИКИ, РАСПРОСТРАНИТЕЛИ, ДИЛЕРЫ ИЛИ АГЕНТЫ УВЕДОМЛЕНЫ О ВОЗМОЖНОСТИ ВОЗНИКНОВЕНИЯ ТАКИХ УБЫТКОВ, ПОТЕРЬ ИЛИ ИЗДЕРЖЕК. ЭТОТ ОТКАЗ СОСТАВЛЯЕТ СУЩЕСТВЕННУЮ ЧАСТЬ ДАННОГО СОГЛАШЕНИЯ, И НЕИСПОЛЬЗОВАНИЕ ДАННОГО РУКОВОДСТВА УПОЛНОМОЧЕНО, КРОМЕ СЛУЧАЕВ В РАМКАХ ДАННОГО ОТКАЗА.
4. ОБЩИЕ СВЕДЕНИЯ
Данное соглашение регулируется и должно истолковываться в соответствии с законами Японии независимо от его принципов коллизионного права. В случае возникновения спора в рамках или в связи с данным соглашением Вы, таким образом, даете согласие на персональную юрисдикцию Японии и отказываетесь от любого возражения, что такая дискуссия вызывает затруднение. Далее Вы соглашаетесь на получение судебных извещений в любом действии, возникающем из данного Соглашения по обычной почте или другими коммерчески оправданными способами доставки расписки в получении. Если любое положение данного Соглашения должно быть определено недействительным по какой-либо причине, то оставшиеся положения не должны быть признаны недействительными и должны остаться в силе без изменений. Данное Соглашение устанавливает в дальнейшем целое соглашение и понимание между Вами и компанией Nikon, и замещает собой и заменяет любые другие соглашения, относящиеся к сути дела данного Соглашения. Неуспех любой стороны в настаивании на строгом исполнении любого правила или положения данного соглашения, или выполнение любой опции, права или защиты прав, содержащихся в данном документе, не должны толковаться в качестве отказа от любого применения такого правила, положения, опции, права или защиты прав в будущем, и такое правило, положение, опция, право или защита прав должны продолжиться и сохранить полную юридическую силу и действие. Заголовки разделов данного Соглашения вставлены только для удобства и не должны составлять часть данного документа или влиять каким-либо образом на значение или толкование данного Соглашения. Кроме случаев, когда иначе явно указано в данном документе, положения раздела 3 и раздела 4 вместе с любыми положениями, которые с помощью своих прямо выраженных условий относятся к периодам после прекращения срока действия данного Соглашения, должны оставаться в силе после прекращения действия данного Соглашения по какой-либо причине.
Руководства для продуктов Nikon/ 2018/02/15/ Вер. 2.0.0

Данная инструкция на русском языке предназначена для фотокамеры
Nikon D3000, описывает принцип работы и основные моменты эксплуатации устройства.
Производитель настойчиво рекомендует перед включением фотокамеры
внимательно изучить настоящую инструкцию.
Инструкция для фотокамеры
представлена в формате PDF. Все современные браузеры уже поддерживают данный формат и сложностей с открытием файла возникнуть не должно.
Но если открыть инструкцию все же не удается, то необходимо установить на компьютер программу для чтения PDF файлов, например, Acrobat Reader. Если у вас возникли сложности с открытием инструкции на смартфоне под управлением Android, нужно установить, например, Adobe Acrobat Reader.
Комментарии (0)
Комментарии про другие Фотокамеры
Другие Фотокамеры Nikon
-
Инструкции по эксплуатации
15
Языки:

Nikon D3000 инструкция по эксплуатации
(68 страниц)
- Языки:Русский
-
Тип:
PDF -
Размер:
6.62 MB
Просмотр

Nikon D3000 инструкция по эксплуатации
(216 страниц)
- Языки:Русский
-
Тип:
PDF -
Размер:
15.91 MB
Просмотр

Nikon D3000 инструкция по эксплуатации
(68 страниц)
- Языки:Словацкий
-
Тип:
PDF -
Размер:
6.39 MB
Просмотр

Nikon D3000 инструкция по эксплуатации
(68 страниц)
- Языки:Польский
-
Тип:
PDF -
Размер:
6.46 MB
Просмотр

Nikon D3000 инструкция по эксплуатации
(216 страниц)
- Языки:Нидерландский
-
Тип:
PDF -
Размер:
15.66 MB
Просмотр

Nikon D3000 инструкция по эксплуатации
(216 страниц)
- Языки:Исландский
-
Тип:
PDF -
Размер:
15.48 MB
Просмотр

Nikon D3000 инструкция по эксплуатации
(216 страниц)
- Языки:Венгерский
-
Тип:
PDF -
Размер:
15.59 MB
Просмотр

Nikon D3000 инструкция по эксплуатации
(216 страниц)
- Языки:Эстонский
-
Тип:
PDF -
Размер:
15.46 MB
Просмотр

Nikon D3000 инструкция по эксплуатации
(216 страниц)
- Языки:Португальский
-
Тип:
PDF -
Размер:
15.91 MB
Просмотр

Nikon D3000 инструкция по эксплуатации
(216 страниц)
- Языки:Итальянский
-
Тип:
PDF -
Размер:
15.81 MB
Просмотр

Nikon D3000 инструкция по эксплуатации
(68 страниц)
- Языки:Итальянский
-
Тип:
PDF -
Размер:
6.45 MB
Просмотр

Nikon D3000 инструкция по эксплуатации
(216 страниц)
- Языки:Немецкий
-
Тип:
PDF -
Размер:
15.71 MB
Просмотр

Nikon D3000 инструкция по эксплуатации
(216 страниц)
- Языки:Чешский
-
Тип:
PDF -
Размер:
15.52 MB
Просмотр

Nikon D3000 инструкция по эксплуатации
(68 страниц)
- Языки:Чешский
-
Тип:
PDF -
Размер:
6.4 MB
Просмотр

Nikon D3000 инструкция по эксплуатации
(216 страниц)
-
Тип:
PDF -
Размер:
15.59 MB
Просмотр
На NoDevice можно скачать инструкцию по эксплуатации для Nikon D3000. Руководство пользователя необходимо для ознакомления с правилами установки и эксплуатации Nikon D3000. Инструкции по использованию помогут правильно настроить Nikon D3000, исправить ошибки и выявить неполадки.
- Manuals
- Brands
- Nikon Manuals
- Digital Camera
- D3000
- User manual
-
Contents
-
Table of Contents
-
Troubleshooting
-
Bookmarks
Quick Links
DIGITAL
CAMERA
)¢)C)
User’s Manual
Related Manuals for Nikon D3000
Summary of Contents for Nikon D3000
-
Page 1
DIGITAL CAMERA )¢)C) User’s Manual… -
Page 2
PictureControls Nikon’s unique Picture Control system makes it possible to share image processing settings, including sharpening, contrast, saturation, and hue, among compatible devices and software. Selecting a Picture Control The camera offers six Picture Controls. In R S,A, and M modes, you can choose a Picture Control according to the subject or type of scene (in other modes, the camera selects a Picture Control automatically). -
Page 3
Modifying Picture Controls Picture Controls can be modified to suit the scene or the user’s creative intent. Choose a balanced combination of settings using Quick adjust, or make manual adjustments to individual settings. Display the Picture Control menu. To display the menus, press the MENU button. Highlight Set Picture Control in the… -
Page 4
Choose from options between -2 and +2 to reduce or exaggerate the effect of the selected Picture Control (note that this resets all manual adjustments). Quickadjust For example, choosing positive values for Vivid makes pictures more vivid. Not available with Neutral or Monochrome Picture Controls. -
Page 5
The Picture Control Grid Pressing the _ button in Step 3 displays a Picture Control grid showing the contrast and saturation for the selected Picture Control in relation to the other Picture Controls (only contrast is displayed when Monochrome is selected). Release the _ button to return to the Picture Control… -
Page 6
More onPlayback Full.Frame Pla, To play photographs back, press the F_I button. The most recent photograph will be displayed the monitor. F_qbutton __Us°e =°:U:’_=_- Description View additional Press • to view photographs in order recorded, • to view photographs photographs in reverse order. -
Page 7
Photo Information Photo information is superimposed on images displayed in full-frame playback. Press • or • to cycle through photo information as shown below. Note that shooting data, RGB histograms, and highlights are only displayed if corresponding option is selected for Display mode (_ 118). File information Overview data Shooting data 3… -
Page 8: Protect Status ……………………………………….. 1 O0 Retouch Indicator 1
II R6BHistogrom_ Protect status ……….1 O0 Retouch indicator ……..141 White balance ……….80 White balance fine-tuning …… 8 2 Preset manual ……….83 Camera name Histogram (RGB channel). In all histograms, horizontal axis gives pixel brightness, vertical axis number pixels.
-
Page 9
Protect status ……….1 O0 Retouch indicator ……..1 41 Image highlights Camera name Frame number/total number of images * Displayed only if Highlights is selected for Display mode (_ 118). Blinking areas indicate highlights. ll ShootingData Page 17 Metering ………… -
Page 10
IIShooting Data Page 21 Color space ……….. Picture Control ……….Quick adjust 2……….Original Picture Control 3……Sharpening …………Contrast …………Brightness [Saturation 4…………Filter effects s ……….Hue 4 …………..Protect status ……….100 Toning 5…………. Retouch indicator ……..141 Camera name White balance ………. -
Page 11
II OverviewData Histogram showing the distribution tones in the image (_ 93). ISO sensitivity*……….6 2 Focal length ……….161 Image comment indicator …….128 Flash mode …………59 Flash compensation ……..7 8 Exposure compensation ……7 6 Metering ………… -
Page 12
To display images in «contact sheets» of four, nine, or 72 images, press the ql_ button. Full-frame Calendar playback Thumbnail Piayback playback Description Display more Press ql_ button to increase the number of images displayed. images _-button to reduce the number of images displayed. -
Page 13
To view images taken on a selected date, press the e_ button when 72 images are displayed. Full-frame Calendar playback Thumbnail playback playback Thumbnail list Press the e=_ button to toggle between the date list and the list of thumbnails for the selected date. -
Page 14
Press the _ button to zoom in on the image displayed in full-frame playback or on the image currently highlighted in thumbnail or calendar playback. The following operations can be performed while zoom is in effect: _-_UUFFTo -:77U’F’F’I -°_ —JJse «=_ Description _-to zoom in to maximum… -
Page 15
In full-frame, zoom, thumbnail, and calendar playback, the o-n button can be used to protect photographs from accidental deletion. Protected files can not be deleted using the _ button or the Delete option in the playback menu. Note that protected images will be deleted when the memory card is formatted (_ 21). -
Page 16
To delete the photograph displayed in full-frame playback or the photograph highlighted in the thumbnail list, press the _ button. To delete multiple selected photographs, all photographs taken on a selected date, or all photographs in the current playback folder, use the Delete option in the playback menu. Once deleted, photographs can not be recovered. -
Page 17
The Playback Menu The Delete option in the playback menu contains the following options. Note that depending on the number of images, some time may be required for deletion. _=°-_ Description _’_-_ Delete selected pictures. Select date I Delete all pictures taken on a selected date. ALL All Delete all pictures in the folder currently selected for playback (_ 117). -
Page 18
II SelectDate: Deleting PhotographsTakenon a SelectedDate Choose Select Date. In the delete menu, highlight Select date and press I_. Highlight a date. Press• or • to highlight a date. To view the pictures taken on the highlighted date, press ql_. Use the multi selector to scroll through the pictures, or press _ to view the current picture full… -
Page 19
The Slide show option in the playback menu is used to display a slide show of the pictures in the current playback folder (_ 117). Select Slide show. To display the slide show menu, press the MENU button and select Slide show in the playback menu. -
Page 20
II SuppliedSoftware Nikon Transfer is used to copy photographs from the camera to the computer, where they can be viewed using ViewNX (Nikon Transfer can also be used to back up photographs and embed information in photographs as they are transferred,… -
Page 21
(for more information on using Nikon Transfer, select Nikon Transfer help from the Nikon Transfer Help menu). Start Transfer button Turn the camera off and disconnect the USB cable when transfer ends. Nikon Transfer will close automatically when transfer is complete. -
Page 22
To print selected JPEG pictures on a PictBridge printer via a direct USB connection, follow the steps below. Take photographs IISeiect_hotogra_hs_or_rinting.singPr,ntse Connect camera to printer (see below) Print_hotogra_hsoneata IIPrintm.lti_lephotogra_hs II Create index_rints time, t08) Disconnect USB cable Printing Via Direct USB Connection Be sure the EN-ELga battery is fully charged or use an optional… -
Page 23
Turn the camera A welcome screen will be displayed in the monitor, followed by a PictBridge playback display. Printing Pictures One at a Time Select a picture. Press • or I_ to view additional pictures, or press • or • to view photo information (_ 92). -
Page 24
Option Description This option is available only if supported by current )rinten Menu shown at right will be displayed. Press • or • to choose print style from Printer default (print Border using current printer settings), Print with border (print )hoto with white border), or No border, then press _) to select and return to previous… -
Page 25
Printing Multiple Pictures Display the PictBridge menu. Press the MENU button in the PictBridge playback display (see Step 3 on page 108). MENU b utton Choose an option. Highlight one of the following options and press I_. • Print select: Select pictures for printing. •… -
Page 26
Select pictures or choose a date. If you chosePrint select or Print (DPOF) in Step2, use the multi selector to scroll through the pictures on the memory card. To display the current picture full screen, press and hold the _ button. To select the current picture for printing, press the ql_ button and… -
Page 27
Display printing options. Press _) to display PictBridge printing options. Adjust printing options. Press • or • to highlight an option and press I_ to select. _°Ol_ti-°o_n Description ‘_TI_=I°’_T°’°’°’°’°’° ..Menu of page sizes will be displayed (_ 108; options not supported by current Page )rinterarenotlisted). -
Page 28
Creating Index Prints To create an index print of all JPEG pictures on the memory card, select Index print in Step 2 of»Printing Multiple Pictures» (_ 110). Note that if the memory card contains more than 256 pictures, only the first 256 images will be printed. Select Index print. -
Page 29
Creating a DPOF Print Order: Print Set The Print set (DPOF) option in the playback menu is used to create digital «print orders» for PictBridge-compatible printers and devices that support DPOF. Selecting Print set (DPOF) from the playback menu displays the menu shown in Step 1. Choose Select/set. -
Page 30
Select imprint options. Highlight the following options and press I_ to toggle the highlighted option on or off (to complete the print order without including this information, proceed to Step 5). • Data imprint: Print shutter speed aperture on all pictures in print order. -
Page 31
An EG-DIO0 video cable (available separately) can be used to connect the camera to a television or VCR for playback or recording. Before connecting the camera, confirm that the camera video standard (_ 127) matches that used in the TV. Turn the camera off. -
Page 32
Menu Guide Th e Playba ck M en U: Managinglmages To display the playback menu, press MENU and select the I_I (playback menu) tab. MENU b utton The playback menu contains the following options: c°_’ Option Option Image review Rotate tall Choose a folder for playback: Option Description… -
Page 33
Choose the information available in the playback photo information display (_ 92). Press • or • to highlight an option, then press I_ to select the option for the photo information display. A [] appears next to selected items; to deselect, highlight and press I_. -
Page 34: Image Quality 5
To display the shooting menu, press MENUand select the I_1 (shooting menu) tab. MENU button The shooting menu contains the following options: Option Option Reset shooting options Colorspace Noisereduction Set Picture Control Releasemode Image quality Focus mode Image size White balance AF-areamode ISOsensitivitysettings Single point…
-
Page 35
Adjust ISO sensitivity (_ 62). Ilbto 150Sensitivity If Off is chosen for Auto ISO sensitivity in P,S,A,and M modes, ISO sensitivity will remain fixed at the value selected by the user (_ 62). When On is chosen, ISO sensitivity will automatically adjusted if optimal exposure can not be achieved at the value selected by the user (ISO sensitivity… -
Page 36
DCF, select the appropriate color space manually. For more information, see the documentation provided with the application or device. Nikon Software ViewNX (supplied) and Capture NX 2 (available separately) automatically select the correct color space when opening photographs created with this camera. -
Page 37
If On is selected, photographs taken at shutter speeds slower than 8 s or at ISO sensitivities over ISO 400 will be processed to reduce noise. The time required for processing is roughly equal to the current shutter speed; during processing, «uoo» nr»… -
Page 38
Choose the flash mode for the built-in flash in E S,A, and M modes. TTLf_ T TL Flash output is adjusted automatically in response to shooting conditions. Choose a flash level between Full and 1/32 (1/32of full power). At full power, the built-in flash has a Guide MS Manual Number of 13/43 (m/ft., ISO 100, 20°C/68 °F). -
Page 39
To display the setup menu, press MENU and select the y (setup menu) tab. MENU b utton The setup menu contains the following options: Option Default DustOff ref photo Auto off timers Normal LCDbrightness Self-timer delay 10 s Remoteon duration .5 mi n. -
Page 40
Select Yes to reset setup menu all settings except Video mode, Time zone and date, Language, and Active folder to the defaults listed on page 124. The LCD brightness menu contains the following options: • I.Cl)brightness:The menu at right will be displayed; press •… -
Page 41
Select a background color. Highlight a background color and press _). Choose from blue, black, or orange (Classic) or green, black, or brown (Graphic). The «Classic» display is shown below. Camera rotated 90 oto shoot Camera in normal orientation in tall (portrait) orientation 16 171819 10 9 11… -
Page 42
This option can be set separately for auto and scene modes and for R S,A, and M modes. If On is selected, the information display will appear after the shutter-release button is pressed halfway; if image review (_ 118) is off, it will also be displayed immediately after shooting. -
Page 43
Add a comment to new photographs as they are taken. Comments can be viewed as metadata in ViewNX (supplied) or Capture NX 2 (available separately; _ 167). The comment is also visible on the third shooting data page in the photo information display (_ 95). -
Page 44
Acquire reference data for the Image Dust Off option in Capture NX 2 (available separately; for more information, see the Capture NX 2 manual). Dust off ref photo is available only when a CPU lens is mounted on the camera. A lens with a focal length of at least 50 mm is recommended. -
Page 45
Acquire dust off reference data. Press the shutter-release button the rest of the way down to acquire Image Dust Off reference data. The monitor turns off when the shutter-release button pressed. Note that noise reduction will be performed if the subject is poorly lit, increasing recording times. -
Page 46
Choose the length of the shutter release delay in self-timer mode (_ 55). Choose how long the camera will wait for a signal from the remote before cancelling delayed or quick-response remote mode and restoring single-frame or continuous mode (_ 56). Choose shorter times for longer battery life. -
Page 47
Display a framing grid in the viewfinder or choose whether the exposure indicator the viewfinder can be used as a focusing aid in manual focus mode. II Viewfinder Grid Choose On to display on-demand grid lines in the viewfinder reference when composing photographs. -
Page 48
When a photograph is taken, the camera names the file by adding one to the last file number used. This option controls whether file numbering continues from the last number used when a new folder is created, the memory card is formatted, or a new memory… -
Page 49
Choose the roles played by the _/Fn and AE-L/AF-L buttons. II Q/Fn Button Choose the role played by the Fn (_) button. Fn(_) button Option Description Self-timer Press the Fn(_) button to toggle self-timer mode on and off (_ 57). Press the Fn(_) button and rotate the command dial to select the… -
Page 50
IIAE-L/AF-L Choose the role played by the AE-L/AF-L button. AE-L/AF-L button Option Description AE/AF lock Focus and exposure lock while the AE-L/AF-L button is pressed. AE Iockonly Exposure locks while the AE4./AF-L button is pressed. AF lock only Focus locks while the AE4./AF-L button is pressed. Exposure locks when the AE-L/AF-L button is pressed, and remains locked !_@ AE lock (hold) until the button is pressed a second time or the exposure meters turn… -
Page 51: Date Of Recording 1
If Release locked is selected, the shutter-release button is only enabled when a memory card is inserted in the camera. Selecting Enable release allows the shutter to be released when no memory card is inserted, although no pictures will be recorded (they will however be displayed in the monitor in demo mode).
-
Page 52
II DateCounter Pictures taken while this option is in effect are imprinted with the number of days remaining until a future date or the number days elapsed since a past date. Use it to track the growth of a child or count down the days until a birthday or wedding. -
Page 53: Folder Name
(e.g., 101D3000). The camera treats folders with the same name but different folder numbers as the same folder. For example, if the folder NIKONis selected for Active folder, photographs in all folders named NIKON (IOONIKON,101NIKON, 102NIKON, etc.) will be visible when Current is selected for Playback folder (_ 117). Renaming changesall folders with the same name but leavesthe folder numbers intact.
-
Page 54
This option isdisplayed onlywhen anEye-Fi memory c ard (available separately from third-party s uppliers) isinserted i nthecamera. Choose E nable to upload photographs toapreselected destination. Note thatpictures w illnotbeuploaded i f signal strength isinsufficient. Observe alllocal l aws concerning wireless devices a ndchoose D isable where wireless devices areprohibited. -
Page 55
To display the retouch menu, press MENUand select the _ (retouch menu) tab. MENU button The retouch menu is used to create trimmed or retouched copies of the photographs on the memory card, and is only available when a memory card containing photographs is inserted in the camera. -
Page 56
Creating Retouched Copies To create a retouched copy: Display a photo full frame (_ 91). Retouch The camera may not be able to display or retouch images created with other devices. Press _) to display the retouch menu. Monitor off Delay The monitor will turn off automatically if no… -
Page 57
D-Lighting brightens shadows, making it ideal for dark or backlit photographs. Before After Press • or • to choose the amount of correction performed. The effect can be previewed in the edit display. Press _) to copy the photograph. This option is used to correct «red-eye» caused by the flash, and is available only with photographs taken using the flash. -
Page 58
Create a cropped copy of the selected photograph. selected photograph is displayed with the selected crop shown in yellow; create a cropped copy as described in the following table. 1″O Description Increase size of crop button to increase the size of the crop. Reduce size of crop Press the ql_ button to reduce the size of the crop. -
Page 59
Choose from the following filter effects. After adjusting filter effects as described below, press Q to copy the photograph. _-_z_i_i-(J_i)ti°o°n °’T-‘_ ..Description Creates the effect of a skylight filter, making Skylight picture less blue. The effect can be previewed the monitor as shown at right. -
Page 60
Use the multi selector to create a copy with modified color balance as shown below. The effect is displayed in the monitor together with red, green, and blue histograms (_ 93) giving the distribution of tones in the copy. Increase amount of green Increase amount _/_-… -
Page 61
Choose Select image. Highlight Select image and press I_. Select pictures. Highlight pictures using the multi selector and press the ql_ button to select or deselect. Selected pictures are marked by an icon. To view the highlighted photograph full frame, press and hold the _ button. q[] button Press _) to complete the operation. -
Page 62
Image overlay combines two existing NEF (RAW) photographs to create a single picture that is saved separately from the originals; the results, which make use of RAW data from the camera image sensor, are noticeably better than overlays created in an imaging application. -
Page 63
Set gain. Highlight Image I or Image 2 and optimize exposure for the overlay by pressing • or • to set gain for the selected image to values between 0.1 and 2.0. Repeat for the second image. The default value is 1.0; selecting 0.5 cuts gain in half, while selecting 2.0 doubles gain. -
Page 64
Create JPEG copies of NEF (RAW) photographs. Select NEF (RAW) processing. Highlight NEF (RAW) processing in the retouch menu and press I_ to display a picture selection dialog listing only NEF (RAW) images created with this camera. Select a photograph. Use the multi selector to highlight a photograph (to view the highlighted… -
Page 65
Create copies with enhanced saturation and contrast. D-Lighting is applied as required to brighten dark or backlit subjects. Press • or • to choose the amount of enhancement. The effect can be previewed in the edit display. Press _) to copy the photograph. -
Page 66
Selecting Stop-motion movie from the retouch menu displays the menu shown in Step 1. Follow the steps below to create a stop-motion movie from photographs taken with the camera. Choose the frame size. Highlight Frame size and press I1_to display a menu of frame size options. -
Page 67
Select Save. The menu shown at right will be displayed; if no further edits are necessary, highlight Save and press _) to proceed to Step 7. To edit the movie, highlight Edit and press _). The following options will be displayed: •… -
Page 68
II Viewing Stop-Motion Movies To view stop-motion movies, select the Stop-motion movie option in the playback menu 117). A list of existing stop-motion movies will be displayed; press • and I_ to highlight a movie and press _) to begin playback. -
Page 69
Compare retouched copies to the original photographs. This option is only available if the _) button is pressed to display the retouch menu when a copy or original is played back full frame. Select a picture. Select a retouched copy (shown by a Fall i con) or a photograph that has been retouched in full-… -
Page 70
To display the recent settings menu, press MENU and select the _ (recent settings) tab. MENU b utton The recent settings menu lists the twenty most recently used settings. Press • or • to highlight an option and press I_ to select. -
Page 72
Technical N otes Compatible CPU Lenses Autofocus is available with AF-S and AF-I CPU lenses only; autofocus is not supported with other autofocus (AF) lenses. IX NIKKOR lenses can not be used. The features available with compatible CPU lenses are listed below: AI-P NIKKOR 1 Use AF-S or AF-I lenses to get the most from your camera. -
Page 73
Identifying CPU and Type G and D Lenses CPU lenses can be identified by the presence of CPU contacts, type G and D lenses by a letter on the lens barrel. Type G lenses are not equipped with a lens aperture ring. -
Page 74
Compatible Non-CPU Lenses Non-CPU lenses may only be used when the camera is in mode M. Selecting another mode disables the shutter release. Aperture must be adjusted manually via the lens aperture ring and the camera metering system, i-TTL flash control, and other features requiring a CPU lens can not be used. -
Page 75
_I_ The Built-in Flash The built-in flash can be used with lenses with focal lengths of 18-300 ram, although some cases the flash may be unable to entirely light the subject at some ranges or focal lengths due to shadows cast by the lens, while lenses that block the subject’s view of the red- eye reduction lamp may interfere with red-eye reduction. -
Page 76
_I_ AF-Assist Illumination AF-assist illumination is not available with the following lenses: • AF-S NIKKOR 14-24mm f/2.8G ED • AF-S 80-200mm f/2.8D ED • AF-S VR 70-200 m m f/2.8G ED • AF-S VR 200 mm f/2G ED • AF-S NIKKOR 70-200mm f/2.8G ED VR II •… -
Page 77
Before using a Nikon flash unit not listed in this section, contact a Nikon-authorized service representative for more information. The Nikon Creative Lighting… -
Page 78
ll CL$-Compatible F lashUnits The camera can be used with the following CLS-compatible flash units: • TheSB-900,SB-800,SB-600, S B-400,andSB-R200: Ifa color filter is attached to the SB-900 when AUTOor _ (flash) is selected for white balance, camera will automatically detect the filter and adjust white balance appropriately. -
Page 79
II Other FlashUnits The following flash units can be used in non-TTL auto and manual modes. I Select mode P,S,A, or M, lower built-in flash, and use optional flash unit only. 2 Flash mode is automatically set to TTL and shutter-release is disabled. -
Page 80
[I_ Notes on Optional Flash Units (Continued) The SB-900, SB-800, SB-600, and SB-400 provide red-eye reduction, while the SB-900, SB-800, SB-600, and SU-800 provide AF-assist illumination with the following restrictions: • SB-900: AF-assist illumination is available for all focus points; with17-135 mm AF lenses, however, autofocusis not available… -
Page 81
D3000….°. Rechargeable Li-ionBattery EN_ available from local retailers and Nikon service representatives. The EN-ELga can be recharged using an MH-23 quick charger. EN-EL9 batteries can also be used. Power • QuickChargerMH-23(LJ 14): The MH-23 can be used to recharge EN-ELga and EN-EL9 batteries. -
Page 82
_=’°’=:: _’_’=: Capture NX2:A complete photo editing package. Software Note:Usethe latest versions of Nikon software. Most Nikon software offers an auto update feature when the computer is connected to the Internet. Seethe websites listed on page xvi for the latest information on supported operating systems. -
Page 83
Attaching a Power Connector and AC Adapter Turn the camera off before attaching an optional power connector and AC adapter. Ready the camera. Open the battery-chamber (0_) and power connector (<(2_) covers. Insert the EP-5 power connector. Be sure to insert the connector in the correct orientation. Close the battery-chamber cover. -
Page 84
Nikon recommends that the camera be inspected by the original retailer or Nikon service representative once every one to two years, and that it be serviced once every three to five years (note that fees apply to these services). Frequent… -
Page 85
The Low-Pass Filter The image sensor that acts as the camera’s picture element is fitted with a low-pass filter to prevent moir6. If you suspect that dirt or dust on the filter is appearing photographs, you can clean the filter using the Clean image sensor option in the setup menu. -
Page 86
If dust can not be fully removed using the options in the Clean image sensor menu, clean the image sensor manually 172) or consult a Nikon-authorized service representative. If image sensor cleaning is performed several times in succession, image sensor cleaning… -
Page 87
(_ 170), the filter can be cleaned manually as described below. Note, however, that the filter is extremely delicate and easily damaged. Nikon recommends that the filter be cleaned only by Nikon-authorized service personnel. Charge the battery or connect an AC adapter. -
Page 88
End cleaning or inspection immediately. [I_ Foreign Matter on the Low-Pass Filter Nikon takes every possible precaution to prevent foreign matter from coming into contact with the low-pass filter during production and shipping. The D3000, however, is designed… -
Page 89
Donot drop:The product may malfunction if subjected to strong shocks or vibration. Keepdry: This product is not waterproof, and may malfunction if immersed in water or exposed to high levels of humidity. Rusting of the internal mechanism can cause irreparable damage. Avoidsuddenchangesin temperature: Sudden changes in temperature, such as those that occur… -
Page 90
To prevent mold or mildew, take the camera out of storage at least once a month. Turn the camera on and release the shutter a few times before putting it away. Store the battery in a cool, dry place. Replace the terminal cover before putting the battery away. -
Page 91
Defaults can The following table lists the settings that can be adjusted in each mode. be restored with Reset shooting options (_ 119). _°_T°_°T_ _ ooop- -_° °°= l_ =»_-°° ‘_° —=» .._-_ _- .._-_ _ .._-_ _ 111111— Reset when mode dial is rotated to new setting. -
Page 92
The following table shows the approximate number of pictures that can be stored on a 4 GB Lexar Media Professional 133x card at different image quality and size settings. No. of images1 Buffercapacity2 NEF (RAW)+ 9.8 MB JPEG basic 3 NEF (RAW) 8.6 MB 4.7 MB… -
Page 93
The exposure program for programmed auto is shown in the following graph: F (lens focal length) <_ 55 mm —55mm <F<_ 135mm _135mm<F F1,4 @F2.8 / //////// _ F4 //////// //////// r_ F8 //////////// //////////// //////////// ///////////./. 30″15″ 8″ 4″ 2″… -
Page 94
If the camera fails to function as expected, check the list of common problems below before consulting your retailer or Nikon representative. Display Viewfinderisout of focus: Adjust viewfinder focus or use optional eyepiece correction lenses (_ 23, 166). Viewfinderis dark: Insert a fully-charged battery 15, 25). -
Page 95
Shooting (All Modes) Cameratakes time to turn on: Delete files or folders. Shutter-releasedisabled: • Memory card is locked, full, or not inserted (_ 20, 22, 26). • Built-in flash is charging (_ 29). • Camera is not in focus (_ 28). •… -
Page 96
Nophototaken when remotecontrolshutter-releasebutton is pressed: • Replace battery in remote control (_ 167). • Choose remote control mode (_ 53, 55). • Flash is charging (_ 29). • Time selected for Remote on duration has passed: reselect remote control mode (_ 131). •… -
Page 97
Playback Flashingareas,shootingdata,or graphsappear onimages:Press • or • to choose photo information displayed, or change settings for Display mode (_ 92, 118). NEF(RAW)image is not playedback:Photo was taken at image quality of NEF+JPEG basic (_ S1). Somepicturesarenot displayedduringplayback:Select All for Playback folder. -
Page 98
This section lists the indicators and error messages that appear in the viewfinder monitor. Warning Icons A flashing _ in the monitor or _] in the viewfinder indicates that a warning or error message can be displayed in the monitor by pressing the ? (ql_) button. -
Page 99
Monitor _mera off and insert new • Reduce quality or size..Delete photographs. L.arotsTuu » » autofocus. Change 42, 48 sensitivity • Use commercial ND filter Subjectistoo bright• In mode: _ $1ncrease shutter speed rlSO sensitivity Subjectistoo dark• In mode: SLower shutter speed NoBulb in Smode… -
Page 100
_!_:ii_:_u_!__iu_ii_ _i_i_o_]i! C ¸ _:!_ Monitor Solution ._rr._r. i,ress.snutterrelease frequently consult Nikon-authorized service I_Ut_on again. Start-up error.Contact a Nikon-authorized service representative. _lce representative. _utoexposure error.L.ontac_ _ a Nikon-authorizedservice contains no images. Foldercontainsnoimages. _dor selecta different Filedoesnot containimage _d or modif)ed usinga .. -
Page 101
_ i i_ II Nikon D3000 Digital Camera Image size(pixe!s) • 3,872 x 2,592 (L) • 2,896 x 1,944 (M) • 1,936 x 1,296 (S) Fiie_fo°r°matT7 °_°_ • NEF(RAW) • JPEG: J PEG-Baseline compliant with fine (approx. 1 : 4), normal (approx. -
Page 102
Compatible lenses AF-SorAF-I:All functions supported. TypeGor D AFNIKKOR without built-inautofocusmotor: All functions except autofocus supported. IX NIKKOR lenses not supported. OtherAFNIKKOR: A ll functions supported except autofocus and 3D color matrix metering II. Lenses for F3AF not supported. TypeDPCNIKKOR: A ll functions supported except autofocus and some… -
Page 103
Autofocus Nikon Multi-CAM 1000 autofocus sensor module with TTL phase detection, 11 focus points (including one cross-type sensor), and AF- assist illuminator (range approx. 0.5-3 m/1 ft. 8 in.-9 ft. 10 in.) Detectionrange -1 -+19 EV(ISO 100,20 °C/68 °F) Lenssento •… -
Page 104
• Nikon reserves the right to change the specifications of the hardware and software described in this manual at any time and without prior notice. Nikon will not be held liable for damages that may result from any mistakes that this manual may contain. -
Page 105
Ratedinput AC 100-240 V (50/60 Hz) Ratedoutput DC 8.4 V/900 mA Supported batteries Nikon EN-EL9a or EN-EL9 rechargeable Li-ion battery (EN-ELg) when battery is fully discharged Operating temperature 0-40 °C (+32-104 °F) (WxHxD) Approx. 82.5 x 28 x 65 mm (3.2 x 1.1 x 2.6 in.) length of cord Approx. -
Page 106
265 g (9 3 oz) Lenshood HB45 (available separately; attaches as shown below) Nikon reserves the right to change the specifications of the hardware and software described in this manual at any time and without prior notice Nikon will not be held liable for damages… -
Page 107
The SD logo is a trademark of the SD Card Association. PictBridge and the SDHC logo are trademarks. All other trade names mentioned in this manual or the other documentation provided with your Nikon product trademarks or registered trademarks of their respective holders. -
Page 108
• Slow shutter speeds • Using VR (vibration reduction) mode with VR lenses To ensure that you get the most from rechargeable Nikon EN-ELga batteries: • Keep the battery contacts clean. Soiled contacts can reduce battery performance. • Use batteries immediately after charging. -
Page 109: Preset Manual 8
Index AE-L/AF-L ……..135 CPU contacts ……..158 Symbols AE-UAF-L button ……4 7, 75 CPU lens ……..17, 157 _.° (Auto mode) …….. 25 AF ……….41-47 Creative Lighting System ..162 (Auto (flash off) mode) … 25 AF-area mode ……44, 122 Cross screen (Filter effects) ..144 (Portrait) ……..
-
Page 110: Picture Control
Info display format ……125 Neutral (Set Picture Control) ..87 Reset setup options ….1 25 In-focus indicator ….28, 46, 49 Nikon Transfer …… 1 05, 106 Reset shooting options ….1 19 Information ……6, 92, 125 Retouch menu ……. 140 No memory card? ……
-
Page 111: Toning 5
Set framing grid ……134 Set Picture Control ……8 8 Warm filter (Filter effects) ..144 Setup menu ……..124 WB …………80 Shade (White balance) ….80 White balance ……..80 Shooting data ……9 4, 95 Shooting menu ……119 Shutter-priority auto …..69 Shutter-release…
-
Page 112
No reproduction in any form of this manual, in whole or in part (except for brief quotation in critical articles or reviews), may be made without written authorization from NIKON CORPORATION. NIKONCORPORATION Fuji Bldg., 2-3 Marunouchi 3-chome, Printed in Hong Kong…
Требуется руководство для вашей Nikon D3000 Цифровая камера? Ниже вы можете просмотреть и загрузить бесплатно руководство в формате PDF. Кроме того, приведены часто задаваемые вопросы, рейтинг изделия и отзывы пользователей, что позволит оптимально использовать ваше изделие. Если это не то руководство, которое вы искали, – свяжитесь с нами.
Ваше устройство неисправно, и в руководстве отсутствует решение? Перейдите в Repair Café для получения бесплатных ремонтных услуг.
Руководство

Рейтинг
Сообщите нам, что вы думаете о Nikon D3000 Цифровая камера, оставив оценку продукта. Хотите поделиться вашими впечатлениями от данного изделия или задать вопрос? Вы можете оставить комментарий в нижней части страницы.
Довольны ли вы данным изделием Nikon?
Да Нет
Будьте первым, кто оценит это изделие
0 голоса
Часто задаваемые вопросы
Наша служба поддержки выполняет поиск полезной информации по изделиям и отвечает на часто задаваемые вопросы. Если вы заметили неточность в наших часто задаваемых вопросах, сообщите нам об этом с помощью нашей контактной формы.
Как предотвратить появление «красных глаз» на фотографиях? Проверенный
Эффект «красных глаз» вызван попаданием слишком большого количества света за слишком короткий промежуток времени в глаза людей на фото. Этот эффект еще сильнее заметен в темноте. Чтобы его предотвратить, можно сделать следующее: не позволяйте людям смотреть прямо в камеру, создайте больше света, подойдите ближе к позирующим, не используйте функцию приближения/удаления.
Это было полезно (182)
Что такое мегапиксель? Проверенный
Мегапиксель (Мп) равен одному миллиону пикселей. Мегапиксели, кроме прочего, используются для обозначения разрешения цифровых фотоаппаратов и видеокамер. Например, фотоаппарат, который выдает снимки размером 1280×960 пикселей, имеет разрешение около 1,3 Мп. На качество снимков влияют различные факторы, но все же можно сказать, что большее количество мегапикселей дает более качественное изображение.
Это было полезно (170)
Нужно ли полностью разряжать литий-ионный аккумулятор перед зарядкой? Проверенный
Нет, не нужно. Это необходимо было делать с аккумуляторами старого образца. Литий-ионные аккумуляторы можно заряжать после использования и останавливать процесс зарядки в любой момент.
Это было полезно (140)
Что означает SD? Проверенный
SD означает Secure Digital. SD-карты являются стандартным носителем информации для многих цифровых фотоаппаратов.
Это было полезно (112)
Аккумулятор в моем устройстве окислился, могу ли я его безопасно использовать? Проверенный
Ja, устройство все еще можно безопасно использовать. Во-первых снимаем оксидизд АКБ. Никогда не используйте для этого голые руки. Затем протрите батарейный отсек ватным тампоном, смоченным уксусом или лимонным соком. Дайте ему высохнуть и вставьте новые батарейки.
Это было полезно (103)
В каких условиях лучше всего длительно хранить литий-ионный аккумулятор? Проверенный
Рекомендуется хранить литий-ионный аккумулятор при температуре от 5 до 45 °C. Прежде чем отправить аккумулятор на хранение, следует также убедиться в том, что он заряжен примерно на 67%.
Это было полезно (98)
В каких условиях литий-ионный аккумулятор функционирует оптимально? Проверенный
Литий-ионный аккумулятор работает оптимально при температуре от 5 до 45 °C. В очень холодную и очень теплую погоду вы можете заметить, что аккумулятор быстрее разряжается. Не рекомендуется заряжать аккумулятор при температурах ниже 5 °C и выше 45 °C.
Это было полезно (90)
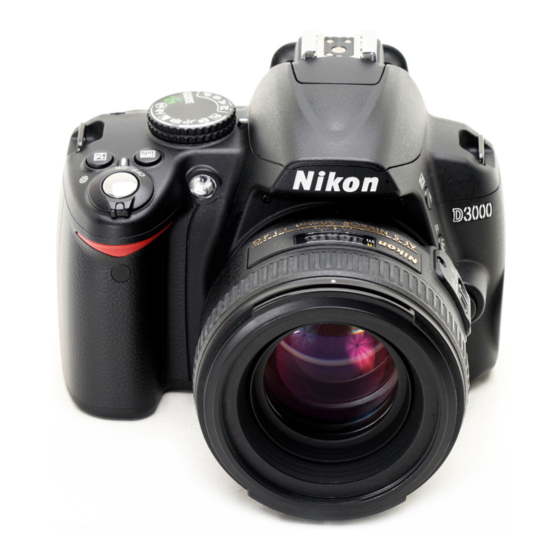
 Модель: Зеркальная фотокамера Nikon D3000
Год выпуска: 2009
Количество страниц: 216
Язык: русский
Формат: pdf
Размер: 10.8 Mb
Описание:
Превосходная зеркальная фотокамера Nikon D3000 для начинающих фотографов с матрицей формата DX, разрешением 10,2 мегапикселей, быстрой и точной системой автофокуса с 11 точками и большим 3-дюймовым ЖК монитором. Эта простая и интересная в использовании фотокамера содержит режим справки, облегчающий легкое создание потрясающих фотоснимков.
Содержание
- Вопросы и ответы.
- Меры безопасности.
- Уведомления.
- Введение.
- Общие сведения.
- Знакомство с фотокамерой.
- Корпус фотокамеры.
- Диск выбора режимов.
- Видоискатель.
- Информационный экран.
- Диск управления.
- Выключатель питания.
- Меню фотокамеры.
- Использование меню фотокамеры.
- Перед началом работы.
- Зарядите батарею.
- Вставьте батарею.
- Установите объектив.
- Основные настройки.
- Вставьте карту памяти.
- Отформатируйте карту памяти.
- Настройте фокус видоискателя.
- Съёмка и просмотр снимков.
- Съёмка «Наведи и снимай» (режимы «авто» или «авто с выключенной вспышкой»).
- Шаг 1: Включите фотокамеру.
- Шаг 2: Выберите режим «авто» или «авто с выключенной вспышкой».
- Шаг 3: Скомпонуйте кадр.
- Шаг 4: Фокусировка.
- Шаг 5: Снимайте.
- Творческая съёмка (сюжетные режимы).
- Портрет.
- Пейзаж.
- Ребенок.
- Спорт.
- Макро.
- Ночной портрет.
- Основной просмотр.
- Удаление ненужных снимков.
- Съёмка «Наведи и снимай» (режимы «авто» или «авто с выключенной вспышкой»).
- Режим справки.
- Меню справки.
- Съeмка: фотосъёмка в режиме справки.
- Просмотр/удаление: просмотр и удаление снимков в режиме справки.
- Настр-ка: изменение настроек фотокамеры в режиме справки.
- Дополнительные сведения о фотографировании (все режимы).
- Фокусировка.
- Режим фокусировки.
- Режим зоны АФ.
- Выбор точки фокусировки.
- Блокировка фокуса.
- Ручная фокусировка.
- Качество и размер изображения.
- Кач-во изображения.
- Размер изображения.
- Режим съемки.
- Режимы автоспуска и дистанционного управления.
- Использование встроенной вспышки.
- Реж. вспышки.
- Чувст-ть ISO.
- Активный D-Lighting.
- Фокусировка.
- Режимы P, S, A и M.
- Выдержка и диафрагма.
- Режим P (Программный авто).
- Режим S (Авт. с приор. выд.).
- Режим A (Авт. с приор. диаф.).
- Режим M (Ручной).
- Экспозиция.
- Замер экспозиции.
- Блокировка автоматической экспозиции.
- Поправка экспозиции.
- Поправка вспышки.
- Баланс белого.
- Тонкая настройка баланса белого.
- Ручная настройка.
- Режимы управления снимками.
- Выберите режим управления снимками.
- Изменение режимов управления снимками.
- Выдержка и диафрагма.
- Дополнительные сведения о просмотре снимков.
- Полнокадровый просмотр.
- Информация о снимке.
- Просмотр миниатюр.
- Календарный просмотр.
- Просмотр крупным планом: увеличение при просмотре.
- Защита снимков от удаления.
- Удаление снимков.
- Полнокадровый просмотр, просмотр миниатюр, календарный просмотр.
- Меню режима просмотра.
- Слайд-шоу.
- Полнокадровый просмотр.
- Подключения.
- Подключение к компьютеру.
- Перед подключением фотокамеры.
- Подключение фотокамеры.
- Печать снимков.
- Подключение принтера.
- Печать снимков по одному.
- Печать нескольких снимков.
- Создание списка снимков.
- Создание задания печати DPOF: Задание печати.
- Просмотр снимков на экране телевизора.
- Подключение к компьютеру.
- Сведения о параметрах меню.
- Меню просмотра: Управление снимками.
- Папка просмотра.
- Режим дисплея.
- Просмотр снимка.
- Поверн. вертикально.
- Меню съёмки: Параметры съёмки.
- Сброс настроек съемки.
- Настр. чувст-ти ISO.
- Цветовое простр.
- Подавление шума.
- Подсветка АФ.
- Встроенная вспышка.
- Меню настройки: Настройка фотокамеры.
- Сброс парам-в настр-и.
- Яркость ЖКИ.
- Формат вывода инф.
- Авт. отобр. инф.
- Видеостандарт.
- Часовой пояс и дата.
- Язык (Language).
- Комментарий.
- Авт. поворот изображ.
- Уд. пыли – этал. снимок.
- Таймеры авт. выкл.
- Задержка автоспуска.
- Время ожид. дист. упр.
- Сигнал.
- Парам-ы видоискателя.
- Посл. нумер. файлов.
- Кнопки.
- Нет карты памяти?
- Впечатывание даты.
- Активная папка.
- Загрузка Eye-Fi.
- Версия прошивки.
- Меню обработки: Создание обработанных копий.
- Создание обработанных копий.
- D-Lighting.
- Коррекц. «красн. глаз».
- Кадрирование.
- Монохромный.
- Эфф. фильтра.
- Цветовой баланс.
- Уменьш. снимок.
- Наложение изображ.
- Обработка NEF (RAW).
- Быстрая обработка.
- Цветовой контур.
- Эффект миниатюры.
- Анимац. видео.
- Наглядное сравнение.
- Недавние настройки.
- Меню просмотра: Управление снимками.
- Техническая информация.
- Совместимые объективы.
- Совместимые объективы с микропроцессором.
- Совместимые объективы без микропроцессора.
- Дополнительные вспышки.
- Система креативного освещения (CLS) Nikon.
- Прочие принадлежности.
- Рекомендованные карты памяти.
- Подключение разъёма питания и сетевого блока питания.
- Уход за фотокамерой.
- Хранение.
- Чистка.
- Инфракрасный фильтр.
- Уход за фотокамерой и батареей: Предупреждения.
- Доступные установки.
- Ёмкость карты памяти.
- Программный режим экспозиции.
- Поиск и устранение неисправностей.
- Индикация.
- Съёмка (Все режимы).
- Съемка (P, S, A, M).
- Просмотр.
- Прочее.
- Сообщения об ошибках.
- Технические характеристики.
- Срок службы батарей.
- Предметный указатель.
- Совместимые объективы.
Скачать: disk.yandex.ru | mega.co.nz