In this post, You are gonna learn how you can install and use Nmap Tool In termux, And I am also gonna give you some Exmaple commands so you can try it your self. Overall it’s Gonna be a serious posts and if you wanna be a good hacker then you must know how to use Nmap.
What is Nmap in termux?
Nmap is an Open Source Network mapper that allows you to scan your network and collect Important data about the network as well as all the devices connected to it. For becoming a good hacker you must know how to collect data about any device and network and with the help of the Nmap tool you can get all that information in a few commands. To collect the data about the Device Nmap sends a packet and then analyses it to get the Information.

With the help of Nmap, you can use the Footprinting technique to gather a lot of information about the Victim networks as well as the system. You can Scan Networks and get information about all the Connected Devices to a particular system. You can scan all the open ports, You can even find the name of all the devices and these Open ports.
If you want to Scan a Website and know it’s Open port then you can also do that with the help of the Nmap tool, you can find the IPs of the websites. If you wanna know more about Nmap then you can Visit There Offical Site @Nmap.org.
How to install Nmap in termux?
Step 1:
Nmap is a really important tool and we don’t want any bugs while running it so we will first upgrade the packages using the below command.
apt update && apt upgrade -y

This command will Install updates in all the previously installed packages in termux.
Step 2:
Nmap is just a basic Package in termux and you can install it like any other package so To install Nmap in Temux you just have to use the pkg command. Nmap is a small package so it won’t take a lot of data to download it. You can just paste the below command and it will be installed in no time.
pkg install nmap -y

Now if you see the $ sign on your Termux that means its Completely installed.
NOTE: This post is only for educational purposes. I and this site do not support any criminal activity. If you are doing any sort of misuse of this information This site is not responsible for that. THIS SITE ONLY SUPPORT ETHICAL HACKING.
How to Use Nmap in Termux :
You can do many things with the help of the Nmap tool but in this post, I am gonna give few important commands that will give a brief idea of how you can use the Nmap tool in termux.
How to scan a Website with Nmap Termux :
To scan a Website you must have permissions Else it can cause you Trouble, Nmap allows you to Scan there Test website so, in this post, we will use that website, you just have to type Nmap and then the site name you can paste the below command in the termux to scan the Nmap test website.
nmap Scanme.nmap.org

Output :
You can see that we got an IP-Adress of the website in the second line as well as we can see the latency is 0.24 Seconds.and we can also see all the open port of the website.

Scan your Local Network with Nmap Termux :
If You just wanna scan your Local network (Your Intire subnet )and know How many devices are connected with your Wifi then you can use this command. This command will give you a list of all Devices in the network as well as you all the open ports of those devices.
nmap 192.168.1.1/24

Output :
Now you can see in the below picture, I have 2 devices in my network. and you can also see all the open ports. The 192.168.1.202 Host is up and the latency is 0.0025s. If you have multiple devices on your network then it will show you a list of all the Devices.

Aggressive scan using Nmap Termux :
In the above Local Network scan, It won’t show you detailed information but if you want to see every possible detail then you can use -A argument in the command. I am just gonna use the above command with -A argument.
nmap -A 192.168.1.1/24

Output :
Now you can see Its showing iBall Baton I Login as well as it is showing the URL of the login page. This is just my local network that’s why you are unable to see anything interesting but if are scanning any website then it can surely give you some extra data.

Scan a Single port in Nmap Termux :
If you just wanna scan a Single Port of a Particular Ip address then you can do that using the below command. Here I am scanning the entire network for the port 80 but you can put a single IP and it will work Perfectly. The advantage of scanning a single port is that it will save you some extra time especially when you are in a hurry.
nmap -p 80 192.168.1.1/24

Output :
Here you can see that Nmap is checking for port 80 only but on my entire network.

Scan Multiple Port in Nmap Termux :
Do you know most of the time when you scan a Network and you find a device with open port 80 as well as 443 then it means that its a WebServer? So In the below command, I am gonna scan these two ports on my network, of course, I don’t have a webserver running in my home so it won’t show 443 port but if you scan it in a network where they have a webserver then it will show with this command.
nmap -p 80,443 192.168.1.1/24

Output :
In the below picture you can clearly see that it is only checking for 2 port and as the output, we can see in my routers Ip address port 80 is open but port 443 is not. And in my second device, Both ports are closed.

Ping A Website or an IP-Address with Nmap in Termux :
If you Quickly wanna Check if a Host is still up or not then you can do a Ping. It will tell you the amount of time it took the Nmap to make a connection with the website or the Device.
nmap -sP 192.168.1.202

You can also Type Nmap -sP www.google.com and it will ping the google server and tell you latency.
Output :
You can see that the latency is 0.02 seconds and the Host is still up.

Perform a Quick Scan with Nmap in Termux:
If you just wanna do a quick scan of the network and you only wanna know basic information then you can use -F Argument. It is much faster than the normal scan.
nmap -F 192.168.1.1/24

Output :
Here you can see I got the output much faster and The result is still good.
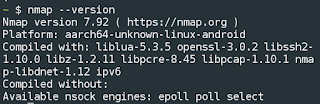
Check Nmap Version in Termux :
If you wanna check the Nmap Version then you can type the below command.
nmap -V
Output :
Now you can see the Nmap Version in the below picture.
Conclusion :
Nmap is a Fine information gathering tool and it can be useful for people who are at least intermediate hackers. There are more New and advanced Information gathering tools. Most of the Nmap Commands are not working in termux because they require root privileges. Still, you can use this tool to scan networks and you will get decent information about the network. If you have any questions, just ask me in the comments and will surly give you a reply, Thanks For Reading Guys, and as always Stay Ethical👾.
Perform a Quick Scan with Nmap in Termux:
If you just wanna do a quick scan of the network and you only wanna know basic information then you can use -F Argument. It is much faster than the normal scan.
nmap -F 192.168.1.1/24

Output :
Here you can see I got the output much faster and The result is still good.

Check Nmap Version in Termux :
If you wanna check the Nmap Version then you can type the below command.
nmap -V

Output :
Now you can see the Nmap Version in the below picture.

Conclusion :
Nmap is a Fine information gathering tool and it can be useful for people who are at least intermediate hackers. There are more New and advanced Information gathering tools. Most of the Nmap Commands are not working in termux because they require root privileges. Still, you can use this tool to scan networks and you will get decent information about the network. If you have any questions, just ask me in the comments and will surly give you a reply, Thanks For Reading Guys, and as always Stay Ethical👾.
NMAP (Network Mapper) is a free and open-source network scanning tool widely used by network administrators and cybersecurity professionals to discover and map devices on a network. It can scan a range of IP addresses or a single host to identify the services and operating systems running on it. In this article, we will discuss how to install and use NMAP in Termux.

Installing NMAP in Termux
1. Open Termux on your Android device and update the package repository by running the following command:
pkg update && pkg upgrade -y
2. Install the Nmap package by running the following command:
pkg install nmap
3. To verify the installation, you can run the nmap command with the —version option
nmap —version
Using NMAP in Termux
NMAP provides a wide range of options for scanning networks and hosts. Here are a few examples of how to use NMAP in Termux:
Scanning a range of IP addresses
To scan a range of IP addresses, you can use the -sL option followed by the range of IP addresses you want to scan. For example, to scan the range 192.168.1.1-255, you can use the following command:
nmap -sL 192.168.1.1-255
This will list all the IP addresses within the specified range.
Scanning a single host
To scan a single host, you can use the -sV option followed by the hostname or IP address of the host you want to scan. For example, to scan the host www.example.com, you can use the following command:
nmap -sV http://scanme.nmap.org/
This will scan the specified host and report the services and operating system running on it.
Scanning a range of ports
NMAP can also be used to scan a range of ports on a host. To do this, you can use the -p option followed by the range of ports you want to scan. For example, to scan the range of ports 1-1000 on the host www.example.com, you can use the following command:
nmap -p 1-1000 www.example.com
This will scan the specified host and report the status of the ports within the specified range.
Performing an OS detection scan
NMAP can also be used to detect the operating system of a host. To do this, you can use the -O option followed by the hostname or IP address of the host you want to scan. For example, to detect the operating system of the host www.example.com, you can use the following command:
nmap -O www.example.com
This will scan the specified host and attempt to detect the operating system running on it.
Also Read:
- Ethical Hacking With Termux App
- How to install cmatrix in termux
- How to use Metasploit in termux
Conclusion
In this article, we have discussed how to install and use NMAP in Termux. NMAP is a powerful and versatile tool that can be used to scan networks and hosts to identify the services and operating systems running on them. By following the steps outlined in this article, you can easily install and use NMAP in Termux on your Android device. We have a comprehensive nmap tutorial
-
Инструменты для пентеста в termux , в этой статье мы разберем основные инструменты для пентеста, и попробуем их в действии.
Nmap — свободная утилита предназначенная для разнообразного сканирования IP сетей.Установка :
pkg update
pkg upgrade
pkg install nmap
Nmap очень полезный сканер, даже провести скан на отрытые порты, с помощью nmap делать гораздо удобнее, давайте разберем некоторые команды :
Команда которая пропингует вам ip:
Быстрое сканирование открытых портов :Полное сканирование открытых портов :(1-10000 это диапазон сканирования портов ,т.е все 10000 портов будут перебраны)
Определение операционной системы + MAC адрес:Определение сервисов которые висят на открытых портах:Подмена MAC адреса при сканировании жертвы :nmap --spoof-mac 0 192.168.1.2
Ищем уязвимости порта :
nmap -sC 192.168.0.112 -p 80
Вместо 80 пишем другой открытый порт
Проверка ip на доступность:
Список ключей nmap:-sL — создать список работающих хостов;
-sP — проверка доступен ли ip;
-PN — считать все хосты доступными, даже если они не рабочие;
-sS/sT/sA/sW/sM — сканирование tcp портов;
-sU — сканирование udp портов;
-sN/sF/sX — TCP NULL и FIN сканирование;
-sC — запускать скрипт по умолчанию;
-sI — Indle сканирование;
-p — указать диапазон портов для проверки;
-sV — детальное исследование портов для определения версий служб;
-O — определить операционную систему;
-T[0-5] — скорость сканирования, чем больше, тем быстрее;
-D — маскировать сканирование с помощью фиктивных IP;
-S — изменить свой IP адрес на указанный;
-e — использовать определенный интерфейс;
—spoof-mac — установить свой MAC адрес;
-A — определение операционной системы с помощью спец. скриптов.Итак, утилита nmap , это в первую очередь очень мощный поисковик, без которого в мир пинтеста нам никуда. Спасибо за внимание, знаю что рассказал не всё, но думаю еще про nmap будут статьи.
Последнее редактирование: 17 май 2022
![[IMG]](https://telegra.ph/file/04e0170affca1dbaa32a7.jpg)
![[IMG]](https://telegra.ph/file/4688437742a3a5f54be39.png)
![[IMG]](https://telegra.ph/file/a70234d83b98b84c34373.png)
![[IMG]](https://telegra.ph/file/c31bd448211e987e35a8b.png)

Гайд по nmap в termux
Termux, please
Всем привет! хочу рассказать вам про утилиту nmap. Вы конечно все про нее слышали, и даже наверное использовали, но я хочу рассказать про его мощь. Поехали!

Сначала покажу как установить nmap, всего лишь 3 команды.
pkg update
pkg upgrade
pkg install nmap
Команда запуска
Синтаксис запуска очень прост:
nmap опции ip_адрес
А сейчас я покажу основные опции nmap:
-sL — создать список работающих хостов;
-sP — проверка доступен ли ip;
-PN — считать все хосты доступными, даже если они не рабочие;
-sS/sT/sA/sW/sM — сканирование tcp портов;
-sU — сканирование udp портов;
-sN/sF/sX — TCP NULL и FIN сканирование;
-sC — запускать скрипт по умолчанию;
-sI — Indle сканирование;
-p — указать диапазон портов для проверки;
-sV — детальное исследование портов для определения версий служб;
-O — определить операционную систему;
-T[0-5] — скорость сканирования, чем больше, тем быстрее;
-D — маскировать сканирование с помощью фиктивных IP;
-S — изменить свой IP адрес на указанный;
-e — использовать определенный интерфейс;
—spoof-mac — установить свой MAC адрес;
-A — определение операционной системы с помощью спец. скриптов.
nmap в действии
Давайте попробуем определить oc одного из серверов google:
nmap -A 173.194.73.102
Как видим у них стоит linux:

Чтобы посмотреть все подключенные в локальной сети устройства пишем:
nmap -sn 192.168.0.1/24
Вместо 192.168.0.1 пишем ip адрес роутера в локальной сети.
Как видим, мы увижели локальные ip адреса:

Теперь можем сканировать данные ip:
nmap 192.168.0.112
Для более детально информации вводим:
nmap -sV 192.168.0.112
Также можно попытаться найти уязвимость порта с помощью спец. скриптов nmap:
nmap -sC 192.168.0.112 -p 23
вместо 23 пишем открытый порт.
Вывод
Nmap очень годный инструмент которым нужно пользоваться.
Спасибо за прочтение!

- ✅Основной канал — https://t.me/under_public
- 🏴☠️ Приватный канал — https://t.me/joinchat/AAAAAEmM-bkL9Pv7KLyL7w
- 🛒Хакерский aliexpress — https://t.me/hackali0x41
- 👨💻Termux, please — 100% termux
- 👹ZLinux — чем Zлее Linux, тем ты сильнее.
- 📮ИБ News — самые свежие и интересные новости Информационной Безопасности.
- 🌐TG-канал форума: https://t.me/darksploit0x41
- Наш форум: https://darksploit.su/
- Чат — https://t.me/UnderChats
Со всеми предложениями и идеями для статей пишите нашему боту @undermbot
Также вы можете присылать ваши статьи в бота (оформляйте в телеграфе), я их просмотрю, если всё ОК — опубликую статью на канале с указанием автора.
Hey folks! In this article I’m listing out some of the most used nmap tool commands that can be used for foot-printing purposes. I’ve tried my best to sort out most of them. But if you find any missing not mentioned here that you know, please comment below. This kind gensture will surely add knowledge of me & others.
Basic Scanning Techniques
Scan a single target —> nmap [target]
Scan multiple targets —> nmap [target1,target2,etc]
Scan a list of targets —-> nmap -iL [list.txt]
Scan a range of hosts —-> nmap [range of IP addresses]
Scan an entire subnet —-> nmap [IP address/cdir]
Scan random hosts —-> nmap -iR [number]
Excluding targets from a scan —> nmap [targets] –exclude [targets]
Excluding targets using a list —> nmap [targets] –excludefile [list.txt]
Perform an aggressive scan —> nmap -A [target]
Scan an IPv6 target —> nmap -6 [target]
Discovery Options
Perform a ping scan only —> nmap -sP [target]
Don’t ping —> nmap -PN [target]
TCP SYN Ping —> nmap -PS [target]
TCP ACK ping —-> nmap -PA [target]
UDP ping —-> nmap -PU [target]
SCTP Init Ping —> nmap -PY [target]
ICMP echo ping —-> nmap -PE [target]
ICMP Timestamp ping —> nmap -PP [target]
ICMP address mask ping —> nmap -PM [target]
IP protocol ping —-> nmap -PO [target]
ARP ping —> nmap -PR [target]
Traceroute —> nmap –traceroute [target]
Force reverse DNS resolution —> nmap -R [target]
Disable reverse DNS resolution —> nmap -n [target]
Alternative DNS lookup —> nmap –system-dns [target]
Manually specify DNS servers —> nmap –dns-servers [servers] [target]
Create a host list —-> nmap -sL [targets]
Advanced Scanning Options

TCP SYN Scan —> nmap -sS [target]
TCP connect scan —-> nmap -sT [target]
UDP scan —-> nmap -sU [target]
TCP Null scan —-> nmap -sN [target]
TCP Fin scan —> nmap -sF [target]
Xmas scan —-> nmap -sX [target]
TCP ACK scan —> nmap -sA [target]
Custom TCP scan —-> nmap –scanflags [flags] [target]
IP protocol scan —-> nmap -sO [target]
Send Raw Ethernet packets —-> nmap –send-eth [target]
Send IP packets —-> nmap –send-ip [target]
Port Scanning Options
Perform a fast scan —> nmap -F [target]
Scan specific ports —-> nmap -p [ports] [target]
Scan ports by name —-> nmap -p [port name] [target]
Scan ports by protocol —-> nmap -sU -sT -p U:[ports],T:[ports] [target]
Scan all ports —-> nmap -p “*” [target]
Scan top ports —–> nmap –top-ports [number] [target]
Perform a sequential port scan —-> nmap -r [target]
Version Detection
Operating system detection —-> nmap -O [target]
Submit TCP/IP Fingerprints —-> http://www.nmap.org/submit/
Attempt to guess an unknown —-> nmap -O –osscan-guess [target]
Service version detection —-> nmap -sV [target]
Troubleshooting version scans —-> nmap -sV –version-trace [target]
Perform a RPC scan —-> nmap -sR [target]
Timing Options
Timing Templates —-> nmap -T [0-5] [target]
Set the packet TTL —-> nmap –ttl Thursday, October 08, 2016 16:14 UTC+9 [target]
Minimum of parallel connections —-> nmap –min-parallelism [number] [target]
Maximum of parallel connection —-> nmap –max-parallelism [number] [target]
Minimum host group size —–> nmap –min-hostgroup [number] [targets]
Maximum host group size —-> nmap –max-hostgroup [number] [targets]
Maximum RTT timeout —–> nmap –initial-rtt-timeout Thursday, October 08, 2016 16:14 UTC+9 [target]
Initial RTT timeout —-> nmap –max-rtt-timeout [TTL] [target]
Maximum retries —-> nmap –max-retries [number] [target]
Host timeout —-> nmap –host-timeout Thursday, October 08, 2016 16:14 UTC+9 [target]
Minimum Scan delay —-> nmap –scan-delay Thursday, October 08, 2016 16:14 UTC+9 [target]
Maximum scan delay —-> nmap –max-scan-delay Thursday, October 08, 2016 16:14 UTC+9 [target]
Minimum packet rate —-> nmap –min-rate [number] [target]
Maximum packet rate —-> nmap –max-rate [number] [target]
Defeat reset rate limits —-> nmap –defeat-rst-ratelimit [target]
Firewall Evasion Techniques
Fragment packets —-> nmap -f [target]
Specify a specific MTU —-> nmap –mtu [MTU] [target]
Use a decoy —-> nmap -D RND: [number] [target]
Idle zombie scan —> nmap -sI [zombie] [target]
Manually specify a source port —-> nmap –source-port [port] [target]
Append random data —-> nmap –data-length [size] [target]
Randomize target scan order —-> nmap –randomize-hosts [target]
Spoof MAC Address —-> nmap –spoof-mac [MAC|0|vendor] [target]
Send bad checksums —-> nmap –badsum [target]
Output Options
Save output to a text file —-> nmap -oN [scan.txt] [target]
Save output to a xml file —> nmap -oX [scan.xml] [target]
Grepable output —-> nmap -oG [scan.txt] [target]
Output all supported file types —-> nmap -oA [path/filename] [target]
Periodically display statistics —-> nmap –stats-every Thursday, October 08, 2016 16:14 UTC+9 [target]
133t output —-> nmap -oS [scan.txt] [target]
Troubleshooting and debugging
Help —> nmap -h
Display Nmap version —-> nmap -V
Verbose output —-> nmap -v [target]
Debugging —-> nmap -d [target]
Display port state reason —-> nmap –reason [target]
Only display open ports —-> nmap –open [target]
Trace packets —> nmap –packet-trace [target]
Display host networking —> nmap –iflist
Specify a network interface —> nmap -e [interface] [target]
Nmap Scripting Engine
Execute individual scripts —> nmap –script [script.nse] [target]
Execute multiple scripts —-> nmap –script [expression] [target]
Script categories —-> all, auth, default, discovery, external, intrusive, malware, safe, vuln
Execute scripts by category —-> nmap –script [category] [target]
Execute multiple scripts categories —-> nmap –script [category1,category2, etc]
Troubleshoot scripts —-> nmap –script [script] –script-trace [target]
Update the script database —-> nmap –script-updatedb
Judging two outptus : Ndiff
Ndiff verbose mode —-> ndiff -v [scan1.xml] [scan2.xml]
Comparison using Ndiff —-> ndiff [scan1.xml] [scan2.xml]
XML output mode —-> ndiff –xml [scan1.xm] [scan2.xml]
Did you like this article? Let us know in the comments below 🙂
Thank you!