-
Contents
-
Table of Contents
-
Bookmarks
Quick Links
VX6s
All-in-One Video Controller
User Manual
Document Version:
V1.0.0
Document Number:
NS160100270
Related Manuals for NovaStar VX6s
Summary of Contents for NovaStar VX6s
-
Page 1
VX6s All-in-One Video Controller User Manual Document Version: V1.0.0 Document Number: NS160100270… -
Page 2
Copyright © 2018 Xi’an NovaStar Tech Co., Ltd. All Rights Reserved. No part of this document may be copied, reproduced, extracted or transmitted in any form or by any means without the prior written consent of Xi’an NovaStar Tech Co., Ltd. Website: www.novastar.tech… -
Page 3: Preface
Preface Preface Overview The VX6s is an all-in-one video controller that integrates sending card functions with video processing. Designed with powerful video processing capability, it supports 10 video inputs and 6 Gigabit Ethernet outputs. Based on the powerful FPGA processing platform, the VX6s supports multiple transition effects, such as quick seamless switching and fade, providing flexible display controlling and outstanding video presentations.
-
Page 4
All-in-One Video Controller VX6s User Manual Preface Change History Version Release Date Description V1.0.0 2018-07-24 First release www.novastar.tech… -
Page 5: Table Of Contents
All-in-One Video Controller VX6s User Manual Contents Contents Preface ……………………..ii 1 Overview …………………….. 1 2 Appearance ……………………2 2.1 Appearance …………………………2 2.2 Applications …………………………4 2.3 Home Screen …………………………. 5 3 Menu Operations………………….6 3.1 Operation Instructions……………………..6 3.2 Screen Brightness ……………………….
-
Page 6: Overview
User Manual 1 Overview Overview The VX6s is an all-in-one video controller that integrates sending card functions with video processing. Designed with powerful video processing capability, it supports 10 video inputs and 6 Gigabit Ethernet outputs. Based on the powerful FPGA processing platform, the VX6s supports multiple transition effects, such as quick seamless switching and fade, providing flexible display controlling and outstanding video presentations.
-
Page 7: Appearance
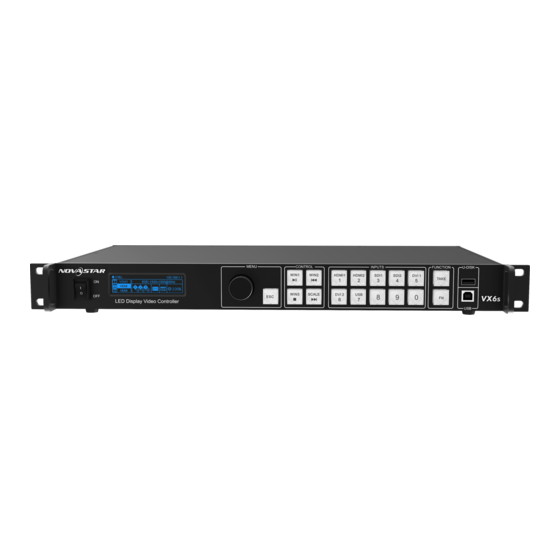
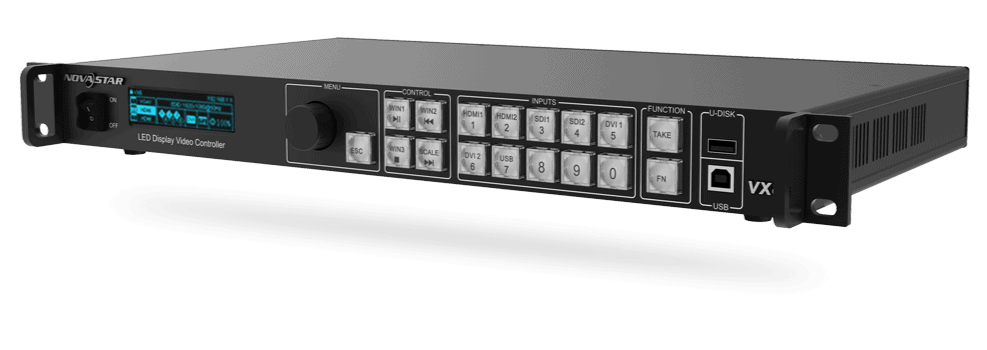
All-in-One Video Controller VX6s User Manual 2 Appearance Appearance 2.1 Appearance Front Panel No. Button Function ON/OFF Power button button OLED screen Displays the current status and setting menu of the device. Knob On the home screen, pressing the knob enters the operation menu screen.
-
Page 8
All-in-One Video Controller VX6s User Manual 2 Appearance In the USB playback mode, you can play, pause, fast forward, rewind or stop current playback. SCALE: This is a shortcut button for auto fit function. You can press this button to make the window of the lowest priority fit the screen. -
Page 9: Applications
All-in-One Video Controller VX6s User Manual 2 Appearance A monitoring connector, which can be set to preview the editing image or monitor the PGM Control Connector Quantity Description Connects to the PC for communication, or to the Ethernet network. USB (Type-B) …
-
Page 10: Home Screen
User Manual 2 Appearance 2.3 Home Screen After the VX6s is powered on, the home screen is shown in the figure below. Figure 2-1 Home screen 1. Product name and device IP address 2. Resolution of configured screen and output refresh rate 3.
-
Page 11: Menu Operations
User Manual 3 Menu Operations Menu Operations The VX6s has powerful functions and is easy to operate. By using the knob and ESC button, you can perform any operations. Besides, you can switch the input sources by pressing only one button.
-
Page 12: Input Settings
Figure 3-1 Screen brightness 3.3 Input Settings The resolutions of input sources can be changed on the VX6s. Currently, only HDMI and DVI connectors support setting the input resolutions. To change the resolutions of other connectors, the only way is to change the output resolutions on the front-end devices.
-
Page 13: Color Adjustment
Figure 3-3 Custom resolution 3.3.2 Color Adjustment The VX6s supports adjustment of the input color (namely image quality), including brightness, contrast, saturation, hue and red/green/blue brightness (R/G/B). Step 1 Choose Color Adjustment > HDMI 1 to enter the color adjustment page of HDMI 1 input source.
-
Page 14: Screen Settings
All-in-One Video Controller VX6s User Manual 3 Menu Operations Figure 3-4 Input color adjustment 3.4 Screen Settings 3.4.1 Quick Configuration Prerequisites The LED screen is a regular one, not an irregular one. The cabinets of the LED screen are regular, and each cabinet has the same resolution.
-
Page 15: Advanced Configuration
3.4.2 Advanced Configuration The connection of cabinets loaded by each Ethernet port must follow the 8 data flow patterns provided in the VX6s. In advanced configuration, you must manually set the Cabinet Row Qty, Cabinet Column Qty, Horizontal Offset, Vertical Offset and Data Flow for each Ethernet port.
-
Page 16: Rv Card Color
(namely RCFGx files) that have been configured on NovaLCT software to the VX6s. Step 1 On NovaLCT, after you configured the screen, click Save to File to save the configuration file to PC.
-
Page 17
All-in-One Video Controller VX6s User Manual 3 Menu Operations Figure 3-9 Saving receiving card configuration file Step 2 On NovaLCT, choose Tools > Controller Cabinet Configuration File Import, click Add Configuration File and select the configuration file you have saved to PC in step 1. -
Page 18: Saving To Rv Card
Step 3 Review the configuration file name and click Save the Change to HW to save the configuration file to the VX6s. Figure 3-11 Saving configuration file to VX6s 3.4.5 Saving to RV Card After the cabinet configuration file is loaded or the receiving card color is changed, if you save the configuration data to receiving card by using the Save to RV Card function, the configuration data will not be lost even if power failure occurred.
-
Page 19: Mapping
Figure 3-13 Configuration template 3.5 Window Settings The VX6s supports up to 3 windows. The input source, size, position, priority and input cropping of each window can be set. Window Settings Step 1 Rotate the knob to select Window1 Setting, and press the knob to enter the submenu.
-
Page 20: Osd Settings
This function can automatically resize the window image and then fill the entire LED display with the resized window image. 3.6 OSD Settings The VX6s supports overlapped display of the prestored images or text. After you add an OSD file on V-Can, you can send the file to VX6s. Figure 3-15 Adding OSD…
-
Page 21: Display Control
All-in-One Video Controller VX6s User Manual 3 Menu Operations Figure 3-16 OSD settings OSD Status: The status of OSD function Initial X: The initial horizontal coordinate Initial Y: The initial vertical coordinate Priority: The priority of OSD over window. You can choose Top or Bottom.
-
Page 22: Preset Settings
3 Menu Operations Figure 3-18 Test pattern 3.8 Preset Settings The VX6s supports 16 user presets. After the preset data is configured, you can recall and use the configured presets by selecting the preset name. Figure 3-19 Preset settings www.novastar.tech…
-
Page 23: Advanced Settings
Figure 3-20 Advanced settings Output Mode You can set the output mode of VX6s here, including switcher and direct modes. Figure 3-21 Output mode Switcher mode: Preview the image being edited.
-
Page 24
Figure 3-22 Fn settings Redundancy The VX6s supports redundancy settings. You can set current device as the primary or backup device. If the primary device becomes abnormal, the backup device can take over the work immediately. This can prevent black out of display. -
Page 25: Communication Settings
Figure 3-25 Factory reset Hardware Version This function is used to check the hardware version of the VX6s. If a new version is released, you can log in to NovaLCT on the PC to update the firmware programs of the VX6s.
-
Page 26
USB first When the VX6s is connected to the control computer via both the USB and Ethernet ports, if the communication mode is set as USB First, the control computer will communicate with the VX6s via the USB port. -
Page 27: Language
All-in-One Video Controller VX6s User Manual 3 Menu Operations 3.11 Language The UI language of VX6s currently supports Chinese and English. You can change the language freely as you need. Figure 3-28 Language www.novastar.tech…
-
Page 28: Usb Playback
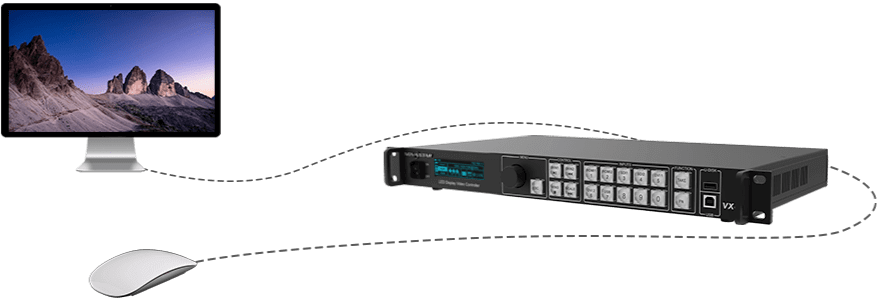
Preparation Step 1 Insert the USB drive into the type-A USB port on the rear panel of the VX6s. Step 2 Connect the mouse to the VX6s via the type-A USB port on the rear panel. Step 3 Set the input source of current window to USB.
-
Page 29
LED screen will be paused. When the input source is set as USB, the VX6s will automatically detect the files that can be played in the USB drive and then automatically play the files in full screen. -
Page 30: Product Specifications
All-in-One Video Controller VX6s User Manual 5 Product Specifications Product Specifications Input Connector Quantity Description 3G-SDI Supports input resolutions up to 1920×1080@60Hz and downward compatibility. Connects to a USB flash drive to play video or picture files stored in the drive.
-
Page 31
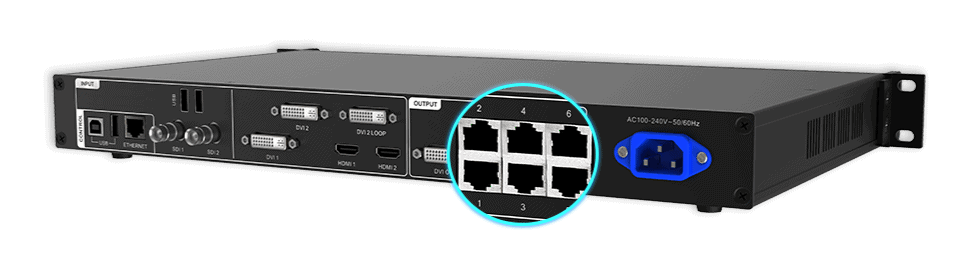
All-in-One Video Controller VX6s User Manual 5 Product Specifications U-DISK The type-A USB port on front panel: a reserved port The type-B USB port on rea panel (Type-B) Connects to the PC for device control. Used as the input for cascading devices…
Видеоконтроллер VX6s
Упрощенно, но не просто
VX6s — это универсальный видеоконтроллер, который объединяет выходы передачи 6 Gigabit Ethernet, 3 уровня и функции бесшовной коммутации. VX6s разработан с мощными возможностями обработки видео, коммутации и передачи.
7 входных разъемов
Включая 2 × 3G-SDI, 2 × HDMI 1.3, 2 × DVI, 1 × DVI + DVI LOOP и 1 × USB воспроизведение

Выход 6 Гигабит Ethernet
Максимальная емкость загрузки до 3,9 млн пикселей
Максимальная высота или ширина могут достигать 4096 пикселей
Модули Multi VX6s могут быть подключены каскадом
Гибкая компоновка в 3 слоя
Поддерживает предустановку загрузки одним щелчком
Поддерживает эффекты переключения, такие как нарастание / затухание
Легкое управление
Поддерживает V-Can, Smart LCT и Nova LCT-Mars
Воспроизведение с USB-накопителя
Воспроизведением через USB можно интуитивно управлять в реальном времени подключив мышь и монитор
- Характеристики
-
Характеристики
Гарантия 2 года Артикул VX6S Производитель Novastar Кол-во в упаковке 1 Вес кг. 2.5 - Отзывы
- Доступные файлы к загрузке
-
Доступные файлы к загрузке
Сертификат

(Размер: 0.24 MB)
(Размер: 0.51 MB)
Инструкции
(Размер: 3.46 MB)
(Размер: 18.73 MB)
(Размер: 2.65 MB)
Программа для управления
(Размер: 108.31 MB)
(Размер: 78.14 MB)
(Размер: 46.06 MB)
(Размер: 41.47 MB)
Спецификации
(Размер: 0.61 MB)


VX6s All-in-One Controller
User Manual
Figure 3-2 Quick configuration
Step 4 Rotate the knob to select Port 1 Cabinet Qty (number of cabinets loaded by
Ethernet port 1) and set the number of cabinets.
Note:
The number of cabinets loaded by Ethernet port 1, 2, 3, 4 and 5 individually must be
the same. The number of cabinets loaded by Ethernet port 6 must be less than or
equal to that of Ethernet port 1.
The number of cabinets loaded by each Ethernet port must be the integral multiple of
the number of cabinet rows or columns in the LED screen.
Step 5 Rotate the knob to select Data Flow (Front View) and press the knob to select one
data flow according to current cabinet connection.
When setting the data flow, you can view the results of different data flow patterns in
real time on LED display by rotating the knob. When you are satisfied with the LED
display image in which no image parts are overlapped or displayed repeatedly, press
the knob to apply and save the selected data flow. If you press the ESC button, you
will exit current operation and the data flow in preview will not be saved.
Figure 3-3 Data flow
After the LED screen is powered on, if a certain cabinet or the entire LED screen
cannot be lit, you can load the receiving card configuration files (namely RCFGx files)
that have been configured on NovaLCT software to the VX6s.
Step 1 On NovaLCT, after you configured the screen, click Save to File to save the
configuration file to PC.
3 Menu Operations
9


- Описание
- Характеристики
- Отзывы
Видеопроцессор NovaStar VX6S профессиональный видеоконтроллер для управления светодиодными экранами большого размера.
Имеет 10 видео входов и 6 Ethernet выходов.
- Входное разрешение 1920×1200 при 60Hz
- Поддерживает 3.9 миллионов пикселей
- 7 входных интерфейсов: 2x3G-SDI, 2xHDMI, 2xDVI, 2xUSB
- Поддерживает 3x слоя и 1xOSD
- Неограниченное каскадное соединение
- Неограниченная цепочка, бесшовное соединение
- Поддержка PIP PBP функция картинка в картинке
- Подключения к экрану без компьютера
- Поддерживаются пользовательские режимы кнопки регулировки согласно привычкам пользователей
- Горячее резервирование
- Поддерживаются сохранение разных пользовательских режимов размещения формы
- Поддержка точечной технологии коррекции изображения нового поколения, что позволяет выполнять коррекцию намного быстрее и эффективнее
- Возможность произвести калибровку баланса белого и цветовой гаммы, для получения эффекта «True color»
- Возможность приближения картинки
- Поддержка отображения HD, 8 bit, 10 bit видео
- Высокий уровень цветопередачи и естественный цвет
- Функция отслеживания температуры кабинета
- Отслеживание статуса интернет подключения
- Контроль питания
- Изысканные оттенки серого
- Высокая частота обновления
- Максимальная ширина видео выхода составляет 4096 пикселей
- Настройка яркости, цветопередачи, яркости пикселей для каждого светодиода
- Поддерживает быстрые и расширенные настройки экрана.
- Переключение PVW в PGM, нажатием только одной кнопки TAKE.
- Поддерживает предварительный просмотр PGM в режиме переключателя.
- Поддерживает настройку входного разрешения и резервное копирование источника ввода.
- Поддерживает регулировку яркости экрана, загруженного VX6s
- Несколько видео процессоров VX6 могут соединяться каскадом
- Автоматически масштабирует изображение, чтобы соответствовать всему экрану.
- Любой входной источник HDMI или DVI может использоваться в качестве сигнала синхронизации
- Имеет интуитивно понятный OLED-экран и светящиеся индикаторные кнопки на передней панели
Входные разъемы:
- 2- 3G-SDI-Максимальная поддержка входного видеосигнала с разрешением 1920×1080 при 60 Гц, обратная совместимость.
- 2 — USB -Воспроизведение видео файлов с USB-накопителя или подключения мышки.
- 2- DVI — Стандарт VESA поддерживает входной видеосигнал до 1920 × 1200 при 60 Гц, который обратно совместим. Поддержка HDCP.
- 2- HDMI — Максимальная поддержка входного видеосигнала с разрешением 1920 × 1200 @ 60 Гц, обратно совместимая. Поддержка HDCP.
Выходные разъемы:
- 6 — Порт Ethernet. Выходной интерфейс 6-канального сетевого порта.
- 1- Интерфейс предварительного мониторинга DVI, можно настроить на предварительный просмотр PGM.
Интерфейс управления
- 1- Ethernet подключение к ПК или доступ к сети.
- 1 — USB Type-B Подключите к ПК и управляйте им через ПК. USB каскадный вход.
- 1- USB Type-A — Используется для каскадного вывода устройства.
Макс. количество пикселей:
3900000
Разрешение, пикс.:
2048×1920
Разъёмы:
2x3G-SDI, 2xHDMI, 3xDVI, 2xUSB, 6xLAN,
Сообщения не найдены
Написать отзыв