- Manuals
- Brands
- MACROMEDIA Manuals
- Software
- DIRECTOR MX-USING DIRECTOR MX
- Use manual
-
Contents
-
Table of Contents
-
Troubleshooting
-
Bookmarks
Quick Links
Using Director MX
Macromedia Director MX
Related Manuals for MACROMEDIA DIRECTOR MX-USING DIRECTOR MX
Summary of Contents for MACROMEDIA DIRECTOR MX-USING DIRECTOR MX
-
Page 1
Using Director MX Macromedia Director MX… -
Page 2
If you access a third-party Web site mentioned in this guide, then you do so at your own risk. Macromedia provides these links only as a convenience, and the inclusion of the link does not imply that Macromedia endorses or accepts any responsibility for the content on those third-party sites. -
Page 3: Table Of Contents
CONTENTS INTRODUCTION ……….. . 13 Getting Started System requirements .
-
Page 4
Add navigation buttons to the animation scene ……. 77 Build the sound and video scene ……… . 79 Write Lingo scripts to control movie playback . -
Page 5
CHAPTER 5 …………157 Sprites Creating sprites . -
Page 6
Working with Macromedia Fireworks …….. -
Page 7
CHAPTER 11 ….. . 293 Using Flash and Other Interactive Media Types Using Flash Movies ……….. 293 Editing a Flash cast member . -
Page 8
CHAPTER 14 …………357 Behaviors Attaching behaviors . -
Page 9
CHAPTER 17 …………443 3D Basics What you need to know . -
Page 10
CHAPTER 20 ……… . 521 Controlling the 3D World 3D Lingo events . -
Page 11
CHAPTER 26 ……..571 Packaging Movies for Distribution Shockwave browser compatibility . -
Page 12
Contents… -
Page 13: Introduction Getting Started
INTRODUCTION Getting Started Macromedia Director MX is the world’s foremost authoring tool for creating interactive multimedia. Developers rely on Director to create attention-grabbing business presentations, advertising kiosks, interactive entertainment, and educational products. To see some of the exciting and varied ways in which developers use Director, visit the Director showcase at www.macromedia.com/software/director/special/inspiration/.
-
Page 14: Installing Director
Integration with other Macromedia MX products Director MX is truly a part of the Macromedia MX family; this is evident in the workspace, which matches those of other Macromedia MX products, as well as in other aspects of the application’s strong integration with Macromedia Flash MX, ColdFusion MX, Flash…
-
Page 15
Macromedia Flash Remoting MX Macromedia ColdFusion MX and Shockwave Player. When used with Director MX, Flash Remoting MX lets you easily pass data to ColdFusion MX and back. gives Director MX developers access to the robust design… -
Page 16: Resources For Learning Director
The Director MX workspace contains tooltips and context-sensitive help, and additional help is available on the Director MX website at www.macromedia.com/support/ director. The new Answers panel in the Director workspace gives you a quick and easy way to find out about the latest Director materials available on the web.
-
Page 17
The Answers panel provides quick access to information that helps you work effectively with Director. This includes tutorials, TechNotes, and other useful content. You can get the latest Director information from macromedia.com by simply clicking the Update button in the Answers panel. -
Page 18: Conventions Used In Director Help And Printed Books
Conventions used in Director Help and printed books The help system and printed books use the following conventions: • The terms Lingo and Director refer to Director MX. • Within the text and in Lingo examples, Lingo elements and parts of actual code are shown in font.
-
Page 19: Chapter 1 Director Basics
CHAPTER 1 Director Basics Macromedia Director MX is the tool of choice for legions of web and multimedia developers. With Director, you can create movies for websites, kiosks, and presentations as well as movies for education and entertainment. Movies can be as small and simple as an animated logo or as complex as an online chat room or game.
-
Page 20: Introducing The Director Workspace
Introducing the Director workspace When you first launch Director, there are several windows in the default layout, including the Stage, the Score, the Cast, and the Property inspector. Stage Tools Property inspector Cast Score Default Director MX window layout (Windows platform) When creating and editing a movie, you typically work in four of these windows: the Stage, the Score, the Cast, and the Property inspector.
-
Page 21
To scroll around the Stage, do one of the following: • Use the scroll bars. (To show or hide Stage scroll bars, select Edit > Preferences > General and select or deselect Show Stage Scrollbars.) • Select the Hand tool from the Tool palette and drag inside the Stage to reposition the visible portion. -
Page 22
The floating (detached) Control panel displays tempo information that does not appear when the Control panel is attached to the Stage. For more information about tempo, see “About tempo” on page 267. Actual tempo Tempo Setting The floating Control panel To close the floating Control panel, do one of the following: •… -
Page 23
You can control the Score by zooming to reduce or magnify your view and by displaying multiple Score windows. You can also control the Score’s appearance by selecting Edit > Preferences > Score. Score Playhead Keyframe Sprite in Score The Cast window If the Cast window is not visible, select Window >… -
Page 24
The Property inspector If the Property inspector is not visible, select Window > Property Inspector. The Property inspector provides a convenient way to view and change attributes of any selected object, or multiple objects, in your movie. After you select an object, relevant category tabs and associated fields appear in the Property inspector. -
Page 25
The following illustrations show different information that appears in the Property inspector, depending on what is selected. In the first illustration, a sprite is selected. In the second illustration, a cast member is selected. To show more or less information in the Property inspector: •… -
Page 26
The following illustrations show different information appearing in the Property inspector depending on whether the expanded information is hidden or shown. Chapter 1… -
Page 27
Setting Stage and movie properties You use the Property inspector’s Movie tab to specify settings that affect the entire movie, such as how colors are defined, the size and location of the Stage, the number of channels in the Score, copyright information, and font mapping. -
Page 28
To select a color palette for the movie, select a palette from the Palette pop-up menu. This palette remains selected until Director encounters a different palette setting in the Palette channel. For a complete discussion of color palettes and using color in Director, see “Controlling color” on page 255. -
Page 29
When you change the size of the Stage, any guides or grids you use to assist you with alignment will also scale to the zoomed size, and you can manipulate Stage objects in the same way that you would on a Stage that is not zoomed. To zoom the Stage, do one of the following: •… -
Page 30
About channels in the Score Channels are the rows in the Score that control your media. The Score contains sprite channels and special effects channels. Sprite channels are numbered and contain sprites that control all visible media in the movie. Effects channels at the top of the Score contain behaviors as well as controls for the tempo, palettes, transitions, and sounds. -
Page 31
To turn off a Score channel: • Click the gray button to the left of the channel. A darkened button indicates that the channel is off. This channel is on This channel is off To turn multiple Score channels off and on: •… -
Page 32
About the playhead The playhead moves through the Score to show the frame currently appearing on the Stage. As you play your movie, the playhead automatically moves through your Score. You can also click any frame in the Score to move the playhead to that frame, and you can drag the playhead backward or forward through frames. -
Page 33
• Select an option on the Zoom pop-up menu to the right of the Score. Zoom pop-up menu Score zoomed out to 50% Score at 100% Score zoomed in to 200% You can also display more frames in a Score without changing the zoom setting. To do so, place a sprite in the rightmost frame of the Score. -
Page 34: Managing The Workspace In Director Mx
Using context menus To let you quickly access certain commands, Director provides context menus that display commands that are relevant to a particular element. These menus are called context menus because the commands on the menu vary, depending on the context in which the menu appears. In the following illustration, Director shows the context menu for a sprite.
-
Page 35
The following is a list of document windows in Director MX. • Stage • Score • Cast • Script • Message • Media editors (Paint, Vector Shape, Text, Field, QuickTime, Shockwave 3D, RealMedia, AVI Video) The following is a list of tool windows. •… -
Page 36
Panels have the following features: a header bar that displays the name of the panel, a title bar, an expander arrow to collapse and expand panels, a panel gripper to dock and undock panels, and an Options menu for managing panels. Title bar Header bar Options menu… -
Page 37
To hide all panels: • Select Window > Hide Panels, or press the F4 key on your keyboard. Repeat this command to show all panels. Note: The Hide Panels menu command hides all floating (non-docked) tool windows and all docking channels (Windows only). -
Page 38
To dock a panel or panel group: • Drag the panel or panel group by its gripper over another panel or panel group, or (in Windows only) over a docking channel. Panel gripper As you drag the panel over a docking area, a placement preview line or rectangle shows where it will be placed among the panel groups. -
Page 39
To group a panel with another panel or panel group: Select a panel or tab within a panel group. From the panel’s Options menu, select Group [panel name] With, and then select a panel or panel group name from the submenu that appears. To remove a panel (tab) from a panel group: Select a tab within a panel group. -
Page 40
Using panel Options menus Each panel and panel group has an Options menu located in its upper right corner. The Options menu contains items for grouping, closing, and renaming panels. To use a panel’s Options menu: Expand the panel, if necessary, by clicking the panel’s expander arrow or the title next to the expander arrow. -
Page 41: Using Multiple Score Windows
Using multiple Score windows You can view and work in different parts of a movie at the same time by opening additional Score windows. If your sprite bars occupy many frames in the Score, for example, you can open a second Score window to work on another place in the movie without scrolling.
-
Page 42: Using Markers
Using markers Markers identify fixed locations at a particular frame in a movie. You use markers when you’re defining navigation. Using Lingo or draggable behaviors, you can instantly move the playhead to any marker frame. This is useful when jumping to new scenes from a menu or looping while cast members download from the web.
-
Page 43: Selecting And Editing Frames In The Score
To enter marker comments: Move the playback head to a marker, and select Window > Markers. The Markers window opens and displays comments associated with that frame. Comments Marker names Comments associated with markers appear in the right column. By default, the marker name appears as the first line of text in the comments column and should not be removed.
-
Page 44: About Adding Interactivity With Lingo
If you want to delete frames, select Edit > Clear Sprites, or press the Delete key on your keyboard. If you cut, clear, or delete the selected frames, Director removes the frames and closes up the empty space. Note: To delete a single frame, you can also select Insert > Remove Frame. To paste frames that you have cut or copied, select any frame or sprite, and select Edit >…
-
Page 45: Converting Movies Created In Previous Versions Of Director
Movies command is faster for converting large projects. It’s also more effective for preserving links to external media. See “Processing movies with Update Movies” on page 585. Note: Macromedia Shockwave Player 8.5 can play Shockwave movies created with Director 5, 6, 7, 8, and Director MX.
-
Page 46
Setting general preferences To control some of the Director default settings for the Stage and the user interface, you can use the General Preferences dialog box. These settings control the appearance of movies only in the authoring environment, not during playback. To set Director default values: Select Edit >… -
Page 47
Choosing Internet connection settings Director can connect to the Internet to import cast members and retrieve data. Use settings in the Network Preferences dialog box to control how the connection works and to define a preferred browser. To select Internet connection settings: Select Edit >… -
Page 48
Printing movies You can print movie content to review it and mark changes, to distribute edits to a team, to make handouts from a presentation, or to see your work on paper. You can print a movie while in authoring mode in several ways. You can print an image of the Stage in standard or storyboard format, the Score, the cast member number and contents of text cast members in the Cast window, all scripts or a range of scripts (movie, cast, Score, and sprite scripts), the comments in the Markers window, the Cast window artwork, or the entire Cast window. -
Page 49
To determine the layout of the items to print, click Options and select from the following: provides options to print at 100%, 50%, or 25% of the original size. Scale creates a border around each frame. Frame Borders prints the frame number with each frame. Frame Numbers places marks on every page to align the page for reproduction. -
Page 50: About Using Xtra Extensions To Extend Director Functionality
Xtra extensions. For information on creating Xtra extensions, download the Xtras Developer’s Kit from the Director Support Center at www.macromedia.com/support/xtras/. You must distribute any Xtra that a movie requires along with the movie. Xtra extensions can be packaged with projectors, or your user can download your required Xtra extensions from the Internet.
-
Page 51: About Distributing Movies
• Transition Xtra extensions supply transitions in addition to the predefined transitions that are available in the Frame Properties: Transition dialog box. • Tool Xtra extensions provide useful functions in the authoring environment, but they don’t do anything while a movie runs. They do not have to be distributed with movies. About installing Xtra extensions To make custom Xtra extensions available to Director, place them in the Xtras folder located in the same folder as the Director application.
-
Page 52: Answers Panel
The Answers panel provides quick access to information that helps you work effectively with Director, including TechNotes, articles, and other useful content. To open the Answers panel: • Select Window > Answers. To get the latest Director information from macromedia.com: • Click the Update button. Chapter 1…
-
Page 53: Director Mx Basics Tutorial
CHAPTER 2 Director MX Basics Tutorial The Director Basics chapter of Using Director introduces you to the Macromedia Director MX user interface and basic Director concepts; you’ll gain a greater understanding of the material presented in this tutorial if you’ve first read Chapter 1, “Director Basics,” on page 19. This tutorial reiterates and expands on much of that information while it guides you through the process of creating a simple interactive movie with animation, sound, and video.
-
Page 54: About The Director Metaphor
About the Director metaphor The Director user interface is designed around a movie metaphor. Each project you create can be thought of as a movie, with a cast of characters, a score, a stage where the action takes place, and a director (you, the author).
-
Page 55: View The Completed Movie
View the completed movie You can view a completed version of the tutorial movie to become familiar with how your finished movie will appear. Launch Director and select File > Open. Within your Director MX application folder, browse to Tutorials/Basics/Finished and double-click the Basic_finished.dir file. If windows obscure the Stage, drag them out of the way.
-
Page 56: Set Up The Movie
Set up the movie You can now arrange your workspace and set properties for your movie, such as the Stage size and color, and the number of channels in your Score. During the authoring process, you view Director movies on the Stage window. You can set up the size and color of the Stage window.
-
Page 57
In the Property inspector, select a dark orange color from the Stage Fill color picker. Stage Fill color picker Save your movie by selecting File > Save or clicking the Save button in the toolbar (Window > Toolbar). Director MX Basics Tutorial… -
Page 58: View Your Cast Members
View your cast members To create a Director movie, you need cast members. Cast members are the objects that appear on the Stage and in the Score. Some of these elements might be text, graphics, sound, video, or Lingo scripting behaviors. The movie you create in this tutorial consists of three scenes.
-
Page 59: Edit A Text Cast Member
Edit a text cast member The first cast member you will use in your movie is the text cast member containing the words “Director Basics.” You’ll edit the text to give it a more appealing graphic design. Double-click the text cast member in the first slot of the Cast window. The Text window opens.
-
Page 60: Build The First Scene
Give the text cast member a name by clicking in the Cast Member Name text box at the top of the window and typing TitleText. Press Enter (Windows) or Return (Macintosh). Close the Text window, and save your movie. The next section guides you through the process of building the first scene of your movie and creating a new cast member for the scene.
-
Page 61
In the Cast window, click the TitleText cast member and drag it anywhere on the Stage to create a sprite from the TitleText cast member. The background of the new text sprite is white. Click the new text sprite on the Stage to select it. On the Sprite tab in the Property inspector, select Background Transparent from the Ink pop-up menu. -
Page 62
Add buttons to the Stage In addition to the title text, the first scene of your movie will contain two buttons. You’ll add the first button to the Stage, then you’ll create a new button on the Stage to complete the scene. You begin by giving the button cast member in the second slot of the Cast window a name. -
Page 63
Remember that button cast members contain special functionality to automatically highlight when clicked. Creating button cast members in Director is different from creating most other cast members. Cast members are often created in separate windows and then dragged from the Cast window to the Stage. -
Page 64: Edit Sprites In The Score Window
When you release the mouse button, the rectangle you created becomes an editable text box in which you enter the text that you want to appear on your button. Type Go to Sound and Video in the text box. To place the button precisely, in the Property inspector, type 242 in the X text box and type 161 in the Y text box.
-
Page 65
In the Score window, click the end of the TitleText sprite in frame 28, and drag it to the left to frame 10. Note: You can also lengthen sprites by dragging their end frames to the right to higher-numbered frames, and you can edit more than one sprite at the same time by selecting multiple sprite end frames. -
Page 66: Create An Animation
Create an animation The second scene of your movie will contain a simple animation of a sunset. The sun will set behind a mountain range, and a cloud will move across the sky. You’ll make three of the cast members for this scene, arrange their sprites in the Score, and create the animation of the sun. This scene will also include a new button that returns users to the first scene.
-
Page 67
When you place new sprites on the Stage, Director puts them into the first available channel in the Score. Because there were no other sprites in frame 15, the Mountain sprite appeared in channel 1. Later you will make changes to the order in which the sprites appear in the Score channels. -
Page 68
In the Paint window toolbar, select the Pencil tool. Select an orange color from the Foreground Color pop-up menu. Eraser tool Paint Bucket tool Pencil tool Foreground Color pop-up menu Select the one-pixel line width from the list of line widths at the bottom of the left-side Paint window toolbar. -
Page 69
Fill the shape with color After you’ve drawn the cloud outline, you can fill it with color. Because this is an animation of a sunset, the cloud will have an orange gradient. A gradient is a smooth blending of one color into another. -
Page 70
With the Paint Bucket tool still selected, click inside the outline of the cloud. The cloud fills with an orange gradient. Cast Member Name text box Click the Cast Member Name text box at the top of the Paint window, type Cloud in the text box, and then press Enter (Windows) or Return (Macintosh). -
Page 71
Select Window > Vector Shape, and select the Filled Ellipse tool in the toolbar on the left side of the window Filled Ellipse tool Stroke Width pop-up menu Gradient color boxes Select 0 point from the Stroke Width pop-up menu. Drag the pointer in the window to make a circle. -
Page 72
Select a very light orange from the second Gradient Color box. This will be the ending color of the gradient. Click Gradient, below the Gradient Color boxes. The gradient fill in the circle changes color from left to right. To rotate the gradient so it changes from top to bottom, enter 90 in the Angle text box at the top of the window. -
Page 73
Animate the cloud You are now ready to add the cloud to the scene and create an animation of it moving across the sky. You can do this by placing a sprite of the Cloud cast member on the Stage, and then using a technique called tweening. -
Page 74
The new Cloud sprite has a bounding box around it and a round dot in the middle. Click and drag the round dot in the middle of the cloud to the right edge of the Stage. A line connects the original location of the cloud to the new location of the dot. There is still a dot in the middle of the Cloud sprite, but it is a different color from the dot that you dragged. -
Page 75: Change The Tempo Of An Animation
Change the tempo of an animation To create a slower tempo for the sprite, you can extend the sprite in the Score. Click the end frame of the Cloud sprite in frame 24 of the Score, and drag it to frame 50. To see the slower animation this creates, drag the playhead back and forth from frame 15 to frame 50 in the Score.
-
Page 76
Drag the dot in the middle of the Sun sprite downward, in a slight diagonal toward the left, to the bottom of the Stage. A line appears, connecting the dots. This line is the sun’s tweened animation path. Click the end frame of the Sun sprite in frame 24 of the Score, and drag the end frame from frame 24 to frame 50. -
Page 77: Add Navigation Buttons To The Animation Scene
Click and drag the Sun sprite from channel 4 to channel 1, but make sure it remains in frames 15 through 50. Scrub or drag the playhead from frame 15 to 50 to see the modified animation. The Sun sprite now appears behind the mountains and cloud. Add navigation buttons to the animation scene You’ve successfully completed your first animation.
-
Page 78
Add a new button Next, you create a new button that returns users to the first scene. Click frame 15 in the frame number bar in the Score to move the playhead to that frame. In the Tool palette (Window > Tool Palette), click the Push Button tool. Drag a horizontal rectangle to the lower left area of the Stage, and release the mouse button. -
Page 79: Build The Sound And Video Scene
Arrange sprites in the Score To make the Score easier to read, arrange the sprites of the animation scene in the Score so there is an empty channel between the graphic sprites and the button sprites. Select both the SoundVideo and GoStart sprites, which begin in frame 15, in the Score by Shift-clicking them.
-
Page 80
Import a cast digital video member So far, all the cast members you’ve used have been created and stored within your Director movie file. The buttons, graphics, and text are part of the Director file. It is common to import files from outside Director, too. -
Page 81
Double-click the digital video cast member in the Cast window. The QuickTime window opens. Playhead Fast forward Play Rewind Play the video using the controls at the bottom of the QuickTime window: • Click the Play button in the lower left corner of the window. The video begins playing, and the Play button changes to a Pause button. -
Page 82
Create a QuickTime sprite You are now ready to place the QuickTime sprite on the Stage. The sound and video scene should start in frame 55. Click frame 55 in the frame number bar in the Score. The playhead moves to frame 55. Drag the Ouch! QuickTime cast member to the upper left corner of the Stage. -
Page 83
Add buttons to the Stage Next, you’ll add buttons that control playback of the QuickTime sprite. These buttons are already included in the Cast window in cast slots 9, 10, and 11. Unlike the Director Button cast members, these cast members are bitmap graphics that don’t include automatic button functionality. -
Page 84
To place the Pause button on the Stage, verify that frame 55 is selected, and drag the Pause button from the Cast window to the left side of the Stage window, directly beneath the QuickTime sprite and to the right of the Play button. Again, precise placement isn’t necessary yet. -
Page 85
Import a sound The QuickTime movie has no soundtrack. You can make the scene more interesting by adding sound to accompany the video. The easiest way to add sound to a Director movie is to import a sound cast member and place it in one of the sound channels in the Score. Whenever the playhead plays frames that include sound sprites, the sound plays. -
Page 86
If the effects channels that appear above the frame number bar in the Score are not visible, click the Hide/Show Effects Channels button in the upper right corner of the Score. The effects channels appear. Sound channels Click frame 55 in the frame number bar in the Score. With the Cast window and Score open, drag the drumloop cast member from the Cast window to frame 55 in sound channel 1. -
Page 87
Add navigation buttons The last sprites that you’ll add to the sound and video scene are the navigation buttons. You’ll then be ready to add simple Lingo, the Director scripting language, to all the buttons. The sound and video scene needs a button that returns users to the start scene and a button that’s linked to the animation scene. -
Page 88: Write Lingo Scripts To Control Movie Playback
On the Stage, click the Animation button to select it. Use the Sprite tab in the Property inspector (Windows > Property Inspector), as you did earlier, to give the button x- and y- coordinates of 220 and 298, respectively. Note: As you complete the tutorial, remember to save your work frequently. Each scene of your movie is graphically complete.
-
Page 89
Each script you write is composed of handlers. A handler is a set of Lingo commands that handle a specific event, such as the event. Some scripts have only one handler and some have exitFrame multiple handlers. Each handler begins with the name of the triggering event, such as exitFrame and ends with the word Write a handler… -
Page 90
Reuse the handler You’ll use the same script cast member in the last frame of your movie, frame 64. With the Cast window and Score open, drag the Loop script from cast slot 13 to frame 64 in the script channel of the Score. A new sprite for the script appears in frame 64. Notice that the default length of script sprites is one frame. -
Page 91
In the markers channel to the right of the marker menu in the Score, click frame 15. Marker menu Markers channel A new marker appears in the marker bar in frame 15. Type Animation in the text box next to the new marker, and press Enter (Windows) or Return (Macintosh) to name the marker. -
Page 92: Add Lingo To Navigation Buttons
Add Lingo to navigation buttons To make the navigation buttons function, you need to add scripts to the buttons. You’ll write scripts attached to the button sprites, rather than to frames in the script channel. Your frame scripts respond to events.
-
Page 93: Write Lingo That Refers To Scenes
Add markers to two additional scenes Your first button is complete. To use similar scripts on the remaining navigation buttons, you can add markers to the start scene as well as the sound and video scene. In the Score, click the marker bar in frame 1, the first frame of the start scene. A new marker appears.
-
Page 94: About Controlling Video In Director
Add scripts to the animation scene The animation scene contains two buttons: the Go to Start button and the Go to Sound and Video button. Because you’ve already written a script for the Go to Sound and Video button, you can reuse it.
-
Page 95: Add Scripts For Video Control
Digital video movies use a timeline instead of a Score. The timing of the video playback is tied closer to the soundtrack of the video. For example, if the video has a soundtrack, the timing of the video and sound must remain synchronized during the entire playback of the video. For this reason, digital videos will skip frames if necessary to keep up with the soundtrack.
-
Page 96
In the name text box at the top of the script window, type RewindScript. Close the Script window, and save your movie. The Lingo you typed in this handler uses a different syntax than the scripts you wrote earlier. When you write Lingo that manipulates properties of objects such as sprites or cast members, you use dot syntax. -
Page 97: Control Sound With Lingo
Add a script that pauses the QuickTime sprite When the video is paused, the is 0. You can play a video at faster than normal speed movieRate by using numbers greater than 1 and at slow speed by using numbers less than 1. In the Score, right-click (Windows) or Control-click (Macintosh) the Pause button sprite in channel 3, frames 55 through 64, and select Script from the context menu.
-
Page 98: Add Sounds To Buttons
Modify the script for the Pause button Now you need to modify the PauseScript Lingo so that the sound pauses when the user clicks the Pause button to pause the video. In the Cast window, select the PauseScript cast member, and click the Cast Member Script button at the upper right of the window.
-
Page 99: Publish Your Movie For The Web
In general, you can publish your movie for the web by simply selecting File > Publish. Using default Publish settings, Director will create a Macromedia Shockwave version of your movie, with the Director movie (DCR) extension, in the same directory as your original movie. An HTML page includes the necessary tags to embed the movie.
-
Page 100
Note: Both versions of the QuickTime Xtra are cross-platform. Select Download if Needed, click OK, and save your movie. The Xtra will now download transparently to the user’s computer, from a Macromedia secure server, if the user doesn’t have the Xtra. For additional information about Xtra extensions, see TechNote 14888 Using Xtras in Director: An Overview at www.macromedia.com/support/… -
Page 101
Change Publish settings and publish your movie When you use the Publish command, you can take advantage of the default Publish settings of Director, or you can modify them with the Publish Settings dialog box. For the tutorial movie, you’ll publish the movie using the Detect Shockwave HTML page which, in addition to including tags that are necessary to display your movie correctly OBJECT… -
Page 102: Continue Learning About Director
Continue learning about Director By completing this tutorial, you’ve become familiar with the basic tasks and procedures used to create Director movies. You now know how to: • Import cast members • Edit movie properties • Create sprites • Use inks •…
-
Page 103: Director Mx 3D Tutorial
Macromedia Director MX includes three-dimensional (3D) images, text, and animations with the suite of Macromedia design and development tools. 3D cast members in your Director movies allow realistic spatial rendering of graphical objects. With Director MX 3D features, you can create and view images that have depth as well as height and width.
-
Page 104: View The Completed Movie
View the completed movie You can view a completed version of the tutorial movie to become familiar with how your finished movie will appear. Launch Director, and then select File > Open. Browse to the Director MX application folder and open Tutorials/3D/Magic_finished.dir. To play the movie, click the Play button, along the bottom of the Stage window, or select Control >…
-
Page 105
If the Stage and Library are not open, select Window > Library Palette. If your Internal Cast window is not open, select Window > Cast. In the Cast window, find the cast member named Title text. Title text is 2D text created in Director MX. In the Score (Window >… -
Page 106
If the Property inspector Sprite tab is not visible, click the Title text sprite on the Stage. On the Sprite tab, type 0 in the X text box and 0 in the Y text box. Press Enter (Windows) or Return (Macintosh). You use the X and Y text boxes to place the sprite precisely. -
Page 107
In the Display pop-up menu, select 3D Mode. On the Stage, the text becomes 3D. Modify the 3D text You can alter the appearance of the 3D text by changing settings in the Property inspector 3D Extruder tab. Click the Property inspector 3D Extruder tab. Move the Tunnel Depth slider left and right to see the different effects. -
Page 108
In the Light pop-up menu, select Top Center. Three-dimensional objects in Director can use both ambient and directional lights. By specifying Top Center as the light, you’re indicating where on the text it should appear as though a light is shining. The Title text sprite changes to reflect the settings in the Property inspector. -
Page 109
Rotate the 3D text To rotate the text, you use a behavior from the Library palette. When the 3D text rotates, the directional light that you specified in the Property inspector appears to shine on one fixed position, lighting the text much as a spotlight would. In the Library List pop-up menu, if Actions is not already selected, select 3D >… -
Page 110
In the Which Axis to Rotate About pop-up menu, select Y, and then click OK. The x- and y-axes are the model’s horizontal and vertical axes, respectively; the z-axis refers to the depth of the model. To view the 3D text rotating, play your movie. The rotation speed seems a bit fast. -
Page 111: Modify Behaviors
Modify behaviors Once you’ve added a behavior to a sprite, you can use the Property inspector to modify the behavior. Slow the rotation speed To slow the rotation speed setting, complete the following steps: With the Title text sprite selected, click the Property inspector Behavior tab. With Automatic Model Rotation (Internal) selected in the Property inspector, click the down arrow to the right of Rotation Speed and move the Rotation Speed slider from 10 to 3.
-
Page 112: View A 3D World
View a 3D world Click the magic shop scene on the Stage. The scene is comprised of models within a single sprite named Magic trick. The Magic trick cast member is an example of a 3D world. The 3D world contains models, which are the visible objects within the world, such as the tables.
-
Page 113
In the Parameters for Pan Camera Horizontal dialog box, specify the following: • In the Degrees to Pan Per Frame text box, type 10. • In the Which Group Does This Behavior Belong To text box, type Pan. Then click OK. You are creating a group, named Pan, to which you’ll add actions and triggers. -
Page 114
Specify the panning trigger for the opposite direction Naturally, you want to give your user the ability to pan the camera to the right as well as to the left. The procedure to add a keyboard input to pan left is similar to the keyboard input procedure you just completed. -
Page 115
Pan the camera horizontally To see the Pan Camera Horizontal behavior in action, do the following: Play the movie and press the Left Arrow key repeatedly. Each time you press the key, the camera for the 3D world moves a little to the left. Press the Right Arrow key to see the camera change direction. -
Page 116
Add a trigger for the Pan Camera Vertical action Again, you must associate triggers with the action. First, you will specify a trigger to pan the camera upward. Drag the Keyboard Input behavior from the Cast window to the Magic trick sprite on the Stage. -
Page 117
Pan the camera vertically Now you’ll test the pan behaviors that you added. Play the movie. Press the Up Arrow key to see the camera tilt up, and press the Down Arrow key to see the camera tilt down. When you finish moving the camera, stop and rewind the movie. Add the Dolly Camera behavior Another way to manipulate the view of a 3D world during movie playback is to dolly the camera. -
Page 118
Add the triggers for the Dolly Camera behavior You have already associated triggers with all four of the arrow keys. You’ll now specify that the F and B keys trigger the forward and backward dollying action. Drag the Keyboard Input behavior from the Cast window to the Magic trick sprite either on the Stage or in the Score. -
Page 119
In the Parameters for Keyboard Input dialog box, specify the following: • In the Which Key Will Be Used pop-up menu, verify that The Custom Key I’ve Entered Below is selected. • In the If Using a Custom Key, Enter It Here text box, type b. •… -
Page 120
Reset the camera Once the camera starts moving around the world, it can be tricky for the user to return to the original camera position—unless you’ve included a way to reset the camera. Fortunately, Director MX has a Reset Camera behavior, which you’ll now apply. In the Library palette, verify that 3D >… -
Page 121: Set Model Rollover Cursors
Set model rollover cursors Often in interactive movies, the pointer transforms into a hand when it’s over an object the user can click, such as a link or hot spot. The Model Rollover Cursor behavior lets you select a model, then specify how the pointer will appear when it’s over that model.
-
Page 122: Use 3D Behaviors For Navigation
When you finish viewing this behavior, stop and rewind the movie. The cursor changes to a pointing finger Use 3D behaviors for navigation When a pointer changes to a pointing finger, users know that they can click and expect some sort of result.
-
Page 123
Use the Click Model Go to Marker behavior The Click Model Go to Marker behavior lets you specify both the model in a 3D world that the user clicks and the marker that the playhead moves to when the user clicks the model. In the Library, with 3D >… -
Page 124
Select the action and trigger for the Hat marker You’ll repeat the procedure to add the Click Model Go to Marker action behavior and trigger behavior for the middle table. Drag the Click Model Go to Marker behavior from the Cast window to the Magic trick sprite. In the Parameters for Click Model Go to Marker dialog box, specify the following: •… -
Page 125: Play Your Completed Movie
You’ve almost finished By now, you should be familiar with the procedure to add the Click Model Go to Marker action and its trigger. You’ll repeat the steps a final time for the remaining table. Drag the Click Model Go to Marker behavior from the Cast window to the Magic trick sprite. This time, specify Table 3 in the Which Model pop-up menu and Rings in the Go to Which Marker pop-up menu.
-
Page 126: To Learn More
Use the left mouse button (Windows) to click on the Table 1 model. (Macintosh users with a single-button mouse can simply click.) Notice the following: • The movie plays from frame 10, the frame labeled with the Cards marker, to frame 20. By clicking Table 1 during playback mode, you cause the action to jump to another marker on the Score.
-
Page 127: Cast Members And Cast Windows
Cast window with tabs in Thumbnail view You can create and edit cast members in Macromedia Director MX using basic tools and media editors such as the Paint and Text windows, and you can also edit cast members using external editors.
-
Page 128: Creating New Casts
Casts can be internal—stored inside the movie file and exclusive to that movie—or external— stored outside the movie file and available for sharing with other movies. When you create a new movie, an empty internal cast is automatically created, and when you open the Cast window it is in the default List view.
-
Page 129
To create a new cast: Do one of the following: • Select File > New > Cast. • Select Modify > Movie > Casts to open the Movie Casts dialog box, and click the New button. • In the Cast window, click the Cast button and select New Cast from the pop-up menu. (See “Using Cast window controls”… -
Page 130: Creating Cast Members
Creating cast members You can create several types of cast members in Director. Director includes editors to create and edit common media such as text, shapes, and bitmaps. You can also define external editors to launch from within Director when you double-click a cast member, and edit almost any type of supported media.
-
Page 131: Using The Cast Window
To create a cast member in a media editing window: Open a media editing window by selecting Window and then selecting the type of cast member you want to create (Paint, Vector Shape, Text, and so on). Click the New Cast Member button to create a cast member of the corresponding type. The cast member is added to the most recently active Cast window.
-
Page 132
Switching from one Cast window view to another You can easily toggle between List and Thumbnail views of the Cast window. To switch from one Cast window view to another, do one of the following: • Click the Cast View Style button on the Cast window to toggle between the two views. Cast View Style •… -
Page 133
To group a Cast panel with another Cast panel or Cast panel group: Select a Cast panel or a tab within a Cast panel group. From the panel’s Options menu, select Group [Panel Name] With, then select a panel or panel group name from the submenu that appears. -
Page 134
Using Cast window controls The controls along the top of the Cast window are the same in both the List and Thumbnail views. You use the controls to change the cast that appears in the Cast window, the cast member selection, or the name of a cast member. -
Page 135
Do one of the following: • Click the Cast Member Properties button. • Right-click (Windows) or Control-click (Macintosh), and select Cast Member Properties from the context menu. • Select Window > Property Inspector. See “Viewing and setting cast member properties” on page 142. To view the cast member number: •… -
Page 136: Naming Cast Members
Naming cast members To avoid problems in Lingo when referring to cast members, you should name them and refer to them by name. Naming cast members doesn’t affect Director performance. The name stays the same even if the cast member number changes. Avoid duplicating cast member names.
-
Page 137: Using Cast Thumbnail View
Column Title Column Information Modified By Who modified the cast member. This value comes from the user login name (Windows) or the Sharing setup name (Macintosh). Filename The full path to the cast member if it is a linked asset Resizing columns in Cast List view You can resize columns in Cast List view.
-
Page 138
Icon Cast member type Icon Cast member type Movie script Palette Parent script PICT QuickTime video Radio button RealMedia Shape Shockwave 3D Shockwave Audio Sound Text Transition Vector shape Xtra To turn off or on the display of cast member icons in Thumbnail view and change the Cast window display: •… -
Page 139: Moving Cast Members Within The Cast Window
Moving cast members within the Cast window To move a cast member to a new position within the Cast window, you can use Thumbnail view to see the representation of the cast member’s position. Note: When you move a cast member to a new position, Director assigns it a new number and updates all references to the cast member in the Score, but it doesn’t automatically update references to cast member numbers in Lingo scripts.
-
Page 140: Setting Cast Window Preferences
To sort the cast using the Modify menu: With the Cast window active, select the cast members to sort or select Edit > Select All. Select Modify > Sort. In the Sort Cast Members dialog box, select one of the following sorting methods: places selected cast members that are used in the Score at the beginning of the Usage in Score selection.
-
Page 141
To set the Cast window to display in either List or Thumbnail view, select the appropriate Cast View option. If you want your preferences to apply to all Cast windows, select Apply to All Casts. To select the columns that appear in Cast List view, select the desired List Columns options. See “Using Cast List view”… -
Page 142: Changing Cast Properties
To make your preference settings the default settings, click Save as Default. When you finish selecting your preferences, click OK. Changing Cast properties You use the Property inspector to change the name of a Cast and to define how its cast members are loaded into memory.
-
Page 143
For an Xtra cast member, the information displayed in the Property inspector is determined by the developer of the Xtra. Some Xtra extensions have options in addition to those listed here. For non-Macromedia Xtra extensions, refer to documentation supplied by the developer. Cast Members and Cast Windows 143… -
Page 144: Finding Cast Members
For information on specific cast member properties, see the following topics: • “Using animated GIFs” on page 205” • “Embedding fonts in movies” on page 274 • “Using Flash Movies” on page 293 • “Setting bitmap cast member properties” on page 237 •…
-
Page 145
To find cast members: Select Edit > Find > Cast Member. In the Find Cast Member dialog box, select a Cast window to search from the Cast pop-up menu. To search every cast in the movie, select All Casts. Select a search option: •… -
Page 146: Importing Cast Members
To find a cast member in the Score: Select a cast member for which to search in the cast or the Score. If you select a sprite that includes multiple cast members, Director searches for the first cast member in the sprite; to select a cast member other than the first, open the sprite to select the cast member.
-
Page 147
Select File > Import. To import a file from the Internet, click Internet and enter a URL in the Find URL text box. To import local files, select the type of media to import from the Files of Type (Windows) or the Show (Macintosh) pop-up menu. -
Page 148
creates a link to the selected files and imports the data each time the movie Link to External File runs. If you choose to import from a URL via the Internet, the media is dynamically updated. For more information, see “About linking to files” on page 149. Note: Text and RTF files are always imported and stored inside the movie file (see the previous option, Standard Import), even if you select Link to External File. -
Page 149
About import file formats Director can import files in all the formats listed in the following table. For information on additional file formats Director might support, see the Director Support Center website at www.macromedia.com/support/director. Type of file Supported formats Animation and multimedia… -
Page 150
Choosing import image options If you import a bitmap cast member with a color depth or color palette that is different from that of the Stage (the current movie), Director lets you select the image’s color depth and color palette. You can choose to import the bitmap at its original color depth or at the Stage color depth. -
Page 151: Launching External Editors
If the PICS/Scrapbook Options dialog box appears while you are importing an image using File > Import, specify the range of images to import: imports as many as 512 frames in a PICS file or from a Scrapbook file. Each frame All Frames is imported as a separate cast member.
-
Page 152
To launch an external editor: Select a cast member of a media type for which you have defined an external editor, and do one of the following: • If you specified Use External Editor when you defined the external editor for this media type, double-click the cast member. -
Page 153: Managing External Casts
Managing external casts An external cast is a separate file that must be explicitly linked to a movie for the movie to use its cast members. If you link an external cast to a movie, Director opens the cast every time it opens the movie. If you don’t link an external cast to a movie, you must open and save the file separately.
-
Page 154: Creating Libraries
Creating libraries A library is a special type of unlinked external cast that appears in the Library palette. When you drag a cast member from an external cast library to the Stage or Score, Director automatically copies the cast member to one of the movie’s internal casts. Libraries are useful for storing any type of commonly used cast members, especially behaviors.
-
Page 155: Setting Xtra Cast Member Properties
The content of the Properties dialog box is determined by the developer of the Xtra. For non-Macromedia Xtra extensions, refer to any documentation that the developer supplies. To view or change Xtra cast member properties: Select an Xtra cast member.
-
Page 156
Chapter 4… -
Page 157: Chapter 5 Sprites
CHAPTER 5 Sprites A sprite is an object that controls when, where, and how cast members appear in a Macromedia Director MX movie. Multiple sprites can use the same cast member. You can also switch the cast member assigned to a sprite as the movie plays. You use the Stage to control where a sprite appears, and you use the Score to control when it appears in your movie.
-
Page 158: Changing Sprite Preferences
Changing sprite preferences You use the Sprite Preferences dialog box to control the way sprites behave and appear in the Score window and on the Stage. To change preferences for sprites: Select Edit > Preferences > Sprite. To determine if selecting a sprite on the Stage selects the entire span of the sprite or only the current frame in the sprite, select one of the following Stage Selection options: selects the sprite in all frames that it occupies.
-
Page 159
A selected sprite appears on the Stage with a double border. When you select a single frame within a sprite, the sprite appears on the Stage with a single border. Entire sprite selected Single frame within sprite selected To select sprites, do one of the following: Note: The following techniques select an entire sprite only if Edit Sprite Frames is not enabled for the sprite(s) you select. -
Page 160
• To select discontiguous sprites, Control-click (Windows) or Command-click (Macintosh) the discontiguous sprites. To select a keyframe, do one of the following: • To select only a keyframe, click the keyframe indicator. • To select a keyframe and sprites at the same time, Control-click (Windows) or Command-click (Macintosh) the keyframe and the desired sprites. -
Page 161: Layering Sprites
Layering sprites A sprite appears in front of other sprites on the Stage according to its channel. Sprites in higher- numbered channels appear in front of sprites in lower-numbered channels. The rocket in channel 2 appears in front of the planet in channel 1. To change a sprite’s layer on the Stage: Select the sprite.
-
Page 162
Displaying and editing sprite properties in the Property inspector Depending on your preference, you can use either the Sprite toolbar or the Property inspector to perform many of the same procedures. To display and edit sprite properties in the Property inspector: Select one or more sprites on either the Stage or the Score. -
Page 163
Edit any of the following sprite settings in the Property inspector: changes the sprite to a locked sprite so you or other users cannot change it. For additional Lock information on locked sprites, see “Locking and unlocking sprites” on page 167. applies only to text sprites and lets you edit the selected text sprite on the Stage during Editable playback. -
Page 164
Using the Sprite Overlay The Sprite Overlay displays important sprite properties directly on the Stage. You can open editors, inspectors, and dialog boxes to change sprite properties by clicking the corresponding icons in the Sprite Overlay. To display the Sprite Overlay when a sprite is selected: •… -
Page 165
To change the opacity of the Sprite Overlay: • Drag up or down the small thin line that appears on the right edge of the Sprite Overlay. Displaying sprite labels in the Score Sprite labels appear in the Score’s sprite bars and display key information about the sprite in relation to the movie. -
Page 166
To change sprite label options: • Select a display option from the Display pop-up menu in the Score or from the View > Display menu. displays the name and number of the sprite’s cast member. Cast Member displays the behavior that is assigned to the sprite. Behavior displays the x and y coordinates of the sprite’s registration point. -
Page 167: Locking And Unlocking Sprites
Locking and unlocking sprites During authoring, you can lock sprites to avoid inadvertent changes to the sprite, either by you or by someone else working on the same project. When you lock a sprite, you can no longer change its settings, although you still see it represented on the Stage and in the Score. While preserving the settings of your locked sprites, you can continue to create and edit unlocked sprites.
-
Page 168
The following diagram shows all the sprite coordinates you can specify. 0,0 Upper left corner of the Stage Registration point (X,Y) Bounding rectangle Left Right Height Bottom Width Director places the image of a cast member on the Stage by specifying the location of its registration point. -
Page 169
To visually position a sprite on the Stage during playback: Select a sprite that you want to position during playback. On the Sprite tab in the Property inspector, click Moveable. See “Displaying and editing sprite properties in the Property inspector” on page 162. Begin playing back the movie. -
Page 170
You can create and modify the guides and the grid from the Property inspector or by using menu commands. To add and configure guides: With the Property inspector open, click the Guides tab. The top half of the tab contains settings for Guides. To change the guide color, click the Guide Color box and select a different color. -
Page 171
To configure the grid: With the Property inspector open, click the Guides tab. The bottom half of the Guides tab contains Grid settings. To change the grid color, click the Grid Color box and select a different color. Select the desired options to make the grid visible and to make the sprites snap to the grid. To change the width and height of the grid, enter values in the W and H text boxes. -
Page 172
To place a sprite at a specific location: • Set one of the following properties (see the Lingo Dictionary for entries on each property): sets the horizontal and vertical distance from the upper left corner of The loc sprite property the Stage to the sprite’s registration point. -
Page 173
To copy or move sprites between frames: Select a sprite or sprites, as described in “Selecting sprites” on page 158. Select Edit > Cut Sprites or Edit > Copy Sprites. Position the pointer where you want to paste the sprite, and select Edit > Paste Sprites. If the pasting will overwrite existing sprites, select one of the following Paste options in the Paste Options dialog box: replaces the sprites with the content of the Clipboard. -
Page 174
To extend a sprite to the current location of the playhead: Select the sprite or sprites to extend. Click the frame channel to move the playhead: • To extend the sprite, move the playhead past the right edge of the sprite. Frame channel •… -
Page 175: Changing The Appearance Of Sprites
Changing the appearance of sprites You can change the appearance of sprites on the Stage without affecting the cast member assigned to the sprite. You can resize, rotate, skew, flip, and apply new foreground and background colors to sprites. Applying these changes allows you to reuse the same cast member to create several different versions of an image.
-
Page 176
To restore a sprite to its original dimensions, do one of the following: • On the Sprite tab in the Property inspector (Graphical view), click Restore All. • Select Modify > Transform > Reset Width and Height or Reset All. To resize a sprite’s bounding rectangle with Lingo: •… -
Page 177
To rotate or skew a sprite on the Stage: Select a sprite on the Stage. Select Window > Tool Palette to display the Tool palette. Click the Rotate tool in the Tool palette. You can also press Tab while the Stage window is active to select the Rotate tool. The handles around the sprite change to indicate the new mode. -
Page 178
To skew the selected sprite, enter the number of degrees in the Skew text box. Rotate Skew To resize a rotated or skewed sprite, do one of the following: • Click the Rotate or Skew tool and drag any of the sprite’s handles. Use Alt-drag (Windows) or Option-drag (Macintosh) to maintain the sprite’s proportions as you resize. -
Page 179
Do any of the following: • Click the Flip Vertical or Flip Horizontal button on the Sprite tab in the Property inspector to flip the sprite without moving the registration point or changing the current skew or rotation angles. • Select Modify >… -
Page 180: Using Sprite Inks
Setting blends You can use blending to make sprites transparent. To change a sprite’s blend setting, use the Sprite tab in the Property inspector. Blend setting of 30% Blend setting of 100% Director can gradually change blend settings to make sprites fade in or out. See “Tweening other sprite properties”…
-
Page 181
You change the ink for a sprite in the Property inspector or with Lingo. Sprite with Copy ink Sprite with Matte ink To achieve the fastest animation rendering on the screen, use Copy ink; other ink types might have a slight effect on performance. To change a sprite’s ink with the Property inspector: Select the sprite. -
Page 182
When creating a bitmap mask for a sprite, use a grayscale palette if the mask cast member is an 8-bit (or less) image. An 8-bit mask affects only the transparency of the sprite and does not affect the color. Director ignores the palette of mask cast members that are less than 32-bit images; using a grayscale palette lets you view the mask in a meaningful way. -
Page 183
Ink definitions The following definitions describe all available ink types. displays all the original colors in a sprite. All colors, including white, are opaque unless the Copy image contains alpha channel effects (transparency). Copy is the default ink and is useful for backgrounds or for sprites that do not appear in front of other artwork. -
Page 184: Assigning A Cast Member To A Sprite With Lingo
subtracts the RGB color value of the foreground sprite’s color from the RGB value of the Subtract background sprite’s color to determine the new color. If the color value of the new color is less than 0, Director adds 256 so the remaining value is between 0 and 255. subtracts the RGB color value of pixels in the foreground sprite from the value of the Subtract Pin background sprite.
-
Page 185: Chapter 6 Animation
Animation is the appearance of an image changing over time. The most common types of animation in Macromedia Director MX involve moving a sprite on the Stage (tweening animation) and using a series of cast members in the same sprite (frame-by-frame animation).
-
Page 186: About Tweening In Director
About tweening in Director To use tweening in Director, you define properties for a sprite in frames called keyframes and let Director change the properties in the frames in between. Tweening is very efficient for adding animation to movies for websites, since no additional data needs to download when a single cast member changes.
-
Page 187
Drag the red handle within the sprite to the place on the Stage where you want the sprite’s path to end. The red handle represents the sprite’s location in the end frame. For bitmaps, the red handle is usually in the center of the image. For vector shapes and other media types, the handle is often in the upper left corner. -
Page 188: Accelerating And Decelerating Sprites
Tweening size works best for vector-based cast members created in the Vector Shape window or in Macromedia Flash (bitmaps can become distorted when resized). Director can tween all of these properties at once.
-
Page 189
To tween sprite properties: If the Score isn’t open, select Window > Score. Position a sprite on the Stage and make sure it spans all the frames in which you want the sprite to change. Select the start frame of the sprite in the Score. To tween size, scale the sprite or resize the sprite on the Stage. -
Page 190: Suggestions And Shortcuts For Tweening
Suggestions and shortcuts for tweening Follow the suggestions listed here to improve results and productivity while tweening sprites. • For smoother movements, tween across more frames, increasing the tempo if necessary. • To achieve some types of motion, you may need to split the sprite and tween the sprites separately.
-
Page 191: Switching A Sprite’s Cast Members
To change how the sprite curves between positions defined by keyframes, adjust the Curvature slider. makes the sprite move in a straight line between the keyframe positions. Linear makes the sprite follow a curved path inside the keyframe positions. Normal makes the sprite follow a curved path outside the keyframe positions.
-
Page 192: Editing Sprite Frames
If you selected an entire sprite, Director replaces the cast member for the entire sprite. Before cast members are exchanged, the sprite moves like this. After cast members are exchanged, the sprite still moves in the same way, but it displays a different cast member.
-
Page 193: Frame-By-Frame Animation
Frame-by-frame animation To create animation that is more complex than is possible with simple tweening, you can use a series of cast members in frame-by-frame animation. Sprites usually refer to only one cast member, but they can refer to different cast members at different times during the life of the sprite.
-
Page 194
To animate a sprite with multiple cast members: Create a sprite by placing the first cast member in the animation on the Stage in the appropriate frame. Change the length of the sprite as needed. Drag the start or end frame in the Score, or enter a new start or end frame number in the Sprite Inspector. -
Page 195: Shortcuts For Animating With Multiple Cast Members
Shortcuts for animating with multiple cast members The Cast to Time and Space to Time commands are both useful shortcuts for animating with multiple cast members. Using the Cast to Time command To move a series of cast members to the Score as a single sprite, you use the Cast to Time command (Modify >…
-
Page 196
Using the Space to Time command To move sprites from adjacent channels to a single sprite, you use the Space to Time command (Modify > Space to Time). This method is convenient when you want to arrange several images on the Stage in one frame and then convert them to a single sprite. Arrange sprites on the Stage in a single frame. -
Page 197: Using Film Loops
Using film loops A film loop is an animated sequence that you can use like a single cast member. For example, to create an animation of a bird flying across the Stage, you can create a film loop of the sequence of cast members that shows the bird flapping its wings.
-
Page 198: Setting Film Loop Properties
Director provides three other ways of incorporating a completed animation into a movie as a discrete element: you can export it as a digital video (QuickTime or AVI), save and import it as a linked Director movie, or play it in a window in another Director movie. Note: If you need to edit a film loop and you’ve deleted the original Score data it was based on, it’s possible to restore the Score data for editing.
-
Page 199: Step-Recording Animation
To determine how the film loop plays back, use the following settings: plays the sound portion of the film loop. Turn this option off to mute sounds. Audio replays the film loop continuously from the beginning to the end and back to the Loop beginning.
-
Page 200: Real-Time Recording Animation
Real-time recording animation You can create animation by recording the movement of a sprite as you drag it across the Stage. The real-time recording technique is especially useful for simulating the movement of a pointer or for quickly creating a complex motion for later refinement. For better control when you’re recording in real time, use the Tempo control in the Control panel to record at a speed that’s slower than normal.
-
Page 201: Linking A Sequence With Paste Relative
Linking a sequence with Paste Relative Paste Relative automatically aligns the start frame of one sprite with the end frame of the preceding sprite. It’s useful for extending animations across the Stage. The first sprite ends here, and the pasted sprite begins. To paste one sequence relative to another: Select a sprite in the Score Select Edit >…
-
Page 202
Chapter 6… -
Page 203: Chapter 7 Bitmaps
CHAPTER 7 Bitmaps Bitmaps and vector shapes are the two main types of graphics used with Macromedia Director MX. A bitmap defines an image as a grid of colored pixels, and it stores the color for each pixel in the image. A vector shape is a mathematical description of a geometric form that includes the thickness of the line, the fill color, and additional features of the line that can be expressed mathematically.
-
Page 204: About Importing Bitmaps
Director takes advantage of compressed JPEG data at runtime. The original compressed data bits are saved in a Macromedia Shockwave movie or a projector (if the Shockwave compression option is on). If you edit the member within Director in the Paint window, the compressed data will be lost.
-
Page 205: Using Animated Gifs
Using animated GIFs You can import an animated GIF into Director with File > Import, similar to the way in which you import any other bitmap cast member. The only difference is that when the Select Format dialog box appears, you select Animated GIF. Director supports both the GIF89a and GIF87 formats.
-
Page 206: Using The Paint Window
Using the Paint window The Paint window has a complete set of paint tools and inks for creating and changing bitmap cast members for movies. Anything you draw in the Paint window becomes a cast member. When you make a change to a cast member in the Paint window, the image in the Cast window is instantly updated—as is the cast member wherever it appears on the Stage.
-
Page 207
To change the location of the registration point, do one of the following: • Click the Registration Point tool, and click the spot where you want to set the registration point. • Double-click the Registration Point tool to set the registration point in the center of the image. See “Changing registration points”… -
Page 208
To draw a 1-pixel line in the current foreground: • Click the Pencil tool, and drag it in the Paint window. To constrain the line to horizontal or vertical, Shift-Click and drag. If the foreground color is the same as the color underneath the pointer, the Pencil tool draws with the background color. -
Page 209
To select a foreground and destination color for color-shifting inks: • Click the color box on the left to select a foreground color; click the color box on the right to select a destination color. These colors affect the Gradient, Cycle, and Switch inks. Each of these inks uses a range of colors that shifts between the foreground color and the destination color. -
Page 210
To select a line thickness, do one of the following: • Click the None, One-, Two-, or Three-Pixel Line button. Other line width • Double-click the Other Line Width button to open the Paint Window Preferences dialog box, and assign a width to the line. To change the color depth of the current cast member: •… -
Page 211
Using the Lasso tool You use the Lasso tool to select irregular areas or polygons. After you select artwork, it can be dragged, cut, copied, cleared, or modified with the effects on the Paint toolbar. The Lasso tool selects only those pixels of a color that are different from the color the Lasso tool was on when you first started dragging it. -
Page 212
To make a copy of artwork that is selected with the Marquee tool: • Hold down Alt (Windows) or Option (Macintosh) while dragging the selection. To change marquee settings: • Click the Marquee tool, hold down the mouse button, and select from the following options: causes the rectangle to shrink around the selected artwork. -
Page 213
Using the Brush tool You use the Brush tool to brush strokes with the current color, ink, and fill pattern. To select a different size and brush shape, you use the Brush Settings dialog box. The selections you make in the Brush Settings dialog box are assigned to the menu item in the pop-up menu and remain in effect until you change them. -
Page 214: Changing Selected Areas Of A Bitmap
Zooming in and out in the Paint window You can use the Magnify tool or the Zoom commands on the View menu to zoom in or out at four levels of magnification. To zoom in or out, do one of the following: •…
-
Page 215: Flipping, Rotating, And Applying Effects To Bitmaps
• To copy and stretch the selection (Marquee tool only), Control-Alt-drag (Windows) or Command Option drag (Macintosh) the selection. • To constrain the movement of the selection to horizontal or vertical, Shift drag the selection. • To move the selection one pixel at a time, use the arrow keys. Flipping, rotating, and applying effects to bitmaps The toolbar at the top of the Paint window contains buttons to apply effects to bitmaps.
-
Page 216
• To rotate the selection by any amount in either direction, click the Free Rotate button, and drag the rotate handles in any direction. (You can rotate a sprite that contains a bitmap instead of the bitmap. See “Rotating and skewing sprites” on page 176.) •… -
Page 217
• To create a perspective effect, click the Perspective button, and drag one or more handles to create the effect you want. • To create an outline around the edges of the selected artwork, click the Trace Edges button. To apply color effects to a selected area: Select an area within a bitmap cast member using either the Marquee or the Lasso tool. -
Page 218: Using Auto Distort
• To reverse the colors of the selected area, click the Invert button. • To increase or reduce the brightness of the selected area, click the Lighten Color or Darken Color button. This effect works on 8-bit (256 color) images only. •…
-
Page 219: Changing Registration Points
In the Auto Distort dialog box, enter the number of cast members to create and click the Begin button. Director generates new cast members with an intermediate amount of change applied to each one. The new cast members appear in the first available cast positions. Changing registration points A registration point is a marker that appears on a sprite when you select it with your mouse.
-
Page 220: Changing Size, Color Depth, And Color Palette For Bitmaps
Stage, use the Sprite tab in the sprite’s Property inspector. You can also remap images to new palettes with an image-editing program such as Macromedia Fireworks. The Transform Bitmap dialog box displays values for the current selection. If you select more than one cast member, a blank value indicates that cast members in the selection have different values.
-
Page 221
To change the color depth, select an option from the Color Depth pop-up menu. For more information about the color depth of bitmap cast members, see “Controlling color” on page 255. To change the palette, select a palette from the Palette pop-up menu and select one of the following remapping options: replaces the original colors in the graphic with the most similar solid colors in Remap Colors… -
Page 222: Controlling Bitmap Images With Lingo
Controlling bitmap images with Lingo Lingo lets you control bitmap images in two ways. First, you can perform simple operations that affect the content of entire image cast members. These operations include changing the background and foreground colors as well as switching the image that appears in a specific cast member with that of another cast member.
-
Page 223
Editing image objects After you create an image object, its data can be edited with a variety of Lingo commands that are designed to manipulate the pixels of the image. You can crop images, draw new pixels on them, copy sections of them, and work with mask and alpha channel information. For more information, see the individual commands in the Lingo Dictionary. -
Page 224: Using Gradients
To make a new image object from the alpha channel information of a 32-bit image object: • Use the , which can be useful for preserving the alpha channel extractAlpha() command information of a 32-bit image object that you plan to reduce to a lower bit depth. Reducing the bit depth can delete the alpha information.
-
Page 225
Use the current tool in the Paint window. Director uses the gradient you’ve defined to fill the image. To stop using a gradient, select Normal from the Ink pop-up menu. See “Using Paint window inks” on page 229. Editing gradients You can change gradients before using them by changing the settings in the Gradient Settings dialog box. -
Page 226
To determine how a gradient shifts between colors, select an option from the Method pop-up menu: If you select Dither as the Type option, the following choices are available: ignores the order of the colors in the palette. Instead, it uses only colors that create Best Colors a continuous blend from foreground to background colors and blends them with a dithered pattern. -
Page 227
To control how colors cycle in a gradient, select a Cycles option, as described in the following list: cycles have a banded appearance; smooth cycles go from foreground to destination and Sharp then back to foreground. cycles the gradient once through the range of colors you define. cycles through the range of colors from foreground to destination twice. -
Page 228: Using Patterns
Using patterns You can select among three sets of patterns that are included with Director or create custom patterns. The patterns you change or edit in the Paint window do not affect the patterns that are available for shapes. To use a pattern: Select the Brush tool, the Bucket tool, or one of the filled shape tools.
-
Page 229: Creating A Custom Tile
Creating a custom tile Custom tiles provide an effective way of filling a large area with interesting content without using much memory or increasing the downloading time. They are especially useful for large movies on the web. A custom tile uses the same amount of memory no matter what size area it fills. To create a custom tile: Create a bitmap cast member to use as a tile, and display it in the Paint window.
-
Page 230
The result of the ink you select depends on whether you are working in color or in black and white. Also, some inks work better when painting with patterns, and others work better when painting with solid colors. B&W Color Works with Normal Solids and patterns… -
Page 231
is a color ink. As you draw with Cycle ink, the colors change as the ink progresses through Cycle the palette. The beginning and ending points of the color cycle are determined by the foreground and destination colors. If you want to cycle through the whole palette, select white as the foreground color and black as the destination color. -
Page 232: Using Bitmap Filters
Using bitmap filters Bitmap filters are plug-in image editors that apply effects to bitmap images. You can install Photoshop-compatible filters to change images within Director. Original image Filtered image You can apply a filter to a selected portion of a bitmap image, to an entire cast member, or to several cast members at once.
-
Page 233
Using filters to create animated effects You can use Auto Filter to create dramatic animated effects with bitmap filters. Auto Filter applies a filter incrementally to a series of cast members. You can use it either to change a range of selected cast members or to generate a series of new filtered cast members based on a single image. -
Page 234: Using Onion Skinning
Using onion skinning Onion skinning derives its name from a technique used by conventional animators, who would draw on thin “onion skin” paper so that they could see through it to one or more of the previous images in the animation. With onion skinning in Director, you can create or edit animated sequences of cast members in the Paint window using other cast members as a reference.
-
Page 235
• To specify the number of following cast members to display, enter a number in the Following Cast Members text box. Registration point Two preceding cast members shown with onion skinning and registration points The specified number of cast members appear as dimmed images behind the current cast member. -
Page 236: About The Paste As Pict Option
To use a series of images as a background while painting a series of foreground images: In the Cast window, arrange the series of cast members you want to use as your background in consecutive order. Cast members in the foreground and the background series must be adjacent to each other in the cast.
-
Page 237: Setting Bitmap Cast Member Properties
Setting bitmap cast member properties To view important information about cast members, change a cast member’s name, select alpha settings, or turn on highlighting and dithering, you use bitmap cast member properties. To view or change bitmap cast member properties: Select a bitmap cast member, and click the Member tab in the Property inspector using the Graphical view.
-
Page 238: Setting Pict Cast Member Properties
Setting PICT cast member properties You use PICT cast member properties to change the names of PICT cast members and set their properties. To view or change PICT cast member properties: Select a PICT cast member, and open the Property inspector in Graphical view. To view or edit the cast member name, use the Name field text box on the Member tab.
-
Page 239: Compressing Bitmaps
When you determine the most suitable compression level, Director remembers the settings you established in Fireworks. For more information, see “Optimizing Bitmaps in Fireworks” in the Director Support Center website at www.macromedia.com/support/ director/vector/d8/fw_bitmaps.html. To compress a bitmap at the cast member level: Select bitmap cast members or sprites, and click the Bitmap tab in the Property inspector.
-
Page 240: Working With Macromedia Fireworks
Note: Director saves your publish settings when you save your movie. Working with Macromedia Fireworks You can combine the power of Macromedia Fireworks and Director. Fireworks lets you export graphics and interactive content into Director. The export process preserves the behaviors and slices of the graphic.
-
Page 241
Exporting layered and sliced content to Director By exporting Fireworks slices to Director, you can export sliced and interactive content such as buttons and rollover images. By exporting layers to Director, you can export layered Fireworks content such as animations. To export Fireworks files to Director: In Fireworks, select File >… -
Page 242
To import layered, sliced, or interactive Fireworks content: In Director, select Insert > Fireworks > Images from Fireworks HTML. Note: The location and name of this menu command might be different depending on your version of Director. Locate the Fireworks HTML file you exported for use in Director. The Open Fireworks HTML dialog box appears. -
Page 243
Editing Director cast members in Fireworks Using launch-and-edit integration, you can make changes to Director cast members by launching Fireworks to edit them from inside Director. You can also launch Fireworks from inside Director to optimize cast members. To launch Fireworks to edit a Director cast member: In Director, right-click (Windows) or Control-click (Macintosh) the graphic in the Cast window. -
Page 244
Chapter 7… -
Page 245: Chapter 8 Vector Shapes
CHAPTER 8 Vector Shapes Vector shapes and bitmaps are the two main types of graphics used with Macromedia Director MX. A vector shape is a mathematical description of a geometric form that includes the thickness of the line, the fill color, and additional features of the line that can be expressed mathematically.
-
Page 246
• The first vertex in a curve is green. • The last vertex in a curve is red. • All other vertices are blue. • Unselected vertices are solid. • Selected vertices are unfilled. To open the Vector Shape window: •… -
Page 247
To create a vector shape using the Pen tool: In the Vector Shape window, click the New Cast Member button. Click the Pen tool and begin to draw: • To create a corner point, click once. • To create a curve point, click and drag. Dragging creates control handles that define how the line curves through the point you define. -
Page 248
To create multiple curves, do one of the following: • If you use the Pen tool, double-click the last vertex drawn. The next vertex will start a new curve. • With no vertices selected, use the Pen tool to start a new curve. •… -
Page 249: Editing Vector Shapes
• To set the background color, select a color from the Background Color menu. Choosing a background color that matches the color of the background results in better performance than using Background Transparent ink. • To set gradient fill colors, select colors from the Gradient Colors control. For more information about creating gradient fill, see “Editing vector shapes”…
-
Page 250
• To move the window view without using the scroll bars, click the Hand tool and drag anywhere inside the shape. To add a point in the middle of a shape: Open a vector shape in the Vector Shape window. Click the Pen tool. -
Page 251: Defining Gradients For Vector Shapes
To close or open vector shapes: • Select or deselect the Close box at the left side of the window. If the shape is closed, Director draws a line between the last and first points defined; if it is open, Director removes the line between the last and first points. To close a shape with Lingo: •…
-
Page 252: Controlling Vector Shapes With Lingo
To specify the rate at which the gradient shifts between colors, use the Spread control to enter a percentage. A setting of 100% uses the entire width or height of the shape to gradually shift colors. Lower settings make the shift more abrupt. For settings over 100%, the end color is reached at a theoretical location beyond the edges of the shape.
-
Page 253: Using Shapes
To set specific vector shape settings, click the Vector tab. To set the stroke color, choose a color from the Color menu, or enter a color value in the Stroke Color text box. To set the width of the stroke, use the Width slider. To set the fill color, select a color from the Color menu, or enter a color value in the Fill Color text box.
-
Page 254: Setting Shape Cast Member Properties
Setting shape cast member properties You can use cast member properties to view and change settings for selected shape cast members. You can change the type of shape and choose a new fill color or pattern. You can also use Lingo to control shape cast member properties.
-
Page 255: Color, Tempo, And Transitions
CHAPTER 9 Color, Tempo, and Transitions Several behind-the-scenes functions in Macromedia Director MX are important to the appearance and performance of a movie. To control the way Director manages colors, it’s important to understand the difference between RGB and index color, and how to assign colors to various elements in your movie.
-
Page 256
Director identifies a palette index color by the number of its position in a set of colors called a color palette. Color number 12, for example, might be blue. If a different palette is active, color number 12 might be red. When a computer is set to display 256 colors or fewer, it can display only the colors in the palette currently active in the system. -
Page 257
Choosing colors for movie elements Use the Color menu to select colors for movie elements such as the Stage, vector shapes, and the foreground and background of sprites. For some elements, such as Stage and sprite colors, you can also enter hexadecimal values for any RGB color. The Color menu displays the colors in the current palette;… -
Page 258
Click and hold the mouse button while pointing at the Foreground Color and Background Color buttons. Note: To open the Color menu in the opposite mode (RGB or index), hold down the Alt key (Windows) or Option key (Macintosh) while clicking the color box. To select colors not on the Color menu: Open the Color menu. -
Page 259
Select a new color for the box using one of the following options: • Click the color box to open the Color menu and select a color from the current palette. • Enter an RGB value for a color in the box to the right of the color box. •… -
Page 260
To specify a palette: In the Score, do one of the following: • Double-click the cell in the palette channel where you want the new palette setting to appear. • Right-click (Windows) or Control-click (Macintosh) the cell in the effects channel where you want the new palette setting to appear, and then select Palette from the Context menu. -
Page 261
Using the Color Palettes window Use the Color Palettes window to change and rearrange color palettes and to determine which colors in a palette are used in an image. This section explains basic features of the Color Palettes window. Select a palette to change Reserve, select, and rearrange colors Define a new color Tools… -
Page 262
Select all the cast members that use the old version of the palette, or use Find to locate all the cast members using a particular palette. Select Modify > Transform Bitmap and select the desired options. Note: Be sure to select Remap Colors, not Dither. Click Transform to remap all the cast members to the new palette. -
Page 263
To select colors in the palette used by the current cast member: In the Cast window, select the cast member. Select Window > Color Palettes. Select Used button Invert Selection button Click the Select Used button in the Color Palettes window. In the Select Colors Used In Bitmap dialog box, click Select. -
Page 264
Changing colors in a color palette You can define a new color for a color palette by selecting a color you want to change and then using either the controls at the bottom of the Color Palettes window or the system color. Open the color picker Define a new color by hue, saturation, and brightness… -
Page 265
Controlling color palettes with Lingo By using the command, you can change the current palette and specify how puppetPalette quickly a new palette fades in. This command is useful when you want to change the palette to suit changing conditions in the movie without entering a new frame. For example, you can change the palette when you switch a cast member assigned to a sprite. -
Page 266: Setting Palette Cast Member Properties
• If the Import option for Palette in the Image Options dialog box is not available while you are importing an image, the image’s palette might not meet standard system requirements. Note: Use an image editor to make sure the image’s palette meets the following requirements: The palette must contain exactly 16 or 256 colors.
-
Page 267: About Tempo
About tempo Tempo is the number of frames per second that Director tries to play. You can control tempo using the Score tempo channel or Lingo’s command. puppetTempo Director tempo settings control the maximum speed at which the playhead moves from frame to frame.
-
Page 268
To specify a tempo setting: In the Score, do one of the following: • Double-click the cell in the tempo channel where you want the new tempo setting to appear. • Right-click (Windows) or Control-click (Macintosh) the cell in the effects channel where you want the new tempo setting to appear, and then select Tempo from the Context menu. -
Page 269
Comparing actual speed with tempos you’ve set It’s good practice to test the performance of your movie on a system that is similar to that of your users. Make sure the movie plays well on the slowest systems likely to be used. The tempo you’ve set and the actual speed of a movie both appear in the floating Control panel. -
Page 270: Using Transitions
Using transitions Transitions create brief animations that play between frames to create a smooth flow as sprites move, appear, or disappear or as the entire Stage changes. Director provides dozens of transitions built into the application, and many third-party Xtra extensions also include transitions. For example, you can dissolve from one scene to the next, display a new scene strip by strip, or switch to a scene as though revealing it through venetian blinds.
-
Page 271
Tips for using transitions Here are some points to remember when working with transitions: • To play a sound while a transition occurs, place the sound in the frame immediately before the transition. • The Dissolve Pixels, Dissolve Pixels Fast, or Dissolve Patterns transitions might look different on Windows and Macintosh systems. -
Page 272
Setting transition cast member properties You use the Property inspector to set values for the transition cast member. To view or change transition cast member properties: Select a transition cast member. To display the Property inspector, select Modify > Cast Member > Properties, or select Window >… -
Page 273: Chapter 10 Text
CHAPTER 10 Text Macromedia Director MX creates text that is editable, anti-aliased, and compact for fast downloading in any font on any platform. Combine these features with any of the animation capabilities of Director, such as rotation, and you can create text effects that are not possible in any other application.
-
Page 274: Embedding Fonts In Movies
Embedding fonts in movies Before creating text or field cast members, it’s good practice to embed the fonts you want to use in the movie. Embedding fonts makes Director store all font information in the movie file so that a font will display properly even if it is not installed in a user’s system.
-
Page 275: Creating Text Cast Members
To embed a font in a movie with Lingo: • Use the command. See in the Lingo Dictionary. recordFont recordFont Creating text cast members You can create text within Director or import text from external files. Creating text in Director Director provides two ways to create text cast members: directly on the Stage or in the Text window.
-
Page 276: Editing And Formatting Text
Importing text You can import text from any application that saves text in rich text format (RTF), in plain text (ASCII), or from HTML documents. Use the standard importing procedure with File > Import to import any RTF, ASCII, or HTML document. To import an HTML document from the Internet, click the Internet button in the Import dialog box (File >…
-
Page 277
Selecting and editing text on the Stage For basic text editing, it’s fastest to edit text directly on the Stage. To edit text on the Stage: Click a text cast member on the Stage to select it as a sprite. The text sprite appears as a normal sprite with double borders. -
Page 278
Formatting characters After you created text cast members for your movie, you can format them in several ways: You can set the font, style, size, line spacing, and color. The following procedure uses the Font dialog box, but many of the same options are available in the Text inspector and the Text window. To format characters: Double-click inside a text sprite. -
Page 279
To define tabs, use any of the following options: • Set a tab by clicking the Tab button until the type of tab you want appears. Then click the ruler to place the tab. Right tab Tab button Decimal tab Left tab Center tab •… -
Page 280
Formatting entire cast members Director can apply formatting changes to entire cast members. This process is much faster than manually opening each cast member and applying changes. Any change you apply to a cast member affects all the text within the cast member. To format text cast members: In a Cast window or on the Stage, select the cast members you want to change. -
Page 281
Using anti-aliased text dramatically improves the quality of large text on the Stage, but it can blur or distort smaller text. Experiment with the size settings to get the best results for the font you are using. Director can anti-alias all outline (TrueType, PostScript, and embedded) fonts but not bitmap fonts. -
Page 282: Creating A Hypertext Link
To set additional search options, select Wrap-Around, Whole Words Only, or Case Sensitive. specifies whether Director returns to the beginning of text after it reaches the Wrap-Around end. If you select this option but not All Casts, Director continues searching from the top of the current text after it reaches the bottom of the window.
-
Page 283: Using Editable Text
To create a field cast member: Perform one of the following actions: • Select Insert > Control > Field. • Click the Field tool in the Tool palette, and drag on the Stage to define the area of the field. Field tool The field is created, and an insertion point is placed at the beginning of the field.
-
Page 284: Converting Text To A Bitmap
To make a text sprite editable in a range of frames: Select a range of frames within a sprite. You can select an entire sprite, or Shift-Alt-click (Windows) or Shift-Option-click (Macintosh) to select frames within a sprite. Click the Property inspector’s Text or Field tab using the Graphical view. Click Editable.
-
Page 285: Setting Text Or Field Cast Member Properties
Windows font Macintosh font Terminal Monaco Times New Roman Times (because Times New Roman is larger than Times, Fontmap.txt assigns a smaller point size.) Fontmap.txt also determines the scaling of fonts and how special characters such as bullets and symbols are translated between platforms. Again, the default settings are correct for nearly all applications, but you can edit the settings if necessary.
-
Page 286
To determine how Director places text within the boundaries of the cast member, select one of the following Framing options: expands the text box vertically when text that is entered extends beyond the Adjust to Fit current size of the box. attaches a scroll bar to the right side of the text box. -
Page 287
To control how Director anti-aliases text for a text cast member, select one of the following Anti-Alias options: anti-aliases all the text in the text block. All Text anti-aliases only text that is larger than the point size entered in the Points Larger Than text box. -
Page 288: Formatting Chunks Of Text With Lingo
Formatting chunks of text with Lingo The Director interface lets you format a variety of text characteristics, such as the font, size, style, and line spacing. Using Lingo, you can format text dynamically as the movie plays. You can also use Lingo to rapidly format text during authoring.
-
Page 289: Formatting Text Or Field Cast Members With Lingo
Formatting text or field cast members with Lingo In addition to formatting text in any chunk expression, Lingo can specify anti-aliasing and kerning for an entire text cast member and control the appearance of the text’s bounding rectangle. Setting anti-aliasing and kerning with Lingo You can use Lingo to specify anti-aliasing and kerning for a text cast member.
-
Page 290: Controlling Scrolling Text With Lingo
Controlling scrolling text with Lingo Lingo can scroll text and determine the location of specific text within the text box for text and field cast members. For example, this statement sets the value for the text cast scrollTop member called Discussion to 0, which makes its first line appear at the top of its scrolling field: (member «Discussion»).scrollTop = 0 This procedure can be useful for making a scrolling field automatically scroll back to the top.
-
Page 291: Modifying Strings With Lingo
Modifying strings with Lingo As time passes or other conditions change, you might want to update and change text. For example, you might want to frequently update a text sprite that displays the user’s name or a description of a musical selection that the user is currently streaming from a website. See individual entries in the Lingo Dictionary.
-
Page 292
Chapter 10… -
Page 293: Using Flash And Other Interactive Media Types
Flash movie. Director can import Flash 2 files or later. It supports the new features of Macromedia Flash MX, including access to Flash Communication Server MX.
-
Page 294
Flash movies are particularly effective for use in Shockwave movies because, as vector-based media, they are extremely small and therefore load much more quickly than most other media types. Because Flash movies are vector-based, you can scale and rotate them while still maintaining their sharpness. -
Page 295
Select Playback options to control how a Flash movie sprite plays in a Director projector, in a Shockwave movie, and while you are authoring in Director: displays the image of the Flash movie when it plays. When Image is deselected, the Flash Image movie is invisible. -
Page 296: Editing A Flash Cast Member
Blend and color settings are supported for Flash sprites just as they are for vector shapes. Editing a Flash cast member If you have Macromedia Flash MX installed, you can launch the Flash authoring tool from within Director to edit your Flash cast members.
-
Page 297: Controlling A Flash Movie With Lingo
If you install Flash MX before installing Director, Flash is added to the list of external editors automatically when you install Director. If you install Flash MX after installing Director, you can enable Flash launch and edit by adding Flash MX to the list of external editors. To add Flash MX to the list of external editors: Select Edit >…
-
Page 298
Flipping, rotating, and skewing Flash sprites Lingo can flip, rotate, and skew Flash sprites as the movie plays. For more information, see the Lingo Dictionary. • To flip a Flash sprite, set the sprite properties. flipH flipV • To skew a Flash sprite, set the sprite property. -
Page 299
Controlling a Flash movie’s bounding rectangle and registration points You can use to Lingo to control a Flash movie’s bounding rectangle and to set a Flash movie’s registration points. For more information, see the Lingo Dictionary. • To control which part of a Flash movie appears within its sprite’s bounding rectangle, set the , and properties. -
Page 300: Streaming Flash Movies With Lingo
Streaming Flash movies with Lingo In addition to the Lingo that lets you stream many of the Director media types, Director offers Lingo that specifically lets you control and monitor streaming Flash movies. For general information about using Lingo to stream media in Director, see Chapter 27, “Using Shockwave Player,”…
-
Page 301: Using Lingo To Set And Test Flash Variables
• To stop a Flash movie at its current frame but let any audio continue to play, use the command. hold • To specify a separate timeline within a Flash cast member as the target of subsequent Lingo sprite commands, use the commands.
-
Page 302: Sending Lingo Instructions From Flash Movies
In previous versions of Director, there were only three possible return values for this function: . In Director 8.5 and later, there is a fourth return value #background #normal, #button possible: . This value indicates that an editable text field within the Flash sprite is #editText over the specified location.
-
Page 303
• To specify an event message, specify the word followed by a colon, the name of a event handler you will write in Director, and a parameter (if any) to pass along with the event. For example, in Flash, you can specify this in the Network URL field: event: FlashMouseUp “Dali”… -
Page 304: Using Flash Objects In Lingo
Using Flash objects in Lingo With Director MX, you can create Flash ActionScript objects and access all of their properties and methods. You can create a wide variety of Flash objects, including arrays, dates, Booleans, XML objects, and net connection objects for use with Flash Communication Server MX. If you have authored a Flash movie that contains ActionScript classes that generate custom objects, you can access those objects in Lingo as well.
-
Page 305
• To access a property of the object, such as the array’s length, you only need to refer to the property as a property of the object reference you created: put myNewFlashObject.length — 3 • To access a part of the object, such as the value of the third item in the array, use the following syntax: put myNewFlashObject[2] — «banana»… -
Page 306: Using The Flash Local Connection Object
Using the Flash local connection object Macromedia Flash MX includes an object type called local connection. The Flash local connection object can be very useful for allowing separate movies on the same computer to connect to and communicate with each other. Because the local connection object is a Flash object supported in Director, it can allow communication between separate Flash movies, Director movies, or combinations of the two.
-
Page 307
For more information about allowing domains, see the Flash Communication Server MX documentation. Set up the callback for these user-defined messages. Decide what string you want to use as your message subjects, so that you know what the event name will be. -
Page 308
Writing callback handlers Now the callbacks are set up. In order for them to work, however, you must write the callback handlers themselves. While the commands are all inside a handler setCallback() beginSprite in this example, the callback handlers must be outside the handler because they are beginSprite handlers by themselves. -
Page 309: Using Flash Communication Server Mx
Using Flash Communication Server MX Macromedia Flash Communication Server MX allows Flash movies on separate computers to share information, including sound, video, text and other data in real time. You can use Flash…
-
Page 310
The steps required to communicate with Flash Communication Server MX are identical to those you would use in ActionScript. To create a NetConnection object: • Use the Lingo command. newObject() myNetConObject = sprite(1).newObject(«NetConnection») To create a NetStream object: • Use the command and include the object as a parameter: newObject() -
Page 311: Using The Flash Settings Panel
To receive a video stream from the server, the stream must be attached to a video clip instance in a Flash sprite. A sample Flash movie containing a video clip object is included in the Macromedia/ Support/Flash/ folder on the Director installation CD.
-
Page 312: Playback Performance Tips For Flash Movies
You can also choose to use ActionScript in your Flash movie to enable the Settings panel. For more information, see the Macromedia Flash MX documentation. Playback performance tips for Flash movies Performance of Flash movies can vary greatly, depending on the options in effect and the playback environment.
-
Page 313: Using Director Movies Within Director Movies
For more information about using Flash in Director, see the Flash section of the Director Support Center (www.macromedia.com/support/director/programs_fl.html). Using Director movies within Director movies You can import a Director movie into another movie as an internal or linked cast member, with the Import command.
-
Page 314: Setting Linked Director Movie Properties
For both types of imported movies, the host movie controls the tempo settings, palette settings, and transitions. Settings for these functions in the imported movie are ignored. Once it is imported, the movie appears as a cast member in the Cast window. The cast members of a movie imported as internal media also appear in the Cast window.
-
Page 315
To view or edit the cast member name, use the Name field. To add comments about the cast member, use the Comments field. To specify how Director removes the cast member from memory if memory is low, select one of the following options from the Unload pop-up menu: sets the selected cast members to be removed from memory after any priority 2 cast 3—Normal members have been removed. -
Page 316: Using Activex Controls
Note: Not all ActiveX controls expose their methods and properties in all hosts. Test the controls you want to use to see how they work in Director. Because ActiveX controls are non-Macromedia software, Macromedia Technical Support does not support them.
-
Page 317
Setting ActiveX control properties An ActiveX control describes its information using properties—named characteristics or values such as color, text, font, and so on. Properties can include not only visual aspects but also behavioral ones. For example, a button might have a property that indicates whether the button is momentary or push-on/push-off. -
Page 318
As an example, if the Microsoft Access Calendar control is inserted into a Director movie as the second sprite on the Score, the following Lingo code would increment the year displayed within the Calendar control: sprite(2).NextYear() For the same Calendar control, the following Lingo code would decrement the year displayed by the Calendar control: sprite(2).PrevYear() Parameters passed to the ActiveX control are automatically converted from their Director data… -
Page 319: Sound And Synchronization
You can give your movie added appeal by including a soundtrack, a voice-over, ambient noises, or other sounds. With Macromedia Director MX, you can control when sounds start and stop, how long they last, their quality and volume, and several other effects. Using Macromedia Shockwave Audio, you can compress sounds for easier distribution and stream them from an Internet source.
-
Page 320: Importing Internal And Linked Sounds
Importing internal and linked sounds Director handles sounds as either internal or linked. You can determine whether a sound is internal or linked when you import it. Each type of sound has advantages for different situations. Director stores all the sound data for an internal sound cast member in a movie or cast file and loads the sound completely into RAM before playing it.
-
Page 321: Setting Sound Cast Member Properties
Setting sound cast member properties You can use sound cast member properties to make a sound loop, change its name, change the external sound file to which it’s linked (if it’s a linked sound), and set its unload priority. To set sound cast member properties: Select a sound cast member.
-
Page 322: Looping A Sound
In addition to the two sound channels in the Score, Director can use as many as six additional sound channels simultaneously. However, the additional channels are accessible only from Lingo or from behaviors. Available RAM and the computer’s speed are the constraints on how many sounds Director can use effectively.
-
Page 323: Using Sound In Windows
DirectSound..See in the Lingo Dictionary. (Windows NT4 does not soundDevice support DirectSound 5.) Check the Director Support Center at www.macromedia.com/ support/director/ for the latest developments related to this issue. • The default number of sounds that Director can mix in Windows is eight. This number can be decreased by modifying the value for MixMaxChannels in the Director.ini file in the…
-
Page 324
These statements queue the sound members Explosion and Siren and play them in succession in sound channel 2: sound(2).queue(member(«Explosion»)) sound(2).queue(member(«Siren»)) sound(2).play() To control how a queued sound plays: • Include optional parameters in a property list within the function. See in the queue() queue() -
Page 325: About Shockwave Audio
About Shockwave Audio Shockwave Audio is a technology that makes sounds smaller and plays them faster from disk or over the Internet. Shockwave Audio can compress the size of sounds by a ratio of up to 176:1 and is streamable, which means Director doesn’t have to load the entire sound into RAM before it begins playing.
-
Page 326: Compressing Internal Sounds With Shockwave Audio
Compressing internal sounds with Shockwave Audio Shockwave Audio can compress any internal sounds in a movie. Although internal sounds are not streamed, compressing them with Shockwave Audio dramatically decreases the size of the sound data in a movie, shortens the download time from the Internet, and saves disk space. You can use Shockwave Audio settings to specify compression settings for internal sound cast members.
-
Page 327: Playing Shockwave Audio And Mp3 Audio With Lingo
To stream a linked Shockwave Audio or MP3 sound: Select Insert > Media Element > Shockwave Audio. This process creates a cast member that controls the streaming Shockwave Audio. In the SWA Cast Member Properties dialog box that appears, click Browse and select a Shockwave Audio file on a local disk, or enter a URL in the Link Address box.
-
Page 328: Synchronizing Media
• To stop a streaming sound file, use the command. stop member • To determine the state of a streaming sound file, test the cast member property. state • To determine whether an error occurred when streaming a sound file, use the getError() function.
-
Page 329: Synchronizing Sound With Lingo
To use cue points: Place cue points in a sound file or (on the Macintosh only) in a QuickTime file. Use an audio-editing program to define cue points in sounds and digital videos. Import the sound or digital video into Director. Note: Digital video is always linked, whether you select the Standard Import option or the Link to External File option in the Import dialog box.
-
Page 330
Chapter 12… -
Page 331: Chapter 13 Using Video
CHAPTER 13 Using Video You can give your Macromedia Director MX movie added appeal by including digital video. Digital video not only offers high-quality real-time image animation and sound but also supports new types of media such as QuickTime VR.
-
Page 332: Importing Digital Video
.dcr and .gif. For more information, see the Director Support Center website at www.macromedia.com/support/director. To import a digital video: Select File > Import.
-
Page 333: Setting Digital Video Cast Member Properties
Setting digital video cast member properties Use cast member properties to control the media in a digital video, specify how it is framed and whether it plays direct-to-Stage, and set other important options. To set digital video cast member properties: Select a digital video cast member in the cast.
-
Page 334: Playing Digital Video Direct-To-Stage
stops the digital video when it first appears on the Stage (while playing the Paused Director movie). replays the digital video continuously from the beginning to the end. Loop (AVI only) loads the cast member into memory when the movie starts. For more Preload information, see “Preloading AVI digital video”…
-
Page 335: Controlling Digital Video In The Score
If Direct to Stage is selected, select one of the following Playback options: makes the digital video skip frames (if necessary) to keep up with its Sync to Soundtrack soundtrack. The digital video might also take less time to play. makes every frame of the digital video appear but does not play the Play Every Frame soundtrack because the video cannot play the soundtrack asynchronously while the video…
-
Page 336: Playing Digital Video With Lingo
Playing digital video with Lingo Lingo can take advantage of the most important and powerful features of digital video. Besides playing digital video linearly, Lingo can pause, stop, and rewind a video. These abilities are useful for jumping to segments within a digital video and for emulating a typical digital video control panel.
-
Page 337: Controlling Quicktime With Lingo
• To determine whether a sprite’s track is enabled to play, check the digital video’s trackEnabled sprite property. • To obtain the text at the current time from a text track in a digital video sprite, check the digital video’s sprite property.
-
Page 338
Responding to user interaction Lingo lets you control how QuickTime VR responds when the user clicks a QuickTime VR sprite. Use Lingo to specify how Director handles image quality, clicks and rollovers on a QuickTime VR sprite, clicks on hotspots, and interactions with QuickTime VR nodes. For more information, see the Lingo Dictionary. -
Page 339: Cropping Digital Video
Panning QuickTime VR Use Lingo to pan a QuickTime VR digital video without the user dragging the image, as described in the following list. For more information, see the Lingo Dictionary. • To set the current pan of the QuickTime VR sprite, set the QuickTime VR sprite property.
-
Page 340: About Using Digital Video On The Internet
Go to the Stage and drag any of the handles that appear on the selection rectangle that surrounds the video image. Director displays only as much of the movie image as will fit in the area that is defined by the selection rectangle.
-
Page 341: Preloading Avi Digital Video
For details see “Synchronizing media” on page 328. Using RealMedia content in Director The Macromedia Director Xtra for RealSystem Streaming Media (Xtra for RealMedia) adds RealAudio and RealVideo to the media types supported by Director (Windows only), and handles the playback of RealMedia content in the Shockwave player (Windows only) using an embedded RealPlayer engine.
-
Page 342
License restrictions and copyright information The Macromedia Director license agreement outlines the restrictions and requirements for creating and serving content created using Macromedia Director Xtra for RealSystem Streaming Media (referred to as the Xtra for RealMedia in this document and RealMedia Asset.x32 (Windows) in the Movie Xtras dialog box). -
Page 343
This publication contains links to third-party websites that are not under the control of Macromedia, and Macromedia is not responsible for the content on any linked site. If you access a third-party website mentioned in this guide, then you do so at your own risk. Macromedia provides these links only as a convenience, and the inclusion of the link does not imply that Macromedia endorses or accepts any responsibility for the content on those third-party sites. -
Page 344
RealMedia cast members RealMedia cast members are always linked cast members; they reference an external stream via a URL (of type HTTP, RTSP, or PNM) to a location on the Internet or a local file on your hard disk or network file server. RealMedia cast members are always of type #realMedia Sprites created from RealMedia cast members are treated as regular sprites and can be rotated, skewed, stretched, flipped, colorized, composited with other sprite layers with ink, and… -
Page 345
• If you use RealPlayer native audio to process RealAudio, all Lingo sound elements and the audio property in the Property inspector are ignored. You enable RealPlayer native audio by setting the function to . This function should be executed realPlayerNativeAudio() TRUE in a… -
Page 346
Streaming of RealMedia cast members is handled by RealPlayer, not the Shockwave player. Since the streaming of RealMedia cast members is independent of the streaming functionality of Director, RealMedia cast members are not placed in the Director cache, and NetLingo does not apply to RealMedia cast members. -
Page 347
To create a RealMedia cast member using Insert > Media Element: Select Insert > Media Element > RealMedia. On the Member tab in the Property inspector, enter the name of the RealMedia cast member and enter the URL, or use the “…” button to browse to the location of a local RealMedia file. Use the options on the RealMedia tab in the Property inspector to specify the properties of the cast member. -
Page 348
Obtaining dynamic RealMedia cast member properties When a RealMedia cast member is initially created, the values that are listed in the Property inspector for the dynamic properties— , and —are placeholder height width rect duration values. After you play the cast member on the Stage or in the RealMedia viewer, the actual values for the properties are saved and appear in the Property inspector. -
Page 349
The RealMedia tab in the Property inspector The RealMedia tab in the Property inspector displays the properties of RealMedia cast members. To set or change the editable properties, you can use the Property inspector or the Lingo properties for RealMedia. Even if you are not planning to use the Lingo properties, it is a good idea to read the Lingo entries for the properties that appear in the Property inspector because they contain valuable information. -
Page 350
• lets you specify a user name if the cast member references a protected userName (RealMedia) URL. For security purposes, after a user name has been entered, it cannot be retrieved. If this property has been set, the value that appears in the Property inspector is ********. •… -
Page 351
lets a text area or field provide a graphical display of the stream- RealMedia Buffering Indicator buffering progress of the RealMedia sprite with the RealMedia Target behavior attached. As stream buffering progresses, the width of the sprite increases from 0 to 100%. lets a text area or field display text information for the RealMedia RealMedia Stream Information sprite with the RealMedia Target behavior attached. -
Page 352
You can create as many of these features as you like. You do not have to use control buttons in movies with RealMedia cast members if you want to control them from the Score or using Lingo. The RealMedia viewer The new RealMedia viewer is a simple media viewer that lets you play RealMedia cast members in isolation from other elements of your movie. -
Page 353
The Xtra for RealMedia is not part of the standard Shockwave 8.5, but can be downloaded from the Macromedia website. The first time a user attempts to play a Shockwave movie that contains a RealMedia cast member, the Shockwave player automatically downloads and installs the Xtra for RealMedia if you selected RealMedia Asset.x32 in the Movie Xtras dialog box. -
Page 354: Using Lingo Sound Elements With Realmedia
Using Lingo sound elements with RealMedia All the Lingo elements in this section are documented in the main Lingo Dictionary and are discussed here only as they pertain to working with RealMedia content. For complete information, see the Lingo Dictionary. Supported sound elements The following Lingo elements operate on a sound channel and are fully supported for sound channels playing the audio portion of a RealMedia cast member:…
-
Page 355
Unsupported sound elements The following Lingo elements are not supported for RealMedia cast members or for sound channels playing the audio portion of a RealMedia stream: • breakLoop() • channelCount • endTime • getPlayList() • loopCount • loopEndTime • loopsRemaining •… -
Page 356
Chapter 13… -
Page 357: Chapter 14 Behaviors
CHAPTER 14 Behaviors A behavior in Macromedia Director MX is prewritten Lingo script that you use to provide interactivity and add interesting effects to your movie. You drag a behavior from the Library palette and drop it on a sprite or frame to attach it.
-
Page 358
To attach a behavior to a single sprite or frame using the Library palette: Select Window > Library Palette. Select a library from the Library pop-up menu in the upper left corner of the palette. To view a brief description of included behaviors, move the pointer over a behavior icon. If the behavior includes a longer description, you can view it in the Behavior inspector. -
Page 359
To attach a behavior to a frame in the behavior channel, drag a behavior from the Library palette to a frame in the behavior channel. Enter parameters for the behavior in the Parameters dialog box. Note: If you attach a behavior from a Director library of behaviors, the behavior is copied to an internal cast, to prevent you from accidentally changing the original behavior. -
Page 360: Changing The Order Of Attached Behaviors
Select a behavior from the Behaviors pop-up menu. Director attaches the behavior you select to the sprite(s) or frame(s). Note: Some behaviors work only when applied to either a sprite or a frame; for more information, read the behavior descriptions. To change parameters for a behavior attached to a sprite or frame: Select the sprite or frame to which the behavior is attached.
-
Page 361: Getting Information About Behaviors
Getting information about behaviors Behaviors included with Director have pop-up descriptions that appear when you hold the pointer over a behavior in the Library palette. Some behaviors, however, have longer descriptions and instructions, which you can view in the Behavior inspector. A scrolling pane in the Behavior inspector displays the complete description provided by the behavior’s author.
-
Page 362
Using the Behavior inspector is a good way to learn Lingo. You can examine the scripts created by the Behavior inspector to see how basic functions are assembled. Select any behavior and click the Script button to view the associated Lingo script. All behaviors detect an event and then perform one or more actions in response. -
Page 363
Click the arrow in the lower left of the Behavior inspector to expand the editing pane. Click here to expand the editing pane The editing pane shows the events and actions in the current behavior. If you’re creating a new behavior, no events or actions appear. -
Page 364
indicates that the right mouse button was released. (On the Macintosh, Director Right Mouse Up treats a Control-click the same as a right mouse click on a Windows system.) indicates that the right mouse button was clicked. Right Mouse Down indicates that the pointer entered a sprite’s region. -
Page 365: Writing Behaviors With Lingo
executes any Lingo function or sends a message to a handler. You specify the new New Action handler’s name. Writing behaviors with Lingo If you are familiar with Lingo, you can author your own behaviors. From the perspective of Lingo, a behavior is a script with these additional features: •…
-
Page 366: Setting Behavior Properties With Lingo
To allow users to set different values for a property in different instances of the behavior, the behavior’s script needs two types of Lingo: • statement that allows each instance to maintain a separate value for the property property • handler that sets up the property on getPropertyDescriptionList Setting behavior properties with Lingo…
-
Page 367: Creating An On Getpropertydescriptionlist Handler
For example, to define the property as an integer that can be set to a value from 1 to 10 movement and whose default value is 5, use a phrase similar to this: #movement: [#default: 5, #format:#integer, ¬ #comment: «Set motion to the right:», #range: [#min:1, #max:10]] •…
-
Page 368: Including A Description For The Behavior Inspector
For example, this handler creates a property list named Description that contains the definitions movement whichSound on getPropertyDescriptionList set description = [:] addProp description, #Movement, [#default: 5, #format:#integer, #comment: ¬ «Set motion to the right:», #range: [#min:1, #max:10]] addProp description, #noise, [#default:»», format: #sound, ¬ #comment:»Sound cast member name»] return description Alternatively, you can use this syntax to do the same as the previous handler:…
-
Page 369: Example Of A Complete Behavior
Example of a complete behavior If the handlers described here were in one behavior, the script would look like this (the command was added to the handler in this example): puppetSound on mouseUp property movement, noise on getPropertyDescriptionList set description = [:] addProp description, #movement, [#default: 5, ¬…
-
Page 370
For example, this handler sends the custom message and the argument 2 to sprite 1 bumpCounter when the user clicks the mouse: on mouseDown me sendSprite (1, #bumpCounter, 2) sendSprite Note: The symbol ( ) operator must precede the message in the command. -
Page 371: Using Inheritance In Behaviors
Using inheritance in behaviors Behaviors can have ancestor scripts in the same way that parent scripts do. (Ancestor scripts are additional scripts whose handlers and properties a parent script can call on and use.) • The ancestor’s handlers and properties are available to the behavior. •…
-
Page 372
Chapter 14… -
Page 373: Navigation And User Interaction
CHAPTER 15 Navigation and User Interaction Adding interactivity lets you involve your audience in your Macromedia Director MX movies. Using the keyboard, the mouse, or both, your audience can download content from the Internet, jump to different parts of movies, enter information, move objects, click buttons, and perform many other interactive operations.
-
Page 374: Creating Basic Navigation Controls With Behaviors
Creating basic navigation controls with behaviors Director provides behaviors that let you create basic navigation controls without knowing Lingo. You can use behaviors to move the playhead to a frame number or marker. You can also stop the playhead at any frame and wait for the user to act. The following examples explain the basic use of the Hold on Current Frame Go Next…
-
Page 375: Jumping To Locations With Lingo
Setting properties for push buttons, radio buttons, and check boxes When you create a push button, radio button, or check box on the Stage, a Button cast member is added to the Cast. You can use button cast member properties to change the name and button type of button cast members.
-
Page 376
Jumping to a URL Lingo lets you jump to a URL that represents an Internet movie or a web page. • To jump to an Internet movie, use the command. gotoNetMovie For example, the statement gotoNetMovie «http://www.yourserver.com/movies/ retrieves and plays the movie named movie1.dcr. See in the movie1.dcr»… -
Page 377: Detecting Mouse Clicks With Lingo
Detecting mouse clicks with Lingo Users can click the mouse button in several ways, each of which Lingo can detect. The following are ways that you can use Lingo to detect what the user does with the mouse. See individual properties and functions in the Lingo Dictionary.
-
Page 378: Making Sprites Editable Or Moveable With Lingo
To make a text sprite editable: • Click the Editable button in the Property inspector. Moveable button Editable button Making sprites editable or moveable with Lingo Lingo can make sprites editable or moveable regardless of the settings in the Score. You can also use Lingo to constrain a moveable sprite to a certain region.
-
Page 379: Checking Which Text Is Under The Pointer With Lingo
Checking which text is under the pointer with Lingo Lingo can detect which text component in a text or field cast member is currently under the mouse pointer. See individual properties and functions in the Lingo Dictionary. Use Lingo that applies to text and field cast members as follows: •…
-
Page 380: Finding Mouse Pointer Locations With Lingo
Finding mouse pointer locations with Lingo Determining where the mouse pointer is on the Stage is a common need in Director. To determine the mouse pointer’s horizontal and vertical positions: • Use the functions. See in the Lingo Dictionary. mouseH() mouseV() mouseH mouseV…
-
Page 381: Identifying Keys On Different Keyboards
Lingo term Windows key Macintosh key optionDown Option controlDown Control Control ENTER Enter key on the numeric keypad Enter key on the numeric keypad (during authoring, pressing Enter (during authoring, pressing Enter starts playing the movie) starts playing the movie) BACKSPACE Backspace Delete…
-
Page 382: Creating An Animated Color Cursor Cast Member
Requirements for animated color cursors All cast members used for an animated color cursor must meet certain criteria: • They must be bitmap cast members. • They must have a color depth of 8 bits (256 colors). • They must use only the first eight or the last eight colors that are in the standard System — Win palette.
-
Page 383
Select the cast member you want, and click Add. You see the cast member in the Cursor Frames preview area. The Frame X of Y field shows where the cast member falls within an animated series of cursor frames. Repeat steps 2 through 4 until you have added all the cast members for the cursor. In the Cursor Frames area, you can use the <… -
Page 384: Using An Animated Color Cursor In A Movie
Using an animated color cursor in a movie After you add an animated color cursor to the cast, use Lingo to switch to the animated cursor as you would any other cursor. You can set up an animated cursor as the movie’s cursor or a sprite’s cursor.
-
Page 385: Writing Scripts With Lingo
CHAPTER 16 Writing Scripts with Lingo Lingo, the scripting language of Macromedia Director MX, adds interactivity to a movie. You can use Lingo to control a movie in response to specific conditions and events. For example, Lingo can play a sound after a specified amount of the sound has streamed from the Internet.
-
Page 386
are special scripts that contain Lingo used to create child objects. You can use Parent scripts parent scripts to generate script objects that behave and respond similarly yet can still operate independently of each other. A parent script icon appears in the lower right corner of the Cast window thumbnail. -
Page 387
The best approach is to start simple and test your work frequently. When you get one part of a script working, start writing the next part. This approach helps you identify bugs efficiently and ensures that your Lingo is solid as you write more complex scripts. For more information about debugging scripts, see “Troubleshooting Lingo”. -
Page 388
To keep the playhead in a single frame: • In a frame behavior, type the following statement on the line after the on exitFrame statement: go to the frame The Lingo expression “the frame” always refers to the frame currently occupied by the playhead. This statement essentially tells the playhead to “go back to the frame you are currently in”. -
Page 389: Lingo Terminology
To open a movie script or parent script for editing: • Double-click the script in the Cast window. To change a script’s type: Select the script in the Cast window or open it in the Script window. Click the Script tab of the Property inspector and select a script type from the Type pop-up menu.
-
Page 390: Lingo Syntax
are terms that return a value. For example, the function returns the current Functions date() date set in the computer. The function returns the key that was pressed last. Parentheses key() occur at the end of a function. are sets of Lingo statements within a script that run when a specific event occurs in a Handlers movie (see “Using handlers”…
-
Page 391
You can also use parentheses to override Lingo’s order of precedence in math operations or to make your Lingo statements easier to read. For example, this math expression will yield a result of 13: 5 * 3 — 2 while this expression will yield a result of 5: 5 * (3 — 2) Character spaces Words within expressions and statements are separated by spaces. -
Page 392: Writing Lingo Statements
Optional keywords and abbreviated commands You can abbreviate some Lingo statements. Abbreviated versions of a command are easier to enter but may be less readable than the longer versions. The command is a good example. All the following statements are equivalent, but the last one uses the fewest keystrokes. go to frame «This Marker»…
-
Page 393
Dot syntax Dot syntax is a concise form of Lingo that makes longer scripts easier to read and comprehend for users who have at least a basic understanding of the language. By understanding and using dot syntax, you can make your scripts shorter and easier to read and debug. An understanding of dot syntax makes it easier to learn other programming languages, since many of them use dot syntax exclusively. -
Page 394
Using messages to identify events To run the appropriate set of Lingo statements at the right time, Director must determine what is occurring in the movie and which Lingo to run in response to certain events. Director sends messages to indicate when specific events occur in a movie, such as when sprites are clicked, keyboard keys are pressed, a movie starts, the playhead enters or exits a frame, or a script returns a certain result. -
Page 395
Using Lingo keywords for handler names can create confusion. Although it is possible to explicitly replace or extend the functionality of a Lingo element by using it as a handler name, this should be done only in certain advanced situations. When you have multiple handlers with similar functions, it is useful to give them names that have similar beginnings so they appear together in an alphabetical listing, such as the listing that can be displayed by the Edit >… -
Page 396: Using Handlers
Using handlers As described in “Using messages to identify events” on page 394, Director sends messages to handlers within scripts when specific events occur. You attach a set of handlers to an object by attaching the handlers’ script to the object. See “Creating and attaching scripts with the Script window”…
-
Page 397
Returning results from handlers Often you want a handler to report some condition or the result of some action. To return results from a handler: • Use the function to have a handler report a condition or the result of an action. For return example, the following handler returns the current color of sprite 1: on findColor… -
Page 398: Using Lists
After a handler intercepts a message, the message doesn’t automatically pass on to the remaining locations. (You can use the command to override this default rule and pass the message to pass other objects.) If no matching handler is found after the message passes to all possible locations, Director ignores the message.
-
Page 399
For example, the following statements have the same effect; each statement creates a linear list of three names: set workerList = [«Bruno», «Heather», «Carlos»] set workerList = list(«Bruno», «Heather», «Carlos») To create an empty linear list: • Set the list to Creating property lists The only way to create a property list is to use the list operator ( ). -
Page 400
To set a value in a property list, do one of the following: • Use the equals (=) operator. (You can also use the command, which was introduced setAProp in earlier versions of Director.) For example, the statement makes sushi the new value foodList[#Bruno] = «sushi»… -
Page 401
Adding and deleting items in a list You can add or delete items in a list by using the following commands. See entries for individual commands in the Lingo Dictionary. • To add an item at the end of a list, use the command. -
Page 402
2 = member «Big Flash» set sprite (2).member = member («Big Flash») sprite (2).member = member («Big Flash») As another example, each of these statements assigns a URL to the variable placesToGo placesToGo = «http://www.macromedia.com» set placesToGo = «http://www.macromedia.com» Chapter 16… -
Page 403
Global variables can be shared among handlers and movies. A global variable exists and retains its value as long as Director is running or until you issue the command. clearGlobals In Macromedia Shockwave, global variables persist among movies displayed by the Lingo command, but not among those displayed by the command. goToNetMovie goToNetPage Every handler that declares a variable as global can use the variable’s current value. -
Page 404: Expressing Literal Values
To clear all current global variables: • Use the command in the Message window to set the value of all global variables clearGlobals VOID , and in the Lingo Dictionary. global clearGlobals showGlobals To monitor the values of global variables during movie playback, use the Object inspector. See “Using the Object inspector”…
-
Page 405
Writing strings Strings are words or groups of characters that Lingo treats as regular words instead of as variables. Strings must be enclosed in double quotation marks. For example, you might use strings to give messages to the user of your movie or to name cast members. In the statement member («Greeting»).text = «Hello»… -
Page 406
Identifying cast members and casts Note: If you rearrange (and thus renumber) cast members while creating a movie, Director doesn’t automatically update references to cast member numbers in Lingo scripts. Therefore, although some of the examples in this section illustrate how to reference cast members by number, the best practice is to always name cast members and refer to them by name in Lingo scripts. -
Page 407
• The word refers to the next marker or the marker before the current scene, next previous respectively. • The term followed by a minus or plus sign and the number of frames before the frame or after the current frame refers to a frame that’s a specific number of frames before or after the current frame. -
Page 408: Using Operators To Manipulate Values
Expressing constants A constant is a named value whose content never changes. For example, , and TRUE FALSE VOID are constants because their values are always the same. EMPTY The constants , and refer to keyboard characters. BACKSPACE ENTER QUOTE RETURN SPACE For example, to test whether the user is pressing the Enter key, use the following statement:…
-
Page 409
Operator Effect Precedence Performs addition. When placed between two numbers, performs subtraction. Note: When only integers are used in an operation, the result is an integer. Using integers and floating-point numbers in the same calculation results in a floating-point number. When dividing one integer by another doesn’t result in a whole number, Lingo rounds the result down to the nearest integer. -
Page 410: Controlling Flow In Scripts
String operators String operators combine and define strings. These are the string operators available in Lingo: Operator Effect Precedence & Concatenates two strings. && Concatenates two strings and inserts a space between the two. » Marks the beginning or end of a string. Controlling flow in scripts Lingo uses , and…
-
Page 411
For example, the following statement tests which key the user pressed most recently and case responds accordingly: case (the key) of «A»: go to frame «Apple» «B», «C»: puppetTransition 99 go to frame «Oranges» otherwise beep end case • If the user pressed A, the movie goes to the frame labeled Apple. •… -
Page 412: Creating And Attaching Scripts With The Script Window
Lingo continues to loop through the statements inside the repeat loop until the condition is no longer true or until one of the instructions sends Lingo outside the loop. In the previous example, Lingo exits the repeat loop when the mouse button is released because the condition mouseDown is no longer true.
-
Page 413
To make new Script windows automatically format your scripts with proper indenting, select Enable for Auto Format. This option is on by default. To make new Script windows display line numbers for your scripts, select Enable for Line Numbering. This option is on by default. If Auto Coloring is on, select colors for the following code elements from the corresponding color menus: •… -
Page 414
When an element requires additional parameters, Lingo includes placeholder names that indicate the additional required information. When more than one argument or parameter is required, Lingo highlights the first one for you, so all you have to do is type to replace it. You must select and change the other parameters yourself. -
Page 415
Finding handlers and text in scripts The Find command in the Edit menu is useful for finding handlers and for finding and editing text and handlers. To find handlers in scripts: Select Edit > Find > Handler. The Find Handler dialog box appears. The leftmost column in the Find Handler dialog box displays the name of each handler in the movie. -
Page 416: Using Linked Scripts
To find the next occurrence of the text specified in the Find field: • Select Edit > Find Again. To find occurrences of selected text: Select the text. Select Edit > Find > Selection. Using linked scripts In addition to scripts stored as internal cast members, you can choose to keep scripts in external text files and link them to your Director movie.
-
Page 417: Using Parent Scripts And Child Objects
To turn an internal script cast member into an external, linked script cast member: Select the internal cast member and click the Script tab of the Property inspector. Click Link Script As. Enter a name for the script file in the Save As dialog box. Click Save.
-
Page 418
Parent script and child object basics A parent script is a set of handlers and properties that define a child object; it is not a child object itself. A child object is a self-contained, independent instance of a parent script. Children of the same parent have identical handlers and properties, so child objects in the same group can have similar responses to events and messages. -
Page 419
When handlers and properties are not defined in a child object, Director searches for the handler or property in the child’s ancestors, starting with the child’s parent script. If a handler is called or a property is tested and the parent script contains no definition for it, Director searches for a definition in the ancestor script. -
Page 420
Creating the on new handler Each parent script typically uses an handler. This handler creates the new child object on new when another script issues a command, which tells the new(script parentScriptName) specified parent script to create a child object from itself. The handler in the parent script on new can also set the child object’s initial property values, if you want. -
Page 421
When referring to properties defined in ancestor scripts, you must use the parameter as the source of the reference. This is because the property, while defined in the ancestor script, is nevertheless a property of the child object. For example, these statements both use to refer to an object and access properties defined in an ancestor of the object: —access ancestor property… -
Page 422
Checking child object properties You can check the values of specific property variables in individual child objects by using a simple syntax. For example, this statement assigns the variable objectName.PropertyName value of the property of the child object in the variable carSpeed car1 x = car1.carSpeed… -
Page 423
To remove an object from actorList: • Use the command to delete the item from the list. See in the Lingo Dictionary. delete delete Using scriptInstanceList You can use the property to dynamically add new behaviors to a sprite. scriptInstanceList Normally, is the list of behavior instances created from the behavior scriptInstanceList… -
Page 424
The object’s handler in its parent or ancestor script will then run automatically on stepFrame each time the playhead advances. The object will be passed as the first argument (that is, the argument) to the handler. on stepFrame Director doesn’t clear the contents of when branching to another movie, which can actorList cause unpredictable behavior in the new movie. -
Page 425
This statement creates a timeout object named that will call the handler timer1 on accelerate in the child object every 2 seconds: car1 myTimer = timeOut(“timer1”).new(2000, #accelerate, car1) To determine when the next timeout message will be sent from a particular timeout object, check property. -
Page 426: Troubleshooting Lingo
Troubleshooting Lingo Scripts don’t always do what you want the first time. The script often has an error in its syntax: possibly a word is misspelled or a small part of the script is missing. Other times the script might work but doesn’t produce the expected result.
-
Page 427
Basic debugging Debugging involves strategy and analysis, not a standard step-by-step procedure. This section describes the basic debugging approaches that programmers successfully use to debug any code, not just Lingo. Before you modify a movie significantly, always make a backup copy. Identifying the problem It might seem obvious, but the first thing to do when debugging is to identify the problem. -
Page 428
Solving simple problems When finding a bug, it’s a good idea to check for simple problems first. The first debugging test occurs when you close the Script window. Director gives you an error message if the script contains incorrect syntax when you close the Script window. The message usually includes the line in which the problem was first detected. -
Page 429
Using the Message window The Message window provides a way for you to test Lingo commands and to monitor what is happening in Lingo while a movie plays. To open the Message window: • Select Window > Message. Managing the Message window The Message window has an Input pane and an Output pane. -
Page 430
Testing Lingo You can test Lingo commands to see how they work by entering them in the Message window and observing the results. When you enter a command in the Message window, Director executes the command immediately, regardless of whether a movie is playing. To test a one-line Lingo statement: Type the statement directly in the Message window. -
Page 431
To test a handler: Type the handler in a Movie Script or Behavior Script window. Type the handler name in the Message window. Press Enter (Windows) or Return (Macintosh). The handler executes. Any output from statements in the handler appears in the Message window. Like the Script window, the Message window contains pop-up menus of Lingo commands. -
Page 432
For example, the following line indicates several things: == Frame: 39 Script: 1 Handler: mouseUp • The movie entered frame 39. • The movie ran script 1, the first script attached to the frame. • The movie ran the handler in script 1 after the movie entered the frame. on mouseUp Entries after an arrow made up of a double hyphen and right angle bracket ( ) indicate lines of… -
Page 433
• Check variables and expressions. Analyze how their values change as the movie plays. See if they change at the wrong time or don’t change at all. If the same variable is used in more than one handler, make sure that each handler that uses the variable states that the variable is global. You can track the values of variables and expressions by displaying their values in the Watcher pane or the Object inspector. -
Page 434
To drag an item to the Object inspector, do one of the following: • Select a sprite in the Score window and drag it to the Object inspector. • Select a cast member in the Cast window and drag it to the Object inspector. •… -
Page 435
To turn off Autopoll: • Select Autopoll from the context menu again You can set the value of an object or property in the Object inspector by entering a new value in the box to the right of the object or property name. To set an object or property value: Double-click the value to the right of the item name. -
Page 436
Entering debugging mode In order to access the Debugger window, a break must occur in a script. A break occurs when Director encounters a script error or a breakpoint in a script. When a script error occurs, the Script Error dialog box appears. The dialog box displays information about the type of error that occurred, and asks you whether you want to debug the script, edit the script in the Script window, or cancel. -
Page 437
When the Debugger window opens, it shows the current line of Lingo and offers several choices for what to run next. To see which is the current line of Lingo: • Look for the green arrow next to a line of Lingo in the Script pane. The green arrow points to the current line. -
Page 438
To display the variables associated with a handler in the call stack: • Click the name of the handler in the Call Stack pane. The variables appear in the Variable pane. The Variable pane includes four tabs for viewing variables: displays both global and local variables associated with the current handler. -
Page 439
To organize objects in the Watcher pane, do one of the following: • To sort the objects in the Watcher pane, click the Name column head at the top of the left column. The object names in the column are listed in alphabetical order. •… -
Page 440
Editing scripts in debugging mode When you are in debugging mode, you may edit your scripts directly in the Debugger window. This way you can fix bugs as soon as you find them and continue debugging. To edit a script in the Debugger window: Click in the Script pane and place the insertion point where you want to begin typing. -
Page 441
To add the selected expression or variable to the Object inspector: • Click Inspect Object. To recompile the movie’s scripts: • Click Recompile All Modified Scripts. Writing Scripts with Lingo 441… -
Page 442
Chapter 16… -
Page 443: 3D Basics
Director MX lets you develop a wide spectrum of 3D productions, ranging from simple text handling to interactive product demonstrations to complete immersive game environments. Using Macromedia’s free Shockwave Player 8.5, users can view your work on the web with Netscape Navigator, Microsoft Internet Explorer, or other Shockwave-supported browsers.
-
Page 444: From 2D To 3D
From 2D to 3D Because Director MX is an evolutionary development, most of what you know about Director still holds true. The following are the main components common to Director MX and earlier versions: • The Stage is the authoring area in which the Director movie is assembled. •…
-
Page 445
• The Behavior library lets you select the behaviors you want to use. • The Behavior inspector lets you create and modify behaviors. For an introduction to the Behavior inspector, see “3D behaviors” on page 452. For a full discussion, see “Using 3D behaviors” on page 466. Also see Chapter 3, “Director MX 3D Tutorial,”… -
Page 446: The 3D Xtra
The 3D Xtra The 3D Xtra lets you include 3D models in a Director movie. You can import 3D models or worlds created with a 3D modeling program and use Director to deliver them on the web. You can also combine the abilities of Director and your 3D modeling software by building a 3D world in your modeling program and adding to it or modifying it in Director.
-
Page 447
• The camera buttons along the side—Dolly, Rotate, and Pan—let you change your viewing angle by zooming in and out, moving around the models, and moving in a straight line horizontally or vertically, respectively. Hold the Shift key while using these tools to make the camera move faster. -
Page 448: Using The Property Inspector For 3D
Using the Property inspector for 3D The Property inspector lets you modify the 3D cast member without using Lingo. The 3D Model tab of the Property inspector offers a simple way to view and control numerous aspects of the 3D world. To view the 3D Model tab: Open the Cast window if it isn’t already open.
-
Page 449: Using Rendering Methods
• The Preload option controls how media that’s being downloaded to the user’s computer is displayed. The media can be held back from display until it has been completely streamed into memory, or it can be displayed progressively on the Stage as data becomes available. •…
-
Page 450: Using 3D Anti-Aliasing
Select a rendering method from the pop-up menu. If you don’t select a rendering method, Director defaults to #auto Below the pop-up menu, the name of the active 3D renderer property appears. The value of this property indicates which rendering method is currently being used. This is especially useful when you want to know which renderer is active while you have selected.
-
Page 451
Determining whether anti-aliasing is supported Not all 3D renderers can perform the additional calculations that anti-aliasing requires. If you have a 3D sprite that you want to anti-alias, check first that the 3D renderer supports anti-aliasing. The renderers that currently support anti-aliasing include the Director software renderer, and DirectX 5.2 and DirectX 7.0. -
Page 452: 3D Behaviors
3D behaviors The Director MX Behavior library includes new 3D-specific behaviors. For more information on these behaviors, see Chapter 3, “Director MX 3D Tutorial,” on page 103. 3D behaviors are divided into four types: • Local behaviors are actions that accept triggers only from the sprite to which they’re attached. •…
-
Page 453
The illustration that follows shows the relationships between the components of a 3D cast member: Your movies can use 2D and 3D cast members simultaneously. For example, a product demonstration movie might consist of a 3D cast member that represents the product and one or more 2D controls that allow users a virtual tryout of the product. -
Page 454
A model’s parent and children don’t have to be models, however. Models, lights, cameras, and groups all share the same parent-child hierarchy. A light, for example, can be the child of a group and the parent of a model. The primary benefit of these parent-child relationships is that they make it easier to move complex models around in the 3D world and to have the component parts of those models move together in the proper way. -
Page 455: The 3D Cast Member, 3D Text, And 3D Behaviors
CHAPTER 18 The 3D Cast Member, 3D Text, and 3D Behaviors This chapter introduces several Macromedia Director MX features that let you create a 3D movie: • A 3D cast member contains a complex internal structure that includes model resources, models, lights, and cameras.
-
Page 456: Model Resources
• Cameras are views into the 3D cast member. Each sprite that uses a given cast member can display the view from a different camera. For more information on sprites, see Chapter 17, “3D Basics,” on page 443. • Groups are clusters of models, lights, and/or cameras that are associated with one another. This makes moving the associated items much easier;…
-
Page 457
The following commands and properties perform basic model resource operations: Command Function Returns modelResource. Returns the number of model resource objects Integer. included in the cast member. count modelResource. Returns the model resource named name. Returns the model resource object named name, if it exists. -
Page 458: Models
Models The models in a cast member are the actual visible objects that are seen in the 3D cast member. Models move according to the motions you assign to them in your 3D modeling software. Their movement results from repositioning and reorienting their geometries in 3D space. The following commands and properties can be used to perform basic model operations: Command Function…
-
Page 459: Textures
Command Function Returns newShader Creates a new shader and adds it to the shader Returns a new shader object with a object list. The type can be #standard, #painter, unique name. If the name isn’t name,type #engraver, or #newsprint. unique, returns a Lingo error. deleteShader Deletes the shader named name.
-
Page 460: Motions
Motions A motion is an animation of a model. Motions can be shared by multiple models. A 3D cast member contains a palette of motions that are available to any model in the world. The following commands and properties can be used to perform basic motion operations: Command Function Returns…
-
Page 461: Cameras
Command Function Returns deleteLight Deletes the light named name. Lingo references to TRUE (1) if the light named name this light persist but can do nothing. exists. FALSE (0) if the light name named name doesn’t exist. deleteLight Deletes the light with the given index number. Lingo TRUE (1) if the light with this index index references to this light persist but can do nothing.
-
Page 462: Groups
Groups Groups are collections of models and other objects that are formally associated with one another. These associations can be created in your 3D modeling software or with Lingo. Each 3D cast member has a default group called world, which is the cast member. Groups simplify the rotation and translation of models by letting all members of a group move together with a single command.
-
Page 463: Modifying 3D Text
Select 3D Mode from the Display pop-up menu. The text on the screen changes to 3D. You can now work with it, as discussed in the next section. Modifying 3D text After your 2D text has been changed to 3D, you can modify it. To modify the 3D text: Click the Property inspector’s 3D Extruder tab.
-
Page 464: Lingo For 3D Text
Select a beveled edge type. Beveling makes the edges of the 3D letters appear rounded or angled. Select Round for rounded edges, and Miter for angled edges. Select a bevel amount. This determines the size of the bevel. Set up the lighting. You can select a color and position for the text’s default directional light.
-
Page 465
Type of Lingo Element Member command scrollByLine Member function charPosToLoc Member function linePosToLocV Member function locToCharPos Member function locVToLinePos Sprite property editable Sprite function pointInHyperLink Sprite function pointToChar Sprite function pointToItem Sprite function pointToLine Sprite function pointToParagraph Sprite function pointToWord Hypertext Lingo hyperlinkClicked Hypertext Lingo… -
Page 466: Using 3D Behaviors
Property Access Description Range or Default Get and set Faces of shape to display. displayFace #front #tunnel #back Default is to show all three faces displayMode Get and set Specifies how the text appears. #modeNormal #Mode3D Default is #modeNormal, which is 2D text Not applicable Creates a new model resource in…
-
Page 467
Using the 3D Behavior Library All 3D behaviors are listed in the Behavior Library. The Behavior Library is divided into two sublibraries: actions and triggers. To view 3D trigger behaviors: Click the Library Palette button on the Director toolbar. Click the Library List button and select 3D. Select Triggers from the 3D submenu. -
Page 468
The action behaviors appear, as shown in the following figure. Local actions When you attach a local action to a sprite, that action responds only to a trigger that is attached to that same sprite. The following table describes the available local actions. Name Effect Description… -
Page 469
Public actions As with local actions, you can add public actions to a movie by attaching them to any 3D sprite. Unlike local actions, public actions are triggered whether the trigger is attached to the same sprite as the action or to any other sprite. Public actions use the same triggers as local actions. The following table describes available public actions. -
Page 470
Applying 3D behaviors You apply 3D behaviors in the same way as standard behaviors in Director MX. You can attach as many behaviors to a sprite as needed, but each behavior that requires a trigger must have a unique trigger to activate it. To apply a 3D behavior: Open the Library palette. -
Page 471
For local behaviors, attach a trigger behavior to the same sprite. For public behaviors, attach a trigger behavior to a specific sprite. The Parameters dialog box appears. You can use this dialog box to control when the trigger should work; what modifier keys, if any, are associated with the trigger; and to which sprite group the trigger is assigned. -
Page 472
Chapter 18… -
Page 473: Working With Models And Model Resources
Director 3D behaviors or Lingo to manipulate camera positions. About models and model resources Models are the objects you see in the 3D world. You can create models within Macromedia Director MX. Spheres, boxes, planes, cylinders, and particle systems can be created either with Lingo or with Director MX behaviors.
-
Page 474: Primitives
Common model resource properties The following properties are shared by all model resources: Property Access Description Range or Name Default name Unique string naming model resource. If imported, the name of the model. If created in Lingo, the assigned name in the constructor function.
-
Page 475
Sphere properties Spheres created at runtime aren’t saved with the cast member’s media when the Director movie is saved. Their . Their surface is generated by sweeping a two-dimensional type #sphere semicircle arc in the xy plane from in the y-axis. If startAngle startAngle endAngle… -
Page 476
Box properties Boxes have a property of . Box properties can be modified or animated at runtime. type #box Property Access Description Value Range height Get and set Height of the box, measured along the y-axis. Positive floating-point value. The default is 50.0 width Get and set… -
Page 477
Plane properties Planes are the default Director MX primitive. Planes, whose property is , are type #plane generated in the xz plane with Lingo. Plane properties can be modified or animated at runtime. Property Access Description Value Range width Get and set Width of the plane Positive floating-point value. -
Page 478
Property Access Description Value Range colorList Get and set List identifying every color in the mesh. Any No default. Instead, set color can be shared by several faces. the value to the number of colors specified in your Alternatively, specify texture coordinates for the newMesh call. -
Page 479
Mesh generator commands Use these commands to work with mesh primitives: Command Description Returns build() Builds the mesh according to the current property values. Nothing (The mesh construction properties specified in the previous build() table have no effect until is called.) Generates a Lingo error if any properties specify an invalid list. -
Page 480
Property Access Description Value Range texture Get and set Texture to use when drawing each particle. The Texture object. void default is emitter. Get and set Number of particles in a burst or stream. Positive integer. The numParticles 1000 default is emitter.mode #burst Get and set… -
Page 481: Cast Member Commands
Property Access Description Value Range emitter.grav Get and set Vector representing simulated gravity. The Any vector. vector’s length indicates its strength. emitter.wind Get and set A vector representing simulated wind pushing Any vector. particles in a given direction. The vector’s length indicates its strength.
-
Page 482: Models
Command Description Returns cloneMotion Performs a deep clone of a motion from one cast member A motion object FromCastMember and puts it into another cast member. name motion castmember newModel Creates a new model resource and adds it to the model New model resource Resource( type…
-
Page 483
Model properties The properties of a model determine its particular appearance and relationship to the rest of the 3D world. Property Access Description Value name Unique string name. Any string. parent Get and set This model’s parent; either another object or the 3D An object or cast cast member itself. -
Page 484
Property Access Description Value visibility #none: Get and set The way in which the sides of the model’s resource are drawn. The choices are as follows: #front #none , in which no polygons are drawn and the #back model is invisible. #both #front , in which only polygons on the outer… -
Page 485
Command Description Returns clone( name name) Clones a model named , adds it to the child list of the Lingo model object model’s parent, and adds it to the world. The clone shares the same model resource, shader list, and parent as the original model, but it has unique copies of the model’s transform and modifier properties. -
Page 486
Command Description Returns translate xIncrement Moves the model forward by along the x- Nothing yIncrement zIncrement xIncrement, axis, along the y-axis, and yIncrement, along the z-axis. zIncrement, relativeTo parameter is optional. It determines relativeTo how arguments are interpreted. The possible values are as follows: #self : the default. -
Page 487: Shaders
Moving models Because the 3D world has no absolute frame of reference, moving and rotating is much more complex than in 2D, where all movement is in relation to screen position. In 3D, everything is drawn relative to the camera’s frame of reference. If the camera is behind an object, when the object moves to the left relative to the center of the world, or world origin, it appears to move toward the right of the screen.
-
Page 488
Properties of the standard shader The standard shader makes the surface of a model appear in a photorealistic style. Use these properties to work with the standard shader: Property Name Access Description Default name The string name of this shader. None ambient rgb(63,63,… -
Page 489
Property Name Access Description Default textureList void Get and set A shader can use up to eight layers of textures. This eight-element list defines which texture is used for which layer. Get: Returns a list of texture objects, one per layer. -
Page 490
Property Name Access Description Default textureMode #none Get and set This property allows access to the texture List[index] coordinate generation function used for a texture at the texture level and then to allows you to change how textures are applied to a model’s surface. -
Page 491
Property Name Access Description Default wrapTransform transform(50 Get and set Controls the orientation of UV generation in List .0000,0.0000 model space. ,0.0000,0.00 Get: Returns a list of texture coordinate generation transforms, one per layer. 0.0000,50.00 Set: Specifies a texture coordinate generation 00,0.0000,0. -
Page 492
Property Name Access Description Default blendFunction #multiply Get and set Access to the blending function associated List[index] with a texture layer at the position indicated by index , which must be a positive integer smaller than or equal to 8. Possible values are as follows: #replace #multiply… -
Page 493
Property Name Access Description Default blendConstant 50.0 Get and set The blending ratio used for the first layer when #blend the blend function is set to blendSourceList[index] is set to #constant . Returns a floating-point value 100.0 from textureRepeat TRUE (1) Get and set Allows you to get or set the texture clamping List[index]… -
Page 494: Textures
Property Access Description Default highlight Get and set Percentage of lighting steps to be treated as Percentage highlight shadowStrength Get and set Factor controlling darkness of shadowed areas highlight Get and set Factor controlling brightness of highlighted Strength areas Properties of the newsprint shader shader creates a dithering effect similar to a newspaper photograph.
-
Page 495
Texture properties Use these properties to work with textures: Property Access Description Default name Get and set Name of texture. None type Possible values: None #fromfile : bitmap defined as part of 3D import #castmember : bitmap derived from Director cast member member #castmember… -
Page 496: Groups
Groups Groups have many of the same properties and commands as models, except that you need to substitute the word for the word when writing Lingo scripts. A group can contain group model models, lights, cameras, or other groups. Group properties The properties of the group determine its particular appearance and relationship to the rest of the 3D world.
-
Page 497
Group commands Use these commands to work with groups: Command Description Returns addChild( aNode aNode, Adds to this group’s list of children. An equivalent Nothing aNode.parent this group preserveWorld operation is to set to equal preserveWorld argument is optional. It can have two #preserveWorld #preserveParent values:… -
Page 498: Modifiers
Command Description Returns translate xIncrement Moves the group forward by along the x-axis, Nothing yIncrement zIncrement xIncrement, along the y-axis, and along the yIncrement, z-axis. zIncrement, relativeTo parameter is optional. It determines how relativeTo arguments are interpreted. The possible values are as follows: #self : the default.
-
Page 499
Use these properties to work with the level of detail modifier: Property Access Description Default .lod.auto TRUE (1) TRUE (1) whichModel Get and set means that polygons are automatically reduced based on the distance from the camera. The fewer polygons that are drawn, the faster performance will be. -
Page 500
Property Access Description Default .toon. whichModel Get and set Lingo color object describing line color Black lineColor (rgb 0,0,0) .toon. TRUE (1) FALSE (0) TRUE (1) whichModel Get and set value indicating silhouettes presence or absence of lines around silhouettes .toon. -
Page 501
Use these properties to work with the SDS modifier: Property Access Description Default .sds.enable TRUE (1) whichModel Get and set Enables/disables subdivision surfaces modifier functionality. .sds. #uniform whichModel Get and set The following are the possible values: subdivision #uniform : mesh is uniformly scaled up in detail, with each face subdivided the same number of times #adaptive… -
Page 502: Animation Modifiers
Property Access Description Default .collision. TRUE (1) FALSE (0) TRUE (1) whichModel Get and set value indicating resolve whether collisions are automatically resolved. TRUE (1) If the value is and if the other collision model has the modifier applied enabled TRUE (1) and has set to…
-
Page 503
The two animation types can be combined. You might, for example, combine a “run in place” bones animation with a “move around the room” keyframe animation. Bones animations use the Bones player modifier. Keyframe animations use the Keyframe player modifier. Most commands and properties are available to both players. •… -
Page 504
Bones player commands Use these commands to work with bones animations: Command Description Returns .bonesPlayer. name whichModel Plays the motion named starting at the Nothing play( timeOffset “name”, looped, startTime, endTime, time , with the currently playing playRate motion being pushed down the play list. If looped FALSE (0) , the preceding… -
Page 505
Property Access Description Default whichModel Get and set Current local time of motion at the top of the bonesPlayer. play list, in milliseconds. The motion’s duration currentTime property tells you how long the animation lasts. whichModel Get and set A value indicating how quickly or slowly to play bonesPlayer. -
Page 506
Property Access Description Default #all whichModel Get and set Normally a model snaps back to its original bonesPlayer. rotation after a motion finishes playing. This rotationReset property maintains any or all of the rotational changes after playing is complete. The values are as follows: #none #all #none… -
Page 507
Keyframe player commands Use these commands to work with keyframe animations: Command Description Returns .keyframePlayer.play name whichModel Plays the motion named starting at the Nothing (» » startTime name , looped, startTime, endTime, time , with the currently playing playRate motion being pushed down the play list. -
Page 508
Property Access Description Returns whichModel Get and set A value indicating how quickly or slowly to keyframePlayer. play back the motion. For example, a value of playRate 2.0 doubles the speed of the motion; a value of 0.5 halves the speed of the motion. This value is multiplied by the value of the playRate play… -
Page 509
Property Access Description Returns #all whichModel Get and set Normally a model snaps back to its original keyframePlayer. rotation after a motion finishes playing. This rotationReset property maintains any or all of the rotational changes after playing is complete. The values are as follows: #none #all #none… -
Page 510: Motions
Use these properties to work with the mesh deform modifier: Property Access Description whichModel Returns the number of meshes in a model. meshDeform. mesh.count whichModel Get and set Returns a list of the vertices for the specified mesh. To meshDeform. modify the vertices in this mesh, set this property to a list of mesh[ index…
-
Page 511: About Lights And Cameras
You can add lights to your 3D world in your 3D modeling application or with the Macromedia Director MX Property inspector. For information on the Property inspector, see Chapter 17, “3D Basics,” on page 443. You can also add and remove lights, change their color or position, and manipulate their parent-child relationships using Lingo commands and properties.
-
Page 512: Light Properties
Light properties Use these properties to work with lights: Property Name Access Description Default name Unique name of this light. None If the light was exported from a 3D modeling package, the name is the name assigned there. parent Group Get and set The model, light, camera, or group that is this («World»)
-
Page 513: Light Commands
Property Name Access Description Default spotDecay TRUE (1) FALSE (0) FALSE (0) Get and set value that controls whether or not spotlight intensity falls off with camera distance. pointAt None Get and set Two orthogonal vectors Orientation (objectRelativeDirection objectRelativeUp) controlling how the pointAt light’s command works.
-
Page 514
Command Description Returns registerScript handlerName TRUE (1) Registers a handler named that is called in the (eventName, scriptInstance eventName FALSE (0) instance when the event occurs. handlerName, TRUE (1) with scriptInstance is 0, a movie script handler called scriptInstance) indicating that the eventName is called. -
Page 515: Cameras
Cameras Cameras act as view ports into the 3D world. By default, a newly added camera’s view is positioned at the world’s origin, the vector (0,0,0), and looks down the negative z-axis. Changing a camera’s property affects the camera’s position and orientation. When a 3D sprite is transform created from a 3D cast member, the sprite uses one of the cast member’s cameras.
-
Page 516
Property Name Access Description Default colorBuffer. TRUE (1) FALSE (0) TRUE (1) Get and set clearAtRender value indicating whether color buffer is or isn’t cleared out after each frame. TRUE (1) If value is set to , the effect is similar to the trails ink effect, although it’s limited to the redrawing of models within the sprite itself. -
Page 517
Property Name Access Description Default overlay[ O, O index Get and set Rotation value used by a specific overlay in rotation the camera’s list of overlays. overlay[ 100.0 index Get and set Blend value used by a specific overlay in blend the camera’s list of overlays. -
Page 518
Camera commands Use these commands to work with cameras: Command Description Returns addChild( aNode aNode Adds to this camera’s list of children. An equivalent Nothing aNode.parent thisCamera preserveWorld operation is to set to equal preserveWorld argument is optional.I t can have two #preserveWorld #preserveParent values:… -
Page 519
Command Description Returns translate xIncrement Moves the camera forward by along the x-axis, Nothing yIncrement zIncrement xIncrement along the y-axis, and along the z- yIncrement axis. zIncrement relativeTo parameter is optional. It determines how relativeTo arguments are interpreted. The possible values are as follows: #self : the default. -
Page 520
Chapter 19… -
Page 521: Controlling The 3D World
CHAPTER 20 Controlling the 3D World Macromedia Director MX provides powerful methods for overall control of the three-dimensional (3D) world, including Lingo for handling new 3D-generated events, selecting models (picking), vector math operations, and transforms. In addition, the properties and methods of the Director global renderer services object supply common rendering properties for all 3D sprites and cast members.
-
Page 522: Collisions
Use these commands to set up event handling: Command Description Returns registerForEvent eventName TRUE (1) The event is one of the following: if the operation eventName succeeds. #collideAny : Called when any collision occurs. handlerName FALSE (0) if the #collideWith : Called when a collision with a specific scriptInstance operation fails.
-
Page 523
Property Access Description pointOf Vector describing world-space location of collision. Available Contact only if the collision has been resolved. Occurs if the model’s resolve TRUE (1) collision modifier property is or either the collisionData resolveA() collisionData resolveB() method is called. collision Vector indicating direction of collision. -
Page 524: Vector Math
Camera commands These camera functions allow you to determine which models have been clicked when a user clicks the mouse within a 3D sprite. You can also translate coordinates in 3D space to coordinates in 2D sprite space and vice versa. Function Description Returns…
-
Page 525
Vector creation commands Use these functions to create vectors: Function Description Returns vector Creates a vector from arguments representing all axes. A vector object (x,y,z) random Creates a vector describing a randomly chosen point on the A unit vector Vector() vector(random(10)/ surface of a unit sphere. -
Page 526: Transforms
Command Description Returns distanceTo vector vector2 Returns the distance between . If these Floating-point value of vector2 vectors represent positions in the 3D world, this is the distance distance. between them. duplicate() A copy of the vector. A new vector object. Vector binary operations Use these syntaxes to perform additional vector math calculations: Operator…
-
Page 527
Transform properties Use these properties to work with transforms: Property Access Description Default position vector Get and set Lingo vector object describing the position of (0,0,0) a transform with the value vector(xOffset, yOffset, zOffset) . A model.transform position represents the model’s position in relation to its parent. -
Page 528
Property Access Description Default y axis vector Get and set A vector representing the transform’s (0,1,0) canonical y axis in transform space. Example: transform.identity() transform.rotate(90,0,0) put transform.yaxis —vector(0,0,1) z axis vector Get and set A vector representing the transform’s (0,0,1) canonical z axis in transform space. -
Page 529
Command Description Returns translate Translates the position of the transform relative to the transform’s Nothing xIncrement,yIncre current orientation: ment,zIncrement model.transform.identity() model.transform.rotate(0,90,0) model.transform.translate(100,0,0) After this series of transformations, performed in this order, the model’s (100,0,0) local origin will be at , assuming the model’s parent is the world. -
Page 530: Rendering Functionality
Transform operator Use the asterisk (*) to multiply two transforms: Operator Description Returns transform1 * Returns a new transform that is the product of the two original A new transform transform2 transforms. Useful for combining the effects of two transforms. object Rendering functionality The Director global…
-
Page 531
Property Access Description Default modifiers A list of modifiers available for 3D cast None members. Possible values are as follows: #lod #toon #sds #bonesPlayer #keyframePlayer #inker #collision #meshDeform primitives A list of basic 3D shapes available for all 3D cast None members. -
Page 532
Property Access Description Default colorBuffer Either 16 or 32, depending on the hardware None Depth card. Controls the precision of the hardware output buffer. getHardware Returns a property A property list with the following entries: Info() list of the specifics of #Present TRUE (1) if the card is present;… -
Page 533
Use the following properties to work with 3D cast members in Lingo: Property Access Description Default preload TRUE (1) FALSE (0) Get and set specification of None whether the member is preloaded before display and playback or streamed in during playback. This property is only available for linked cast members. -
Page 534
Property Access Description Default texture Get and set Name of cast member to use as the source for the No texture Member textureType default texture when is set to #member percent Percentage of file that has been downloaded, with None Streamed values from bytes… -
Page 535
Property Access Description Default targetFrame Get and set Controls the desired playback speed. If the Rate useTargetFramerate TRUE (1) property is lod.bias then the property of all model resources is dynamically altered until the target frame rate is met. useTarget TRUE (1) Get and set If a target frame rate has been set and you want to… -
Page 536
Chapter 20… -
Page 537: Chapter 21 Movies In A Window
You can create and control movies in windows using behaviors from the Behavior Library or by writing your own Lingo scripts. Macromedia Shockwave does not support MIAWs. Use MIAWs only with movies that you intend to distribute as projectors (see “About distribution formats” on page 574 and “About projectors”…
-
Page 538: Creating A Miaw Using Lingo
Creating a MIAW using Lingo In Lingo, you create a MIAW by specifying a window’s rectangle ( property) on the Stage rect and then specifying the filename for the movie that is assigned to the window. You can also make the window visible, change its type, set its title, and set the window’s size and location.
-
Page 539: Setting The Window Type For A Miaw
Opening a MIAW Before you can play a movie in a separate window, you must open the window explicitly with Lingo. To open a MIAW: • Use the command. open window Unless Lingo explicitly preloads the movie, Director doesn’t load the movie into memory until the window is opened, which can cause a noticeable pause.
-
Page 540: Setting The Window Size And Location For A Miaw
To specify the window type for a MIAW: • Assign a value for the property. windowType Different numerical values for the property specify different types of window windowType styles. When you don’t specify a window type, Director uses a movable, sizable window without a zoom box and with a title bar, which is type -1.
-
Page 541: Controlling The Appearance Of A Miaw
To scale a MIAW: • Set the property to coordinates that are smaller than the MIAW’s original size and drawRect apply the position to the window, as shown in the following example: set aRect = [0, 0, 200, 300] set window(«Sample»).drawRect = aRect — sets window size to 200 x 300 set window(«Sample»).drawRect = aRect/2 — scales the window to half its original size When the…
-
Page 542: Controlling Interaction Between Miaws
Controlling interaction between MIAWs Movies can interact with each other by sending Lingo messages back and forth. This lets movies share current values for variables, share information about current conditions, and send each other Lingo instructions. Global variables can be declared in the main movie (the Stage) or in a MIAW. No matter where they are declared, they are available to the main movie and to all movies that are playing in windows.
-
Page 543: Using The Xml Parser Xtra
CHAPTER 22 Using the XML Parser Xtra The XML Parser Xtra lets Macromedia Director MX movies read, parse, and use the contents of Extensible Markup Language (XML) documents. Using the XML Parser Xtra requires that you understand the structure and content of the documents you are parsing. You can then access the XML document’s contents through Lingo or convert the contents to a Lingo list that is…
-
Page 544: Using Xml Parser Objects
Using XML parser objects The XML Parser Xtra lets Director developers access the nodes of an XML document. A node can be a tag (similar to an HTML tag, also called an element), character data (text that does not appear inside the angle brackets of a tag), or a processing instruction (a special type of tag that passes data to the parsing application for special processing).
-
Page 545: Using Xml Document Nodes
The following Lingo statement uses the command to convert the parsed data to a makeList() property list: theList = gParserObject.makeList() If you choose to make a property list with the command, the result is a nested makeList() property list, reflecting the tree structure of the XML. Each element in the document is represented by its own property list, with another property list for each child element that it contains.
-
Page 546
You use Lingo to access the nodes of an XML document. The following table shows the Lingo terms that refer to nodes and their properties: Node Lingo Return value if an Return value if text Return value if Processing Instruction element type #element… -
Page 547
variable contains the parsed XML. When used in the preceding Lingo, it gParserObject refers to the root node of the XML document. The Lingo term refers to the first level child[1] of nested tag, which is the tag. To find out what kind of node the first tag is, use the function, as shown in the following type example:… -
Page 548: Accessing Attributes
Accessing attributes Some XML tags contain attributes with values. Use the Lingo attributeName properties to access the attributes of tags that have values. In the previous XML attributeValue example, the first tag nested inside the tag is called and has two attributes called tagName attr1 attr2…
-
Page 549: Treating White Space
Treating white space The default behavior of the XML Parser Xtra is to ignore character data between XML tags when all the characters are white space. This type of white space is usually due to Return characters and superfluous space characters, but sometimes it can have meaning to the XML document. You can use the function to change the way the Xtra treats white space.
-
Page 550
The XML Parser Xtra supports the following character sets: • Also called Latin 1. This is the most common Western encoding used on the web. ISO-8859-1 It matches the default character set used on Windows in most Western countries. It does not match the character set used in most Western versions of the Mac OS (MacRoman) and does not match character sets commonly used in most non-Western countries. -
Page 551: Making Director Movies Accessible
CHAPTER 23 Making Director Movies Accessible As a Macromedia Director MX author, you might want to provide ways for computer users with disabilities to experience the movies that you create. Director includes accessibility features that let you do this. By using these features, you can make existing and new movies accessible to users who have hearing, visual, or mobility impairment.
-
Page 552: Using The Accessibility Behavior Library
Using the Speech Xtra The Speech Xtra adds special commands to Lingo that enable the Director text-to-speech capability. The text-to-speech behaviors require this Xtra because they use these Lingo commands. If you write custom text-to-speech Lingo scripts, you need to include the Speech Xtra in your movie’s Xtra list.
-
Page 553
Enabling keyboard navigation With the Accessibility Behavior library, you can easily make sprites on the Stage navigable with the keyboard. This lets mobility-impaired users select sprites and simulate mouse clicks without using a mouse. For example, if you have four button sprites on the Stage, you can apply accessibility behaviors that let them be selected by using the Tab key. -
Page 554
In the dialog box that appears, enter a name for the behavior group. Because the accessibility behaviors work together and are dependent on one another, a group name associates all the accessibility behaviors used in a given scene of your movie with one another. -
Page 555
You can specify a Lingo string to be executed when the user presses Enter (Windows) or Return (Macintosh) while the sprite is selected. You can use any valid Lingo string, such as a command or a call to a separate handler that you have written, such as to frame 20 startAnimation Click OK… -
Page 556
To apply the Accessibility Speak behavior: Begin by applying the keyboard navigation behaviors to sprites in your scene. For more information, see “Enabling keyboard navigation” on page 553. Drag the Accessibility Speak behavior from the Library palette to the sprite you want to trigger the spoken text when the user navigates to it with the Tab key. -
Page 557
To apply the Accessibility Speak Enable/Disable behavior: Apply the keyboard navigation behaviors to sprites in your scene. For more information, see “Enabling keyboard navigation” on page 553. Drag the Accessibility Speak Enable/Disable behavior from Library palette to the sprite you want to use to toggle the text-to-speech behaviors. -
Page 558
To apply the Accessibility Sync Caption behavior: Apply the keyboard navigation behaviors to sprites in your scene. For more information, see “Enabling keyboard navigation” on page 553. Apply the text-to-speech behaviors to sprites in your scene. For more information, see “Enabling text-to-speech”… -
Page 559: Using Accessibility Lingo
Using accessibility Lingo If you have a basic understanding of Lingo, you can write custom scripts to add text-to-speech functionality to your movies. For more information about Lingo, see Chapter 16, “Writing Scripts with Lingo,” on page 385. First, you must initialize the speech software. To initialize the text-to-speech software: •…
-
Page 560: Deploying Accessible Movies
To check whether the speech is currently speaking, paused, or stopped: • Use the function. voiceState() To set the volume of the voice: • Use the command. voiceSetVolume() To set the pitch of the voice: • Use the command. voiceSetPitch() To determine the chronological number of the current word within the string being spoken: •…
-
Page 561
Macintosh OS 8.6 and later include text-to-speech software. No additions are necessary. Understanding the Xtra download process Because the Speech Xtra is from Macromedia, it is considered a trusted download. The user does not have to interact with any dialog boxes for the download to occur. When a user encounters an accessible Shockwave movie for the first time, the Xtra downloads automatically. -
Page 562
Chapter 23… -
Page 563: Chapter 24 Managing Memory
CHAPTER 24 Managing Memory Macromedia Director MX has effective built-in memory management that is sufficient for most projects. To make memory available for new sprites, Director simply unloads the cast members used for sprites that are no longer on the Stage. However, sometimes large cast members, such as high resolution images, large sounds, or digital video, can take longer to load or unload than typical, smaller cast members.
-
Page 564: Loading And Unloading Individual Cast Members
Whenever Director runs low on memory, such as when trying to load many large cast members, other cast members are automatically unloaded from memory, according to the following rules: • The first cast members to be unloaded are those that have a value of 3.
-
Page 565: Preloading Digital Video
Preloading digital video It is recommended that you do not preload digital video cast members. Digital video is played by streaming the video file from a disk. As the file is streamed, it is decompressed into memory one section at a time. Preloading a digital video file causes the entire file to be decompressed into memory at once, which can cause low memory situations on most computers.
-
Page 566
Chapter 24… -
Page 567: Managing And Testing Director Projects
CHAPTER 25 Managing and Testing Director Projects As you work with Macromedia Director MX and develop projects with it, you might encounter some situations where a seemingly small change in the design of a project has a significant effect on the organization of the Director files and media files associated with it. A little bit of planning before you start a Director project can help avoid difficult changes during the course of development.
-
Page 568: About Testing Movies To Avoid Problems
• Organize the cast members in your cast in a logical way. You might choose to group all the cast members of a particular type together, or you might choose to group the cast members from each scene together. Choose a system that works for you and that will make it easy to find cast members when your cast becomes large.
-
Page 569
Occasionally the server’s MIME types might need editing to include the MIME types for Director. For more information, see Director TechNote 16509, Configuring your server for Macromedia Shockwave Player, at www.macromedia.com/ support/flash/ts/documents/tn4151.html. •… -
Page 570
Director movies: • Chapter 16, “Writing Scripts with Lingo,” on page 385 contains extensive information about debugging Lingo scripts. • Index of Director testing and troubleshooting TechNotes, at www.macromedia.com/support/ director/troubleshoot.html • TechNote 13872, General troubleshooting tips, at www.macromedia.com/support/general/ts/ documents/troubleshooting_pt87.htm •… -
Page 571: Packaging Movies For Distribution
CHAPTER 26 Packaging Movies for Distribution When you finish authoring your Macromedia Director MX movie, you have a choice of several ways to prepare it for distribution. You can distribute a movie in the Shockwave format that plays in a browser or as a stand-alone projector. Stand-alone projectors can contain the software necessary to play the movie, or they can use an installed Shockwave player to play the movie independently of a browser.
-
Page 572: Previewing A Movie In A Browser
For details about security issues when playing a movie in a browser, see “Director and Internet Security” in the Director Support Center at www.macromedia.com/support/director/internet/ security/.
-
Page 573
The Shockwave player includes the Xtra extensions that support the most common features and media types. These include text; vector shapes; Macromedia Flash; BMP, PICT, JPEG, and GIF file importing; sound management; and Shockwave Audio. Xtra extensions not included with the Shockwave player must be installed in a user’s system before the movie plays. -
Page 574: Managing Xtra Extensions For Distributed Movies
Managing Xtra extensions for distributed movies You can manage Xtra extensions for your movie using the Modify menu. To manage Xtra extensions for the current movie: Select Modify > Movie > Xtras. To add or remove Xtra extensions, do any of the following: •…
-
Page 575
• A projector is a movie intended for play outside of a web browser. A projector can include a player (called the Standard player), Xtra extensions, multiple casts, and linked media in a single file. A projector can also include several different movie files. Configured in this way, a projector can be a completely stand-alone application. -
Page 576: Creating Shockwave Movies
Creating Shockwave movies You save your work as a Shockwave (DCR) movie to prepare it for playback in a Shockwave- enabled web browser, or to make disk-based movies smaller. Using a Shockwave movie also prevents your users from editing the movie if they own Director. If the Shockwave movie you’re creating will be distributed on the Internet and requires any Xtra extensions, make sure the Xtra extensions are listed in the Movie Xtras dialog box and that Download If Needed is selected for each required Xtra extension.
-
Page 577
Changing Publish settings You can change Publish settings by using the Publish Settings dialog box. To change Publish settings: • Select File > Publish Settings. The Publish Settings dialog box appears with some or all of the following tabs, depending on the HTML template you select: Formats, General, Shockwave, Compression, Shockwave Save, and Image. -
Page 578
To use the General tab: • To make the DCR movie match the dimensions of your DIR movie, select Match Movie in the Dimensions field. • If you use the default Match Movie setting in the Dimensions field, values in the OBJECT tags in the HTML file are set to the exact dimension of your movie. -
Page 579
Shockwave movie. If you do not specify a URL, Shockwave attempts to provide one. To avoid unpredictable results, Macromedia highly recommends that you provide the URL. • To specify the path to a BMP file, use the Icon File field. -
Page 580: Setting Movie Options For Browser Resizing
For more information about the Shockwave Save fields, and for detailed instructions on developing for Shockmachine, see “Shockmachine development guide for Director” at www.macromedia.com/support/director/internet/shockmachine_for_d8/ in the Director Support Center. If you selected the Shockwave with Image HTML template on the Formats tab, the Image tab appears on the Publish Settings dialog box.
-
Page 581
• To maintain the same aspect ratio of your original Director movie no matter what size the user makes the browser, select Preserve Proportions. The movie will fit within the width and height parameters, as much as possible, while preserving the movie’s aspect ratio. The movie aligns within the window based on the align tags that you specify in step 4. -
Page 582: About Projectors
To specify align tags for your movie, use the Horizontal Align and Vertical Align pop-up menus. You can select left, center, or right horizontal alignment, and top, center, or bottom vertical alignment. About projectors To create projectors for any version of Windows, you must use the Windows version of Director; likewise, you can create Macintosh projectors only with the Macintosh version of Director.
-
Page 583
To control how movies interact with the user’s system, select Playback options: specifies that the projector play all movies in the play list. Otherwise, the Play Every Movie projector plays only the first movie in the play list (unless other movies are called by Lingo from the first movie). -
Page 584
To determine how the player code is included in the projector, select an option for Player. includes the uncompressed player code in the projector file. This option starts the Standard movie faster than other options but creates the largest projector file. includes a compressed version of the player code in the projector file. -
Page 585: Processing Movies With Update Movies
In your Director application folder, copy the Xtra extensions required to play your movie into the Xtras folder you just created. You must also include external movies, external casts, and linked media with your projector. If the external files are in the folder that contains the projector, the projector can automatically link to the files.
-
Page 586: Exporting Digital Video And Frame-By-Frame Bitmaps
Click OK. A dialog box appears from which you select the files to change. Select the movies and casts you want to change and click one of the following: • Click Add to add the selected files. • Click Add All to add all the movies in the current folder. The items you select appear in the file list at the bottom of the dialog box.
-
Page 587
Select the range of frames you want from the Export options at the top of the dialog box: exports the current frame on the Stage. This is the default. Current Frame exports the selected frames in the Score. Selected Frames exports all frames. -
Page 588: Setting Quicktime Export Options
Setting QuickTime export options You use the QuickTime Options dialog box to specify options for exporting a movie as a QuickTime digital video. This dialog box appears when you click the Options button in the Export dialog box and QuickTime is the specified format. To set QuickTime export options: Select File >…
-
Page 589
To reduce the file size of a QuickTime movie at the expense of quality, select an option from the Compressor pop-up menu. Different options appear on the Compressor pop-up menu depending on the video hardware and software available in your system. Consult your QuickTime documentation. -
Page 590: About Organizing Movie Files
About organizing movie files In most cases, you should divide a large production into a series of smaller movies. You can combine as many movies as you want in a projector, but larger files take longer to save and are cumbersome to work with.
-
Page 591: Using Shockwave Player
CHAPTER 27 Using Shockwave Player Macromedia Director MX movies can use the Internet in various ways: hosting multiuser sessions such as chats and games, streaming movies and sounds, retrieving data from the network, and interacting with a browser. Whether it is distributed on disk or downloaded from the Internet, a movie can use an active network connection to retrieve linked files, send information, open web pages, and perform many other network activities.
-
Page 592: About Network Operations
If the movie jumps ahead in the Score or uses cast members that are referenced only by Lingo scripts, the required cast member might not be available when necessary. If cast members are not available, the movie either ignores them or displays a placeholder, depending on how you set the streaming options in the Movie Playback Properties dialog box.
-
Page 593: Setting Shockwave Playback Options
Setting Shockwave playback options To view Shockwave movies, your users must have the Shockwave player, which comes preinstalled on many computer systems. The player is also available for free downloading from Macromedia’s website at www.macromedia.com/shockwave/download/. The Shockwave player includes a volume control and a standard context menu that appears when a user right-clicks (Windows) or Control-clicks (Macintosh) a movie.
-
Page 594: About Creating Multiuser Applications
If you want to create multiuser movies or applications with Director, you need to use Macromedia Flash Communication Server MX in your Director movie. You do this by importing a Flash movie into your Director movie. This can be a Flash movie that has already been authored to communicate with the Flash Communication server or a simple Flash movie that can serve as a container for Flash script objects that you create with Lingo.
-
Page 595: Checking Whether Media Elements Are Loaded With Lingo
Looping behaviors Looping behaviors make the playhead return (loop) to a frame or stay on the current frame until specified media elements have been downloaded and then continue to the next frame. Attach a looping behavior to a frame in the script channel, not to a sprite. The following looping behaviors are accessible by selecting Internet >…
-
Page 596: Downloading Files From The Internet With Lingo
Checking whether a frame’s contents are loaded Use the function to determine whether all the media elements that the specified frameReady() frame requires are available locally. See in the Lingo Dictionary. frameReady() Downloading files from the Internet with Lingo Lingo uses the Internet’s resources by obtaining files from the Internet. The data is copied to the local disk or cache.
-
Page 597: Retrieving Network Operation Results With Lingo
To retrieve a file as text: Use the function or the command to start retrieving text. See getNetText() postNetText in the Lingo Dictionary. getNetText() postNetText Use the function to return the text you retrieved with netTextResult() getNetText . See in the Lingo Dictionary. postNetText netTextResult() To retrieve and play a new Shockwave movie from the network:…
-
Page 598: Using Lingo In Different Internet Environments
Internet environment. For details about security concerns when playing a movie on the Internet, see “Director and Internet Security” on the Director Support Center website at www.macromedia.com/support/director/internet/security/. In general, the following Lingo features are unsupported because of Internet security concerns: •…
-
Page 599
Using URLs with Lingo In addition to the Lingo that is explicitly intended for use with network operations, some Lingo elements can use URLs as references to external files. The following Lingo elements can use URLs as file references in all circumstances: •… -
Page 600
The default folder locations for Windows and Macintosh are described in the following list: The MacromedShockwave 8 subfolder of the system folder; the system folder is Windows typically c:winntsystem32 or c:windowssystem The System Folder:Extensions:Macromedia:Shockwave 8 folder Macintosh command can’t write to a file that is on a CD. setPref For more information, see “Director and Internet Security”… -
Page 601: Testing Your Movie
Testing your movie However you select to create your movie, test it thoroughly before releasing it to the public. Make sure you test on systems with all common types of Internet connections, especially on slow modems and at busy times of day. The following list describes things you might want to check before distributing your movie over the Internet;…
-
Page 602
Chapter 27… -
Page 603: Index
INDEX Symbols actions, Behavior inspector & operator 291 Beep 364 && operator 291 Change Cast Member 364 ¬ (continuation symbol) 414 Change Cursor 364 Change Ink 364 Numerics Change Location 364 2D text, converting to 3D text 455 Change Palette 364 3D cast members 455.
-
Page 604
animated cursors axis creating 382 and camera movement 447 using 381 and model generation 475 animated GIFs 205 and model movement 486, 487, 498 tempo 205 camera movement 469 animation colors 469 animated color cursors 381 in animation 491, 506, 509 Cast to Time command 195 defined 185 background color 179… -
Page 605
bitmaps cache, clearing 47 animated GIFs 205 call command 370 Auto Filter command 233 cameras changing color palettes and color depth 220 commands 518, 524 changing selected areas 214 defined 454, 515 compared to vector shapes 204 manipulating 447, 448, 468, 469 compressing 579 overview 511 controlling with Lingo 222… -
Page 606
cast members (continued) casts (continued) editing script of 134 opening in new window 134 editing text 276 preferences 138 finding 144 saving 153 Flash 294 saving as libraries 154 formatting text in 280 centering the Stage 46 formatting text with Lingo 289 centimeters, specifying as unit of measure 278 icons 138 Change Cast Member action 364… -
Page 607
color (continued) compressing choosing 257 bitmaps 579 choosing color palettes 259 movies 576 color menu 257, 259 sounds. See Shockwave for Audio color picker 257 concatenating strings 410 diffuse 449 conditions favorite colors 258 describing 392 of sprites 179 in a movie 392 overview setting 402 RGB and index 255… -
Page 608
cropping digital video cast member properties 333 movie in a window 540 Direct to Stage digital video property 334 videos 339 Direct to Stage Flash movie 295 cross-platform issues. See mapping fonts and special directional light 449 characters Director 5 and later movies, updating 45 cross-platform keys 380 Director 8, similarities to 444 cue points, using with Lingo 329… -
Page 609
144 movies as digital video 586 sprite locations with Lingo 380 QuickTime options 588 text 281 to Macromedia Director 241 First frame option 165 expressions, definition of 389 Flash Communication Server MX 306, 309 Extend Sprite command 174… -
Page 610
Flip command 163 Full Screen projector option 583 flipping functions Flash movies with Lingo 298 charToNum 381 sprites 178 contains 290 floating-point numbers 405 definition of 390 flow of Lingo scripts 386, 410 getError 328 Fontmap.txt file 28, 284 getErrorString 328 fonts getVariable() 301 embedding in a movie 274… -
Page 611
grid 169 importing (continued) aligning sprites to 170 linking to files 149 configuring 171 PICS and Scrapbook 150 groups (3D) 454 Preserve Original Data for External Editing commands 462 option 148, 151 overview 471 sound 320 guides 169 supported file types 149 adding and configuring 170 text 276 aligning sprites to 170… -
Page 612
internal sounds LANs, movies on 575 compressing 326 Lasso tool (Paint window) 206, 211 using 320 Launch When Needed option 47 Internet level of detail (LOD) connection settings 47 and model resources 474 digital video and 340 modifier 469 distributing movies on 575 level of detail (LOD) modifier See Also network operations automatic assignment of settings 474… -
Page 613
149 Macromedia Director linked movie cast member properties 314 cast members 243 linking external casts 153 exporting to 241 List view, in Property inspector 448 placing Fireworks files in 240 lists Magnifying Glass tool 29 adding items to 401… -
Page 614
messages (continued) movie in a window (continued) order of 395 creating with Lingo 538 order of locations sent to 397 cropping 540 to sprite scripts 369, 370 events involving 542 when Lingo responds 397 handlers for 542 methods, displaying for an Xtra 414 listing 541 MIAW. -
Page 615
naming cast members 136 object-relative model movement 487 navigation obtaining data from a network 596 creating basic controls 374 on new handler, creating 420 jumping and coming back 376 one-frame sprites, stretching 173 jumping to different locations 375 onion skinning jumping to URL 376 description of 234 markers 42… -
Page 616
painter shader 493 Play Animation option, in Property inspector 449 Palette Cast Member Properties dialog box 266 Play Cast Member action 364 palette index color 255 play command 376 specifying 28 play done command 376 palette transition 260 Play Every Frame digital video property 335 palettes. -
Page 617
properties QTVR. See QuickTime VR actorList 422, 423 QuickTime cast member 142 controlling with Lingo 337 constraint 378 creating interaction with Lingo 338 definition of 390, 398 exporting options 588 height 176 importing files 147 loc of sprite 172 masks 337 locH 172 rotating and scaling with Lingo 338 locH of sprite 172… -
Page 618
Reset Rotation and Skew command 178 Score (continued) Reset World button 447 digital video in 335 resizing sprites 175 displaying sprite information in 41 resolution for screen images 204 editing frames 43 Restore Cursor action 364 Extended display 166 return function 397 frames 31 Reverse ink 183 Ink display 166… -
Page 619
scripts (continued) shocked fonts 274 inserting Lingo from menu 413 Shockmachine, exporting movies for 579 making decisions 410 Shockwave objects 521 and global variables 403 overview 385 backward compatibility 45 parent. See parent scripts description of 19 planning and debugging linking to local media 332 possible content of 397 playback options 593… -
Page 620
sound (continued) sprites (continued) issues for Windows 323 extending 174 looping 322 fading 188 playing during a transition 271 finding location with Lingo 380 playing external 323, 327 flipping 178 repeating 322 foreground and background color 179 Shockwave Audio 325 info panels 164 stops during a transition 271 joining 174… -
Page 621
Stage Selection sprite preference 158 syntax (continued) Stage Size option 27 for lists 398 Stage Size projector options 583 for strings 405 Standard Import option 147 of Lingo elements 390 not supported for AVI and Quicktime files 147 troubleshooting 426 start frame 163, 173 system events, relaying to child objects 425 state of member property 328… -
Page 622
Text inspector 280 transitions text ruler units 46 adding 270 Text tab (Property inspector) 462 channel 270 Text tool controlling with Lingo 271 in Paint window 207 differences between platforms 271 in Tool palette 253 overview 270 Text window 275 tips for using 271 text wrapping, setting with Lingo 289 transition Xtra extensions 270, 271… -
Page 623
verbose syntax in Lingo 392 unlinking external casts 153 Verisign Xtra downloading 573 unlocking sprites 167 vertex Update Movies command 45, 585 defined 245 updating movies from older versions 45 selecting 247 uppercase letters, using in Lingo 391, 405 vertices URLs in mesh 477, 478 as references in Lingo 599… -
Page 624
XML 543 Xtra extensions 3D 446 Auto Filter command 233 bitmap filters 232 cast member 50 description of 50 displaying list of 414 displaying methods 414 download properties 572 Filter Bitmap command 232 importing 50 installing 51 managing for distributed movies 572 scripting 50 tool 51 transition 51, 270, 271…
 Loading…
![]()
DIRECTOR®MX
2004
Using Director
Trademarks
ActiveEdit, ActiveTest, Add Life to the Web, Afterburner, Aftershock, Andromedia, Allaire, Animation PowerPack, Aria, Attain, Authorware, Authorware Star, Backstage, Blue Sky Software, Blue Sky, Breeze, Bright Tiger, Clustercats, ColdFusion, Contents Tab Composer, Contribute, Design In Motion, Director, Dream Templates, Dreamweaver, Drumbeat 2000, EDJE, EJIPT, Extreme 3D, Fireworks, Flash, FlashHelp, Flash Lite, FlashPaper, Flex, Flex Builder, Fontographer, FreeHand, Generator, Help To Source, HomeSite, Hotspot Studio, HTML Help Studio, JFusion, JRun, Kawa, Know Your Site, Knowledge Objects, Knowledge Stream, Knowledge Track, LikeMinds, Lingo, Live Effects, MacRecorder Logo and Design, Macromedia, Macromedia Action!, Macromedia Central, Macromedia Flash, Macromedia M Logo and Design, Macromedia Spectra, Macromedia xRes Logo and Design, MacroModel, Made with Macromedia, Made with Macromedia Logo and Design, MAGIC Logo and Design, Mediamaker, Movie Critic, Open Sesame!, RoboDemo, RoboEngine JFusion, RoboHelp, RoboHelp Office, RoboInfo, RoboInsight, RoboPDF, 1-Step RoboPDF, RoboFlash, RoboLinker, RoboScreenCapture, ReSize, Roundtrip, Roundtrip HTML, Shockwave, Sitespring, Smart Publishing Wizard, Software Video Camera, SoundEdit, Titlemaker, UltraDev, Web Design 101, what the web can be, WinHelp, WinHelp 2000, WinHelp BugHunter, WinHelp Find+, WinHelp Graphics Locator, WinHelp Hyperviewer, WinHelp Inspector, and Xtra are either registered trademarks or trademarks of Macromedia, Inc. and may be registered in the United States or in other jurisdictions including internationally. Other product names, logos, designs, titles, words, or phrases mentioned within this publication may be trademarks, service marks, or trade names of Macromedia, Inc. or other entities and may be registered in certain jurisdictions including internationally.
Third-Party Information
This guide contains links to third-party websites that are not under the control of Macromedia, and Macromedia is not responsible for the content on any linked site. If you access a third-party website mentioned in this guide, then you do so at your own risk. Macromedia provides these links only as a convenience, and the inclusion of the link does not imply that Macromedia endorses or accepts any responsibility for the content on those third-party sites.
Apple Disclaimer
APPLE COMPUTER, INC. MAKES NO WARRANTIES, EITHER EXPRESS OR IMPLIED, REGARDING THE ENCLOSED COMPUTER SOFTWARE PACKAGE, ITS MERCHANTABILITY OR ITS FITNESS FOR ANY PARTICULAR PURPOSE. THE EXCLUSION OF IMPLIED WARRANTIES IS NOT PERMITTED BY SOME STATES. THE ABOVE EXCLUSION MAY NOT APPLY TO YOU. THIS WARRANTY PROVIDES YOU WITH SPECIFIC LEGAL RIGHTS. THERE MAY BE OTHER RIGHTS THAT YOU MAY HAVE WHICH VARY FROM STATE TO STATE.
Copyright © 2004 Macromedia, Inc. All rights reserved. This manual may not be copied, photocopied, reproduced, translated, or converted to any electronic or machine-readable form in whole or in part without prior written approval of Macromedia, Inc. Part
Second Edition: September 2004
Macromedia, Inc.
600 Townsend St.
San Francisco, CA 94103

CONTENTS
CHAPTER 1: Introduction. . . . . . . . . . . . . . . . . . . . . . . . . . . . . . . . . . . . . . . . . . . . 11
About Director . . . . . . . . . . . . . . . . . . . . . . . . . . . . . . . . . . . . . . . . . . . . . . . . . . . 11 What’s new in Director MX 2004 . . . . . . . . . . . . . . . . . . . . . . . . . . . . . . . . . . . . . 12 Guide to instructional media. . . . . . . . . . . . . . . . . . . . . . . . . . . . . . . . . . . . . . . . . 13
CHAPTER 2: Score, Stage, and Cast . . . . . . . . . . . . . . . . . . . . . . . . . . . . . . . . . . 17
Using the Tool palette with the Stage . . . . . . . . . . . . . . . . . . . . . . . . . . . . . . . . . . 17 Setting Stage properties . . . . . . . . . . . . . . . . . . . . . . . . . . . . . . . . . . . . . . . . . . . . . 18 Using multiple Score windows . . . . . . . . . . . . . . . . . . . . . . . . . . . . . . . . . . . . . . . 19 Changing Score settings . . . . . . . . . . . . . . . . . . . . . . . . . . . . . . . . . . . . . . . . . . . . 20 Selecting and editing frames in the Score. . . . . . . . . . . . . . . . . . . . . . . . . . . . . . . . 21 About Cast Members. . . . . . . . . . . . . . . . . . . . . . . . . . . . . . . . . . . . . . . . . . . . . . . 22 Creating new casts. . . . . . . . . . . . . . . . . . . . . . . . . . . . . . . . . . . . . . . . . . . . . . . . . 23 Creating cast members . . . . . . . . . . . . . . . . . . . . . . . . . . . . . . . . . . . . . . . . . . . . . 24 Using the Cast window . . . . . . . . . . . . . . . . . . . . . . . . . . . . . . . . . . . . . . . . . . . . 26 Naming cast members . . . . . . . . . . . . . . . . . . . . . . . . . . . . . . . . . . . . . . . . . . . . . . 31 Using Cast List view . . . . . . . . . . . . . . . . . . . . . . . . . . . . . . . . . . . . . . . . . . . . . . . 31 Using Cast Thumbnail view . . . . . . . . . . . . . . . . . . . . . . . . . . . . . . . . . . . . . . . . . 33 Moving cast members within the Cast window . . . . . . . . . . . . . . . . . . . . . . . . . . . 35 Organizing cast members within the Cast window . . . . . . . . . . . . . . . . . . . . . . . . 35 Setting Cast window preferences . . . . . . . . . . . . . . . . . . . . . . . . . . . . . . . . . . . . . . 36 Changing Cast properties . . . . . . . . . . . . . . . . . . . . . . . . . . . . . . . . . . . . . . . . . . . 38 Viewing and setting cast member properties . . . . . . . . . . . . . . . . . . . . . . . . . . . . . 39 Finding cast members . . . . . . . . . . . . . . . . . . . . . . . . . . . . . . . . . . . . . . . . . . . . . . 40 Importing cast members . . . . . . . . . . . . . . . . . . . . . . . . . . . . . . . . . . . . . . . . . . . . 42 Launching external editors . . . . . . . . . . . . . . . . . . . . . . . . . . . . . . . . . . . . . . . . . . 46 Managing external casts. . . . . . . . . . . . . . . . . . . . . . . . . . . . . . . . . . . . . . . . . . . . . 47 Creating libraries . . . . . . . . . . . . . . . . . . . . . . . . . . . . . . . . . . . . . . . . . . . . . . . . . . 48 Setting cast member properties using Lingo or JavaScript syntax . . . . . . . . . . . . . . 49 Setting Xtra cast member properties . . . . . . . . . . . . . . . . . . . . . . . . . . . . . . . . . . . 49
3

CHAPTER 3: Sprites . . . . . . . . . . . . . . . . . . . . . . . . . . . . . . . . . . . . . . . . . . . . . . . 51
Creating sprites . . . . . . . . . . . . . . . . . . . . . . . . . . . . . . . . . . . . . . . . . . . . . . . . . . . 52 Setting sprite general preferences . . . . . . . . . . . . . . . . . . . . . . . . . . . . . . . . . . . . . . 52 Selecting sprites . . . . . . . . . . . . . . . . . . . . . . . . . . . . . . . . . . . . . . . . . . . . . . . . . . . 53 Naming sprites . . . . . . . . . . . . . . . . . . . . . . . . . . . . . . . . . . . . . . . . . . . . . . . . . . . 55 Finding sprites. . . . . . . . . . . . . . . . . . . . . . . . . . . . . . . . . . . . . . . . . . . . . . . . . . . . 57 Creating sprite channel names . . . . . . . . . . . . . . . . . . . . . . . . . . . . . . . . . . . . . . . . 57 Layering sprites . . . . . . . . . . . . . . . . . . . . . . . . . . . . . . . . . . . . . . . . . . . . . . . . . . . 58 Displaying and editing sprite properties. . . . . . . . . . . . . . . . . . . . . . . . . . . . . . . . . 59 Locking and unlocking sprites . . . . . . . . . . . . . . . . . . . . . . . . . . . . . . . . . . . . . . . . 63 Positioning sprites . . . . . . . . . . . . . . . . . . . . . . . . . . . . . . . . . . . . . . . . . . . . . . . . . 64 Changing the appearance of sprites . . . . . . . . . . . . . . . . . . . . . . . . . . . . . . . . . . . . 71 Using sprite inks . . . . . . . . . . . . . . . . . . . . . . . . . . . . . . . . . . . . . . . . . . . . . . . . . . 77 Assigning a cast member to a sprite with Lingo or JavaScript syntax . . . . . . . . . . . 80 Exchanging cast members . . . . . . . . . . . . . . . . . . . . . . . . . . . . . . . . . . . . . . . . . . . 81
CHAPTER 4: Animation. . . . . . . . . . . . . . . . . . . . . . . . . . . . . . . . . . . . . . . . . . . . . 83
About tweening in Director. . . . . . . . . . . . . . . . . . . . . . . . . . . . . . . . . . . . . . . . . . 83 Tweening the path of a sprite. . . . . . . . . . . . . . . . . . . . . . . . . . . . . . . . . . . . . . . . . 84 Accelerating and decelerating sprites . . . . . . . . . . . . . . . . . . . . . . . . . . . . . . . . . . . 85 Tweening other sprite properties . . . . . . . . . . . . . . . . . . . . . . . . . . . . . . . . . . . . . . 86 Suggestions and shortcuts for tweening . . . . . . . . . . . . . . . . . . . . . . . . . . . . . . . . . 87 Changing tweening settings. . . . . . . . . . . . . . . . . . . . . . . . . . . . . . . . . . . . . . . . . . 88 Switching a sprite’s cast members. . . . . . . . . . . . . . . . . . . . . . . . . . . . . . . . . . . . . . 89 Editing sprite frames . . . . . . . . . . . . . . . . . . . . . . . . . . . . . . . . . . . . . . . . . . . . . . . 89 Frame-by-frame animation . . . . . . . . . . . . . . . . . . . . . . . . . . . . . . . . . . . . . . . . . . 90 Shortcuts for animating with multiple cast members . . . . . . . . . . . . . . . . . . . . . . . 92 Using film loops . . . . . . . . . . . . . . . . . . . . . . . . . . . . . . . . . . . . . . . . . . . . . . . . . . 94 Setting film loop properties . . . . . . . . . . . . . . . . . . . . . . . . . . . . . . . . . . . . . . . . . . 95 Step-recording animation . . . . . . . . . . . . . . . . . . . . . . . . . . . . . . . . . . . . . . . . . . . 96 Real-time recording animation . . . . . . . . . . . . . . . . . . . . . . . . . . . . . . . . . . . . . . . 96 Linking a sequence with Paste Relative . . . . . . . . . . . . . . . . . . . . . . . . . . . . . . . . . 97 Animating sprites with Lingo or JavaScript syntax . . . . . . . . . . . . . . . . . . . . . . . . . 97
CHAPTER 5: Bitmaps . . . . . . . . . . . . . . . . . . . . . . . . . . . . . . . . . . . . . . . . . . . . . . 99
About importing bitmaps . . . . . . . . . . . . . . . . . . . . . . . . . . . . . . . . . . . . . . . . . . 100 Using animated GIFs . . . . . . . . . . . . . . . . . . . . . . . . . . . . . . . . . . . . . . . . . . . . . 101 Using the Paint window . . . . . . . . . . . . . . . . . . . . . . . . . . . . . . . . . . . . . . . . . . . 102 Changing selected areas of a bitmap . . . . . . . . . . . . . . . . . . . . . . . . . . . . . . . . . . 109 Flipping, rotating, and applying effects to bitmaps . . . . . . . . . . . . . . . . . . . . . . . 109 Using Auto Distort . . . . . . . . . . . . . . . . . . . . . . . . . . . . . . . . . . . . . . . . . . . . . . . 111 Changing registration points . . . . . . . . . . . . . . . . . . . . . . . . . . . . . . . . . . . . . . . . 112 Changing size, color depth, and color palette for bitmaps . . . . . . . . . . . . . . . . . . 113 Controlling bitmap images with Lingo or JavaScript syntax. . . . . . . . . . . . . . . . . 114 Using gradients . . . . . . . . . . . . . . . . . . . . . . . . . . . . . . . . . . . . . . . . . . . . . . . . . . 117 Using patterns . . . . . . . . . . . . . . . . . . . . . . . . . . . . . . . . . . . . . . . . . . . . . . . . . . . 120 Creating a custom tile . . . . . . . . . . . . . . . . . . . . . . . . . . . . . . . . . . . . . . . . . . . . . 120 Using Paint window inks. . . . . . . . . . . . . . . . . . . . . . . . . . . . . . . . . . . . . . . . . . . 121
4Contents

Using bitmap filters. . . . . . . . . . . . . . . . . . . . . . . . . . . . . . . . . . . . . . . . . . . . . . . 123 Using onion skinning . . . . . . . . . . . . . . . . . . . . . . . . . . . . . . . . . . . . . . . . . . . . . 125 About the Paste as Pict option . . . . . . . . . . . . . . . . . . . . . . . . . . . . . . . . . . . . . . . 127 Setting bitmap cast member properties . . . . . . . . . . . . . . . . . . . . . . . . . . . . . . . . 128 Setting PICT cast member properties . . . . . . . . . . . . . . . . . . . . . . . . . . . . . . . . . 128 Setting Paint window preferences . . . . . . . . . . . . . . . . . . . . . . . . . . . . . . . . . . . . 129 Compressing bitmaps . . . . . . . . . . . . . . . . . . . . . . . . . . . . . . . . . . . . . . . . . . . . . 129 Working with Macromedia Fireworks . . . . . . . . . . . . . . . . . . . . . . . . . . . . . . . . . 131
CHAPTER 6: Vector Shapes . . . . . . . . . . . . . . . . . . . . . . . . . . . . . . . . . . . . . . . . 135
Drawing vector shapes. . . . . . . . . . . . . . . . . . . . . . . . . . . . . . . . . . . . . . . . . . . . . 135 Editing vector shapes. . . . . . . . . . . . . . . . . . . . . . . . . . . . . . . . . . . . . . . . . . . . . . 139 Defining gradients for vector shapes . . . . . . . . . . . . . . . . . . . . . . . . . . . . . . . . . . 141 Controlling vector shapes with Lingo or JavaScript syntax. . . . . . . . . . . . . . . . . . 142 Setting vector shape properties . . . . . . . . . . . . . . . . . . . . . . . . . . . . . . . . . . . . . . 142 Using shapes . . . . . . . . . . . . . . . . . . . . . . . . . . . . . . . . . . . . . . . . . . . . . . . . . . . . 143 Setting shape cast member properties . . . . . . . . . . . . . . . . . . . . . . . . . . . . . . . . . 144
CHAPTER 7: Color, Tempo, and Transitions. . . . . . . . . . . . . . . . . . . . . . . . . . . . 145
Controlling color. . . . . . . . . . . . . . . . . . . . . . . . . . . . . . . . . . . . . . . . . . . . . . . . . 145 Setting palette cast member properties. . . . . . . . . . . . . . . . . . . . . . . . . . . . . . . . . 155 About tempo . . . . . . . . . . . . . . . . . . . . . . . . . . . . . . . . . . . . . . . . . . . . . . . . . . . 157 Using transitions . . . . . . . . . . . . . . . . . . . . . . . . . . . . . . . . . . . . . . . . . . . . . . . . . 160
CHAPTER 8: Text . . . . . . . . . . . . . . . . . . . . . . . . . . . . . . . . . . . . . . . . . . . . . . . . 163
Embedding fonts in movies . . . . . . . . . . . . . . . . . . . . . . . . . . . . . . . . . . . . . . . . . 164 Creating text cast members . . . . . . . . . . . . . . . . . . . . . . . . . . . . . . . . . . . . . . . . . 165 Editing and formatting text . . . . . . . . . . . . . . . . . . . . . . . . . . . . . . . . . . . . . . . . 166 Creating a hypertext link . . . . . . . . . . . . . . . . . . . . . . . . . . . . . . . . . . . . . . . . . . . 171 Working with fields. . . . . . . . . . . . . . . . . . . . . . . . . . . . . . . . . . . . . . . . . . . . . . . 172 Using editable text. . . . . . . . . . . . . . . . . . . . . . . . . . . . . . . . . . . . . . . . . . . . . . . . 172 Converting text to a bitmap . . . . . . . . . . . . . . . . . . . . . . . . . . . . . . . . . . . . . . . . 173 Mapping fonts between platforms for field cast members . . . . . . . . . . . . . . . . . . 173 Setting text or field cast member properties . . . . . . . . . . . . . . . . . . . . . . . . . . . . . 174 Formatting chunks of text with Lingo or JavaScript syntax . . . . . . . . . . . . . . . . . 176 Formatting text or field cast members with Lingo or JavaScript syntax . . . . . . . . 178 Controlling scrolling text with Lingo or JavaScript syntax . . . . . . . . . . . . . . . . . . 179 Checking for specific text with Lingo or JavaScript syntax. . . . . . . . . . . . . . . . . . 179 Modifying strings with Lingo or JavaScript syntax. . . . . . . . . . . . . . . . . . . . . . . . 180
Contents 5

CHAPTER 9: Using Flash, Flash Components,
and Other Interactive Media Types. . . . . . . . . . . . . . . . . . . . . . . . . . . . . . . . . . . . . 181
Using Flash Content . . . . . . . . . . . . . . . . . . . . . . . . . . . . . . . . . . . . . . . . . . . . . . 181 Adding a Flash content cast member . . . . . . . . . . . . . . . . . . . . . . . . . . . . . . . . . . 182 Editing a Flash cast member . . . . . . . . . . . . . . . . . . . . . . . . . . . . . . . . . . . . . . . . 184 Controlling Flash content with Lingo or JavaScript syntax . . . . . . . . . . . . . . . . . 185 Controlling Flash content appearance with Lingo or JavaScript syntax . . . . . . . . 185 Streaming Flash content with Lingo or JavaScript syntax. . . . . . . . . . . . . . . . . . . 187 Playing back Flash content with Lingo or JavaScript syntax. . . . . . . . . . . . . . . . . 188 Using Lingo or JavaScript syntax to set and test Flash variables . . . . . . . . . . . . . . 189 Sending messages from Flash content using getURL . . . . . . . . . . . . . . . . . . . . . . 190 Sending XML Data from Flash to Director . . . . . . . . . . . . . . . . . . . . . . . . . . . . . 193 Using Flash objects in script . . . . . . . . . . . . . . . . . . . . . . . . . . . . . . . . . . . . . . . . 193 Using the Flash local connection object . . . . . . . . . . . . . . . . . . . . . . . . . . . . . . . 195 Using Flash Communication Server MX 2004 . . . . . . . . . . . . . . . . . . . . . . . . . . 198 Using the Flash Settings panel . . . . . . . . . . . . . . . . . . . . . . . . . . . . . . . . . . . . . . 200 Playback performance tips for Flash content . . . . . . . . . . . . . . . . . . . . . . . . . . . . 201 Using Director movies within Director movies . . . . . . . . . . . . . . . . . . . . . . . . . . 202 Setting linked Director movie properties . . . . . . . . . . . . . . . . . . . . . . . . . . . . . . . 203 Using ActiveX controls . . . . . . . . . . . . . . . . . . . . . . . . . . . . . . . . . . . . . . . . . . . . 204 Using Flash components . . . . . . . . . . . . . . . . . . . . . . . . . . . . . . . . . . . . . . . . . . . 207 Button component . . . . . . . . . . . . . . . . . . . . . . . . . . . . . . . . . . . . . . . . . . . . . . . 210 CheckBox component . . . . . . . . . . . . . . . . . . . . . . . . . . . . . . . . . . . . . . . . . . . . . 211 DateChooser component. . . . . . . . . . . . . . . . . . . . . . . . . . . . . . . . . . . . . . . . . . . 212 Label component. . . . . . . . . . . . . . . . . . . . . . . . . . . . . . . . . . . . . . . . . . . . . . . . . 214 List component . . . . . . . . . . . . . . . . . . . . . . . . . . . . . . . . . . . . . . . . . . . . . . . . . . 216 NumericStepper component . . . . . . . . . . . . . . . . . . . . . . . . . . . . . . . . . . . . . . . . 218 RadioButton component. . . . . . . . . . . . . . . . . . . . . . . . . . . . . . . . . . . . . . . . . . . 220 ScrollPane component. . . . . . . . . . . . . . . . . . . . . . . . . . . . . . . . . . . . . . . . . . . . . 222 TextArea component . . . . . . . . . . . . . . . . . . . . . . . . . . . . . . . . . . . . . . . . . . . . . . 224 TextInput component . . . . . . . . . . . . . . . . . . . . . . . . . . . . . . . . . . . . . . . . . . . . . 225 Tree component . . . . . . . . . . . . . . . . . . . . . . . . . . . . . . . . . . . . . . . . . . . . . . . . . 227
CHAPTER 10: Sound and Synchronization. . . . . . . . . . . . . . . . . . . . . . . . . . . . . 231
Importing internal and linked sounds . . . . . . . . . . . . . . . . . . . . . . . . . . . . . . . . . 231 Setting sound cast member properties . . . . . . . . . . . . . . . . . . . . . . . . . . . . . . . . . 232 Controlling sound in the Score . . . . . . . . . . . . . . . . . . . . . . . . . . . . . . . . . . . . . . 233 Looping a sound . . . . . . . . . . . . . . . . . . . . . . . . . . . . . . . . . . . . . . . . . . . . . . . . . 234 Using sound in Windows . . . . . . . . . . . . . . . . . . . . . . . . . . . . . . . . . . . . . . . . . . 234 Playing sounds with Lingo or JavaScript syntax . . . . . . . . . . . . . . . . . . . . . . . . . . 235 About Shockwave Audio . . . . . . . . . . . . . . . . . . . . . . . . . . . . . . . . . . . . . . . . . . . 237 Compressing internal sounds with Shockwave Audio . . . . . . . . . . . . . . . . . . . . . 237 Streaming linked Shockwave Audio and MP3 audio files. . . . . . . . . . . . . . . . . . . 238 Playing Shockwave Audio, Windows Media Audio, and
MP3 audio with Lingo or JavaScript syntax . . . . . . . . . . . . . . . . . . . . . . . . . . 239 Synchronizing media . . . . . . . . . . . . . . . . . . . . . . . . . . . . . . . . . . . . . . . . . . . . . . 240 Synchronizing sound with Lingo or JavaScript syntax . . . . . . . . . . . . . . . . . . . . . 241 Accessibility. . . . . . . . . . . . . . . . . . . . . . . . . . . . . . . . . . . . . . . . . . . . . . . . . . . . . 241
6Contents

CHAPTER 11: Using Digital Video . . . . . . . . . . . . . . . . . . . . . . . . . . . . . . . . . . . . 243
About digital video formats . . . . . . . . . . . . . . . . . . . . . . . . . . . . . . . . . . . . . . . . . 244 Using the video windows. . . . . . . . . . . . . . . . . . . . . . . . . . . . . . . . . . . . . . . . . . . 245 Playing digital video direct-to-Stage. . . . . . . . . . . . . . . . . . . . . . . . . . . . . . . . . . . 245 Controlling digital video in the Score . . . . . . . . . . . . . . . . . . . . . . . . . . . . . . . . . 246 Playing digital video with Lingo or JavaScript syntax. . . . . . . . . . . . . . . . . . . . . . 247 Setting QuickTime digital video cast member properties. . . . . . . . . . . . . . . . . . . 248 Controlling QuickTime with Lingo or JavaScript syntax . . . . . . . . . . . . . . . . . . . 250 Using Windows Media files in Director. . . . . . . . . . . . . . . . . . . . . . . . . . . . . . . . 252 Using DVD media content in Director . . . . . . . . . . . . . . . . . . . . . . . . . . . . . . . . 254 Cropping digital video. . . . . . . . . . . . . . . . . . . . . . . . . . . . . . . . . . . . . . . . . . . . . 257 About using digital video on the Internet . . . . . . . . . . . . . . . . . . . . . . . . . . . . . . 258 Synchronizing video and animation. . . . . . . . . . . . . . . . . . . . . . . . . . . . . . . . . . . 259 Using RealMedia content in Director . . . . . . . . . . . . . . . . . . . . . . . . . . . . . . . . . 259 Using Lingo or JavaScript syntax sound elements with RealMedia. . . . . . . . . . . . 272
CHAPTER 12: Behaviors. . . . . . . . . . . . . . . . . . . . . . . . . . . . . . . . . . . . . . . . . . . 275
Attaching behaviors. . . . . . . . . . . . . . . . . . . . . . . . . . . . . . . . . . . . . . . . . . . . . . . 275 Changing the order of attached behaviors . . . . . . . . . . . . . . . . . . . . . . . . . . . . . . 278 Getting information about behaviors. . . . . . . . . . . . . . . . . . . . . . . . . . . . . . . . . . 278 Creating and modifying behaviors. . . . . . . . . . . . . . . . . . . . . . . . . . . . . . . . . . . . 279 Writing behaviors with Lingo or JavaScript syntax. . . . . . . . . . . . . . . . . . . . . . . . 281 Setting up a Parameters dialog box . . . . . . . . . . . . . . . . . . . . . . . . . . . . . . . . . . . 282 Setting behavior properties with script. . . . . . . . . . . . . . . . . . . . . . . . . . . . . . . . . 282 Customizing a behavior’s property. . . . . . . . . . . . . . . . . . . . . . . . . . . . . . . . . . . . 283 Creating an on getPropertyDescriptionList handler. . . . . . . . . . . . . . . . . . . . . . . 284 Including a description for the Behavior inspector. . . . . . . . . . . . . . . . . . . . . . . . 285 Example of a complete behavior . . . . . . . . . . . . . . . . . . . . . . . . . . . . . . . . . . . . . 285 Sending messages to behaviors attached to sprites . . . . . . . . . . . . . . . . . . . . . . . . 287 Using inheritance in behaviors. . . . . . . . . . . . . . . . . . . . . . . . . . . . . . . . . . . . . . . 289
CHAPTER 13: Navigation and User Interaction. . . . . . . . . . . . . . . . . . . . . . . . . . 291
Creating basic navigation controls with behaviors . . . . . . . . . . . . . . . . . . . . . . . . 291 Adding push buttons, radio buttons, and check boxes . . . . . . . . . . . . . . . . . . . . . 292 Jumping to locations with Lingo or JavaScript syntax . . . . . . . . . . . . . . . . . . . . . 293 Detecting mouse clicks with Lingo or JavaScript syntax. . . . . . . . . . . . . . . . . . . . 294 Making sprites editable and draggable . . . . . . . . . . . . . . . . . . . . . . . . . . . . . . . . . 295 Making sprites editable or moveable with Lingo or JavaScript syntax. . . . . . . . . . 295 Checking which text is under the pointer with Lingo or JavaScript syntax. . . . . . 296 Responding to rollovers with Lingo or JavaScript syntax . . . . . . . . . . . . . . . . . . . 296 Finding mouse pointer locations with Lingo or JavaScript syntax . . . . . . . . . . . . 297 Checking keys with Lingo or JavaScript syntax . . . . . . . . . . . . . . . . . . . . . . . . . . 297 Equivalent cross-platform keys . . . . . . . . . . . . . . . . . . . . . . . . . . . . . . . . . . . . . . 298 Identifying keys on different keyboards . . . . . . . . . . . . . . . . . . . . . . . . . . . . . . . . 298 About animated color cursors . . . . . . . . . . . . . . . . . . . . . . . . . . . . . . . . . . . . . . . 298 Creating an animated color cursor cast member . . . . . . . . . . . . . . . . . . . . . . . . . 299 Using an animated color cursor in a movie . . . . . . . . . . . . . . . . . . . . . . . . . . . . . 301
Contents 7

CHAPTER 14: 3D Basics . . . . . . . . . . . . . . . . . . . . . . . . . . . . . . . . . . . . . . . . . . 303
What you need to know . . . . . . . . . . . . . . . . . . . . . . . . . . . . . . . . . . . . . . . . . . . 303 About 3D in Director MX 2004 . . . . . . . . . . . . . . . . . . . . . . . . . . . . . . . . . . . . . 304 The 3D Xtra . . . . . . . . . . . . . . . . . . . . . . . . . . . . . . . . . . . . . . . . . . . . . . . . . . . . 305 Using the Shockwave 3D window . . . . . . . . . . . . . . . . . . . . . . . . . . . . . . . . . . . . 306 Using the Property inspector for 3D . . . . . . . . . . . . . . . . . . . . . . . . . . . . . . . . . . 308 Using rendering methods . . . . . . . . . . . . . . . . . . . . . . . . . . . . . . . . . . . . . . . . . . 309 Using 3D Anti-aliasing . . . . . . . . . . . . . . . . . . . . . . . . . . . . . . . . . . . . . . . . . . . . 310 3D behaviors. . . . . . . . . . . . . . . . . . . . . . . . . . . . . . . . . . . . . . . . . . . . . . . . . . . . 312 3D text . . . . . . . . . . . . . . . . . . . . . . . . . . . . . . . . . . . . . . . . . . . . . . . . . . . . . . . . 312 The 3D world . . . . . . . . . . . . . . . . . . . . . . . . . . . . . . . . . . . . . . . . . . . . . . . . . . . 313
CHAPTER 15: The 3D Cast Member, 3D Text, and 3D Behaviors. . . . . . . . . . . 315
About the 3D cast member . . . . . . . . . . . . . . . . . . . . . . . . . . . . . . . . . . . . . . . . . 315 Model resources. . . . . . . . . . . . . . . . . . . . . . . . . . . . . . . . . . . . . . . . . . . . . . . . . . 316 Models . . . . . . . . . . . . . . . . . . . . . . . . . . . . . . . . . . . . . . . . . . . . . . . . . . . . . . . . 318 Shaders . . . . . . . . . . . . . . . . . . . . . . . . . . . . . . . . . . . . . . . . . . . . . . . . . . . . . . . . 319 Textures. . . . . . . . . . . . . . . . . . . . . . . . . . . . . . . . . . . . . . . . . . . . . . . . . . . . . . . . 320 Motions. . . . . . . . . . . . . . . . . . . . . . . . . . . . . . . . . . . . . . . . . . . . . . . . . . . . . . . . 321 Lights . . . . . . . . . . . . . . . . . . . . . . . . . . . . . . . . . . . . . . . . . . . . . . . . . . . . . . . . . 321 Cameras . . . . . . . . . . . . . . . . . . . . . . . . . . . . . . . . . . . . . . . . . . . . . . . . . . . . . . . 322 Groups . . . . . . . . . . . . . . . . . . . . . . . . . . . . . . . . . . . . . . . . . . . . . . . . . . . . . . . . 323 Creating 3D text . . . . . . . . . . . . . . . . . . . . . . . . . . . . . . . . . . . . . . . . . . . . . . . . . 324 Modifying 3D text . . . . . . . . . . . . . . . . . . . . . . . . . . . . . . . . . . . . . . . . . . . . . . . 324 Script and 3D text . . . . . . . . . . . . . . . . . . . . . . . . . . . . . . . . . . . . . . . . . . . . . . . 325 Using 3D behaviors. . . . . . . . . . . . . . . . . . . . . . . . . . . . . . . . . . . . . . . . . . . . . . . 327
CHAPTER 16: Working with Models and Model Resources . . . . . . . . . . . . . . . . 335
About models and model resources . . . . . . . . . . . . . . . . . . . . . . . . . . . . . . . . . . . 335 Model resources. . . . . . . . . . . . . . . . . . . . . . . . . . . . . . . . . . . . . . . . . . . . . . . . . . 336 Primitives . . . . . . . . . . . . . . . . . . . . . . . . . . . . . . . . . . . . . . . . . . . . . . . . . . . . . . 337 Cast member methods. . . . . . . . . . . . . . . . . . . . . . . . . . . . . . . . . . . . . . . . . . . . . 345 Models . . . . . . . . . . . . . . . . . . . . . . . . . . . . . . . . . . . . . . . . . . . . . . . . . . . . . . . . 346 Shaders . . . . . . . . . . . . . . . . . . . . . . . . . . . . . . . . . . . . . . . . . . . . . . . . . . . . . . . . 352 Textures. . . . . . . . . . . . . . . . . . . . . . . . . . . . . . . . . . . . . . . . . . . . . . . . . . . . . . . . 360 Groups . . . . . . . . . . . . . . . . . . . . . . . . . . . . . . . . . . . . . . . . . . . . . . . . . . . . . . . . 363 Modifiers. . . . . . . . . . . . . . . . . . . . . . . . . . . . . . . . . . . . . . . . . . . . . . . . . . . . . . . 366 Animation modifiers . . . . . . . . . . . . . . . . . . . . . . . . . . . . . . . . . . . . . . . . . . . . . . 372 Motions. . . . . . . . . . . . . . . . . . . . . . . . . . . . . . . . . . . . . . . . . . . . . . . . . . . . . . . . 381 About lights and cameras. . . . . . . . . . . . . . . . . . . . . . . . . . . . . . . . . . . . . . . . . . . 382 Light properties . . . . . . . . . . . . . . . . . . . . . . . . . . . . . . . . . . . . . . . . . . . . . . . . . . 383 Light methods . . . . . . . . . . . . . . . . . . . . . . . . . . . . . . . . . . . . . . . . . . . . . . . . . . . 384 Cameras . . . . . . . . . . . . . . . . . . . . . . . . . . . . . . . . . . . . . . . . . . . . . . . . . . . . . . . 386
8Contents

CHAPTER 17: Controlling the 3D World . . . . . . . . . . . . . . . . . . . . . . . . . . . . . . . 393
3D Lingo or JavaScript syntax events. . . . . . . . . . . . . . . . . . . . . . . . . . . . . . . . . . 393 Collisions . . . . . . . . . . . . . . . . . . . . . . . . . . . . . . . . . . . . . . . . . . . . . . . . . . . . . . 394 Vector math. . . . . . . . . . . . . . . . . . . . . . . . . . . . . . . . . . . . . . . . . . . . . . . . . . . . . 397 Transforms . . . . . . . . . . . . . . . . . . . . . . . . . . . . . . . . . . . . . . . . . . . . . . . . . . . . . 399 Rendering functionality. . . . . . . . . . . . . . . . . . . . . . . . . . . . . . . . . . . . . . . . . . . . 403
CHAPTER 18: Movies in a Window . . . . . . . . . . . . . . . . . . . . . . . . . . . . . . . . . . . 409
About MIAWs. . . . . . . . . . . . . . . . . . . . . . . . . . . . . . . . . . . . . . . . . . . . . . . . . . . 410 Creating or declaring a MIAW . . . . . . . . . . . . . . . . . . . . . . . . . . . . . . . . . . . . . . 410 Opening and closing a MIAW. . . . . . . . . . . . . . . . . . . . . . . . . . . . . . . . . . . . . . . 410 Setting the window size and location for a MIAW . . . . . . . . . . . . . . . . . . . . . . . . 412 Controlling the appearance of a MIAW . . . . . . . . . . . . . . . . . . . . . . . . . . . . . . . 413 Controlling MIAW layering . . . . . . . . . . . . . . . . . . . . . . . . . . . . . . . . . . . . . . . . 416 MIAW events . . . . . . . . . . . . . . . . . . . . . . . . . . . . . . . . . . . . . . . . . . . . . . . . . . . 416 Listing the current MIAWs . . . . . . . . . . . . . . . . . . . . . . . . . . . . . . . . . . . . . . . . . 417 Controlling interaction between MIAWs. . . . . . . . . . . . . . . . . . . . . . . . . . . . . . . 417
CHAPTER 19: Using the XML Parser Xtra . . . . . . . . . . . . . . . . . . . . . . . . . . . . . 419
About XML . . . . . . . . . . . . . . . . . . . . . . . . . . . . . . . . . . . . . . . . . . . . . . . . . . . . 419 Using XML parser objects . . . . . . . . . . . . . . . . . . . . . . . . . . . . . . . . . . . . . . . . . . 420 Using XML document nodes . . . . . . . . . . . . . . . . . . . . . . . . . . . . . . . . . . . . . . . 422 Accessing attributes . . . . . . . . . . . . . . . . . . . . . . . . . . . . . . . . . . . . . . . . . . . . . . . 424 Parser objects and XML nodes. . . . . . . . . . . . . . . . . . . . . . . . . . . . . . . . . . . . . . . 424 Treating white space . . . . . . . . . . . . . . . . . . . . . . . . . . . . . . . . . . . . . . . . . . . . . . 425 XML and character sets . . . . . . . . . . . . . . . . . . . . . . . . . . . . . . . . . . . . . . . . . . . . 425
CHAPTER 20: Making Director Movies Accessible . . . . . . . . . . . . . . . . . . . . . . 427
About government requirements . . . . . . . . . . . . . . . . . . . . . . . . . . . . . . . . . . . . . 427 Making Director movies accessible . . . . . . . . . . . . . . . . . . . . . . . . . . . . . . . . . . . 427 Using the Accessibility behavior library . . . . . . . . . . . . . . . . . . . . . . . . . . . . . . . . 428 Accessibility scripting with Lingo or JavaScript syntax. . . . . . . . . . . . . . . . . . . . . 434 Deploying accessible movies . . . . . . . . . . . . . . . . . . . . . . . . . . . . . . . . . . . . . . . . 435
CHAPTER 21: Managing Memory. . . . . . . . . . . . . . . . . . . . . . . . . . . . . . . . . . . . 437
How Director unloads items from memory . . . . . . . . . . . . . . . . . . . . . . . . . . . . 437 Loading and unloading individual cast members . . . . . . . . . . . . . . . . . . . . . . . . . 439 Preloading digital video . . . . . . . . . . . . . . . . . . . . . . . . . . . . . . . . . . . . . . . . . . . . 439
|
CHAPTER 22: Managing and Testing Director Projects . . . . . . . . . . . . . . . . . . |
441 |
Managing Director projects . . . . . . . . . . . . . . . . . . . . . . . . . . . . . . . . . . . . . . . . 441 About testing movies to avoid problems . . . . . . . . . . . . . . . . . . . . . . . . . . . . . . . 443 Printing movies . . . . . . . . . . . . . . . . . . . . . . . . . . . . . . . . . . . . . . . . . . . . . . . . . . 444 Resources . . . . . . . . . . . . . . . . . . . . . . . . . . . . . . . . . . . . . . . . . . . . . . . . . . . . . . 445
Contents 9

|
CHAPTER 23: Packaging Movies for Distribution . . . . . . . . . . . . . . . . . . . . . . . |
447 |
About distributing movies . . . . . . . . . . . . . . . . . . . . . . . . . . . . . . . . . . . . . . . . . . 447 Shockwave browser compatibility . . . . . . . . . . . . . . . . . . . . . . . . . . . . . . . . . . . . 448 Previewing a movie in a browser . . . . . . . . . . . . . . . . . . . . . . . . . . . . . . . . . . . . . 448 About Xtra extensions . . . . . . . . . . . . . . . . . . . . . . . . . . . . . . . . . . . . . . . . . . . . . 449 Managing Xtra extensions for distributed movies . . . . . . . . . . . . . . . . . . . . . . . . 450 About distribution formats . . . . . . . . . . . . . . . . . . . . . . . . . . . . . . . . . . . . . . . . . 451 Creating Shockwave content . . . . . . . . . . . . . . . . . . . . . . . . . . . . . . . . . . . . . . . . 452 Using default Publish settings . . . . . . . . . . . . . . . . . . . . . . . . . . . . . . . . . . . . . . . 452 Changing Publish Settings. . . . . . . . . . . . . . . . . . . . . . . . . . . . . . . . . . . . . . . . . . 453 Using dswmedia folders and the support folder to publish Shockwave content . . 459 Using linked media when testing Shockwave content . . . . . . . . . . . . . . . . . . . . . 459 Converting movies created in previous versions of Director. . . . . . . . . . . . . . . . . 459 About projectors . . . . . . . . . . . . . . . . . . . . . . . . . . . . . . . . . . . . . . . . . . . . . . . . . 460 Creating projectors . . . . . . . . . . . . . . . . . . . . . . . . . . . . . . . . . . . . . . . . . . . . . . . 460 About cross-platform projectors. . . . . . . . . . . . . . . . . . . . . . . . . . . . . . . . . . . . . . 463 Processing movies with Update Movies . . . . . . . . . . . . . . . . . . . . . . . . . . . . . . . . 464 Exporting digital video and frame-by-frame bitmaps . . . . . . . . . . . . . . . . . . . . . . 465 Setting QuickTime export options . . . . . . . . . . . . . . . . . . . . . . . . . . . . . . . . . . . 466 About organizing movie files . . . . . . . . . . . . . . . . . . . . . . . . . . . . . . . . . . . . . . . . 468
CHAPTER 24: Using Shockwave Player . . . . . . . . . . . . . . . . . . . . . . . . . . . . . . 469
About streaming movies . . . . . . . . . . . . . . . . . . . . . . . . . . . . . . . . . . . . . . . . . . . 469 About network operations . . . . . . . . . . . . . . . . . . . . . . . . . . . . . . . . . . . . . . . . . . 470 Setting movie playback options . . . . . . . . . . . . . . . . . . . . . . . . . . . . . . . . . . . . . . 471 Setting Shockwave playback options . . . . . . . . . . . . . . . . . . . . . . . . . . . . . . . . . . 471 About creating multiuser applications . . . . . . . . . . . . . . . . . . . . . . . . . . . . . . . . . 472 About streaming with the Score and behaviors . . . . . . . . . . . . . . . . . . . . . . . . . . 473 Checking whether media elements are loaded with Lingo or JavaScript syntax . . 474 Downloading files from the Internet with Lingo or JavaScript syntax . . . . . . . . . 474 Retrieving network operation results with Lingo or JavaScript syntax . . . . . . . . . 476 Using Lingo or JavaScript syntax in different Internet environments . . . . . . . . . . 477 Testing your movie . . . . . . . . . . . . . . . . . . . . . . . . . . . . . . . . . . . . . . . . . . . . . . . 479 About downloading speed . . . . . . . . . . . . . . . . . . . . . . . . . . . . . . . . . . . . . . . . . . 480
INDEX . . . . . . . . . . . . . . . . . . . . . . . . . . . . . . . . . . . . . . . . . . . . . . . . . . . . . . . . . . 481
10 Contents
![]()
CHAPTER 1
Introduction
Welcome to Macromedia Director MX 2004. With Director, you can develop high-performance multimedia content and applications for CDs, DVDs, kiosks, and the Internet. This guide, Using Director, includes comprehensive descriptions and detailed step-by-step instructions that explain how to use all of the features in Director.
In this chapter, you can get an overview of Director, learn about the features that are new in this release of Director, and find additional sources of information.
About Director
With Director, a proven multimedia authoring tool for professionals, you can develop highperformance content and deploy it anywhere: on CDs, DVDs, intranets, kiosks, or the Internet. Whether you are creating enhanced CD/DVD-ROM content, educational content, or entertainment applications, Director handles the widest variety of media, letting you unleash your creativity and build rich, interactive experiences that deliver measurable results. Director provides all the tools you need to maximize productivity, including a choice of scripting languages and cross-platform publishing.
With Director, you can now do all of the following:
•Embed most major media formats in your multimedia projects, including DVD-Video, Windows Media, RealMedia, QuickTime, and Macromedia Flash content, in addition to audio, bitmap, and 3D formats.
•Work seamlessly with other Macromedia MX products, including Macromedia Flash MX 2004.
•Extend the authoring environment and playback engine with the Xtra extension plug-in architecture in Director. Use third-party Xtra extensions or write your own to control external devices, such as joysticks and cameras, and perform sophisticated operating system-level tasks.
•Write scripts to add interactivity and automation to your projects, using the Lingo scripting language, JavaScript syntax, or a combination of the two.
•Publish content across platforms and to different formats, including Macintosh and Windows projectors.
11

Users view your completed Director movies in one of the following ways:
•In a projector, which plays on your user’s computer as a stand-alone application.
•In the Macromedia Shockwave Player format, which plays in Shockwave-enabled web browsers. Millions of web users already have the Shockwave Player on their computers, browsers, or system software. Others have downloaded Shockwave Player, which is free, from the Macromedia website at www.macromedia.com/shockwave/download/.
Tip: To see some of the exciting and varied ways in which developers use Director, visit the Director showcase at www.macromedia.com/go/discreet_inspiration. You can also see great examples of Shockwave content at www.shockwave.com.
What’s new in Director MX 2004
Director MX 2004 introduces many new features, designed to save time during authoring or to improve integration with other software, media types, and multimedia development processes.
Importing Macromedia Flash MX 2004 content You can now access Macromedia Flash MX 2004 from within Director.
Scripting in JavaScript syntax Director now supports scripting in JavaScript syntax, in addition to Lingo. You can use whichever language is more familiar to you or use both languages in the same movie to develop interactive features and functionality.
Using prebuilt components Prebuilt Macromedia Flash MX 2004 components are now available to reduce your scripting time. You can drop components, such as calendars and user interface elements, into movies to cut the time that it takes to develop interactive features.
Adding DVD-Video You can now embed, control, and play back the popular DVD-Video format inside Director movies. This feature makes DVD possible and affordable for a wide variety of developers—including entertainment studios, distance learning professionals, DVD authors, and corporate presentation specialists.
Publishing to Mac and Windows in one step After you complete a movie, you can now publish across platforms in one step, creating either stand-alone applications or web-based Shockwave content that runs on Mac and Windows. The new projector publishing feature eliminates extraneous dialog boxes, saves projector settings on a per-project basis, and eliminates redundancies.
Naming sprites and channels Sprites and channels can now have custom names, and absolute references to sprites are no longer necessary. This feature is an advantage when you make lastminute changes to your movie. With absolute references, your Lingo or JavaScript syntax scripts might break. But with sprite names, you can move sprites on the Score without worrying about broken scripts.
Customizing your workspace You can arrange your workspace in multiple configurations and save each workspace for later use. As a new part of this feature, you can now create workspace settings that include Movie in a Window (MIAW) windows that are docked alongside your other windows. These docked MIAW windows can extend Director functionality.
Integrating with other Macromedia Studio MX 2004 products If you already use other Macromedia Studio MX 2004 products, such as Macromedia Flash MX 2004 and Macromedia Fireworks MX 2004, then the Director interface is already familiar to you. In addition to a common interface, you can now start and edit other Macromedia Studio MX 2004 files from directly within Director.
12 Chapter 1: Introduction

Integrating with Macromedia server technologies You can now choose to integrate Director with Macromedia server technologies, such as Macromedia ColdFusion MX 6.1 and Macromedia Flash Communication Server MX. For multi-user games, distance learning content, and other server-controlled content, this link between your Director content and IT infrastructure extends your interactivity options.
Getting help from the reference panel A new reference panel is now available in Director to simplify getting help with using Director, behaviors, Xtra extensions, and application programming interfaces (APIs) for both Lingo and JavaScript syntax.
Guide to instructional media
Director contains a variety of information sources to help you learn the program quickly and become proficient in creating multimedia. This information includes several printable PDF files and online help. The Director workspace contains tooltips and context-sensitive help, and additional help is available on the Director website at www.macromedia.com/go/ director_support.
Getting online help
As you use Director, you can get immediate online help by opening Director Help. You can also get help with the specific item in Director that you are currently using. This feature is called context-sensitive help.
To access Director Help:
1 Select Help > Director Help.
2 Browse for a topic on the Contents tab, or type a keyword on the Search tab.
|
Guide to instructional media |
13 |

To access context-sensitive help, do one of the following:
• If you are working in a window, display the Options menu for that window and select Help.
•If you are working in a dialog box, click the Help button.
Director Help opens and displays a topic that relates to the window or dialog box that you are using.
Sources of information
Getting Started with Director This printed manual contains the essential information that you need to get started, including information about installing the latest version of Director. This manual also guides you through the workspace and offers a tutorial, designed for those who are new to Director.
Director Help Panel This online help system is the comprehensive information source for all Director features. It includes overviews of the features, examples, how-to procedures, descriptions of interface elements, and a reference of all scripting objects in both Lingo and JavaScript syntax. Topics are linked and indexed to make finding information and jumping to related topics quick and easy. To view the Director Help Panel, select Help > Director Help while you are working in Director.
Using Director This manual is available in printable PDF format from the Director Documentation Center at www.macromedia.com/go/director_docs. It explains how to use all of the features and functionality offered in Director. Information in the manual is also available in the online Director Help.
14 Chapter 1: Introduction

Director Scripting Reference This manual is available in printable PDF format from the Director Documentation Center at www.macromedia.com/go/director_docs. It provides a complete reference of the Director application programming interfaces (APIs), including both Lingo and JavaScript syntax. Information in the manual is also available in the online Director Help.
Creating Your First 3D Movie in Director This tutorial is available in printable PDF format from the 3D tutorial page on the Macromedia website at www.macromedia.com/go/ drmx2004_3d_tutorial_en. It takes you step by step through creating a simple 3D movie.
Tooltips When you place your mouse pointer over a Director tool or another item in the Director workspace for a few seconds, a small tooltip appears that explains what you can do with the item.
Director Support Center The Director Support Center website (www.macromedia.com/go/ director_support) contains the latest information about Director, plus additional topics, examples, tips, and updates. Check the website often for the latest news and how to get the most out of Director.
Document conventions
Director Help and the Director product manuals all follow a few basic conventions:
•The term Director typically refers to the most recent version of Director.
•Lingo refers to a scripting language that is shipped with Director. JavaScript syntax refers to the Director implementation of JavaScript.
•How-to procedures are identified with bold headings that begin with “To…” and end with a colon. For example, if To access Director Help: appears in a heading, then the heading is followed by a set of steps.
•Examples of Lingo and JavaScript syntax are shown in a fixed-width font. For example,
answer = 2 + 2 is a sample Lingo statement.
•Variables used to represent parameters in Lingo and JavaScript syntax appear in italics. For example, whichCastMember is commonly used to indicate where you should insert the name of a cast member in Lingo or JavaScript syntax.
•Text that you should type in a window or dialog box is shown in a bold font.
|
Guide to instructional media |
15 |

16 Chapter 1: Introduction

CHAPTER 2
Score, Stage, and Cast
If you are new to Macromedia Director MX 2004, see the Getting Started topics in the Director Help Panel to become familiar with the Director workspace and features. (In Macromedia Director MX 2004, select Help > Director Help to view the Getting Started topics.) These topics include overviews and basic definitions of the primary windows and tools in Director, some of the basic tasks that you need to know how to do, and a tutorial that guides you through the process of creating a simple movie.
The topics presented here go into greater detail about how to use three of the most important windows in Director: the Score, the Stage, and the Cast windows.
Using the Tool palette with the Stage
The Tool palette contains useful tools for creating and manipulating sprites on the Stage. It also contains drawing tools and elements you can place directly on the Stage. There are three views that you can access: Default, Classic, and Flashcomponent. Each view of the Tool palette contains some of the same tools; for example, they each contain the arrow, hand, and magnifying glass tools. The Flashcomponent view contains primarily Flash components, while the Classic view has no components at all. The Default view combines elements from the other two: some Flash components but also some Classic items.
17

To change Tool palette views:
1If the Tool palette is not already available, select Window > Tool Palette. The default Tool palette appears.
2Click on the Tool palette view menu and select the view you want: classic, flashcomponent, or default.
The Tool palette changes to display the tools available for each view.
In Windows, you can also dock the Tool palette to the docking channels contained by the application window. (There are no docking channels on the Macintosh.)
•To dock the Tool palette (Windows only), click and drag the palette by the palette gripper over a docking channel. A placement preview line or rectangle appears when the palette can be docked.
How to use each tool in the Tool palette is covered in topics that relate to that specific tool. For example, to find out how to use the Flash component tools, see “Selecting components using the Tool palette” on page 208.
Setting Stage properties
When active, the Stage has three tabs in the Property inspector available at all times: Guides, Movie, and Display Template.
•The Display Template tab lets you set properties for Movies in a Window. For more information, see Chapter 18, “Movies in a Window,” on page 409.
•The Movie tab lets you set the properties of the movie on the Stage. These properties include color definitions, size, and location of the Stage while the movie plays and channels in the movie’s Score. For more information about setting movie properties, see “Setting movie properties” in the Getting Started topics in the Director Help Panel. (In Director, select Help > Director Help to view the Getting Started topics.)
•The Guides tab lets you control the guides and grid that appear on the Stage to assist with movie authoring. The bottom half of the Guides tab contains grid settings.
Setting guides and grid properties
Guides are horizontal or vertical lines that you can either drag around the Stage or lock in place to assist you with sprite placement. The Guides tab also lets you activate the grid. The grid contains cell rows and columns of a specified height and width that you use to assist in visually placing sprites on the Stage. Moving a sprite with the Snap to Grid or Snap to Guides feature selected lets you snap the sprite’s edges and registration point to the nearest grid or guide line. (For more information about sprites, see Chapter 3, “Sprites,” on page 51.)
You must create guides before they become available; you do this by using the Guides tab on the Property inspector. The grid is always available. Guides and the grid are visible during authoring only. When you are not using the guides or the grid, you can hide them.
18 Chapter 2: Score, Stage, and Cast

To create and set guide properties:
1With the Property inspector open, click the Guides tab. The top half of the tab contains settings for Guides.
2 Click the Guide Color box to select a different color.
3Select the options you want to make the guides visible, lock them, or to make the sprites snap to the guides.
4To add a guide, move the cursor over the new horizontal or vertical guide, and then drag the guide to the Stage. Numbers in the guide tooltip indicate the distance, in pixels, the guide is located from the top or left edge of the Stage.
5To reposition a guide, move the pointer over the guide. When the sizing handle appears, drag the guide to its new position.
6 To remove a guide, drag it off the Stage.
7 To remove all guides, click Remove All on the Guides tab in the Property inspector.
To set grid properties:
1With the Property inspector open, click the Guides tab. The bottom half of the Guides tab contains grid settings.
2 To change the grid color, click the Grid Color box and select a different color.
3 Select the desired options to make the grid visible and to make the sprites snap to the grid. 4 To change the width and height of the grid, enter values in the W and H text boxes.
5 Select the desired options to display the grid as dots or lines.
Using multiple Score windows
You can view and work in different parts of a movie at the same time by opening additional Score windows. If your sprite spans occupy many frames in the Score, for example, you can open a second Score window to work on another place in the movie without scrolling. You can also drag sprites from one Score window to another.
To open a new Score window:
1 Activate the current Score window.
2 Select Window > New Score Window.
You can scroll in this window to a different location in the Score.
|
Using multiple Score windows |
19 |

Changing Score settings
To control the appearance of the Score and the information that appears in numbered sprite channels, you set preferences for the Score. By doing so, you can display a script preview and cast member information.
To change Score settings:
1 Select Edit > Preferences > Score.
Note: If you are using a Macintosh OS X operating system, select the Director menu, instead of the Edit menu, to access Preferences.
2The Extended display option lets you display information about sprites in the Score. For more information, see “Displaying sprite labels in the Score” on page 62. To specify what information appears in the numbered sprite channels when Extended display is on, select from the following options:
Name displays sprites by name, if they have names assigned to them. Cast Member displays the cast member number, name, or both. Behaviors displays the behaviors attached to the sprite.
Ink Mode displays the type of ink applied to the sprite. Blend displays the blend percentage applied to the sprite. Location shows the sprite’s x and y screen coordinates.
Change in Location shows the change in x and y coordinates relative to the previous cast member in that channel.
3To display the first few lines of the selected script in a box at the top of the Score, select Script Preview.
4To display the cast member’s name and number when the pointer is over a sprite for a few seconds, select Show Data Tips.
You can also change when a sprite span starts in the score (different frames or a marker, perhaps) by setting it through Edit > Preferences > Sprite. For more information, see “Sprites” on page 51.
Note: If you are using a Macintosh OS X operating system, select the Director menu, instead of the Edit menu, to access Preferences.
20 Chapter 2: Score, Stage, and Cast

Truncate Sprites Being Pasted by shortening its frame span.
Selecting and editing frames in the Score
You can select a range of frames in the Score and then copy, delete, or paste all the contents of the selected frames.
To move, copy, or delete all the contents of a range of frames:
1 Double-click in the frame channel to select frames.
Double-click here to select all sprites in a frame, including markers, special effects, and sounds. Double-click and drag to select a range of frames.
2 If you want to move or copy frames, select Edit > Cut Frames or Edit > Copy Frames.
3If you want to delete frames, select Edit > Clear Frames, or press the Delete key on your keyboard.
If you cut, clear, or delete the selected frames, Director removes the frames and closes up the empty space.
Note: To delete a single frame, you can also select Insert > Remove Frame.
4To paste frames that you have cut or copied, select any frame or sprite, and select Edit > Paste Sprites.
If there aren’t enough empty frames available for the entire sprite to be pasted, the Paste Options dialog box appears, so you can decide how you want the frames to be pasted.
Overwrite Existing Sprites copies the entire sprite over the frames of any existing sprites pastes the sprite into the number of available empty frames
Insert Blank Frames to Make Room inserts frames into the Score so the entire sprite can fit without being truncated or overwriting other sprites.
|
Selecting and editing frames in the Score |
21 |

To add new frames:
1 Select a frame in the Score.
2 Select Insert > Frames.
3Enter the number of frames to insert.
The new frames appear to the right of the selected frame. Sprites in the frames you select are extended or tweened. For more information about tweening, see Chapter 4, “Animation,” on page 83.
About Cast Members
Cast members are the media and other assets in your movie. They can be bitmaps, vector shapes, text, scripts, sounds, Macromedia Flash content or components, DVD content, QuickTime movies, Windows Media video or audio, Macromedia Shockwave 3D content, Rich Text, sounds of various formats, and more. When you place a cast member on the Stage or in the Score, you create a sprite. For more information about sprites, see Chapter 3, “Sprites,” on page 51.
You use windows called casts to group and organize your cast members. To populate casts, you import and create cast members. You can create and use multiple casts in a movie. You can also group multiple Cast windows together in a tabbed panel layout:
Cast window with tabs in Thumbnail view
You can create and edit cast members in Director by using basic tools and media editors such as the Paint and Text windows, or you can edit cast members by using external editors. In addition, you can import cast members from nearly every popular media format into a movie file. For some media types, you can link cast members as external files located on a disk or the Internet. Linked cast members can be updated dynamically.
The Property inspector contains asset management fields for cast members on the Member tab. These fields let you name cast members, add comments about them, and view information such as creation and modification dates and file size.
22 Chapter 2: Score, Stage, and Cast

Casts can be internal—stored inside the movie file and exclusive to that movie—or external— stored outside the movie file and available for sharing with other movies. When you create a new movie, an empty internal cast is created automatically, and when you open the Cast window it is in the default List view. For more information about Cast window views, see “Switching from one Cast window view to another” on page 26.
Cast window in List view
External casts are also useful for creating groups of commonly used cast members. You can use external casts as a way of switching large groups of cast members in a single step. For example, you could switch the text cast members in your movie from English to French by simply switching the cast that the movie uses, rather than each individual cast member.
Using external casts can keep the movie size small for downloading because an external cast can download separately from the movie file if or when it is needed.
Creating new casts
Before assembling a large number of cast members, it’s good practice to create the casts that are necessary to keep them organized. You can sort casts by type, edit cast properties, and use external casts for storing and sharing common media elements.
You can create as many casts as necessary; the number of casts does not affect the size of a movie for downloading.
You can include as many as 32,000 cast members in a single cast, but it’s usually best to group media such as text, buttons, and images logically in a few different casts for each movie.
Creating new casts 23

To create a new cast:
1Do one of the following:
■Select File > New > Cast.
■Select Modify > Movie > Casts to open the Movie Casts dialog box, and click the New button.
■In the Cast window, click the Cast button and select New Cast from the pop-up menu. (See “Using Cast window controls” on page 29.)
Cast button
2 In the New Cast dialog box, type a name for the new cast.
3Specify how to store the cast:
Internal stores the cast within the movie file. This option makes the cast available only to the current movie.
External stores the cast in a separate file outside the movie file. This option makes the cast available for sharing with other movies. For information about internal and external casts, see “Managing external casts” on page 47.
4If you chose External and you don’t want to use the cast in the current movie, deselect the Use in Current Movie option.
Note: You can link the external cast to your movie later. See “Managing external casts” on page 47.
5Click Create.
The cast is created and appears as a tabbed panel in the Cast window.
Note: Creating a new cast by selecting Modify > Movie > Casts does not automatically display a tabbed panel. To display the tabbed panel, click the Cast button and select the cast you created from the pop-up menu.
6If you created an external cast, select File > Save while its Cast window is active, and then save the cast in the desired directory.
Creating cast members
You can create several types of cast members in Director. Director includes editors to create and edit common media such as video, text, shapes, and bitmaps. You can also define external editors to launch from within Director when you double-click a cast member, and you can edit almost any type of supported media. For more information, see “Launching external editors” on page 46.
You can also import cast members. For more information, see “Importing cast members” on page 42.
24 Chapter 2: Score, Stage, and Cast

To create a new cast member from the Insert menu:
1Open the Cast window for the cast member you are creating.
To place a cast member in a specific position in the Cast window, select the position in Thumbnail view. For more information, see “Using Cast Thumbnail view” on page 33. Otherwise, Director places the new cast member in the first empty position or after the current selection in the Cast window.
2Select Insert > Media Element, and then select the type of cast member to create. For more information about each choice, see the following sections:
■“Using the Paint window” on page 102
■“Using the Color Palettes window” on page 151
■“Streaming linked Shockwave Audio and MP3 audio files” on page 238
■“Creating text cast members” on page 165
■“Embedding fonts in movies” on page 164
■“Creating an animated color cursor cast member” on page 299
■“Drawing vector shapes” on page 135
■“Using Flash Content” on page 181
■“Using Windows Media files in Director” on page 252
■“Using DVD media content in Director” on page 254
■“About digital video formats” on page 244
■“Using animated GIFs” on page 101
3To create a control or button, do one of the following:
■Select Insert > Control > Push Button, Radio Button, or Check Box to create a button cast member and a sprite on the Stage. For more information, see “Using shapes” on page 143.
■Select Insert > Control > Field to create a field cast member. Creating a field cast member also creates a sprite on the Stage. For more information, see “Working with fields”
on page 172.
■(Windows only) Select Insert > Control >ActiveX to create an ActiveX cast member. For more information, see “Using ActiveX controls” on page 204.
Note: You can also use Flash components to create controls and buttons. For more information about using Flash components, see “Selecting Flash components” on page 207.
To create a cast member in a media editing window:
1Open a media editing window by selecting Window and then selecting the type of cast member you want to create (Paint, Vector Shape, Text, Windows Media, DVD, and so on).
2Click the New Cast Member button to create a cast member of the corresponding type. The cast member is added to the most recently active Cast window.
New Cast Member button
Creating cast members 25

To create a cast member using the Script window:
1 Open the Script window by selecting Window > Script.
2 Click the New Cast Member button to create a script cast member.
To create a cast member on the Stage:
1 Open the Tool palette, if it is not already open, by selecting Window > Tool Palette.
2Using the tools in the Tool palette, create content directly on the Stage. Each object you create automatically becomes a cast member.
Note: Cast members created on the Stage are automatically placed in the Score.
Using the Cast window
In the Cast window, you can view the cast in either the default List view or the Thumbnail view. (You can change the default so that the Cast window opens in Thumbnail view. See “Setting Cast window preferences” on page 36.)
The Cast window lets you do the following actions:
•Organize and display all media in a movie.
•Move groups of cast members.
•Start editors for cast members.
•Launch the Property inspector to view, add, and change comments about your cast members and to view and modify cast member properties.
•Group multiple casts in a tabbed view using panel groups (see “Working with Cast panel groups” on page 27).
To view the Cast window:
•Select Window > Cast or press Control+3 (Windows) or Command+3 (Macintosh).
If there is more than one cast in the movie, you can select which Cast window to open by selecting Window > Cast and then selecting a cast name from the Cast submenu.
Switching from one Cast window view to another
You can easily toggle between List and Thumbnail views of the Cast window.
To switch from one Cast window view to another, do one of the following:
• Click the Cast View Style button on the Cast window to toggle between the two views.
Cast View Style
•With the Cast window active, select View > Cast, and select either List or Thumbnail, as desired.
•Right-click (Windows) or Control-click (Macintosh) the Cast window, and select either List or Thumbnail, as desired, from the context menu.
26 Chapter 2: Score, Stage, and Cast

Rename Panel Group
Cast panel group.
Working with Cast panel groups
Each Cast panel and panel group has an Options menu located in its upper right corner. The Options menu contains items for grouping, closing, and renaming panels.
To use a Cast panel Options menu:
•Click the Options menu control in the upper right of the panel, and select the desired menu item.
Help launches the page in the help system that is relevant to the current panel.
Group [Panel name] With lets you group the currently selected tab in a panel group with another Cast panel or panel group.
opens the Rename Panel Group dialog box where you can rename the
Maximize Panel Group maximizes the panel group to occupy the entire height of the docking channel.
Close Panel Group closes the panel group.
To group a Cast panel with another Cast panel or Cast panel group:
1 Select a Cast panel or a tab within a Cast panel group.
2From the panel’s Options menu, select Group [Panel Name] With, then select a panel or panel group name from the submenu that appears.
To remove a panel (tab) from a Cast panel group:
1 Select a tab within a Cast panel group.
2From the panel group’s Options menu, select Group [Panel Name] With, then select New Panel Group from the submenu that appears.
The selected panel opens in its own floating panel. The new panel assumes the name previously assigned to it.
Note: The New Panel Group submenu option is dimmed if the panel group only contains a single panel.
To rename a Cast panel group:
1 Select Rename Panel Group from the panel’s Options menu.
2In the Rename Panel Group dialog box, type a new name for the panel group in the Panel Group Name text box, and click OK.

To rearrange the order of tabs within a Cast panel group:
1 Select a tab within the Cast panel group.
2Select Group [Panel Name] With from the panel group’s Options menu, then choose the name of the Cast panel group that contains the selected panel.
The tab is moved to the last (rightmost) position in the panel group.
Note: Save your panel layout if you want to restore your Cast panel configuration the next time you open your file. To save your panel layout, select Window > Panel Sets > Save Panel Layout.
Managing Casts
When casts are grouped with other casts, they appear as tabs in the Cast panel group.
To save the configuration of your Cast panel tabs, you must save the panel layout before closing your file. When you open the file again, restore the tab configuration by opening the panel layout you created. For more information, select Help > Director Help and see “Saving panel sets” in the Getting Started topics.
Managing casts in older Director movies
When you open a multicast movie created in a previous version of Director, only the first cast appears in the Cast window. You can display the remaining casts as tabs in a panel group, or in a new Cast window.
To open a cast as a tabbed panel:
• In the Cast window, click the Cast button and select the cast from the pop-up menu.
To open a cast in a new window:
•Alt+click (Windows) or Option+click (Macintosh) the Cast button and select a cast from the pop-up menu.
A dialog box reminds you to save your panel layout if you want to restore the configuration of your Cast windows the next time you open your file.
28 Chapter 2: Score, Stage, and Cast

Using Cast window controls
The controls along the top of the Cast window are the same in both the List and Thumbnail views. You use the controls to change the cast that appears in the Cast window, the cast member selection, or the name of a cast member. You can also use them to move cast members and to open a cast member’s Script window or the Property inspector.
Cast Member Script
Cast Member Number
Cast Member Properties
Drag Cast Member
Previous/Next Cast Member
Cast View Style
To change the cast displayed in the current Cast window, do one of the following:
•Click the Cast button and select a cast from the pop-up menu. The cast is displayed as a tabbed panel in the current panel group.
•Click a tabbed panel to make it active.
•Press Control+Alt (Windows) or Command+Option (Macintosh) followed by the Right Arrow key or Left Arrow key to move from tab to tab.
To open a cast in a new Cast window:
•Alt+click (Windows) or Option+click (Macintosh) the Cast button and select a cast from the context menu.
A dialog box reminds you to save your panel layout if you want to restore your Cast panel configuration the next time you open your file.
To select the previous or next cast member:
• Click the Previous Cast Member or Next Cast Member button.
To move a selected cast member to a new position in the Cast window (Thumbnail view) or to the Stage:
•Drag the Drag Cast Member button to the desired position in the Cast window or to the Stage.
This procedure is useful when the selected cast member has scrolled out of view.
To enter a cast member name:
• Select a cast member, and enter the name in the Cast Member Name text box.
To edit a cast member script:
• Select a cast member and click the Cast Member Script button.
Using the Cast window 29

To view cast member properties:
1 Select a cast member.
2Do one of the following:
■Click the Cast Member Properties button.
■Right-click (Windows) or Control-click (Macintosh), and select Cast Member Properties from the context menu.
■Select Window > Property Inspector. The Property inspector displays only those properties associated with the selected cast member.
For more information, see “Viewing and setting cast member properties” on page 39.
To view the cast member number:
• Refer to the Cast Member Number field in the upper right corner of the Cast window.
Selecting cast members in the Cast window
Before changing, sorting, or moving cast members, you must select them in the Cast window.
To select a single cast member, do one of the following:
•In List view, click the name or icon (Windows) or click any part of the text or icon (Macintosh).
•In Thumbnail view, click the thumbnail image.
To select multiple adjacent cast members, do one of the following:
•In List view, Shift-click or marquee-select the cast members.
•In Thumbnail view, click the first cast member in the range and then Shift-click the last cast member in the range.
To select multiple nonadjacent cast members:
•In either List or Thumbnail view, Control-click (Windows) or Command-click (Macintosh) each cast member that you want to select.
Copying cast members
You can easily create multiple versions of a cast member in a single cast. For example, you might want several cast members to be identical except for color or size. You can also copy cast members from one Cast window to another.
To copy a cast member:
1In either List or Thumbnail view, select the cast member (or multiple cast members) that you want to copy.
2Alt+click (Windows) or Option+click (Macintosh), and drag the cast member to a new location in Thumbnail view or to the bottom of the list in List view.
You can drag the cast member to a location in the same Cast window or to a different Cast window. Director creates a cast member with a new number, but with all of its other information identical to the original.
3If you copied the cast member into the same Cast window, change the name of the copied cast member so that you (and scripts) can distinguish it from the original. For more information, see “Naming cast members” on page 31.
30 Chapter 2: Score, Stage, and Cast
![]()
Naming cast members
To avoid problems in Lingo or JavaScript syntax when referring to cast members, you should name them and then refer to them by name. Naming cast members doesn’t affect Director performance. The name stays the same even if the cast member number changes.
Avoid duplicating cast member names. If more than one cast member has the same name, Lingo or JavaScript syntax uses the cast member with the lowest number in the cast.
To name a cast member:
1 Select the cast member in either the List or the Thumbnail view of the Cast window.
2Do one of the following:
■Enter a name in the Cast Member Name text box at the top of the Cast window or in any of the editing windows.
■Enter a name in the Name text box on the Cast or Member tab in the Property inspector.
To name a cast member using Lingo or JavaScript syntax:
•Set the name cast member property. For more information about this property, see the Scripting Reference topics in the Director Help Panel.
Using Cast List view
Cast List view, the default view in which the Cast window opens, provides seven columns of information by default. They are shown in the following table:
|
Column Title |
Column Information |
|
Name |
The name of the cast member and an icon that describes the cast member |
|
type. For information about what the icons represent, see “Using Cast |
|
|
Thumbnail view” on page 33. |
|
|
# |
The number that is assigned to the cast member. This number represents the |
|
order in which this cast member appears in Thumbnail view. |
|
|
* |
An asterisk (*) in this column indicates the cast member has changed, but |
|
you have not yet saved those changes. |
|
|
Script |
The word Member in this column means the cast member contains a script. |
|
The word Movie in this column means the cast member is a movie script. |
|
|
The word Behavior in this column means the cast member is a Behavior. |
|
|
You can use the Script icon to view the script or behavior. |
|
|
Type |
The cast member type |
|
Modified |
The date and time the cast member was changed |
|
Comments |
Displays text entered on the Property inspector Member tab, in the |
|
Comments text box. |
|

Four additional columns are available in the Cast Window Preferences dialog box. For more information, see “Setting Cast window preferences” on page 36. The additional columns that you can display are described in the following table:
|
Column Title |
Column Information |
|
Size |
The size in bytes, kilobytes, or megabytes |
|
Created |
The date and time the cast member was created |
|
Modified By |
Who modified the cast member. This value comes from the user login name |
|
(Windows) or the Sharing setup name (Macintosh). |
|
|
Filename |
The full path to the cast member if it is a linked asset |
Resizing columns in Cast List view
You can resize columns in Cast List view.
To resize a column:
1 Hold the pointer over the column boundary to activate the Resizing tool. 2 Drag the column to the desired size.
Sorting Cast List view columns
You can sort the Cast List view columns in ascending and descending order by clicking the column title. When you sort the Cast List window by clicking the column title, you’re changing the way in which the information appears but are not changing any cast member attributes.
About cast member order in Cast List view
Unlike the way in which cast members appear in Thumbnail view, in List view the cast member order does not always correspond to the member’s physical location in the cast.
When you work in List view, also keep in mind the following:
•In List view, Director places new cast members at the end of the list, and the cast member number becomes the first available number after the current selection.
•You can use Thumbnail view to reorder (and renumber) cast members by dragging them to different locations in the window; you cannot reorder cast members by dragging in List view.
32 Chapter 2: Score, Stage, and Cast

Using Cast Thumbnail view
As the name suggests, the Cast Thumbnail view shows a very small (thumbnail) version of the cast member, along with an icon that represents the cast member media type, as shown in the following table:
|
Icon |
Cast member type |
Icon |
Cast member type |
|
Animated GIF |
Behavior |
||
|
Bitmap |
Button |
||
|
Check box |
Custom cursor |
||
|
Digital video |
DVD |
||
|
Field |
Film loop |
||
|
Flash component |
Flash movie |
||
|
Font |
Linked bitmap (all linked cast member icons are |
||
|
changed in the same way) |
|||
|
Movie script |
OLE |
||
|
Palette |
Parent script |
||
|
PICT |
QuickTime video |
||
|
Radio button |
RealMedia |
||
|
Shape |
Shockwave 3D |
||
|
Shockwave Audio |
Sound |
||
|
Text |
Transition |
||
|
Vector shape |
Windows Media |
||
|
Xtra |
|||
|
Using Cast Thumbnail view |
33 |

To turn off or on the display of cast member icons in Thumbnail view and change the Cast window display:
•Select Edit > Preferences > Cast. For more information, see “Setting Cast window preferences” on page 36.
Note: If you are using a Macintosh OS X operating system, select the Director menu, instead of the Edit menu, to access Preferences.
Creating a custom cast member thumbnail
Note: For most cast members, Director displays a scaled version as the thumbnail unless you define a custom thumbnail. Creating a custom thumbnail is useful for behaviors that you want to identify in the Library palette, because behaviors have no identifying image.
To create a custom cast member thumbnail:
1Select the bitmap image to use as the new thumbnail, and copy it to your system’s Clipboard.
You can copy the image from any bitmap editor, including the Paint window. The image can be any size, but smaller images look better because they require less scaling.
2 Select any cast member in the Cast window and open the Property inspector. 3 Right-click or Control-click (Macintosh) the Thumbnail window.
4From the context menu, select Paste Thumbnail.
The image from the Clipboard replaces the current cast member thumbnail, creating a custom thumbnail.
You can also use text as a thumbnail. Create and copy text from any bitmap editor instead of an image and follow the same steps.
34 Chapter 2: Score, Stage, and Cast

Moving cast members within the Cast window
To move a cast member to a new position within the Cast window, you can use Thumbnail view to see the representation of the cast member’s position.
Note: When you move a cast member to a new position, Director assigns it a new number and updates all references to the cast member in the Score, but it doesn’t automatically update references to cast member numbers in Lingo or JavaScript syntax. The best practice is to always name cast members and refer to them by name in scripts that refer to them.
To move a cast member to a new position or a different cast:
•Using Thumbnail view, drag the cast member to a new position in any open Cast window.
In Thumbnail view, a highlight bar indicates where the cast member will be placed. If you drag the cast member over a position that already contains a cast member, Director places your selected cast member in that position and moves the existing cast member one position to the right.
In List view, the cast member is added to the bottom of the list.
To cut, copy, and paste cast members to a new position or a different cast:
1 Select one or more cast members, then select Cut or Copy from the Edit menu.
2Do one of the following:
■In Thumbnail view, select an empty position in any open Cast window, and then select Edit > Paste.
■In List view, deselect all cast members by clicking anywhere in the window except on a cast member name. Then select Edit > Paste.
Note: In either Thumbnail or List view, if you paste cast members while other cast members are selected, you will overwrite the selected cast members.
To move a cast member to a position that is not currently visible in Thumbnail view:
1 Select the cast member you want to move.
2 Scroll the Cast window to display the destination position.
3 Drag the Drag Cast Member button to the destination position.
Organizing cast members within the Cast window
The Sort command in the Modify menu helps clean up and organize the Cast window. Use Sort to sort cast members by their media type, name, size, or usage in the Score. You can also use Sort to remove empty positions in a Cast window.
When you use the Sort command to organize a Cast window, Director can move cast members to new positions, with new cast member numbers.
Note: If you’ve written scripts that refer to cast members by number, these scripts can’t find moved cast members. To avoid this problem, always name your cast members and refer to them by name in your scripts.
If you want to view the cast members in a different sort order without changing cast member numbers, click a column title in Cast List view. See “Sorting Cast List view columns” on page 32.
Organizing cast members within the Cast window 35

Empty at End
To sort the cast using the Modify menu:
1 With the Cast window active, select the cast members to sort or select Edit > Select All. 2 Select Modify > Sort.
3In the Sort Cast Members dialog box, select one of the following sorting methods:
Usage in Score places selected cast members that are used in the Score at the beginning of the selection.
Media Type groups all cast members according to their media type.
Name groups the selection alphabetically by cast member name. Size arranges the selection with the largest files appearing first.
places all empty cast positions in the selection at the end.
4Click Sort.
Director reorders the cast members according to the sorting method you selected. The Score automatically adjusts to the new cast member numbers.
Setting Cast window preferences
You use the Cast window preferences settings to control the appearance of the current Cast window or, if desired, all Cast windows. You can set different preferences for each Cast window. The title bar of the dialog box displays the name of the Cast window preferences you are changing.
To set Cast window preferences:
1 Select a Cast window to change, or a click a tab within a Cast panel group. 2 Select Edit > Preferences > Cast.
Note: If you are using a Macintosh OS X operating system, select the Director menu, instead of the Edit menu, to access Preferences.
36 Chapter 2: Score, Stage, and Cast

3To set the Cast window to display in either List or Thumbnail view, select the appropriate Cast View option.
4 If you want your preferences to apply to all Cast windows, select Apply to All Casts.
5To select the columns that appear in Cast List view, select the desired List Columns options. See “Using Cast List view” on page 31.
6To specify the maximum number of cast members to appear in the Cast window, select a value from the Thumbnails Visible pop-up menu.
This option does not limit the number of cast members that can exist in the cast. If you have a small number of cast members, you can hide the remaining unused cast positions to make better use of the vertical scroll bar. The default is 1000.
7To specify the number of thumbnails in each row of the Cast window, select an option from the Row Width pop-up menu.
The options for 8 Thumbnails, 10 Thumbnails, and 20 Thumbnails specify fixed-row widths that are independent of the window size; if the Cast window is smaller horizontally than the width of the cast row, you must use the horizontal scroll bar to reveal the rest of the cast. The Fit to Window option automatically adjusts the number of cast members per row to fit the current width of the Cast window. In this mode, the horizontal scroll bar is disabled because the entire width of the cast is always in view. The default is Fit to Window.
8To set the size of each cast thumbnail image that appears in the Cast window, select one of the following options from the Thumbnail Size pop-up menu:
Small 44 x 33 pixels
Medium 56 x 42 pixels (default)
Large 80 x 60 pixels
Thumbnails always maintain the standard 4:3 aspect ratio.
If the thumbnails appear fuzzy, they are probably displaying larger than their original size. To correct this, change the Cast window preferences thumbnail setting to a smaller size. Click OK when the alert message asks whether thumbnails should be regenerated.
9To select the display format of the cast member ID that appears below each cast thumbnail image in the Cast window, select one of the following options from the Label pop-up menu:
Number displays the cast number.
Name displays the cast name, if one exists; otherwise, this option displays the cast number in decimal format.
Number:Name displays the cast number in decimal format and the cast name, separated by a colon (:) (for example, 340:Dancing Potato). If no name exists, this setting displays the cast number in decimal format.
The selected format is also used in other windows, including the Score, whenever a cast ID appears.
10 To specify whether Director displays an icon in the lower right corner of each cast member that indicates the cast member’s type, select one of the following from the Media Type Icons popup menu: All Types, All but Text and Bitmap, or None.
11 To display a script indicator icon in the lower left corner of each cast member that has a script attached, select Script.
12 To make your preference settings the default settings, click Save as Default. 13 When you finish selecting your preferences, click OK.
|
Setting Cast window preferences |
37 |

Changing Cast properties
You use the Property inspector to change the name of a Cast and to define how its cast members are loaded into memory.
To change Cast window properties:
1 With the Cast window as the active window, open the Property inspector and click the Cast tab.
2 To change the name of the current cast, enter the new name in the Name text box.
3 Select one of the following Preload options to define how cast members are loaded into memory when the movie runs:
When Needed loads each cast member into memory when it is required by the movie. This setting can slow down the movie while it plays, but it makes the movie begin playing sooner. This setting is the best choice when controlling cast members loading with Lingo or JavaScript syntax.
After Frame One loads all cast members (except those required for frame 1) when the movie exits frame 1. This setting can ensure that the first frame appears as quickly as possible, and it might be the best choice if the first frame of the movie is designed to remain onscreen for a number of seconds.
Before Frame One loads all cast members before the movie plays frame 1. This setting makes the movie take longer to start playing, but it provides the best playback performance if there is enough memory to hold all cast members.
38 Chapter 2: Score, Stage, and Cast

Viewing and setting cast member properties
You can display and set properties for individual cast members, or for multiple cast members at once, even if the cast members are different types. In both cases, you use the Property inspector.
You can also set cast member properties by using Lingo or JavaScript syntax (see “Setting cast member properties using Lingo or JavaScript syntax” on page 49).
To view and set cast member properties:
1 Select one or more cast members.
2Do one of the following:
■If the Property inspector is open, click the Member tab.
■If the Property inspector is not open, select Window > Property Inspector, and click the Member tab.
As with all fields in the Property inspector, if you’ve selected multiple cast members, the information that is common to all the selected cast members appears. Any changes you make apply to all the selected cast members.
3Display the Graphical view on the Member tab. The Member tab displays the following items:
■Editable fields to view or change the cast member’s name (the Name text box), a Comments text box to enter text that appears in the Comments column of the Cast List window, and an Unload pop-up menu that lets you select how to remove a cast member from memory. For more information about using the Unload pop-up menu, see “Controlling cast member unloading” on page 47.
■View-only fields which indicate the cast member’s size, when the cast member was created and modified, and the name of the person who modified the cast member.
For an Xtra cast member, the information displayed in the Property inspector is determined by the developer of the Xtra. Some Xtra extensions have options in addition to those listed here. For non-Macromedia Xtra extensions, refer to documentation supplied by the developer.
Viewing and setting cast member properties 39

For information about specific cast member properties, see the following topics:
•“Using animated GIFs” on page 101”
•“Embedding fonts in movies” on page 164
•“Using Flash Content” on page 181
•“Setting bitmap cast member properties” on page 128
•“Setting vector shape properties” on page 142
•“Synchronizing media” on page 240
•“Setting film loop properties” on page 95
•“Setting palette cast member properties” on page 155
•“Setting PICT cast member properties” on page 128
•“To specify a shape’s fill in Lingo or JavaScript syntax:” on page 144
•“Setting sound cast member properties” on page 232
•“Setting text or field cast member properties” on page 174
•“Setting transition cast member properties” on page 162
•“Setting Xtra cast member properties” on page 49
•“Creating an animated color cursor cast member” on page 299
•“Streaming linked Shockwave Audio and MP3 audio files” on page 238
•“Setting Flash component parameters” on page 209
•“Setting Windows Media properties” on page 253
•“Setting DVD Cast member properties” on page 257
Launching cast member editors
You can open any cast member in the appropriate editor directly from the Cast window. You can use the Director internal media editors, such as the Text, Paint, or Vector Shape window, or you can specify external editors for certain types of cast members. For more information, see “Launching external editors” on page 46.
To launch an editor for a cast member, do one of the following:
•Double-click a cast member in the Cast window.
•Double-click a sprite that contains the cast member in the Score or on the Stage. See “Sprites” on page 51.
Finding cast members
You can search for cast members by name, type, and color palette. You can search for selected cast members used in the Score, such as when you are preparing a movie for distribution. You can also search for cast members not used in the Score—for example, to clean up a movie and reduce the space and memory required to save and run the movie.
Before releasing a movie, it’s a good idea to remove unused cast members to make the movie as small as possible for downloading.
40 Chapter 2: Score, Stage, and Cast
![]()
To find cast members:
1 Select Edit > Find > Cast Member.
2In the Find Cast Member dialog box, select a Cast window to search from the Cast pop-up menu.
To search every cast in the movie, select All Casts.
3Select a search option:
■Select Name, and enter search text in the text box. For example, to search for a group of related cast members that share a common element in their names, you might enter the word Bird to search for cast members named Bird 1, Bird 2, and Bird 3.
■Select Type, and select an option from the pop-up menu to search for cast members by media type.
■Select Palette, and select an option from the pop-up menu. You can use this option to search for and resolve palette conflicts.
■Select Usage to locate all cast members that aren’t used in the Score. Cast members that you find with this option might be used in the movie by a script.
Director displays the specified cast member.
4Do one of the following:
■Select a cast member on the list, and click Select to close the dialog box and select the cast member in the Cast window.
■Click Select All to close the dialog box and select all listed cast members in the Cast window.
To find a cast member in the Score:
1Select a cast member for which to search in the cast or the Score. If you select a sprite that includes multiple cast members, Director searches for the first cast member in the sprite; to select a cast member other than the first, open the sprite to select the cast member. (For information about selecting sprites, see “Selecting sprites” on page 53.)
2Select Edit > Find > Selection, or press Control+Shift+F (Windows) or Command+Shift+F (Macintosh).
Director searches the Score and highlights the first Score cell it finds.
3 Select Edit > Find Again to find the next occurrence of the cast member in the Score.

Importing cast members
Importing lets you create cast members from external media. You can either import data into a Director movie file or create a link to the external file and re-import the file each time the movie opens. Linked files let you display dynamic media from the Internet, such as sports scores, sounds, and weather pictures, which makes downloading movies faster. For more information about linked files, see “About linking to files” on page 44.
Director can import cast members from almost every popular media file format. See “About import file formats” on page 44.
You can import files by using the Import dialog box, dragging files from the desktop to a Cast window, or by using Lingo or JavaScript syntax.
To import cast members and specify import options:
1In Thumbnail view, select an empty position in a cast.
If no cast position is selected, Director places the new cast member in the first available position in the current cast in Thumbnail view. In List view, Director places the new cast member at the end of the list.
2 Select File > Import.
3 To import a file from the Internet, click Internet and enter a URL in the Find URL text box.
4To import local files, select the type of media to import from the Files of Type (Windows) or the Show (Macintosh) pop-up menu.
All the files in the current directory appear unless you make a selection.
5To select a file or files to import, do one of the following:
■Double-click a file.
■Select one or more files, and click Add.
■Click Add All.
You can switch folders and import files from different folders at the same time.
42 Chapter 2: Score, Stage, and Cast

6From the Media pop-up menu at the bottom of the dialog box, select an option to specify how to treat imported media:
Standard Import imports all selected files, storing them inside the movie file but not updating them when changes are made to the source material. If you selected the option to import from the Internet in step 3, Director retrieves the file immediately from the Internet if a connection is available.
Note: All digital video files like DVD, Windows Media, QuickTime, RealMedia, and so on, are linked automatically to the original external file (see the next option, Link to External File), even if you select Standard Import.
Link to External File creates a link to the selected files and imports the data each time the movie runs. If you choose to import from a URL via the Internet, the media is dynamically updated. For more information, see “About linking to files” on page 44.
Note: Text and RTF files are always imported and stored inside the movie file (see the previous option, Standard Import), even if you select Link to External File.
Include Original Data for Editing preserves the original data in the movie file for use with an external editor.
When this option is selected, Director keeps a copy of the original cast member data and sends the original to the external editor when you edit the cast member. This option preserves all the editor’s capabilities. For example, if you specify Photoshop to edit PICT images, Director maintains all the Photoshop object data. For more information, see “Launching external editors” on page 46.
■ Import PICT File as PICT prevents PICT files from being converted to bitmaps.
7When you finish selecting the files, click Import.
If you’ve imported a bitmap with a color depth or color palette that differs from the current movie, the Image Options dialog box appears, so you can enter additional information. See “Choosing import image options” on page 45.
For information about importing specific media, see the following sections:
•“About importing bitmaps” on page 100
•“Importing internal and linked sounds” on page 231
•“Using Director movies within Director movies” on page 202
•“Importing internal and linked sounds” on page 231
•“Importing text” on page 165
•“Using animated GIFs” on page 101
•“Using Flash Content” on page 181
•“Importing Windows Media” on page 252
•“Using DVD media content in Director” on page 254
•“Using Flash components” on page 207
To import files by dragging:
1 In the Explorer (Windows) or on the system desktop (Macintosh), select a file or files to import.
2Drag the files from the desktop to the desired position in the Cast window Thumbnail view or to the Cast window List view.
If you drag the files to List view, the imported files are added at the bottom of the list.
Importing cast members 43

To import files with Lingo or JavaScript syntax:
•Use the importFileInto method to import a file. Set the fileName cast member property to assign a new file to a linked cast member. For more information about this property, see the Scripting Reference topics in the Director Help Panel.
About import file formats
Director can import files in all the formats listed in the following table. For information about additional file formats Director might support, see the Director Support Center website at www.macromedia.com/support/director.
|
Type of file |
Supported formats |
|
Animation and |
Flash movies, animated GIF, PowerPoint presentations, Director movies, |
|
multimedia |
Director external cast files |
|
Image |
BMP, GIF, JPEG, LRG (xRes), Photoshop 3.0 (or later), MacPaint, PNG, |
|
TIFF, PICT, Targa |
|
|
Multiple-image file |
Windows only: FLC, FLI |
|
Macintosh only: PICS, Scrapbook |
|
|
Sound |
AIFF, WAV, MP3 audio, Shockwave Audio, Sun AU, uncompressed and |
|
IMA compressed |
|
|
Digital Video |
DVD; Windows Media (WMV); QuickTime; AVI; RealMedia |
|
Text |
RTF, HTML, ASCII (often called Text Only), Lingo, or JavaScript syntax |
|
Palette |
PAL, Photoshop CLUT |
About linking to files
Director reimports media every time a movie runs when Link to External File is selected in the Import dialog box (select File > Import). Linking makes it easy to use bulky media such as long sounds and is especially useful for showing media from the Internet that changes frequently.
Linking also makes downloading movies faster; users can choose whether to view linked files, so the files do not download unless they’re needed.
When you link to an external file, Director creates a cast member that stores the name and location of the file. Saving a movie saves only the link to the linked cast member. Keep linked files in a folder that’s close to the original movie file. Paths are restricted to 4096 characters by the system. URLs can be as many as 260 characters. If you store a file too many folders away from the movie or using a very long URL, it might not link correctly.
When distributing movies with linked media, use the following guidelines:
•If you distribute a movie, you also must include all linked cast member files, and they must be in their expected locations. In addition, the Xtra extensions that are used to import the media must be present when the movie runs (either on the user’s computer or included in your movie). For more information, see “Setting Xtra cast member properties” on page 49.
•When you link to media on the Internet, the media must be present at the specified URL when the movie runs. Provide for link failure because you can’t guarantee that an Internet transaction will be successful.
44 Chapter 2: Score, Stage, and Cast

•To retrieve media from the Internet during playback, Director requires that the projector include certain Xtra extensions. To include these Xtra extensions automatically, click Add Network in the Movie Xtras dialog box. Movies playing in web browsers do not require these Xtra extensions.
Note: Select Edit > Preferences > Network to define standard network settings for the Director authoring environment. If you are using a Macintosh OS X operating system, select the Director menu, instead of the Edit menu, to access Preferences.
Choosing import image options
If you import a bitmap cast member with a color depth or color palette that is different from that of the Stage (the current movie), Director lets you select the image’s color depth and color palette. You can choose to import the bitmap at its original color depth or at the Stage color depth. (The Stage color depth is the same as the system color depth.) You can also choose to import the image’s color palette or remap the image’s colors to a palette in the movie.
In many cases, it’s easiest to change the image’s color depth to the depth of the movie and remap the image to the color palette that is used in the rest of the movie. For more information about controlling color in Director, see Chapter 7, “Color, Tempo, and Transitions,” on page 145.
If you change 16-, 24-, or 32-bit cast members to 8 or fewer bits, you must remap the cast members to an existing color palette.
To select bitmap image options for importing:
1Import a bitmap image by selecting File > Import. (For more information about this procedure, see “Importing cast members” on page 42.)
2If the Image Options dialog box appears while you are importing a bitmap image using File > Import, select one of the following Color Depth options:
Image specifies the color depth and palette of the image.
Stage specifies the color depth of the current Stage.
3Select a Palette option to change palette settings for 2-, 4- or 8-bit images:
Import imports the image with its color palette. The palette appears as a new cast member immediately following the bitmap cast member.
Remap To replaces the image’s colors with the most similar solid colors in the palette you select from the pop-up menu.
4Select Image options:
Trim White Space removes any white pixels from the edges of the image. Deselect this option to preserve the white canvas around an image.
Dither blends the colors in the new palette in the Palette section to approximate the original colors in the graphic.
5To apply the current settings to all the remaining files that you selected for importing, select Same Settings for Remaining Images.
Importing cast members 45

Launching external editors
You can specify external applications to edit many types of media. All the types of media for which you can define an external editor are listed in the Editors Preferences dialog box. After you set up an external editor for a particular media type, Director starts the application when you edit a cast member of that type. When you finish editing a cast member in an external editor and then save and close the file, Director re-imports the cast member media.
You can easily edit Flash cast members using the launch-end-edit feature in Director MX. For more information, see “Editing a Flash cast member” on page 184.
If you want to use an external editor for an imported cast member, select Include Original Data for External Editing during import. For more information, see “Importing cast members”
on page 42.
You cannot define an external editor for any cast member created by an Xtra, such as text, vector shapes, and custom pointers.
To define an external editor:
1 Select Edit > Preferences > Editors.
Note: If you are using a Macintosh OS X operating system, select the Director menu, instead of the Edit menu, to access Preferences.
2 Select a type of media for which you want to define an external editor. 3 Click Edit.
4Click Browse or Scan to locate the application.
You can specify any application capable of editing the selected type of media.
5To determine which editor appears when you double-click a cast member, do one of the following:
■If you prefer to make changes inside of Director and only occasionally want to use the external editor, select Use Internal Editor.
■If you prefer to use the external editor to make changes to the cast member, select Use External Editor.
To launch an external editor:
1Select a cast member of a media type for which you have defined an external editor, and do one of the following:
■If you specified Use External Editor when you defined the external editor for this media type, double-click the cast member.
■Select Edit > Launch External Editor.
■While the cast member is selected and the Cast window is active, right-click (Windows) or Control-click (Macintosh) and select Launch External Editor from the context menu.
Director launches or switches to the application that created the cast member, sending the original data to the external editor.
Note: If you’ve specified an external editor and you want to edit a cast member with the Director internal editors, select the cast member and select Edit > Edit Cast Member.
46 Chapter 2: Score, Stage, and Cast

2Edit the cast member.
If you change an image in the Paint window and then edit the image with an external editor, changes made in the Paint window, with the exception of registration points, are lost. Director warns you of this possibility.
3 Save and close the file. Director re-imports the cast member.
Controlling cast member unloading
When Director runs low on memory, it removes cast members from memory. You use the Property inspector to specify the priority with which a cast member is removed from memory. When a cast member is available in memory, it appears almost instantly. When it needs to be loaded from disk, the loading can cause a delay. Set your cast members so that frequently used cast members remain in memory as long as possible.
These settings are the same for all types of cast members.
To specify the Unload setting:
1 Select the cast members in the Cast window.
2 On the Property inspector Member tab, display the Graphical view and then select an option from the Unload pop-up menu:
3—Normal sets the selected cast members to be removed from memory after any priority 2 cast members are removed.
2—Next sets the selected cast members to be among the first removed from memory. 1—Last sets the selected cast members to be the last removed from memory.
0—Never sets the selected cast members to be retained in memory; these cast members are never unloaded.
Managing external casts
An external cast is a separate file that must be explicitly linked to a movie for the movie to use its cast members.
If you link an external cast to a movie, Director opens the cast every time it opens the movie. If you don’t link an external cast to a movie, you must open and save the file separately. You can use unlinked external casts as libraries to store commonly used elements for authoring, such as scripts, buttons, and so on. For more information, see “Creating libraries” on page 48.
When you distribute a movie that uses an external cast, you must include the external cast file. For disk-based movies, the cast must be in the same relative path in your files as it was when the movie was created. For Shockwave movies on the web, the cast must be at the specified URL.
To create an external cast:
1 Select File > New > Cast.
2 Type a name for the new cast.
3Specify that the cast be stored as an external cast.
If you don’t want to use the cast in the current movie, deselect the Use in Current Movie option.
|
Managing external casts |
47 |

4Click Create.
The cast is created, and a Cast window for the cast appears in List view. For more information, see “Using the Cast window” on page 26.
5 Select File > Save while the Cast window is active, and save the cast in the desired directory.
To link an external cast to a movie:
1 Select Modify > Movie > Casts.
2 In the Movie Casts dialog box, click Link.
3Locate and select the external cast you want, and click Open.
You can link to casts on your local disk or to casts that are stored at any URL. Click Internet and enter a URL (in the Find URL text box) for a linked external cast. Click OK.
To unlink a cast from a movie:
1 Select Modify > Movie > Casts.
2 In the Movie Casts dialog box, select the external cast. 3 Click Remove.
To save a movie and all open casts, linked or unlinked:
• Select File > Save All.
Note: To use a cast member from an external cast without creating a link to the external cast, first copy the cast member to an internal cast or to a (different) linked external cast.
Creating libraries
A library is a special type of unlinked external cast that appears in the Library palette. When you drag a cast member from an external cast library to the Stage or Score, Director automatically copies the cast member to one of the movie’s internal casts. Libraries are useful for storing any type of commonly used cast members, especially behaviors. A library cannot be linked to a movie. For more information, see “Attaching behaviors” on page 275.
When you create a library, as explained in the following procedure, it appears in the Library List pop-up menu in the Library palette.
To create a library:
1Create an external cast file, following the procedure under “Creating new casts” on page 23. Do not select Use in Current Movie.
2With the Cast window for the external cast active, select File > Save, and place the external cast in the Libs folder in the Director application folder.
3 Restart Director to see the cast that you just created appear in the Library palette.
48 Chapter 2: Score, Stage, and Cast

Setting cast member properties using Lingo or JavaScript syntax
Lingo or JavaScript syntax lets you control and edit cast members by setting their properties. Some properties are available for every type of cast member, and other properties are available only for specific cast member types. For more information about these properties, see the Scripting Reference topics in the Director Help Panel.
To specify the cast member’s content:
• Set the media cast member property.
To specify the cast member’s name:
• Set the name cast member property.
To set the contents of the cast member’s comments field:
•Set the comments cast member property. You can store any text information in this field that you find useful, and access it at runtime by getting the comments property.
To specify the cast member’s purge priority:
• Set the purgePriority cast member property.
To specify the content of the script that is attached to the cast member:
• Set the scriptText cast member property.
To specify the file that is assigned to a linked cast member:
• Set the fileName cast member property.
For additional cast member properties that you can test and set using Lingo or JavaScript syntax, see the properties in the Scripting Reference topics in the Director Help Panel.
Setting Xtra cast member properties
Xtra cast members have the same Name and Unload properties as other cast members, but they can also contain an extra panel of options that is accessible from the Property inspector. To set cast member properties, use the Member tab and the custom tab for the type of cast member you are working with. The Member tab contains an Edit button and might contain a More Options button, depending on the type of Xtra. Use the Edit button to edit the cast member with its default editor. Use the More Options button to display the Cast Member Properties dialog box for the current cast member.
The custom tab for the type of cast member you are working with might also contain a More Options button. This button displays the Cast Member Properties dialog box for the current cast member.
The content of the Properties dialog box is determined by the developer of the Xtra. For non-Macromedia Xtra extensions, refer to any documentation that the developer supplies.
Setting Xtra cast member properties 49

To view or change Xtra cast member properties:
1 Select an Xtra cast member.
2Open the Property inspector, and click the Member tab.
The Member tab displays the following information about the member:
■The cast member name
■The name of the cast that contains the cast member
■The size in kilobytes
■The creation date
■The date the cast member was last modified
■The name of the user who last modified the cast member
3 Use the Name field to view or edit the cast member name.
4To specify how Director removes cast members from memory if memory is low, select options from the Unload pop-up menu. For information about these options, see “Controlling cast member unloading” on page 47.
5To set special options for the current Xtra cast member, click the custom tab for the cast member you are working with. Some types of Xtra cast members also have a More Options button on this tab. You can use this button to set any properties of the cast member that are not displayed on the tab.
50 Chapter 2: Score, Stage, and Cast
Просмотров 1к. Обновлено 11 октября 2019
 Урок из серии : «Работа в редакторе Flash»
Одной из универсальных систем векторной графики и компьютерной анимации является редактор Macromedia Flash.
Кроме стандартных элементов рисования он содержит язык программирования Action Script, что позволяет создавать как простые анимации, так и интерактивные, т.е. управляемые пользователем.
В этом уроке мы познакомимся поближе с рабочей средой редактора Flash MX.
В целом организация пользовательского интерфейса редактора является достаточно стандартным для Windows-приложений.
Та же полоса меню, те же кнопки основной панели инструментов, на которую вынесены наиболее часто используемые команды.
Достаточно своеобразной является панель временной диаграммы, но опять-таки только для тех, кто пока не знаком с Dreamweaver.
Наиболее важные элементы основного окна Flash MX показаны на рисунке.
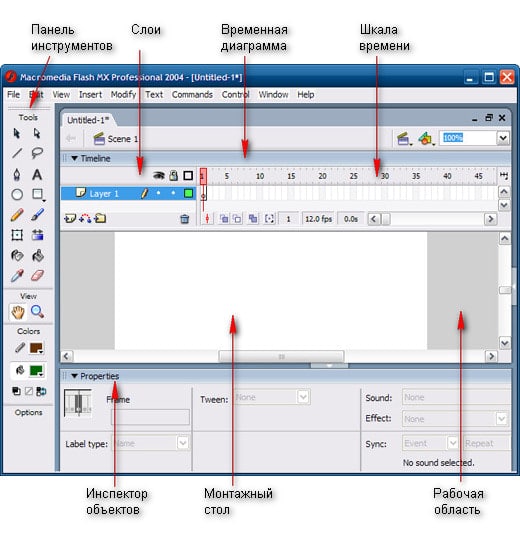
-
- Панель инструментов редактирования (Tools)Панель инструментов редактирования расположена вдоль левой границы окна. Она обеспечивает доступ к инструментам, которые применяются для создания и редактирования графических объектов. Многие из этих инструментов вам знакомы по работе с графическими редакторами.
- Рабочая областьРабочая область занимает всю центральную часть окна. В рабочей области можно выполнять любые операции редактирования объектов, однако в «кадр» попадут только те объекты (или их фрагменты), которые расположены в пределах Монтажного стола (Stage).
- Временная диаграмма (Timeline)Панель Временной диаграммы расположена над рабочей областью Временная диаграмма, как и стол, принадлежит конкретной сцене фильма. Она позволяет описать взаимное расположение слоев на сцене, последовательность изменения состояния объектов, представленных на сцене.Временная диаграмма является основным инструментом при создании анимации и при описании поведения интерактивных элементов фильма.Основные элементы временной диаграммы:
- описание слоев текущей сцены фильма; описание представлено в виде своеобразной таблицы, содержащей несколько столбцов; в них указываются названия слоев и их атрибуты. Подробнее эта часть панели временной диаграммы будет рассмотрена на уроке «Создание анимации»;
- собственно временная диаграмма, содержащая шкалу кадров, изображение «считывающей головки» и временные диаграммы для каждого слоя сцены.
- Инспектор свойств (Properties)Ниже рабочей области (в исходном состоянии) размещается панель инспектора свойств Если в рабочей области не выбран ни один объект, либо таковые вообще отсутствуют, то инспектор свойств отображает общие параметры фильма.При выборе какого-либо объекта автоматически изменяется формат инспектора свойств, на панели отображаются свойства выбранного объекта.
Панель инструментов рисования и редактирования содержит четыре раздела.
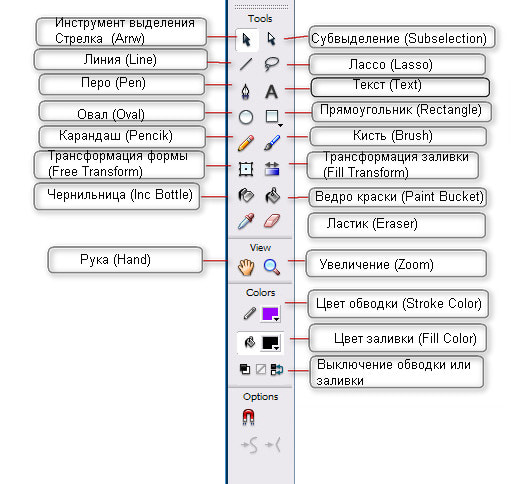
В разделе Tools собраны сами инструменты. Затем следуют разделы View (способ просмотра), Color (выбор цвета обводки и заливки) и, наконец, контекстно-зависимая область настройки инструментов Options (параметры).
Более подробно с элементами окна Flash MX и инструментами Вы познакомитесь по мере их применения в ходе выполнения практических заданий.
Название: Использование Macromedia Flash MX.
Автор: Гурвиц М., Мак-Kейб Л.
2003.
Данная книга представляет собой исчерпывающее и профессионально написанное руководство по Flash MX. Эта книга поможет вам в самом начале пути освоения Flash MX и останется ценным источником информации, даже когда вы станете настоящим мастером. Использование Macromedia Flash MX — это именно та книга, которая будет полезна любому профессиональному Web-дизайнеру, разработчику и аниматору.

ОГЛАВЛЕНИЕ
Введение
ЧАСТЬ I. СРЕДА И ИНСТРУМЕНТЫ FLASH. 27
Глава 1, Что нового во Flash MX. 29
Глава 2. Интерфейс Flash. 39
Глава 3. Рисование во Flash. 61
Глава 4. Использование растровых изображений во Flash. 81
Глава 5. Работа с текстом. 97
ЧАСТЬ II. АНИМАЦИЯ И ЗВУК. 115
Глава 6. Символы, экземпляры и элементы библиотек. 117
Глава 7. Анимация во Flash. 137
Глава 8. Использование звука. 157
Глава 9. Кнопки, меню и поля ввода данных. 173
Глава 10. Интеграция видео. 187
ЧАСТЬ III. РАСШИРЕНИЕ ИНТЕРАКТИВНОСТИ С ПОМОЩЬЮ ACTIONSCRIPT. 197
Глава 11. Знакомство с ActionScript. 199
Глава 12. Управление переменными, данными и типами данных. 217
Глава 13. Использование операторов. 245
Глава 14. Работа с данными: использование предложений. 279
Глава 15. Объединение предложений в функции. 295
Глава 16. Взаимодействие, события и установление последовательности. 329
Глава 17. Демонстрация мощи видеоклипов. 357
Глава 18. Процедура рисования с помощью ActionScript. 395
ЧАСТЬ IV. РАСШИРЕННЫЕ СЦЕНАРИИ ACTIONSCRIPT. 417
Глава 19. Использование встроенных базовых объектов. 419
Глава 20. Использование встроенных объектов фильмов. 467
Глава 21. Упаковка данных и функций с помощью пользовательских объектов. 515
Глава 22. Компоненты. 537
Глава 23. Использование обучающих взаимодействий. 559
Глава 24. Коллективное использование ActionScript. 577
Глава 25. Тестирование, отладка и устранение проблем. 589
ЧАСТЬ V. РЕАЛИЗАЦИЯ ВНЕШНИХ СВЯЗЕЙ С ПОМОЩЬЮ FLASH. 601
Глава 26. Локальная связь. 603
Глава 27. Взаимосвязь с сервером. 625
Глава 28. XML-данные. 637
ЧАСТЬ VI. ВЫХОДНЫЕ ПАРАМЕТРЫ FLASH. 653
Глава 29. Печать Flash-фильма. 655
Глава 30. Оптимизация, публикация и экспортирование фильмов. 669
ПРИЛОЖЕНИЕ А. Улучшение доступности Flash. 688
Предметный указатель.
СЛОИ И ПАПКИ СЛОЕВ.
Слои позволяют компоновать содержимое фильма. Каждый слой можно считать отдельной полосой фильма на куске чистой ацетатной ткани. Если на каком-то участке слоя содержимое отсутствует, то сквозь данный слой будет «просвечивать» содержимое слоя, находящегося под ним. Если на каком-то участке верхнего слоя имеется содержимое, оно будет закрывать нижние слои.
Слои позволяют систематизировать и разделить содержимое. Содержимым легче управлять, если оно разнесено по слоям. Особенностью Flash является возможность слияния простых не-сгруппированных изображений, существующих в пределах одного слоя, если они перекрываются или соприкасаются. На рис. 2.4 показано, что если два красных круга, расположенных в одном СЛОС, соприкасаются, они становятся единым объектом. Разнесение содержимого в отдельные слои позволяет анимировать объекты индивидуально, с достижением весьма сложных эффектов. Добавление слоев не приводит к увеличению размера файла фильма, поэтому слои можно смело использовать при необходимости организации содержимого.
Бесплатно скачать электронную книгу в удобном формате, смотреть и читать:
Скачать книгу Использование Macromedia Flash MX — Гурвиц М., Мак-Kейб Л. — fileskachat.com, быстрое и бесплатное скачивание.
Скачать pdf
Ниже можно купить эту книгу по лучшей цене со скидкой с доставкой по всей России.Купить эту книгу
Скачать книгу — Использование Macromedia Flash MX — Гурвиц М., Мак-Kейб Л. — depositfiles
Скачать книгу — Использование Macromedia Flash MX — Гурвиц М., Мак-Kейб Л. — letitbit
Дата публикации: 24.07.2011 16:33 UTC
Теги:
книга по web-дизайну :: Macromedia Flash MX :: Гурвиц :: Мак-Kейб
Создание статического текста
Расширяемый горизонтальный текст
Статический горизонтальный текст заданной ширины
Статический вертикальный текст
Функция Аlias Тext
Использование device-шрифтов (только для горизонтального
текста)
Форматирование текста
Установка выравнивания, полей, абзацных отступов и межстрочного
интервала
Настройка режима, при котором пользователю разрешено выделение
текста (только для горизонтального текста)
Редактирование текста
Связывание текста с URL
Преобразование и разбиение
текста
Добавлять текст в Macromedia Flash MX 2004 и Macromedia Flash MX Professional
20041 можно несколькими способами. Вы можете
создать текстовые блоки, содержащие статический текст (static text) — текст,
содержание и внешний вид которого вы определяете, когда создаете документ. Вы
также можете создать динамический текст (dynamic text) — текст, динамически
изменяющийся во время воспроизведения ролика, например такой текст может отображать
счет в игре или биржевые сводки.
Можно также создать текст для поля ввода Input Text Fields. Поле ввода позволяет
пользователям вводить текст в интерактивные формы. С помощью подобного поля
пользователь может передать информацию на сервер. Поля текстового ввода позволяют
вводить текст в формы, отчеты и т.д. В данном уроке речь пойдет только о статических
текстах, о динамическом тексте и тексте для полей ввода мы поговорим в других
уроках.
Статический текст можно ориентировать не только горизонтально (слева направо),
но и вертикально (как слева направо, так и справа налево). Flash MX позволяет
применять все основные элементы форматирования (менять шрифт, размер текста,
стиль, цвет, трэкинг, кернинг, сдвиг базовой линии, выравнивание, поля, отступы
и т.д.). Текст можно изменять так же, как обычный объект, — поворачивать, масштабировать,
применять к нему деформацию сдвига, делать зеркальное отображение текста и т.д.,
и при этом у вас останется возможность редактировать его как текст. Горизонтальным
текстовым блокам можно давать ссылки на заданный URL. Текст можно перевести
в графическое представление и затем применять к буквам (как к графическим объектам)
все виды графических преобразований. Итак, рассмотрим эти возможности по порядку.
Создание статического текста
Для создания текста выберите инструмент Text (кнопка с буквой А — она показана
нажатой на рис. 1) и выполните команду Window => Properties.
В результате появится одноименная панель.

Рис. 1. Инструмент Text и панель Properties
В левой части панели Properties находится выпадающее меню (на рис. 1 оно выделено
светлым эллипсом), в котором можно выбрать тип текстового поля: Static Text
(Статический текст), Dynamic Text (Динамический текст) или Input Text (Поле
ввода).
Выберите вариант Static text. Программа Flash позволяет создавать разные виды
статических текстовых полей, рассмотрим их последовательно.
Расширяемый горизонтальный текст
Для создания расширяемого горизонтального текста выберите инструмент Тext,
щелкните на рабочем поле (появится текстовый блок, в правом верхнем углу которого
имеется круглый маркер), по мере ввода текста блок расширяется (рис. 2).
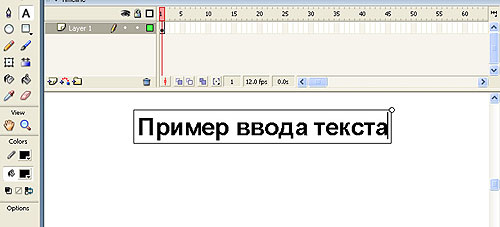
Рис. 2. Горизонтальный текст, расширяемый по мере ввода
Статический горизонтальный текст заданной ширины
Для создания статического горизонтального текста заданной ширины выберите инструмент
Тext, щелкните мышью и, удерживая нажатой левую кнопку, перетащите курсор для
задания нужной ширины текстового блока. В правом верхнем углу текстового блока
располагается квадратный маркер. Текстовый блок имеет фиксированную длину. Текст
выравнивается под эту длину путем автоматического переноса (рис. 3).

Рис. 3. Статический горизонтальный текст заданной ширины
Если вы хотите поменять ширину текстового блока, потяните за маркер — перенос
слов в тексте и высота текстового блока поменяются автоматически (рис. 4).

Рис. 4. При изменении ширины текстового блока происходит автоматический
перенос слов
Статический вертикальный текст
Для того чтобы располагать текст вертикально, щелкните по иконке с буквами
Abcd (рис. 5). В результате появится панель, где можно выбрать варианты Vertical,
Left to Right (при этом текст будет заполняться, как показано на рис. 5) либо
Vertical, Right to left (в этом случае текст будет заполняться вертикально справа
налево).
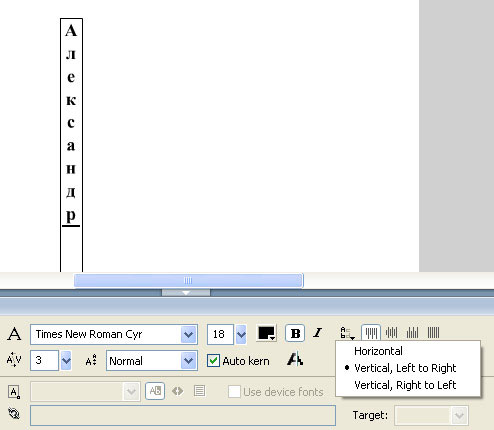
Рис. 5. Пример вертикального текстового блока
Функция Аlias Тext
Кнопка Alias Text (на рис. 6 она выделена светлым эллипсом) позволяет более
четко отображать текст при малых размерах шрифта. Для того чтобы понять, как
работает данная функция, сделайте две надписи, например, шрифтом Times New Roman
8 пунктов, причем одну при активированной функции Alias Text, а другую, отменив
данную функцию (кнопка Аlias Тext выделена светлым эллипсом на рис. 6).
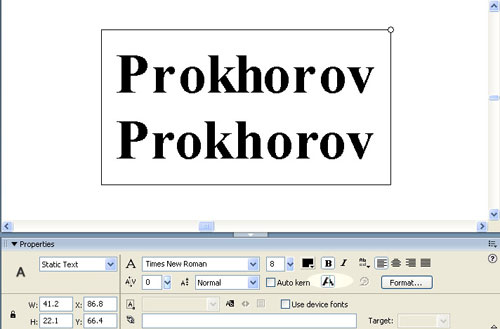
Рис. 6. Применение функции Аlias Тext
Затем выполните команду Control => Test Scene, и вы увидите
результат, показанный на рис. 7. Как видно из рис. 7, надписи сильно различаются
по качеству.
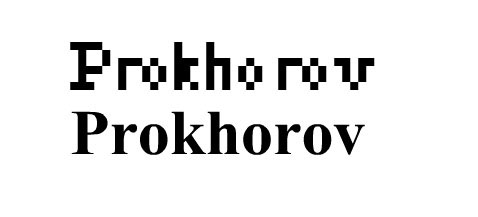
Рис. 7. Пример отображения надписей с применением функции Аlias
Тext и без нее
Использование device-шрифтов (только для горизонтального
текста)
По умолчанию шрифты встраиваются в результирующий файл Flash-ролика. Когда
вы создаете статический текст, то можете указать, чтобы Flash Player применял
device-шрифты для отображения определенных текстовых блоков. Использование device-шрифтов
позволяет уменьшить размер результирующего файла вашего документа, поскольку
документ не содержит лишней информации о данном шрифте. Применение device-шрифтов
позволяет также увеличить четкость текста при размерах меньше 10 пунктов. Для
того чтобы определить, что текст должен отображаться с использованием device-шрифтов,
необходимо выделить текстовый блок, в панели Properties выбрать режим Static
Text и поставить флажок Use Device Fonts (на рис. 8 он выделен светлым эллипсом).

Рис. 8. Использование device-шрифтов
Форматирование текста
При выборе шрифта из выпадающего меню (рис. 9) в панели справа отображается
его начертание. Рядом с панелью выбора шрифта располагаются кнопки, которые
позволяют задать размер шрифта, сделать текст полужирным или курсивным и выбрать
цвет заливки текста. Интерфейс данных кнопок реализован так же, как и в программе
Word, и не требует пояснений.
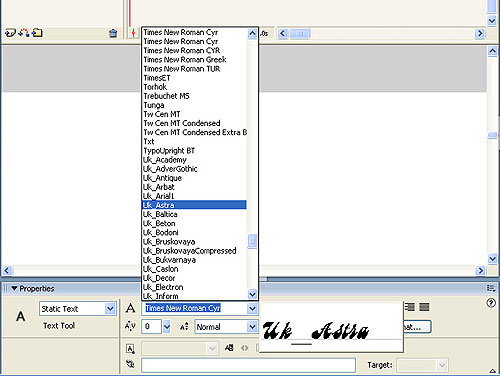
Рис. 9. Выбор шрифта
Для того чтобы изменить межсимвольный интервал, щелкните по стрелке вниз рядом
с полем Character Spacing (рис. 10) и передвиньте движок или просто введите
нужное значение в поле ввода.
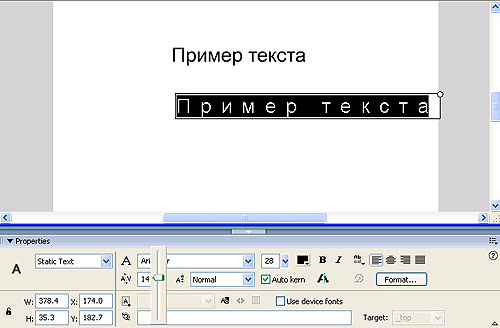
Рис. 10. Пример изменения межсимвольного интервала
Чтобы разместить текст выше или ниже базовой линии, щелкните по стрелке вниз
рядом с полем Character Position (рис. 10) и выберите требуемое размещение из
меню: вариант Normal — размещение текста по базовой линии, Superscript — текст
находится выше базовой линии (для горизонтального текста) или правее ее (для
вертикального текста), Subscript — текст располагается под базовой линией (для
горизонтального текста) или левее ее (для вертикального текста).
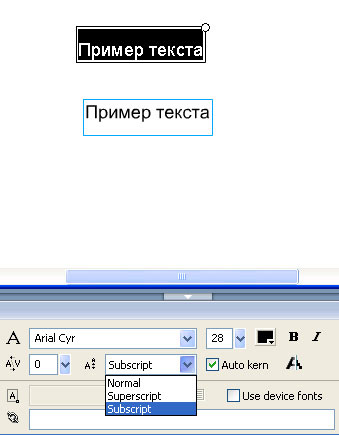
Рис. 11. Смещение текста от базовой линии в верхний и нижний регистры
Текст сверху напечатан в режиме Subscript, а нижний в режиме Superscript
Установка выравнивания, полей, абзацных отступов и межстрочного
интервала
Иконки выравнивания текста по левому краю, по центру и по правому краю выглядят
так же, как и в программе Word, а потому их назначение вам будет понятно.
Для того чтобы настроить параметры Indent (Отступ), Line Spacing (Межстрочное
расстояние), Left Margin (Левое поле) и Right Margin (Правое поле), щелкните
по кнопке Format Options и установите нужные значения в соответствующих полях
(рис. 12).
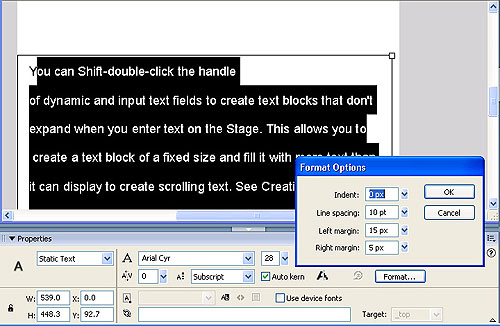
Рис. 12. Панель настройки отступа, межстрочного расстояния, левого
и правого полей
Настройка режима, при котором пользователю разрешено выделение
текста (только для горизонтального текста)
Для того чтобы разрешить пользователю выделять текст в результирующем документе,
выделите горизонтальный текст, выберите режим Static Text, установите флажок
Use Device Fonts (Использовать device-шрифты) и щелкните по кнопке Selectable
(на рис. 13 она выделена светлым эллипсом). Выполнив команду Control
=> Test Scene, можно убедиться, что текст в результирующем документе
действительно можно выделять.

Рис. 13. Кнопка Selectable (выделена светлым эллипсом)
Редактирование текста
При редактировании текста во Flash можно пользоваться теми же приемами, что
и при работе в большинстве текстовых редакторов. Можно использовать команды
Cut, Copy и Paste как для перемещения текста внутри программы Flash, так и для
обмена текстом с другими приложениями. Чтобы выделить текстовый блок, выберите
инструмент Arrow и щелкните по текстовому блоку. Для одновременного выделения
нескольких блоков, щелкайте по ним при нажатой клавише Shift (рис. 14).
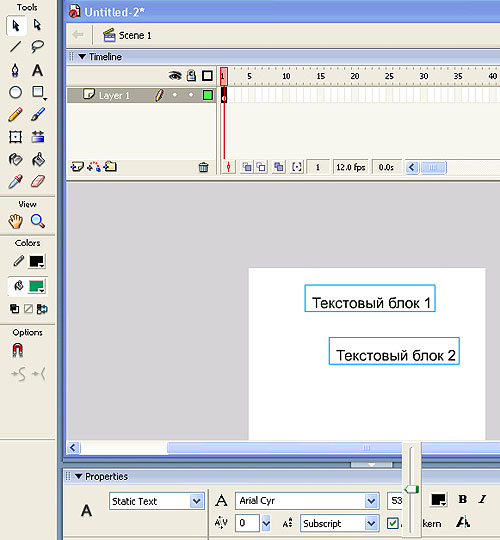
Рис. 14. Выделения текстовых блоков
Связывание текста с URL
Сразу отметим, что связывание текста с URL возможно только для горизонтального
текста. Напечатайте текст, например «связывание текста с URL», как на рис. 15.
Выделите напечатанный текст и в поле ссылки наберите URL-ссылку в нашем примере
http://www.hownetworks.boom.ru,
а затем выполните команду Control => Тest Scene и щелкните
мышью по надписи — загрузится соответствующая Web-страничка.
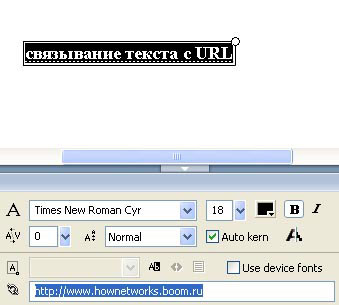
Рис. 15. Связывание текста с URL
Преобразование и разбиение текста
Текстовые блоки можно преобразовывать точно так же, как и другие объекты, —
масштабировать, поворачивать, искажать и зеркально отображать. При масштабировании
текстового блока как объекта увеличение или уменьшение размера шрифта не отражается
в панели Properties. Как видно на рис. 16, мы увеличили размер букв в надписи,
однако в панели Properties размер шрифта в пунктах указан прежний — 53 пункта.
Рис. 16. Трансформирование текстового блока
Текст можно разбивать на отдельные текстовые блоки, а также преобразовывать
в графику (то есть превращать в линии и области заливки).
Чтобы разбить текст, щелкните инструментом Arrow на текстовом блоке и выполните
команду Modify => Break Apart. В результате все символы
будут помещены в отдельные текстовые блоки (рис. 17).
Рис. 17. Текст, разбитый на отдельные текстовые блоки
Вы можете выделить инструментом Arrow каждый символ и переместить его.
Однако символы можно по-прежнему редактировать как элементы текста. Например,
вы можете выделить инструментом Arrow все символы и изменить гарнитуру или размер
шрифта (рис. 18).
Рис. 18. Пример изменения шрифта для всех текстовых блоков
Но если повторно выполнить команду Modify => Break Apart,
то буквы превратятся в линии и заливки. После такого преобразования символы
можно будет редактировать только как графические объекты.
Как и любые другие фигуры, литеры текста можно группировать или преобразовывать
в символы и анимировать. Выделив совокупность графических объектов, к ним можно
применить различные преобразования. Например, функция Modify =>Transform
=> Envelope позволяет различным образом трансформировать контуры,
в которые вписан текст (рис. 19).
Рис. 19. Режим трансформирования Envelope
Интересного эффекта можно добиться с помощью команды Modify => Shape
=> Soften Fill Edges (рис. 20). Данные режим позволяет смягчить
края контуров.
Рис. 20. Режим смягчения краев
Напомним, что программа позволяет использовать не только заливку цветом, но
и растровую заливку. На рис. 21 в качестве заливки была использована фотография
снега.
Рис. 21. Использование растрового изображения для заливки
Следует иметь в виду, что команду Break Apart можно применять только к векторным
шрифтам (TrueType, PostScript). Bitmap-шрифты просто исчезнут при попытке разбить
их.
Удалив заливку букв (рис. 21) и залив растром контур, можно сделать буквы прозрачными
и поместить их на какой-нибудь фон (рис. 22).
Рис. 22. Использование эффекта прозрачности букв
И наконец, можно произвольным образом изменять форму букв с помощью инструментов
Subselect и Arrow (рис. 23). Пользуясь данными инструментами, можно нарисовать
буквы причудливой формы, которых не найдешь ни в одном стандартном шрифте.

Рис. 23. С помощью инструмента Subselect можно редактировать отдельные
символы
Таким образом, после текста в отдельные графические объекты, с ними можно выполнять
все те манипуляции, которые Flash позволяет производить с графическими объектами.
Надеюсь, вы убедились, что Flash предоставляет в этом плане широкий спектр возможностей.
Однако, это еще не все, на что способная программа Flash, — она также позволяет
создавать интересные анимационные эффекты, о которых речь пойдет в следующем
уроке.
КомпьютерПресс
2’2004
ОГЛАВЛЕНИЕ
- Введение в Macromedia Flash
MX 2004 и мультимедиа-технологии - Организация интерфейса пользователя
Macromedia Flash MX 2004 - Создание статичной графики в Macromedia
Flash MX 2004 - Редактирование статичной графики
в Macromedia Flash MX 2004 - Работа с цветом в Macromedia Flash
MX 2004 - Слои в Macromedia Flash MX 2004
- Образцы в Macromedia Flash MX 2004
- Введение в анимацию
- Покадровая анимация в Macromedia
Flash MX 2004 - Трансформационная анимация
в Macromedia Flash MX 2004: движение - Трансформационная анимация в Macromedia
Flash MX 2004: морфинг и составная анимация - Заключение
- Источники в Интернете
- Литература
Аннотация. В учебнике дается введение во flash-технологии.
Рассмотрено создание и редактирование в Macromedia Flash MX 2004 статичной
графики, покадровой, трансформационной и составной анимации. Большое
внимание уделено созданию слоев и образцов.
Изложенные в учебнике материалы легли в основу курсов по мультимедиа-технологиям,
читаемых на факультете ТСС Санкт-Петербургского государственного университета
телекоммуникаций им. проф. М.А. Бонч-Бруевича.
Ключевые слова: Macromedia Flash MX 2004, учебник,
создание статичной графики, редактирование графики, слои, образцы, покадровая
анимация, трансформационная анимация, ключевой кадр, промежуточный кадр,
мультимедиа, Интернет, сцена.

Введение
Анимация во Flash основана на изменении свойств
объектов, используемых в “мультике”. Например,
объекты могут исчезать или появляться, изменять
свое положение, форму, размер, цвет, степень
прозрачности и т. д.
Во Flash предусмотрено три различных механизма
анимирования объектов:
- покадровая (“классическая”) анимация, когда
автор сам создает или импортирует из других
приложений каждый кадр будущего “мультика” и
устанавливает последовательность их просмотра; - автоматическое анимирование (так называемая
tweened-анимация), при использовании которой автор
создает только первый и последний кадры
мультипликации, а Flash автоматически генерирует
все промежуточные кадры; различают два вида
tweened-анимации: анимация, основанная на
перемещении объекта (motion animation), и анимация,
основанная на трансформации (изменении формы)
объекта (shape animation); - анимация на основе сценариев; сценарий
представляет собой описание поведения объекта
на собственном языке Flash, который называется
ActionScript; синтаксис этого языка напоминает
синтаксис других языков сценариев, используемых
в Web-публикациях (например, JavaScript и VBScript).
Каждый из этих механизмов имеет как
достоинства, так и недостатки. В частности,
tweened-анимация обладает двумя несомненными
достоинствами:
- во-первых, автор избавлен от необходимости
создавать каждый кадр в отдельности; - во-вторых, для воспроизведения такого
“мультика” Flash достаточно хранить только первый
и последний кадры, что обеспечивает значительное
уменьшение объема такого фильма. - Вместе с тем, tweened-анимация пригодна для
создания лишь наиболее простых сюжетов, в
которых свойства объектов изменяются
равномерно. - С помощью сценариев на ActionScript можно описать
достаточно сложное поведение объектов, однако…
Однако для этого нужно изучить язык ActionScript. - Другими словами, прежде чем приступить к
созданию собственного “мультика”, следует
определиться с выбором механизма его реализации.
Шкала времени
Если в рабочей области редактируется
графическое содержимое, то в шкале времени
фактически пишется сценарий флэш-фильма.
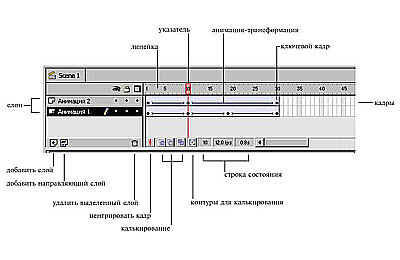
<Рисунок1>
Линейка — отображает все кадры по
возрастающей. Числом отмечен каждый пятый кадр.
Указатель шкалы времени — выполняет ту же
функцию, что и инструмент Стрелка в рабочей
области. Он выделяет кадр, для последующей с ним
работы.
Чтобы выделить конкретный кадр, щелкните по
нему левой клавишей мыши.
Типы кадров
Наша анимация состоит из последовательности
кадров. Кадр может быть как составленным вручную,
так и сгенерированным Flash. Это относится к кадрам
одного слоя. Так как сцены Flash состоят обычно из
нескольких слоев, то итоговые
«многослойные» кадры, могут содержать, как
сгенерированные, так и «самодельные» слои.
Ключевой кадр — кадр доступный для обработки.
В анимации этот кадр будет отображаться так, как
нарисует пользователь. На временной шкале
ключевой кадр отображается чёрным кружочком,
если в нём есть изображение, и белым, если нет
никакого рисунка.
Обычный кадр — кадр, который будет
отображаться в анимации, но пользователь
непосредственного участия в прорисовке кадра не
принимал. Он будет таким же, как ключевой кадр
слева или, если была проведена раскадровка, то
кадр автоматически сформированный программой.
Раскадровка — автоматический переход
изображения из одного ключевого кадра в другой.
Кадр-фантом — пустая клетка на временной
диаграмме, в которой может быть установлен либо
ключевой кадр, либо обычный кадр.
По кадровое формирование изображения.
Самое простое формирование анимации — это по
кадровое изменение рисунка, т.е. на каждом кадре
изменяется положение объекта, его
характеристики, или добавляются новые и
удаляются старые объекты.
Элементарные операции с кадрами:
| Действие | Контекстное меню | Комбинация клавиш | Примечание |
| Вставить пустой ключевой кадр | Вставить пустую клавиатуру | F7 | |
| Ключевой кадр, повторяющий содержание предыдущего |
Вставить клавиатуру | F6 | Если перед вставляемым кадром уже был ключевой кадр, содержащий объекты, то они будут скопированы в создаваемый кадр. |
| Очистить ключевой кадр | Очистить клавиатуру | Shift-F6 | |
| Вставить обычный кадр | Вставить кадр | F5 | Вставляя обычный кадр (не ключевой), увеличиваем время анимации или время отображения предыдущего ключевого кадра. |
| Удалить кадр | Стереть кадры | Shift-F5 |
Покадровая анимация
Покадровая анимация – это анимация,
полностью составленная из ключевых кадров. Т.е.
вы сами определяете, как содержимое кадра, так и
его «длительность» (т.е. сколько таких
статических кадров будет занимать изображение).
Достоинства: Покадровая анимация дает
вам, в некотором смысле, больший контроль над
анимацией, и если вы опытный аниматор, вы можете
выгодно ею пользоваться. Это единственный
способ организовать смену абсолютно независимых
изображений – слайд-шоу (например, создавая
обычный баннер средствами Flash).
И все остальное, что вытекает из возможности
прорисовывать каждый кадр вручную.
Недостатки: Покадровую анимацию сложно
модифицировать. Особенно, если это не дискретный
набор изображений, а связанная анимация.
Приходится модифицировать все кадры. На деле, у
опытных Flasher-ов, такая ситуация практически не
встречается.
Покадровая анимация занимает достаточно большой
объем, так как приходится хранить информацию о
каждом кадре.
Практическая работа № 1.
Создание покадровой анимации
Рассмотрим технологию покадровой анимации на
примере создания анимированного заголовка
«Анимация во Flash».
1. Выберите Документ Flash.
2. Выберите инструмент Стрелка и кликните
левой клавишей мыши в первом кадре шкалы времени
(Выбор кадра).
3. Выберите инструмент Текст и задайте
параметры его модификаторов (тип шрифта, размер,
цвет и пр.).
4. Кликните левой клавишей мыши в левом верхнем
углу сцены, чтобы установить текстовую метку.
5. На клавиатуре наберите заглавную букву А.
<Рисунок2>
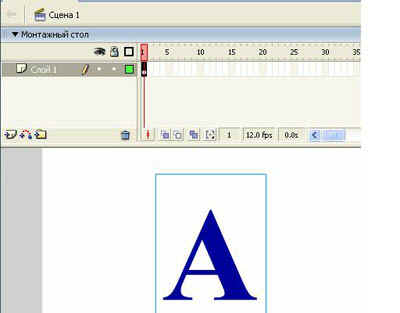
6. Для того, чтобы в анимации буквы в разных
кадрах располагались на одной линии,
воспользуемся инспектором объектов. Для этого
выберите инструмент Стрелка и кликните левой
клавишей мыши на букве А. Чтобы оптимизировать
площадь заголовка, задайте нулевые координаты в
строках X и Y. Буква А будет размещена в самой
верхней левой точке основной сцены. <Рисунок3>
7. Для формирования следующего кадра, в котором
будет появляться новая буква, необходимо
выполнить следующие действия: Кликните левой
клавишей мыши в следующем пустом кадре шкалы
времени. (Он станет темным).
8. Выберите Вставить клавиатуру или просто
нажмите на клавиатуре клавишу F6. В кадре
шкалы времени появится черная точка.
9. Выберите инструмент Текст и если это
необходимо задайте новые параметры его
модификаторов (тип шрифта, размер, цвет и пр.). Для
лучшего усвоения технологии покадровой анимации
будем рассматривать пример без изменения
параметров модификаторов текста.
10. Кликните левой клавишей мыши рядом с
предыдущей буквой, чтобы установить текстовую
метку.
11. На клавиатуре наберите следующую букву.
<Рисунок 4>
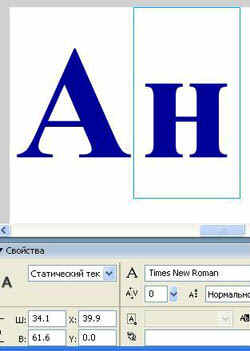
12. Выберите инструмент Стрелка и кликните
левой клавишей мыши на новой букве. С помощью
этого же инструмента букву, как графический
объект, можно перемещать.
13. Задайте нулевую координату в строке Y, для
того, чтобы все буквы располагались на одной
прямой.
14. Повторяйте 8-13 операции для каждой новой
буквы в заголовке. Для анимации такого заголовка
потребуется 15 кадров. <Рисунок5>

Тестирование анимации
Для того чтобы протестировать полученную анимацию:
1. Выберите в главном меню Регулировака –
Проверить клип или просто нажмите на
клавиатуре клавиши Ctrl-Enter.
2. Просмотрев анимацию, нажмите левой клавишей
мыши в правом верхнем углу окна тестирования
кнопку Закрыть окно (Х).
Формирование оптимальной сцены анимации
Перед публикацией в Web обрежем все лишнее:
1. Выберите в главном меню Преобразовать –
Документ или на клавиатуре нажмите клавиши Ctrl+J.
2. В открывшемся окне Характеристики
документа нажмите на клавишу Содержимое.
<Рисунок6>
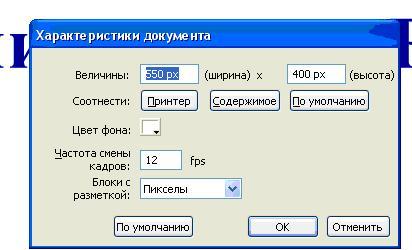
В результате сцена примет размеры содержимого
анимации.
<Приложение1>
3. Сохраните файл под именем pr_1.fla.
Анимация с построением промежуточных
кадров
Гораздо эффективнее другой тип анимации, когда
создаются только начальный и конечный кадры
некоторого фрагмента, а все промежуточные кадры
система достраивает сама. Такой тип анимации
называется автоматический (tweened-анимация).
При этом способе анимации Flash автоматически
строит промежуточные кадры между ключевыми
кадрами, заданными вами. Это означает, что вы
рисуете объект, потом на другом кадре
производите изменения и просите Flash рассчитать
те кадры, которые лежат между этими двумя
ключевыми кадрами. Он выполняет эту работу, и вы
получаете плавную анимацию.
Скорость и плавность анимации зависят от
количества кадров, которые вы отводите под
движение и скорости вашего Flash фильма. Скорость
фильма можно изменить здесь: Выберите в главном
меню Преобразовать – Документ или на
клавиатуре нажмите клавиши Ctrl+J. В
открывшемся окне Характеристики документа параметр
Частота смены кадра задает количество кадров
в секунду. Для качественной анимации скорость
должна быть не меньше 25-30 кадров в секунду.
Плавность и длительность задается количеством
кадров, отведенных на анимацию (ее фрагмент).
Например, если скорость вашего фильма — 30
кадров/сек., и вам нужно совершить перемещение,
скажем, самолетика, из одного угла картинки — в
другой за 2.5 секунды, то на это движение вам нужно
отвести 75 кадров.
Во Flash существует два варианта построения
промежуточных изображений — motion tweening (анимация
движения) и shape tweening (построение анимации на
основе изменения формы). Эти способы отличаются в
корне. Первый используется чаще всего, т.к. с
помощью него можно построить подавляющее
большинство анимации. Второй применяется в
случаях, когда нужно плавное изменение формы.
Практическая работа №2. Анимация
перемещения объекта
1. В левом верхнем углу нарисуйте квадрат.
2. Первый кадр шкалы времени видоизменился –
окрасился в бледно-красный цвет, и в нем
появилась жирная точка – признак того, что кадр
стал ключевым.
3. Вызовете контекстное меню и выберите
“Создать промежуточное изображение”.
<Рисунок7>
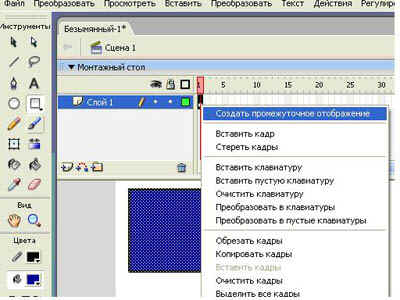
4. Вызовете контекстное меню в кадре диаграммы
времени, где предпочитаете закончить анимацию и
выберите команду “Вставить клавиатуру”
5. С помощью инструмента “Средства Выделения”
(V) переместите объект в новое положение, но в
начале проверьте, что вы находитесь в последнем
ключевом кадре. <Рисунок8>
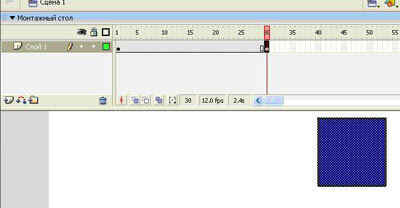
6. Отмените выделение объекта, и нажмите Enter
– объект пришел в движение.
7. Для замедления движения надо переместить
влево конечный ключевой кадр, для ускорения –
вправо. Выделите слой.
8. Нажмите и не отпускайте клавишу Ctrl.
Наведите курсор на ключевой кадр – указатель
превратился в двунаправленную стрелку.
9. Нажмите кнопку мыши и, не отпуская ее,
передвигайте кадр.
10. Сохраните файл под именем pr_2.fla. <Приложение2.>
Практическая работа №3. Анимация изменения
размера объекта
1. Создайте новый файл.
2. В 1-м ключевом кадре – создать промежуточное
изображение.
3. Выберите время анимации и команду “Вставить
клавиатуру”.
4. Измените размер объекта конечного ключевого
кадра, используя инструмент “Свободная
трансформация” (Q).
5. Протестируйте проект.
6. Сохраните файл под именем pr_3.fla.
Практическая работа №4. Анимация изменения
цвета объекта
1. Создайте новый файл, нарисуйте новый объект и
примените к нему правила создания анимации
движения.
2. Находясь в конечном ключевом кадре выделите
объект инструментом “Средства Выделения” (V). В
результате в панели “Свойства” высветится поле
“Цвет”. Выбрать вариант “Тон”, появятся
дополнительные поля, с помощью которых можно
выбрать цвет. <Рисунок9>
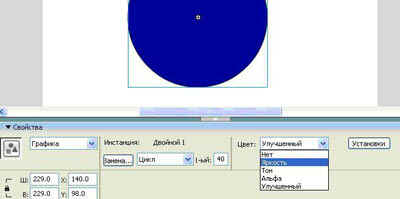
3. Сохраните файл под именем pr_4.fla. <Приложение3>
Некоторые особенности анимации
Одновременно можно изменять несколько свойств
объекта. Для этого в конечном ключевом кадре
необходимо указать их новые значения, например,
переместить объект и одновременно изменить его
размер.
Можно задать анимацию, не изменяя ни одного
свойства. В результате объект “замрет” на
протяжении указанного промежутка времени
Практическая работа №5. Создание анимации
постепенно исчезающий рисунок
Объект маленький квадрат, расположен в левом
верхнем углу кадра; анимация включает в себя
следующие пять шагов:
1. Квадрат увеличивается.
2. Квадрат движется направо строго
горизонтально и останавливается у правой
границе кадра.
3. Квадрат движется по направлению к левому
нижнему углу, изменяя свой цвет, и
останавливается в точности под своим
увеличенным на 1-м шаге изображением.
4. Квадрат некоторое время стоит неподвижно.
5. Квадрат возвращается в исходное положение с
изменением размера до первоначального.
Сохраните файл под именем pr_5.fla. <Приложение4>
Практическая работа №6. Морфинг
Морфинг — это трансформация объектов. Например
из квадрата может получится круг, а из круга,
объект, который захотите.
1. Создайте новый файл.
2. Нарисуйте круг.
3. Выделите ключевой кадр и выберите на
панели Свойства – Твин – Форма. <Рисунок10>
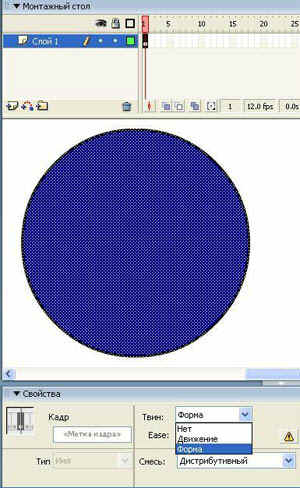
4. Выберите 20 кадр и нажмите F6.
5. Измените круг используя инструмент Выделение
(заливку можно сделать другого цвета, получится
очень красиво!).
6. Протестируйте проект.
7. Сохраните файл под именем pr_6.fla. <Приложение5>
Используемая литература
- Вовк Е.Т. Информатика: уроки по Flash. – М.:
КУДИЦ-ОБРАЗ, 2005, — 176 с. - П. Лапин. Самоучитель Flash MX. – Спб.: Питер, 2003. – 368
с.
1. Введение в Macromedia Flash MX 2004 и мультимедиа технологии
Мультимедиа происходит от двух латинских слов: multi – много и media – среда. Мультимедийные приложения могут одновременно использовать несколько сред: графику, видео, фотографию, анимацию, текст, звуковое сопровождение и, обеспечивая при этом активное взаимодействие с пользователем (интерактивность). Таким образом, мультимедиа – это совокупность интерактивных аудио-визуальных компьютерных технологий.
В данном курсе мультимедийные технологии будут изучаться на примере пакета Macromedia Flash MX 2004. С помощью Macromedia Flash MX 2004 можно создавать:
— анимационные фильмы;
— презентационные ролики;
— рекламные баннеры;
— навигацию веб-сайтов;
— веб-сайты;
— игры.
Сейчас flash-технологии не только стали де-факто одним из интернет-стандартов, но и поддерживаются практически во всех современных мобильных мультимедийных телефонах.
Курс состоит из частей: статичная (неподвижной) графика (главы 2 – 7), анимация (главы 8 – 10), создание интерактивности посредством написания скриптов на языке ActionScript 2.0. В данном учебнике рассматриваются только две первые части курса: статичная графика и анимация.
2. Организация интерфейса пользователя Macromedia Flash MX 2004
Алгоритм запуска программы Macromedia Flash MX 2004 следующий (рис. 1):
— Нажать кнопку «Пуск».
— Выбрать пункт «Программы».
— Выбрать пункт Macromedia.
— Выбрать пункт Macromedia Flash MX 2004.

Рис. 1. Запуск Macromedia Flash MX 2004
Для удобства рекомендуется разместить ярлык запуска Macromedia Flash MX 2004 на рабочем столе.
Структура интерфейса пользователя пакета Macromedia Flash MX 2004 типичная для Windows-приложений и имеет все стандартные для них панели инструментов, на которых мы останавливаться не будем.
Слева расположены инструменты рисования, управление масштабированием и цветом, а также модификаторы (рис. 2). Внизу расположен инспектор свойств, справа – окна других инспекторов (управления цветом, компонентов и т.д.).

Рис. 2. Структура интерфейса Macromedia Flash MX 2004
В центре расположен рабочий стол. На рабочем столе собственно создаются изображения. Рабочий стол имеет область «кадр», которая только и будет отображаться пользователю. Все другие изображения, находящиеся на рабочем столе, но не попавшие в кадр, отображены не будут. Это свойство часто используется при создании скриптов. Над рабочем столом расположена временная шкала, используемая для создания анимации. Особенности вышеперечисленных областей будут рассмотрены в соответствующих главах.
Новый документ пакета Macromedia Flash MX 2004 создается, как и обычно в Windows-приложениях, посредством кнопки создания нового документа или выбора соответствующего пункта меню (New) в разделе «Файл».
После того, как создан новый документ, необходимо задать размер кадра, частоту кадров и, возможно, цвет фона (рис. 3). Для вызова данного диалогового окна необходимо нажать кнопку Size (рис. 2).

Рис. 3. Задание размера кадра в Macromedia Flash MX 2004
3. Создание статичной графики в Macromedia Flash MX 2004
В Macromedia Flash MX 2004 существует богатый арсенал средств создания и редактирования неподвижных изображений или статичной графики. Изучение средств и приемов создания статичной графики является очень важным, так как она лежит в основе создания анимированных изображений (анимации). Инструменты рисования сосредоточены на панели инструментов рисования (рис. 4). Примеры созданных изображений с помощью основных инструментов рисования приведены на рис. 5.

Рис. 4. Панель инструментов Macromedia Flash MX 2004

Рис. 5. Примеры изображений, полученных с помощью инструментов рисования Macromedia Flash MX 2004
Инструмент «Линия» (Line Tool)
Для того чтобы нарисовать линию необходимо:
1. Выбрать инструмент рисования «Линия» (Line Tool).
2. Установить курсор в точку начала линии.
3. Нажать левую кнопку мыши и, не отпуская ее переместить курсор в точку, являющуюся концом рисуемой линии.
4. Отпустить левую кнопку мыши.
Если необходимо, чтобы рисуемые линии были проведены под углом, кратным 45?, необходимо во время ее рисования держать нажатой клавишу <Shift>.
При включенном модификаторе притяжения к объекту (Snap to Object) рисуемая линия будет притягиваться к объекту, когда курсор окажется на достаточно близком от него расстоянии. Точка притяжения будет отмечена кружком.
Инструмент «Овал» (Oval Tool)
Процесс рисования овала:
1. Выбрать инструмент «Овал» (Oval Tool).
2. Установить курсор мыши в левую верхнюю точку воображаемого прямоугольника, в который будет вписан создаваемый овал.
3. Нажать левую кнопку мыши и, не отпуская ее переместить курсор в точку, являющуюся нижней левой точкой воображаемого прямоугольника, в который будет вписан овал.
4. Отпустить левую кнопку мыши.
Если необходимо нарисовать круг, следует во время рисования удерживать нажатой клавишу <Shift>.
Инструмент «Прямоугольник» (Rectangle Tool)
Рисование прямоугольника:
1. Выбрать инструмент «Прямоугольник» (Rectangle Tool).
2. Установить курсор в левую верхнюю точку рисуемого прямоугольника.
3. Нажать левую кнопку мыши и, не отпуская ее переместить курсор в нижнюю левую точку создаваемого прямоугольника.
4. Отпустить левую кнопку мыши.
Если необходимо нарисовать квадрат, то во время рисования следует удерживать нажатой клавишу <Shift>.
При необходимости получения прямоугольника со скругленными углами необходимо включить модификатор сглаживания углов (Round Rectangle Radius) и выбрать коэффициент сглаживания.
Инструмент «Карандаш» (Pencil Tool)
С помощью инструмента «Карандаш» можно рисовать произвольные линии, причем рисуемая линия будет повторять путь курсора. Алгоритм рисования следующий:
1. Выбрать инструмент «Карандаш» (Pencil Tool).
2. Установить курсор в начальную точку рисуемой линии.
3. Нажать левую кнопку мыши и не отпуская ее провести линию требуемой формы.
4. Отпустить левую кнопку мыши.
Созданная линия будет состоять из ряда примитивов. Для сглаживания линии можно воспользоваться модификатором сглаживания Smoothing, а для спрямления углов – модификатором Straighten. Для этого необходимо выделить фрагмент изображения и выбрать соответствующий модификатор.
Инструмент «Перо» (Pen Tool)
С помощью инструмента «Перо» можно создавать фигуры, состоящие из отрезков прямых и кривых линий (кривые Безье), причем у последних возможно задавать требуемый радиус кривизны. Чтобы воспользоваться этим инструментом необходимо:
1. Выбрать инструмент «Перо» (Pen Tool).
2. Установить курсов в начальную точу отрезка прямой или кривой линии.
3. Нажать левую кнопку мыши.
4. Если рисование линии не закончено, то перейти к шагу 2.
5. Сделать двойной щелчок левой кнопкой мыши.
Чтобы замкнуть линию необходимо точно подвести курсов к точке, после чего нажать левую кнопку мыши. После этого, для замкнутой области будет автоматически создана заливка. Для обеспечения требуемой точности можно увеличить масштаб изображения.
Инструмент «Кисть» (Brush Tool)
Чтобы создать заливку произвольной формы необходимо:
1. Выбрать инструмент «Кисть» (Brush Tool).
2. Установить курсор в начальную точку рисуемой заливки.
3. Нажать левую кнопку мыши и, не отпуская ее нарисовать заливку требуемой формы.
4. Отпустить левую кнопку мыши.
При рисовании заливки можно менять размер и форму кисти с помощью модификаторов Brush Size и Brash Shape, соответственно.
Кроме того, существует пять режимов управления перекрытием создаваемых заливок:
1. Paint Normal (обычное закрашивание) – закрашивается все: пустые области, линии и заливки (рис. 6, а).
2. Paint Fills (закрашивание заливок) – закрашиваются только заливки (рис. 6, б).
3. Paint Behind (закрашивание сзади) – закрашиваются только пустые области, линии и заливки не закрашиваются (рис. 6, в).
4. Paint Selection (закрашивание выделенного) – закрашиваются только выделенные заливки (рис. 6, г).
5. Paint Inside (закрашивание внутри) – закрашивается заливка и пустая область находящиеся либо в пределах, либо за пределами замкнутого контура (рис. 6, д–е).

Рис. 6. Режимы модификатора Brash Shape пакета Macromedia Flash MX 2004
Инструмент «Ластик» (Eraser Tool)
Данный инструмент работает аналогично инструменту «Кисть», только вместо создаваемых ей заливок стирает изображение. Как и у «Кисти» у «Ластика» имеется модификаторы размера и управления перекрытием, но модификатор формы – отсутствует.
Инструмент «Ведро с краской» (Paint Bucket Tool)
Данный инструмент служит для создания заливок замкнутых областей по следующему алгоритму:
1. Выбрать инструмент «Ведро с краской» (Paint Bucket Tool).
2. Поместить курсор в какую-либо точку замкнутой области, для которой необходимо сделать заливку.
3. Нажать левую кнопку мыши.
Цвет заливки задается с помощью селектора цвета. Кроме того, с помощью модификатора можно задавать величину зазора, который будет игнорироваться, т.е. при котором область будет считаться замкнутой.
Инструмент «Чернильница» (Ink Bottle Tool)
Чернильница служит для управления цветом контура. Для того чтобы изменить цвет контура необходимо:
1. С помощью селектора цвета контура выбрать требуемый цвет.
2. Поместить курсор в любую точку контура, цвет которого необходимо изменить.
3. Нажать левую кнопку мыши.
Источник structuralist.narod.ru