Кто-то уже выкладывал все файлы по нашей Фабии. Выложу ещё раз, чтобы не потерялось. Файлы на русском языке с заводским руководством по ремонту большинства двигателей, коробок передач, кузовни, электроники, ходовой всех версий и т. п.
Папка в Яндекс.Диске — yadi.sk/d/4XE83o-tluSkFA
Коробки передач
АКПП 001 — yadi.sk/i/rLycVhHDyX8E9A
КПП 002 — yadi.sk/i/tbFh97Hp-NoiwA
КПП 02R — yadi.sk/i/xIPUOOUGv67XQA
КПП 02T — yadi.sk/i/AOMj1Fn9A-65WA
КПП 0A8 — yadi.sk/i/bdmoWStnXSt-AA
Бензиновые двигатели
1,0 (50 л.с.) и 1,4 (60/68 л.с.)
Механическая часть — yadi.sk/i/XXiWGmOXM00eHQ
Впрыск — yadi.sk/i/CagNOY6T8YdTbw
1,2 (54 л.с.) и 1,2 (64 л.с.)
Механическая часть — yadi.sk/i/Dic_RVed8t4cRA и yadi.sk/i/pYxH1SFt5FLKDQ
Впрыск — yadi.sk/i/cxUpOow22b0xew
1,4 (75 л.с.) и 1,4 (101 л.с.)
Механическая часть — yadi.sk/i/ddODrv2mOQGzxA
Впрыск — yadi.sk/i/AyYQA_nNPg30Hg
2,0 (115 л.с.)
Механическая часть — yadi.sk/i/avtsCyu45nC31Q
Впрыск — yadi.sk/i/nljDwTii5CD2zQ
Дизельные двигатели
1,4 TDI (75 л.с.)
Механическая часть — yadi.sk/i/FIZKM7lnD82Pkg
Впрыск — yadi.sk/i/oeOQsL4yDjRkDQ
1,9 SDI (64 л.с.)
Механическая часть — yadi.sk/i/0QMzWGp240t2nQ
Впрыск — yadi.sk/i/YtfVyvTc4QzIXA
1,9 TDI (100 л.с.)
Механическая часть — yadi.sk/i/tpVn7SMolo9Diw
Впрыск — yadi.sk/i/FAB07jDoaO4eBw
1,9 TDI RS (130 л.с.)
Механическая часть — yadi.sk/i/t9ddX6HCfwYOzw
Впрыск — yadi.sk/i/UYSLIYtWl_1m8g
Электроника и схемы
Электрооборудование — yadi.sk/i/jkDQNlRUPe3GRQ
Схемы электрические 1 — yadi.sk/i/_FKOUkUs1BeZpg
Схемы электрические 2 — yadi.sk/d/auG3fH0R_4ApEw
Схемы электрические 3 — yadi.sk/i/1-swiFc-fNTcQA
Всё остальное
Отопление и кондиционер — yadi.sk/i/6Afrhm6TO9sn_A
Ходовая часть — yadi.sk/i/tTEyzhhGU8Sg0A
ТО — yadi.sk/i/qx15l-bmrq7DXQ
Кузов, жестяные работы — yadi.sk/i/zcP3pNP0cQgh8g
Кузов, сборочные работы — yadi.sk/i/y50h0MSiJ6KixQ
Руководство на английском языке по техническому обслуживанию и ремонту автомобиля Skoda Fabia 2000-2006 годов выпуска.
- Автор: A.K. Legg
- Издательство: Haynes Publishing
- Год издания: 2006
- Страниц: 373
- Формат: PDF
- Размер: 122,1 Mb
Руководство по эксплуатации, техническому обслуживанию и ремонту автомобиля Skoda Fabia с 1999 года выпуска с бензиновыми и дизельными двигателями.
- Автор: —
- Издательство: Техническая книга
- Год издания: 2007
- Страниц: 246
- Формат: PDF
- Размер: 234,9 Mb

Руководство по техническому обслуживанию и ремонту автомобиля Skoda Fabia 2000-2006 годов выпуска с бензиновыми и дизельными двигателями.
- Автор: —
- Издательство: Алфамер
- Год издания: —
- Страниц: 384
- Формат: —
- Размер: —
Руководство по техническому обслуживанию и ремонту автомобиля Skoda Fabia с 2000 года выпуска.
- Автор: —
- Издательство: Skoda Auto
- Год издания: —
- Страниц: —
- Формат: PDF
- Размер: 553,0 Mb
Руководство по техническому обслуживанию и ремонту автомобиля Skoda Fabia с 2007 года выпуска.
- Автор: —
- Издательство: Skoda Auto
- Год издания: —
- Страниц: —
- Формат: PDF
- Размер: 33,8 Mb
Руководство по эксплуатации и ремонту автомобиля Skoda Fabia с 2000 года выпуска с бензиновыми и дизельными двигателями.
- Автор: —
- Издательство: Монолит
- Год издания: —
- Страниц: 428
- Формат: —
- Размер: —
Руководство по эксплуатации и ремонту автомобилей Skoda Fabia/Fabia Combi/Fabia Sport Edition с 2007 года выпуска с бензиновыми и дизельными двигателями.
- Автор: —
- Издательство: Монолит
- Год издания: —
- Страниц: 350
- Формат: —
- Размер: —
Сборник руководств по эксплуатации и техническому обслуживанию автомобиля Skoda Fabia второго поколения.
- Автор: —
- Издательство: Skoda Auto
- Год издания: -/2010/2014
- Страниц: 284/276/213
- Формат: PDF
- Размер: 84,6 Mb
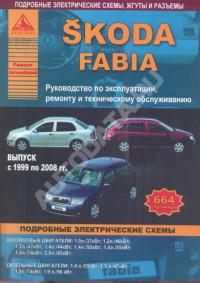
Руководство по эксплуатации, техническому обслуживанию и ремонту автомобиля Skoda Fabia 1999-2008 годов выпуска с бензиновыми и дизельными двигателями.
- Автор: —
- Издательство: Арго-Авто
- Год издания: —
- Страниц: 664
- Формат: —
- Размер: —
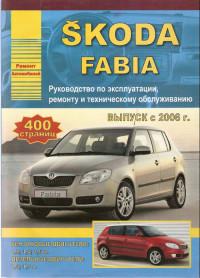
Руководство по эксплуатации, техническому обслуживанию и ремонту автомобиля Skoda Fabia с 2006 года выпуска с бензиновыми и дизельными двигателями.
- Автор: —
- Издательство: Арго-Авто
- Год издания: 2009
- Страниц: 400
- Формат: —
- Размер: —
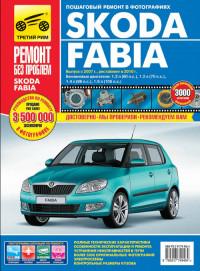
Руководство по эксплуатации, техническому обслуживанию и ремонту автомобиля Skoda Fabia с 2007 года выпуска с бензиновыми двигателями объемом 1,2/1,4/1,6 л.
- Автор: —
- Издательство: Третий Рим
- Год издания: 2012
- Страниц: 325
- Формат: —
- Размер: —
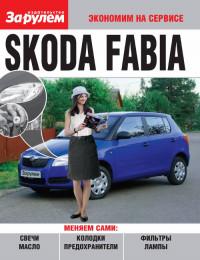
Руководство по техническому обслуживанию автомобиля Skoda Fabia второго поколения.
- Автор: —
- Издательство: За рулем
- Год издания: 2010
- Страниц: 89
- Формат: PDF
- Размер: 35,7 Mb

Руководство по эксплуатации, техническому обслуживанию и ремонту автомобиля Skoda Fabia с 2007 года выпуска.
- Автор: —
- Издательство: Мир автокниг
- Год издания: —
- Страниц: 400
- Формат: —
- Размер: —

Skoda Fabia (код модели: 6Y2) 2000 — 2007
Skoda Fabia Combi (код модели: 6Y5) 2001 — 2008
Skoda Fabia Sedan (код модели: 6Y3) 2001 — 2008
Быстрый переход по разделам:
Двигатели
Система охлаждения, отопления и кондиционирования
Системы впрыска, зажигания
Топливная система
Система выпуска
Передняя и задняя подвеска
Тормозная система
Рулевое управление
Коробки передач, сцепление
Кузов
Электрооборудование
Общая документация
Двигатели
(Engines)
Замена ремней ГРМ и натяжного ролика на двигателе 1.4 BUD (rus.) Фотоотчет
Капитальный ремонт двигателей AWY, AZQ, BME, BMD, BBM, BZG, CEVA, CHFA, CGPA (rus.)
Полная подборка информации и Фотоотчет.
Снятие турбины на двигателе BNM (rus.) Фотоотчет
Снятие турбины на двигателе BNV (rus.) Фотоотчет, подходит для автомобилей:
Skoda Fabia (код модели: 6Y2)
Skoda Fabia Combi (код модели: 6Y5)
Skoda Fabia Sedan (код модели: 6Y3) и др.
Двигатель ASZ, ремонт предпускового подогрева, свечи накала, датчики температуры (rus.) Фотоотчет
Skoda Fabia 2000 ->: Двигатели 1,0/37kW; 1,4/44kW; 1,4/50kW (ARV, AQV, AZE, AZF, AME, ATZ, AQW) Руководство по ремонту (rus.) Тexничecкиe дaнныe, Cнятиe и уcтaнoвкa двигaтeля, Кривoшипнo-шaтунный мexaнизм, Головка цилиндров, клапанный механизм газораспределения, Cмaзoчнaя cиcтeмa, Cиcтeмa oxлaждeния, Cиcтeмa питaния, Cиcтeмa выпуcкa. (17 Mb.)
Разборка и чистка гидрокомпенсаторов на Skoda Fabia двигатель 1.4 AZE (rus.) Фотоотчет
3-Cyl. diesel engine BNM (eng.) Заводское руководство по ремонту двигателя. Буквенное обозначение двигателя: BNM.
Содержание: 00 — Technical data, 10 — Cylinders, engine block, support, cover, 13 — Crankshaft, pistons, 15 — Cylinder head, valve control mechanism, 17 — Lubrication system, 19 — Cooling system, 20 — Supply system — Fuel tank, fuel pump, 21 — Overcharge — turbo, 23 — Supply system — mechanical injection (diesel), 26 — Exhaust system, 28 — Chamber pre-heating system. 128 страниц.
3-cylinder injection engine BMD, CHFB (eng.) Workshop Manual.
Руководство по ремонту двигателей. Редакция 12.2009
Двигатель с буквенным обозначением: BMD, CHFB устанавливался на автомобили:
Skoda Fabia (код модели: 6Y2, 6Y5, 6Y3) 2000 — 2008
Содержание: 00 — Technical data, 10 — Cylinders, engine block, support, protector, 13 — Crankshaft, pistons, 15 — Cylinder head, valve control mechanism, 17 — Lubrication system, 19 — Cooling system, 20 — Supply system — tank, Fuel pump (pre-supply pump) G6, 24 — Supply system — fuel injection, 26 — Exhaust system, 28 — Ignition system.
116 страниц. 3 Mb.
Двигатели TDI 1.2 л и 1.4 л (rus.) Устройство и принцип действия. Программа самообучения 223 VW/Audi. Буквенное обозначение двигателей: ANY, AMF.
На моделях Golf и Passat уже были успешно внедрены 4-цилиндровые двигатели TDI 1,9 л с насос-форсунками. Теперь эта линия на развитие дизельных двигателей с турбонаддувом и непосредственным впрыском, сочетающих низкий расход топлива и низкий уровень выбросов с высокой мощностью, продолжается рядом 3-цилиндровых двигателей TDI для моделей Polo и Lupo.
Отказ от четвертого цилиндра позволяет уменьшить массу самого двигателя и массу его движущихся частей, а также снизить внутренние потери на трение. При этом, несмотря на уменьшение рабочего объема, двигатель остается достаточно мощным для автомобилей класса Polo и Lupo.
На двигателе TDI 1,2 л, разработанном специально для модели Lupo 3L, было использовано особенно много новых конструкторских и технологических решений, внесших существенный вклад в достижение конечной цели — создание автомобиля, расходующего не более 3 литров топлива на 100 километров пробега. Главными факторами, позволившими достичь этой цели, стали уменьшение массы, снижение потерь на трение и оптимизирование процессов сгорания топлива.
Эта программа самообучения знакомит читателя с новым поколением двигателей TDI на примере моделей с рабочим объемом 1,2 л и 1,4 л. Они относятся к конструкционной группе EA 188.
Содержание: Введение, Механическая часть двигателя, Система впрыска с насос-форсунками, Система питания, Система выпуска ОГ, Система управления двигателя, Электрическая схема, Стартер, Система управления двигателя (особенности модели Lupo 3L), Техническое обслуживание, Контрольные вопросы.
Двигатели и коробки передач Audi A2 (rus.) Устройство и принцип действия. Программа самообучения 247 VW/Audi.
Содержание: Общие сведения: Двигатель, 1.4 л TDI (55 кВт) AMF, 1.4 л 16 V (55 кВт) AUA, Коробка передач.
Двигатель: Конструкция и работа 1,4-литрового 16-клапанного двигателя, Схема системы, Лямбда-регулирование в рамках европейской бортовой диагностики (EOBD), Функциональная схема.
Коробка передач: Общие сведения, Картер, Конструкция коробки передач, Механизм переключения, Датчики и исполнительные механизмы.
Информация по ремонту двигателей VAG / Engines repair
Данная информация по ремонту двигателей подходит ко всем автомобилям VAG. Для того чтобы быстро найти документацию по Вашему двигателю просто нажмите на клавиатуре Ctrl-F и наберите буквы своего двигателя. Например: 2E или BSE (только на английском языке!)
Система охлаждения, отопления, вентиляции и кондиционирования
(Cooling, Heating, Air Conditioning and Climate Control Systems)
Skoda Fabia: Система охлаждения — проверка, обслуживание, ремонт (rus.)
Skoda Fabia: Разборка и сборка деталей системы охлаждения. Двигатель 1.4L (rus.)
Замена радиатора охлаждения Skoda Fabia (rus.) Фотоотчет
Замена датчика температуры на испарителе (кондиционер) Skoda Fabia (rus.) Фотоотчет
Замена водяной помпы на Skoda Fabia двигатель 1.4 AME (rus.) Фотоотчет
Переделка термостата на Skoda Fabia двигатель 1.4 AME (rus.) Фотоотчет
Отопитель и климатическая установка (rus.) Техническое руководство Skoda. Обучение специалистов станций техобслуживания. Подробно рассмотрены климатические установки применяемые на автомобилях Felicia (нерегулируемый компрессор), Fabia (компрессор с внешним регулированием), Octavia I (компрессор с внутренним регулированием), Octavia II (компрессор с внешним регулированием), SUPERB (компрессор с внутренним регулированием).
Общая информация по системам охлаждения, отопления и вентиляции
Подходит ко многим автомобилям VW, Skoda, SEAT, Audi
Много информации по системе охлаждения, относящаяся к конкретным типам двигателей, находится в разделе «Двигатели»
Системы впрыска, зажигания
(Injector, ignition system)
Расходомер воздуха дизельного двигателя (ДМРВ) — Pierburg, вставка в корпус расходомера LMM 7.22684.08 (rus.) Фотоотчет
Проверка, чистка, адаптация клапана EGR, ошибки 16786,16787, 16788, 16791, 16792 (rus.) Фотоотчет
Skoda Fabia 2000->: Система зажигания. Двигатель 1.4 50kW (rus.)
Skoda Fabia 2000->: Ремонт системы зажигания. Двигатели 1.4 55/74kW (rus.)
Skoda Fabia 2000->: Устройство предварительного разогрева (накаливания). Двигатель 1.9 47kW (rus.)
Дизельный двигатель 1,4 литра (BNM, BNV, BMS), система впрыска и зажигания (rus.)
Системы впрыска и зажигания
Данная информация по системам впрыска подходит ко всем автомобилям VW, Skoda, SEAT, Audi.
Общая информация по системам зажигания
Подходит ко многим автомобилям VW, Skoda, SEAT, Audi
Топливная система
(Fuel System)
Замена бензонасоса на Skoda Fabia 1.4 (rus.) Фотоотчет
Топливная система двигателей FSI (rus.) Устройство и принцип действия. Пособие по программе самообразования 334 VW/Audi.
Все двигатели FSI мощностью 66 кВт и более оснащаются усовершенствованной топливной системой.
Эта система имеет следующие отличия: Детали насоса высокого давления и рампы форсунок имеют специальное антикоррозионное покрытие, которое защищает их от воздействия
топлива с содержанием этанола до 10%. Изменено управление насосом высокого давления. Устранен за ненадобностью трубопровод отвода
(в бак) топлива, просочившегося вдоль плунжера. Отвод топлива, сбрасываемого через установленный на рампе форсунок предохранительный
клапан, производится через относительно короткий трубопровод в контур низкого давления, перед насосом высокого давления.
В данной программе самообразования описываются устройство и действие усовершенствованной
топливной системы на примере двухлитрового двигателя FSI мощностью 110 кВт.
Содержание: Состав и схема топливной системы, Принцип регулирования подачи топлива по его расходу, Компоненты топливной системы, Блок управления топливным насосом, Подкачивающий электронасос, Насос высокого давления с регулятором давления топлива, Датчик низкого давления, Датчик высокого давления, Форсунки высокого давления, Регулятор давления, Переходник с дросселем.
Общая информация по топливным системам
Подходит ко многим автомобилям VW, Skoda, SEAT, Audi
Система выпуска
(Exhaust system)
Skoda Fabia 2000 ->: Система выпуска отработавших газов. Двигатели 1.0/37kW и 1.4/37kW (rus.)
Skoda Fabia 2000 ->: Система выпуска отработавших газов. Двигатели 1.4/55kW и 1.4/74kW (rus.)
Skoda Fabia: Система выпуска отработавших газов (rus.)
Двигатели 1,2 — AWY, AZQ, BMD, BME: Подробнейшее описание ремонта двигателей на русском (rus.) Демонтаж и монтаж двигателя, Кривoшипнo-шaтунный мexaнизм, Головка цилиндров, клапанный механизм газораспределения, Система смазки, Система охлаждения, Система питания, Выхлопная система.
Общая информация по системам выпуска отработанных газов
Подходит ко многим автомобилям VW, Skoda, SEAT, Audi
Передняя и задняя подвеска
(Front and rear suspension)
Skoda Fabia: 2000-> Руководство по ремонту — Ходовая часть (rus.)
Замена ступиц на Skoda Fabia (rus.) Фотоотчет
Замена ступичного подшипника на Skoda Fabia (rus.) Фотоотчет
Замена задних сайлентблоков нижних рычагов на Skoda Fabia I, двигатель AME (rus.) Фотоотчет
Замена передних стоек в Seat Ibiza 6L, VW Polo 9N, Seat Cordoba, Skoda Fabia (rus.) Фотоотчет
Замена внешнего пыльника ШРУС на Seat Ibiza 6L, VW Polo 9N (rus.) Фотоотчет
Общая информация по подвеске
Подходит ко многим автомобилям VW, Skoda, SEAT, Audi
Тормозная система
(ABS, EDS, ESP / Brake system)
Восстановление тормозных суппортов VW II 239/10/12/20 (rus.) Фотоотчет.
Skoda Fabia: Тормозной механизм переднего колеса типа FS II (rus.)
Skoda Fabia: Тормозной механизм переднего колеса типа FS III (rus.)
Skoda Fabia: Ремонт суппорта (rus.)
Skoda Fabia: Тормозной механизм заднего колеса (барабанный) (rus.)
Skoda Fabia: Замена тормозного барабана (rus.)
Skoda Fabia: Замена колесного тормозного цилиндра (rus.)
Skoda Fabia: Тормозной механизм заднего колеса (дисковый) (rus.)
Skoda Fabia: Замена тормозного диска (rus.)
Skoda Fabia: Ремонт суппорта (rus.)
Skoda Fabia 2000->: Устройство и ремонт ABS и ABS/EDS/ASR (rus.)
Замена тормозных дисков (суппорт FS III) в Seat Ibiza 6L, VW Polo 9N, Seat Cordoba, Skoda Fabia (rus.) Фотоотчет
Перестал работать насос подкачки ABS на VW Polo 2003 (rus.) Фотоотчет
Системы торможения и стабилизации (rus.) Устройство и принцип действия. Программа самообучения
В течение последних тридцати лет производители автомобилей и поставщики тормозных систем разрабатывают системы
торможения и стабилизации, которые помогают водителям справиться с некоторыми критическими ситуациями Эти системы вместе с ремнями и подушками безопасности относятся к важнейшим элементам системы активной безопасности.
Мифы о системах безопасности Из-за слабой информированности о принципах действия вспомогательных систем в среде любителей функционирует множество слухов К числу наиболее часто звучащих мифов относятся следующие неправильные высказывания:
• система ABS увеличивает тормозной путь;
• с помощью быстрого, прерывистого торможения систему ABS можно заменить;
• система ESC вмешивается в управление автомобилем преждевременно и неточно;
• система ESC способна устранить для водителя любую критическую ситуацию в ходе движения
Содержание: Значение систем торможения и стабилизации, Повышение активной безопасности автомобиля, Облегчение поездки и повышение комфортабельности движения, Элементы активной безопасности автомобиля, Системы торможения и стабилизации как конструктивные элементы активной безопасности, Место систем торможения и стабилизации в обеспечении безопасности дорожного движения, Категории систем торможения и стабилизации: Обзор систем торможения и стабилизации, Иерархия систем торможения и стабилизации, Применение систем в зависимости от режима движения, Основы динамики движения: Окружность трения, Проскальзывание шин, Процесс торможения, Датчики: Логика срабатывания датчиков систем торможения и стабилизации, Датчики, используемые в контурах систем торможения и стабилизации, Протокол обмена данными, Антиблокировочная система (ABS): Функциональные требования к системе ABS, Поведение автомобиля без ABS, Поведение автомобиля с ABS, Компоненты системы ABS, Гидравлическая схема ABS, Принцип действия ABS, Система электронного распределения тормозных сил (EBV), Функция стабилизации при торможении в повороте (CBC), Функция снижения момента сил, вызывающих рыскание автомобиля (GMB), Антипробуксовочная система (ASR): Компоновка, Принцип действия системы ASR, Система регулирования крутящего момента при торможении двигателем (MSR): Описание принципа действия, Электронная система поддержания курсовой устойчивости (ESC): Принцип стабилизации автомобиля с помощью ESC, Гидравлическая схема системы ESC, Электронная блокировка дифференциала (EDS): Принцип действия EDS, Расширенная функция блокировки дифференциала (XDS): Компоновка, Принцип действия, Гидравлический тормозной ассистент (HBA): Компоновка, Описание принципа действия HBA, Функция компенсации падения эффективности торможения Overboost (FBS), Гидравлический усилитель тормозов (HBV), Функция стабилизации прицепа (TSA), Активный ассистент рулевого управления для улучшения курсовой устойчивости автомобиля (DSR): Описание принципа действия, Ассистент трогания на подъёме (HHC), Функция удаления влаги с тормозных дисков (BSW), Система контроля давления в шинах (TPM): Описание принципа действия, Ассистент движения на спуске (на бездорожье): Условия активации, Условия отключения, Ассистент движения на спуске — активация функции, Ассистент движения на спуске — проезд перегибов рельефа, Функция ABS-Offroad, Функция EDS-Offroad, Функция ASR-Offroad, Ассистенты торможения и законодательство, Глоссарий.
Общая информация по тормозным системам, ABS, EDS, ESP и др.
Подходит ко многим автомобилям VW, Skoda, SEAT, Audi
Рулевое управление
(Steering)
Skoda Fabia: 2000-> Руководство по ремонту — Рулевое управление (rus.) 1 Mb
Skoda Fabia: Рулевое управление с электрогидроусилителем (rus.)
Skoda Fabia. Гидроусилитель рулевого управления с электроприводом EPHS (rus.) Конструкция и принцип действия. Пособие по программе самообразования. Блок электродвигателя с насосом, блок управления гидроусилителя, датчик угла поворота рулевого колеса, механизм гидроусилителя рулевого управления, сервисное обслуживание, самодиагностика, функциональная схема.
Общая информация по рулевому управлению
Подходит ко многим автомобилям VW, Skoda, SEAT, Audi
Коробки передач, сцепление
(Transmission, clutch)
Переборка коробки передач 02T, замена подшипников в МКПП типа 02Т семейства MQ200 (rus.)
Подробнейший Фотоотчет.
Автоматическая коробка передач 001 (rus.) Заводское руководство по ремонту АКПП 001.
Автоматическая коробка передач 001, с буквенными обозначениеми коробки передач: ESK, GJF, GJG устанавливалась на автомобили:
Skoda Fabia (код модели: 6Y2, 6Y5, 6Y3)
АКПП типа 001 с другими буквенными обозначениеми устанавливались на автомобили:
VW Lupo (код модели: 6X1)
SEAT Arosa (код модели: 6H1)
Содержание (группы ремонта): 00 — Технические данные, 01 — Система автоматического контроля, 32 — Преобразователь крутящего момента, 37 — Управление переключением передач, картер, 38 — Шестерни, регулирование, 39 — Главная передача, дифференциал. 202 страницы. 27 Mb.
Информация по ремонту коробок передач VAG / Transmission repair
Данная информация по ремонту коробок передач подходит ко всем автомобилям VAG.
Кузов
(Body)
Skoda Fabia: 2000-> Кузов, сборочные работы (rus.) Руководство по ремонту.
Skoda Fabia: 2000-> Кузов, жестяные работы (rus.) Руководство по ремонту.
Skoda Fabia. Кузов (rus.) Программа по обучению. Все геометрические размеры кузова Hatchback.
Skoda Fabia: 2000-> Система отопления, кондиционер воздуха (rus.) Руководство по ремонту.
Ремонт кнопки открытия багажника на Skoda Fabia (rus.) Фотоотчет
Разбираем переднюю дверь Skoda Fabia 2002 (rus.) Фотоотчет
Skoda Fabia — замена стекла задней двери (rus.) Фотоотчет
Установка омыватемя фар на Skoda Fabia (rus.) Фотоотчет.
Восстановление креплений фар на Skoda Fabia (rus.) Фотоотчет
Удаление небольшой коррозии кузова (rus.) Фотоотчет
Ремонт бамперов своими силами (rus.) Фотоотчет.
Skoda Fabia Combi. Кузов (rus.) Программа по обучению. Все геометрические размеры кузова Combi.
Общая информация по кузову, шинам и дискам
Подходит ко многим автомобилям VW, Skoda, SEAT, Audi
Электрооборудование
(Electrical equipment)
Замена датчика температуры на испарителе (кондиционер) Skoda Fabia (rus.) Фотоотчет
Ремонт генератора — нет зарядки, подмигивание лампы генератора (rus.) Фотоотчет
Замена шкива генератора с муфтой свободного хода (rus.) Фотоотчет
Замена подшипников генератора Bosch (rus.) Фотоотчет.
Skoda Fabia: 2000-> Руководство по ремонту — Электроборудование автомобиля (rus.)
Skoda Fabia: 2000-> Руководство по ремонту — Коробки предохранителей, релейная панель, распиновка (rus.)
Skoda Fabia: 2000-> Руководство по ремонту — Электросхемы (rus.)
Автомобили Skoda: Панели приборов — сервис (rus.) История панелей управления, их различие, функции диагностики, кодирование блоков, таблица неисправностей панели, и др.
Cистема комфорта (rus.) Устройство, описание, диагностика. Рассматриваются Skoda Octavia, Skoda Octavia II, Skoda Fabia, Skoda SuperB.
Skoda Fabia: Электрооборудование автомобиля (rus.) Пособие по программе самообразования. Блок управления бортовой сети, системы шин данных, комбинация приборов, освещение и световая сигнализация, очиститель ветрового стекла, активные датчики скорости вращения колес, дополнительный электрический отопитель, система помощи при парковке, специальные функции, самодиагностика.
Skoda Fabia. Гидроусилитель рулевого управления с электроприводом EPHS (rus.) Конструкция и принцип действия. Пособие по программе самообразования. Блок электродвигателя с насосом, блок управления гидроусилителя, датчик угла поворота рулевого колеса, механизм гидроусилителя рулевого управления, сервисное обслуживание, самодиагностика, функциональная схема.
Skoda Fabia: 2000-> Электростеклоподьемники и обогреваемые наружные зеркала заднего вида. С августа 1999г. (rus.) Электросхемы
Skoda Fabia: 2004-> Электростеклоподьемники и обогреваемые наружные зеркала заднего вида. С мая 2004г. (rus.) Электросхемы
Установка омыватемя фар на Skoda Fabia (rus.) Фотоотчет.
Подогрев сидений на Skoda Fabia 6Y, быстрый и бюджетный (rus.) Фотоотчет
Electrical System — general notes (eng.) Редакция 12.2014.
Руководство по ремонту электрооборудования автомобилей Skoda:
Fabia 2000 -> ,
Содержание (группы ремонта): 27 — Starter, current supply, CCS, 92 — Windscreen wash/wipe system, 94 — Lights, bulbs, switches — exterior, 96 — Lights, bulbs, switches — interior, 97 — Wiring
73 страницы. 2 Mb.
Общая информация по электрооборудованию
Подходит ко многим автомобилям VW, Skoda, SEAT, Audi
Магнитолы и радионавигационные системы Volkswagen, Audi, Skoda, Seat
Документация по автомагнитолам и навигации Фольксваген, Ауди, Шкода, Сеат
Общая документация по автомобилю
Skoda Fabia: 2000-> Руководство по ремонту. Сервисные техосмотры и уход (rus.) 8,5 Mb (более полная и свежая версия )
Skoda Fabia с 2000 г. выпуска: Ремонт и эксплуатация (rus.) 160 Mb.
Skoda Fabia (eng.) Конструкция автомобиля. Пособие по программе самообразования.
Общая информация по сервисному обслуживанию
Подходит ко многим автомобилям VW, Skoda, SEAT, Audi
Как здесь найти нужную информацию?
Расшифровка заводской комплектации автомобиля (англ.)
Расшифровка заводской комплектации VAG на русском!
Диагностика Фольксваген, Ауди, Шкода, Сеат, коды ошибок.
Если вы не нашли информацию по своему автомобилю — посмотрите ее на автомобили построенные на платформе вашего авто.
С большой долей вероятности информация по ремонту и обслуживанию подойдет и для Вашего авто.
-
Page 1
Service Workshop Manual FABIA 2000 Body Work Edition 08.99 Service Department. Technical Information Printed in Czech Republic S00.5319.00.20… -
Page 2
Service The Workshop Manual is intended only for use within the Organisation Škoda. Printed in Czech Republic S00.5319.00.20 It is not permitted to pass it on to other persons. © ŠKODA AUTO a. s. -
Page 3
FABIA 2000 Body Work List of Supplements to Workshop Manual FABIA 2000 Body Work Edition 08.99 Supple- Edition Subject Article Number ment 08.99 Basic Edition S00.5319.00.20 11.99 Supplement to Basic Edition S00.5319.01.20 12.99 Self-diagnosis for convenience system S00.5319.02.20 03.00 Final diagnosis for airbag S00.5319.03.20… -
Page 4
FABIA 2000 Body Work List of Supplements Edition 01.05 S00.5319.15.20… -
Page 5: Table Of Contents
FABIA 2000 Body Work Table of Contents 00 – Technical Data 00-1 Technical Data ………………page 00-1 — Vehicle identification data …………….page 01 – Self-diagnosis 01-1 Self-diagnosis for convenience system …………page 01-1 — Notes concerning self-diagnosis for convenience system ……..
-
Page 6
FABIA 2000 Body Work — Fault table ………………..01-6 page 01-6 — Reading measured value block …………..page 01-6 — Test table ………………..page 01-6 — Parts inspection with test box -VAS 5056- …………page 13 01-7 Deactivating and activating airbag units (adaptation) ……… -
Page 7
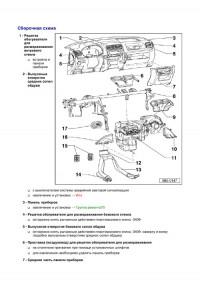
FABIA 2000 Body Work — Door adjustment ………………58-1 page 58-1 — Summary of components of door handle and door lock ……… page 58-1 — Removing and installing the door handle …………page 58-1 — Removing and installing the door lock …………. -
Page 8
FABIA 2000 Body Work Rear-view mirror ………………66-2 page 66-2 — Summary of components of rear-view mirror …………. page 66-3 Water box cover ………………page 66-3 — Removing and installing water box cover …………page 66-4 Roof drip moulding ……………… -
Page 9
FABIA 2000 Body Work — Removing and installing the rear seat belts …………69-1 page 69-1 — Summary of components — middle three-point seat belt at the rear ……page 69-2 Inspecting seat belts ……………… page 69-2 — Checks ……………….. -
Page 10
FABIA 2000 Body Work — Summary of components of rear cargo opening cover ………. 70-4 page 70-4 — Summary of components of trim panels of tailgate ……….page 70-4 — Removing and installing holder for luggage compartment cover (estate car) …. -
Page 11: Technical Data
FABIA 2000 Body Work 00 – Technical Data 00-1 Technical Data Vehicle identification data Vehicle identification number The vehicle identification number (chassis number) is at- tached to the right suspension dome. The vehicle identification number (chassis number) can also be found bottom left of the front window corner.
-
Page 12
FABIA 2000 Body Work Vehicle data sticker The vehicle data sticker is located at the rear left on the floor of the luggage compartment. 00-1 Technical Data Edition 03.00 page S00.5319.03.20… -
Page 13: 01 — Self-Diagnosis
FABIA 2000 Body Work 01 – Self-diagnosis 01-1 Self-diagnosis for con- venience system Notes concerning self-diagnosis for con- venience system The central control unit for convenience system -J393- is located above the accelerator pedal in the dash panel. It is clipped into the bracket on the heating housing. The di- agnostic connector is located behind the storage tray un- der the light switch.
-
Page 14
FABIA 2000 Body Work In case of repairs or self-diagnosis of the conven- ience system first the system of the communication cable must be defined. This is detected by means of the connection of the diagnostic device and by entry of the address word 46 „Central module convenience… -
Page 15: Overview Of The Selectable Functions Of The Diagnosis For The Convenience System
FABIA 2000 Body Work ♦ Sliding roof closing function via outside closing com- mand ♦ Radio control for anti-theft alarm system and central locking ♦ the optical Safe function indicator (is a LED mounted in the door equipment of the driver’s door) The system comprises the control unit for conven- ience system.
-
Page 16: Connect Vehicle System Tester -V.a.g 1552
FABIA 2000 Body Work Connect vehicle system tester -V.A.G 1552- Special tools, test and measuring equipment and auxiliary items required ♦ Vehicle system tester -V.A.G 1552- ♦ Diagnostic cable -V.A.G 1551/3, 3A, 3B, 3C- Test conditions • All fuses must be OK in compliance with the current flow diagram.
-
Page 17: Interrogating Control Unit Version
FABIA 2000 Body Work The following display relates to the system with LIN Vehicle system test HELP databus cable: Select function XX In this case continue the self-diagnosis ⇒ Chap. 01- The following display relates to the system with CAN databus cable: 6Q1959801 OM D.contr unit DDCU…
-
Page 18: 02 — Interrogating Fault Memory
FABIA 2000 Body Work → – Press key. 6Q1959812 OM door control.RR TFK 0001→ Readout on display, e.g.: (RR door control unit) → – Press key. Vehicle system test HELP Readout on display: Select function XX Ending output ⇒ 01-1 page 8.
-
Page 19: Ending Output
FABIA 2000 Body Work – Enter function 03. Vehicle system test – 03 Actuator diagnosis Confirm the entry with key Readout on display: → Actuator diagnosis Inside door handle lighting Door handle switches are lit. → – Press key. →…
-
Page 20: Ending Output
FABIA 2000 Body Work Readout on display: Vehicle system test 05 Erase fault memory – Confirm the entry with key Readout on display: → Vehicle system test The fault memory is erased → – Press key. Note Caution! ♦ If the following message is displayed the test se-…
-
Page 21
FABIA 2000 Body Work Table of codes for vehicles with LIN databus cable Vehicle equipment Code number indi- Code number over- vidual door open- all door opening Central locking without power-window lifter 00018 00019 – Confirm the entry with key 6Q09959433 OM convenience unit. -
Page 22
FABIA 2000 Body Work 01-1 Self-diagnosis for convenience system Edition 01.05 page S00.5319.15.20… -
Page 23: Self-Diagnosis For Convenience System With Can Databus Cable
FABIA 2000 Body Work 01-2 Self-diagnosis for con- venience system with CAN databus cable Overview of the selectable functions of the self diagnosis for convenience sys- tem with CAN databus cable Operation Page ⇒ Chap. 01-1, Interrogating control unit version ⇒…
-
Page 24
FABIA 2000 Body Work Program Control unit function Control unit part No. number Central control Door control unit unit for conven- ience system 6Q0959433C OL 0002 Control unit with 2 power-window lifters, with radio con- 6Q0959433E OL 6Q1959801 OL TFK 0001… -
Page 25: Coding Control Unit With Can Databus Cable
FABIA 2000 Body Work Program Control unit function Control unit part No. number Central control Door control unit unit for conven- ience system 6Q0959433C 0J 0002 Control unit with 4 power-window lifters, with radio con- 6Q0959433E 34 6Q1959801 0J/34 TFK 0001…
-
Page 26: Fault Table Convenience System With Can Databus Cable
FABIA 2000 Body Work Fault table Convenience system with CAN databus cable Note ♦ Below is a list of all possible faults detected by the central control unit for convenience system -J393- and displayed on -V.A.G 1552 -, arranged according to their 5-digit fault code.
-
Page 27
FABIA 2000 Body Work Display on V.A.G. 1552 Possible cause of fault Rectifying fault ♦ 00914 Implausible signal Cables or plug connections de- – Check wiring and plug connec- Switch for RL fective tions according to the current flow window lifter,… -
Page 28
FABIA 2000 Body Work Display on V.A.G. 1552 Possible cause of fault Rectifying fault ♦ 00930 Implausible signal Locking unit defective – Reading measured value block ⇒ 01-2 page 16 Locking unit for RL CL -F222- – Replace locking unit ♦… -
Page 29
FABIA 2000 Body Work Display on V.A.G. 1552 Possible cause of fault Rectifying fault ♦ 00934 No setting or incor- missing or incorrectly set window – Initialisation for automatic lift/low- Window lifter rect setting lifter mechanism er lift mechanism motor rl -V26- ♦… -
Page 30
FABIA 2000 Body Work Display on V.A.G. 1552 Possible cause of fault Rectifying fault ♦ 00939 Replace mirror adjustment motor – Replace mirror adjustment motor Replace mirror driver’s side -V149- defective Replace driver’s side -V149- adjustment mo- ♦ Cables or plug connections de- –… -
Page 31
FABIA 2000 Body Work Display on V.A.G. 1552 Possible cause of fault Rectifying fault ♦ 00958 Adaptation thresh- Key not adapted – Reading measured value block ⇒ 01-2 page 16 Key 4 old (mul) exceeded ♦ Perform adaptation ⇒ Chap. 01-4 Key was operated over 200 –… -
Page 32
FABIA 2000 Body Work Display on V.A.G. 1552 Possible cause of fault Rectifying fault ♦ 01037 Cables or plug connections de- – Reading measured value block ⇒ 01-2 page 16 Window lifter: fective Activation of ♦ Window lifter mechanism loose –… -
Page 33
FABIA 2000 Body Work Display on V.A.G. 1552 Possible cause of fault Rectifying fault ♦ 01330 defective Control unit -J393- defective – Replace control unit -J393- Central control ♦ If the communication cable be- unit for conven- tween the units or control unit is ience system O.K.:… -
Page 34
FABIA 2000 Body Work Display on V.A.G. 1552 Possible cause of fault Rectifying fault ♦ 01332 defective Control unit -J387- defective – Replace control unit -J387- Door control unit ♦ No communication Communication cable between – Check communication cable be-… -
Page 35
FABIA 2000 Body Work Display on V.A.G. 1552 Possible cause of fault Rectifying fault ♦ 01334 defective Control unit -J389- defective – Replace control unit -J389- Door control unit ♦ No communication Communication cable between – Check communication cable be-… -
Page 36
FABIA 2000 Body Work Display on V.A.G. 1552 Possible cause of fault Rectifying fault ♦ 01340 Implausible signal Mirror adjustment switch defec- – Replace switch Mirror adjust- tive ment switch ♦ Cables or plug connections de- – Check cables, plug connections… -
Page 37
FABIA 2000 Body Work Reading measured value block for con- venience system with CAN databus ca- The measured value block is subdivided into 15 display groups. Each display group is subdivided into max. 4 dis- play fields. Vehicle system test… -
Page 38: Test Table For Convenience System With Can Databus Cable
FABIA 2000 Body Work Test table for convenience system with CAN databus cable Display group 001 Display Readout on dis- Denomination Rectifying fault field play autom. closing Central switch for window lifter: – Visual inspection of the cable guide. man. closing switch for window lifter DS –…
-
Page 39
FABIA 2000 Body Work Display group number 003 Display Readout on display Denomination Rectifying fault field pos. X+ Mirror adjustment switch – Visual inspection of the cable guide. pos. X- – Check mirror adjustment switch for cor- pos. Y+ rect fitting and tightness. -
Page 40
FABIA 2000 Body Work Display group number 005 Display Readout on display Denomination Rectifying fault field man. closing Window lifter switch: – Visual inspection of the cable guide. man. opening door RL – Check window lifter switch for correct fit- not activated ting and tightness. -
Page 41
FABIA 2000 Body Work Display group number 007 Display Readout on display Denomination Rectifying fault field open Key switch – Visual inspection of the cable guide. closed – Check lock cylinder for correct fitting and not activated. tightness. open Key switch –… -
Page 42
FABIA 2000 Body Work Display group number 009 Display Readout on display Denomination Rectifying fault field unlock CL acknowledgement: – Visual inspection of the cable guide. lock door DS – Check the correct fitting and tightness of safe the plug connections of the relevant cir- not fitted cuit while observing the display. -
Page 43
FABIA 2000 Body Work Display group number 011 Display Readout on display Denomination Rectifying fault field Immobilizer key detection – Visual inspection of the cable guide. – Check electronic immobiliser not fitted ⇒ Electrical System Rep.- Gr. 90. no contact –… -
Page 44
FABIA 2000 Body Work Display group number 013 Display Readout on display Denomination Rectifying fault field O.K. If „N.O.K.“ Fixed code known N.O.K. – Key code is outside of reception range. no measured value Re-initialise radio control via function „10“… -
Page 45
FABIA 2000 Body Work Display group number 015 Display Readout on display Denomination Rectifying fault field Display Only the last 4 activation zones of the anti- last alarm source 1…65535 theft alarm system are displayed! e.g. „32“ — engine hood contact switch… -
Page 46
FABIA 2000 Body Work 01-2 Self-diagnosis for convenience system with CAN databus cable Edition 01.05 page S00.5319.15.20… -
Page 47: Self-Diagnosis For Convenience System With Lin Databus Cable
FABIA 2000 Body Work 01-3 Self-diagnosis for con- venience system with LIN databus cable Overview of the selectable functions of the self-diagnosis for convenience sys- tem with LIN databus cable Operation Page ⇒ Chap. 01-1 ⇒ 01-3 Interrogating control unit version page 1 ⇒…
-
Page 48: Fault Table Of Control Unit For Convenience System With Lin Databus Cable
FABIA 2000 Body Work Coding control unit with LIN databus coding – Connect vehicle system tester -V.A.G 1552- and enter function 07 „coding control unit“ ⇒ Chapter 01-1. – Enter code number following table: Vehicle equipment Code number indi- Code number over-…
-
Page 49
FABIA 2000 Body Work Display on V.A.G. 1552 Possible cause of fault Rectifying fault ♦ 00928 Implausible signal Locking unit defective – Reading measured value block ⇒ 01-3 page 10 Locking unit for CL driver’s side – Replace locking unit -F220- ♦… -
Page 50
FABIA 2000 Body Work Display on V.A.G. 1552 Possible cause of fault Rectifying fault ♦ 00948 Short circuit to pos- Cables or plug connections de- – Check wiring and plug connec- Close sliding itive fective tions according to the current flow… -
Page 51
FABIA 2000 Body Work Display on V.A.G. 1552 Possible cause of fault Rectifying fault ♦ 01032 Short circuit to Cables or plug connections de- – Reading measured value block ⇒ 01-3 page 10 Lock the CL key earth fective switch on the ♦… -
Page 52
FABIA 2000 Body Work Display on V.A.G. 1552 Possible cause of fault Rectifying fault ♦ 01330 defective Control unit -J393- defective – Replace control unit -J393- Central control ♦ If the communication cable be- unit for conven- tween the units or control unit is ience system O.K.:… -
Page 53: Fault Table Of Lin Databus/Control Units For Window Control In The Individual Doors
FABIA 2000 Body Work Display on V.A.G. 1552 Possible cause of fault Rectifying fault ♦ 01358 Implausible signal Cables or plug connections de- – Check cables, plug connections Switch for inside fective and fuses in accordance with the locking, driver’s…
-
Page 54
FABIA 2000 Body Work In the convenience sytem with LIN databus cable (win- dow control) 5 fault conditions must be distinguished: ♦ Short circuit of LIN databus to earth or positive ♦ No communication from control unit for window con-… -
Page 55
FABIA 2000 Body Work Conditions of control units for window control, door: Possible cause of fault Rectifying fault Driver’s Front pas- Rear left Rear right side senger ♦ Limited Emergency Emergency Emergency Short circuit of LIN da- – Check wiring and plug… -
Page 56: Test Table With Lin Databus Cable
FABIA 2000 Body Work Reading measured value block with LIN databus cable The measured value block is subdivided into 15 display groups. Each display group is subdivided into max. 4 dis- play fields. Vehicle system test HELP Readout on display: Select function XX –…
-
Page 57
FABIA 2000 Body Work Display group number 002 Display Readout on display Denomination Rectifying fault field Central switch for window lifter: – not fitted Check window lifter switch for correct fit- switch for window lifter FPS ting and tightness. Central switch for window lifter: not fitted –… -
Page 58
FABIA 2000 Body Work Display group number 005 Display Readout on display Denomination Rectifying fault field Window lifter switch: – not fitted Check window lifter switch for correct fit- door RL ting and tightness. WL thermo fuse RL not fitted –… -
Page 59
FABIA 2000 Body Work Display group number 007 Display Readout on display Denomination Rectifying fault field open Key switch – Test wiring and plug connections accord- closed ing to current flow diagram. not activated. – Check lock cylinder for correct fitting and… -
Page 60
FABIA 2000 Body Work Display group number 009 Display Readout on display Denomination Rectifying fault field unlock CL acknowledgement: – Visual inspection of the cable guide lock door DS – Check the correct fitting and tightness of safe the plug connections of the relevant cir- not fitted cuit while observing the display. -
Page 61
FABIA 2000 Body Work Display group number 011 Display Readout on display Denomination Rectifying fault field Immobilizer key detection – Test wiring and plug connections accord- ing to current flow diagram. not fitted – Check electronic immobiliser no contact ⇒ Electrical System Rep.- Gr. 90. -
Page 62
FABIA 2000 Body Work Display group number 013 Display Readout on display Denomination Rectifying fault field O.K. If „N.O.K.“ Fixed code known N.O.K. – Key code is outside of reception range. no measured value Re-initialise radio control via function „10“… -
Page 63
FABIA 2000 Body Work Display Readout on display Denomination Rectifying fault field 1…65535 Last alarm source Only the last 4 activation zones of the anti- theft alarm system are displayed! 1…65535 Penultimate alarm source e.g. „32“ — engine hood contact switch ⇒… -
Page 64
FABIA 2000 Body Work 01-3 Self-diagnosis for convenience system with LIN databus cable Edition 01.05 page S00.5319.15.20… -
Page 65: Adapting The Convenience System ( For All Convenience System Types)
FABIA 2000 Body Work 01-4 Adapting the convenience system ( for all convenience sys- tem types) Adjustment Chan- Operation Page numbe ⇒ 01-4 page 1 Erasing initialised ignition keys with radio control ⇒ 01-4 page 1 Adaptation of ignition keys with radio control, initialising new key ⇒…
-
Page 66
FABIA 2000 Body Work Adaptation of ignition keys with vehicle system tester V.A.G. 1552 (erase new key and initialise) Note ♦ Only on control units with radio control receiver ⇒ Chapter 01-1. ♦ The adaptation can be interrupted with key -V.A.G 1552-. -
Page 67
FABIA 2000 Body Work WARNING! All keys must be initialised during a single initiali- sation process. When adapting all keys never exceed the 30 sec- ond limit. The ignition key adaptation is automatically terminated if: ♦ The number of keys to be adapted has been reached. -
Page 68
FABIA 2000 Body Work Confirm the entry with → Channel 4 Adaptation 1 Readout on display: Changed value stored → – Press key. Vehicle system test HELP Readout on display: Select function XX The activation or deactivation of the interior monitoring is locked by pressing twice –… -
Page 69
FABIA 2000 Body Work – Confirm the entry with key → Channel 7 Adaptation 1 Readout on display: Changed value stored → – Press key. Vehicle system test HELP Readout on display: Select function XX Unlocking is confirmed by the indicator lights flashing –… -
Page 70
FABIA 2000 Body Work Readout on display: Channel 10 adjustment Setting Siren in Great Britain -↑-↓- – Confirm the entry with key Readout on display: Channel 10 Adaptation Store changed value? – Confirm the entry with key → Readout on display:… -
Page 71: Self-Diagnosis For Airbag System I
FABIA 2000 Body Work 01-5 Self-diagnosis for Airbag System I Function of the airbag system The airbag System comprises: ♦ Airbag control unit ♦ Sensors for side impact ♦ Driver airbag ♦ Front passenger airbag ♦ Driver and front passenger side airbags ♦…
-
Page 72
FABIA 2000 Body Work If airbag units or belt tensioners are ignited, the airbag CU sends a crash signal to the electrical system control unit. When the airbag unit is released: ♦ all doors are unlocked ♦ the interior lighting is switched on ♦… -
Page 73: Connect Vehicle System Tester -V.a.g 1552- And Select Address Word „Airbag
FABIA 2000 Body Work Note ♦ The description which follows relates to the vehicle system tester -V.A.G 1552- using program card -6.0- (and higher version). ♦ The use of the device -VAS 5052- or -V.A.G 1551- with program card -9.0- (and later version) is almost identical except for specific deviations (e.g.
-
Page 74: Overview Of Selectable Functions
FABIA 2000 Body Work Note ♦ One of the following four displays will appear in the event of a communication set-up failure between ve- hicle system tester -V.A.G 1552- and the control unit. ♦ Press key to display the possible fault causes.
-
Page 75
FABIA 2000 Body Work Interrogating control unit version – Connect vehicle system tester -V.A.G 1552- and se- lect address word 15 „Airbag“. Vehicle system test HELP Readout on display: Select function XX – Select function 01 and confirm entry with 0003 →… -
Page 76
FABIA 2000 Body Work Vehicle equipment Vehicle Parts No. equipment- Version number Driver and front passenger airbag 1C0 909 601 A belt tensioner (mechanically ignited) switch for front passenger airbags Driver and front passenger airbag 1C0 909 605 K belt tensioner (mechanically ignited) -
Page 77
FABIA 2000 Body Work If airbag units or belt tensioners are ignited, the airbag CU sends a crash signal to the electrical system control unit. When the airbag unit is released: ♦ all doors are unlocked ♦ the interior lighting is switched on ♦… -
Page 78: Ending Output
FABIA 2000 Body Work Readout on display: → Vehicle system test The fault memory is erased and end output ⇒ 01-5 page 8. → – Press Note → Caution! ♦ If the following message is displayed the test se- Fault memory was not interrogated quence is incorrect: ♦…
-
Page 79
FABIA 2000 Body Work Vehicle equipment Parts No. Control unit code number Driver and front passenger airbag 12338 6Q0 909 605 H 02 belt tensioner (electrically ignited) 12344 6Q0 909 605 H 08 side airbags 12344 1C0 909 605 H 08… -
Page 80
FABIA 2000 Body Work character index), or whether possibly a wrong code was entered. – Repeat coding. If the control unit cannot be coded (correct control unit, correct code number) the control unit is defective. – Replace the control unit with a new original part and repeat coding. -
Page 81: Self-Diagnosis For Airbag System Ii
FABIA 2000 Body Work 01-6 Self-diagnosis for airbag system II DANGER! Check correct fitting and tightness of the wiring and plug connections with the ignition off (also possibly disconnect the plug connections). Before disconnecting the airbag plug connections the mechanic must „electrically discharge him- self“!
-
Page 82: Fault Table
FABIA 2000 Body Work Fault table Note ♦ All the faults which can be detected by the control unit -J234- and displayed on the vehicle system tester -V.A.G 1552-, are listed in the table according to the 5-digit fault code.
-
Page 83
FABIA 2000 Body Work Readout on -V.A.G 1552 — Possible cause of fault Rectifying fault ♦ 00589 Short circuit to Cables or plug connections de- – Check cables, plug connections Ignition device 1 positive fective and fuses in accordance with the current flow diagram ⇒… -
Page 84
FABIA 2000 Body Work Readout on -V.A.G 1552 — Possible cause of fault Rectifying fault ♦ 00655 Short circuit to Cables or plug connections de- – Reading measured value block ⇒ 01-6 page 6 Belt tensioner ig- positive fective niter (front pas- Short circuit to –… -
Page 85
FABIA 2000 Body Work Readout on -V.A.G 1552 — Possible cause of fault Rectifying fault ♦ 01221 undefined switch Cables or plug connections de- – Check cables, plug connections Crash sensor side status fective and fuses in accordance with the current flow diagram ⇒… -
Page 86: Reading Measured Value Block
FABIA 2000 Body Work Readout on -V.A.G 1552 — Possible cause of fault Rectifying fault ♦ 01285 Side airbag front passenger’s – Blocking and activating airbag units ⇒ Chapter 01-7 Side airbag front side deactivated passenger’s side deactivated ♦ –…
-
Page 87: Test Table
FABIA 2000 Body Work Readout on display: Vehicle system test HELP Select function XX – Enter function 08. Readout on display: Vehicle system test Read measured value block – Confirm the entry with key Readout on display: Read measured value block Enter display group number –…
-
Page 88
FABIA 2000 Body Work Analysis of display group number 001 Display Denomination Readout on Rectifying fault field display Driver-side front correct No fault. airbag igniter -N95- too small – Visual inspection of the cable guide. – Check the correct fitting and tightness of the plug connections of the relevant circuit and again check on the display. -
Page 89
FABIA 2000 Body Work Display Denomination Readout on Rectifying fault field display Passenger-side correct No fault. front airbag ignit- er -N131- – too small Visual inspection of the cable guide. – Check the correct fitting and tightness of the plug connections of the relevant circuit and again check on the display. -
Page 90
FABIA 2000 Body Work Display group number 003 → ⇐ Readout on display Reading measured value block 3 Text Text Text Text ⇐ Display field Specification Analysis Switch for belt tensioner activated Ignore deactivated front passenger’s side not fitted activated… -
Page 91
FABIA 2000 Body Work Display group number 005 → ⇐ Readout on display Reading measured value block 5 Text Text Text Text ⇐ Display field Specification Analysis Ignition device for side air- correct Ignore too small bag rear passenger side… -
Page 92
FABIA 2000 Body Work Display group 010 → ⇐ Readout on display Reading measured value block 10 Text Text Text ⇐ Display field Specification Analysis ⇒ 01-6 Switch for the front passenger airbag — condition of the switch page 12 ⇒… -
Page 93: Parts Inspection With Test Box -Vas 5056
FABIA 2000 Body Work Display Denomination Readout on Rectifying fault field display Switch for the No fault. front passenger airbag — switch off the front passen- ger side airbag too small – Visual inspection of the cable guide. too great –…
-
Page 94
FABIA 2000 Body Work ♦ The cause of the display readout „too small“ may be the incorrect function of the „short-circuit bridge“ in the plug connection of the connected airbag unit. ♦ The cause of the display readout „too large“ may be an incorrect plug connection, e.g.„contact resistance“… -
Page 95
FABIA 2000 Body Work 1 — Plug connection of the igni- tion circuit on the front pas- senger’s side 2 — Key 3 — Test box -VAS 5056- 4 — Adapter cable of test box -VAS 5056- 01-6 Edition 01.05… -
Page 96
FABIA 2000 Body Work 01-6 Self-diagnosis for airbag system II Edition 01.05 page S00.5319.15.20… -
Page 97: Deactivating And Activating Airbag Units (Adaptation)
FABIA 2000 Body Work 01-7 Deactivating and activat- ing airbag units (adapta- tion) The control unit for the airbag allows locking (deactiva- tion) of all airbag units and the electronically actuated belt tightener. Blocking passenger airbag units ⇒ 01-7 page 1.
-
Page 98
FABIA 2000 Body Work attention of the occupants to the fact that the passenger- side airbag units have been deactivated. For vehicles with a switch for airbags For vehicles MY 03 , which are fitted with the key switch for airbags, the switching on and off of the front airbag or… -
Page 99
FABIA 2000 Body Work – Enter function 10 and continue with channel number → Channel 1 Adaptation 0 Readout on display: FP airbag activated WSC XXXXX -↑-↓- ↑ ↓ Select adaptation value „1“ with keys Channel 1 adjustment Readout on display: FP airbag deactiv. -
Page 100
FABIA 2000 Body Work Front passenger-side airbag is switched off see fault No. 01285 – If other faults appear in the display, they should be rectified according to the fault table ⇒ Chapter 01-6. For the Czech Republic – Separate plug connection for side airbag unit below front passenger seat. -
Page 101
FABIA 2000 Body Work Activating front passenger airbag For the Czech Republic – Fit together plug connection for side airbag unit below front passenger seat. Continued for all countries Remove the glove compartment ⇒ Chapter 70-1. – – Connect plug connection for front airbag unit. -
Page 102
FABIA 2000 Body Work – Switch on ignition. The airbag warning light -K75- comes on at first for about 4 seconds after switching on the ignition and must then go out. This indicates that the airbag unit on the front pas- senger side is activated and no fault is stored in the fault memory of the airbag system. -
Page 103: Front Body
FABIA 2000 Body Work 50 – Front body 50-1 Front body Removing and installing lock carrier with component parts 1 — Lock carrier with attached parts removing: – Detach Bowden wire ⇒ item 5 on the lock. – Separate the electrical plug connections in the headlamp housing.
-
Page 104
FABIA 2000 Body Work 50-1 Front body Edition 02.02 page S00.5319.09.20… -
Page 105: Front Wing
FABIA 2000 Body Work 50-2 Front wing Removing and installing the front wing 1 — 8 Nm 2 — 8 Nm 3 — Wing Removing: – Removing front bumper ⇒ Chap. 63-1. – Removing wheelhouse liner ⇒ Chap. 66-1. –…
-
Page 106
FABIA 2000 Body Work 50-2 Front wing Edition 06.00 page S00.5319.04.20… -
Page 107: 55 — Bonnet, Tailgate
FABIA 2000 Body Work 55 – Bonnet, tailgate 55-1 Front bonnet Summary of front bonnet components 1 — Front bonnet removing: Release screws ⇒ item 12 – and remove bonnet. Installing: Installation is carried out in the reverse order. adjust ⇒ 55-1 page 3…
-
Page 108: Summary Of Radiator Grill Components
FABIA 2000 Body Work Summary of radiator grill components 1 — Grid 2 — Radiator grill frame 3 — Trim strip 4 — Bracket 5 — Front bonnet 6 — 3 Nm 7 — Radiator grill removing: Release screws ⇒ item 6 –…
-
Page 109: Adjusting Front Bonnet
FABIA 2000 Body Work – Release the bottom catch pegs of the trim strip with screwdriver in -direction of arrow A-. – Release the top catch pegs of the trim strip with screwdriver in -direction of arrow B- and remove.
-
Page 110
FABIA 2000 Body Work 55-1 Front bonnet Edition 10.03 page S00.5319.13.20… -
Page 111: Tailgate
FABIA 2000 Body Work 55-2 Tailgate Removing the pressurized gas strut – Open tailgate and support. – Use a screwdriver to raise the locking element -2- and pull the gas strut off the angle bracket with ball stud -1-. Note ♦…
-
Page 112: Summary Of Components Of Tailgate Lock
FABIA 2000 Body Work Summary of components of tailgate lock 1 — Grip strip Removing: – Unclip trim panel of tailgate ⇒ Chap. 70-4. – Remove the protective foil. – Separate the electrical plug connection. Release the nuts ⇒ item 2.
-
Page 113: Summary Of Components Of Remote Release
FABIA 2000 Body Work Summary of components of remote release 1 — Remote release for tailgate and fuel-tank lid for removing, take off en- trance strip ⇒ Chap. 68-4 2 — 10 Nm 3 — Riveted nuts 4 — Nut…
-
Page 114: Adjusting Luggage Compartment Lid
FABIA 2000 Body Work – Open luggage compartment lid and support it. Remove pressurized gas struts -2- ⇒ 55-2 page 1. – – Take off retaining clip together with wiring loom -1- (only at left holder). – Unscrew fixing screws of hinge -3- (8 Nm) and place tailgate down.
-
Page 115: Fuel-Tank Lid Unit
FABIA 2000 Body Work 55-3 Fuel-tank lid unit Summary of components of the fuel-tank lid unit 1 — Fuel-tank lid unit comprises the fuel-tank cap and rubber part Removing: – Unscrew the fuel-tank cap. – Activate the remote release to draw back the release rod.
-
Page 116
FABIA 2000 Body Work 55-3 Fuel-tank lid unit Edition 11.99 page S00.5319.01.20… -
Page 117: 57 — Front Doors/Door Internal Parts/Central Locking
FABIA 2000 Body Work 57 – Front doors/door internal parts/central locking 57-1 Front door Summary of components 1 — Door removing and installing ⇒ 57-1 page 2 2 — Door handle removing and installing ⇒ 57-1 page 6 3 — Lock cylinder housing removing ⇒…
-
Page 118: Removing And Installing The Door
FABIA 2000 Body Work Removing and installing the door Removing – Separate boot -3- from pillar A and disconnect the electrical plug connections. – Release nuts -1- of hinge bolts -2-. Tightening torque: 30 Nm. – Release screw -4- from the door arrester. Tightening torque: 30 Nm.
-
Page 119
FABIA 2000 Body Work – On vehicles with convenience system disconnect the plug connection from the complete door lock. For vehicles 11.03 – Release screws -arrows-. Release the assembly car- rier from the door, raise and remove the door towards the hinge side from the door. -
Page 120
FABIA 2000 Body Work Installing the lock cylinder housing ⇒ 57-1 page 6. – – Lower the door window until screws -4- are located behind holes -5-. – Push door window -3- in the window run -arrow- and tighten the clamping jaws with screws -4- (10 Nm). -
Page 121: Summary Of Components Of Door Handle And Door Lock
FABIA 2000 Body Work Summary of components of door handle and door lock 1 — Door lock the door lock can only be re- moved together with the as- sembly carrier removing and installing ⇒ 57-1 page 7 2 — Control cable…
-
Page 122: Removing And Installing The Door Handle
FABIA 2000 Body Work – Pull and hold door handle -1-. Loosen screw -3- by about 3 turns. The lock cylinder housing is detached. Note If the screw is unscrewed too far the catch may separate from the bracket and fall inside the door.
-
Page 123: Removing And Installing The Door Lock
FABIA 2000 Body Work – Draw clip -1- in the plate opening and allow to clip into door handle -2-. Note During assembly keep the door handle -2- pressed against the door panel. Installing the lock cylinder housing ⇒ 57-1 page 5.
-
Page 124
FABIA 2000 Body Work – Release screws -1- (20 Nm). – Loosen cable harness and remove from door. – Unclip catch peg -1- from holder -2- using a screwdriv- er and remove door lock -3- from its holder. – Unclip securing rod -1-. To do so turn the door lock in the direction of the arrow. -
Page 125: Removing And Installing The Locking Button For Locking Rod
FABIA 2000 Body Work Installing – Pull out the control lever -1- in the direction of the ar- row. – Using a screwdriver tension the spring fitted to the door lock -2- in the direction of the arrow and hook the lock lever to the spring.
-
Page 126: Summary Of Components Of Front Door Seals
FABIA 2000 Body Work Summary of components of front door seals 1 — Outside window run 2 — Outside channel seal 3 — Clip inserted in the ouside door seal 4 — Outside door seal 5 — Front door 6 — Inside channel seal…
-
Page 127: 58 — Rear Doors/Door Internal Parts
FABIA 2000 Body Work 58 – Rear doors/door internal parts 58-1 Rear door Summary of components 1 — Door removing and installing ⇒ 58-1 page 2 2 — Door handle removing and installing ⇒ 58-1 page 3 3 — Housing removing ⇒…
-
Page 128: Removing And Installing The Door
FABIA 2000 Body Work Removing and installing the door Removing – Disconnect multiple-plug connection under the rubber sleeve of pillar B. Unscrew nuts ⇒ item 22 in 58-1 page 1 of the hinge – bolts. Tightening torque: 30 Nm. Release screw ⇒ item 20 in 58-1 page 1 on the door –…
-
Page 129: Summary Of Components Of Door Handle And Door Lock
FABIA 2000 Body Work Summary of components of door handle and door lock 1 — Door lock the door lock can only be re- moved together with the as- sembly carrier removing and installing ⇒ 58-1 page 5 2 — Control cable…
-
Page 130
FABIA 2000 Body Work – Unclip clip -1- from the door handle. – Swivel door handle out of the door. Installing – Swivel door handle into the door. – Hang assembly device -T10118- in the spring fixed -arrow A- to the door lock and hang the spring in the lock lever -arrow B-. -
Page 131: Removing And Installing The Door Lock
FABIA 2000 Body Work Removing and installing the door lock The window lifter, door lock and loudspeaker are fitted to the assembly carrier. The door lock can only be removed together with the as- sembly carrier. The assembly carrier can only be removed if the door window is detached from the window lifter.
-
Page 132: Removing And Installing Assembly Carrier
FABIA 2000 Body Work Removing and installing assembly carri- Removing Note ♦ The assembly carrier is removed together with the door lock. ♦ Removing and installing window lifter motor ⇒ Chapter 57-1. Removing rear door trim panel ⇒ Chapter 70-2.
-
Page 133
FABIA 2000 Body Work – Subsequently release the wiring loom from the inside panel of the door and remove ducts. – Disconnect the plug connection from the complete door lock (on vehicles with convenience system). – Separate the assembly carrier from the door, at the top, lift and remove towards the hinge. -
Page 134: Summary Of Components Of Door Seals
FABIA 2000 Body Work – Carefully remove window. Installing – Insert window in frame. – Pull seal onto the flange. – Insert window into the seal slots and fix in place with adhesive tape. Install assembly carrier ⇒ 58-1 page 6.
-
Page 135: Rear Door (Praktik)
FABIA 2000 Body Work 58-2 Rear door (Praktik) Rear door Summary of components Note ♦ The door at the rear on the left must not be opened in some countries due to legal requirements (the lock re- mains permanently in the locked position).
-
Page 136: Removing And Installing The Door Lock
FABIA 2000 Body Work Installing: Installation is carried out in the reverse order. Removing and installing the door lock Removing Remove assembly carrier ⇒ item 7 in 58-2 page 1. – Remove the door grip ⇒ Chapter 58-1. – –…
-
Page 137: 60 — Sliding/Tilting Roof
FABIA 2000 Body Work 60 – Sliding/tilting roof 60-1 Sliding/tilting roof with glass panel Summary of components of sliding/tilting roof with glass panel 1 — Glass panel for sliding/tilting roof (single-layer safety glass) 2 — Gasket 3 — Sun screen…
-
Page 138
FABIA 2000 Body Work – Tilt sliding/tilting roof. – Unclip bottom trim strip -1- and pull forwards away from the roof frame. – Unclip top trim strip -2- at front and middle and unhook at rear. – Release screws -1-. -
Page 139
FABIA 2000 Body Work – Insert glass panel for sliding/tilting roof from the top and slightly tighten the fixing screws -1-. Note Adjust the pane height before tightening up the fixing screws. Setting the glass roof height ⇒ 60-1 page 3. -
Page 140
FABIA 2000 Body Work – Tilt sliding/tilting roof. – Slide sun screen backwards. – Unclip bottom trim strip -1- at rear -arrow- and pull for- wards away from the roof frame. – Unclip top trim strip -2- at front and middle and unhook at rear. -
Page 141
FABIA 2000 Body Work Rear roof panel adjustment: -b- = 0…1 mm higher than roof -Arrow- = direction of travel – Tighten glass panel screws. Tightening torque 4.5 – Adjust the left and right side symmetrically. Note Inspect the height adjustment by opening and closing the sliding/tilting roof. -
Page 142: Removing And Installing Sun Screen
FABIA 2000 Body Work Removing and installing sun screen Removing Remove glass panel for sliding/tilting roof ⇒ 60-1 – page 1. – For easier mounting slide sun screen slightly back- wards. – Lever off front and rear slide with a screwdriver -ar- row-.
-
Page 143: Setting E-Drive (0 Position)
FABIA 2000 Body Work Removing automatic preselection mechanism – Using a wedge -3409- remove the E-drive cover -1-. – Remove light covering -1- in -direction of arrow-. – Remove screws -arrows- and remove lamp with con- trol. – Disconnect the control plug connection and remove control from lamp.
-
Page 144: Adapting Drive
FABIA 2000 Body Work – Turn the rotary switch of the automatic preselection mechanism to „roof closed“. – In „0 position“ install the drive with the sliding/tilting roof closed. „0 position“ is marked in the window -arrow A- by the re- cess on the drive pinion -arrow B-.
-
Page 145: Removing And Installing Assembly Unit
FABIA 2000 Body Work Removing and installing assembly unit Note Two mechanics are required to remove and install the as- sembly unit. Removing – Remove the automatic preselection mechanism ⇒ 60-1 page 7. Removing moulded headliner ⇒ Chapter 70-5. –…
-
Page 146
FABIA 2000 Body Work Front water drain hoses The front water drain hoses -1- run in the A pillars and ter- minate between the door and pillar A. Clean from top end of the water drain hose. 1 — Front water drain hoses… -
Page 147: 63 — Bumpers
FABIA 2000 Body Work 63 – Bumpers 63-1 Front bumper Summary of components on the front bumper 1 — Nut 2 — Guide part supports the bumper corner on the left and right removing: – Removing the bumper ⇒ item 5.
-
Page 148
FABIA 2000 Body Work Summary of components on the front bumper (RS) 1 — Nut 2 — Guide part supports the bumper corner on the left and right removing: – Removing the bumper ⇒ item 5. Release screws ⇒ item 3. -
Page 149
FABIA 2000 Body Work Removing and installing the bumper bracket Removing Removing the bumper ⇒ 63-1 page 1. – – Release (30 Nm) screws -2- and remove bumper bracket -1-. Installing Installation is carried out in the reverse order. 63-1 Edition 01.05… -
Page 150
FABIA 2000 Body Work 63-1 Front bumper Edition 01.05 page S00.5319.15.20… -
Page 151: Rear Bumper
FABIA 2000 Body Work 63-2 Rear bumper Summary of components of rear bumper 1 — Nut 2 — 5 Nm 3 — Bumpers removing: – Remove trim panel on the right and left ⇒ Chap. 70-4. – Removing rear lights ⇒…
-
Page 152: Removing And Installing Rear Apron (Rs)
FABIA 2000 Body Work Removing and installing the bumper bracket Removing Removing the bumper ⇒ 63-2 page 1. – – Release (30 Nm) screws -3- and remove bumper bracket -4-. – Unscrew the nuts -2- and remove mounting strip -1-.
-
Page 153: 64 — Glazing
FABIA 2000 Body Work 64 – Glazing 64-1 Glued windows Removing and installing glued windows Special tools, test and measuring equipment and auxiliary items required ♦ Cutting tool, e.g. -V.A.G 1351- or -DGE 100- and -TWH 200- manufactured by the company Equalizer.
-
Page 154
FABIA 2000 Body Work Summary of components windscreen 1 — PUR — glue sealing material 2 — Sealing section is part of the windscreen 3 — Windscreen Removing and installing windscreen ⇒ 64-1 page 3 4 — Eccentric for adjusting the position of… -
Page 155
FABIA 2000 Body Work Removing windscreen Removing front side roof drip moulding -5- ⇒ Chap. – 66-4. – Unscrew wiper arms -2-. Tightening torque of the nuts: 20 Nm. Removing water box cover -1- ⇒ Chapter 66-3. – Removing interior rear-view mirror -3- ⇒ Chapter 68- –… -
Page 156
FABIA 2000 Body Work Summary of components of rear window 1 — PUR — glue sealing material 2 — Rear window 3 — Stop install for window Removing undamaged window – Remove the centre high-mounted brake light ⇒ Electrical System; Rep. Gr. 94. -
Page 157
FABIA 2000 Body Work – Cover the painted surfaces along the window with tex- tile adhesive tape. – Cut back glue sealing material to a thickness of about 1 mm. Installing rear window Prepare new windscreen for fitting ⇒ 64-1 page 8. -
Page 158
FABIA 2000 Body Work – Remove cover of centre high-mounted brake light. – Disconnect the plug connections of the heated rear window and press the contact tabs onto the window. – Cover the painted surfaces along the window with tex- tile adhesive tape. -
Page 159: Removing And Installing Side Window (Combi)
FABIA 2000 Body Work Removing and installing side window (Combi) Assembly overview of side window (Combi) 1 — Side window 2 — Sealing profile (part of the pre-layering put on by the manufacturer) 3 — Trim strip ♦ affixed to the sealing profile ♦…
-
Page 160: Prepare New Windscreen For Fitting
FABIA 2000 Body Work – Stick on side window. Stick on side strip: – Cover the adherend of the strip with glazing/primer -D 009 200 02- and after drying apply adhesive to the strip and stick on strip. Observe waiting time ⇒ 64-1 page 11.
-
Page 161: Prepare Flange For Fitting
FABIA 2000 Body Work Rear window 1 — Rear window stops for fitting the window have been fitted all around 2 — Applied bead Applying bead ⇒ 64-1 page 10 respect dimensions: a = 8 mm, b = 12 mm…
-
Page 162: Glueing
FABIA 2000 Body Work Glueing – After completing the preparations cut the nozzle for applying the glue into shape as shown in the figure. – Dimension -a- 12 mm. – Bead width 8 mm. – Application direction -arrow-. Note ♦…
-
Page 163: Waiting Time
FABIA 2000 Body Work Waiting time Note ♦ Waiting time: From fitting of the window until the vehi- cle is put into service. ♦ The vehicle must stand on a flat surface during the waiting period at an ambient temperature above 15°C.
-
Page 164
FABIA 2000 Body Work – Clean plastic coverings: Allow glue sealing material to harden (approx 1 hour) and then pull off. 64-1 Glued windows Edition 10.03 page S00.5319.13.20… -
Page 165: 66 — Exterior Equipment
FABIA 2000 Body Work 66 – Exterior equipment 66-1 Wheelhouse liner Removing and installing the front wheel- house liner Removing – Unscrew wheel, Mu = 120 Nm. – Release screws -2-. – Remove wheelhouse liner -1-. Note For vehicles with engine identification characters ATD and AUN: When removing the wheelhouse liner the wheelhouse noise insulation panel -3- may fall out.
-
Page 166
FABIA 2000 Body Work 66-1 Wheelhouse liner Edition 11.00 page S00.5319.06.20… -
Page 167: Rear-View Mirror
FABIA 2000 Body Work 66-2 Rear-view mirror Summary of components of rear-view mirror 1 — Damping 2 — 10 Nm 3 — Cover 4 — Clip 5 — Mirror adjustment 6 — Nut 7 — Electrical plug connection for electric mirror adjustment…
-
Page 168
FABIA 2000 Body Work 66-2 Rear-view mirror Edition 11.99 page S00.5319.01.20… -
Page 169: Water Box Cover
FABIA 2000 Body Work 66-3 Water box cover Removing and installing water box cover 1 — Plug replace 2 — Water box cover clipped into windscreen seal- ing section -3- 3 — Windscreen sealing section 4 — Windscreen 5 — Gasket when glueing use e.g.
-
Page 170
FABIA 2000 Body Work 66-3 Water box cover Edition 06.00 page S00.5319.04.20… -
Page 171: Roof Drip Moulding
FABIA 2000 Body Work 66-4 Roof drip moulding Removing and installing roof drip moulding 1 — Roof drip moulding 2 — Fixing element of a roof rack 3 — 10 Nm 4 — Cap covers the roof rack holes 5 — Roof drip moulding holder Removing –…
-
Page 172
FABIA 2000 Body Work 66-4 Roof drip moulding Edition 06.00 page S00.5319.04.20… -
Page 173: Protective Strips
FABIA 2000 Body Work 66-5 Protective strips Removing and installing protective side strips 1 — Front door protective strip adhesive 2 — Rear door protective strip adhesive Removing – Heat adhesive protective side strip with a hot air blow- er for plastic (e.g. -V.A.G 1416-) and pull off strip.
-
Page 174
FABIA 2000 Body Work Note If there are other protective side strips on the body, align the protective side strips to be replaced on these. – Remove protective film, position the protective side strip and press on with force (before pressing on check whether the position of the protective side strip has changed). -
Page 175: Trailer Coupling
FABIA 2000 Body Work 66-6 Trailer coupling Summary of components trailer coupling 1 — Trailer coupling frame ♦ Removing: – Remove trailer arm -4-. – Insert dummy plug -5-. – Removing rear bumper ⇒ Chap. 63-2. – Remove plug connection -8-.
-
Page 176
FABIA 2000 Body Work 66-6 Trailer coupling Edition 07.00 page S00.5319.05.20… -
Page 177: Roof Railing (Combi)
FABIA 2000 Body Work 66-7 Roof railing (Combi) Removing and installing the roof rack Removing Removing moulded headliner ⇒ Chap. 70-5. – – Unscrew bottom fixing nuts -3- (6 Nm) and remove roof rack -1-. The roof rack can also be removed without removing…
-
Page 178
FABIA 2000 Body Work 66-7 Roof railing (Combi) Edition 04.01 page S00.5319.07.20… -
Page 179: Rear Spoiler
FABIA 2000 Body Work 66-8 Rear spoiler Summary of the components — for the complete rear spoiler (Combi) 1 — Rear spoiler 2 — 3. Brake light 3 — Glue sealing mass Removing and installing rear spoiler completely (Combi) Special tools, test and measuring equipment and auxiliary items required ♦…
-
Page 180: Removing And Installing Rear Spoiler Completely (Rs)
FABIA 2000 Body Work 3 — Glue sealing mass Removing and installing rear spoiler completely (RS) Special tools, test and measuring equipment and auxiliary items required ♦ Cutting wire with holder (e.g. -V.A.G 1351-) ♦ Glue sealing mass -HHA 381 013- ♦…
-
Page 181: Decorative Strips (Combi)
FABIA 2000 Body Work 66-9 Decorative strips (Combi) Removing and installing decorative strips Special tools, test and measuring equipment and auxiliary items required ♦ Hot air pistol, e.g. -HLG — 600 — ♦ Technical petrol ♦ Degreased white spirit solution ♦…
-
Page 182
FABIA 2000 Body Work 66-9 Decorative strips (Combi) Edition 07.02 page S00.5319.11.20… -
Page 183: 68 — Interior Equipment
FABIA 2000 Body Work 68 – Interior equipment 68-1 Interior rear-view mirror Removing interior rear-view mirror – Dislodge the interior rear-view mirror -1- from the re- taining plate by pressing it down -arrow- obliquely (clamping springs in mirror base plate).
-
Page 184
FABIA 2000 Body Work WARNING! Do not damage the ceramic layer. Scratches re- main visible. – Cut out a piece of nylon to the exact dimension of the mirror base plate. Note It is recommended to wear a rubber glove. -
Page 185: Covers, Storage Areas And Trim Panels
FABIA 2000 Body Work 68-2 Covers, storage areas and trim panels Summary of components of centre console 1 — Clip 2 — Front centre console clipped onto centre console ⇒ item 10 must be removed together with centre console ⇒ item 10…
-
Page 186: Removing And Installing The Sun Visor
FABIA 2000 Body Work Removing and installing the front can holder Removing – Open can holder -3-. – Remove trim -1- -arrow-. – Unscrew bolts -2-. – Pull out can holder -3- from centre section of dash- board. Installing Installation is carried out in the reverse order.
-
Page 187: Removing And Installing The Moulded Headliner (Praktik)
FABIA 2000 Body Work – Release screws -1- (1.5 Nm). – Take out the storage area -2-. Installing Installation is carried out in the reverse order. Removing and installing the moulded headliner (Praktik) Removing – Remove the moulded headliner –…
-
Page 188
FABIA 2000 Body Work 68-2 Covers, storage areas and trim panels Edition 01.05 page S00.5319.15.20… -
Page 189: Recessed Handle
FABIA 2000 Body Work 68-3 Recessed handle Removing and installing recessed han- Removing – Fold down recessed handle -1-. – Lever off caps -2- with a narrow screwdriver and open. – Release the screws -3- (1.5 Nm) and remove the re- cessed handle -1-.
-
Page 190
FABIA 2000 Body Work 68-3 Recessed handle Edition 01.05 page S00.5319.15.20… -
Page 191: Partition Panel And Protective Grating (Praktik)
FABIA 2000 Body Work 68-4 Partition panel and protective grating (Praktik) Summary of components for the partition panel 1 — 10 Nm 2 — Partition panel removing: – Removing the floor plate at the front ⇒ Chapter 68-6. Release screws ⇒ item 3.
-
Page 192
FABIA 2000 Body Work 68-4 Partition panel and protective grating (Praktik) Edition 01.05 page S00.5319.15.20… -
Page 193: Floor Partition (Praktik)
FABIA 2000 Body Work 68-5 Floor partition (Praktik) Removing and installing the front floor partition Removing Remove rear floor partition ⇒ 68-5 page 1. – – Remove securing eyes -1- (17 Nm). – Take out the plate -2-. Installing Installation is carried out in the reverse order.
-
Page 194
FABIA 2000 Body Work 68-5 Floor partition (Praktik) Edition 02.02 page S00.5319.09.20… -
Page 195: Front Entrance Plates (Rs)
FABIA 2000 Body Work 68-6 Front entrance plates (RS) Removing and installing the front en- trance plates 1 — Connection of interior trim 2 — Entrance plate 3 — The protective film 4 — Adhesive tapes Special tools, test and measuring equipment and auxiliary items required ♦…
-
Page 196
FABIA 2000 Body Work 68-6 Front entrance plates (RS) Edition 10.03 page S00.5319.13.20… -
Page 197: 69 — Occupant Protection
FABIA 2000 Body Work 69 – Occupant protection 69-1 Seat belts Safety instructions for work on seat belt tensioners ♦ All inspection, removal and installation and repair work must only be carried out by properly qualified personnel. ♦ Belt tensioner units must not be opened or repaired.
-
Page 198: Summary Of Components Of Front Seat Belts
FABIA 2000 Body Work Summary of components of front seat belts 1 — Belt height adjustment 2 — 23 Nm 3 — Top deflection fitting 4 — 35 Nm 5 — Cap 6 — The belt guide secured with screws ⇒…
-
Page 199: Removing And Installing The Rear Seat Belts
FABIA 2000 Body Work Removing and installing the rear seat belts 1 — Deflection fitting below 2 — 35 Nm 3 — Inertia reel The retaining lugs determine the position of the inertia reel removing: – Lift the rear seat bench and fold back.
-
Page 200: Summary Of Components — Middle Three-Point Seat Belt At The Rear
FABIA 2000 Body Work Summary of components — middle three- point seat belt at the rear Note ♦ Arrow = direction of travel. Check seat belts ⇒ Chapter 69-2 ♦ 1 — Right rear panel 2 — Vehicle floor 3 — 35 Nm…
-
Page 201: Inspecting Seat Belts
FABIA 2000 Body Work 69-2 Inspecting seat belts WARNING! The seat belt system must be inspected after every accident! If one of the inspection points reveals any damage inform the customer that the seat belts must be replaced. Inspection points: ♦…
-
Page 202
FABIA 2000 Body Work • No locking effect — replace seat belt together with buckle with a new original part. • First check whether the withdrawal and retracting of the belt is smooth or whether the position of the inertia reel has changed. -
Page 203
FABIA 2000 Body Work Check deflection fitting and buckle latch When the belt system is burdened (seat belt attached in an accident) plastic-coated fittings will display fine paral- lel score marks. (Normal wear and tear due to frequent use is recognisable by a stripe-free smooth abrasion). -
Page 204
FABIA 2000 Body Work 69-2 Inspecting seat belts Edition 11.99 page S00.5319.01.20… -
Page 205: Airbag
FABIA 2000 Body Work 69-3 Airbag Airbag system Note Self-diagnosis for airbag system ⇒ Chapter 01-5. 1 — Airbag warning lamp -K75- 2 — Passenger airbag unit removing ⇒ 69-3 page 7 blocking and activating func- tion (adaptation) ⇒ Chapter…
-
Page 206
FABIA 2000 Body Work ♦ Inspection, removal and installation and repair work must only be carried out by properly qualified person- nel. ♦ Inspections of the airbag system must only be per- formed with the test and measurement equipment provided as otherwise there is a risk of the airbag unit being activated. -
Page 207: Replacing Parts Of The Airbag System
FABIA 2000 Body Work ♦ Replace all harpoon clips with new original parts. ♦ In the event of damage to the upholstery — tears, burn holes etc. — in the area of the side airbag always re- place the upholstery with a new original part for safety reasons.
-
Page 208
FABIA 2000 Body Work Removing and installing driver airbag unit WARNING! Safety measures should be observed when han- dling airbag units ⇒ 69-3 page 1. Note After connecting the battery earth strap, a few additional operations are necessary ⇒ Electrical System;… -
Page 209: Summary Of Components Of Four-Armed Steering Wheel
FABIA 2000 Body Work Summary of components of four-armed steering wheel 1 — Steering wheel removing: – Removing the driver’s airbag unit ⇒ 69-3 page 4. – Turn the steering wheel to centre position (wheels in straightahead position). Release screws ⇒ item 2 –…
-
Page 210: Summary Of Components Of Three-Armed Steering Wheel
FABIA 2000 Body Work Summary of components of three-armed steering wheel 1 — Steering wheel removing: – Removing the driver’s airbag unit ⇒ 69-3 page 4, or horn unit for vehicles without air- bag. – Turn the steering wheel to centre position (wheels in straightahead position).
-
Page 211: Removing And Installing Passenger Airbag Unit
FABIA 2000 Body Work Note ♦ The restoring ring with slip ring must be removed and installed when the steering wheel is in centre position (wheel in straightahead position). ♦ Restoring ring with slip ring are secured by a clip in the centre position when supplied as a replacement part.
-
Page 212: Removing And Installing A Side Airbag Crash Sensor
FABIA 2000 Body Work WARNING! ♦ Nobody should be in the vehicle when the bat- tery is being connected. Removing and installing a side airbag crash sensor WARNING! Safety measures should be observed when han- dling airbag units ⇒ 69-3 page 1.
-
Page 213
FABIA 2000 Body Work – Loosen the backrest upholstery in the area of the air- bag unit ⇒ Chapter 74-1. – Remove cable strap -5- for electrical airbag cable -4-. – Release screws -2- and remove airbag unit -3- from backrest rack -1-. -
Page 214: Removing And Installing Airbag Control Unit -J234
FABIA 2000 Body Work WARNING! Nobody should be in the vehicle when the battery is being connected. Removing and installing airbag control unit -J234- 1 — 8 Nm 2 — control units plug 3 — control unit Note After connecting the battery earth strap, a few additional operations are necessary ⇒…
-
Page 215
FABIA 2000 Body Work Removing: – Disconnect earth strap of the battery. – Turn the switch with the ignition key into the middle position and pull out the front passenger airbag switch -arrow- carefully. – Disconnect the plug connection of the front passenger airbag switch. -
Page 216
FABIA 2000 Body Work 69-3 Airbag Edition 10.03 page S00.5319.13.20… -
Page 217: Removal Of Pyrotechnic Parts Before Scrapping The Vehicle
FABIA 2000 Body Work 69-4 Removal of pyrotechnic parts before scrapping the vehicle Parts of the airbag unit and the belt tensioner must be dis- posed of safely according to accident prevention regula- tions to protect against undesirable explosion (unintentional ignition).
-
Page 218
FABIA 2000 Body Work – Lay the ignition system through the gap in the door and connect to the external battery. – Ignite the airbag unit and dispose of it as scrap. Ignite the side airbag units – Pull out the plug connector for the airbag unit under the seat ⇒… -
Page 219: 70 — Trim Panel/Insulation
FABIA 2000 Body Work 70 – Trim panel/insulation 70-1 Dash panel Removing and installing the dash panel Removing dash panel WARNING! Disconnect earth strap from the battery before commencing work on the electrical system. Remove steering wheel ⇒ Chapter 69-3.
-
Page 220
FABIA 2000 Body Work Removing light switch ⇒ Electrical System; – Rep. Gr. 96. – Release fuse box from the dash panel. – Unclip diagnostic connection from glove compartment on driver’s side -1-. – Unscrew bolts -3-. – Remove bottom dash panel -2-. -
Page 221
FABIA 2000 Body Work – Pull off trim for heater control -3-. – Release screws -4-. – Release heater control -2- from dash panel -1-. – Unscrew screws -arrows- and release the centre part of the dash panel -1-. –… -
Page 222: Removing And Installing The Central Tube/Dash Panel
FABIA 2000 Body Work – Screw out screws -arrows- (tightening torque 2 Nm). – Pull off dash panel -1- from cross member -2- and re- move from the vehicle. Installing dash panel Installation is carried out in the reverse order.
-
Page 223: Removing And Installing The Convenience System Central Control Unit
FABIA 2000 Body Work – Remove screws -arrows- for dash panel support (4 Nm). – Removing the fixing screws for the steering column on the central tube of the dash panel ⇒ Running Gear; Rep. Gr. 48. – Remove fixing screws for central tube/dash panel -ar- rows- (12 Nm).
-
Page 224
FABIA 2000 Body Work 70-1 Dash panel Edition 10.03 page S00.5319.13.20… -
Page 225: Door Trim Panels
FABIA 2000 Body Work 70-2 Door trim panels Summary of components of front door trim panels 1 — Door 2 — Plastic spreading nut 3 — Recessed handle cover 4 — Recessed handle 5 — Door trim panel removing and installing ⇒…
-
Page 226
FABIA 2000 Body Work such a way that the retaining lug of the removal tool tangibly interlocks with the recessed handle cover. – Pull out the removal tool -V 19L 193- from the door trim panel -arrow B- and release the recessed handle cover -1- upwards. -
Page 227: Summary Of Components Of Rear Door Trim Panels
FABIA 2000 Body Work – Unclip trim -1-. – Release screws -arrows-. – Unclip door trim panel -2- at the sides. – Unhook the activation control cable of the door open- – Disconnect plug connection for clearance light -3-. –…
-
Page 228: Removing And Installing The Rear Door Trim Panel
FABIA 2000 Body Work Removing and installing the rear door trim panel Removing – Place the removal tool -V 19L 193- in the opening of the lower part of the recessed handle -arrow A- in such a way that the retaining lug of the removal tool tangibly interlocks with the recessed handle cover.
-
Page 229: Pillar And Side Trim Panels
FABIA 2000 Body Work 70-3 Pillar and side trim panels Removing and installing top trim panel of pillar A Removing – Pull off door seal -3- from pillar side A. – Pull off top trim panel -1- from pillar A.
-
Page 230: Summary Of Components Of Trim Panels Of Pillar B
FABIA 2000 Body Work Summary of components of trim panels of pillar B 1 — Top trim panel removing: – Removing seat belt deflec- tion ⇒ Chap. 69-1. – Remove top trim panel start- ing from the top of pillar B.
-
Page 231: Removing And Installing Top Trim Panel Of Pillar C
FABIA 2000 Body Work – Pull off top part of bottom trim panel -1- in direction of the tailgate. – Insert a long screwdriver into the retaining clips and release the clips -Arrow A-. – Grab the trim panel -1- at the loose part and loosen bottom part of trim panel by pulling upwards -Arrow B- (if necessary slacken with screwdriver).
-
Page 232: Removing And Installing Top Trim Panel Of Pillar C (Fabia Combi)
FABIA 2000 Body Work Removing – Unscrew nuts -2-. – Swivel out the bottom of trim panel C -1- from the lug- gage compartment cover support. Installing Installation is carried out in the reverse order. Removing and installing top trim panel…
-
Page 233: Removing And Installing Top Trim Panel Of Pillar D
FABIA 2000 Body Work Removing and installing top trim panel of pillar D Removing – Release the fixing screw -arrow- of the top trim panel of pillar D. – Pull off top trim panel from pillar D. Installing – When fitting the trim panel replace clips in the trim panel of pillar D or replace with new ones.
-
Page 234: Summary Of Components Of Entrance Plate
FABIA 2000 Body Work Summary of components of entrance plate 1 — Entrance plate removing: – Remove bottom trim panel of pillar A ⇒ Chapter 70-3. – Remove bottom trim panel of pillar B ⇒ Chapter 70-3. – Release entrance plate with clips ⇒…
-
Page 235: Removing And Installing The Tailgate/Luggage Compartment Cover (Praktik)
FABIA 2000 Body Work Removing and installing the tailgate/lug- gage compartment cover (Praktik) Removing – Release screws -1- (5 Nm). – Remove cover -2-. Installing Installation is carried out in the reverse order. 70-3 Edition 01.05 Pillar and side trim panels page S00.5319.15.20…
-
Page 236
FABIA 2000 Body Work 70-3 Pillar and side trim panels Edition 01.05 page S00.5319.15.20… -
Page 237: Door Trim Panels In The Luggage Compartment
FABIA 2000 Body Work 70-4 Door trim panels in the luggage compartment Summary of components of luggage compartment cover 1 — Screw 2 — Support for luggage compart- ment cover removing: Release screws ⇒ item 1. – – Pull off support from the top of trim panel of pillar C.
-
Page 238: Summary Of Components Of Side Trim Panel Of Luggage Compartment
FABIA 2000 Body Work Summary of components of side trim panel of luggage compartment 1 — Side luggage compartment cover removing: – Release seat bench and backrest and fold forward. – Remove luggage compart- ment side trim panel with re- taining clips ⇒…
-
Page 239: Removing And Installing Bases For Luggage Compartment Floor
FABIA 2000 Body Work Removing and installing bases for lug- gage compartment floor Removing – Fold seat bench and backrests at the rear forwards ⇒ Chapter 72-2. – Pull out the base for the luggage compartment floor -1- towards the top.
-
Page 240: Summary Of Components Of Rear Cargo Opening Cover
FABIA 2000 Body Work Summary of components of rear cargo opening cover 1 — Cargo opening cover right Left cargo opening cover is a mirror image removing: – Remove centre cargo open- ing cover ⇒ item 4. – Separate right cargo opening cover from clips ⇒…
-
Page 241: Summary Of Components Of Trim Panels Of Tailgate
FABIA 2000 Body Work Summary of components of trim panels of tailgate 1 — Tailgate 2 — Insert nut 3 — Opening for pull loop 4 — Trim panel of tailgate removing: – Pull off trim panel of tailgate. Installing: –…
-
Page 242: Removing And Installing Holder For Luggage Compartment Cover (Estate Car)
FABIA 2000 Body Work Removing and installing holder for lug- gage compartment cover (estate car) Removing – Unclip belt from holder for luggage compartment cov- er -1-. – Release screws -arrows-. – Unclip and pull off the light -2-. –…
-
Page 243: Removing And Installing The Bonnet At The Rear (Praktik)
FABIA 2000 Body Work Removing and installing the bonnet at the rear (Praktik) Removing – Release screws -1- (5 Nm). – Take out the trim panel -2-. Installing Installation is carried out in the reverse order. Removing and installing the bonnet at…
-
Page 244
FABIA 2000 Body Work Removing and installing the finishing strip Removing – Release screws -2- (1.5 Nm). – Remove the strip -1-. Installing Installation is carried out in the reverse order. 70-4 Door trim panels in the luggage compartment Edition 02.02 page S00.5319.09.20… -
Page 245: Moulded Headliner
FABIA 2000 Body Work 70-5 Moulded headliner Removing and installing moulded head- liner Removing – First check whether a radio set with anti-theft coding has been fitted. If this is the case obtain coding. – Disconnect earth strap of the battery.
-
Page 246: Removing And Installing The Moulded Headliner (Praktik)
FABIA 2000 Body Work Removing top trim panel of pillar B ⇒ Chap. 70-3. – Removing trim panel of pillar A ⇒ Chapter 70-3. – Removing top trim panel of pillar C ⇒ Chap. 70-3. – – Pull off the trim of the sliding roof opening (only for ve- hicles with a sliding roof).
-
Page 247
FABIA 2000 Body Work – Release screws -arrows- (1.5 Nm). – With the assistance of a second mechanic (risk of fracture) lower the moulded headliner -1- and remove from vehicle. Installing Installation is carried out in the reverse order. 70-5 Edition 01.05… -
Page 248: Summary Of Components Of The Moulded Headliner Noise Insulation Panels (Fabia Combi) Page
FABIA 2000 Body Work Summary of components of the moulded headliner noise insulation panels (Fabia Combi) 1 — Roof 2 — Noise insulation panel ♦ adhesive 3 — Moulded headliner 70-5 Moulded headliner Edition 01.05 page S00.5319.15.20…
-
Page 249: 72 — Seat Racks
FABIA 2000 Body Work 72 – Seat racks 72-1 Front seats Removing and installing the front seats Removing Note ♦ The seat is removed together with the guide rails. ♦ Additional operations should be carried out after the battery earth strap has been disconnected and con- nected ⇒…
-
Page 250: Removing And Installing The Grip For The Seat Height Adjuster
FABIA 2000 Body Work – Release fixing screws at rear -2- (24 Nm). – Remove seat from vehicle. Installing Installation is carried out in the reverse order. Vehicles with side airbags – Switch off the ignition before attaching the battery.
-
Page 251
FABIA 2000 Body Work – Disconnect the plug connections for seat heating (if applicable) -3- and -4- and for side airbag -2- under- neath the seat from the plug connection. – Disconnect the plug connection (if applicable) on the heating control. -
Page 252: Removing And Installing Seat Height Adjusting Elements
FABIA 2000 Body Work WARNING! Nobody should be in the vehicle when the battery is being connected. When manipulating a seat fitted with a side airbag observe the safety instructions ⇒ Chapter 69-3. Removing and installing seat height ad- justing elements Removing Remove front seat ⇒…
-
Page 253: Rear Seats
FABIA 2000 Body Work 72-2 Rear seats Removing and installing seat bench and backrest Removing seat – Pull seat forwards and fold open -arrows-. – Push out hooks -1- from lugs -2- and remove seat from vehicle. Installing seat Installation is carried out in the reverse order.
-
Page 254: Removing And Installing The Rear Armrests
FABIA 2000 Body Work Removing and installing the rear arm- rests Removing – Tilt forward the backrest -1-, unlock the cover -2- and unhook out of the clips -arrows-. Installing Installation is carried out in the reverse order. 72-2 Rear seats Edition 03.02…
-
Page 255: 74 — Seat Upholstery, Covers
FABIA 2000 Body Work 74 – Seat Upholstery, Covers 74-1 Front seat upholstery and covers Assembly overview of covers and uphol- stery for front seats Special tools, test and measuring equipment and auxiliary items required ♦ Upholstery retaining clip pliers, e.g. -V.A.G 1634- ♦…
-
Page 256: Assembly Overview Of Covers And Upholstery For Backrests
FABIA 2000 Body Work Assembly overview of covers and uphol- stery for backrests Vehicles with side airbag and seat heating Note Two mechanics are required to fit the cover. WARNING! Observe the safety instructions for working with airbags ⇒ Chapter 69-3.
-
Page 257
FABIA 2000 Body Work – Remove cover up to approx. – Remove dummy plugs from the holes in the bottom section of the backrest and unhook the longitudinal wires of the backrest rack -3-. – Cut through upholstery retaining clips -9-. -
Page 258
FABIA 2000 Body Work 74-1 Front seat upholstery and covers Edition 02.02 page S00.5319.09.20… -
Page 259: Rear Seat Upholstery And Covers
FABIA 2000 Body Work 74-2 Rear seat upholstery and covers Assembly overview of covers and upholstery for rear seats 1 — Cover removing: – Unhook clamping section -3- from wire frame -7-. – Section upholstery retaining clips -5- and remove cover from upholstery -6-.
-
Page 260: Assembly Overview Of Covers And Upholstery For Rear Backrest
FABIA 2000 Body Work Assembly overview of covers and upholstery for rear backrest 1 — Headrest 2 — Tension spindle 3 — Guide press catch peg with a screwdriver and remove guide 4 — Sealing sleeve 5 — Guide 6 — Foam upholstery…
- Руководства по ремонту
- Руководство по ремонту Шкода Фабия 2000-2007 г.в.
Руководство по ремонту Skoda Fabia / Шкода Фабиа
Общая информация об автомобиле.
Fabia – легковой переднеприводный автомобиль с поперечным расположением силового агрегата, предназначенный для эксплуатации на дорогах с твердым покрытием.
Семейство автомобилей Fabia включает три базовые модели, различающиеся кузовами: Skoda Fabia 1.4 с кузовом типа хэтчбек, Skoda Fabia 1.4 Combi с кузовом типа универсал и Skoda Fabia 1.4 Sedan с кузовом типа седан Кузов седан предназначен в основном для перевозки пассажиров и небольшого багажа. Кузов хэтчбек более универсален, в нем можно перевозить крупногабаритный багаж, сложив заднее сиденье и увеличив за счет этого багажное отделение. Универсал – это грузопассажирский кузов, позволяющий перевозить значительный объем груза при сложенном заднем сиденье. Багажное отделение универсала намного превышает по объему багажное отделение хэтчбека. Все кузова цельнометаллические несущей конструкции.
Существуют четыре базовые комплектации автомобиля: Basic, Classik, Comfort и Elegance, различающиеся установленными на них двигателями и оборудованием.
Двигатели четырехцилиндровые бензиновые или дизельные рабочим объемом от 1,0 до 1,9 л. Все двигатели оборудованы системой улавливания паров топлива и каталитическими нейтрализаторами в системе выпуска отработавших газов.
Автомобиль оснащен двухконтурной рабочей тормозной системой с гидравлическим приводом и вакуумным усилителем, что повышает его безопасность. Передние тормозные механизмы дисковые, задние – барабанные или дисковые.
Благодаря переднеприводной компоновке автомобиль обладает улучшенными по сравнению с заднеприводными моделями характеристиками управляемости, особенно при прохождении поворотов и на скользкой дороге.
↓ Комментарии ↓
1. Шкода Фабия
1.0 Skoda Fabia
1.2. Технические характеристики автомобилей
1.3 Паспортные данные
1.4 Ключи
1.5 Двери
1.6 Капот
1.7 Багажник
1.8 Регулировка сидений
1.9 Увеличение вместимости багажника
1.10 Ремни безопасности
1.11. Подушки безопасности системы Airbag
1.12 Безопасность детей
1.13 Заправка автомобиля
1.14 Топливо
1.15 Органы управления
1.16 Комбинация приборов
1.17 Блок контрольных ламп
1.18 Рычаг переключения передач
1.19 Рычаг стояночного тормоза
1.20 Регулировка рулевой колонки
1.21 Выключатель (замок) зажигания
1.22 Подрулевой переключатель
1.23 Подсветка приборов
1.24 Корректор фар
1.25 Центральный переключатель
1.26 Прикуриватель
1.27 Пепельница
1.28 Вещевые ящики
1.29 Аварийная сигнализация
1.30 Подогрев передних сидений
1.31 Обогрев заднего стекла
1.32 Выключатель антипробуксовочной системы (ASR)
1.33 Вентиляция и отопление салона
1.34 Кондиционер
1.35 Зеркала заднего вида
1.36 Стеклоподъемники с электроприводом
1.37 Солнцезащитные козырьки
1.38 Люк в крыше с электроприводом
1.39 Сдвижная крыша с электроприводом
1.40 Освещение салона
1.41 Багажник на крыше
1.42 Тягово-сцепное устройство
1.43 Обкатка автомобиля
1.44 Пуск двигателя
1.45 Остановка двигателя
1.46 Пуск двигателя от внешнего источника
1.47 Пуск двигателя буксировкой
1.48 Буксировка автомобиля
1.49 Поднятие автомобиля
1.50. Колеса и шины
1.51 Очистители и омыватели стекол
1.52 Аккумуляторная батарея
1.53 Уход за автомобилем
1.54 Сервисная книжка
2. Двигатель
2.0 Двигатель
2.2. Установка поршня первого цилиндра в положение ВМТ такта сжатия
2.3 Замена ремня привода генератора
2.4. Замена и регулировка натяжения ремня привода распределительного вала
2.5 Замена цепи привода распределительного вала
2.6 Подбор распределительной шестерни коленчатого вала
2.7 Замена прокладки головки блока цилиндров
2.8 Замена сальника распределительного вала
2.9 Замена маслосъемных колпачков
2.10 Замена переднего сальника коленчатого вала
2.11 Задний сальник коленчатого вала
2.12. Ремонт головки блока цилиндров
2.13. Ремонт двигателя
3. Система смазки
3.0 Система смазки
3.1 Снятие и установка масляного картера двигателя
3.2 Ремонт масляного насоса на двигателях 1,0 л, 37 кВт и 1,4 л, 50 кВт
3.3 Замена масляного насоса
3.4 Масляный фильтр дизельного двигателя
3.5 Проверка уровня масла в картере двигателя
3.6 Замена масла и масляного фильтра
4. Система питания
4.0 Система питания
4.2 Замена фильтрующего элемента воздушного фильтра
4.3 Замена датчика указателя уровня топлива
4.4 Снятие и установка топливного бака
4.5 Проверка воздушного клапана
4.6 Проверка гравитационного клапана
4.7 Замена топливного фильтра
4.8 Проверка клапана подогрева топлива
4.9 Замена адсорбера системы улавливания паров топлива
4.10 Замена топливного радиатора
4.11 Снятие и установка вакуумного насоса дизельного двигателя
4.12 Снятие и установка впускной трубы двигателя
4.13 Снятие и установка педали акселератора
4.14. Снятие и установка форсунок
4.15 Проверка цепи питания форсунок бензинового двигателя
4.16 Проверка сопротивления насос-форсунки
4.17 Проверка свечей накаливания дизельного двигателя 1,9 л, 47 кВт
4.18 Проверка цепи питания свечей накаливания
4.19 Проверка датчика температуры охлаждающей жидкости
4.20 Проверка датчика температуры воздуха, поступающего в двигатель
4.21 Проверка датчика температуры топлива дизельного двигателя 1,9 л, 74 кВт
4.22 Проверка датчика частоты вращения коленчатого вала
4.23 Проверка привода дроссельной заслонки
4.24 Проверка датчика положения распределительного вала
4.25 Проверка элекромагнитного клапана рециркуляции отработавших газов
4.26 Проверка реле топливного насоса двигателей 1,4 л, 55 и 74 кВт
4.27 Проверка электромагнитного клапана продувки адсорбера
4.28 Снятие и установка турбокомпрессора
4.29 Снятие и установка промежуточного охладителя воздуха
4.30 Проверка клапана давления наддува
5. Система охлаждения
5.0 Система охлаждения
5.1 Проверка герметичности системы охлаждения
5.2 Проверка пробки расширительного бачка
5.3 Снятие и установка радиатора на моделях без кондиционера
5.4 Снятие и установка радиатора на моделях с кондиционером
5.5 Снятие и установка водяного насоса на моделях с бензиновыми двигателями
5.6 Снятие и установка водяного насоса на моделях с дизельными двигателями
5.7 Снятие и установка вентилятора радиатора
5.8 Замена датчика включения вентилятора
5.9 Снятие и установка термостата
5.10 Проверка термостата
5.11 Замена шлангов системы охлаждения двигателя
5.12 Проверка уровня охлаждающей жидкости
5.13 Замена охлаждающей жидкости
6. Система выпуска отработавших газов
6.0 Система выпуска отработавших газов
6.1 Проверка герметичности системы выпуска отработавших газов
6.2 Снятие и установка приемной трубы глушителя (бензиновые двигатели)
6.3 Снятие и установка приемной трубы глушителя (дизельные двигатели)
6.4 Замена узлов глушителя в сборе (резонатора или глушителя)
6.5 Система рециркуляции отработавших газов (двигатели 1,4 л, 55 и 74 кВт)
6.6 Система рециркуляции отработавших газов (двигатели 1,9 л, 74 кВт)
6.7 Система рециркуляции отработавших газов (двигатели 1,9 л, 47 кВт)
7. Трансмиссия и ходовая часть
7.0 Трансмиссия и ходовая часть
7.1. Технические характеристики коробок передач (КП)
7.2. Передняя подвеска
7.3. Задняя подвеска
8. Рулевое управление
8.0 Рулевое управление
8.1 Снятие и установка рулевого колеса
8.2 Снятие и установка возвратного и контактного колец в сборе
8.3. Рулевая колонка
8.4. Рулевой механизм (без усилителя)
8.5. Рулевой механизм (с усилителем)
9. Тормозная система
9.0 Тормозная система
9.1. Педальный узел
9.2 Вакуумный усилитель
9.3 Главный тормозной цилиндр
9.4 Регулятор давления (на моделях без ABS)
9.5. Тормозной механизм переднего колеса типа FS III
9.6. Тормозной механизм переднего колеса типа FS II
9.7. Тормозной механизм заднего колеса (барабанный)
9.8. Тормозной механизм заднего колеса (дисковый)
9.9. Стояночный тормоз
9.10. Антиблокировочная система (ABS)
10. Электрооборудование
10.0 Электрооборудование
10.2 Аккумуляторная батарея
10.3. Система зажигания
10.4 Снятие и установка комбинации приборов
10.5. Очиститель и омыватель ветрового стекла
10.6. Очиститель и омыватель стекла двери задка
10.7 Замена ламп
10.8 Снятие и установка фары
10.9 Снятие и установка заднего фонаря
10.10 Замена дополнительного фонаря сигнала торможения
10.11 Выключатели и переключатели
10.12 Снятие и установка звуковых сигналов
10.13 Снятие и установка динамиков
10.14 Снятие и установка антенны
11. Кузов
11.0 Кузов
11.2. Передняя дверь
11.3. Задняя дверь
11.4. Сиденья
11.5. Ремни безопасности
11.6 Снятие и установка панели приборов
11.7 Снятие и установка тягово-сцепного устройства
11.8. Отопитель
12. Электросхемы
12.0 Электросхемы
12.1. Символы, встречающиеся на схемах электрооборудования
12.2 Cхемы электрооборудования автомобиля Шкода Фабиа
- Главная
- Skoda
- Fabia
- Книга по ремонту и обслуживанию Skoda Fabia 1999-2007 гг.
Год выпуска:
1999 — 2007 гг.
Найдено 6 книг стоимостью от 391 руб.
Быстро купить книгу в оригинальной качественной версии PDF от издательства
Купить бумажную версию книги с доставкой по вашему адресу
Скачать руководство с предоставленного файлообменника
Руководство по ремонту и эксплуатации Skoda Fabia, которые производились с 1999 по 2007 года. Так же как и большинство других автомобилей, Skoda Fabia делится на несколько поколений. Наш сайт представляет вам руководство по Skoda Fabia первого поколения. Данные автомобили первого поколения производились в Чехии.
Руководство расскажет читателю все подробности об автомобилях Skoda Fabia с двигателями, малолитражными: 1.0 литра, мощность 37 кВт, 1.2 литра, мощность 40 кВт, 1.4 литра, мощностями 44 и 50 кВт, а так же с двигателем 1.9 литра.
Пособие рассказывает, какие правильно инструменты применять при ремонте той или иной детали, в случае поломки, а так же подробно показывает все эти действия на иллюстрациях, а так же какие лучше детали использовать для замены и какие нюансы учитывать.
Данным руководством по ремонту Skoda Fabia пользуются не только автолюбители, но и автомеханики, что значительно упрощает им жизнь.
Эксплуатация Skoda Fabia
Похожие руководства на сайте
49 посетителей на сайте. Из них:
Список пользователей
mob-3
Был(a) в сети 16 минут назад
pycckob
Был(a) в сети 22 минуты назад
manuk
Был(a) в сети 32 минуты назад
Magua
Был(a) в сети 42 минуты назад
ANRI
Был(a) в сети 1 час назад
che125
Был(a) в сети 1 час назад
гоша
Был(a) в сети 2 часа назад
георги
Был(a) в сети 2 часа назад
dsn999
Был(a) в сети 3 часа назад
daci
Был(a) в сети 3 часа назад
andd02
Был(a) в сети 5 часов назад
serg010
Был(a) в сети 5 часов назад
Altron
Был(a) в сети 5 часов назад
HJW
Был(a) в сети 5 часов назад
sktem
Был(a) в сети 6 часов назад
e706co
Был(a) в сети 6 часов назад
g6guhef
Был(a) в сети 6 часов назад
vcvcvc
Был(a) в сети 6 часов назад
Lemming
Был(a) в сети 7 часов назад
sanek51
Был(a) в сети 7 часов назад
Susell
Был(a) в сети 8 часов назад
serg264
Был(a) в сети 8 часов назад
feca
Был(a) в сети 9 часов назад
Mitsuba
Был(a) в сети 9 часов назад
vedat
Был(a) в сети 9 часов назад
alxbk
Был(a) в сети 10 часов назад
mariolo
Был(a) в сети 10 часов назад
василь
Был(a) в сети 12 часов назад
Kurasan
Был(a) в сети 12 часов назад
arsrum
Был(a) в сети 13 часов назад
eddol
Был(a) в сети 13 часов назад
bmm-71
Был(a) в сети 13 часов назад
Masterm
Был(a) в сети 16 часов назад
iay10
Был(a) в сети 21 час назад
Шкода Фабия Руководство по эксплуатации, техническому обслуживанию и ремонту Здесь
Шкода Фабия Сервисное тexoбcлуживaниe: Руководство для цехов (мастерских)
Skoda Fabia Руководство по эксплуатации (издание 08.2003)
Skoda Fabia Руководство по эксплуатации (издание 08.2004)
Skoda Fabia Руководство по эксплуатации (издание 05.2005)
Skoda Fabia Руководство по эксплуатации (издание 05.2007)
ЕСЛИ ВЫ ВИДИТЕ ОШИБКУ 406 Not Acceptable и не видите документ, то скорей всего у Вас IP РФ и его надо сменить, на любой другой страны, с помощью VPN ( Scribd и SlideShare блокируют посетителей с Российским IP).
Видео Škoda Fabia замена термостата (Шкода Фабия 2000-2005)
Skoda Fabia Mark 1 общая информация (Шкода Фабия 2000-2006)
УДАЛЕНИЕ ВОЗДУХА ИЗ ТОРМОЗНОЙ СИСТЕМЫ
Удаление воздуха из гидропривода тормозной системы с помощью прибора «ROMESS S15»
1. Присоедините прибор для удаления воздуха из гидропривода, но пока не включайте.
2. Нажав на тормозную педаль, зафиксируйте ее фиксатором. Нажав на тормозную педаль, зафиксируйте ее фиксатором.
3. Снимите резиновые колпачки с суппортов тормозных механизмов / рабочих тормозных цилиндров.
4. Откройте в предусмотренной последовательности клапаны выпуска воздуха и, включив прибор для удаления воздуха, удалите воздух из суппортов тормозных механизмов и рабочих тормозных цилиндров.
Последовательность удаления воздуха:
1. Рабочий тормозной цилиндр и суппорт тормозного механизма заднего правого колеса.
2. Рабочий тормозной цилиндр и суппорт тормозного механизма заднего левого колеса.
3. Суппорт тормозного механизма переднего левого колеса.
4. Суппорт тормозного механизма переднего правого колеса.
5. После удаления воздуха закройте соответствующий клапан выпуска воздуха и наденьте резиновый колпачок.
6. Выключите прибор удаления воздуха.
7. Отсоедините трубопроводы от бачка с тормозной жидкостью и снимите фиксатор тормозной педали.
8. Произведите испытательный пробеге активацией (срабатыванием) системы «ABS».
9. Осуществите установку в исходное положение.
10. Осуществите испытательный пробег, по крайней мере, с одной активацией (срабатыванием) системы «ABS».
Удаление воздуха из гидропривода тормозной системы без применения прибора для удаления воздуха
Внимание! У автомобилей, оснащенных только «ABS», удаление воздуха из гидропривода тормозной системы осуществляется таким же образом, что и у автомобилей без нее. У автомобилей без «ABS», оснащенных регулятором тормозных сил в зависимости от нагрузки автомобиля, нужно в ходе удаления воздуха из тормозного механизма заднего колеса перемещать рычаг регулятора. Во время удаления воздуха нужно непрестанно наблюдать за уровнем тормозной жидкости в бачке гидропривода.
В случае необходимости долейте ее до отметки «МАХ».
1. Нажимая повторно на педаль управления тормозной системой, повысьте давление в тормозной системе.
2. Наденьте шланг для удаления воздуха и откройте клапан выпуска воздуха.
3. При нажатой педали управления тормозной системой закройте клапан выпуска воздуха.
4. Повторяйте этот процесс до тех пор, пока не перестанет выходить воздух.
Последовательность при удалении воздуха:
1. Рабочий тормозной цилиндр и суппорт тормозного механизма заднего правого колеса.
2. Рабочий тормозной цилиндр и суппорт тормозного механизма заднего левого колеса.
3. Суппорт тормозного механизма переднего правого колеса.
4. Суппорт тормозного механизма переднего левого колеса.
5. После удаления воздуха закройте соответствующий клапан и наденьте резиновый колпачок.
6. Произведите испытательный пробег с активацией (срабатыванием) системы «ABS».
7. Осуществите установи у в исходное положение.
8. Осуществите испытательный пробег, по крайней мере, с одной активацией (срабатыванием) системы «ABS».
The Skoda Fabia models covered by this manual were manufactured between March 2000 and December 2005. Models included in this Manual are available with 1.2 litre 3-cylinder SOHC 6-valve, 1.2 litre 3-cylinder DOHC 12-valve, 1.4 litre 4-cylinder 8-valve, and 1.4 litre 4-cylinder 16-valve petrol engines. The diesel engines available are 1.4 litre 3-cylinder (6-valve) and 1.9 litre 4-cylinder (8-valve). 1.0 litre OHV and 2.0 litre 16-valve petrol engines are not covered in this Manual. 1.9 litre diesel engines are available in normally-aspirated and turbocharged versions. All petrol engines use multi-point fuel injection, and are fitted with a wide range of emission control systems.
All the engines are of a well-proven design and, provided regular maintenance is carried out, are unlikely to give trouble. Skoda Fabia models are available in 5-door Hatchback, 4-door Saloon and 5-door Estate body styles. Fully-independent front suspension is fitted, with the components attached to a subframe assembly; the rear suspension is semiindependent, with a torsion beam and trailing arms. A five-speed manual gearbox is fitted, with a four-speed automatic gearbox available as an option for 1.4 litre 16-valve petrol engine models. Note: At the time of writing, no information was available for the 6-speed gearbox (code OAB) fitted to vRS models. A wide range of standard and optional equipment is available within the model range to suit most tastes, including anti-lock braking, traction control and air conditioning.
For the home mechanic, Skoda Fabia models are straightforward vehicles to maintain, and most of the items requiring frequent attention are easily accessible. Your Skoda Fabia Manual The aim of this manual is to help you get the best value from your vehicle. It can do so in several ways. It can help you decide what work must be done (even should you choose to get it done by a garage). It will also provide information on routine maintenance and servicing, and give a logical course of action and diagnosis when random faults occur. However, it is hoped that you will use the manual by tackling the work yourself. On simpler jobs it may even be quicker than booking the car into a garage and going there twice, to leave and collect it. Perhaps most important, a lot of money can be saved by avoiding the costs a garage must charge to cover its labour and overheads. The manual has drawings and descriptions to show the function of the various components so that their layout can be understood. Tasks are described and photographed in a clear step-by-step sequence. References to the ‘left’ and ‘right’ of the vehicle are in the sense of a person in the driver’s seat facing forward.
Acknowledgements Thanks are due to Draper Tools Limited, who provided some of the workshop tools, and to all those people at Sparkford who helped in the production of this manual. This manual is not a direct reproduction of the vehicle manufacturer’s data, and its publication should not be taken as implying any technical approval by the vehicle manufacturers or importers. We take great pride in the accuracy of information given in this manual, but vehicle manufacturers make alterations and design changes during the production run of a particular vehicle of which they do not inform us. No liability can be accepted by the authors or publishers for loss, damage or injury caused by any errors in, or omissions from, the information given.

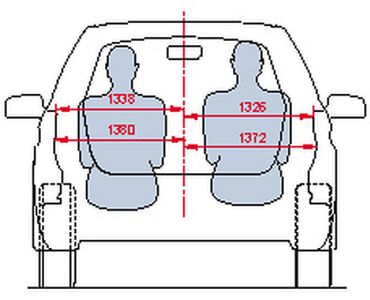
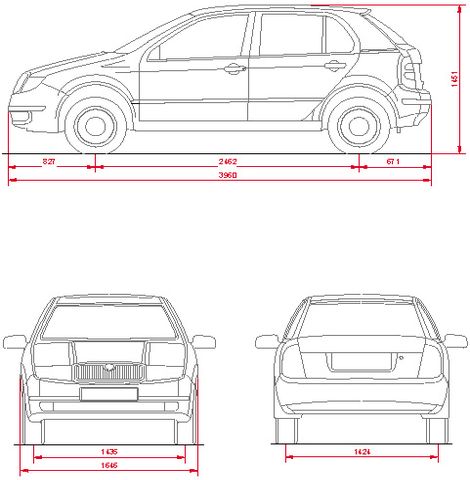
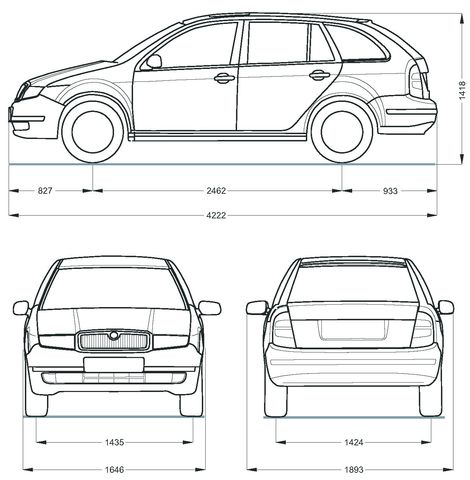
| № | Спецификация / Specs | Данные |
| Габариты (мм/mm) и масса (кг/kg) / Dimensions and Weight | ||
| 1 | Длина / Length | 3960 |
| 2 | Ширина (без/с зеркалами) / Width | 1646/1886 |
| 3 | Высота (загружен/пустой) / Height | 1451 |
| 4 | Колёсная база / Wheelbase | 2462 |
| 5 | Дорожный просвет (клиренс) / Ground clearance | 140 |
| 6 | Снаряжённая масса / Total (curb) weight | 1040 |
| Полная масса / Gross (max.) weight | 1505 | |
|
Двигатель / Engine |
||
| 7 | Тип / Engine Type, Code | Бензиновый, четырехтактный, жидкостного охлаждения, four stroke, liquid-cooled, AZQ/ BME |
| 8 | Количество цилиндров / Cylinder arrangement: Total number of cylinders, of valves | 3-цилиндровый, 12V, рядный, DOHC с верхним расположением двух распределительных валов, Three-cylinder in-line, chain-driven double overhead camshaft |
| 9 | Диаметр цилиндра / Bore | 76.5 мм |
| 10 | Ход поршня / Stroke | 86.9 мм |
| 11 | Объём / Engine displacement | 1198 см³ |
| 12 | Система питания / Fuel supply, Aspiration | Распределенный впрыск топлива Siemens Simes 3PE |
| Атмосферный | ||
| 13 | Степень сжатия / Compression ratio | 10.5:1 |
| 14 | Максимальная мощность / Max. output power kW (HP) at rpm | 47 кВт (63 л.с.) при 5400 об/мин |
| 15 | Максимальный крутящий момент / Max. torque N·m at rpm | 112 Нм при 3000 об/мин |
|
Трансмиссия / Transmission |
||
| 16 | Сцепление / Clutch type | Однодисковое, сухое, с диафрагменной нажимной пружиной и гасителем крутильных колебаний, постоянно замкнутого типа |
| 17 | КПП / Transmission type | МКПП 5 пятиступенчатая механическая, двухвальная, с синхронизаторами на всех передачах переднего хода |
О Книге
- Название: Škoda Fabia Service and Repair Manual Models covered Hatchback, Saloon and Estate, including vRS and special/limited editions
- Бензиновые двигатели / Petrol engines: 1.2 litre (1198cc) 3-cylinder and 1.4 litre (1397cc & 1390cc) 4-cylinder Diesel engines: 1.4 litre (1422cc) 3-cylinder and 1.9 litre (1896cc) 4-cylinder, including turbo Does not cover 1.0 litre OHV engine or 2.0 litre 16-valve petrol engines
- Выпуск с 2000 года
- Серия: «Owners Workshop Manual»
- Год издания: 2012
- Автор: A.K. Legg
- Издательство: «Ассоциация независимых издателей»
- Формат: PDF
- Страниц в книге: 373
- Размер: 31.58 МБ
- Язык: Английский — Graecum est, non legitur
- Количество электросхем: 10