 44:32
44:32
# Обзор V6 2.5л. 177 л/с Рено Латитьюд
 15:01
15:01
Наши тесты — Renault Latitude
 11:09
11:09
Отзыв клиента Renault Latitude (2013г.в 527тыс руб)
 08:21
08:21
Renault Latitude 2.0 dCi 2013 со Скидкой 450€
 16:18
16:18
Renault Latitude V6 2.5л. Осмотр авто в Челябинске.
 15:01
15:01
Наши тесты — Renault Latitude vs Citroen C5
 24:32
24:32
Renault Latitude 2.0 CVT
 11:19
11:19
Тест-драйв нового Renault Latitude
РУКОВОДСТВО ПО ЭКСПЛУАТАЦИИ
LATITUDE

Перевод с английского. Копирование или перевод, даже частичные, а также продажа настоящего руководства по эксплуатации запрещены без предварительного
письменного разрешения компании-производителя.
Данное руководство по эксплуатации содержит сведения, которые позволят Вам:
– ознакомиться с автомобилем, использовать его наилучшим образом и извлечь пользу из всех функций и технических преимуществ,
которыми он обладает;
– сделать так, чтобы автомобиль соответствовал своим наилучшим рабочим характеристикам (благодаря соблюдению простых, но ис-
черпывающих советов по техобслуживанию);
– быстро устранять незначительные неисправности, не требующие вмешательства специалиста.
Мы Вам советуем выбрать время для прочтения этого руководства и ознакомления со сведениями и указаниями, касающимися автомо-
биля, его функций и новшеств. Если некоторые пункты Вам неясны, обращайтесь к специалистам компании-производителя, которые с
удовольствием разъяснят Вам такие моменты.
Следующий символ окажет Вам большую помощь при чтении этого руководства:
Добро пожаловать
в Ваш автомобиль!
Технические характеристики моделей в этом руководстве основаны на информации, актуальной на момент печати руководства.
В этом
руководстве описывается все доступное оборудование (серийное и дополнительное) для этих моделей. Наличие этого обору-
дования зависит от комплектации автомобиля, выбранных опций и страны поставки.
В этом руководстве также может содержаться информация о еще недоступном для данного модельного года оборудовании.
Термин «Представитель производителя» в этом руководстве означает представителя компании RENAULT.
Указывает на риск, опасность или рекомендацию, касающуюся безопасности.
Мы желаем Вам приятного времяпрепровождения за рулем нового автомобиля.

Знакомство с автомобилем ………………………………..
Страница 3
- Изображение
- Текст
Знакомство с автомобилем ……………………………….
Вождение автомобиля ………………………………………
Комфорт …………………………………………………………….
Уход за автомобилем …………………………………………
Практические советы ………………………………………..
Технические характеристики ……………………………..
Алфавитный указатель ……………………………………..
Главы
1
С
О
Д
Е
Р
Ж
А
Н
И
Е
2
3
4
5
6
7

1.1
Глава 1. Знакомство с автомобилем
Карта RENAULT: общие сведения, использование, полная блокировка замков . . . . . . . . . . . . . . . . . . . .
1.2
Открывание и закрывание дверей . . . . . . . . . . . . . . . . . . . . . . . . . . . . . . . . . . . . . . . . . . . . . . . . . . . . . . . . .
1.9
Автоматическая блокировка дверей при начале движения . . . . . . . . . . . . . . . . . . . . . . . . . . . . . . . . . . . . . 1.13
Подголовник переднего сиденья . . . . . . . . . . . . . . . . . . . . . . . . . . . . . . . . . . . . . . . . . . . . . . . . . . . . . . . . . . 1.14
Переднее сиденье . . . . . . . . . . . . . . . . . . . . . . . . . . . . . . . . . . . . . . . . . . . . . . . . . . . . . . . . . . . . . . . . . . . . . . . . 1.15
Сиденье водителя с функцией памяти . . . . . . . . . . . . . . . . . . . . . . . . . . . . . . . . . . . . . . . . . . . . . . . . . . . . . . . 1.17
Сиденье водителя с функцией массажа . . . . . . . . . . . . . . . . . . . . . . . . . . . . . . . . . . . . . . . . . . . . . . . . . . . . . . 1.19
Ремни безопасности . . . . . . . . . . . . . . . . . . . . . . . . . . . . . . . . . . . . . . . . . . . . . . . . . . . . . . . . . . . . . . . . . . . . 1.20
Сиситема дополнительных средств пассивной безопасности . . . . . . . . . . . . . . . . . . . . . . . . . . . . . . . . . . . 1.23
водителя и переднего пассажира . . . . . . . . . . . . . . . . . . . . . . . . . . . . . . . . . . . . . . . . . . . . . . . . . . .
1.23
задних пассажиров . . . . . . . . . . . . . . . . . . . . . . . . . . . . . . . . . . . . . . . . . . . . . . . . . . . . . . . . . . . . . .
1.27
боковые устройства безопасности . . . . . . . . . . . . . . . . . . . . . . . . . . . . . . . . . . . . . . . . . . . . . . . . . .
1.28
Безопасность детей: общие сведения . . . . . . . . . . . . . . . . . . . . . . . . . . . . . . . . . . . . . . . . . . . . . . . . . . . . . . 1.30
выбор детского сиденья . . . . . . . . . . . . . . . . . . . . . . . . . . . . . . . . . . . . . . . . . . . . . . . . . . . . . . . . . .
1.33
установка детского сиденья . . . . . . . . . . . . . . . . . . . . . . . . . . . . . . . . . . . . . . . . . . . . . . . . . . . . . . .
1.35
включение/выключение подушки безопасности переднего пассажира . . . . . . . . . . . . . . . . . . . .
1.40
Рулевое колесо/Рулевое управление с усилителем . . . . . . . . . . . . . . . . . . . . . . . . . . . . . . . . . . . . . . . . . . . 1.43
Место водителя: левостороннее рулевое управление . . . . . . . . . . . . . . . . . . . . . . . . . . . . . . . . . . . . . . . . . 1.44
Предупредительные сигнальные лампы . . . . . . . . . . . . . . . . . . . . . . . . . . . . . . . . . . . . . . . . . . . . . . . . . . . . 1.46
Дисплеи и указатели . . . . . . . . . . . . . . . . . . . . . . . . . . . . . . . . . . . . . . . . . . . . . . . . . . . . . . . . . . . . . . . . . . . . . . 1.50
Бортовой компьютер . . . . . . . . . . . . . . . . . . . . . . . . . . . . . . . . . . . . . . . . . . . . . . . . . . . . . . . . . . . . . . . . . .
1.51
Меню индивидуальных настроек автомобиля. . . . . . . . . . . . . . . . . . . . . . . . . . . . . . . . . . . . . . . . . . . . . .
1.61
Время и температура наружного воздуха . . . . . . . . . . . . . . . . . . . . . . . . . . . . . . . . . . . . . . . . . . . . . . . . . . . 1.62
Зеркала заднего вида . . . . . . . . . . . . . . . . . . . . . . . . . . . . . . . . . . . . . . . . . . . . . . . . . . . . . . . . . . . . . . . . . . . 1.63
Звуковая и световая сигнализация . . . . . . . . . . . . . . . . . . . . . . . . . . . . . . . . . . . . . . . . . . . . . . . . . . . . . . . . 1.65
Приборы наружного освещения и сигнализации . . . . . . . . . . . . . . . . . . . . . . . . . . . . . . . . . . . . . . . . . . . . . 1.66
Электронная регулировка света фар в вертикальной плоскости . . . . . . . . . . . . . . . . . . . . . . . . . . . . . . . . 1.69
Очиститель/омыватель ветрового стекла . . . . . . . . . . . . . . . . . . . . . . . . . . . . . . . . . . . . . . . . . . . . . . . . . . . 1.70
Топливный бак . . . . . . . . . . . . . . . . . . . . . . . . . . . . . . . . . . . . . . . . . . . . . . . . . . . . . . . . . . . . . . . . . . . . . . . . . 1.73
Идентификационная маркировка . . . . . . . . . . . . . . . . . . . . . . . . . . . . . . . . . . . . . . . . . . . . . . . . . . . . . . . . . . 1.75

1.2
Дальность действия карты
RENAULT
Зависит от окружающей обстановки.
Важно следить при обращении с картой
RENAULT, чтобы по неосторожности не
заблокировать или не разблокировать
двери нажатием на кнопки.
КАРТА RENAULT: общие сведения
(1/2)
1 Отпирание боковых дверей и крышки
багажного отделения
2 Запирание всех боковых дверей и
крышки багажного отделения
3 Дистанционное включение освещения
4 Отпирание/запирание крышки багаж-
ного отделения
5 Встроенный ключ
Карта RENAULT обеспечивает:
– запирание и отпирание боковых
дверей и крышки багажного отделения;
– дистанционное включение освещения
автомобиля (см. на следующих стра-
ницах);
– в зависимости от комплектации авто-
мобиля автоматическое дистанцион-
ное закрытие стекол и люка крыши, см.
разделы «Электростеклоподъемники
и люк крыши с электроприводом» в
главе 3;
– запуск двигателя (см. раздел «Запуск
двигателя» в главе 2).
Срок службы элемента
питания карты RENAULT
Убедитесь в том, что элемент питания
не разряжен, рекомендованного типа и
верно установлен.
Срок службы элемента питания при-
мерно два года; после появления сооб-
щения «КЛЮЧ-КАРТА РАЗРЯЖАЕТСЯ»
на приборной панели (см. раздел «Карта
RENAULT: элемент питания» в главе 5)
элемент питания следует заменить.
Примечание: Вы всегда можете забло-
кировать/разблокировать двери Вашего
автомобиля, а также запустить двига-
тель с разряженным элементом питания.
См. разделы «Запирание и отпирание
дверей» в главе 1 и «Запуск двигателя»
в главе 2.
Ответственность водителя
Выходя из автомобиля, ни в
коем случае не оставляйте
карту RENAULT в салоне,
если в автомобиле остался ребенок
(или животное), даже на короткое
время.
В таком случае ребенок может под-
вергнуть опасности себя и других,
запустив двигатель или включив
какое-либо оборудование, напри-
мер стеклоподъемники, или заперев
двери.
Существует опасность получения тя-
желых травм.
4
5
1
2
3

1.3
Использование ключа
Относительно использования запас-
ного ключа см. «Запирание и отпирание
дверей» в главе 1.
Открыв автомобиль с помощью
встроенного ключа, снова вставьте
его в гнездо на карте RENAULT, затем
вставьте карту RENAULT в считываю-
щее устройство, чтобы стал возмож-
ным запуск двигателя.
КАРТА RENAULT: общие сведения
(2/2)
Встроенный ключ 5
Встроенный ключ используется для за-
пирания или отпирания левой двери в
случае отказа карты RENAULT:
– разряжен элемент питания карты
RENAULT, разряжена аккумуляторная
батарея;
– на частоте карты работает другой ра-
диоприбор;
– автомобиль находится в зоне сильных
электромагнитных помех.
Доступ к ключу 5
Нажмите кнопку 6 и потяните за ключ 5,
затем отпустите кнопку.
Замена или получение дополни-
тельной карты RENAULT
Если Вы потеряли или хотите полу-
чить дополнительную карту RENAULT,
обращайтесь только к представителю
компании-производителя.
В случае замены карты RENAULT не-
обходимо доставить автомобиль и
все его карты RENAULT на сервис-
ную станцию компании-производи-
теля для повторной инициализации
всего комплекта.
Вы можете использовать до четырех
карт RENAULT для одного автомо-
биля.
Рекомендация
Не оставляйте карту RENAULT в
жарких, холодных или влажных
местах.
Не убирайте карту RENAULT в места,
где она может быть случайно ис-
кривлена или повреждена. Карта
RENAULT может быть повреждена в
задних карманах брюк.
5
6

Дистанционное включение осветительных приборов Позволяет, …
Страница 7
- Изображение
- Текст
1.4
Дистанционное включение
осветительных приборов
Позволяет, например, найти автомобиль
на стоянке.
При нажатии на кнопку 3 примерно на 30
секунд включаются фары ближнего света,
габаритные огни и внутреннее освещение
салона.
Примечание: повторным нажатием на
кнопку 3 можно выключить освещение.
Предупреждение о
неопределении карты
RENAULT
Если вы открываете дверь при работаю-
щем двигателе, но при отсутствии карты
в считывающем устройстве, сообщение
«КЛЮЧ-КАРТА НЕ НАЙДЕНА» (Карта не
обнаружена) и звуковой сигнал предупре-
дят вас об этом. Сигнал и сообщение ис-
чезнут, как только вы вставите карту в
считывающее устройство.
КАРТА RENAULT С ПУльТОм ДИСТАНцИОННОГО УПРАВлЕНИя: использование
Отпирание боковых дверей и
крышки багажного отделения
Нажмите на кнопку отпирания дверей 1.
Отпирание замков дверей сопровожда-
ется
однократным включением указате-
лей поворота в режиме аварийной сигна-
лизации.
При работающем двигателе кнопки
карты не функционируют.
1
2
Запирание боковых дверей и
крышки багажного отделения
Нажмите на кнопку запирания 2.
Запирание сопровождается
двукрат-
ным включением указателей поворота
в режиме аварийной сигнализации. Если
боковая дверь или крышка багажного от-
деления открыта или неплотно закрыта
или если карта RENAULT оставлена в
считывающем устройстве, боковые двери
и крышка багажника запираются и сразу
же отпираются, при этом указатели пово-
рота в режиме аварийной сигнализации
не мигают.
Отпирание и запирание только
крышки багажного отделения
Нажмите на кнопку 4 для отпирания или
запирания крышки багажника.
4
3
Мигание аварийной сигнализации го-
ворит о состоянии автомобиля:
–
однократное включение в
режиме аварийной сигнализации
указывает на то, что автомобиль
отперт;
–
двукратное включение в режиме
аварийной сигнализации указы-
вает на то, что автомобиль забло-
кирован.

1.5
Примечание: если карта RENAULT нахо-
дится в багажном отделении, автомобиль
запирается, затем сразу же отпирается.
Следите за тем, чтобы карта RENAULT
всегда была при вас. Однако при наличии
помех автомобиль может не отпираться.
КАРТА RENAULT «СВОбОДНыЕ РУКИ»: использование
(1/3)
1
2
Использование
На автомобилях с соответствующим обо-
рудованием эта карта, в дополнение к
возможностям карты RENAULT с пультом
дистанционного управления, обеспечи-
вает запирание/отпирание автомобиля
без воздействия на карту RENAULT, когда
она находится в зоне действия 1.
Примечание: следите, чтобы карта
RENAULT не соприкасалась с другим
электронным оборудованием (компью-
тер, электронный органайзер, телефон и
т. п.), которое может нарушить ее работу.
Разблокировка автомобиля
Если карта RENAULT находится в зоне 1,
Вы можете отпереть автомобиль, поло-
жив руку на ручку двери 2; автомобиль
откроется (в некоторых случаях требу-
ется потянуть за ручку двери 2 два раза
подряд, чтобы отпереть автомобиль и от-
крыть дверь).
Нажатие на кнопку 3 отпирает боковые
двери и крышку багажника.
Отпирание замков дверей сопровожда-
ется
однократным включением указате-
лей поворота в режиме аварийной сигна-
лизации.
Примечание: если ни одна дверь не от-
крывается в течение нескольких минут с
момента отпирания автомобиля с помо-
щью кнопки запирания/отпирания карты
RENAULT, двери автоматически запира-
ются вновь.
3

1.6
КАРТА RENAULT «СВОбОДНыЕ РУКИ»: использование
(2/3)
4
блокировка автомобиля
Существует три способа запирания ав-
томобиля: дистанционный, с помощью
кнопки 4 и с помощью карты RENAULT.
Дистанционная блокировка
Имея карту RENAULT при себе, отойдите
от автомобиля, у которого двери и багаж-
ное отделение должны быть закрыты: ав-
томобиль заблокируется автоматически,
как только Вы выйдете из зоны 1.
Примечание: расстояние, на котором
происходит запирание замков дверей ав-
томобиля, зависит от внешних условий.
Запирание сопровождается двукратным
включением указателей поворотов и зву-
ковым сигналом.
Звуковой сигнал можно отключить.
Обратитесь на сервисную станцию ком-
пании-производителя.
Если боковая дверь или крышка багаж-
ного отделения открыта или неплотно за-
крыта или если карта находится в салоне
автомобиля (или в считывающем устрой-
стве) автомобиль не запирается. В этом
случае,
нет звукового сигнала и мига-
ния указателей поворотов.
Запирание с помощью кнопки 4
При закрытых боковых дверях и крышке
багажного отделения, имея карту
RENAULT при себе, нажмите на кнопку 4
на наружной ручке передней двери.
Автомобиль запирается.
Если боковая дверь или крышка багаж-
ного отделения неплотно закрыта или
если карта RENAULT оставлена в счи-
тывающем устройстве, боковые двери
и крышка багажника не запираются, при
этом указатели поворота в режиме ава-
рийной сигнализации не мигают, даже
если Вы нажимаете на кнопку 4.
Примечание: карта RENAULT должна
находиться в зоне считывания (зона 1),
чтобы автомобиль можно было запереть
с помощью кнопки.
Особенность:
Проверить блокировку замков можно в те-
чение
трех секунд после запирания с по-
мощью кнопки 4, в течение этого времени
при попытке открыть двери замки оста-
нутся заблокированными.
Затем режим «свободные руки» снова ак-
тивируется и любое воздействие на ручку
вызывает отпирание автомобиля.
1
Зона доступа 1, в поле действия ко-
торой автомобиль отпирается, зави-
сит от окружающих условий. Важно
следить при обращении с картой
RENAULT, чтобы по неосторожности
не заблокировать или не разблокиро-
вать двери нажатием на кнопки.

1.7
КАРТА RENAULT «СВОбОДНыЕ РУКИ»: использование
(3/3)
5
6
блокировка автомобиля
(продолжение)
Запирание с помощью карты
RENAULT
При закрытых боковых дверях и
крышке багажного отделения нажмите
на кнопку 5. Автомобиль запирается.
Запирание дверей сопровождается
дву-
кратным включением указателей пово-
рота в режиме аварийной сигнализации.
Примечание: максимальное расстояние,
на котором происходит запирание замков
дверей автомобиля, зависит от внешних
условий.
Особенность:
Блокировка автомобиля не происходит,
если:
– боковая дверь или крышка багажника
открыта или плохо закрыта;
– карта осталась в зоне 6 (или в считы-
вающем устройстве) и в зоне внешнего
обнаружения нет другой карты.
Если при
работающем двигателе, после
открытия и закрытия двери система не
обнаружила карту в салоне автомобиля,
на экране появится сообщение «КЛЮЧ-
КАРТА НЕ НАЙДЕНА» (со звуковым сиг-
налом после превышения скоростного
порога), предупреждающее об отсутствии
карты в автомобиле. Это сделано, напри-
мер, чтобы Вы не уехали, высадив пасса-
жира и оставив карту у него.
Предупреждающее сообщение пропадет,
как только карта будет обнаружена.
После запирания/отпирания автомо-
биля или багажного отделения с помо-
щью кнопок карты RENAULT функция
дистанционного запирания и отпира-
ния автомобиля в режиме «свобод-
ные руки» отключается.
Для повторного включения режима
«свободные руки» вновь запустите
двигатель автомобиля.
Даже если карта RENAULT находится
в зоне 6, автомобиль может запе-
реться, если карта находится около
предмета (например, металличе-
ского), вызывающего помехи.

Комментарии

РУКОВОДСТВО ПО ЭКСПЛУАТАЦИИ
LATITUDE
Сейчас в базе инструкций для RENAULT Latitude насчитывается 3 бесплатных инструкций.

RENAULT Latitude (222 стр.)
Оглавление инструкции
- Страница 1 из 223
LATITUDE РУКОВОДСТВО ПО ЭКСПЛУАТАЦИИ - Страница 2 из 223
Добро пожаловать в Ваш автомобиль! Данное руководство по эксплуатации содержит сведения, которые позволят Вам: – ознакомиться с автомобилем, использовать его наилучшим образом и извлечь пользу из всех функций и технических преимуществ, которыми он обладает; – сделать так, чтобы автомобиль - Страница 3 из 223
С О Д Е Р Ж А Н И Е Главы Знакомство с автомобилем ……………………………….. 1 Вождение автомобиля ………………………………………. 2 Комфорт . …………………………………………………………… 3 Уход за автомобилем - Страница 4 из 223
Глава 1. Знакомство с автомобилем Карта RENAULT: общие сведения, использование, полная блокировка замков . . . . . . . . . . . . . . . . . . . . 1.2 Открывание и закрывание дверей. . . . . . . . . . . . . . . . . . . . . . . . . . . . . . . . . . . . . . . . . . . . . . . . . . . . . . . . . 1.9 - Страница 5 из 223
Карта RENAULT: общие сведения (1/2) Карта RENAULT обеспечивает: 2 3 1 4 5 1 Отпирание боковых дверей и крышки багажного отделения 2 Запирание всех боковых дверей и крышки багажного отделения 3 Дистанционное включение освещения 4 Отпирание/запирание крышки багажного отделения 5 Встроенный ключ – - Страница 6 из 223
Карта RENAULT: общие сведения (2/2) Использование ключа Относительно использования запасного ключа см. «Запирание и отпирание дверей» в главе 1. 5 6 Открыв автомобиль с помощью встроенного ключа, снова вставьте его в гнездо на карте RENAULT, затем вставьте карту RENAULT в считывающее устройство, - Страница 7 из 223
Карта RENAULT с пультом дистанционного управления: использование Запирание боковых дверей и крышки багажного отделения 1 2 Нажмите на кнопку запирания 2. 3 4 Отпирание боковых дверей и крышки багажного отделения Нажмите на кнопку отпирания дверей 1. Дистанционное включение осветительных приборов - Страница 8 из 223
Карта RENAULT «свободные руки»: использование (1/3) 3 2 1 Использование Разблокировка автомобиля На автомобилях с соответствующим оборудованием эта карта, в дополнение к возможностям карты RENAULT с пультом дистанционного управления, обеспечивает запирание/отпирание автомобиля без воздействия на - Страница 9 из 223
Карта RENAULT «свободные руки»: использование (2/3) рийной сигнализации не мигают, даже если Вы нажимаете на кнопку 4. Примечание: карта RENAULT должна находиться в зоне считывания (зона 1), чтобы автомобиль можно было запереть с помощью кнопки. 4 Особенность: Проверить блокировку замков можно в - Страница 10 из 223
Карта RENAULT «свободные руки»: использование (3/3) 5 6 Блокировка автомобиля (продолжение) Запирание с помощью карты RENAULT При закрытых боковых дверях и крышке багажного отделения нажмите на кнопку 5. Автомобиль запирается. Запирание дверей сопровождается двукратным включением указателей - Страница 11 из 223
КАРТА RENAULT: полная блокировка замков Выключение полной блокировки замков 1 2 Откройте автомобиль при помощи кнопки 1 карты RENAULT. 3 Если автомобиль оснащен функцией полной блокировки замков, то Вы можете заблокировать боковые двери и сделать невозможным открывание дверей с помощью внутренних - Страница 12 из 223
ОткрыВАНИЕ и закрыВАНИЕ дверей (1/2) Звуковой сигнал предупреждения о забытой карте 1 2 Открывание дверей снаружи Открывание изнутри При запертых дверях возьмитесь за ручку 1 и потяните ее на себя. Потяните ручку двери 2. Примечание: если автомобиль заперт и Вы потянете ручку двери водителя, дверь - Страница 13 из 223
ОткрыВАНИЕ и закрыВАНИЕ дверей (2/2) 1 Безопасность детей Ç Автомобиль с выключателем 1 Нажмите на выключатель 1, чтобы разрешить открывание задних дверей. Если автомобиль оснащен задними электрическими стеклоподъемниками, после нажатия на этот выключатель также становится возможным их - Страница 14 из 223
Запирание/отпирание дверей (1/2) Запирание/отпирание дверей снаружи Выполняется с помощью карты RENAULT: см. раздел «Карта RENAULT» в главе 1. 2 – элемент питания карты RENAULT частично или полностью разряжен; – на частоте карты работает другой радиоприбор (например мобильный телефон и т. п.); 3 A - Страница 15 из 223
Запирание/отпирание дверей (2/2) Запирание дверей без карты RENAULT 4 Выключатель запирания и отпирания дверей изнутри салона Выключатель 4 одновременно управляет запиранием и отпиранием дверей и крышки багажного отделения. Если какая-либо дверь или крышка багажного отделения открыта или неплотно - Страница 16 из 223
Автоматическое запирание дверей при НАЧАЛЕ ДВИЖЕНИЯ Включение/выключение функции 1 См. раздел «Меню индивидуальных настроек автомобиля», глава 1; функция «Автоматическая блокировка открывающихся элементов кузова во время движения»: = < : функция включена. : функция выключена. Нарушения работы Если - Страница 17 из 223
Подголовники переднего сиденья Чтобы снять подголовник 2 A Примечание: когда подголовник снят, следите за тем, чтобы не изменить положение направляющих 3. 3 1 Чтобы поднять подголовник Вытяните подголовник вверх на необходимую высоту. Чтобы опустить подголовник Слегка приподнимите подголовник, - Страница 18 из 223
Передние сиденья (1/2) Чтобы поднять или опустить подушку сиденья водителя Перемещайте рычаг 6 нужное число раз вверх или вниз, чтобы поднять или опустить подушку сиденья. 7 4 1 2 5 6 3 Чтобы отрегулировать наклон спинки сиденья Потяните рычаг 7 вверх, и не отпуская его, отрегулируйте спинку - Страница 19 из 223
Передние сиденья (2/2) 8 Регулировка поясничного подпора сиденья водителя (в зависимости от комплектации автомобиля) Чтобы усилить поддержку, опустите ручку 8, чтобы ослабить поддержку, поднимите ручку. В зависимости от комплектации автомобиля Вы можете регулировать поясничный подпор с помощью - Страница 20 из 223
Сиденье водителя с функцией памяти положений (1/2) В зависимости от комплектации автомобиля можно занести в память три положения места водителя. Под положением места водителя понимается как настройка положения подушки и спинки сиденья, так и регулировка положения наружных зеркал заднего вида. - Страница 21 из 223
Сиденье водителя с функцией памяти положений (2/2) Сиденье водителя с удобным доступом Эта система обеспечивает водителю более удобный доступ на сиденье, которое автоматически смещается вперед или назад. Смещение назад происходит: – при остановленном двигателе, при открывании двери водителя; – при - Страница 22 из 223
Сиденье водителя с функцией массажа Сиденье водителя с функцией массажа 6 3 4 5 Регулировка поясничного подпора сиденья водителя Вы можете усилить или ослабить подпор, нажав на сторону (+) или (-) переключателя 3/4/5, соответственно для верхней / средней / нижней частей поясничного подпора. При - Страница 23 из 223
Ремни безопасности (1/3) Пристегивайте ремень безопасности во время каждой поездки. Соблюдайте нормативные акты страны, где Вы находитесь. Перед началом движения отрегулируйте положение места водителя, затем попросите всех пассажиров правильно пристегнуть ремни безопасности, чтобы обеспечить их - Страница 24 из 223
Ремни безопасности (2/3) ß Сигнальная лампа непристегнутых ремней безопасности передних сидений 1 5 3 4 5 Пристегивание ремня Медленно вытяните ремень из катушки и вставьте пряжку 3 в замок 5 так, чтобы был слышен характерный щелчок (убедитесь в надежной фиксации, потянув скобу 3). Если ремень - Страница 25 из 223
Ремни безопасности (3/3) Приведенная ниже информация относится к ремням безопасности передних и задних сидений автомобиля. – Категорически запрещается вносить какие-либо изменения в конструкцию элементов системы безопасности (ремни и сиденья, а также их крепления), установленных на автомобиле. – В - Страница 26 из 223
Система дополнительных средств пассивной безопасности для передних сидений (1/4) В зависимости от комплектации автомобиля система может состоять из следующих элементов: – осле ДТП полностью проП верьте систему безопасности. – преднатяжители катушек ремней безопасности; – Запрещено самостоятельно - Страница 27 из 223
Система дополнительных средств пассивной безопасности для передних сидений (2/4) Ограничители усилий До определенной силы удара этот механизм позволяет ограничить силу давления ремня на туловище до приемлемого уровня. Подушки безопасности водителя и переднего пассажира. Подушка безопасности - Страница 28 из 223
Система дополнительных средств пассивной безопасности для передних сидений (3/4) Принцип действия Система работает только при включенном зажигании. При сильном фронтальном ударе подушки безопасности быстро раскрываются. Это смягчает удар водителя головой и грудью о рулевое колесо или пассажира о - Страница 29 из 223
Система дополнительных средств пассивной безопасности для передних сидений (4/4) Нижеследующие предупреждения направлены на предупреждение любых препятствий раскрытию подушек безопасности, которые могут повлечь за собой тяжелые травмы из-за находящихся на пути раскрытия подушки посторонних - Страница 30 из 223
Система пассивной безопасности задних пассажиров В зависимости от комплектации автомобиля она включает в себя: – преднатяжители ремней безопасности, встроенные в инерционные катушки; – ограничитель усилия натяжения ремней безопасности. В случае фронтального удара эти устройства могут сработать как - Страница 31 из 223
Боковые устройства безопасности Боковые подушки безопасности Этими подушками безопасности оборудуются передние сиденья и, в зависимости от страны поставки автомобиля, – задние боковые сиденья. Они раскрываются сбоку от сиденья (со стороны двери), защищая водителя и пассажиров в случае сильного - Страница 32 из 223
дополнительные средства пассивной безопасности В приведенных ниже предупреждениях указано, как обеспечить беспрепятственное срабатывание подушки безопасности и тем самым избежать тяжелых травм при ее срабатывании. Подушка безопасности разработана в качестве дополнения к ремню безопасности. Подушка - Страница 33 из 223
Безопасность детей: общие сведения (1/2) Перевозка детей Вне зависимости от дорожных условий ребенок, как и взрослый пассажир, должен правильно располагаться на сиденье и быть пристегнутым. Вы отвечаете за детей, которых везете. Ребенок — это не взрослый в миниатюре. Дети могут получить - Страница 34 из 223
Безопасность детей: общие сведения (2/2) Использование детского сиденья Уровень защиты, предлагаемой детским сиденьем, зависит от правильности его установки и его способности удержать Вашего ребенка. Неверная установка сиденья снижает степень защиты в случае резкого торможения или удара. Прежде чем - Страница 35 из 223
Безопасность детей: выбор детского сиденья Детское сиденье для установки спинкой вперед Детское сиденье для установки спинкой назад Голова ребенка в пропорции к телу тяжелее головы взрослого человека, а его шея очень хрупкая. Как можно дольше перевозите ребенка в таком положении (не менее чем до 2 - Страница 36 из 223
Безопасность детей: выбор крепления для детского сиденья (1/2) Существуют две системы крепления детского сиденья: ремень безопасности и система креплений ISOFIX. Крепление ремнем безопасности Ремень безопасности должен быть правильно отрегулирован, чтобы он сработал в случае резкого торможения или - Страница 37 из 223
Безопасность детей: выбор крепления для детского сиденья (2/2) 1 3 Крепления ISOFIX разработаны исключительно для детских сидений с системой крепления ISOFIX. Не используйте эти крепления для фиксации других детских сидений, ремней безопасности или других предметов. Убедитесь, что в местах - Страница 38 из 223
Безопасность детей: установка детского сиденья (1/5) Установка детских сидений разрешается не на все места в салоне автомобиля. Схема на следующей странице показывает, где можно устанавливать детское сиденье. Указанные типы детских сидений могут отсутствовать в продаже. Прежде чем использовать - Страница 39 из 223
Безопасность детей: установка детского сиденья (2/5) Детское сиденье, фиксируемое с помощью креплений ISOFIX ü ± Место, разрешенное для крепления детского сиденья ISOFIX. На задних местах имеются крепления, обеспечивающие фиксацию универсального детского сиденья с системой ISOFIX, устанавливаемого - Страница 40 из 223
Безопасность детей: установка детского сиденья (3/5) Детское сиденье, фиксируемое с помощью креплений ISOFIX ü ± Место, разрешенное для крепления детского сиденья ISOFIX. На задних местах имеются крепления, обеспечивающие фиксацию универсального детского сиденья с системой ISOFIX, устанавливаемого - Страница 41 из 223
Безопасность детей: установка детского сиденья (4/5) В соответствии с законодательными нормами ниже приводится таблица, повторяющая в графическом виде информацию, представленную на предыдущей странице. Тип детского сиденья Поперечная люлька Группа 0 Вес ребенка < 10 кг Люлька/сиденье для установки - Страница 42 из 223
Безопасность детей: установка детского сиденья (5/5) X = Место, не разрешенное для установки детского сиденья. U = есто, разрешенное для фиксации ремнем безопасности сертифицированного «универсального» детского сиденья. Убедитесь, что М установка сиденья возможна. IUF IL = есто, разрешенное для - Страница 43 из 223
безопасность детей: выключение, включение подушки безопасности переднего пассажира (1/3) 1 Отключение подушки безопасности переднего пассажира (для автомобилей, которые оснащены соответствующим оборудованием) Чтобы установить детское сиденье на сиденье переднего пассажира, Вы должны обязательно - Страница 44 из 223
безопасность детей: выключение, включение подушки безопасности переднего пассажира (2/3) A A 3 Маркировка на панели приборов и этикетка A с каждой стороны противосолнечного козырька переднего пассажира 3 напомнят Вам об этом. ВНИМАНИЕ! Детские сиденья, устанавливаемые спинкой вперед, имеют - Страница 45 из 223
безопасность детей: выключение, включение подушки безопасности переднего пассажира (3/3) 1 Включение подушки безопасности переднего пассажира Сразу после снятия детского сиденья с сиденья переднего пассажира следует снова включить подушку безопасности для обеспечения защиты пассажира в случае - Страница 46 из 223
Рулевое колесо/рулевое управление с усилителем Адаптивный усилитель рулевого управления Адаптивный усилитель рулевого управления имеет электронную систему, которая меняет степень усиления в зависимости от скорости движения автомобиля. Усилие на рулевом колесе при парковочных маневрах снижается, - Страница 47 из 223
Место водителя: левостороннее рулевое управление (1/2) 1 2 3 4 5 6 7 25 29 28 26 27 12 9 24 23 19 20 21 22 1.44 14 13 18 26 30 8 9 10 11 17 16 15 - Страница 48 из 223
Место водителя: левостороннее рулевое управление (2/2) Состав оборудования, описываемого ниже, ЗАВИСИТ ОТ МОДИФИКАЦИИ АВТОМОБИЛЯ, А ТАКЖЕ ОТ СТРАНЫ ПОСТАВКИ. 1 Боковой дефлектор 2 Решетка обдува бокового стекла 3 Рычаг переключателя: – указателей поворотов – приборов наружного освещения – - Страница 49 из 223
Предупредительные сигнальные лампы (1/4) Наличие и работа сигнальных ламп ЗАВИСИТ ОТ КОМПЛЕКТАЦИИ АВТОМОБИЛЯ И СТРАНЫ ПОСТАВКИ. A á k g f } Сигнальная лампа дальнего света фар Сигнальная лампа ближнего света фар Сигнальная лампа противотуманных фар Сигнальная лампа включения заднего - Страница 50 из 223
Предупредительные сигнальные лампы (2/4) Наличие и работа сигнальных ламп ЗАВИСИТ ОТ КОМПЛЕКТАЦИИ АВТОМОБИЛЯ И СТРАНЫ ПОСТАВКИ. x (ABS) A Сигнальная лампа антиблокировочной системы тормозов Лампа загорается при включении зажигания и гаснет через несколько секунд. Если лампа не гаснет некоторое - Страница 51 из 223
Предупредительные сигнальные лампы (3/4) Наличие и работа сигнальных ламп ЗАВИСИТ ОТ КОМПЛЕКТАЦИИ АВТОМОБИЛЯ И СТРАНЫ ПОСТАВКИ. B A © ния Сигнальная лампа необходимости проведения обслужива- Лампа загорается при включении зажигания и гаснет после запуска двигателя. Она может включиться одновременно - Страница 52 из 223
Предупредительные сигнальные лампы (4/4) Наличие и работа сигнальных ламп ЗАВИСИТ ОТ КОМПЛЕКТАЦИИ АВТОМОБИЛЯ И СТРАНЫ ПОСТАВКИ. Ú C Сигнальная лампа зарядки аккумуляторной батареи Если эта лампа включается вместе с лампой ® и сопровождается звуковым сигналом, это свидетельствует о недостаточной - Страница 53 из 223
Дисплеи и указатели этой цифры. В зависимости от положения автомобиля и от условий движения возможна ситуация, когда уровень топлива отображается неправильно или сигнальная лампа не всегда загорается. 2 Указатель включенной передачи Включенная передача отображается на дисплее 2. Более детальная - Страница 54 из 223
Бортовой компьютер (1/10) d) система контроля давления в шинах; e) скорость, заданная системе ограничения и поддержания скорости; 1 2 f) меню индивидуальных настроек автомобиля ; g) бортовой журнал, последовательный вывод информационных сообщений и сообщений о неисправностях. 3 Бортовой компьютер 1 - Страница 55 из 223
Бортовой компьютер (2/10) 2 3 Обнуление счетчика пробега за поездку Когда «счетчик пробега за поездку» отображается на дисплее, нажмите на кнопку 2 или 3 пока показания счетчика не обнулятся. Обнуление данных о поездке (кнопка обнуления показаний) Когда один из параметров поездки отображается на - Страница 56 из 223
Бортовой компьютер (3/10) Индикация перечисленной ниже информации на щитке приборов ЗАВИСИТ ОТ КОМПЛЕКТАЦИИ АВТОМОБИЛЯ И СТРАНЫ ПОСТАВКИ. Примеры выбора показаний на дисплее Пояснения к выбранным показаниям дисплея 101778 km a) Счетчик суммарного пробега и пробега за поездку. 112.4 km ТОПЛИВО 25.2 - Страница 57 из 223
Бортовой компьютер (4/10) Индикация перечисленной ниже информации на щитке приборов ЗАВИСИТ ОТ КОМПЛЕКТАЦИИ АВТОМОБИЛЯ И СТРАНЫ ПОСТАВКИ. Примеры выбора показаний на дисплее ТЕКУЩИЙ 9.4L/100 ЗАПАС ХОДА 160 km ПРОБЕГ Пояснения к выбранным показаниям дисплея Мгновенный расход топлива Значение - Страница 58 из 223
Бортовой компьютер (5/10) Индикация перечисленной ниже информации на щитке приборов ЗАВИСИТ ОТ КОМПЛЕКТАЦИИ АВТОМОБИЛЯ И СТРАНЫ ПОСТАВКИ. Примеры выбора показаний на дисплее Пояснения к выбранным показаниям дисплея c) Пробег в км/милях до следующего технического обслуживания. ТЕХОБСЛУЖИВАНИЕ 1936 - Страница 59 из 223
Бортовой компьютер (6/10) Данные о поездке Индикация перечисленной ниже информации на щитке приборов ЗАВИСИТ ОТ КОМПЛЕКТАЦИИ АВТОМОБИЛЯ И СТРАНЫ ПОСТАВКИ. Примеры выбора показаний на дисплее Пояснения к выбранным показаниям дисплея ДАВЛЕНИЕ В ШИНАХ d) Система контроля давления в шинах См. раздел - Страница 60 из 223
Бортовой компьютер (7/10) Данные о поездке (продолжение) Индикация перечисленной ниже информации на щитке приборов ЗАВИСИТ ОТ КОМПЛЕКТАЦИИ АВТОМОБИЛЯ И СТРАНЫ ПОСТАВКИ. Примеры выбора показаний на дисплее МЕНЮ НАСТРОЕК ДОЛГОЕ НАЖАТИЕ Пояснения к выбранным показаниям дисплея f) Меню индивидуальных - Страница 61 из 223
Бортовой компьютер (8/10) Информационные сообщения Они могут играть роль подсказки при включении двигателя или давать информацию о выборе или текущем стиле вождения. Примеры сообщений Пояснения к выбранным показаниям дисплея СЛАБ. ЗАР. АККУМ. ПОВЕРНИТЕ КЛЮЧ Свидетельствует о том, что необходимо - Страница 62 из 223
Бортовой компьютер (9/10) Сообщения о неисправностях Сообщения о неисправностях сопровождаются включением сигнальной лампы © : как можно скорее обратитесь к представителю производителя, управляя автомобилем с осторожностью. Несоблюдение этого предписания может привести к повреждению автомобиля. - Страница 63 из 223
Бортовой компьютер (10/10) Предупреждающие сообщения Отображаются вместе с включением сигнальной лампы ® : немедленно остановите автомобиль в безопасном месте. Остановите двигатель и не запускайте его. Обратитесь на сервисную станцию компании-производителя. На следующих страницах приведены примеры - Страница 64 из 223
Меню индивидуальных настроек автомобиля Выбрав нужную строку, длительно нажмите на кнопку 2 или 3 для изменения функции: 1 2 3 Эта функция встроена в бортовой компьютер 1 и позволяет включить/выключить, а также настроить некоторые функции автомобиля. Доступ к меню индивидуальных настроек - Страница 65 из 223
Время и температура наружного воздуха 1 Автомобили, оборудованные системой навигации, аудиосистемой и т. п. Для автомобилей, оборудованных системой навигации или аудиосистемой, прочтите руководство по эксплуатации соответствующего оборудования перед изучением его особенностей. Указатель температуры - Страница 66 из 223
зеркала заднего вида (1/2) D E Складывающиеся наружные зеркала заднего вида (в зависимости от комплектации автомобиля) A B 1 3 2 Занесение регулировок в память Для автомобилей, с памятью положений сиденья водителя, см. раздел «Сиденье водителя с памятью положений» в главе 1. C Наружные зеркала - Страница 67 из 223
зеркала заднего вида (2/2) При движении в светлое время суток Верните переключатель 4 в положение для движения в светлое время суток. Зеркало заднего вида без переключателя 4 Зеркало заднего вида автоматически затемняется, предотвращая ослепление светом фар следующего за Вами автомобиля. 4 - Страница 68 из 223
Звуковая и световая сигнализация Указатели поворотов Для включения указателей поворотов передвиньте рычаг подрулевого переключателя 1 в плоскости рулевого колеса в направлении поворота. 1 0 A Звуковой сигнал Нажмите на ступицу рулевого колеса A сверху или сбоку. Сигнализация дальним светом фар Для - Страница 69 из 223
Приборы наружного освещения и сигнализации (1/3) Функция включения постоянного ближнего света 2 3 1 1 4 u Габаритные огни Поверните кольцо 2 подрулевого переключателя1 до совмещения метки 3 с соответствующим символом. Включаются габаритные огни и фонари освещения номерного знака. Если включена - Страница 70 из 223
Приборы наружного освещения и сигнализации (2/3) Обратитесь на сервисную станцию компании-производителя. 2 3 1 Особенность: – Если ближний свет фар включен вручную, а уровень освещенности снаружи достаточен, фары направленного света остаются неподвижными; – если автоматическое включение фар - Страница 71 из 223
Приборы наружного освещения и сигнализации (3/3) 2 3 5 1 Работа противотуманных фар зависит от положения кольца включения приборов наружного освещения. f Задний противотуманный фонарь 6 Звуковой сигнализатор невыключенного наружного освещения Если фары были включены после выключения двигателя, они - Страница 72 из 223
Электрическая регулировка света фар в вертикальной плоскости Примеры положений переключателя A в зависимости от нагрузки автомобиля Только с водителем или с одним пассажиром спереди A На автомобилях, оборудованных этой функцией, с помощью переключателя A можно отрегулировать высоту световых пучков. - Страница 73 из 223
Очиститель и омыватель ветрового стекла (1/3) 1 E 1 2 A B C D Автомобиль, оснащенный стеклоочистителем с прерывистым режимом работы – A остановка – B прерывистый режим работы стеклоочистителя Очиститель делает паузу в несколько секунд между взмахами. Длительность паузы между взмахами можно - Страница 74 из 223
Очиститель и омыватель ветрового стекла (2/3) Омыватели фар 1 1 A B На автомобиле с соответствующим оборудованием потяните на себя рычаг 1 и удерживайте его примерно 1 секунду: таким образом Вы одновременно с омывателем ветрового стекла включаете омыватель фар. Примечание: при достижении - Страница 75 из 223
Очиститель и омыватель ветрового стекла (3/3) 1 A B C D В морозную погоду перед включением стеклоочистителя очистите ветровое стекло (опасность перегрева электродвигателя стеклоочистителя). Следите за состоянием щеток стеклоочистителя. Замените их, как только их эффективность уменьшится. Для замены - Страница 76 из 223
Топливный бак (1/2) ного бака B и поверхности вокруг нее должны оставаться чистыми. A B 1 Емкость топливного бака: – Бензиновый двигатель: примерно 70 литров; – Дизельный двигатель: примерно 66 литров. Нажмите на левую сторону переключателя 1, чтобы открыть лючок A. Пробка топливного бака B - Страница 77 из 223
Топливный бак (2/2) Постоянный запах топлива щее: В случае появления запаха топлива выполните следую- – остановите автомобиль в безопасном месте и выключите зажигание; – включите аварийную сигнализацию и попросите всех пассажиров выйти из автомобиля и держаться в стороне от проезжей части; – - Страница 78 из 223
ИДЕНТИФИКАЦИОННАЯ МАРКИРОВКА Рядом с основной сертификационной маркировкой может быть нанесена дополнительная маркировка, включающая арабские и римские цифры, а также буквы латинского алфавита, описывающая особенности предоставления официального утверждения конструкции или конструкции компонента - Страница 79 из 223
Глава 2. Вождение автомобиля (рекомендации, связанные с экономией топлива и охраной окружающей среды) Обкатка автомобиля. . . . . . . . . . . . . . . . . . . . . . . . . . . . . . . . . . . . . . . . . . . . . . . . . . . . . . . . . . . . . . . . . . . . Запуск двигателя. . . . . . . . . . . . . . - Страница 80 из 223
ОБКАТКА АВТОМОБИЛЯ Автомобиль с бензиновым двигателем Автомобиль с дизельным двигателем Во время пробега автомобилем первых 1000 км частота вращения коленчатого вала двигателя не должна превышать 3000 — 3500 об/мин. Не превышайте скорость 130 км/ч при движении на высшей передаче и избегайте резких - Страница 81 из 223
Запуск двигателя (1/3) Автомобили с автоматической коробкой передач Рычаг переключения режимов должен находиться в положении P. 1 Для всех автомобилей: 2 3 – В некоторых случаях необходимо поворачивать рулевое колесо, нажимая при этом на кнопку запуска 1 для разблокирования рулевой колонки; - Страница 82 из 223
Запуск двигателя (2/3) Что делать, если двигатель не запускается Если условия запуска двигателя не соблюдены, на щитке приборов отображаются сообщения или загораются сигнальные лампы: – «РЫЧАГ КПП В ПОЛОЖЕНИЕ Р»: переведите рычаг переключения передач в положение P и запустите двигатель; – «НАЖАТЬ - Страница 83 из 223
Запуск двигателя (3/3) Нарушения работы 1 2 В некоторых случаях дальность действия карты RENAULT с функцией «свободные руки» может быть снижена или карта может вовсе не работать: – разряжен элемент питания карты RENAULT, разряжена аккумуляторная батарея; – близость устройства, работающего на той же - Страница 84 из 223
Остановка двигателя Карта RENAULT «свободные руки» 1 2 Условия выключения двигателя Автомобиль должен стоять на месте, рычаг коробки передач должен находиться в положении N или P (автомобили с автоматической коробкой передач). Карта RENAULT с дистанционным управлением Если карта находится в - Страница 85 из 223
Особенности автомобилей с бензиновым двигателем Следующие условия работы: – длительное движение с горящей сигнальной лампой резервного количества топлива; – использование этилированного бензина; – использование присадок к моторному маслу или сортов топлива, не одобренных компанией-производителем. - Страница 86 из 223
Особенности автомобилей с дизельным двигателем Частота вращения коленчатого вала дизельного двигателя Меры предосторожности в зимнее время Дизельные двигатели оборудованы системой впрыска , которая не допускает превышения допустимой частоты вращения коленчатого вала двигателя , независимо от - Страница 87 из 223
рычаг переключения передач / стояночный тормоз Стояночный тормоз Выключение: 1 3 2 Слегка потяните рычаг 4, нажмите кнопку 3 и опустите рычаг до пола. Включение: Потяните рычаг 4 вверх и убедитесь, что автомобиль надежно заторможен. 4 Включение передачи заднего хода Автомобили с механической - Страница 88 из 223
Автоматический стояночный тормоз (1/4) – при выключенном двигателе (например, при самопроизвольной остановке двигателя): при открытии передней двери. В этом случае потяните, затем отпустите выключатель 3, чтобы включить электрический стояночный тормоз. 1 2 Автоматический режим Электрический - Страница 89 из 223
Автоматический стояночный тормоз (2/4) 1 томобиля не блокируются при включении стояночного тормоза. В этом случае переместите автомобиль и остановите его на ровной площадке. Чтобы припарковать автомобиль с выключенным электрическим стояночным тормозом (например, из-за риска примерзания): 4 2 Ручной - Страница 90 из 223
Автоматический стояночный тормоз (3/4) Автоматическое отключение стояночного тормоза вновь начнет работать, как только Вы закроете дверь водителя и переведете рычаг селектора в положение P или N, а затем в положение D или R. 3 Автомобили с автоматической коробкой передач Из соображений безопасности - Страница 91 из 223
Автоматический стояночный тормоз (4/4) – При обнаружении неисправности, на приборной панели загорается сигнальная лампа © и отображается сообщение «ПРОВЕРИТЬ СТОЯНОЧН. ТОРМОЗ». Срочно обратитесь на сервисную станцию компании-производителя. 3 Нарушения работы – При нарушении связи тормозной системы - Страница 92 из 223
Советы: борьба с загрязнением окружающей среды, экономия топлива и вождение (1/3) В зависимости от комплектации автомобиля и заводских регулировок, которые обеспечивают умеренный расход топлива, Ваш автомобиль отвечает действующим нормам токсичности отработавших газов. В качестве автопроизводителя - Страница 93 из 223
Советы: борьба с загрязнением окружающей среды, экономия топлива и вождение (2/3) Ä Сигнальная лампа на щитке приборов отображает любую неисправность устройства снижения токсичности. Лампа загорается при включении зажигания и гаснет после запуска двигателя. – Если лампа горит постоянно, срочно - Страница 94 из 223
Советы: борьба с загрязнением окружающей среды, экономия топлива и вождение (3/3) – На автомобилях, оборудованных кондиционером, увеличение расхода топлива при включенном кондиционере, особенно в городе, — нормальное явление. Если на автомобиле установлен кондиционер с ручным управлением, - Страница 95 из 223
Охрана окружающей среды Ваш автомобиль разработан с учетом соблюдения требований по защите окружающей среды в течение всего срока службы: в процессе производства, эксплуатации и утилизации. Принятие на себя соответствующих обязательств выражается подписью Renault eco². Производство Ваш автомобиль - Страница 96 из 223
Система контроля давления в шинах (1/3) Если автомобиль оснащен данной системой, она контролирует давление воздуха в шинах. Давление нужно проверять на холодных шинах. См. раздел «Давление воздуха в шинах» в главе 4. 1 Принцип действия Каждое колесо (кроме запасного) оснащено датчиком, встроенным в - Страница 97 из 223
Система контроля давления в шинах (2/3) Запасное колесо Запасное колесо не оснащено датчиком, поэтому не может быть обнаружено системой. 3 4 A B D C Перестановка колес Если Вы хотите выполнить перестановку колес, обязательно обратитесь к представителю производителя для повторной инициализации - Страница 98 из 223
Система контроля давления в шинах (3/3) Нарушения работы При неверном давлении воздуха в шинах на щитке приборов появляются следующие сообщения для Вашей информации: Примеры Пояснения к показаниям дисплея НАКАЧАТЬ ШИНЫ ОТРЕГУЛИРОВАТЬ ДАВЛ. В ШИНАХ Отображаемое давление в шине ниже нормы. КОЛЕСО - Страница 99 из 223
СИСТЕМЫ ПОМОЩИ ПРИ ВОЖДЕНИИ (1/4) В зависимости от комплектации автомобиля система может состоять из следующих элементов: – ABS (антиблокировочная система тормозов); – система экстренного торможения с системой предварительного торможения в зависимости от комплектации автомобиля; – система - Страница 100 из 223
СИСТЕМЫ ПОМОЩИ ПРИ ВОЖДЕНИИ (2/4) Неисправности – На приборной панели загораются сиг- x и пональные лампы © и является сообщение «ПРОВЕРИТЬ АБС»: это означает, что ABS отключена. Торможение при этом осуществляется. Обратитесь на сервисную станцию компании-производителя. – На приборной панели - Страница 101 из 223
СИСТЕМЫ ПОМОЩИ ПРИ ВОЖДЕНИИ (3/4) Система курсовой устойчивости ESP с контролем недостаточной поворачиваемости и антипробуксовочной системой ASR Контроль управляемости в повороте Принцип действия Эта система оптимизирует действие ESP при недостаточной поворачиваемости (при потере передними колесами - Страница 102 из 223
СИСТЕМЫ ПОМОЩИ ПРИ ВОЖДЕНИИ (4/4) В подтверждение выключения системы на щитке приборов появляется сообщение «АНТИПРОБУКС СИСТ ОТКЛЮЧЕНА» (Антипробуксовочная система отключена). 1 Нарушения работы При обнаружении неисправности системой на приборной панели загорается сигнальная лампа © и появляется - Страница 103 из 223
Система поддержания и ограничения скорости: функция ограничения скорости (1/3) 2 3 4 6 5 1 Ограничитель скорости – это устройство, которое позволяет не превышать заданную Вами скорость движения, называемую ограниченной скоростью. Органы управления Включение 1 Главный выключатель Вкл./Выкл. Нажмите - Страница 104 из 223
Система поддержания и ограничения скорости: функция ограничения скорости (2/3) Изменение величины ограничения скорости 2 3 4 5 Последовательно нажимайте на выключатель 2 (+) для увеличения значения ограничиваемой скорости или на выключатель 3 (-) для его уменьшения. Превышение значения ограничения - Страница 105 из 223
Система поддержания и ограничения скорости: функция ограничения скорости (3/3) Вызов сохраненного значения ограничения скорости 2 3 4 5 Если значение скорости было занесено в память, его можно вызвать из памяти, нажав на выключатель 5 (R). 1 Перевод системы в режим ожидания Отключение системы Режим - Страница 106 из 223
Система поддержания и ограничения скорости: функция поддержания скорости (1/4) 2 1 Регулятор скорости – это устройство, обеспечивающее движение автомобиля со скоростью, значение которой Вы установили. Скоростью автомобиля, поддерживаемой регулятором скорости, может быть любое значение выше 30 км/ч. - Страница 107 из 223
Система поддержания и ограничения скорости: функция поддержания скорости (2/4) 6 Нажмите на выключатель 1 со стороны с символом . Сигнальная лампа 6 загорится зеленым цветом, а на щитке приборов появится сообщение «КРУИЗ-КОНТР.» (Регулятор) и знаки тире, чтобы проинформировать Вас о включении - Страница 108 из 223
Система поддержания и ограничения скорости: функция поддержания скорости (3/4) Превышение скорости, поддерживаемой регулятором скорости 2 3 4 5 Заданная скорость может быть превышена в любой момент нажатием на педаль акселератора. Пока скорость превышена, на щитке приборов мигает показание значения - Страница 109 из 223
Система поддержания и ограничения скорости: функция поддержания скорости (4/4) Вызов из памяти установленной скорости автомобиля 2 3 4 5 Если значение скорости занесено в память, его можно вызвать из памяти, как только это позволят условия движения (плотность потока, состояние дороги, погодные - Страница 110 из 223
Система помощи при парковке (1/3) Принцип действия Ультразвуковые датчики, встроенные в передний или задний бампер автомобиля, измеряют расстояние от автомобиля до препятствия. Измерение сопровождается звуковыми сигналами, частота которых увеличивается по мере приближения автомобиля к препятствию; - Страница 111 из 223
Система помощи при парковке (2/3) Автоматический режим включения/ отключения системы помощи при парковке передним ходом Система отключается: – если скорость автомобиля превышает примерно 6 км/ч (4 миль/ч); – если автомобиль остается неподвижным более пяти секунд; только в случае если прежде - Страница 112 из 223
Система помощи при парковке (3/3) Длительное отключение системы Вы можете полностью отключить систему помощи при парковке передним или задним ходом. Войдите в меню индивидуальных настроек автомобиля (см. раздел «Меню индивидуальных настроек автомобиля», глава 1) и выберите строку «ПЕРЕДНИЙ П А Р К - Страница 113 из 223
Камера заднего вида 1 2 C B A Неподвижный габарит 2 Неподвижный габарит состоит из цветных меток A, B и C, указывающих расстояние до препятствия от задней части автомобиля: – A (красный) при расстоянии примерно 50 сантиметров от автомобиля; – B (желтый) при расстоянии примерно 1 метра от - Страница 114 из 223
Автоматическая коробка передач (1/3) 1 4 3 2 5 9 6 8 Принцип действия Установите рычаг селектора 1 в положение P и включите зажигание. Нажмите на педаль тормоза (сигнальная лампа c на дисплее 3 погаснет) и передвиньте рычаг селектора из положения P. Для того чтобы вывести рычаг селектора из - Страница 115 из 223
Автоматическая коробка передач (2/3) Вождение в ручном режиме Установите рычаг селектора в положение D, затем переместите его влево. Последовательными нажатиями на рычаг селектора можно переключать передачи вручную: – для перехода на пониженную передачу переведите рычаг назад; – для перехода на - Страница 116 из 223
Автоматическая коробка передач (3/3) Стоянка автомобиля Нарушения работы После остановки автомобиля держите ногу на педали тормоза и переведите рычаг селектора в положение P. Коробка передач находится в нейтральном положении, и ведущие колеса механически заблокированы с помощью коробки передач. – - Страница 117 из 223
Глава 3. Комфорт Дефлекторы. . . . . . . . . . . . . . . . . . . . . . . . . . . . . . . . . . . . . . . . . . . . . . . . . . . . . . . . . . . . . . . . . . . . . . . . . . . Ароматизатор. . . . . . . . . . . . . . . . . . . . . . . . . . . . . . . . . . . . . . . . . . . . . . . . . . . . . . . - Страница 118 из 223
Дефлекторы (1/2) 1 2 3 5 6 7 8 4 12 9 10 9 11 12 1 Левый дефлектор 2 Решетка обдува левого бокового стекла. 5 Центральные дефлекторы 3 Решетка обдува ветрового стекла 7 Решетка обдува правого бокового стекла 4 Дефлекторы в верхней части приборной панели 3.2 6 Панель управления кондиционером 8 - Страница 119 из 223
Дефлекторы (2/2) 1 2 2 1 3 2 Подача воздуха Направление потока воздуха Управляется вращением регулятора 1. Вправо/влево: сдвиньте язычки 2 вправо или влево. Вверх: максимальное открытие. Вниз: закрытие. Управляется вращением регулятора 3. Вверх/вниз: сдвиньте язычки 2 вверх или вниз. Для устранения - Страница 120 из 223
Ароматизатор Регулировка интенсивности работы ароматизатора 1 2 Нажмите на кнопку 4 для регулировки интенсивности работы ароматизатора. Включается встроенная сигнальная лампа, которая показывает выбранный уровень интенсивности: – минимальная интенсивность; – умеренная интенсивность; 3 4 Органы - Страница 121 из 223
Ионизатор воздуха – CLEAN: удаляет вредные вещества из воздуха (бактерии, пыль и т. д.); – RELAX: создает здоровую и успокаивающую атмосферу для вождения путем распространения ионов; – выключен (все встроенные сигнальные лампы не горят). 1 Выбор режима работы При включенном кондиционере нажмите на - Страница 122 из 223
Отопление и система кондиционирования воздуха с ручным управлением (1/3) 1 Изменение режима распределения воздуха 2 Выберите нужный режим, нажав на кнопку 2 3 9 ½ ¾ Весь поток воздуха направляется к передним и задним центральным дефлекторам. Поток воздуха распределяется между центральными - Страница 123 из 223
Отопление и система кондиционирования воздуха с ручным управлением (2/3) Режим рециркуляции воздуха позволяет: – изолировать салон от наружного воздуха (при движении на участках с загрязненным воздухом и т. п.); – быстрее понизить температуру воздуха в салоне. 3 7 Выключение системы Нажмите на - Страница 124 из 223
Отопление и система кондиционирования воздуха с ручным управлением (3/3) Регулирование температуры воздуха Выберите нужную температуру, нажимая кнопку 9. Чем больше установленное значение температуры, тем большее число блоков высвечивается в зоне B. 3 9 B 6 Функция «обеспечение обзора» Нажмите на - Страница 125 из 223
Автоматическая система кондиционирования воздуха (1/6) 3 2 4 Автоматический режим (AUTO) 5 Нажмите на кнопку 3. Включается встроенная в кнопку сигнальная лампа. 6 1 14 13 12 11 10 Органы управления 1 Регулировка температуры в левой части салона 9 8 Автоматическая система кондиционирования - Страница 126 из 223
Автоматическая система кондиционирования воздуха (2/6) 3 4 B 6 1 12 Регулирование температуры воздуха Нажимайте кнопку 1 для регулировки температуры воздуха в салоне со стороны водителя и кнопку 6 для регулировки температуры воздуха в салоне со стороны переднего пассажира. Особенность: при - Страница 127 из 223
Автоматическая система кондиционирования воздуха (3/6) 3 8 Включение или выключение кондиционера С помощью кнопки 8 можно включать (сигнальная лампа горит) или выключать (сигнальная лампа не горит) кондиционер. Выводимые на дисплей значения температуры позволяют судить об уровне комфорта. Даже - Страница 128 из 223
Автоматическая система кондиционирования воздуха (4/6) Функция «обеспечение обзора» 3 14 13 12 A Регулировка скорости вращения вентилятора 10 В автоматическом режиме система кондиционирования устанавливает оптимальную для достижения и поддержания комфортных условий частоту вращения вентилятора. Вы - Страница 129 из 223
Автоматическая система кондиционирования воздуха (5/6) 5 ¿ × Поток воздуха направляется к выходам отопителя к ногам в зоне передних и задних сидений. Поток воздуха распределяется между решетками обдува ветрового стекла и боковых стекол, а также выходами отопителя к ногам, с тем чтобы предотвратить - Страница 130 из 223
Автоматическая система кондиционирования воздуха (6/6) Автоматическая рециркуляция воздуха 2 Нажмите на кнопку 2. Загорается встроенная сигнальная лампа. Датчик, установленный на воздухозаборе, обнаруживает загрязнение поступающего в салон воздуха, что вызывает автоматическое включение или - Страница 131 из 223
Система кондиционирования воздуха: информация и советы по эксплуатации Нарушения работы Советы по эксплуатации Расход топлива В некоторых обстоятельствах (выключен кондиционер, включен режим рециркуляции воздуха, вентилятор не вращается или вращается медленно) стекла автомобиля могут запотевать. В - Страница 132 из 223
Электростеклоподъемники и панорамный люк крыши с электроприводом (1/3) Эти системы работают при включенном или при выключенном зажигании, пока не будет открыта дверь водителя. Безопасность пассажиров на задних сиденьях В зависимости от комплектации автомобиля водитель может заблокировать - Страница 133 из 223
Электростеклоподъемники и панорамный люк крыши с электроприводом (2/3) Особенность 7 0 9 A B C Ваш автомобиль оснащен травмозащитной функцией (ограничителем усилия): если люк крыши встречает препятствие при закрывании (пальцы и т. п.), он останавливается и затем отодвигается на несколько - Страница 134 из 223
Электростеклоподъемники и панорамный люк крыши с электроприводом (3/3) Закрытие стекол с помощью пульта дистанционного управления ется нормальная работа в импульсном режиме. При необходимости обратитесь на сервисную станцию компании-производителя. (для автомобилей с импульсными стеклоподъемниками - Страница 135 из 223
Противосолнечный козырек / солнцезащитные шторки 6 1 4 2 7 5 7 5 3 Передний противосолнечный козырек Поверните козырек 1 вниз к ветровому стеклу или отсоедините его и поверните к боковому стеклу. Зеркало на противосолнечном козырьке Боковые солнцезащитные шторки Задняя солнцезащитная шторка (в - Страница 136 из 223
Освещение салона (1/3) 1 2 3 1 2 3 4 Передний и задний плафоны Нажмите на выключатель 2. – Левое положение: постоянное освещение. – Среднее положение (центральное положение): фонарь загорается, когда Вы открываете дверь, и гаснет через несколько секунд после ее закрывания. Он также загорается на - Страница 137 из 223
Освещение салона (2/3) 5 6 Освещение вещевого ящика 5 Лампа 5 загорается при открывании крышки вещевого ящика. Передние фонари подсветки зоны для ног 6 Фонарь загорается при открывании двери и гаснет через несколько секунд после ее закрывания. Фонарь 6 также загорается на несколько секунд при - Страница 138 из 223
Освещение салона (3/3) 8 Лампа освещения багажного отделения 8 Лампа 8 загорается при открывании крышки багажного отделения. 3.22 - Страница 139 из 223
Вещевые ящики/оборудование салона (1/4) 3 2 1 Вещевые ящики в дверях 1 В них можно хранить справочники, дорожные карты и т. п. Следите за тем, чтобы твердые, тяжелые или острые предметы не находились в открытом ящике и не выступали из него, т. к. при повороте или при резком торможении они могут - Страница 140 из 223
Вещевые ящики/оборудование салона (2/4) 6 5 4 10 9 7 8 Вещевое отделение противосолнечного козырька 4 В нем можно хранить дорожные квитанции и чеки. Вещевой ящик на консоли Нажмите на ручку 5 и приподнимите подлокотник 6. Вещевой ящик на консоли с двумя полками (в зависимости от комплектации - Страница 141 из 223
Вещевые ящики/оборудование салона (3/4) 13 14 11 15 12 Подстаканник 11 Крючки для одежды 13 Центральный подлокотник заднего сиденья 12 Поручень 14 Опустите центральный подлокотник заднего сиденья . В поворотах, при разгонах и торможениях остерегайтесь чтобы из сосудов, установленных в держателе - Страница 142 из 223
Вещевые ящики/оборудование салона (4/4) 16 Вещевой ящик в задней двери 16 В нем можно поместить бутылку с напитком. Следите за тем, чтобы твердые, тяжелые или острые предметы не находились в открытом ящике и не выступали из него, т. к. при повороте или при резком торможении они могут быть выброшены - Страница 143 из 223
Прикуриватель, разъем для дополнительного оборудования, пепельница 1 2 5 7 4 8 3 Прикуриватель 2 Откройте крышку 1, сдвигая ее по направлению стрелки. При включенном зажигании нажмите на прикуриватель 2 до упора. После нагрева спирали прикуриватель автоматически вернется в исходное положение (со - Страница 144 из 223
Подголовник заднего сиденЬя Чтобы установить подголовник A Вставьте стержни подголовника в отверстия направляющих втулок и опустите подголовник до первой отметки. Нерабочее положение A 1 Нажмите на фиксатор 1 и полностью опустите подголовник. Самое низкое положение подголовника (положение A) - Страница 145 из 223
ЗАДНЕЕ МНОГОМЕСТНОЕ СИДЕНЬЕ 1 A 2 В случае перевозки громоздких предметов спинки сидений можно сложить. В любом случае, опустите подголовники задних сидений (см. раздел «Подголовники задних сидений» в главе 3). Заднее многоместное сиденье Надавите кнопку 2 в сторону передней части автомобиля и - Страница 146 из 223
Багажник 2 4 3 1 Чтобы открыть Чтобы закрыть Открытие вручную изнутри – Нажмите на правую сторону выключателя 1, чтобы открыть крышку багажного отделения. Опустите крышку багажного отделения, пользуясь сначала внутренней ручкой 3. Убедитесь, что крышка багажного отделения плотно закрыта. - Страница 147 из 223
Вещевые отделения 1 1 Крепежные крючки Вы можете закрепить груз с помощью точек крепления 1. Располагайте перевозимые предметы так, чтобы самые тяжелые из них опирались на спинку заднего сиденья. Не кладите на заднюю полку предметы, особенно тяжелые и твердые. Во время резкого торможения или аварии - Страница 148 из 223
мультимедийное оборудование Система навигации Наличие данного оборудования и пространство, отведенное под его установку, зависят от версии системы навигации автомобиля. 1 Автомагнитола; 2 Центральный орган управления; 3 Микрофон; 4 Дополнительный вход; 5 Органы управления под рулевым колесом. 1 4 2 - Страница 149 из 223
Перевозка грузов / буксировка B = 1 175 мм A B Сведения о максимально допустимой нагрузке на тягово-сцепное устройство, максимальной массе буксируемого прицепа, оборудованного и не оборудованного тормозами, см. в разделе «Массовые характеристики», глава 6. Перевозка предметов в багажном отделении - Страница 150 из 223
Глава 4. Уход за автомобилем Капот. . . . . . . . . . . . . . . . . . . . . . . . . . . . . . . . . . . . . . . . . . . . . . . . . . . . . . . . . . . . . . . . . . . . . . . . . . . . . . . . . Уровень масла в двигателе: общие сведения. . . . . . . . . . . . . . . . . . . . . . . . . . . . . . . - Страница 151 из 223
Капот Закрывание капота Перед закрыванием капота убедитесь, что в моторном отсеке не забыт какойлибо предмет, который может помешать нормальной работе (инструменты, лист бумаги, кусок ткани и т. п.). Держа капот за среднюю часть, опустите его на высоту примерно 30 см от закрытого положения, а затем - Страница 152 из 223
Уровень масла в двигателе: общие сведения (1/2) В двигателях масло используется для смазки и охлаждения подвижных деталей. Во время эксплуатации иногда возникает необходимость долива масла в промежутке между его заменами. Периодичность: периодически проверяйте уровень масла в двигателе, всегда - Страница 153 из 223
Уровень масла в двигателе: общие сведения (2/2) B B Превышение максимального уровня масла в двигателе. A A C Уровень определяется только по маслоизмерительному щупу, как указано выше. B A B B Если максимальный уровень превышен, не запускайте двигатель и обратитесь на сервисную станцию - Страница 154 из 223
Уровень масла в двигателе: долив и заправка (1/3) 1 1 2 2 2.0 16V Долив масла / заправка Долив масла и заправка двигателя маслом должны выполняться на ровной площадке, на выключенном и остывшем двигателе (например, перед первым в течение дня запуском двигателя). Тип моторного масла См. сервисную - Страница 155 из 223
Уровень масла в двигателе: долив и заправка (2/3) 1 1 1 2 1 1.5 dCi Долив масла / заправка Долив масла и заправка двигателя маслом должны выполняться на ровной площадке, на выключенном и остывшем двигателе (например, перед первым в течение дня запуском двигателя). Тип моторного масла См. сервисную - Страница 156 из 223
Уровень масла в двигателе: долив и заправка (3/3)/Замена масла в двигателе Замена масла в двигателе Периодичность замены: см. сервисную книжку. Средняя емкость по маслу, включая масляный фильтр (для информации) Объем зависит от мощности двигателя и от соответствия нормам токсичности отработавших - Страница 157 из 223
Уровни эксплуатационных жидкостей (1/3) Периодичность проверки уровня охлаждающей жидкости 1 2 Регулярно проверяйте уровень охлаждающей жидкости (при отсутствии охлаждающей жидкости двигатель может выйти из строя). При необходимости долива используйте только охлаждающую жидкость тех марок, которые - Страница 158 из 223
Уровни эксплуатационных жидкостей (2/3) 3 Уровень жидкости Это нормально, что уровень тормозной жидкости понижается по мере износа тормозных колодок, но он ни в коем случае не должен опускаться ниже нижней отметки (метка «MINI») на бачке 3. Если Вы хотите проверить степень износа тормозных дисков - Страница 159 из 223
Уровни эксплуатационных жидкостей (3/3) / фильтры Фильтры 4 Бачок стеклоомывателя / омывателя фар Долив Откройте пробку 4, залейте жидкость, пока она не станет видна, затем закройте пробку. Применяемая жидкость Специальная моющая жидкость для стеклоомывателя (зимой применяется незамерзающая - Страница 160 из 223
Аккумуляторная батарея В зависимости от комплектации автомобиля аккумуляторная батарея находится или в моторном отсеке или в багажном отделении. Во всех случаях она не требует обслуживания. В зависимости от комплектации автомобиля система постоянно проверяет степень зарядки аккумуляторной батареи. - Страница 161 из 223
Давление воздуха в шинах A Условия безопасности при эксплуатации шин и установке цепей противоскольжения A B C E H Давление накачки шин указано на этикетке A, наклеенной на кузов автомобиля. Для того, чтобы прочесть данные, откройте дверь. B: размеры шин, установленных на автомобиле. C: давление - Страница 162 из 223
Уход за кузовом автомобиля (1/2) Должный уход позволяет дольше сохранять кузов автомобиля. Рекомендуется регулярно ухаживать за наружными частями кузова автомобиля Защита кузова от веществ, вызывающих коррозию На Вашем автомобиле применена весьма эффективная система антикоррозионной защиты, тем не - Страница 163 из 223
Уход за кузовом автомобиля (2/2) Что следует делать: – Во время движения по дороге, покрытой гравием, соблюдайте дистанцию между автомобилями во избежание повреждений лакокрасочного покрытия. – Для предотвращения возникновения и распространения коррозии как можно скорее подкрашивайте поврежденные - Страница 164 из 223
УХОД ЗА САЛОНОМ АВТОМОБИЛЯ (1/2) Правильный уход за автомобилем позволит дольше сохранить его в исправном состоянии. Поэтому рекомендуется регулярно выполнять уборку его салона. Любые пятна следует немедленно удалять. Независимо от вида загрязнения используйте для удаления пятна холодный мыльный - Страница 165 из 223
УХОД ЗА САЛОНОМ АВТОМОБИЛЯ (2/2) Демонтаж и установка съемных элементов оборудования салона Если для чистки салона необходимо удалить съемные элементы (например, коврики), обратите внимание на то, чтобы при установке разместить их правильно и на их прежнее место (коврик водителя должен быть - Страница 166 из 223
Глава 5. Практические советы Прокол . . . . . . . . . . . . . . . . . . . . . . . . . . . . . . . . . . . . . . . . . . . . . . . . . . . . . . . . . . . . . . . . . . . . . . . . . . . . . . . Комплект для накачивания шин. . . . . . . . . . . . . . . . . . . . . . . . . . . . . . . . . . . . . . . - Страница 167 из 223
Прокол В случае прокола шины, в зависимости от комплектации автомобиля, Вы можете воспользоваться: запасным колесом или комплектом для накачивания шин (см. на следующих страницах). A Запасное колесо – достаньте запасное колесо. Особенность: Система контроля давления в шинах не контролирует запасное - Страница 168 из 223
КОМПЛЕКТ ДЛЯ НАКАЧИВАНИЯ ШИН (1/3) B A Не используйте комплект, если шина повреждена вследствие движения с проколотой шиной. Комплект сертифицирован только для накачивания шин автомобиля, к которому он первоначально прилагается. Перед проведением ремонта внимательно осмотрите боковые поверхности - Страница 169 из 223
КОМПЛЕКТ ДЛЯ НАКАЧИВАНИЯ ШИН (2/3) 2 3 4 5 6 1 7 10 9 8 В зависимости от комплектации автомобиля в случае прокола шины используйте комплект для накачивания шин. Перед использованием комплекта припаркуйте автомобиль на достаточном удалении от проезжей части, включите аварийную сигнализацию и - Страница 170 из 223
КОМПЛЕКТ ДЛЯ НАКАЧИВАНИЯ ШИН (3/3) 1 10 8 Как только будет достигнуто нормальное давление в шине: – прекратите действие комплекта; – медленно отверните оба наконечника 8 и 10; – наверните наконечник 10 на баллон так, чтобы избежать вытекания герметика; Никакие предметы не должны находиться на полу - Страница 171 из 223
Комплект инструментов / декоративный колпак — колесо 2 Буксировочная проушина См. раздел «Буксировка» в главе 5. 1 3 Отвертка 6 2 4 Ключ для снятия декоративного колпака Он используется для снятия декоративных колесных колпаков. 5 Рожковый ключ 6 Колесный ключ D C F E 7 5 4 3 Комплект инструментов - Страница 172 из 223
Замена колеса (1/2) Автомобили, оборудованные домкратом и колесным ключом 2 Если необходимо, снимите декоративный колпак. 1 – Ослабьте затяжку колесных болтов, как показано стрелкой, с помощью колесного ключа 1. Устанавливайте колесный ключ 1 так, чтобы давить на него сверху; – начните поднимать - Страница 173 из 223
Замена колеса (2/2) – выверните болты и снимите колесо; – наденьте запасное колесо на ступицу и поверните его до совпадения крепежных отверстий ступицы и колеса. Если к запасному колесу прилагаются болты, используйте их только для крепления запасного колеса. Затяните болты, убедившись в правильном - Страница 174 из 223
Шины (1/3) Шины и безопасность Автомобиль контактирует с дорогой только через шины. Необходимо, чтобы шины находились в хорошем состоянии. 2 Вы должны строго следовать местным требованиям, предусмотренным правилами дорожного движения. 1 При износе протектора шины до уровня, когда выступы становятся - Страница 175 из 223
Шины (2/3) Давление воздуха в шинах Соблюдайте предписанные значения давления в шинах (в том числе в шине запасного колеса). Давление должно проверяться не реже одного раза в месяц и перед каждой дальней поездкой (см. в главе 4, раздел «Давление воздуха в шинах». Давление следует проверять на - Страница 176 из 223
Шины (3/3) Перестановка колес Настоятельно рекомендуется не выполнять перестановку колес. Индекс максимальной скорости зимних шин может оказаться ниже максимальной скорости движения вашего автомобиля. Этот индекс состоит из нескольких букв на боковине шины. Особенности эксплуатации шин в зимних - Страница 177 из 223
Фары с галогенными лампами: замена ламп Передние габаритные огни A B 1 2 3 Поверните крышку B на четверть оборота против часовой стрелки, затем освободите от защелок патрон лампы 4, потянув его вверх, и извлеките лампу. Тип ламп: W5W. Указатель поворота 5 Доступ к лампам затруднен (требуется снятие - Страница 178 из 223
Фары с ксеноновыми лампами: замена ламп Передние габаритные огни A B 1 2 Поверните крышку B на четверть оборона против часовой стрелки, затем освободите от защелок патрон лампы 2, потянув его вверх, и извлеките лампу. Тип лампы: W5W. Указатели поворотов Обратитесь на сервисную станцию - Страница 179 из 223
фары: противотуманные фары, дополнительные фары Задний противотуманный фонарь См. раздел «Задние и боковые фонари: замена ламп» в главе 5. 1 Дополнительные фары Если Вы хотите установить на Ваш автомобиль противотуманные фары или прожекторные фары, обратитесь на сервисную станцию - Страница 180 из 223
Задние и боковые фонари: замена ламп (1/3) 1 3 2 4 Указатели поворотов Снимите крышку люка доступа к фонарям, вывернув крепление 2 со стороны багажного отделения. Отверните гайки 1, высвободите блок-фару, потяните и снимите ее. Поверните патрон лампы 3 на четверть оборота против часовой стрелки, - Страница 181 из 223
Задние и боковые фонари: замена ламп (2/3) 7 A 5 6 6 Огни заднего хода / Задний противотуманный фонарь. С помощью плоской отвертки освободите защелку с внутренней стороны крышки багажного отделения, затем потяните обивку A назад. Примечание: тяните назад осторожно, чтобы не сломать обивку A. Лампы - Страница 182 из 223
Задние и боковые фонари: замена ламп (3/3) 8 10 B 9 Фонарь освещения номерного знака 8 Боковые повторители указателя поворота 10 Отсоедините фонарь 8, нажав на язычок 9 инструментом типа отвертки с плоским лезвием. Отсоедините повторитель указателя поворота 10 (при помощи инструмента типа отвертки - Страница 183 из 223
Освещение салона: замена ламп (1/3) 3 1 2 Плафон Отсоедините рассеиватель 1 с помощью инструмента типа отвертки с плоским лезвием, установив его под плафон. Извлеките соответствующую лампу. Тип лампы: W5W. Фонари подсветки в передних дверях Фонарь подсветки зеркала на противосолнечном козырьке 3 - Страница 184 из 223
Освещение салона: замена ламп (2/3) 6 7 5 4 8 Фонарь освещения вещевого ящика 4 Фонарь освещения багажного отделения Обратитесь на сервисную станцию компании-производителя. Отсоедините фонарь багажного отделения 5 с помощью инструмента типа отвертки с плоским лезвием, установив его под фонарем с - Страница 185 из 223
Освещение салона: замена ламп (3/3) 9 Передние фонари подсветки зоны для ног 9 Фонари установлены под вещевым ящиком или под рулевой колонкой. Извлеките соответствующую лампу. Тип лампы: W5W. Внутри лампы находятся под давлением и могут взорваться при замене. травмы. 5.20 Это может стать причиной - Страница 186 из 223
Предохранители (1/2) 1 3 2 A Блок предохранителей 2 Если электрическое устройство не работает, проверьте состояние плавких предохранителей. Откройте вещевой ящик A. Нажмите на фиксатор 1, чтобы сдвинуть его, затем потяните на себя, чтобы отсоединить. Отыщите соответствующий предохранитель, сверяясь - Страница 187 из 223
Предохранители (2/2) Назначение предохранителей (наличие предохранителей зависит от комплектации автомобиля) Дополнительное оборудование отмечается звездочкой «*» на этикетке. Символ Z Назначение Освещение салона Внутреннее зеркало заднего вида C Заднее стекло с обогревом Ì Звуковой сигнал - Страница 188 из 223
Аккумуляторная батарея: устранение неисправностей (1/2) Во избежание искрения – перед подсоединением и отсоединением аккумуляторной батареи убедитесь, что потребители электроэнергии отключены; – во время зарядки выключайте зарядное устройство перед его отсоединением от аккумуляторной батареи.; – не - Страница 189 из 223
Аккумуляторная батарея: устранение неисправностей (2/2) 1 6 2 A 5 B 7 4 9 8 Аккумуляторная батарея в багажном отделении (двигатели V6) Воспользуйтесь выводами в моторном отсеке. Поверните винт 7 на четверть оборота вправо, затем потяните крышку 8 вверх, чтобы получить доступ к выводу 9 (+). - Страница 190 из 223
Карта renault: элемент питания 2 A B 1 4 3 Замена элемента питания Если на щитке приборов появляется сообщение «КЛЮЧ-КАРТА РАЗРЯЖАЕТСЯ» (низкий заряд элемента питания), замените элемент питания карты RENAULT, нажмите на кнопку 1, потянув за ключ 2, затем отсоедините крышку 3 при помощи лапки 4. - Страница 191 из 223
ДОПОЛНИТЕЛЬНОЕ ОБОРУДОВАНИЕ Прежде чем устанавливать какое-либо электрическое или электронное устройство (в частности, это относится к передатчикам/радиоприемникам: диапазон частот, мощность, положение антенны и т. д.), убедитесь, что оно совместимо с Вашим автомобилем. Если Вы используете - Страница 192 из 223
ЩЕТКИ СТЕКЛООЧИСТИТЕЛЕЙ E 2 1 F A B C D Замена щеток стеклоочистителя 2 При включенном зажигании и выключенном двигателе переведите рычаг переключателя стеклоочистителя 1 вниз в положение D; рычаги стеклоочистителя 3 остановятся на расстоянии от капота. 4 Следите за состоянием щеток - Страница 193 из 223
Буксировка: при неисправностях (1/2) Перед началом буксировки разблокируйте рулевую колонку: выключив сцепление, включите первую передачу (рычаг селектора в положении N или R на автомобилях с автоматической коробкой передач), вставьте карту RENAULT в считывающее устройство, затем в течение двух - Страница 194 из 223
Буксировка: при неисправностях (2/2) 4 1 3 2 – Производите буксировку на жесткой сцепке. При буксировке с помощью каната или троса (если это допустимо по действующему законодательству) тормозная система буксируемого автомобиля должна быть в исправном состоянии. – Не следует буксировать автомобиль с - Страница 195 из 223
Нарушения работы (1/5) Рекомендации, приведенные ниже, помогут Вам быстро временно устранить неисправности, однако, по соображениям безопасности, при первой же возможности обратитесь к представителю производителя. Использование карты RENAULT ВОЗМОЖНЫЕ ПРИЧИНЫ ЧТО ДЕЛАТЬ Карта RENAULT не отпирает и - Страница 196 из 223
Нарушения работы (2/5) При включении стартера ВОЗМОЖНЫЕ ПРИЧИНЫ ЧТО ДЕЛАТЬ Сигнальные лампы на щитке приборов гаснут или не загораются, стартер не включается. Клеммы аккумуляторной батареи плохо затянуты, не подключены или окислены. Подключите клеммы. Если они окислились, очистите их и затяните. - Страница 197 из 223
Нарушения работы (3/5) В движении ВОЗМОЖНЫЕ ПРИЧИНЫ ЧТО ДЕЛАТЬ Вибрация. Недостаточное давление воздуха в шинах, неправильная балансировка колес или их повреждение. Проверьте давление в шинах; если оно соответствует норме, обратитесь на сервисную станцию компании-производителя. Выход белого дыма из - Страница 198 из 223
Нарушения работы (4/5) В движении ВОЗМОЖНЫЕ ПРИЧИНЫ ЧТО ДЕЛАТЬ Управление затруднено. Перегрев усилителя рулевого управления. Обратитесь на сервисную станцию компаниипроизводителя. Двигатель перегревается. Стрелка указателя температуры охлаждающей жидкости находится в красной зоне шкалы и горит - Страница 199 из 223
Нарушения работы (5/5) Электрическое оборудование ВОЗМОЖНЫЕ ПРИЧИНЫ ЧТО ДЕЛАТЬ Не работают стеклоочистители. Примерзли щетки стеклоочистителя. Освободите щетки стеклоочистителей перед включением стеклоочистителей. Неисправность электрической цепи. Обратитесь на сервисную станцию - Страница 200 из 223
Глава 6. Технические характеристики Идентификационные таблички автомобиля. . . . . . . . . . . . . . . . . . . . . . . . . . . . . . . . . . . . . . . . . . . . . . . . . Идентификационные таблички двигателя. . . . . . . . . . . . . . . . . . . . . . . . . . . . . . . . . . . . . . . . . . . . . . - Страница 201 из 223
Идентификационные таблички АВТОМОБИЛЯ A 1 2 3 4 5 6 7 8 9 10 11 12 13 A При заказе запасных частей необходимо ссылаться на информацию, которая содержится на идентификационной табличке изготовителя. B 6.2 Идентификационная табличка автомобиля A (В зависимости от комплектации автомобиля табличка - Страница 202 из 223
Идентификационные таблички двигателя (1/2) 1 C C 2 3 2.0 16V Информацию с таблички (или этикетки) в моторном отсеке C следует записать перед любым обращением или заказом. (ее расположение зависит от двигателя) 1 Тип двигателя. 2 Индекс двигателя. 3 Заводской номер двигателя. C 2.5 V6 / 3.5 V6 6.3 - Страница 203 из 223
Идентификационные таблички двигателя (2/2) 1 C C 2 C 3 1.5 dCi 2.0 dCi Информацию с таблички (или этикетки) в моторном отсеке C следует записать перед любым обращением или заказом. (ее расположение зависит от двигателя) 1 Тип двигателя. 2 Индекс двигателя. 3 Заводской номер двигателя. C V6 dCi 6.4 - Страница 204 из 223
Габариты автомобиля, м 1.035 2.762 1.100 1.565 4.897 1.492* 1.562 1.832 * Снаряженный автомобиль 6.5 - Страница 205 из 223
Характеристики двигателей Модификации 2.0 16V 2.5 V6 3.5 V6 1.5 dCi 2.0 dCi V6 dCi Модель двигателя (см. табличку на двигателе) M4R 2ZV 5ZV K9K M9R V9X Рабочий объем, куб. см 1997 2495 3498 1461 1995 2993 Неэтилированное топливо обязательно с октановым числом, соответствующим числу, указанному на - Страница 206 из 223
МАССОВЫЕ ХАРАКТЕРИСТИКИ (кг) Данные массовые характеристики указаны для автомобиля в базовой комплектации и без дополнительного оборудования: они изменяются в зависимости от уровня оснащенности Вашего автомобиля. Обратитесь к представителю компании-производителя. Максимальная разрешенная масса - Страница 207 из 223
Запасные части и ремонтные работы Оригинальные запасные части RENAULT созданы на основе очень жестких технических требований и подвергаются специальным испытаниям. Поэтому они соответствуют всем техническим требованиям к аналогичным деталям, устанавливаемым на новые автомобили. Используя - Страница 208 из 223
ДОКУМЕНТЫ, ПОДТВЕРЖДАЮЩИЕ ПРОВЕДЕНИЕ ТЕХНИЧЕСКОГО ОБСЛУЖИВАНИЯ (1/6) ………………………………………………………………………. :VIN Дата: Км: № фактуры: Тип работ: Печать Комментарии/разное □ Техническое обслуживание □ ………………………………… Проверка - Страница 209 из 223
ДОКУМЕНТЫ, ПОДТВЕРЖДАЮЩИЕ ПРОВЕДЕНИЕ ТЕХНИЧЕСКОГО ОБСЛУЖИВАНИЯ (2/6) ………………………………………………………………………. :VIN Дата: Км: № фактуры: Тип работ: Печать Комментарии/разное □ Техническое обслуживание □ ………………………………… Проверка - Страница 210 из 223
ДОКУМЕНТЫ, ПОДТВЕРЖДАЮЩИЕ ПРОВЕДЕНИЕ ТЕХНИЧЕСКОГО ОБСЛУЖИВАНИЯ (3/6) ………………………………………………………………………. :VIN Дата: Км: № фактуры: Тип работ: Печать Комментарии/разное □ Техническое обслуживание □ ………………………………… Проверка - Страница 211 из 223
ДОКУМЕНТЫ, ПОДТВЕРЖДАЮЩИЕ ПРОВЕДЕНИЕ ТЕХНИЧЕСКОГО ОБСЛУЖИВАНИЯ (4/6) ………………………………………………………………………. :VIN Дата: Км: № фактуры: Тип работ: Печать Комментарии/разное □ Техническое обслуживание □ ………………………………… Проверка - Страница 212 из 223
ДОКУМЕНТЫ, ПОДТВЕРЖДАЮЩИЕ ПРОВЕДЕНИЕ ТЕХНИЧЕСКОГО ОБСЛУЖИВАНИЯ (5/6) ………………………………………………………………………. :VIN Дата: Км: № фактуры: Тип работ: Печать Комментарии/разное □ Техническое обслуживание □ ………………………………… Проверка - Страница 213 из 223
ДОКУМЕНТЫ, ПОДТВЕРЖДАЮЩИЕ ПРОВЕДЕНИЕ ТЕХНИЧЕСКОГО ОБСЛУЖИВАНИЯ (6/6) ………………………………………………………………………. :VIN Дата: Км: № фактуры: Тип работ: Печать Комментарии/разное □ Техническое обслуживание □ ………………………………… Проверка - Страница 214 из 223
Проверка антикоррозионного покрытия (1/5) В случае, когда продолжение действия гарантии обусловлено ремонтом, этот ремонт указывается ниже. VIN (ИНА): ………………………………………………………………………. Выполняемый в связи с коррозией ремонт: Печать Дата ремонта: - Страница 215 из 223
Проверка антикоррозионного покрытия (2/5) В случае, когда продолжение действия гарантии обусловлено ремонтом, этот ремонт указывается ниже. VIN (ИНА): ………………………………………………………………………. Выполняемый в связи с коррозией ремонт: Печать Дата ремонта: - Страница 216 из 223
Проверка антикоррозионного покрытия (3/5) В случае, когда продолжение действия гарантии обусловлено ремонтом, этот ремонт указывается ниже. VIN (ИНА): ………………………………………………………………………. Выполняемый в связи с коррозией ремонт: Печать Дата ремонта: - Страница 217 из 223
Проверка антикоррозионного покрытия (4/5) В случае, когда продолжение действия гарантии обусловлено ремонтом, этот ремонт указывается ниже. VIN (ИНА): ………………………………………………………………………. Выполняемый в связи с коррозией ремонт: Печать Дата ремонта: - Страница 218 из 223
Проверка антикоррозионного покрытия (5/5) В случае, когда продолжение действия гарантии обусловлено ремонтом, этот ремонт указывается ниже. VIN (ИНА): ………………………………………………………………………. Выполняемый в связи с коррозией ремонт: Печать Дата ремонта: - Страница 219 из 223
Алфавитный указатель (1/4) А АБС…………………………………………………………………………2.21 → 2.24 аварийная световая сигнализация………………………………………. 1.65 автомагнитола. - Страница 220 из 223
Алфавитный указатель (2/4) колеса (безопасность)……………………………………………….. 5.9 → 5.11 колесный ключ…………………………………………………………………….. 5.6 комплект для накачивания шин…………………………………….5.3 → 5.5 - Страница 221 из 223
Алфавитный указатель (3/4) регулирование температуры………………………………………3.9 → 3.14 регулировка передних сидений…………………………………. 1.15 – 1.16 ручное управление……………………………………………………….. 1.15 электрическое - Страница 222 из 223
Алфавитный указатель (4/4) щиток приборов……………………………………………………….1.44 → 1.60 Э экономия топлива…………………………………………………….2.14 → 2.16 электрический стояночный тормоз. …………………………..2.10 → 2.13 . элемент - Страница 223 из 223

RENAULT Latitude (47 стр., ru;)
Оглавление инструкции
Document Outline
- РУКОВОДСТВО ПОЛЬЗОВАТЕЛЯ
- МЕРЫ ПРЕДОСТОРОЖНОСТИ ПРИ ЭКСПЛУАТАЦИИ
- Меры предосторожности при эксплуатации аудиосистемы
- Меры предосторожности при обращении с оборудованием
- Меры предосторожности при обращении с телефоном
- Обслуживание передней панели
- Введение
- Функции радиоприемника и проигрывателя компакт-дисков
- Дополнительные функции
- Система «свободные руки»
- Голосовое управление
- функции телефона (в зависимости от комплектации)
- ВКЛЮЧЕНИЕ/ВЫКЛЮЧЕНИЕ
- Включение и выключение
- Выбор источника воспроизведения
- ГРОМКОСТЬ
- Регулировка вручную
- Автоматическая регулировка
- Отключение звука
- Громкость звучания
- Навигаиумя по меню на дисплее
- Использование буквенных символов
- Выбор диапазона
- Выбор радиостанции
- Автоматический прием РМ- радиостанции (Н08-АР)
- Сведения о дорожной обстановке (i Traffic)
- Поиск программ определенного типа (PTY)
- Текстовая информация (Radio Text)
- Характеристики воспроизводимых форматов
- Правила обра1цения с компакт- дисками
- Установка компакт-диска
- Извлечение компакт-диска
- Выбор звуковой дорожки или альбома
- Быстрый просмотр
- Пауза
- Время воспроизведения
- Отображение текстовой информации (если доступно) (CD-Text или ID3 tag)
- Баланс
- ДОПОЛНИТЕЛЬНЫЕ ИСТОЧНИКИ СИГНАЛА (в зависимости от комплектации)
- Дополнительные входы: разъем RCA
- Дополнительный вход: разъем USB и разъем типа «Джек»
- Подключение переносного плеера G Bluetooth*
- Использование переносного плеера с Bluetooth®
- I Обрыв соединения
- Отсоединение переносного плеера с Bluetooth*
- Подключение телефона
- МЕРЫ ПРЕДОСТОРОЖНОСТИ ПРИ ЭКСПЛУАТАЦИИ
- сз:,
- Отключение телефона
- Подсоединение подключенного телефона
- Подсоединение вручную (смена подсоединенного телефона)
- Обрыв соединения
- Отсоединение телефона
- Назначение приоритета телефона
- Вывод телефонной книги на дисплей
- Выбор контакта из телефонной книги
- Обновление памяти телефона
- Удаление телефонной книги
- Добавление контакта в телефонную книгу
- Удаление контакта из телефонной книги
- Конфиденциальность
- Вывод телефонной книги автомобиля на дисплей
- Добавление контакта в телефонную книгу автомобиля
- Импорт контакта
- Изменение контаюе
- Удаление контакта
- Удаление телефонной книги автомобиля
- Внесение контакта в телефонную книгу автомобиля
- Вызов абонента из телефонной книги
- Вызов абонента из сохраненного списка вызовов
- Обновление списка вызовов
- Набор номера голосовой почты
- Вызов служб экстренной помощи
- Прием вызова
- Автоматический режим ожидания вызова
- Автоматический режим ожидания вызова выключен
- во ВРЕМЯ ВЫЗОВА
- Во время вызова
- Тип звонка аудиосистемы/телефона
- Ручной/автоматический режим ожидания вызова
- Версия программного обеспечения
- Восстановление настроек по умолчанию
- Запись голосовой метки
- Изменение, прослушивание или удаление голосовой метки
- Набор номера с помощью голосовой метки
- НАСТРОИКИ СИСТЕМЫ
- Установка времени
- Настройки по умолчанию
- АЛФАВИТНЫМ УКАЗАТЕЛЬ

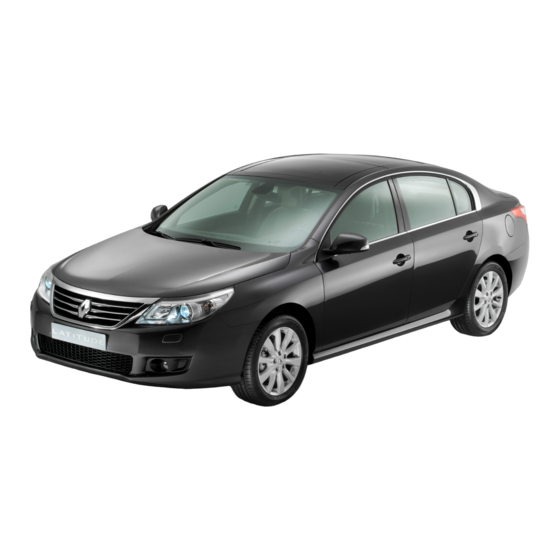
- Manuals
- Brands
- Renault Manuals
- Automobile
- Latitude
- User manual
-
Contents
-
Table of Contents
-
Bookmarks
Related Manuals for Renault Latitude
Summary of Contents for Renault Latitude
-
Page 1
DRIVER’S HANDBOOK… -
Page 2
Warning: to ensure the engine operates optimally, the use of a lubricant may be restricted to certain vehicles. Please ELF has developed a complete range of lubricants for RENAULT: refer to your maintenance document. engine oils manual and automatic gearbox oils Benefiting from the research applied to Formula 1, lubricants are very high-tech products. -
Page 3: Driving
This handbook may also contain information about items of equipment to be introduced later in the model year. Throughout the manual, the “approved Dealer” is your RENAULT Dealer. Enjoy driving your new vehicle.
-
Page 5: Table Of Contents
Sections Getting to know your vehicle ……. Driving …………..Your comfort …………Maintenance …………Practical advice ………… Technical specifications ……..Alphabetical index ……….
-
Page 7
RENAULT card: general information, use, deadlocking …….. -
Page 8: Doors
“Keycard battery low” appears on the inside and never leave a instrument panel (refer to the informa- child (or a pet) unsupervised, even tion on the “RENAULT card: Battery” in for a short while. Section 5). They may pose a risk to themselves…
-
Page 9
Once you have accessed the vehicle using the integrated key, replace it Do not store the RENAULT card in its housing in the RENAULT card, in an area where it may acciden- then insert the RENAULT card into tally become bent or damaged. The the card reader to start the vehicle. -
Page 10: Trunk Lid
30 seconds when button 3 is open or not properly closed, or if a is pressed. RENAULT card is still in the reader, the doors and luggage compartment Note: pressing button 3 again switches lock then quickly unlock and the hazard off the lighting.
-
Page 11: Unlocking The Vehicle
Note: if the RENAULT card is inside the luggage compartment, the vehi- On equipped vehicles, in addition to With the RENAULT card in zone 1, you cle locks/unlocks quickly. Ensure that the functions of the remote control may unlock the vehicle by placing your…
-
Page 12: Locking The Vehicle
RENAULT card. situation, no beep sounds and the hazard warning lights do not flash. Remote locking With the RENAULT card on you, and Locking using button 4 doors and trunk lid closed, move away With the doors and trunk lid closed…
-
Page 13
RENAULT card, remote locking and unlocking Even if the RENAULT card is still in in hands-free mode are deactivated. zone 6, the vehicle may lock if it is close to any (metal) object which is To reactivate the “hands-free”… -
Page 14
RENAULT CARD: deadlocking To deactivate deadlocking Unlock the vehicle using button 1 on the RENAULT card. The hazard warning lights flash once to indicate that the doors have been un- locked. If the vehicle is equipped with a dead- To activate deadlocking… -
Page 15
With the engine switched off, insert the RENAULT card in the reader to allow Opening from the outside Opening from the inside some of the electrical functions to op- erate. -
Page 16: Child Safety
OPENING AND CLOSING THE DOORS (2/2) Driver’s responsibility when parking or stopping the vehicle Safety of rear occupants Never leave an animal, Child safety The driver can authorise child or adult who is not self-suffi- operation of the rear doors Vehicle with switch 1 cient alone on your vehicle, even for Ç…
-
Page 17: Locking/Unlocking Doors
Section 1. In certain cases, the RENAULT card may not work, or its access area will be modified: – if the RENAULT card battery is weak, flat, etc. – if equipment operating on the same frequency as the card (mobile phones, etc.) is used;…
-
Page 18: Indicator Light
RENAULT card indicator light For example, in the event of a dis- Switch 4 has an integrated indicator charged battery or the RENAULT card light which shows whether or not the temporarily not working, etc. doors and trunk lid are locked: With the engine switched off and a –…
-
Page 19: Automatic Locking When Driving
AUTOMATIC LOCKING WHEN DRIVING Activating/deactivating the Operating faults function If you experience an operating fault (no automatic locking, the indicator light in- Refer to the information on “Vehicle set- corporated in button 1 does not light up tings customisation menu” in Section 1; when trying to lock the doors and trunk “Auto door locking while driving”…
-
Page 20: Front Headrests
FRONT HEADRESTS To remove the headrest Lift the headrest to its highest position. Press button 1 and lift the headrest to release it (tilt the seatback backwards if necessary). Note: when the headrest is removed, take care not to change the positions of rods 3.
-
Page 21
FRONT SEATS (1/2) tion, release the lever. Ensure it is cor- rectly locked in place. Heated seats With the engine running, turn control 1 or 5 to the desired position, depending ð on the temperature required. An indicator light on the instrument panel comes on once one of the front seat heating system is operating. -
Page 22
FRONT SEATS (2/2) Adjusting the lumbar support on the driver’s seat (depending on the vehicle) For safety reasons, carry Lower handle 8 to increase the support out any adjustments when and lift to decrease it. Depending on the the vehicle is not being vehicle, you may adjust the electrically- driven. -
Page 23
When driving, it is not possible to – with the “hands-free” RENAULT card recall a driving position. detected or, depending on the vehi- cle, the RENAULT card in the card reader; – when the driver’s door is opened. Storing your driving position Adjust the seat using switches 4 and 5 (see previous pages). -
Page 24
The seat returns to the normal position: – with the engine started; – when the RENAULT card is inserted in the card reader; – by pressing the engine Start/Stop switch, without depressing the pedal (if there is a “hands-free” RENAULT card). -
Page 25: Adjusting The Lumbar Support
DRIVER’S SEAT WITH MASSAGE FUNCTION Driver’s seat with massage Stopping the function function – Turn control 6 to the OFF position. When the engine is running, you may – When you restart the system after use the massage function. If you start having stopped it, the air pressure the system, the air pressure drops com- drops completely before the mas-…
-
Page 26: Seat Belts
SEAT BELTS (1/3) Always wear your seat belt when Before starting, adjust your driving traveling in your vehicle. You must also position and then have each occu- comply with the legislation of the par- pant adjust their seat belt to ensure ticular country you are in.
-
Page 27: Front Seat Belt
SEAT BELTS (2/3) Front seat belt ß reminder warning light This lights up on the central display when the engine is started then, if the driver’s or front passenger’s seat belt (if this seat is occupied) is not fastened and the vehicle has reached approxi- mately 12 mph (20 km/h), it flashes and a bleep sounds for around 120 sec- onds.
-
Page 28
SEAT BELTS (3/3) The following information applies to the vehicle’s front and rear seat belts. – No modification may be made to the component parts of the restraint system (belts and seats and their mountings) fitted originally. – For special operations (e.g.: fitting child seats) contact an approved Dealer. -
Page 29: Methods Of Restraint In Addition To The Front Seat Belts
METHODS OF RESTRAINT IN ADDITION TO THE FRONT SEAT BELTS (1/4) Depending on the vehicle, they may – Have the entire restraint comprise: system checked following – seat belt inertia reel pretension- an accident. ers; – No operation whatso- – lap belt pretensioners; ever is permitted on any part of the system (pretensioners, –…
-
Page 30
METHODS OF RESTRAINT IN ADDITION TO THE FRONT SEAT BELTS (2/4) Load limiters Airbags for driver and front passenger Above a certain level of impact force, this mechanism is used to limit the force The driver’s airbag is on the steering of the belt against the body so that it is wheel, and the passenger’s airbag on at an acceptable level. -
Page 31
METHODS OF RESTRAINT IN ADDITION TO THE FRONT SEAT BELTS (3/4) Operation Special features of the front airbag This system is only operational when the ignition is switched on. After a violent impact, it has two deploy- ment volumes and integrates a ventila- In a severe frontal impact, the airbags tion system: inflate rapidly. -
Page 32
METHODS OF RESTRAINT IN ADDITION TO THE FRONT SEAT BELTS (4/4) All of the warnings below are given so that the airbag is not obstructed in any way when it is inflated and also to prevent the risk of serious injuries caused by items which may be dislodged when the airbag inflates. Warnings concerning the driver’s airbag –… -
Page 33: Methods Of Restraint In Addition To The Rear Seat Belts
METHODS OF RESTRAINT IN ADDITION TO THE REAR SEAT BELTS Force limiter Depending on the vehicle, they are – Have the entire restraint composed of: Above a certain severity of impact, this system checked following – seat belt pretensioners built into mechanism is used to limit the force of an accident.
-
Page 34: Side Protection Devices
SIDE PROTECTION DEVICES Side airbags These airbags are fitted to each front seat and, depending on the country, the rear side seats; the airbags are ac- tivated at the sides of the seats (door side) to protect the occupants in the event of a severe side impact.
-
Page 35
ADDITIONAL METHODS OF RESTRAINT All of the warnings below are given so that the airbag is not obstructed in any way when it is inflated and also to prevent the risk of serious injuries caused by items which may be dislodged when the airbag inflates. The airbag is designed to complement the action of the seat belt. -
Page 36: Child Safety: General Information
CHILD SAFETY: general information (1/2) Carrying children Children, and adults, must be correctly seated and strapped in for all journeys. The children being carried in your vehi- cle are your responsibility. A child is not a miniature adult. Children are at risk of specific injuries as their muscles and bones have not yet fin- ished growing.
-
Page 37
CHILD SAFETY: general information (2/2) Using a child seat The level of protection offered by the child seat depends on its ability to re- strain your child and on its installation. Incorrect installation compromises the protection it offers the child in the event of harsh braking or an impact. -
Page 38: Choosing A Child Seat Mounting
CHILD SAFETY: choosing a child seat Rear-facing child seats Forward-facing child seats Booster cushions A baby’s head is, proportionally, heavier The child’s head and abdomen need to From 15 kg or 4 years, the child can than that of an adult and its neck is very be protected as a priority.
-
Page 39: Choosing Child Seat Mounting
CHILD SAFETY: choosing a child seat mounting (1/2) There are two child seat mounting sys- Attachment with the ISOFIX system tems: via the seat belt or using the Authorised ISOFIX child seats are ap- Some child seats cannot be fitted ISOFIX system.
-
Page 40
CHILD SAFETY: choosing a child seat mounting (2/2) The ISOFIX anchorage points have been exclu- sively designed for child seats with the ISOFIX system. Never fit a different type of child seat, seat belt or other objects to these fittings. Check that nothing is obstructing the anchorage points. -
Page 41: Fitting A Child Seat
CHILD SAFETY: fitting a child seat (1/5) Some seats are not suitable for fitting In the front seat In the rear side seat child seats. The diagram on the follow- The laws concerning children travel- A carrycot can be installed across the ing page shows you how to attach a ling in the front passenger seat differ in vehicle and will take up at least two…
-
Page 42
CHILD SAFETY: fitting a child seat (2/5) Child seat attached using the ISOFIX fitting Seat which allows an ISOFIX ü child seat to be fitted. The rear seats are fitted with ± an anchorage point which allows a forward-facing ISOFIX child seat with “Universal”… -
Page 43
CHILD SAFETY: fitting a child seat (3/5) Child seat attached using the ISOFIX fitting Seat which allows an ISOFIX ü child seat to be fitted. The rear seats are fitted with ± an anchorage point which allows a forward-facing ISOFIX child seat with “Universal”… -
Page 44
CHILD SAFETY: fitting a child seat (4/5) The table below summarises the information already shown on the diagram on the previous page, to ensure the regulations in force are respected. Front passenger seat with airbag Size of Weight of Rear side Rear centre Type of child seat ISOFIX… -
Page 45
CHILD SAFETY: fitting a child seat (5/5) X = Seat not suitable for fitting child seats. U = Seat allowing a child seat with “Universal” approval to be attached by seat belt; check that it can be fitted correctly. IUF/IL = On equipped vehicles, seat which allows a child seat with “universal/semi-universal or vehicle specific approval” to be fitted using the ISOFIX system;… -
Page 46: Deactivating/Activating The Front Passenger Airbag
CHILD SAFETY: deactivating — activating the front passenger airbag (1/3) DANGER Since front passenger airbag triggering and the position of a rear-facing child seat are incompatible, NEVER use a restraining device for rear- facing children on a seat with an ACTIVATED AIRBAG in front of it.
-
Page 47
CHILD SAFETY: deactivating — activating the front passenger airbag (2/3) The markings on the dashboard and labels A on each side of passenger sun blind 3 (example: label shown above) remind you of these instructions. DANGER Since front passenger airbag triggering and the position of a rear-facing child seat are incompatible, NEVER use a restraining device for rear-… -
Page 48
CHILD SAFETY: deactivating — activating the front passenger airbag (3/3) Activating the front Operating faults passenger airbag Contact your approved dealer as soon Reactivate the front passenger airbag as possible. as soon as you remove the child seat It is forbidden to fit a rear-facing child from the front passenger seat to ensure The passenger airbag must seat to the front seat if a fault is noted… -
Page 49: Steering Wheel/Power-Assisted Steering
STEERING WHEEL/POWER-ASSISTED STEERING Variable power-assisted steering The variable power-assisted steering system is equipped with an electronic control system which alters the level of assistance to suit the vehicle speed. Steering is made easier during parking manoeuvres (for added comfort) whilst the force needed to steer increases progressively as the speed rises (for enhanced safety at high speeds).
-
Page 50: Driving Position
DRIVING POSITION: LEFT-HAND DRIVE (1/2) 1.44…
-
Page 51: Control Instruments
– direction indicators radio information, navigation system 26 Engine start/stop button and information, etc. – exterior lights RENAULT card reader 12 Fragrance diffuser cartridge holder – front fog lights 27 Cruise control/speed limiter controls 13 Passenger airbag location – rear fog lights…
-
Page 52
WARNING LIGHTS (1/4) The presence and operation of the warning lights DEPEND ON THE EQUIPMENT AND COUNTRY. Headlight main beam tell- Brake circuit fault warning á tale light light The warning light comes on when the Dipped beam headlight tell- ignition is switched on, and goes off tale light after a few seconds. -
Page 53
WARNING LIGHTS (2/4) The presence and operation of the warning lights DEPEND ON THE EQUIPMENT AND COUNTRY. Anti-lock braking system Low fuel level warning light ê warning light (ABS). This lights up when the igni- This lights up when the ignition is tion is switched on, and goes off after a switched on and goes out after a few few seconds. -
Page 54
WARNING LIGHTS (3/4) The presence and operation of the warning lights DEPEND ON THE EQUIPMENT AND COUNTRY. Warning light These indicator lights light up on in- © strument panel B: This lights up when the ignition is switched on and goes out as soon as Front seat belt reminder ß… -
Page 55
WARNING LIGHTS (4/4) The presence and operation of the warning lights DEPEND ON THE EQUIPMENT AND COUNTRY. Battery charge warning light Power-assisted steering Ú fault warning light ® If it comes on together with the ® If it lights up together with the warning light and a beep, it indicates warning light and a beep, it indicates that the electrical circuit is overcharged… -
Page 56: Displays And Indicators
DISPLAYS AND INDICATORS and the driving conditions, the correct fuel level may not be indicated, or the warning light may not come on auto- matically. Gear engaged indicator The gear engaged is shown on dis- play 2. For more information, refer to the information on the “Automatic gear- box”…
-
Page 57: Trip Computer And Warning System
TRIP COMPUTER: general information (1/2) d) tyre pressure monitor; e) cruise control/speed limiter pro- grammed speed; f) vehicle settings customisation menu; g) on-board log, operating fault and in- formation message readout. Trip computer and warning Display selection keys 2 system 1 and 3 Depending on the vehicle, this includes Scroll through the following informa-…
-
Page 58
TRIP COMPUTER: general information (2/2) Interpreting some of the Automatic resetting of the values displayed after journey parameters resetting Resetting occurs automatically when the maximum value of any of the pa- The values showing average fuel con- rameters is exceeded. sumption, range and average speed will become more stable and reliable the further you travel after pressing the… -
Page 59
TRIP COMPUTER: trip settings (1/7) The display of information shown below DEPENDS ON THE VEHICLE EQUIPMENT AND COUNTRY. Examples of selections Interpreting the display selected 101778 km a) Total mileage and trip mileage recorder. 112.4 km Fuel used b) Journey parameters Fuel used Fuel consumed since the last reset 25.2 L… -
Page 60
TRIP COMPUTER: trip settings (2/7) The display of information shown below DEPENDS ON THE VEHICLE EQUIPMENT AND COUNTRY. Examples of selections Interpreting the display selected Current Current fuel consumption This value is displayed above a speed of approximately 18 mph (30 km/ h). 9.4L/100 Estimated range with remaining fuel This range takes into account the average fuel consumption since the last… -
Page 61
TRIP COMPUTER: trip settings (3/7) The display of information shown below DEPENDS ON THE VEHICLE EQUIPMENT AND COUNTRY. Examples of selections Interpreting the display selected On-board computer without mileage- before-service message c) Mileage before service. Service in Distance remaining until the next service (displayed in Service due in 100km 30000km/24 MOIS miles/kilometres and months), then when the service… -
Page 62
TRIP COMPUTER: trip settings (4/7) The display of information shown below DEPENDS ON THE VEHICLE EQUIPMENT AND COUNTRY. Examples of selections Interpreting the display selected On-board computer with mileage- before-service message Service due in SERVICE INTERVALS c) Mileage before service or oil change. 30,000 kms / 12 months Mileage before service With the ignition switched on but the engine not run-… -
Page 63
TRIP COMPUTER: trip settings (5/7) The display of information shown below DEPENDS ON THE VEHICLE EQUIPMENT AND COUNTRY. Examples of selections Interpreting the display selected On-board computer with distance before next service message (cntd.) Oil change in Mileage before an oil change SERVICE INTERVALS 30,000 kms / 24 months With the ignition switched on and the engine not run-… -
Page 64
TRIP COMPUTER: trip settings (6/7) Journey parameters The display of information shown below DEPENDS ON THE VEHICLE EQUIPMENT AND COUNTRY. Examples of selections Interpreting the display selected Tyre Pressure d) Tyre pressure monitor Refer to the information on the “Tyre pressure monitor” in Section 2. Speed limiter 90 km/h e) Cruise control/speed limiter programmed speed… -
Page 65
TRIP COMPUTER: trip settings (7/7) Journey parameters (continued) The display of information shown below DEPENDS ON THE VEHICLE EQUIPMENT AND COUNTRY. Examples of selections Interpreting the display selected f) Vehicle settings customisation menu “Settings menu: Enables certain vehicle functions to be set (instrument panel language, press and hold”… -
Page 66
“Please romove keycard” Request to remove the RENAULT card from the reader when you leave the vehicle. “Checking control functions” Displayed with the ignition on when the vehicle is running self-diagnostics. -
Page 67
TRIP COMPUTER AND WARNING SYSTEM: operating fault messages © These appear with the warning light and mean that you should drive very carefully to an authorised dealer as soon as possible. If you fail to follow this recommendation, you risk damaging your vehicle. ©… -
Page 68: Warning Messages
TRIP COMPUTER AND WARNING SYSTEM: warning message ® These appear with the warning light and require you to stop immediately, for your own safety, as soon as traffic conditions allow. Stop your engine and do not restart it. Contact an approved Dealer. Examples of warning messages are given in the following pages.
-
Page 69: Vehicle Settings Customisation Menu
VEHICLE SETTINGS CUSTOMISATION MENU Once a line has been selected, keep pressing either button 2 or 3 to change the function: : function activated < : function deactivated If you select either “Parking sensor volume” or “Language”, you will have to make a further selection (sound volume of the parking distance control or in- strument panel language).
-
Page 70: Clock And Exterior Temperature
CLOCK AND EXTERIOR TEMPERATURE Vehicles equipped with a Exterior temperature navigation system, radio, etc. indicator For vehicles equipped with a navigation Special note: Depending on the vehi- system or radio, refer to the specific cle, when the exterior temperature is equipment instructions to discover the between –3°C and +3°C, the °C char- special features.
-
Page 71: Rear View Mirrors
REAR VIEW MIRRORS (1/2) Rear view mirrors which tilt Storing the setting For vehicles fitted with a driver’s seat in reverse gear with position memory, refer to the infor- For vehicles equipped with the driver’s mation on the “Driver’s seat with posi- seat with position memory, you can tilt tion memory”…
-
Page 72: Interior Rear View Mirror
REAR VIEW MIRRORS (2/2) Daytime driving Move lever 4 back to its daytime driv- ing position. Rear view mirror without lever 4 The rear view mirror darkens automat- ically to prevent the driver from being dazzled by the vehicle behind. Interior rear view mirror Its position can be adjusted.
-
Page 73: Audible And Visual Signals
AUDIBLE AND VISUAL SIGNALS Direction indicators Move stalk 1 parallel to the steering wheel and in the direction you are going to turn it. One-touch mode When driving, it is possible that the steering wheel may not be turned suf- ficiently to return the stalk automatically to its starting position.
-
Page 74: Exterior Lighting And Signals
EXTERIOR LIGHTING AND SIGNALS (1/3) Daytime running lights function (only relates to front lights) Depending on the vehicle, the lights come on without using stalk 1 when the engine is started. Main beam headlights á With the engine running and the dipped beam headlights lit, pull stalk 1 towards you.
-
Page 75
EXTERIOR LIGHTING AND SIGNALS (2/3) “Follow-me-home lighting” Special note: – If the dipped beam headlights are function manually switched on and if the light This function is used to switch on the is sufficient, the directional head- dipped beam headlights temporarily lights will remain fixed;… -
Page 76: Rear Fog Lights
EXTERIOR LIGHTING AND SIGNALS (3/3) Rear fog lights Turn centre ring 5 on stalk 1 until the symbol is opposite mark 6, then release it. An indicator light on the instrument panel then comes on. The rear fog lights only come on when the front fog lights or exterior lights are To avoid inconveniencing other road users, remember to switch off this light…
-
Page 77
ELECTRICAL ADJUSTMENT OF THE DIPPED BEAM HEADLIGHTS (1/2) On vehicles fitted with this function, control 1 allows you to adjust the height of the beams according to the load. Turn control 1 downwards to lower the headlights and upwards to raise them. The position for adjustment varies ac- cording to the load and the type of headlights. -
Page 78
ELECTRICAL ADJUSTMENT OF THE DIPPED BEAM HEADLIGHTS (2/2) Examples of positions for adjusting control 1 according to the load Driver alone or with front passenger Driver with one front passenger and one rear passenger Headlights type A: 1 Driver with one front passenger The position for adjustment varies ac- and two or three rear passengers Headlights type B: 0… -
Page 79: Windscreen Wash/Wipe
WINDSCREEN WASH — WIPE (1/3) Vehicle fitted with front windscreen wiper rain sensor – A park – B automatic wiper function When this position is selected, the system detects water on the wind- screen and triggers the wipers at a suitable wiping speed.
-
Page 80: Headlight Washers
WINDSCREEN WASH — WIPE (2/3) Headlight washers Headlights on On equipped vehicles, hold stalk 1 pulled towards you for about 1 second, and the headlight washers and wind- screen washers will be activated at the same time. Note: when the minimum windscreen washer fluid level is reached, the head- light washer system may be deprimed.
-
Page 81
WINDSCREEN WASH — WIPE (3/3) In icy weather, clear the windscreen before starting the wipers (risk of motor overheating). Check the condition of the wiper blades. Under all circumstances, replace the wipers as soon as they lose their efficiency. To replace the wiper blades, switch off the engine and place the stalk in position D. -
Page 82: Fuel Tank
FUEL TANK (1/2) Petrol versions Using leaded petrol will damage the antipollution system and may lead to a loss of warranty. To ensure that the fuel tank is not filled with leaded petrol, the fuel tank filler neck contains a restrictor fitted with a foolproof system which only allows the nozzle for unleaded petrol to be used (at the pump).
-
Page 83
FUEL TANK (2/2) Persistent smell of fuel If you notice a persistent smell of fuel you should: – stop the vehicle as soon as traf- fic conditions allow and switch off No modifications what- the ignition; soever are permitted on –… -
Page 84
1.78… -
Page 85
Section 2: Driving (Advice on use relating to fuel economy and the environment) Running in …………..Starting — stopping the engine . -
Page 86: Running In
RUNNING IN Petrol version Diesel version For approximately the first 600 miles For the first 900 miles (1,500 km), do (1,000 km), do not exceed 3,000 to not exceed 2,500 rpm. After this mile- 3,500 rpm. age, you may drive faster. Your vehicle Do not exceed 78 mph (130 km/h) in will only perform optimally after approx- the highest gear, and avoid sudden ac-…
-
Page 87: Starting — Stopping The Engine
When you get into the vehicle, insert the Starting with the trunk lid open (in hands-free mode) RENAULT card fully into card reader 2. To start, press button 1. If a gear is en- In this case, the RENAULT card must…
-
Page 88
STARTING THE ENGINE (2/3) What to do if the vehicle will Precautions É not start – on diesel versions, if the warn- – In cold weather, or if the vehicle has ing light comes on, it indicates pre- not been started for a while, do not If the starting conditions are not met, heating (the engine may not start);… -
Page 89
STARTING THE ENGINE (3/3) Operating faults In some cases, the hands-free RENAULT card will not operate, or its access area will be modified: – when the RENAULT card battery is drained, flat battery, etc. – near to appliances operating on the same frequency as the card (moni- tor, mobile phone, video game, etc.);… -
Page 90: Stopping The Engine
RENAULT card with If the card is no longer in the passenger you, check that the engine compartment when you press button 1, is completely switched off.
-
Page 91: Special Features Of Petrol Versions
SPECIAL FEATURES OF PETROL VERSIONS The following operating conditions: If you notice any of the above operating faults, have the necessary repairs car- – driving for long periods when the low ried out as soon as possible by an ap- fuel level warning light is lit;…
-
Page 92: Running Out Of Fuel
SPECIAL FEATURES OF DIESEL VERSIONS Diesel engine speed Precautions to be taken in Diesel engines are fitted with injection winter equipment which prevents the engine To avoid faults in icy weather: speed being exceeded irrespective of the gear selected. – ensure that the battery is always fully If the message “Check antipollution charged;…
-
Page 93: Selecting Reverse Gear
GEAR LEVER/HANDBRAKE Handbrake To release: Pull lever 4 slightly, press button 3 and then lower the lever to the floor. To apply: Pull lever 4 upwards and make sure the vehicle is immobilised. Selecting reverse gear Make sure that the hand- brake is properly released Vehicles with manual gearbox: follow when driving (red indicator…
-
Page 94: Assisted Parking Brake
ASSISTED PARKING BRAKE (1/4) – with the engine switched off (eg. when the engine stalls): when a front door is opened. In this case, pull and release switch 3 to apply the assisted parking brake. Automatic releasing of the assisted parking brake The brake will be released as soon as the vehicle starts and accelerates.
-
Page 95: Manual Operation
– select a gear (manual gearbox) or position P (automatic gearbox); – depress the brake pedal and press switch 3 at the same time; – remove the RENAULT card from the card reader. When the driver’s door is opened, the Manual operation Brief stop message “Apply parking brake”…
-
Page 96
ASSISTED PARKING BRAKE (3/4) Automatic release is reactivated when the driver’s door is closed and the gear lever moved to position P or N before moving to D or R. Versions with an automatic gearbox If the driver’s door is open or not prop- erly closed, automatic release is deac- tivated for safety reasons if the gear lever is not at P or N (to prevent the… -
Page 97
ASSISTED PARKING BRAKE (4/4) – If there is a serious fault, the mes- © – If there is a fault, the warning sage “Parking brake fault” is dis- light on the instrument panel comes played on the instrument panel on accompanied by the message ©… -
Page 98: Eco-Driving
ECO-DRIVING Indicator 1 light comes up according to Adjusting the settings Journey record the driving ways or conditions and its Once the engine is switched off, you Press one of buttons 2 or 3 to select a color is changing gradually from orange will see “Journey record”…
-
Page 99: Engine Adjustments
ADVICE: antipollution, fuel economy and driving (1/3) Aiding fuel economy By virtue of its design, moderate fuel Have your vehicle adjusted and consumption and initial settings, your checked by an approved Dealer, in ac- Depending on the vehicle, in order to vehicle conforms to current antipol- cordance with the instructions given in optimise consumption, an indicator light…
-
Page 100
ADVICE: antipollution, fuel economy and driving (2/3) This warning light on the in- – Do not try to maintain the same Ä strument panel will indicate if speed up a hill, accelerate no more there are any faults in the system: than you would on the level. -
Page 101
ADVICE: antipollution, fuel economy and driving (3/3) – In vehicles fitted with air condi- tioning, it is normal to observe an increase in fuel consumption (es- pecially in urban conditions) when it is used. For vehicles fitted with manual air conditioning, switch off the system when it is not required. -
Page 102: Environment
ENVIRONMENT Emissions Your vehicle has been designed with – At the end of the vehicle’s service respect for the environment in mind for life, it should be sent to approved Your vehicle has been designed to its entire service life: during production, centres to ensure that it is recycled.
-
Page 103: Tyre Pressure Monitor
TYRE PRESSURE MONITOR (1/3) If the vehicle is equipped with the func- The pressures must be adjusted tion, this system monitors the tyre pres- when the tyres are cold. sure. Refer to the information on “Tyre pres- sures”. Operating principle If tyre pressures cannot be checked when the tyres are cold, increase the Each wheel (except for the emergency…
-
Page 104: Emergency Spare Wheel
TYRE PRESSURE MONITOR (2/3) Emergency spare wheel The emergency spare wheel has no sensor and cannot therefore be de- tected by the system. When it is fitted to the vehicle, the mes- sage “Tyre pressure sensors absent” is displayed on the instrument panel. Replacing wheels/tyres This operation requires specific equip- ment (wheels, tyres, wheel trims, etc.).
-
Page 105
TYRE PRESSURE MONITOR (3/3) Operating faults If there are any anomalies during inflation, the following messages will appear on the instrument panel to inform you: Examples of selections Interpreting the display selected The tyre pressure is not suitable for the driving speed. Slow down or inflate all four tyres to motorway pressure (refer to the information on “Tyre pres- “Inflate tyres for motorway”… -
Page 106: Driving Correction Devices And Aids
DRIVING CORRECTION DEVICES AND AIDS (1/4) ABS (anti-lock braking Depending on the vehicle, they may comprise: system) Under heavy braking, the ABS prevents – the (anti-lock braking the wheels from locking, allowing the system); stopping distance to be managed and –…
-
Page 107: Emergency Brake Assist
DRIVING CORRECTION DEVICES AND AIDS (2/4) Emergency brake assist Operating faults: Operating faults When the system detects an operat- This is an additional system to ABS © ing fault, the message “Check brak- – lit on the instru- which helps reduce vehicle stopping ing system”…
-
Page 108: Electronic Stability Control
DRIVING CORRECTION DEVICES AND AIDS (3/4) Electronic stability control Understeer control Operating principle ESC with understeer control This system optimises the action of the The system uses wheel sensors to and traction control ASR ESC in the case of pronounced under- constantly measure and compare the steering (loss of front axle road hold- speed of the drive wheels and detect…
-
Page 109
DRIVING CORRECTION DEVICES AND AIDS (4/4) The message “Traction control off” ap- pears on the instrument panel to warn you. The ASR is an additional safety system. It is not advisable to drive with the func- tion disabled. Correct this as soon as possible by pressing switch 1 again. -
Page 110
CRUISE CONTROL — SPEED LIMITER: limiter function (1/3) The speed limiter function helps you Controls Switching on stay within the driving speed limit that 1 Main “On/Off” switch. Press switch 1 on the side showing you choose, known as the limit speed. Indicator light 6 comes on, lit orange, 2 Limit speed activation, storage and and the message “Speed limiter”… -
Page 111: Speed Limiter
CRUISE CONTROL — SPEED LIMITER: limiter function (2/3) Varying the limit speed Limited speed cannot be maintained When driving down a steep gradient, To vary the limit speed, press the system is unable to maintain the switch 2 (+) repeatedly to increase the limit speed: the stored speed will flash speed or switch 3 (-) to decrease.
-
Page 112
CRUISE CONTROL — SPEED LIMITER: limiter function (3/3) Recalling the limit speed If a speed has been stored, it can be re- called by pressing switch 5 (R). Putting the function on Switching off the function standby The speed limiter function is deac- tivated if you press switch 1: in this The speed limiter function is sus- case a speed is no longer stored. -
Page 113
CRUISE CONTROL — SPEED LIMITER: cruise control function (1/4) This function is an addi- tional driving aid. However, the function does not take the place of the driver. The cruise control function helps you to Controls Therefore, it can under no circum- maintain your driving speed at a speed stances replace the driver’s respon- that you choose, called the cruising… -
Page 114: Cruise Control
CRUISE CONTROL — SPEED LIMITER: cruise control function (2/4) Switching on Activating cruise control Driving At a steady speed (above 20 mph Once a cruising speed is stored and Press switch 1 on the side showing (30 km/ h) approximately) press the cruise control function is active, Indicator light 6 comes on, lit green,…
-
Page 115
CRUISE CONTROL — SPEED LIMITER: cruise control function (3/4) Exceeding the cruising speed The cruising speed may be exceeded at any time by depressing the accelera- tor pedal. While it is being exceeded, the cruising speed flashes on the in- strument panel. -
Page 116
CRUISE CONTROL — SPEED LIMITER: cruise control function (4/4) Returning to the cruising speed If a speed is stored, it can be recalled, once you are sure that the road condi- tions are suitable (traffic, road surface, weather conditions, etc.). With a ve- hicle speed above 20 mph (30 km/h), press switch 5 (R). -
Page 117: Parking Distance Control
PARKING DISTANCE CONTROL (1/3) Operating principle Ultrasonic sensors in the front or rear bumper measure the distance between the vehicle and an obstacle. This measurement is indicated by beeps which become more frequent the closer you come to the obstacle, until they become a continuous beep when the vehicle is approximately 30 centi- metres from the obstacle.
-
Page 118
PARKING DISTANCE CONTROL (2/3) Automatic activation/deactivation of Automatic activation/deactivation of front parking distance control rear parking distance control The system deactivates: The system deactivates: – when the vehicle speed is above ap- – when the vehicle speed is above ap- proximately 4 mph (6 km/h);… -
Page 119: Special Features
PARKING DISTANCE CONTROL (3/3) Prolonged deactivation of the You can adjust the volume of the parking distance control by selecting system “Parking sensor volume” in the vehicle You may permanently activate or deac- settings customisation menu. tivate the front or rear parking distance Under the following conditions, the control separately.
-
Page 120: Reversing Camera
REVERSING CAMERA (1/2) Note: make sure that the reversing camera is not obscured (by dirt, mud, snow, etc.). Operation Note: depending on the vehicle, cer- tain settings can be adjusted from the 2 Moving into reverse gear, the 1 camera touchscreen.
-
Page 121
REVERSING CAMERA (2/2) This gauge remains fixed and indicates the vehicle trajectory if the wheels are in line with the vehicle. This system is initially used with the aid of several gauges (mobile for trajectory and fixed for distance). When the red zone is reached, use the bumper image to stop accurately. -
Page 122: Blind Spot Warning
BLIND SPOT WARNING (1/2) This function is an addi- tional aid that indicates there is the other vehicle in This system notifies the driver when Indicator 2 the blind spot area. the other vehicle comes up in the blind Indicator 2 is located in driver side and spot.
-
Page 123
BLIND SPOT WARNING (2/2) First warning Operating faults Indicator 2 lights up when it detects a If the system detects a faults, indicator vehicle in the blind spot area. light on switch 3 flashes for 3 seconds accompanied by the message “Check Second warning Blind spot”. -
Page 124: Automatic Gearbox
AUTOMATIC GEARBOX (1/3) engine speed because the automatic system takes into account the vehicle load and road contour and adjusts itself to the particular driving style you have chosen. Economical driving When driving, leave the lever in posi- tion D, keeping the accelerator pedal lightly depressed to ensure automatic gear changes at comparatively low engine speeds.
-
Page 125
AUTOMATIC GEARBOX (2/3) Driving in manual mode Special circumstances – Vehicle not equipped with a trac- tion control system (ASR): on slip- With the selector lever in position D, – If the road contour and bends do pery roads or roads with low grip, to move the lever to the left. -
Page 126
AUTOMATIC GEARBOX (3/3) Parking the vehicle Operating faults When the vehicle is stopped, move the – when driving, if the “Check auto lever to position P while keeping your gearbox” message appears on the foot on the brake pedal. The gearbox instrument panel, it indicates a fault. -
Page 127: Your Comfort
Section 3: Your comfort Air Vents …………..Fragrance diffuser .
-
Page 128: Air Vents
AIR VENTS (1/2) 9 Front passenger footwell heater out- 1 Left-hand air vent lets 5 Centre air vents 2 Left-hand side window demister out- 10 Centre air vents for the rear seats lets 6 Air conditioning control panel 11 Air conditioning control panel for the 3 Windscreen demister outlet 7 Right-hand side window demister rear seats…
-
Page 129: Air Flow
AIR VENTS (2/2) Air flow Direction To remove bad odours from your ve- hicles, only use the systems designed Turn control knob 1. Right/left: move tabs 2 to the right or for this purpose. Consult an approved left. Up: maximum air flow Dealer.
-
Page 130: Fragrance Diffuser
FRAGRANCE DIFFUSER Fragrance diffuser intensity Precautions adjustment – Capsules approved by our Technical Department must be used. Press button 4 to adjust the diffuser in- tensity. The integrated indicator light – Do not strip or refill the fragrance dif- comes on to show you the intensity se- fuser capsule.
-
Page 131: Air Ionizer
AIR IONIZER – CLEAN: removes harmful matter from the air; – RELAX: provides a clean and relax- ing driving environment by emitting ions; – Stop (all the integrated indicator lights go out). Selecting the operating mode With the air conditioning on, press button 1 to select one of the three fol- lowing modes.
-
Page 132: Manual Air Conditioning/Heating System
MANUAL AIR CONDITIONING — HEATING SYSTEM (1/3) Modifying the air distribution mode Select the desired mode by pressing button 2 The entire air flow is directed ½ towards the front and rear centre air vents. The air flow is distributed be- ¾…
-
Page 133
MANUAL AIR CONDITIONING — HEATING SYSTEM (2/3) Air recirculation operates as follows: – isolating the vehicle from the exter- nal atmosphere (driving in polluted areas, etc.); – lowering the passenger compart- ment temperature as quickly as pos- sible. Stopping the system Position 0 (display A empty) The ventilation speed is zero;… -
Page 134
MANUAL AIR CONDITIONING — HEATING SYSTEM (3/3) Adjusting the air temperature Set the required temperature by press- ing button 9. If the temperature is in- creased, the number of blocks on dis- play B also increases. “Clear View” function You may reduce the ventilation speed (possibility of noise in the passenger Press button 6. -
Page 135: Automatic Climate Control
AUTOMATIC CLIMATE CONTROL (1/6) Automatic mode (AUTO) Press button 3. The indicator light on the button comes on. The automatic climate control system guarantees comfort in the passen- ger compartment and good visibility (except in the event of extreme condi- tions), whilst optimising consumption.
-
Page 136
AUTOMATIC CLIMATE CONTROL (2/6) Adjusting the air temperature Adjusting the rear air in the driver, passenger or rear seats in- dependently of one another. temperature Press button 1 to adjust the tempera- (depending on the vehicle) DUAL operation mode is started (in- ture on the driver’s side and button 6 tegrated indicator light on) or stopped for the passenger side. -
Page 137
AUTOMATIC CLIMATE CONTROL (3/6) The displayed temperature values show a comfort level. However, when the vehicle is started in hot or cold weather and the set temperature is lowered or raised, it is not possible for this tem- perature to be rapidly reached, re- gardless of the value displayed. -
Page 138
AUTOMATIC CLIMATE CONTROL (4/6) “Clear View” function Press button 10. The integrated indica- tor light in the button comes on. This function rapidly demists the wind- screen, rear screen and the door mir- rors (depending on the vehicle). The air conditioning and rear screen de-icer functions are activated automatically. -
Page 139
AUTOMATIC CLIMATE CONTROL (5/6) The air flow is distributed be- × tween the windscreen and side window demister outlets, and the foot- wells to prevent condensation forming. The air flow is directed towards Ø the windscreen and side window demister outlets, to prevent condensation forming. -
Page 140
AUTOMATIC CLIMATE CONTROL (6/6) Automatic air recirculation Press button 2. The integrated indicator light comes on. The sensor located at the air intake de- tects atmospheric pollution, which au- tomatically switches air recirculation on or off, depending on the ambient level of gas. -
Page 141: Maintenance
AIR CONDITIONING: INFORMATION AND ADVICE ON USE Operating faults Fuel consumption Advice on use As a general rule, contact your ap- You will normally notice an increase proved Dealer in the event of an op- Under certain circumstances (heat- in fuel consumption (especially erating fault: ing and air conditioning system off, when driving in town) when the air…
-
Page 142: Electric Windows/Electric Panoramic Sunroof
Driver’s responsibility Never leave your vehicle with the Electric windows One-touch mode RENAULT card inside and never Depending on the vehicle, this mode leave a child (or a pet) unsuper- Press or pull the switch to raise or lower works in addition to the operation of the a window to the desired height (the rear vised, even for a short while.
-
Page 143: Special Note
(some- body’s fingers, etc.) it stops and then moves back several centimetres. Driver’s responsibility Never leave your vehicle with the RENAULT card inside and never leave a Sunroof blind Tilting the sunroof child (or a pet) unsupervised, even…
-
Page 144: Precautions During Use
When you lock the doors from the out- side, press the locking button on the If the sunroof will not close, check RENAULT card twice in quick suc- that there are no obstacles and move cession, or the driver’s door button…
-
Page 145: Sun Visor/Sun Blinds
SUN VISOR/SUN BLINDS Front sun visor Side sun blind Rear sun blind (depending on the vehicle) (depending on the vehicle) Lower sun visor 1 over the windscreen or unclip it and turn it over side window. Pull the sun blinds upwards, holding Pull the sun blinds upwards, holding them by tab 4 to secure them in hook 5 them by tab 6 until hooks 7 engage in…
-
Page 146: Interior Lighting
Press the same switch again to turn it comes on when you open a door is stopped, when the RENAULT card off. and goes out a few seconds after it is removed or when the vehicle is un- is closed.
-
Page 147
Light 6 also comes on for a few seconds when the engine is stopped, when the RENAULT card is removed or when the vehicle is un- locked with the RENAULT card. 3.21… -
Page 148: Passenger Compartment Storage/Fittings
PASSENGER COMPARTMENT STORAGE — FITTINGS (1/4) Door pockets 1 Dashboard storage Sunglasses holder 3 compartment 2 (depending on the vehicle) These can be used for storing books, road maps, etc. To open the sunglasses holder, press 3. Ensure that no hard, heavy Do not hang any heavy and/ or pointed objects are or sharp objects which may…
-
Page 149
PASSENGER COMPARTMENT STORAGE — FITTINGS (2/4) Sun visor storage 4 Centre console storage Front seat storage compartment with two layers compartments 10 It can be used to hold motorway passes. (depending on the vehicle) (depending on the vehicle) It can be used to hold magazines or Centre console storage Using the upper layer road maps, etc. -
Page 150: Clothes Hooks
PASSENGER COMPARTMENT STORAGE — FITTINGS (3/4) Cup holder 11 Clothes hooks 13 Glove box Pull handle 15 to open it. Central rear armrest 12 Grab handle 14 Depending on the vehicles, the glove box is locked and unlocked using the Lower the central rear armrest.
-
Page 151
PASSENGER COMPARTMENT STORAGE — FITTINGS (4/4) Rear door storage compartment 16 It can be used to hold a beverage. Ensure that no hard, heavy or pointed objects are placed in the “open” stor- age compartments in such a way that they may fall onto pas- sengers during sudden turning or braking. -
Page 152: Cigar Lighter/Accessories Socket/Ashtray
CIGAR LIGHTER, ACCESSORIES SOCKET, ASHTRAY Accessories socket 5 (depending on the vehicle) The accessories socket is designed for connecting accessories with a maxi- mum power rating of 120 Watts (volt- age: 12V, 10A). Cigar lighter 2 Ashtray 4, 7 (depending on the vehicle) Open cover 1 by pushing it in the direc- tion shown by the arrow.
-
Page 153: Rear Headrests
REAR HEADRESTS To refit the headrest Insert the headrest rods into the sleeves, and lower the headrest to the first notch. Storage position A Press tab 1 and lower the headrest completely. When the headrest is completely lowered (position A), this is for stor- age only.
-
Page 154: Rear Bench Seat
REAR BENCH SEAT When refitting the seat- The seatbacks can be folded down in To put the seatback back in position, back, make sure it is cor- order to transport large objects. raise it then check that it is locked cor- rectly locked in place.
-
Page 155: Luggage Compartment
LUGGAGE COMPARTMENT To open To close Opening manually from inside the vehicle – Press the right side of switch 1 to Lower the trunk lid using handle 3 open the trunk lid. inside the trunk lid to help you. Check Special note: that the trunk lid is closed securely.
-
Page 156: Storage Compartments
STORAGE COMPARTMENTS Storage compartments A Always position objects being trans- ported so that the heaviest items are resting against the back of the rear bench seat. Do not place any objects, especially heavy or hard objects, on the parcel shelf. These may pose a risk to the vehicle occupants if the driver has to brake suddenly or if the vehi-…
-
Page 157: Transporting Objects/Towing
TRANSPORTING OBJECTS/TOWING B = 1175 mm Permissible nose weight, maximum permissible towing weight, braked and unbraked: refer to the information on “Weights” in Section 6. Transporting objects in the luggage compartment Always place the objects to be trans- ported so that their largest side rests against the back of the rear bench Always position the heavi- seat, for normal loads (Example A), or…
-
Page 158: Navigation System
MULTIMEDIA EQUIPMENT Navigation system The equipment described below may or may not be fitted to the vehicle, and its location may vary, depending on the vehicle navigation system version. 1 Display; 2 Radio; 3 Central control; 4 Auxiliary input; 5 Steering column controls; 6 Microphone.
-
Page 159
Section 4: Maintenance Bonnet …………… . Engine oil level: general information . -
Page 160: Bonnet
BONNET Closing the bonnet Before closing the bonnet, check that nothing has been left in the engine compartment which may prevent it from operating correctly (tools, sheets of paper, cloth, etc.) Hold the middle of the bonnet and guide it down to 30 cm above the closed posi- tion, then release.
-
Page 161: Engine Oil Level: General Information
ENGINE OIL LEVEL: general information (1/2) It is normal for an engine to use oil for lubrication and cooling of moving parts and it is normal to top up the level be- tween oil changes. Frequency: check the oil level from time to time and always before any Oil level long journey to avoid the risk of…
-
Page 162
ENGINE OIL LEVEL: general information (2/2) Maximum engine oil level exceeded. The oil level should only be read with the dipstick as explained above. If the oil level exceeds the maximum level, do not start your vehicle and contact an approved Dealer. Consult your approved Dealer at once if you notice an abnormal or repeated drop in any of the fluid… -
Page 163: Engine Oil Level: Topping Up/Filling
ENGINE OIL LEVEL: topping up and filling (1/3) 2.0 16V 2.5 V6 / 3.5 V6 Topping up/filling – Open cap 1. – Add oil to top up the level (as a guide, The engine oil must be topped up and the capacity between the minimum filled on level ground, with the engine and maximum reading on dipstick 2…
-
Page 164
ENGINE OIL LEVEL: topping up and filling (2/3) 1.5 dCi 2.0 dCi V6 dCi Topping up/filling – Open cap 1. – Add oil to top up the level (as a guide, The engine oil must be topped up and the capacity between the minimum filled on level ground, with the engine and maximum reading on dipstick 2 switched off and cold (for instance,… -
Page 165: Engine Oil Change
ENGINE OIL LEVEL: topping up and filling ENGINE OIL CHANGE (3/3)/ Oil change explained in the paragraph “Topping up and filling” in section 4. Service interval: refer Maintenance Service Document for Engine oil grade your vehicle. Refer to the Maintenance Service Document for your vehicle.
-
Page 166: Levels
LEVELS (1/3) Power-assisted steering oil Checking intervals The power-assisted steering oil level on Check the coolant level regularly reservoir 2 must be between the MINI (very severe damage is likely to be and MAXI marks. caused to the engine if it runs out of Fill up before the level reaches the MINI coolant).
-
Page 167: Brake Fluid
LEVELS (2/3) Fluid level Topping up It is normal for the level to drop as the After any operation on the hydraulic cir- brake shoes become worn, but it must cuit, a specialist must replace the fluid. never drop lower than the “MINI” warn- Only use fluids approved by our ing line on reservoir 3.
-
Page 168: Windscreen/Headlight Washer Reservoir
LEVELS /FILTERS (3/3) Filters The replacement of filter elements (air filter, cabin filter, diesel fuel filter, etc.) is scheduled in the maintenance opera- tions for your vehicle. Replacement intervals for filter el- ements: refer to the Maintenance Service Document for your vehicle. Windscreen/headlight washer reservoir Topping up…
-
Page 169: Battery
BATTERY Depending on the vehicle, the battery is Replacing the battery in the engine compartment or in the lug- To replace the battery, you must con- gage compartment. tact an approved Dealer. It is always maintenance-free. Depending on the vehicle, A system continuously checks the battery charge status.
-
Page 170: Tyre Pressure
TYRE PRESSURE Tyre safety and use of snow chains Refer to the information on “Tyres” in Section 5 for the servicing con- ditions and, depending on the ver- sion, the use of chains. Special note For vehicles used fully laden (maximum permissible all-up…
-
Page 171: Bodywork Maintenance
BODYWORK MAINTENANCE (1/2) What you should not do You should A well-maintained vehicle will last longer. It is therefore recommended to Do not degrease or clean mechani- Wash your car frequently, with the maintain the exterior of the vehicle reg- cal components (e.g.
-
Page 172
BODYWORK MAINTENANCE (2/2) Vehicles with a matte paint Using a roller type car wash Respect local regulations about wash- ing vehicles (e.g. do not wash your ve- finish Return the windscreen wiper stalk to hicle on a public highway). the Park position (refer to the informa- This type of paint requires certain pre- Observe the vehicle stopping distances tion on the “Windscreen washer, wiper”… -
Page 173: Interior Trim Maintenance
INTERIOR TRIM MAINTENANCE (1/2) Glass instrument panel Textiles (seats, door trim, etc) A well-maintained vehicle will last longer. It is therefore recommended to (e.g. instrument panel, clock, exterior Vacuum-clean the textiles regularly. maintain the interior of the vehicle regu- temperature display, radio display, etc.) larly.
-
Page 174
INTERIOR TRIM MAINTENANCE (2/2) Removal/replacing removable You should not: equipment originally fitted in You are strongly advised not to po- the vehicle sition objects such as deodorants, scents, etc. near air vents, as this could If you need to remove equipment in damage your dashboard trim. -
Page 175: Practical Advice
RENAULT card: battery ……..
-
Page 176: Puncture
PUNCTURE In the event of a puncture, Special note: The Tyre Pressure Monitor function depending on the vehicle, does not check the emergency spare you will have: wheel (the wheel replaced by the emer- An emergency spare wheel or tyre in- gency spare wheel disappears from the flation kit (refer to the information on the instrument panel display).
-
Page 177: Tyre Inflation Kit
TYRE INFLATION KIT (1/3) Do not attempt to use the The kit is only approved for inflation kit if the tyre has inflating the tyres of the ve- been damaged as a result hicle originally equipped of driving with a puncture. with the kit.
-
Page 178
TYRE INFLATION KIT (2/3) – Take out compressor 4 and bottle 1 If a minimum pressure of 1.8 bar is 4 5 6 located under the luggage compart- not reached after 15 minutes, repair ment carpet; is not possible; do not drive the ve- –… -
Page 179
TYRE INFLATION KIT (3/3) Precautions when using the Affix the driving recommendation label, located under bottle 1, to the dashboard where it can easily be The kit should not be operated for more seen by the driver; than 15 consecutive minutes. –… -
Page 180: Tool Kit (Jack — Wheelbrace, Etc.)
TOOL KIT/WHEEL TRIM — WHEEL 2 Towing hitch Refer to the information on “Towing” in Section 5. 3 Screwdriver 4 Hubcap tool This tool is used to remove the wheel trims. 5 Nut wrench 6 Wheelbrace The tool kit is located under the lug- Wheel trim gage compartment carpet (tools varies Remove it using hubcap tool 4 by en-…
-
Page 181: Changing A Wheel
CHANGING A WHEEL (1/2) Vehicles equipped with jack and – start cranking the jack using handle 4 wheel wrench to position the jack head in the centre of plate mounting 2 (which should be If necessary, remove the wheel trim. pushed slightly under the vehicle).
-
Page 182
CHANGING A WHEEL (2/2) – undo the bolts and take off the wheel. – fit the emergency spare wheel on the central hub and turn it to locate the mounting holes in the wheel and the hub. If bolts are supplied with the emergency spare wheel, only use these bolts for the emergency spare wheel. -
Page 183: Tyres
TYRES (1/3) Tyre and wheel safety When the tyre tread has been worn to the level of the wear indicators, they The tyres are the only point of contact become visible 2: it is then necessary between the vehicle and the road. It is to replace your tyres because the tread therefore imperative that they are kept rubber is no more than 1.6 mm deep,…
-
Page 184
TYRES (2/3) Tyre Pressure Fitting new tyres Pressures should be checked when the tyres are cold; ignore higher pressures Comply with the specified tyre pres- which may be reached in hot weather sures (including the emergency spare or following a fast journey. wheel). -
Page 185
TYRES (3/3) Changing the position of the The maximum speed code for these “snow” tyres (for use in winter) may be wheels lower than the maximum speed for your It is strongly recommended that you do vehicle. It consists of several letters not change the position of the wheels. -
Page 186: Headlights (Changing Bulbs)
HALOGEN HEADLIGHTS: changing bulbs (1/2) Front side lights Turn cover D a quarter turn anticlock- wise, then unclip bulb holder 4, pulling it upwards to remove the bulb. Bulb type: W5W. Direction indicator lights Consult an approved Dealer. Type A Dipped beam/main beam (depending on the vehicle) headlights…
-
Page 187
HALOGEN HEADLIGHTS: changing bulbs (2/2) Front side lights Turn cover F a quarter turn anticlock- wise, then unclip bulb holder 10, pulling it upwards to remove the bulb. Bulb type: W5W. LED front side lights (depending on the vehicle) Consult an approved Dealer. Direction indicator lights 6 Consult an approved Dealer. -
Page 188
XENON HEADLIGHTS: changing bulbs (1/2) Front side lights Turn cover D a quarter turn anticlock- wise, then unclip bulb holder 2, pulling it upwards to remove the bulb. Bulb type: W5W. Direction indicator lights Consult an approved Dealer. Type A Main beam headlights A special mounting is re- (Depending on the vehicle) -
Page 189
XENON HEADLIGHTS: changing bulbs (2/2) Dipped beam/main beam headlights E Never remove cover A. Fire hazard. LED front side lights Consult an approved Dealer. Direction indicator lights F Consult an approved Dealer. Type B A special mounting is re- (Depending on the vehicle) quired to fit this type of Because some components (the bat- headlight, it is forbidden to… -
Page 190
HEADLIGHTS: fog lights, additional lights Rear fog lights Refer to Section 5 “Rear lights and indi- cator lights: changing bulbs”. Additional lights If you wish to fit fog lights or long range headlights to your vehicle, consult an approved Dealer. Front fog lights 1 Changing bulbs Consult an approved Dealer. -
Page 191: Rear And Side Lights: Changing Bulbs
REAR AND SIDE LIGHTS: changing bulbs (1/5) Type A Turn bulb holder 3 a quarter turn anti- LED brake light 4 clockwise, then unscrew the bulb in the (Depending on the vehicle) Consult an approved Dealer. same way while pressing down on it. Bulb type: PY21W.
-
Page 192
REAR AND SIDE LIGHTS: changing bulbs (2/5) Type A Undo bulb holder 6/7 a quarter turn an- ticlockwise, then remove the bulb by (Depending on the vehicle) pulling it upwards. Reversing lights 7 Reversing lights/rear fog lights Bulb type: W16W. Rear fog lights 6 Remove the clip from the inside of the trunk lid using a flat-blade screwdriver,… -
Page 193
REAR AND SIDE LIGHTS: changing bulbs (3/5) Type B Turn bulb holder 8/9 a quarter turn anti- LED brake lights/side clockwise, then unscrew the bulb in the (Depending on the vehicle) lights 10 same way while pressing down on it. Consult an approved Dealer. -
Page 194
REAR AND SIDE LIGHTS: changing bulbs (4/5) Type B Undo bulb holder 13 a quarter turn an- ticlockwise, then remove the bulb by (Depending on the vehicle) pulling it upwards. Rear fog lights Rear fog lights 13 Remove the clip from the inside of the Bulb type: P21W. -
Page 195
REAR AND SIDE LIGHTS: changing bulbs (5/5) High-level LED brake Number plate lights 15 Side direction indicator lights 14 lights 17 – Unclip light 15 by pressing tab 16 (Depending on the vehicle) using a flat-blade screwdriver type Consult an approved Dealer. tool. -
Page 196: Interior Lights: Changing Bulbs
INTERIOR LIGHTS: changing bulbs (1/3) Courtesy light Front door lights Courtesy mirror light 3 Unclip lens 1 using a flat-blade screw- Unclip light 2 using a flat-blade screw- Unclip the light cover using a flat-blade driver type tool under the courtesy light. driver type tool under each side of the screwdriver type tool under the cover.
-
Page 197: Luggage Compartment Light
INTERIOR LIGHTS: changing bulbs (2/3) Glove box light 4 Luggage compartment light Disconnect the light. Press tab 6 to release lens 8 and Consult an approved Dealer. Unclip light 5 using a flat-blade screw- access bulb 7. driver type tool under the left-hand side of the light.
-
Page 198
INTERIOR LIGHTS: changing bulbs (3/3) Front floor lights 9 There are lights under the glove box or the steering column. Remove the bulb concerned; Bulb type: W5W. The bulbs are under pres- sure and can break when replaced. Risk of injury. 5.24… -
Page 199: Fuses
To replace a fuse, stop the engine, event of an item of equipment using Obtain an emergency kit containing remove the RENAULT card from its an excessive amount of current. a set of spare bulbs and fuses from reader and switch off all electrical an approved Dealer.
-
Page 200
FUSES (2/2) Allocation of fuses (DEPENDING ON THE EQUIPMENT LEVEL) Symbol Allocation Symbol Allocation Interior lighting Brake lights ß Radio amplifier Interior rear-view mirror Rear electric windows Heated rear screen Radio î Horn Ì Instrument panel Child safety ABS/ESC Body Control Module Some accessories are protected by Fuel filler flap fuses located in the engine compart-… -
Page 201: Connecting A Battery Charger
BATTERY: troubleshooting (1/2) To avoid all risk of sparks: Connecting a battery charger Starting the vehicle using the – Ensure that any consumers are battery from another vehicle The battery charger must be com- switched off before disconnecting or patible with a battery with a nominal If you have to use the battery from an- reconnecting the battery.
-
Page 202
BATTERY: troubleshooting (2/2) Battery in the luggage compartment (V6 engines) Use the terminals in the engine com- partment. Turn screw 7 one quarter of a turn clockwise then pull cover 8 upwards to access the (+) terminal 9. Attach the positive lead A to the (+) terminal 9 then to the (+) terminal 3 of the battery supplying the current. -
Page 203: Replacing The Battery
(insert the vicinity of the vehicle; the message replace the RENAULT card battery, the RENAULT card in the card reader) will disappear. press button 1 pulling on emergency and lock/unlock the vehicle (refer key 2, then unclip the cover 3 using to Section 1 “Locking/unlocking the…
-
Page 204: Accessories
ACCESSORIES Electrical and electronic accessories Before installing this type of accessory, make sure it is compatible with your vehicle. You can get advice from an au- thorised dealer. Connect accessories with a maximum power of 120 watts only. Fire hazard. No work may be carried out on the vehicle’s electrical or radio circuits, except by authorised dealers: an incorrectly connected system may result in damage being caused to the electrical equipment and/or the components connected to it.
-
Page 205: Wiper Blades
WIPER BLADES Check the condition of the wiper blades. You are responsible for their service life: – Clean the blades and the wind- screen regularly with soapy water. – do not use them when the wind- screen is dry; – free them from the windscreen when they have not been used for a long time.
-
Page 206: Towing: Breakdown
If your vehicle is the towing or R for vehicles with automatic trans- vehicle, do not exceed the maximum missions), insert the RENAULT card in towing weight for your vehicle (refer the card reader then press the engine to the information on “Weights” in start button for two seconds.
-
Page 207
TOWING: breakdown (2/2) – Use a rigid towing bar. If a rope or cable is used (where the law allows this), the vehicle being towed must be able to brake. – A vehicle must not be towed if it is not fit to be driven. -
Page 208: Operating Faults
Using the RENAULT card POSSIBLE CAUSES WHAT TO DO The RENAULT card does not lock or Card battery is flat. Replace the battery. You can still lock/ unlock the doors. unlock and start your vehicle (refer to the information on “Locking/unlocking the…
-
Page 209
Starting conditions are not ful- Refer to the information on “Starting/stopping the filled. engine” in Section 2. The hands-free RENAULT card Insert the card in the card reader in order to start does not work. the engine. Refer to the information on “Starting/stopping the engine”… -
Page 210
OPERATING FAULTS (3/5) On the road POSSIBLE CAUSES WHAT TO DO Vibrations. Tyres not inflated to correct pres- Check the tyre pressures: if this is not the sures, incorrectly balanced or dam- problem, have them checked by an ap- aged. proved dealer. -
Page 211
OPERATING FAULTS (4/5) On the road POSSIBLE CAUSES WHAT TO DO Steering becomes heavy. Assistance overheating. Consult an approved dealer. The engine overheats. The coolant Engine cooling fan not working. Stop the vehicle, switch off the engine and temperature indicator is in the warn- contact an approved dealer. -
Page 212
OPERATING FAULTS (5/5) Electrical equipment POSSIBLE CAUSES WHAT TO DO The wipers do not work. Wiper blades stuck. Free the blades before using the wipers. Faulty electrical circuit. Consult an approved dealer. The wiper does not stop. Faulty electrical controls. Consult an approved dealer. -
Page 213: Technical Specifications
Section 6: Technical specifications Vehicle identification plates …………Engine identification plates .
-
Page 214: Vehicle Identification Plates
VEHICLE IDENTIFICATION PLATES The information shown on the ve- 5 Rear axle Maximum permissible hicle identification plate should be weight. quoted on all correspondence or 6 Technical specifications of vehicle. orders. 7 Vehicle paint reference. 8 Equipment level. Vehicle identification plate A 9 Vehicle type.
-
Page 215: Engine Identification Plates
ENGINE IDENTIFICATION PLATES (1/2) 2.0 16V The information on the engine plate (or label) C should be quoted on all your correspondence or orders. (Location varies depending on engine) 1 Engine type. 2 Engine suffix. 3 Engine number. 2.5 V6 / 3.5 V6…
-
Page 216
ENGINE IDENTIFICATION PLATES (2/2) 1.5 dCi 2.0 dCi The information on the engine plate (or label) C should be quoted on all your correspondence or orders. (Location varies depending on engine) 1 Engine type. 2 Engine suffix. 3 Engine number. V6 dCi… -
Page 217: Dimensions (In Metres)
DIMENSIONS (in metres) 1,035 2,762 1,100 1,565 4,897 1,492* 1,562 1,832 Unladen…
-
Page 218: Engine Specifications
ENGINE SPECIFICATIONS Versions 2.0 16V 2.5 V6 3.5 V6 1.5 dCi 2.0 dCi V6 dCi Engine type (see engine plate) Cubic capacity (cc) 1997 2495 3498 1461 1995 2993 It is essential that you use unleaded petrol of the octane rating stated on the label inside the fuel filler flap.
-
Page 219: Weights
WEIGHTS (in kg) The weights indicated for a basic vehicle without options: they vary depending on the your vehicle’s equipment. Consult your approved Dealer. Maximum permissible all-up weight (MMAC) Weights are indicated on the vehicle identification plate (refer to Total train weight (MTR) the information on “Vehicle identification plates”…
-
Page 220: Replacement Parts And Repairs
If you always fit genuine RENAULT parts to your vehicle, you will ensure that it performs well. Furthermore, repairs carried out within the manufacturer’s Network using original parts are guaranteed according to the conditions set out on the reverse of the…
-
Page 221: Service Sheets
SERVICE SHEETS (1/6) VIN: ……………… Date: Miles (Km): Invoice number: Comments/miscellaneous Type of operation: Stamp Service □ ……..□ Anti-corrosion check: OK □ Not OK* □ *See specific page Date: Miles (Km): Invoice number: Comments/miscellaneous Type of operation: Stamp Service □…
-
Page 222
SERVICE SHEETS (2/6) VIN: ……………… Date: Miles (Km): Invoice number: Comments/miscellaneous Type of operation: Stamp Service □ ……..□ Anti-corrosion check: OK □ Not OK* □ *See specific page Date: Miles (Km): Invoice number: Comments/miscellaneous Type of operation: Stamp Service □… -
Page 223
SERVICE SHEETS (3/6) VIN: ……………… Date: Miles (Km): Invoice number: Comments/miscellaneous Type of operation: Stamp Service □ ……..□ Anti-corrosion check: OK □ Not OK* □ *See specific page Date: Miles (Km): Invoice number: Comments/miscellaneous Type of operation: Stamp Service □… -
Page 224
SERVICE SHEETS (4/6) VIN: ……………… Date: Miles (Km): Invoice number: Comments/miscellaneous Type of operation: Stamp Service □ ……..□ Anti-corrosion check: OK □ Not OK* □ *See specific page Date: Miles (Km): Invoice number: Comments/miscellaneous Type of operation: Stamp Service □… -
Page 225
SERVICE SHEETS (5/6) VIN: ……………… Date: Miles (Km): Invoice number: Comments/miscellaneous Type of operation: Stamp Service □ ……..□ Anti-corrosion check: OK □ Not OK* □ *See specific page Date: Miles (Km): Invoice number: Comments/miscellaneous Type of operation: Stamp Service □… -
Page 226
SERVICE SHEETS (6/6) VIN: ……………… Date: Miles (Km): Invoice number: Comments/miscellaneous Type of operation: Stamp Service □ ……..□ Anti-corrosion check: OK □ Not OK* □ *See specific page Date: Miles (Km): Invoice number: Comments/miscellaneous Type of operation: Stamp Service □… -
Page 227: Anticorrosion Check
ANTICORROSION CHECK (1/5) If the continuation of the warranty is subject to repair, it is indicated below. VIN: …………Corrosion repair operation to be carried Stamp out: Date of repair: Repair to be carried out: Stamp Date of repair: Repair to be carried out: Stamp Date of repair: 6.15…
-
Page 228
ANTICORROSION CHECK (2/5) If the continuation of the warranty is subject to repair, it is indicated below. VIN: …………Corrosion repair operation to be carried Stamp out: Date of repair: Repair to be carried out: Stamp Date of repair: Repair to be carried out: Stamp Date of repair: 6.16… -
Page 229
ANTICORROSION CHECK (3/5) If the continuation of the warranty is subject to repair, it is indicated below. VIN: …………Corrosion repair operation to be carried Stamp out: Date of repair: Repair to be carried out: Stamp Date of repair: Repair to be carried out: Stamp Date of repair: 6.17… -
Page 230
ANTICORROSION CHECK (4/5) If the continuation of the warranty is subject to repair, it is indicated below. VIN: …………Corrosion repair operation to be carried Stamp out: Date of repair: Repair to be carried out: Stamp Date of repair: Repair to be carried out: Stamp Date of repair: 6.18… -
Page 231
ANTICORROSION CHECK (5/5) If the continuation of the warranty is subject to repair, it is indicated below. VIN: …………Corrosion repair operation to be carried Stamp out: Date of repair: Repair to be carried out: Stamp Date of repair: Repair to be carried out: Stamp Date of repair: 6.19… -
Page 232
6.20… -
Page 233: Alphabetical Index
ALPHABETICAL INDEX (1/4) changing a wheel…………5.7 – 5.8 ABS ……………2.22 → 2.25 changing gear …………2.40 → 2.42 accessories……………. 5.30 child restraint/seat ……….1.30 → 1.39 accessories socket …………3.26 child safety…………1.10, 1.30 → 1.39 additional methods of restraint …..1.23 → 1.26, 1.29 child seats…………..1.30 →…
-
Page 234
ALPHABETICAL INDEX (2/4) engine headrest…………..1.14, 3.27 technical specifications ……….6.6 heating system …………3.6 → 3.14 engine oil …………….4.3 horn ………………. 1.67 engine oil level …………4.3 – 4.4 hubcap tool …………….5.6 engine start/stop button ……….2.3 → 2.6 environment …………… -
Page 235
…………..4.9 RENAULT card coolant …………….4.8 battery …………….5.29 tanks and reservoirs: use ……………1.4 → 1.8 windscreen washer …………4.10 RENAULT card battery …………5.29 technical specifications ……6.2 → 6.5, 6.7 – 6.8 replacement parts …………..6.8 telephone …………….3.32… -
Page 236
ALPHABETICAL INDEX (4/4) temperature regulation ……….3.9 → 3.14 tool kit ……………… 5.6 towing breakdown …………5.32 – 5.33 towing a caravan …………..6.7 towing rings …………… 5.33 towing weights …………..6.7 transporting children ……….1.30 → 1.39 transporting objects in the luggage compartment ……..3.31 trip computer and warning system……1.51 →… -
Page 238
à999101057Rî í ò ä RENAULT S.A.S. SOCIÉTÉ PAR ACTIONS SIMPLIFIÉE AU CAPITAL DE 533 941 113 € / 13-15, QUAI LE GALLO 92100 BOULOGNE-BILLANCOURT R.C.S. NANTERRE 780 129 987 — SIRET 780 129 987 03591 / TÉL. : 0810 40 50 60…

- Manuals
- Brands
- Renault Manuals
- Automobile
- Latitude
- Handbook
-
Contents
-
Table of Contents
-
Bookmarks
Related Manuals for Renault Latitude
Summary of Contents for Renault Latitude
-
Page 1
LATITUDE DRIVER’S HANDBOOK… -
Page 2: Driving
Warning: to ensure the engine operates optimally, the use of a lubricant may be restricted to certain vehicles. Please ELF has developed a complete range of lubricants for RENAULT: refer to your maintenance document. engine oils manual and automatic gearbox oils…
-
Page 3
This handbook may also contain information about items of equipment to be introduced later in the model year. Throughout the manual, the “approved Dealer” is your RENAULT Dealer. Enjoy driving your new vehicle. -
Page 5: Table Of Contents
Sections Getting to know your vehicle ……. Driving …………..Your comfort …………Maintenance …………Practical advice ………… Technical specifications ……..Alphabetical index ……….
-
Page 7
RENAULT card: general information, use, deadlocking …….. -
Page 8: Doors
“Low card battery” appears on the in- for a short while. strument panel (refer to the informa- tion on the “RENAULT card: Battery” in They may pose a risk to themselves Section 5). or to others by starting the engine,…
-
Page 9
Once you have accessed the vehicle using the integrated key, replace it Do not store the RENAULT card in its housing in the RENAULT card, in an area where it may acciden- then insert the RENAULT card into tally become bent or damaged. The the card reader to start the vehicle. -
Page 10: Trunk Lid
30 seconds when button 3 is open or not properly closed, or if a is pressed. RENAULT card is still in the reader, the doors and luggage compartment Note: pressing button 3 again switches lock then quickly unlock and the hazard off the lighting.
-
Page 11: Unlocking The Vehicle
Note: if the RENAULT card is inside the luggage compartment, the vehi- On equipped vehicles, in addition to With the RENAULT card in zone 1, you cle locks/unlocks quickly. Ensure that the functions of the remote control may unlock the vehicle by placing your…
-
Page 12: Locking The Vehicle
RENAULT card. situation, no beep sounds and the hazard warning lights do not flash. Remote locking With the RENAULT card on you, and Locking using button 4 doors and trunk lid closed, move away With the doors and trunk lid closed…
-
Page 13
RENAULT card, remote locking and unlocking Even if the RENAULT card is still in in hands-free mode are deactivated. zone 6, the vehicle may lock if it is close to any (metal) object which is To reactivate the “hands-free”… -
Page 14
RENAULT cARd: deadlocking To deactivate deadlocking Unlock the vehicle using button 1 on the RENAULT card. The hazard warning lights flash once to indicate that the doors have been un- locked. To activate deadlocking If the vehicle is equipped with a dead-… -
Page 15
With the engine switched off, insert the RENAULT card in the reader to allow Opening from the outside Opening from the inside some of the electrical functions to op- erate. -
Page 16: Child Safety
OpENINg ANd cLOsINg ThE dOORs (2/2) driver’s responsibility when parking or stopping the vehicle safety of rear occupants Never leave an animal, child safety The driver can authorise child or adult who is not self-suffi- operation of the rear doors Ç…
-
Page 17: Locking And Unlocking The Doors
Section 1. In certain cases, the RENAULT card may not work, or its access area will be modified: – if the RENAULT card battery is weak, flat, etc. – if equipment operating on the same frequency as the card (mobile phones, etc.) is used;…
-
Page 18: Indicator Light
RENAULT card indicator light For example, in the event of a dis- Switch 4 has an integrated indicator charged battery or the RENAULT card light which shows whether or not the temporarily not working, etc. doors and trunk lid are locked: With the engine switched off and a –…
-
Page 19: Automatic Locking When Driving
AUTOmATIc LOckINg WhEN dRIVINg Activating/deactivating the Operating faults function If you experience an operating fault (no automatic locking, the indicator light in- Refer to the information on “Vehicle set- corporated in button 1 does not light up tings customisation menu” in Section 1; when trying to lock the doors and trunk “Auto door locking while driving”…
-
Page 20: Front Headrests
fRONT hEAdREsTs To remove the headrest Lift the headrest to its highest position. Press button 1 and lift the headrest to release it (tilt the seatback backwards if necessary). Note: when the headrest is removed, take care not to change the positions of rods 3.
-
Page 21
fRONT sEATs (1/2) tion, release the lever. Ensure it is cor- rectly locked in place. heated seats With the engine running, turn control 1 or 5 to the desired position, depending ð on the temperature required. An indicator light on the instrument panel comes on once one of the front seat heating system is operating. -
Page 22
fRONT sEATs (2/2) Adjusting the lumbar support on the driver’s seat (depending on the vehicle) For safety reasons, carry Lower handle 8 to increase the support out any adjustments when and lift to decrease it. Depending on the the vehicle is not being vehicle, you may adjust the electrically- driven. -
Page 23
When driving, it is not possible to – with the “hands-free” RENAULT card recall a driving position. detected or, depending on the vehi- cle, the RENAULT card in the card reader; – when the driver’s door is opened. storing your driving position Adjust the seat using switches 4 and 5 (see previous pages). -
Page 24
The seat returns to the normal position: – with the engine started; – when the RENAULT card is inserted in the card reader; – by pressing the engine Start/Stop switch, without depressing the pedal (if there is a “hands-free” RENAULT card). -
Page 25
dRIVER’s sEAT WITh mAssAgE fUNcTION driver’s seat with massage stopping the function function – Turn control 6 to the Off position. When the engine is running, you may – When you restart the system after use the massage function. If you start having stopped it, the air pressure the system, the air pressure drops com- drops completely before the mas-… -
Page 26: Seat Belts
sEAT BELTs (1/3) Before starting, adjust your driving Always wear your seat belt when traveling in your vehicle. You must also position and then have each occu- comply with the legislation of the par- pant adjust their seat belt to ensure ticular country you are in.
-
Page 27: Front Seat Belt
sEAT BELTs (2/3) ß front seat belt reminder warning light This lights up on the central display when the engine is started then, if the driver’s or front passenger’s seat belt (if this seat is occupied) is not fastened and the vehicle has reached approxi- mately 12 mph (20 km/h), it flashes and a bleep sounds for around 120 sec- onds.
-
Page 28
sEAT BELTs (3/3) The following information applies to the vehicle’s front and rear seat belts. – No modification may be made to the component parts of the restraint system (belts and seats and their mountings) fitted originally. – For special operations (e.g.: fitting child seats) contact an approved Dealer. -
Page 29: Methods Of Restraint In Addition To The Front Seat Belts
mEThOds Of REsTRAINT IN AddITION TO ThE fRONT sEAT BELTs (1/4) Depending on the vehicle, they may – Have the entire restraint comprise: system checked following – seat belt inertia reel pretension- an accident. ers; – No operation whatso- – lap belt pretensioners; ever is permitted on any part of the system (pretensioners, air –…
-
Page 30
mEThOds Of REsTRAINT IN AddITION TO ThE fRONT sEAT BELTs (2/4) Load limiters Air bags for driver and front passenger Above a certain level of impact force, this mechanism is used to limit the force The driver’s air bag is on the steering of the belt against the body so that it is wheel, and the passenger’s air bag on at an acceptable level. -
Page 31
mEThOds Of REsTRAINT IN AddITION TO ThE fRONT sEAT BELTs (3/4) Operation special features of the front air bag This system is only operational when the ignition is switched on. After a violent impact, it has two deploy- ment volumes and integrates a ventila- In a severe frontal impact, the air bags tion system: inflate rapidly. -
Page 32
mEThOds Of REsTRAINT IN AddITION TO ThE fRONT sEAT BELTs (4/4) All of the warnings below are given so that the air bag is not obstructed in any way when it is inflated and also to prevent the risk of serious injuries caused by items which may be dislodged when the air bag inflates. Warnings concerning the driver’s air bag –… -
Page 33: Methods Of Restraint In Addition To The Rear Seat Belts
mEThOds Of REsTRAINT IN AddITION TO ThE REAR sEAT BELTs force limiter Depending on the vehicle, they are – Have the entire restraint composed of: Above a certain severity of impact, this system checked following – seat belt pretensioners built into mechanism is used to limit the force of an accident.
-
Page 34: Side Protection Devices
sIdE pROTEcTION dEVIcEs side air bags These air bags are fitted to each front seat and, depending on the country, the rear side seats; the air bags are acti- vated at the sides of the seats (door side) to protect the occupants in the event of a severe side impact.
-
Page 35
AddITIONAL mEThOds Of REsTRAINT All of the warnings below are given so that the air bag is not obstructed in any way when it is inflated and also to prevent the risk of serious injuries caused by items which may be dislodged when the air bag inflates. The air bag is designed to complement the action of the seat belt. -
Page 36: Child Safety: General Information
chILd sAfETy: general information (1/2) carrying children Children, and adults, must be correctly seated and strapped in for all journeys. The children being carried in your vehi- cle are your responsibility. A child is not a miniature adult. Children are at risk of specific injuries as their muscles and bones have not yet fin- ished growing.
-
Page 37
chILd sAfETy: general information (2/2) Using a child seat The level of protection offered by the child seat depends on its ability to re- strain your child and on its installation. Incorrect installation compromises the protection it offers the child in the event of harsh braking or an impact. -
Page 38: Choosing A Child Seat Mounting
chILd sAfETy: choosing a child seat Rear-facing child seats forward-facing child seats Booster cushions A baby’s head is, proportionally, heavier The child’s head and abdomen need to From 15 kg or 4 years, the child can than that of an adult and its neck is very be protected as a priority.
-
Page 39: Choosing Child Seat Mounting
chILd sAfETy: choosing a child seat mounting (1/2) Attachment with the IsOfIX system There are two child seat mounting sys- tems: via the seat belt or using the Authorised ISOFIX child seats are ap- Some child seats cannot be fitted ISOFIX system.
-
Page 40
chILd sAfETy: choosing a child seat mounting (2/2) The ISOFIX anchorage points have been exclu- sively designed for child seats with the ISOFIX system. Never fit a different type of child seat, seat belt or other objects to these fittings. Check that nothing is obstructing the anchorage points. -
Page 41: Fitting A Child Seat
chILd sAfETy: fitting a child seat (1/5) In the front seat In the rear side seat Some seats are not suitable for fitting child seats. The diagram on the follow- The laws concerning children travel- A carrycot can be installed across the ing page shows you how to attach a ling in the front passenger seat differ in vehicle and will take up at least two…
-
Page 42
chILd sAfETy: fitting a child seat (2/5) child seat attached using the IsOfIX fitting ü Seat which allows an ISOFIX child seat to be fitted. ± The rear seats are fitted with an anchorage point which allows a forward-facing ISOFIX child seat with “Universal”… -
Page 43
chILd sAfETy: fitting a child seat (3/5) child seat attached using the IsOfIX fitting ü Seat which allows an ISOFIX child seat to be fitted. ± The rear seats are fitted with an anchorage point which allows a forward-facing ISOFIX child seat with “Universal”… -
Page 44
chILd sAfETy: fitting a child seat (4/5) The table below summarises the information already shown on the diagram on the previous page, to ensure the regulations in force are respected. front passenger seat with airbag size of Weight of Rear side Rear centre Type of child seat IsOfIX… -
Page 45
chILd sAfETy: fitting a child seat (5/5) X = Seat not suitable for fitting child seats. U = Seat allowing a child seat with “Universal” approval to be attached by seat belt; check that it can be fitted correctly. IUF/IL = On equipped vehicles, seat which allows a child seat with “universal/semi-universal or vehicle specific approval” to be fitted using the ISOFIX system;… -
Page 46
chILd sAfETy: deactivating and activating the front passenger air bag (1/3) deactivating the front To deactivate the air bag: when the vehicle is stationary, push and turn passenger air bag lock 1 to the Off position. (on equipped vehicles) With the ignition on, you must check You must deactivate certain devices ¹… -
Page 47
chILd sAfETy: deactivating and activating the front passenger air bag (2/3) The markings on the dashboard and label A on every side of the front pas- senger sun visor 3 remind you of these instructions. dANgER Since front passenger air bag triggering and the po- sition of a rear-facing child seat are incompatible, NEVER fit a… -
Page 48: Deactivating/Activating The Front Passenger Air Bag
chILd sAfETy: deactivating and activating the front passenger air bag (3/3) Activating the front Operating faults passenger air bag Contact your approved dealer as soon Reactivate the front passenger air bag as possible. as soon as you remove the child seat It is forbidden to fit a rear-facing child from the front passenger seat to ensure seat to the front seat if a fault is noted…
-
Page 49: Steering Wheel/Power-Assisted Steering
sTEERINg WhEEL/pOWER-AssIsTEd sTEERINg Variable power-assisted steering The variable power-assisted steering system is equipped with an electronic control system which alters the level of assistance to suit the vehicle speed. Steering is made easier during parking manoeuvres (for added comfort) whilst the force needed to steer increases progressively as the speed rises (for enhanced safety at high speeds).
-
Page 50: Driving Position
dRIVINg pOsITION: LEfT-hANd dRIVE (1/2) 1.44…
-
Page 51: Control Instruments
3 Stalk for: 25 Cruise control/speed limiter main information, etc. switch – direction indicators 12 Switch 26 RENAULT card reader – exterior lights – Central opening element locking/ 27 Engine start/stop button – front fog lights unlocking switch 28 Remote control audio adjustments –…
-
Page 52
dRIVINg pOsITION: RIghT-hANd dRIVE (1/2) 1.46… -
Page 53
27 Cruise control/speed limiter main unfastened and passenger airbag switch 14 Side window demister outlets deactivated warning light 28 RENAULT card reader 15 Side air vent 7 Centre air vents 29 – Fragrance diffuser cartridge 16 Controls for: 8 Display of the time, temperature, holder –… -
Page 54
WARNINg LIghTs (1/4) The presence and operation of the warning lights dEpENd ON ThE EQUIpmENT ANd cOUNTRy. side light tell-tale light Brake circuit fault warning light The warning light comes on when the á headlight main beam tell- ignition is switched on, and goes off tale light after a few seconds. -
Page 55
WARNINg LIghTs (2/4) The presence and operation of the warning lights dEpENd ON ThE EQUIpmENT ANd cOUNTRy. Ä Anti-lock braking system Toxic fume filter system warning light (ABs). warning light This lights up when the ignition is This lights up when the ignition is switched on and goes out after a few switched on, and goes off after a few seconds. -
Page 56
WARNINg LIghTs (3/4) The presence and operation of the warning lights dEpENd ON ThE EQUIpmENT ANd cOUNTRy. Warning light These indicator lights light up on in- © strument panel B: This lights up when the ignition ß is switched on and goes out as soon as front seat belt reminder the engine is started. -
Page 57
WARNINg LIghTs (4/4) The presence and operation of the warning lights dEpENd ON ThE EQUIpmENT ANd cOUNTRy. Ú À Battery charge warning light Oil pressure warning light If it comes on when you are ® ® If it comes on together with the driving accompanied by the warning light and a beep, it indicates warning light and a beep, it is essential… -
Page 58: Displays And Indicators
dIspLAys ANd INdIcATORs and the driving conditions, the correct fuel level may not be indicated, or the warning light may not come on auto- matically. gear engaged indicator The gear engaged is shown on dis- play 2. For more information, refer to the information on the “Automatic gear- box”…
-
Page 59: Trip Computer And Warning System
TRIp cOmpUTER ANd WARNINg sysTEm (1/9) c) mileage before service; d) tyre pressure monitor; e) cruise control/speed limiter pro- grammed speed; f) vehicle settings customisation menu; g) on-board log, operating fault and in- formation message readout. Trip computer and warning display selection keys 2 system 1 and 3…
-
Page 60
TRIp cOmpUTER ANd WARNINg sysTEm (2/9) Interpreting some of the Automatic resetting of the values displayed after journey parameters resetting Resetting occurs automatically when the maximum value of any of the pa- The values showing average fuel con- rameters is exceeded. sumption, range and average speed will become more stable and reliable the further you travel after pressing the… -
Page 61
TRIp cOmpUTER ANd WARNINg sysTEm (3/9) The display of information shown below dEpENds ON ThE VEhIcLE EQUIpmENT ANd cOUNTRy. Examples of selections Interpreting the display selected 101778 km a) Total mileage and trip mileage recorder. 112.4 km Fuel used b) Journey parameters. fuel used. -
Page 62
TRIp cOmpUTER ANd WARNINg sysTEm (4/9) The display of information shown below dEpENds ON ThE VEhIcLE EQUIpmENT ANd cOUNTRy. Examples of selections Interpreting the display selected Current current fuel consumption This value is displayed above a speed of approximately 18 mph (30 km/ h). 9.4L/100 Estimated range with remaining fuel This range takes into account the average fuel consumption since the last time… -
Page 63
TRIp cOmpUTER ANd WARNINg sysTEm (5/9) The display of information shown below dEpENds ON ThE VEhIcLE EQUIpmENT ANd cOUNTRy. Examples of selections Interpreting the display selected c) mileage before service. Distance remaining until the next service (displayed in miles (kilometres) and months), then when the service nears, several scenarios are possible: –… -
Page 64
TRIp cOmpUTER ANd WARNINg sysTEm (6/9) Journey parameters The display of information shown below dEpENds ON ThE VEhIcLE EQUIpmENT ANd cOUNTRy. Examples of selections Interpreting the display selected Tyre pressure d) Tyre pressure monitor Refer to the information on the “Tyre pressure monitor” in Section 2. f) Vehicle settings customisation menu “Settings menu: Enables certain vehicle functions to be set (instrument panel language,… -
Page 65: Information Messages
“Please remove keycard” Request to remove the RENAULT card from the reader when you leave the vehicle. “Checking control functions” Displayed with the ignition on when the vehicle is running self-diagnostics.
-
Page 66
TRIp cOmpUTER ANd WARNINg sysTEm (8/9) Operating fault messages © These appear with the warning light and mean that you should drive very carefully to an approved dealer as soon as possible. If you fail to follow this recommendation, you risk damaging your vehicle. They disappear when the display selection key is pressed or after several seconds and are stored in the computer log. -
Page 67: Warning Messages
TRIp cOmpUTER ANd WARNINg sysTEm (9/9) Warning messages ® These appear with the warning light and require you to stop immediately, for your own safety, as soon as traffic conditions allow. stop your engine and do not restart it. contact an approved dealer. Examples of warning messages are given in the following pages.
-
Page 68: Vehicle Settings Customisation Menu
VEhIcLE sETTINgs cUsTOmIsATION mENU Once a line has been selected, keep pressing either button 2 or 3 to change the function: : function activated < : function deactivated If you select either “parking sensor volume” or “language”, you will have to make a further selection (sound volume of the parking distance control or in- strument panel language).
-
Page 69: Clock And Exterior Temperature
cLOck ANd EXTERIOR TEmpERATURE Vehicles equipped with a Exterior temperature navigation system, radio, etc. indicator For vehicles equipped with a navigation special note: Depending on the vehi- system or radio, refer to the specific cle, when the exterior temperature is equipment instructions to discover the between –3°C and +3°C, the °C char- special features.
-
Page 70: Rear View Mirrors
REAR VIEW mIRRORs (1/2) storing the setting Rear view mirrors which tilt For vehicles fitted with a driver’s seat in reverse gear with position memory, refer to the infor- For vehicles equipped with the driver’s mation on the “Driver’s seat with posi- seat with position memory, you can tilt tion memory”…
-
Page 71: Interior Rear View Mirror
REAR VIEW mIRRORs (2/2) daytime driving Move lever 4 back to its daytime driv- ing position. Rear view mirror without lever 4 The rear view mirror darkens automat- ically to prevent the driver from being dazzled by the vehicle behind. Interior rear view mirror Its position can be adjusted.
-
Page 72: Audible And Visual Signals
AUdIBLE ANd VIsUAL sIgNALs direction indicators Move stalk 1 parallel to the steering wheel and in the direction you are going to turn it. When driving on the motorway, the steering wheel is not often turned enough to return the stalk automatically to 0.
-
Page 73: Exterior Lighting And Signals
EXTERIOR LIghTINg ANd sIgNALs (1/3) daytime running lights function (only relates to front lights) Depending on the vehicle, the lights come on without using stalk 1 when the engine is started. á main beam headlights With the engine running and the dipped beam headlights lit, pull stalk 1 towards you.
-
Page 74: Switching Off The Lights
EXTERIOR LIghTINg ANd sIgNALs (2/3) special note: “follow-me-home lighting” – If the dipped beam headlights are function manually switched on and if the light This function is used to switch on the is sufficient, the directional head- dipped beam headlights temporarily lights will remain fixed;…
-
Page 75: Rear Fog Lights
EXTERIOR LIghTINg ANd sIgNALs (3/3) Rear fog lights Turn centre ring 5 on stalk 1 until the symbol is opposite mark 6, then release it. An indicator light on the instrument panel then comes on. The rear fog lights only come on when the front fog lights or exterior lights are To avoid inconveniencing other road users, remember to switch off this light…
-
Page 76
ELEcTRIcAL AdJUsTmENT Of ThE dIppEd BEAm hEAdLIghTs Examples of positions for adjusting control A according to the load driver alone or with front passenger driver with one front passenger and one rear passenger On vehicles fitted with this function, driver with one front passenger control A allows you to adjust the height and two or three rear passengers of the beams according to the load. -
Page 77: Windscreen Wash/Wipe
WINdscREEN WAsh ANd WIpE (1/3) Vehicle fitted with front windscreen wiper rain sensor – A park – B automatic wiper function When this position is selected, the system detects water on the wind- screen and triggers the wipers at a suitable wiping speed.
-
Page 78: Headlight Washers
WINdscREEN WAsh ANd WIpE (2/3) headlight washers headlights on On equipped vehicles, hold stalk 1 pulled towards you for about 1 second, and the headlight washers and wind- screen washers will be activated at the same time. Note: when the minimum windscreen washer fluid level is reached, the head- light washer system may be deprimed.
-
Page 79
WINdscREEN WAsh ANd WIpE (3/3) In icy weather, clear the windscreen before starting the wipers (risk of motor overheating). Check the condition of the wiper blades. Under all circumstances, replace the wipers as soon as they lose their efficiency. To replace the wiper blades, switch off the engine and place the stalk in position D. -
Page 80: Fuel Tank
fUEL TANk (1/2) Vehicles running on ethanol- based fuel It is necessary to use unleaded petrol or fuel containing a maximum of 85% ethanol (E85). In very cold conditions, it may be very difficult or even impossible to start the engine.
-
Page 81
fUEL TANk (2/2) filling with fuel persistent smell of Unscrew fuel filler cap B anticlockwise fuel to open it. Insert the nozzle fully before turning it on to fill the fuel tank (risk of If you notice a persistent splashing). smell of fuel you should: Keep the nozzle in this position –… -
Page 82
1.76… -
Page 83
Section 2: Driving (Advice on use relating to fuel economy and the environment) Running in …………..Starting — stopping the engine . -
Page 84: Running In
RUNNING IN Petrol version Diesel version For approximately the first 600 miles For the first 900 miles (1,500 km), do (1,000 km), do not exceed 3,000 to not exceed 2,500 rpm. After this mile- 3,500 rpm. age, you may drive faster. Your vehicle Do not exceed 78 mph (130 km/h) in will only perform optimally after approx- the highest gear, and avoid sudden ac-…
-
Page 85: Starting — Stopping The Engine
Remote control ReNaULt card Starting with the trunk lid open (in When you get into the vehicle, insert the RENAULT card fully into card reader 2. hands-free mode) To start, press button 1. If a gear is en- In this case, the RENAULT card must…
-
Page 86
StaRtING the eNGINe (2/3) What to do if the vehicle will Precautions É not start – on diesel versions, if the warn- – In cold weather, or if the vehicle has ing light comes on, it indicates pre- not been started for a while, do not If the starting conditions are not met, heating (the engine may not start);… -
Page 87
StaRtING the eNGINe (3/3) Operating faults In some cases, the hands-free RENAULT card will not operate, or its access area will be modified: – when the RENAULT card battery is drained, flat battery, etc. – near to appliances operating on the same frequency as the card (moni- tor, mobile phone, video game, etc.);… -
Page 88: Stopping The Engine
RENAULT card with If the card is no longer in the passenger you, check that the engine compartment when you press button 1, is completely switched off.
-
Page 89: Special Features Of Petrol Versions
SPeCIaL FeatUReS OF PetROL VeRSIONS The following operating conditions: If you notice any of the above operating faults, have the necessary repairs car- – driving for long periods when the low ried out as soon as possible by an ap- fuel level warning light is lit;…
-
Page 90: Special Features Of Diesel Versions
SPeCIaL FeatUReS OF DIeSeL VeRSIONS Diesel engine speed Precautions to be taken in Diesel engines are fitted with injection winter equipment which prevents the engine To avoid faults in icy weather: speed being exceeded irrespective of the gear selected. – ensure that the battery is always fully If the message “Check antipollution charged;…
-
Page 91: Gear Lever/Handbrake
GeaR LeVeR/haNDbRake handbrake to release: Pull lever 4 slightly, press button 3 and then lower the lever to the floor. to apply: Pull lever 4 upwards and make sure the vehicle is immobilised. Selecting reverse gear Make sure that the hand- brake is properly released Vehicles with manual gearbox: follow when driving (red indicator…
-
Page 92: Electronic Parking Brake
eLeCtRONIC PaRkING bRake (1/4) – with the engine switched off (eg. when the engine stalls): when a front door is opened. In this case, pull and release switch 3 to apply the electronic parking brake. automatic releasing of the electronic parking brake The brake will be released as soon as the vehicle starts and accelerates.
-
Page 93: Manual Operation
– select a gear (manual gearbox) or position P (automatic gearbox); – depress the brake pedal and press switch 3 at the same time; – remove the RENAULT card from the card reader. When the driver’s door is opened, the Manual operation brief stop message “Apply parking brake”…
-
Page 94
eLeCtRONIC PaRkING bRake (3/4) Automatic release is reactivated when the driver’s door is closed and the gear lever moved to position P or N before moving to D or R. Versions with an automatic gearbox If the driver’s door is open or not prop- erly closed, automatic release is deac- tivated for safety reasons if the gear lever is not at P or N (to prevent the… -
Page 95
eLeCtRONIC PaRkING bRake (4/4) – If there is a serious fault, the mes- © – If there is a fault, the warning sage “Parking brake fault” is dis- light on the instrument panel comes played on the instrument panel © on accompanied by the message accompanied by the ®… -
Page 96: Engine Adjustments
aDVICe: antipollution, fuel economy and driving (1/3) aiding fuel economy By virtue of its design, moderate fuel Have your vehicle adjusted and consumption and initial settings, your checked by an approved Dealer, in ac- Depending on the vehicle, in order to vehicle conforms to current antipol- cordance with the instructions given in optimise consumption, an indicator light…
-
Page 97
aDVICe: antipollution, fuel economy and driving (2/3) Ä This warning light on the in- – Do not try to maintain the same strument panel will indicate if speed up a hill, accelerate no more there are any faults in the system: than you would on the level. -
Page 98
aDVICe: antipollution, fuel economy and driving (3/3) – In vehicles fitted with air condi- tioning, it is normal to observe an increase in fuel consumption (es- pecially in urban conditions) when it is used. For vehicles fitted with manual air conditioning, switch off the system when it is not required. -
Page 99: Environment
This commitment is illustrated by the less fuel (eg. 140 g/km, equivalent to the vehicle components have been de- Renault eco² group signature. 5.3 l/100 km for a diesel vehicle). signed to enable them to be recycled. Our vehicles are also equipped with a…
-
Page 100: Tyre Pressure Monitor
tyRe PReSSURe MONItOR (1/3) the pressures must be adjusted If the vehicle is equipped with the func- tion, this system monitors the tyre pres- when the tyres are cold. sure. Refer to the information on “Tyre pres- sures”. Operating principle If tyre pressures cannot be checked when the tyres are cold, increase the Each wheel (except for the emergency…
-
Page 101
tyRe PReSSURe MONItOR (2/3) emergency spare wheel The emergency spare wheel has no sensor and cannot therefore be de- tected by the system. When it is fitted to the vehicle, the mes- sage “Tyre pressure sensors absent” is displayed on the instrument panel. Replacing wheels/tyres This operation requires specific equip- ment (wheels, tyres, wheel trims, etc.). -
Page 102
tyRe PReSSURe MONItOR (3/3) Operating faults If there are any anomalies during inflation, the following messages will appear on the instrument panel to inform you: examples of selections Interpreting the display selected The tyre pressure is not suitable for the driving speed. Slow down or inflate all four tyres to motorway pressure (refer to the information on “Tyre pres- “Inflate tyres for motorway”… -
Page 103: Driving Correction Devices
DRIVING CORReCtION DeVICeS (1/4) abS (anti-lock braking Depending on the vehicle, they may comprise: system) Under heavy braking, the ABS prevents – the (anti-lock braking the wheels from locking, allowing the system); stopping distance to be managed and – emergency brake assist with, de- keeping control of the vehicle.
-
Page 104
DRIVING CORReCtION DeVICeS (2/4) Operating faults: emergency brake assist Operating faults When the system detects an operat- This is an additional system to ABS © ing fault, the message “Check brak- – lit on the instru- which helps reduce vehicle stopping ing system”… -
Page 105: Electronic Stability Program
DRIVING CORReCtION DeVICeS (3/4) electronic stability program Understeer control Operating principle eSP with understeer control This system optimises the action of the The system uses wheel sensors to and traction control aSR ESP in the case of pronounced under- constantly measure and compare the steering (loss of front axle road hold- speed of the drive wheels and detect electronic Stability Program (eSP)
-
Page 106
DRIVING CORReCtION DeVICeS (4/4) The message “Traction control off” ap- pears on the instrument panel to warn you. The ASR is an additional safety system. It is not advisable to drive with the func- tion disabled. Correct this as soon as possible by pressing switch 1 again. -
Page 107
CRUISe CONtROL — SPeeD LIMIteR: limiter function (1/3) Controls Switching on The speed limiter function helps you stay within the driving speed limit that 1 Main “On/Off” switch. Press switch 1 on the side showing you choose, known as the limit speed. Indicator light 6 comes on, lit orange, 2 Limit speed activation, storage and and the message “speed limiter”… -
Page 108: Speed Limiter
CRUISe CONtROL — SPeeD LIMIteR: limiter function (2/3) Limited speed cannot be maintained If driving up or down a steep gradient, the system is unable to maintain the limit speed: the stored speed on the instrument panel will flash and zone A light up in red to inform you of this situ- ation.
-
Page 109
CRUISe CONtROL — SPeeD LIMIteR: limiter function (3/3) Putting the function on Recalling the limit speed Switching off the function standby If a speed has been stored, it can be re- The speed limiter function is deacti- called by pressing switch 5 (R). vated if you press switch 1: in this case The speed limiter function is sus- a speed is no longer stored. -
Page 110
CRUISe CONtROL — SPeeD LIMIteR: cruise control function (1/5) This function is an addi- tional driving aid. However, the function does not take the place of the driver. Controls The cruise control function helps you to Therefore, it can under no circum- maintain your driving speed at a speed stances replace the driver’s respon- that you choose, called the cruising… -
Page 111: Cruise Control
CRUISe CONtROL — SPeeD LIMIteR: cruise control function (2/5) Switching on activating cruise control Driving At a steady speed (above 20 mph Once a cruising speed is stored and Press switch 1 on the side showing (30 km/ h) approximately) press the cruise control function is active,…
-
Page 112
CRUISe CONtROL — SPeeD LIMIteR: cruise control function (3/5) Cruising speed cannot be maintained If driving up or down a steep gradient, the system is unable to maintain the cruising speed: the stored speed on the instrument panel will flash and zone A light up in red to inform you of this situ- ation. -
Page 113
CRUISe CONtROL — SPeeD LIMIteR: cruise control function (4/5) Putting the function on Returning to the cruising speed standby If a speed is stored, it can be recalled, once you are sure that the road condi- The function is suspended when you: tions are suitable (traffic, road surface, –… -
Page 114
CRUISe CONtROL — SPeeD LIMIteR: cruise control function (5/5) Switching off the function The cruise control function is deacti- vated if you press switch 1: in this case a speed is no longer stored. The in- strument panel green indicator lights 6 and 7 go out, confirming that the func- tion is deactivated. -
Page 115: Parking Distance Control
PaRkING DIStaNCe CONtROL (1/3) Operating principle Parking distance indicator Ultrasonic sensors in the front or rear When this function is operating, the in- bumper measure the distance between dicator is displayed on the instrument the vehicle and an obstacle. panel. This measurement is indicated by The parking distance indicator com- beeps which become more frequent the…
-
Page 116
PaRkING DIStaNCe CONtROL (2/3) Rear parking distance control Operation When reversing, any objects located less than approximately 1.2 metres away from the rear of the vehicle are detected and a beep is emitted. If there are obstacles located close to both the front and rear of the vehicle, only the closest of the two will be ac- knowledged and the corresponding… -
Page 117: Special Features
PaRkING DIStaNCe CONtROL (3/3) Prolonged deactivation of the You can adjust the volume of the parking distance control by selecting system “Parking sensor volume” in the vehicle You may permanently activate or deac- settings customisation menu. tivate the front or rear parking distance Under the following conditions, the control separately.
-
Page 118: Reversing Camera
ReVeRSING CaMeRa Fixed clearance gauge 2 This gauge remains fixed and indicates The fixed clearance gauge comprises the vehicle trajectory if the wheels are coloured markers A, B and C indicating in line with the vehicle. the distance behind the vehicle: This system is initially used with the aid –…
-
Page 119: Automatic Gearbox
aUtOMatIC GeaRbOx (1/3) engine speed because the automatic system takes into account the vehicle load and road contour and adjusts itself to the particular driving style you have chosen. economical driving When driving, leave the lever in posi- tion D, keeping the accelerator pedal lightly depressed to ensure automatic gear changes at comparatively low engine speeds.
-
Page 120
aUtOMatIC GeaRbOx (2/3) Driving in manual mode Special circumstances – Vehicle not equipped with a trac- tion control system (aSR): on slip- With the selector lever in position D, – If the road contour and bends do pery roads or roads with low grip, to move the lever to the left. -
Page 121: Parking The Vehicle
aUtOMatIC GeaRbOx (3/3) Parking the vehicle Operating faults When the vehicle is stopped, move the – when driving, if the “Check auto lever to position P while keeping your gearbox” message appears on the foot on the brake pedal. The gearbox instrument panel, it indicates a fault.
-
Page 122
2.40… -
Page 123: Your Comfort
Section 3: Your comfort Air Vents …………..Fragrance diffuser .
-
Page 124
air Vents (air outlet) 9 Front passenger footwell heater out- 1 Left-hand air vent lets 5 Centre air vents 2 Left-hand side window demister out- 10 Centre air vents for the rear seats lets 6 Air conditioning control panel 11 Air conditioning control panel for the 3 Windscreen demister outlet 7 Right-hand side window demister rear seats… -
Page 125: Air Vents
air Vents air flow Direction To remove bad odours from your ve- hicles, only use the systems designed Turn control knob 1. Right/left: move tabs 2 to the right or for this purpose. Consult an approved left. Up: maximum air flow Dealer.
-
Page 126: Fragrance Diffuser
Fragrance DiFFuser Fragrance diffuser intensity Precautions adjustment – Capsules approved by our Technical Department must be used. Press button 3 to adjust the diffuser in- tensity. The integrated indicator light – Do not strip or refill the fragrance dif- comes on to show you the intensity se- fuser capsule.
-
Page 127: Air Ionizer
air ionizer – CLEAN: removes harmful matter from the air (bacteria, dust, etc.); – RELAX: provides a clean and relax- ing driving environment by emitting ions; – Stop (all the integrated indicator lights go out). selecting the operating mode With the air conditioning on, press button 1 to select one of the three fol- lowing modes.
-
Page 128: Automatic Climate Control
automatic climate control (1/6) automatic modes The automatic climate control system guarantees comfort in the passen- ger compartment and good visibility (except in the event of extreme condi- tions), whilst optimising consumption. The system controls the ventilation speed, air distribution, air recirculation, and starting and stopping the air condi- tioning and air temperature.
-
Page 129
automatic climate control (2/6) adjusting the air temperature adjusting the rear air adjusting the rear air temperature from the front temperature from the rear Turn control 1 to adjust the temperature (depending on the vehicle) (depending on the vehicle) on the driver’s side and control 6 for the passenger side. -
Page 130
automatic climate control (3/6) The displayed temperature values show a comfort level. However, when the vehicle is started in hot or cold weather and the set temperature is lowered or raised, it is not possible for this tem- perature to be rapidly reached, re- gardless of the value displayed. -
Page 131: Adjusting The Ventilation Speed
automatic climate control (4/6) clear View function Press button 2: the integrated indicator light comes on. This function quickly demists and deices the windscreen, the rear screen, the front side windows and the door mir- rors (depending on the vehicle). The air conditioning and rear screen de-icing functions are activated automatically.
-
Page 132
automatic climate control (5/6) õ the air flow is directed towards the side window and wind- screen demisting vents. ô the air flow is directed towards the front and rear centre air vents. ó the air flow is directed mainly towards the footwells. -
Page 133
automatic climate control (6/6) automatic air recirculation Press button 15. The integrated indica- tor light comes on. The sensor located at the air intake de- tects atmospheric pollution, which au- tomatically switches air recirculation on or off, depending on the ambient level of gas. -
Page 134: Maintenance
air conDitioning: information and advice on use advice on use operating faults Fuel consumption In some situations, (air conditioning As a general rule, contact your ap- off, air recirculation activated, venti- You will normally notice an increase proved Dealer in the event of an op- lation speed at zero or low, etc.) you in fuel consumption (especially erating fault:…
-
Page 135: Electric Windows/Electric Panoramic Sunroof
Driver’s responsibility Never leave your vehicle with the electric windows one-touch mode RENAULT card inside and never Depending on the vehicle, this mode Press or pull the switch to raise or lower leave a child (or a pet) unsuper- works in addition to the operation of the a window to the desired height (the rear vised, even for a short while.
-
Page 136: Special Note
(some- body’s fingers, etc.) it stops and then moves back several centimetres. Driver’s responsibility Never leave your vehicle with the RENAULT card inside and never leave a sunroof blind tilting the sunroof child (or a pet) unsupervised, even…
-
Page 137: Precautions During Use
When you lock the doors from the out- side, press the locking button on the If the sunroof will not close, check renault card twice in quick suc- that there are no obstacles and move cession, or the driver’s door button…
-
Page 138: Sun Visor/Sun Blinds
sun Visor/sun BlinDs Front sun visor side sun blind rear sun blind (depending on the vehicle) (depending on the vehicle) Lower sun visor 1 over the windscreen or unclip it and turn it over side window. Pull the sun blinds upwards, holding Pull the sun blinds upwards, holding them by tab 4 to secure them in hook 5 them by tab 6 until hooks 7 engage in…
-
Page 139: Interior Lighting
Press the same switch again to turn it comes on when you open a door is stopped, when the RENAULT card off. and goes out a few seconds after it is removed or when the vehicle is un- is closed.
-
Page 140
Light 6 also comes on for a few seconds when the engine is stopped, when the RENAULT card is removed or when the vehicle is un- locked with the RENAULT card. -
Page 141
interior lighting (3/3) luggage compartment light 8 Light 8 comes on when the luggage compartment is opened. 3.19… -
Page 142: Passenger Compartment Storage/Fittings
Passenger comPartment storage anD Fittings (1/4) Door pockets 1 Dashboard storage sunglasses holder 3 compartment 2 (depending on the vehicle) These can be used for storing books, road maps, etc. To open the sunglasses holder, press 3. Ensure that no hard, heavy Do not hang any heavy and/ or pointed objects are or sharp objects which may…
-
Page 143: Centre Console Storage
Passenger comPartment storage anD Fittings (2/4) sun visor storage 4 centre console storage Front armrest compartment with two layers (depending on the vehicles) It can be used to hold motorway passes. (depending on the vehicle) Pull lever 6 upwards and slide the arm- rest to the desired position.
-
Page 144: Glove Box
Passenger comPartment storage anD Fittings (3/4) cup holder 11 clothes hooks 13 glove box Lower the central rear armrest and Pull handle 15 to open it. press 11 to allow the cup holder to be grab handle 14 Depending on the vehicles, the glove used.
-
Page 145
Passenger comPartment storage anD Fittings (4/4) rear door storage Front seat storage compartment 16 compartments 17 It can be used to hold a beverage. It can be used to hold magazines or road maps, etc. Ensure that no hard, heavy or pointed objects are placed in the “open”… -
Page 146: Cigar Lighter, Accessories Socket, Ashtray
cigar lighter, accessories socket, ashtray cigar lighter 2 accessories socket 5, 6 ashtray 4, 8 (depending on the vehicle) Open cover 1 by pushing it in the direc- You can use the ashtray by pushing tion shown by the arrow. The accessories socket is designed for cover 1 in the direction shown by the With the ignition on, push in cigar…
-
Page 147: Rear Headrests
rear heaDrests to refit the headrest Insert the headrest rods into the sleeves, and lower the headrest to the first notch. storage position A Press tab 1 and lower the headrest completely. When the headrest is completely lowered (position A), this is for stor- age only.
-
Page 148: Rear Bench Seat
rear Bench seat When refitting the seat- The seatbacks can be folded down in To put the seatback back in position, back, make sure it is cor- order to transport large objects. raise it then check that it is locked cor- rectly locked in place.
-
Page 149: Luggage Compartment
luggage comPartment to open to close opening manually from inside the vehicle – Press the right side of switch 1 to Lower the trunk lid using handle 3 open the trunk lid. inside the trunk lid to help you. Check special note: that the trunk lid is closed securely.
-
Page 150: Storage Compartments
storage comPartments anchorage points You can secure the load using anchor- age points 1. Always position objects being trans- ported so that the heaviest items are resting against the back of the rear bench seat. Do not place any objects, especially heavy or hard objects, on the parcel shelf.
-
Page 151: Multimedia Equipment
multimeDia equiPment navigation system The equipment described below may or may not be fitted to the vehicle, and its location may vary, depending on the vehicle navigation system version. 1 Navigation display; 2 Radio; 3 Central control; 4 Navigation DVD reader; 5 Auxiliary input;…
-
Page 152: Transporting Objects/Towing
transPorting oBjects/toWing B = 1175 mm Permissible nose weight, maximum permissible towing weight, braked and unbraked: refer to the information on “Weights” in Section 6. transporting objects in the luggage compartment Always place the objects to be trans- ported so that their largest side rests against the back of the rear bench Always position the heavi- seat, for normal loads (Example A), or…
-
Page 153
Section 4: Maintenance Bonnet …………… . Engine oil level: general information . -
Page 154: Bonnet
BOnnet Closing the bonnet Before closing the bonnet, check that nothing has been left in the engine compartment which may prevent it from operating correctly (tools, sheets of paper, cloth, etc.) Hold the middle of the bonnet and guide it down to 30 cm above the closed posi- tion, then release.
-
Page 155: Engine Oil Level: General Information
engine Oil level: general information (1/2) It is normal for an engine to use oil for lubrication and cooling of moving parts and it is normal to top up the level be- tween oil changes. Frequency: check the oil level from time to time and always before any long journey to avoid the risk of oil level…
-
Page 156
engine Oil level: general information (2/2) Maximum engine oil level exceeded. The oil level should only be read with the dipstick as explained above. If the oil level exceeds the maximum level, do not start your vehicle and contact an approved Dealer. Consult your approved Dealer at once if you notice an abnormal or repeated drop in any of the fluid… -
Page 157: Engine Oil Level: Topping Up/Filling
engine Oil level: topping up and filling (1/3) 2.0 16V 2.5 V6 / 3.5 V6 topping up/filling – Open cap 1. – Add oil to top up the level (as a guide, The engine oil must be topped up and the capacity between the minimum filled on level ground, with the engine and maximum reading on dipstick 2…
-
Page 158
engine Oil level: topping up and filling (2/3) 1.5 dCi 2.0 dCi V6 dCi topping up/filling – Open cap 1. – Add oil to top up the level (as a guide, The engine oil must be topped up and the capacity between the minimum filled on level ground, with the engine and maximum reading on dipstick 2 switched off and cold (for instance,… -
Page 159: Engine Oil Change
engine Oil level: topping up and filling engine Oil ChAnge (3/3)/ Oil change explained in the paragraph “Topping up and filling” in section 4. Service interval: refer Maintenance Service Document for engine oil grade your vehicle. Refer to the Maintenance Service Document for your vehicle.
-
Page 160: Levels
levelS (1/3) Power-assisted steering oil Checking intervals The power-assisted steering oil level on Check the coolant level regularly reservoir 2 must be between the MINI (very severe damage is likely to be and MAXI marks. caused to the engine if it runs out of Fill up before the level reaches the MINI coolant).
-
Page 161: Brake Fluid
levelS (2/3) Fluid level topping up It is normal for the level to drop as the After any operation on the hydraulic cir- brake shoes become worn, but it must cuit, a specialist must replace the fluid. never drop lower than the “Mini” warn- Only use fluids approved by our ing line on reservoir 3.
-
Page 162: Windscreen/Headlight Washer Reservoir
levelS /FilteRS (3/3) Filters The replacement of filter elements (air filter, cabin filter, diesel fuel filter, etc.) is scheduled in the maintenance opera- tions for your vehicle. Replacement intervals for filter el- ements: refer to the Maintenance Service Document for your vehicle. Windscreen/headlight washer Continuously variable reservoir…
-
Page 163: Battery
BAtteRy Replacing the battery Depending on the vehicle, the battery is in the engine compartment or in the lug- To replace the battery, you must con- gage compartment. tact an approved Dealer. It is always maintenance-free. Depending on the vehicle, A system continuously checks the battery charge status.
-
Page 164: Tyre Pressure
tyRe PReSSuRe tyre safety and use of snow chains Refer to the information on “Tyres” in Section 5 for the servicing con- ditions and, depending on the ver- sion, the use of chains. Special note For vehicles used fully laden (maximum permissible all-up…
-
Page 165: Bodywork Maintenance
BODyWORk MAintenAnCe (1/2) – minor impacts A well-maintained vehicle will last for – Allow rust to form following minor im- longer. It is therefore recommended to pacts. You should take a minimum number of regularly maintain the vehicle exterior precautions in order to safeguard your –…
-
Page 166
BODyWORk MAintenAnCe (2/2) you should – Wash your car frequently, with the – Before going through a roller type car engine off, with cleaning products wash, return the windscreen wiper – Observe the vehicle stopping dis- recommended by our Technical stalk to the Park position (refer to tances when driving on gravelled Department (never use abrasive… -
Page 167: Interior Trim Maintenance
inteRiOR tRiM MAintenAnCe (1/2) glass instrument panel textiles (seats, door trim, etc) A well-maintained vehicle will last longer. It is therefore recommended to (e.g. instrument panel, clock, exterior Vacuum-clean the textiles regularly. maintain the interior of the vehicle regu- temperature display, radio display, etc.) larly.
-
Page 168
inteRiOR tRiM MAintenAnCe (2/2) Removal/replacing removable you should not: equipment originally fitted in You are strongly advised not to po- the vehicle sition objects such as deodorants, scents, etc. near air vents, as this could If you need to remove equipment in damage your dashboard trim. -
Page 169: Practical Advice
RENAULT card: battery ……..
-
Page 170: Puncture
Puncture In the event of a puncture, Special note: The Tyre Pressure Monitor function depending on the vehicle, does not check the emergency spare you will have: wheel (the wheel replaced by the emer- An emergency spare wheel or tyre in- gency spare wheel disappears from the flation kit (refer to the information on the instrument panel display).
-
Page 171: Tyre Inflation Kit
tYre InFLAtIOn KIt (1/3) Do not attempt to use the The kit is only approved for inflation kit if the tyre has inflating the tyres of the ve- been damaged as a result hicle originally equipped of driving with a puncture. with the kit.
-
Page 172
tYre InFLAtIOn KIt (2/3) If a minimum pressure of 1.8 bar is – Take out compressor 4 and bottle 1 4 5 6 located under the luggage compart- not reached after 15 minutes, repair ment carpet; is not possible; do not drive the ve- –… -
Page 173
tYre InFLAtIOn KIt (3/3) Precautions when using the Affix the driving recommendation label, located under bottle 1, to the dashboard where it can easily be The kit should not be operated for more seen by the driver; than 15 consecutive minutes. –… -
Page 174: Tool Kit (Jack — Wheelbrace, Etc.)
tOOL KIt/WheeL trIm — WheeL 2 towing hitch Refer to the information on “Towing” in Section 5. 3 Screwdriver 4 hubcap tool This tool is used to remove the wheel trims. 5 nut wrench 6 Wheelbrace Wheel trim The tool kit is located under the lug- gage compartment carpet (tools varies Remove it using hubcap tool 4 by en- Do not leave the tools un-…
-
Page 175: Changing A Wheel
chAngIng A WheeL (1/2) Vehicles equipped with jack and – start cranking the jack using handle 4 wheel wrench to position the jack head in the centre of plate mounting 2 (which should be If necessary, remove the wheel trim. pushed slightly under the vehicle).
-
Page 176
chAngIng A WheeL (2/2) – undo the bolts and take off the wheel. – fit the emergency spare wheel on the central hub and turn it to locate the mounting holes in the wheel and the hub. If bolts are supplied with the emergency spare wheel, only use these bolts for the emergency spare wheel. -
Page 177: Tyres
tYreS (1/3) tyre and wheel safety When the tyre tread has been worn to the level of the wear indicators, they The tyres are the only point of contact become visible 2: it is then necessary between the vehicle and the road. It is to replace your tyres because the tread therefore imperative that they are kept rubber is no more than 1.6 mm deep,…
-
Page 178
tYreS (2/3) tyre Pressure Fitting new tyres Pressures should be checked when the tyres are cold; ignore higher pressures Comply with the specified tyre pres- which may be reached in hot weather sures (including the emergency spare or following a fast journey. wheel). -
Page 179
tYreS (3/3) changing the position of the The maximum speed code for these “snow” tyres (for use in winter) may be wheels lower than the maximum speed for your It is strongly recommended that you do vehicle. It consists of several letters not change the position of the wheels. -
Page 180: Headlights (Changing Bulbs)
hALOgen heADLIghtS: changing bulbs Front side lights Turn cover B a quarter turn anticlock- wise, then unclip bulb holder 4, pulling it upwards to remove the bulb. Bulb type: W5W. Direction indicator lights Consult an approved Dealer. Dipped beam/main beam The bulbs are not easy to access (re- quires bodywork or mechanical compo- headlights…
-
Page 181
xenOn heADLIghtS: changing bulbs Front side lights Turn cover B a quarter turn anticlock- wise, then unclip bulb holder 2, pulling it upwards to remove the bulb. Bulb type: W5W. Direction indicator lights Consult an approved Dealer. cleaning the headlights The lights contain plastic glass;… -
Page 182
heADLIghtS: fog lights, additional lights rear fog lights Refer to Section 5 “Rear lights and indi- cator lights: changing bulbs”. Additional lights If you wish to fit fog lights or long range headlights to your vehicle, consult an approved Dealer. Front fog lights 1 changing bulbs Consult an approved Dealer. -
Page 183: Rear And Side Lights: Changing Bulbs
reAr AnD SIDe LIghtS: changing bulbs (1/3) Direction indicator lights LeD brake light 4 Turn bulb holder 3 a quarter turn anti- clockwise, then unscrew the bulb in the Remove the lights access cover by un- Consult an approved Dealer. same way while pressing down on it.
-
Page 184
reAr AnD SIDe LIghtS: changing bulbs (2/3) reversing lights/rear fog high-level LeD brake light 7 Undo bulb holder 5/6 a quarter turn an- ticlockwise, then remove the bulb by lights. Consult an approved Dealer. pulling it upwards. Remove the clip from the inside of the trunk lid using a flat-blade screwdriver, reversing lights 6 then pull back A. -
Page 185
reAr AnD SIDe LIghtS: changing bulbs (3/3) number plate light 8 Side direction indicator lights 10 – Unclip light 8 by pressing tab 9 using a flat-blade screwdriver type tool. Unclip indicator light 10 (using a flat- blade screwdriver type tool positioned –… -
Page 186: Interior Lights: Changing Bulbs
InterIOr LIghtS: changing bulbs (1/3) courtesy light Front door lights courtesy mirror light 3 Unclip lens 1 using a flat-blade screw- Unclip light 2 using a flat-blade screw- Unclip the light cover using a flat-blade driver type tool under the courtesy light. driver type tool under each side of the screwdriver type tool under the cover.
-
Page 187: Luggage Compartment Light
InterIOr LIghtS: changing bulbs (2/3) glove box light 4 Luggage compartment light Disconnect the light. Press tab 6 to release lens 8 and Consult an approved Dealer. Unclip light 5 using a flat-blade screw- access bulb 7. driver type tool under the left-hand side of the light.
-
Page 188
InterIOr LIghtS: changing bulbs (3/3) Front floor lights 9 There are lights under the glove box or the steering column. Remove the bulb concerned; Bulb type: W5W. The bulbs are under pres- sure and can break when replaced. Risk of injury. 5.20… -
Page 189: Fuses
To replace a fuse, stop the engine, event of an item of equipment using Obtain an emergency kit containing remove the RENAULT card from its an excessive amount of current. a set of spare bulbs and fuses from reader and switch off all electrical an approved Dealer.
-
Page 190
FuSeS (2/2) Allocation of fuses (depending on the equipment level) The optional equipment is also marked with an asterisk “*” in the label. Symbol Allocation Symbol Allocation ß Interior lighting Brake lights Radio amplifier Interior rear-view mirror Rear electric windows Heated rear screen î… -
Page 191: Connecting A Battery Charger
BAtterY: troubleshooting (1/2) to avoid all risk of sparks: connecting a battery charger Starting the vehicle using the – Ensure that any consumers are battery from another vehicle the battery charger must be com- switched off before disconnecting or patible with a battery with a nominal If you have to use the battery from an- reconnecting the battery.
-
Page 192
BAtterY: troubleshooting (2/2) Battery in the luggage compartment (V6 engines) Use the terminals in the engine com- partment. Turn screw 7 one quarter of a turn clockwise then pull cover 8 upwards to access the (+) terminal 9. Attach the positive lead A to the (+) terminal 9 then to the (+) terminal 3 of the battery supplying the current. -
Page 193: Replacing The Battery
(insert will disappear. place the RENAULT card battery, press the RENAULT card in the card reader) button 1 pulling on emergency key 2, and lock/unlock the vehicle (refer note: it is not advisable to touch the then unclip the cover 3 using tab 4.
-
Page 194: Accessories
AcceSSOrIeS Before fitting an electrical or If you are using an anti-theft electronic device (particu- device, only attach it to the larly for transmitters/receiv- brake pedal. ers: frequency bandwidth, power level, position of the aerial, etc.), ensure that it is compatible electrical and electronic with your vehicle.
-
Page 195: Wiper Blades
WIPer BLADeS Check the condition of the wiper blades. You are responsible for their service life: – Clean the blades and the wind- screen regularly with soapy water. – do not use them when the wind- screen is dry; – free them from the windscreen when they have not been used for a long time.
-
Page 196: Towing: Breakdown
If your vehicle is the towing or r for vehicles with automatic trans- vehicle, do not exceed the maximum missions), insert the RENAULT card in towing weight for your vehicle (refer the card reader then press the engine to the information on “Weights” in start button for two seconds.
-
Page 197
tOWIng: breakdown (2/2) When engine stopped, steering and brak- ing assistance are not op- erational. – Use a rigid towing bar. If a rope or cable is used (where the law allows this), Access to towing points Only use rear towing point 1 and front the vehicle being towed towing point 4 (never use the drive Unclip cover 2. -
Page 198: Operating Faults
POSSIBLe cAuSeS WhAt tO DO The RENAULT card does not lock or Card battery is flat. Replace the battery. You can still lock/ unlock the doors. unlock and start your vehicle (refer to the information on “Locking/unlocking the…
-
Page 199
The engine will not start. Starting conditions are not fulfilled. Refer to the information on “Starting/stop- ping the engine” in Section 2. The hands-free RENAULT card Insert the card in the card reader in order to does not work. start the engine. -
Page 200
OPerAtIng FAuLtS (3/5) On the road POSSIBLe cAuSeS WhAt tO DO Vibrations. Tyres not inflated to correct pres- Check the tyre pressures: if this is not the sures, incorrectly balanced or dam- problem, have them checked by an ap- aged. proved dealer. -
Page 201
OPerAtIng FAuLtS (4/5) On the road POSSIBLe cAuSeS WhAt tO DO Steering becomes heavy. Assistance overheating. Consult an approved dealer. The engine overheats. The coolant Engine cooling fan not working. Stop the vehicle, switch off the engine and temperature indicator is in the warn- contact an approved dealer. -
Page 202
OPerAtIng FAuLtS (5/5) electrical equipment POSSIBLe cAuSeS WhAt tO DO The wipers do not work. Wiper blades stuck. Free the blades before using the wipers. Faulty electrical circuit. Consult an approved dealer. The wiper does not stop. Faulty electrical controls. Consult an approved dealer. -
Page 203: Technical Specifications
Section 6: Technical specifications Vehicle identification plates …………Engine identification plates .
-
Page 204: Vehicle Identification Plates
Vehicle identification plates the information shown on the ve- 5 Rear axle Maximum permissible hicle identification plate should be weight. quoted on all correspondence or 6 Technical specifications of vehicle. orders. 7 Vehicle paint reference. 8 Equipment level. Vehicle identification plate A 9 Vehicle type.
-
Page 205: Engine Identification Plates
engine identification plates (1/2) 2.0 16V the information on the engine plate (or label) C should be quoted on all your correspondence or orders. (Location varies depending on engine) 1 Engine type. 2 Engine suffix. 3 Engine number. 2.5 V6 / 3.5 V6…
-
Page 206
engine identification plates (2/2) 1.5 dCi 2.0 dCi the information on the engine plate (or label) C should be quoted on all your correspondence or orders. (Location varies depending on engine) 1 Engine type. 2 Engine suffix. 3 Engine number. V6 dCi… -
Page 207: Dimensions (In Metres)
dimensions (in metres) 1.035 2.762 1.100 1.565 4.897 1.492* 1.562 1.832 Unladen…
-
Page 208: Engine Specifications
engine specifications Versions 2.0 16V 2.5 V6 3.5 V6 1.5 dci 2.0 dci V6 dci engine type (see engine plate) cubic capacity (cc) 1997 2495 3498 1461 1995 2993 It is essential that you use unleaded petrol of the octane rating stated on the label inside the fuel filler flap.
-
Page 209: Weights
Weights (in kg) the weights indicated for a basic vehicle without options: they vary depending on the your vehicle’s equipment. consult your approved dealer. maximum permissible all-up weight (mmac) Weights are indicated on the vehicle identification plate (refer to total train weight (mtR) the information on “Vehicle identification plates”…
-
Page 210: Replacement Parts And Repairs
If you always fit genuine RENAULT parts to your vehicle, you will ensure that it performs well. Furthermore, repairs carried out within the manufacturer’s Network using original parts are guaranteed according to the conditions set out on the reverse of the…
-
Page 211: Service Sheets
seRVice sheets (1/6) Vin: ……………… Date: Miles (Km): Invoice number: Comments/miscellaneous type of operation: stamp Service □ ……..□ anti-corrosion check: OK □ Not OK* □ *See specific page Date: Miles (Km): Invoice number: Comments/miscellaneous type of operation: stamp Service □…
-
Page 212
seRVice sheets (2/6) Vin: ……………… Date: Miles (Km): Invoice number: Comments/miscellaneous type of operation: stamp Service □ ……..□ anti-corrosion check: OK □ Not OK* □ *See specific page Date: Miles (Km): Invoice number: Comments/miscellaneous type of operation: stamp Service □… -
Page 213
seRVice sheets (3/6) Vin: ……………… Date: Miles (Km): Invoice number: Comments/miscellaneous type of operation: stamp Service □ ……..□ anti-corrosion check: OK □ Not OK* □ *See specific page Date: Miles (Km): Invoice number: Comments/miscellaneous type of operation: stamp Service □… -
Page 214
seRVice sheets (4/6) Vin: ……………… Date: Miles (Km): Invoice number: Comments/miscellaneous type of operation: stamp Service □ ……..□ anti-corrosion check: OK □ Not OK* □ *See specific page Date: Miles (Km): Invoice number: Comments/miscellaneous type of operation: stamp Service □… -
Page 215
seRVice sheets (5/6) Vin: ……………… Date: Miles (Km): Invoice number: Comments/miscellaneous type of operation: stamp Service □ ……..□ anti-corrosion check: OK □ Not OK* □ *See specific page Date: Miles (Km): Invoice number: Comments/miscellaneous type of operation: stamp Service □… -
Page 216
seRVice sheets (6/6) Vin: ……………… Date: Miles (Km): Invoice number: Comments/miscellaneous type of operation: stamp Service □ ……..□ anti-corrosion check: OK □ Not OK* □ *See specific page Date: Miles (Km): Invoice number: Comments/miscellaneous type of operation: stamp Service □… -
Page 217: Anticorrosion Check
anticoRRosion check (1/5) If the continuation of the warranty is subject to repair, it is indicated below. Vin: …………stamp Corrosion repair operation to be carried out: Date of repair: Repair to be carried out: stamp Date of repair: Repair to be carried out: stamp Date of repair: 6.15…
-
Page 218
anticoRRosion check (2/5) If the continuation of the warranty is subject to repair, it is indicated below. Vin: …………stamp Corrosion repair operation to be carried out: Date of repair: Repair to be carried out: stamp Date of repair: Repair to be carried out: stamp Date of repair: 6.16… -
Page 219
anticoRRosion check (3/5) If the continuation of the warranty is subject to repair, it is indicated below. Vin: …………stamp Corrosion repair operation to be carried out: Date of repair: Repair to be carried out: stamp Date of repair: Repair to be carried out: stamp Date of repair: 6.17… -
Page 220
anticoRRosion check (4/5) If the continuation of the warranty is subject to repair, it is indicated below. Vin: …………stamp Corrosion repair operation to be carried out: Date of repair: Repair to be carried out: stamp Date of repair: Repair to be carried out: stamp Date of repair: 6.18… -
Page 221
anticoRRosion check (5/5) If the continuation of the warranty is subject to repair, it is indicated below. Vin: …………stamp Corrosion repair operation to be carried out: Date of repair: Repair to be carried out: stamp Date of repair: Repair to be carried out: stamp Date of repair: 6.19… -
Page 222
6.20… -
Page 223: Alphabetical Index
AlphAbeticAl index (1/4) changing a wheel…………5.7 – 5.8 ABS ……………2.21 → 2.24 changing gear …………2.37 → 2.39 accessories……………. 5.26 child restraint/seat ……….1.30 → 1.39 accessories socket …………3.24 child safety…………1.10, 1.30 → 1.39 additional methods of restraint …..1.23 → 1.26, 1.29 child seats…………..1.30 →…
-
Page 224
AlphAbeticAl index (2/4) engine oil level …………4.3 – 4.4 hubcap tool …………….5.6 engine start/stop button ……….2.3 → 2.6 external temperature …………1.63 indicator lights…………..1.66 instrument panel ……..1.44 – 1.45, 1.48 → 1.61 faults instrument panel messages……..1.55 → 1.61 operating faults ……….5.30 →… -
Page 225
AlphAbeticAl index (3/4) RENAULT card battery …………5.25 maintenance: replacement parts …………..6.8 bodywork …………4.13 – 4.14 roof bars …………….3.30 mechanical …………6.9 → 6.14 running in …………….2.2 mileage before service ……..6.9 → 6.14 map reading lights ……….3.17 → 3.19 screen wash/wipe ……….1.71 →… -
Page 226
AlphAbeticAl index (4/4) temperature regulation ……….3.6 → 3.11 tool kit ……………… 5.6 towing breakdown …………5.28 – 5.29 towing a caravan …………..6.7 towing rings …………… 5.29 towing weights …………..6.7 transporting children ……….1.30 → 1.39 transporting objects in the luggage compartment ……..3.30 trip computer and warning system……1.53 →… -
Page 228
à999109709Rî ô ë ä RENAULT S.A.S. SOCIÉTÉ PAR ACTIONS SIMPLIFIÉE AU CAPITAL DE 533 941 113 € / 13-15, QUAI LE GALLO 92100 BOULOGNE-BILLANCOURT R.C.S. NANTERRE 780 129 987 — SIRET 780 129 987 03591 / TÉL. : 0810 40 50 60…