Бесплатная доставка
По Москве и большинству городов России
Подробнее
Бесплатное подключение
Профессионально установим технику на готовые коммуникации
Подробнее
Бесплатное хранение
До 365 дней — купите сегодня, а получите когда удобно
Подробнее
Простой возврат и обмен
Что-то не так? Обменяем товар или вернем деньги
Подробнее
Перейти к контенту
![]()
Русские электронные инструкции по эксплуатации
Постоянно обновляемый большой каталог документации по эксплуатации и использованию современных устройств и оборудования на русском языке. Бесплатное скачивание файлов.
Поиск:
Главная
♥ В закладки
Просмотр инструкции в pdf


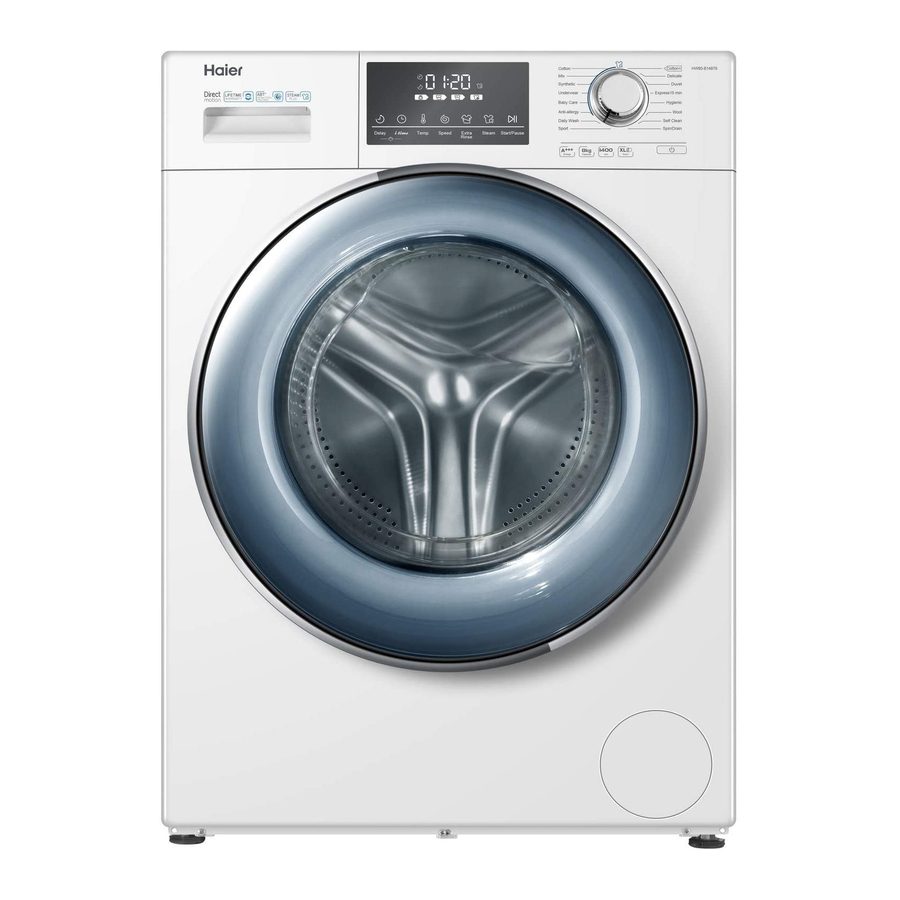
Инструкция по эксплуатации стиральной машины Haier HW80-B14876.
Скачать инструкцию к стиральной машине Haier HW80-B14876 (13,53 МБ)

Инструкции по эксплуатации стиральных машин Haier
« Инструкция к стиральной машине AEG L58527XFL
» Инструкция к стиральной машине Hotpoint-Ariston VMSG 501 W
Вам также может быть интересно

Инструкция к водонагревателю Haier ES50V-B1

Инструкция к электрической плите Haier HCX-5CDPC2

Инструкция к микроволновой печи Haier HMX-DG289X

Инструкция к телевизору Haier LE32K5000T

Инструкция к телевизору Smart TV Haier 50 Smart TV BX

Инструкция к кондиционеру Haier HSU-09HTM103-R

Инструкция к микроволновой печи Haier HMX-MM218W

Инструкция к телевизору Haier 50 Smart TV K6 DH1VL7D01RU
Добавить комментарий
Имя *
Email *
Сайт
Комментарий


![]()


Сохранить моё имя, email и адрес сайта в этом браузере для последующих моих комментариев.
- Добавить инструкцию
- Заказать инструкцию
- Manuals
- Brands
- Haier Manuals
- Washer
- HW80-B14876
- User manual
-
Contents
-
Table of Contents
-
Troubleshooting
-
Bookmarks
Quick Links
User manual
Washing machine
HW80-B14876
HW100-B14876
EN
Related Manuals for Haier HW80-B14876
Summary of Contents for Haier HW80-B14876
-
Page 1
User manual Washing machine HW80-B14876 HW100-B14876… -
Page 2
Thank You Thank you for purchasing a Haier Product. Please read these instructions carefully before using this appliance. The instructions con- tain important information which will help you get the best out of the appliance and ensure safe and proper installation, use and maintenance. -
Page 3: Table Of Contents
Content 1-Safety information ……………………… 4 2-Product description ……………………. 7 3-Control panel ………………………. 8 4-Programmes ………………………12 5-Consumption ……………………..13 6-Daily use ……………………….14 7-Eco-friendly washing ……………………19 8-Care and cleaning ……………………..20 9-Troubleshooting ……………………..23 10-Installation ………………………..26 11-Technical data ……………………..30 12-Customer service ……………………32…
-
Page 4: 1-Safety Information
1-Safety information Before switching on the appliance for the first time read the follow- ing safety hints!: WARNING! Before first use Make sure there is no transport damage. Make sure all transport bolts are removed. Remove all packaging and keep out of children´s reach. Handle the appliance always with at least two persons because it is heavy.
-
Page 5
1-Safety information WARNING! Daily use Do not remove or insert the plug in the presence of flammable Do not hot wash foam rubber or sponge-like materials. Do not wash any laundry which is polluted with flour. Do not open detergent drawer during any wash cycle. Do not touch the door during the washing process, it gets hot. -
Page 6
1-Safety information WARNING! Installation Install or use the appliance only where the temperature is above 5 °C. Do not place the appliance directly on a carpet, or close to a wall or furniture. Do not install the appliance in direct sunlight or in the near of heat sources(e.g. -
Page 7: 2-Product Description
2-Product description Note: 2.1 Picture of appliance Front (Fig. 2-1): Rear side (Fig. 2-2): 5 6 7 Cotton Cotton+ HW80-B14876 Delicate Synthetic Duvet Underwear Express15 min Baby Care Hygienic Anti-allergy Wool Daily Wash Self Clean Sport Spin/Drain Delay Temp. Speed…
-
Page 8: 3-Control Panel
3-Control panel HW120-B14876 Cotton Cotton+ Delicate Synthetic Duvet Underwear Express15 min Baby Care Hygienic Anti-allergy Wool Daily Wash Self Clean Sport Spin/Drain Delay Temp. Speed Extra Steam Start/Pause Rinse 12 11 7 6 5 Function buttons 1 Detergent / Softener Drawer 6 Steam 11 Child lock 2 Display…
-
Page 9
3-Control panel Display symbols: Programme status indication Programme cycle indication Remaining opera- tion time Display for washing time, end time Remaining delay delay as well as error codes and Steam time service information. Wash cycle Spin/drainage cycle Automatic weighing Rinse cycle 3.3 Program selector By turning the knob (Fig. -
Page 10
3-Control panel 3.6 Function buttons The function buttons (Fig. 3-6) enables additional op- tions in the selected programme before program start. The related indicators are displayed. Delay Temp. Speed Extra Steam Rinse gram, all options are disabled. If a button has multiple options, the desired option can be selected by pressing the button sequentially. -
Page 11
3-Control panel 3.6.3 Function “ “ 3-6-3 Press the “ ” button (Fig.3-6-3) can choose dif- ferent washing time. This function does not apply to “Delicate”,”Self Clean” and “Spin/Drain” programs. 3.6.4 Function “Steam“ Press this button (Fig.3-6-4), the steam program can 3-6-4 be selected. -
Page 12: 4-Programmes
4-Programmes Detergent compartment for: Bleaching agent Liquid detergent Softener, conditioning agent etc. • Yes, Optional, º Powder detergent Max. Temperature Preset Function load Spin speed in kg in °C HW100/ in rpm HW80 Program max Preset Fibre type • º •…
-
Page 13: 5-Consumption
5-Consumption Temper- Max. load Energy Water Washing time Spin drying ature in h:min performance in °C in kg in kWh in L HW100/ HW100/HW80 HW100/HW80 HW100/HW80 HW100/HW80 HW100/HW80 Programme HW80 40°C 0.50/0.46 46/37 4:08/3:27 60°C 0.56/0.56 46/37 4:12/3:30 Cotton+ * 60°C 10/8 0.50/0.54…
-
Page 14: 6-Daily Use
6-Daily use 6.1 Power supply Connect the washing machine to a power supply (220V to 240V~/50Hz; Fig. 6-1). Please refer also to section Installtion. 6.2 Water connection Before connecting check the cleanliness and clar- ity of the water inlet. Tun on the tap (Fig.6-2). Note: Tightness Before use check for leakage in the joints between the tap and the inlet hose by turning on the tap.
-
Page 15
6-Daily use Care chart Washing Washable up to 95°C Washable up to 60°C Washable up to 60°C normal process normal process mild process Washable up to 40°C Washable up to 40°C Washable up to 40°C normal process mild process very mild process Washable up to 30°C Washable up to 30°C Washable up to 30°C… -
Page 16
6-Daily use 6.5 Selecting detergent Use only machine wash approved detergent. Mind always detergent manufacturer recommendations. Do not use dry cleaning agents such as trichloroethylene and similar products. Choose the best detergent Kind of detergent Universal Colour Delicate Special Softener Programme Cotton Synthetic… -
Page 17
6-Daily use 6.6 Adding detergent 1. Slide out the detergent drawer. 2. Put the required chemicals into corresponding compartments (Fig. 6-6), 3. Push back the drawer gently. Note: Remove detergent residues before next wash cycle from the detergent drawer. Do not overuse detergent or softener. Please follow the instruction on the detergent package. -
Page 18
6-Daily use 6.10 Start wash programme 6-10 Press “Start/Pause“ button (Fig. 6-10) to start; appli- ance operates according to present settings. Changes Start/Pause are only possible by cancelling the programme. 6.11 Interrupt — cancel wash programme To interrupt a running programme press gently “Start/Pause“. Press it again to resume operation. -
Page 19: 7-Eco-Friendly Washing
7-Eco-friendly washing Environmentally responsible use To achieve best use of energy, water, detergent and time you should use the recom- mended maximum load size. Do not overload (hand width clearance above laundry). For slightly soiled laundry select the Quick Wash programme. Apply exact dosages of each washing agent.
-
Page 20: 8-Care And Cleaning
8-Care and cleaning 8.1 Cleaning the detergent drawer Take always care there are no detergent residues. Clean the drawer regularly (Fig. 8-1): 1. Pull out the drawer until it stops. 2. Press the release button and remove the drawer. 3. Flush the drawer with water until it is clean and insert the drawer back in the appliance.
-
Page 21
8-Care and cleaning 8.5 Long periods of disuse If the appliance is left idle for a longer period: 1. Pull out the electrical plug (Fig. 8-6). 2. Turn off water supply (Fig. 8-7). 3. Open the door to prevent formation of moisture and odours. -
Page 22
8-Care and cleaning 9. Clean carefully pump filter, e.g. using running water 8-14 8-15 (Fig. 8-14). 10. Refix it thoroughly (Fig. 8-15). 11. Close service flap.. CAUTION! Pump filter sealing has to be clean and unhurt. If the lid is not full tightened, water can escape. -
Page 23: 9-Troubleshooting
9-Troubleshooting of a problem please check all shown possibilities and follow below instructions before you WARNING! Before maintenance, deactivate the appliance and disconnect the mains plug from the mains socket. improper repairs can cause considerable consequential damages. A damaged power cable should only be replaced by the manufacturer, its service 9.1 Information codes Following codes are displayed only for information referring to the washing cycle.
-
Page 24
9-Troubleshooting Problem Cause Solution Temperature sensor — error. Contact the After sales service. Heating error. Contact the After sales service. Motor — error. Contact the After sales service. Water level sensor error. Contact the After sales service. FC0, FC1 or Abnormal communication error. -
Page 25
9-Troubleshooting Problem Cause Solution Excessive foam • Detergent is not a appropriate. • Check detergent recommen- floats drum and/or dations. detergent drawer. • Excessive use of detergent. • Reduce amount of detergent. Automatic adjust- • Washing programme duration will • This is normal and doesn‘t af- ment of washing be adjusted. -
Page 26: 10-Installation
10-Installation 10.1 Preparation Take the appliance out of the packaging. keep them out of childrens reach. While opening the package, water drops may be seen on plastic bag and porthole. This normal phenomenon results from water tests in the factory. Note: Packaging disposal Keep all packaging materials out of children´s reach and dispose them in an environmen- tally friendly manner.
-
Page 27
(S1 and S2) from the machine.*HW100-B14876 R5-R10 Remove the 4 screws (R1 — R4) from lower back reinforcement. take out reinforcements (S2) from the machine.*HW80-B14876 (Fig. 10-4) R1-R4 3. Pull out the 2 iron bars I1 and I2 (Fig. 10-5) 10-5 10-6 4. -
Page 28
10-Installation 10.6 Drain Water Connection Fix the water drain hose properly to the piping. The hose has to reach at one point a height between 80 and 100 cm above the appliance bottom line! If possible keep always drain hose fixed to the clip at the appliance back. WARNING! Use only the supplied hose set for the connection. -
Page 29
10-Installation 10.7 Fresh Water Connection 10-11 10-12 10-12 Make sure that the gaskets are inserted. 1. Connect the water inlet hose with the angled end to the appliance (Fig. 10-11). Tighten the screw joint by hand. 2. The other end connect to a water tap with a 3/4“… -
Page 30: 11-Technical Data
11-Technical data Suppliers name or trade mark Haier HW80-B14876 HW100-B14876 Rated capacity (kg) A+++ A+++ Energy consumption per year (AE in kWh/year) Energy consumption of standard cotton programme 0.54 0.50 60°C, full load (kWh/cycle) Energy consumption of standard cotton programme 0.56…
-
Page 31
11-Technical data 11.2 Additional technical data HW80-B14876 HW100-B14876 Dimension (HxDxW in mm) 845x460x595 845x530x595 Dimension (D in mm) Voltage in V 220-240 V~/50Hz Current in A Max power in W 2000 Water pressure in MPa 0.03≤P ≤1 Netto weight in kg 11.3 Standards and Directives… -
Page 32: 12-Customer Service
12-Customer service We recommend our Haier Customer Service and the use of original spare parts. If you have a problem with your appliance, please first check section TROUBLESHOOTING. If you cannot find a solution there, please contact your local dealer or the Service &…
-
Page 33
12-Customer service… -
Page 36
0020508374AA…