
-
Contents
-
Table of Contents
-
Bookmarks
Related Manuals for Triumph DAYTONA 675
Summary of Contents for Triumph DAYTONA 675
-
Page 1
DAYTONA 675 STREET TRIPLE STREET TRIPLE R… -
Page 2
Triumph Daytona 675, Street Triple and Street Triple R Motorcycle Service Manual Pa rt Number 3856750 issue 1, 06.2009 Service Manual — Daytona 675, Street Triple and Street Triple R… -
Page 3
Cylinder Head Clutch Crankshaft, Connecting Rods and Pistons Balancer Transmission Lubrication Engine Removal/Refit Fuel System/Engine Management Cooling Rear Suspension Front Suspension Brakes Wheels/Tyres Frame and Bodywork Electrical Service Manual — Daytona 675, Street Triple and Street Triple R I UMP… -
Page 4: Table Of Contents
Warnings, Cautions and Notes ………….. with Noise Control System Prohibited ……….vii erin .vii References…………….Dimensions…………….vii Repairs and Replacements …………..vii .vii Force…………….vii …………….Edges procedure …………..vii Tightening Service Manual — Daytona 675, Street Triple and Street Triple R Il1MP…
-
Page 5: Howto Use This Manual
• Keep complete records of all maintenance and repairs with dates and any new parts installed. • Use only approved lubricants, as specified in the owner’s handbook, in the maintenance of the motorcycle. Service Manual — Daytona 675, Street Triple and Street Triple R L UMP…
-
Page 6: Noise Control System Prohibited
Whenever tapping to aid removal of an item is necessary, tap lightly using a hide or plastic faced mallet. Service Manual — Daytona 675, Street Triple and Street Triple R I uMP…
-
Page 7
Press…………….BallBearings …………….. ChassisBearing Lubrication …………Metalbushes …………… 1.10 FuelHandling Precautions …………..1.10 General…………….1.10 Petrol Gasoline …………..1.10 FuelTank Rem oval …………..1.11 ChassisRepairs …………….1.11 Service Manual — Daytona 675, Street Triple and Street Triple R II.I MP… -
Page 8: General Information
1.32 1.33 CoolantSystem …………..Suspension…………….. 1.33 1.34 FuelInjection System …………..EmissionsControls …………..1.34 Brakes…………….1.34 Brakes(continued) …………..1.35 1.35 Wheelsand Tyres …………..1.36 Frame…………….ElectricalEquipment …………..1.36 Service Manual — Daytona 675, Street Triple and Street Triple R I UMP…
-
Page 9
Fuel Tank Breather Hose Routing — Street Triple and Street Triple R ……1.58 Fuel Tank Breather Hose Routing — Models with Evaporative Emissions — Daytona 675 ….1.59 Fuel Tank Breather Hose Routing — Models with Evaporative Emissions — Street Triple and Triple R ……………. -
Page 10: Ignitionsystem Safety Precautions
Always be aware of who your nearest first- Service Manual — Daytona 675, Street Triple and Street Triple R L UMP…
-
Page 11: Environmentalprotection Precautions
Failure to change the brake fluid at the interval specified in the routine maintenance schedule may reduce braking efficiency resulting in an Service Manual — Daytona 675, Street Triple and Street Triple R L UMP…
-
Page 12: Safetyinstructions
Reduced cooling system efficiency may lead to the engine overheating an d engine damage. Service Manual — Daytona 675, Street Triple and Street Triple R I UMP…
-
Page 13: Cleaningcomponents
Do not re-use a gasket or O-ring once it has been in service. The mating surfaces around the gasket should be free of foreign matter and perfectly smooth to avoid oil or compression leaks. Service Manual — Daytona 675, Street Triple and Street Triple R ll1Mp…
-
Page 14: Lockingdevices
Protect the seal from any surface which could cause • Grease the bearing, not the cavity where it damage to the seal lips when it is being fitted. Use a is located. Service Manual — Daytona 675, Street Triple and Street Triple R lliMP…
-
Page 15
Grease the bearing races and the ball bearing carrier. Sealed bearings (wheel bearings & swinging arm, depending on the model) Note: • Sealed bearings can be identified by their integrated seals. Service Manual — Daytona 675, Street Triple and Street Triple R Il1MP… -
Page 16: Metalbushes
The notice must instruct the reader of the precautions which must be taken. Failure to observe any of the above warnings may lead to a fire hazard which could result in personal injury. 1.10 Service Manual — Daytona 675, Street Triple and Street Triple R Il1MP…
-
Page 17: Fueltank Rem Oval
VAPOUR warning label attached to them as soon as they are removed from the vehicle. In all cases, they must be stored in a secured, marked area. 1.11 Service Manual — Daytona 675, Street Triple and Street Triple R I UMP…
-
Page 18: Electricalprecautions
Never force connectors apart either by using tools or by pulling on the wiring itself. Always ensure locking mechanisms are disengaged before removal and note the orientation to enable correct reconnection. Ensure that 1.12 Service Manual — Daytona 675, Street Triple and Street Triple R ILiMP…
-
Page 19: Electrical Wires
By transposing either of these formulae, the value of any unit can be calculated if the other two values are known. For example, if a battery of 12V is connected to a bulb of 60W: Service Manual — Daytona 675, Street Triple and Street Triple R 1.13 I UMP…
-
Page 20: Circuitdiagrams
On ECMs with two connectors, the connector pins. An additional number outside the box will number would be prefixed with the letters ‘A’ or ‘B to identify the component. 1.14 Service Manual — Daytona 675, Street Triple and Street Triple R L UMP…
-
Page 21: Tracingcircuits
These are often caused by chafing of the harness to the short circuits. frame or wires trapped between a bolted component, and will often blow the fuse on that circuit. Service Manual — Daytona 675, Street Triple and Street Triple R 1.15 t UMP…
-
Page 22: Tocheck Continuity
(Q). • Probe each end of the wire. • If there is continuity, the meter will usually bleep or register the resistance of the cable. 1.16 Service Manual — Daytona 675, Street Triple and Street Triple R IllMP…
-
Page 23: Splices
(or bus) which are used for the transmission of vehicle sensor data. By using CAN, the overall number of system sensors, and the amount of 1.17 Service Manual — Daytona 675, Street Triple and Street Triple R Il1MP…
-
Page 24: Alternator/Charging System
VOLTAGE FROM THE 3 ALTERNATOR FAULTY ALTERNATOR OUTPUT WIRES IN TURN. THE OUTPUT VOLTAGE MUST NOW EXCEED 30 VOLTS AC FROM EACH WIRE Above 30 Volts AC FAULTY RECTIFIER/ REGULATOR 1.18 Service Manual — Daytona 675, Street Triple and Street Triple R L UMP…
-
Page 25: Startingcircuit
Starter cable open circuit Defective starter relay Starter motor turns but engine does not turn over Defective sprag clutch Defective idler gear, reduction gear or starter motor 1.19 Service Manual — Daytona 675, Street Triple and Street Triple R 1l.I MP…
-
Page 26: Diagnosis- Starter Circuit
OPEN CIRCUIT IN WIRING LOOM CONNECTOR FAULTY ALARM Voltage Measured Normal CHECK THE STARTER RELAY LOOSE OR POOR CONTACT AT STARTER RELAY OPERATION Abnormal FAULTY STARTER RELAY 1.20 Service Manual — Daytona 675, Street Triple and Street Triple R Il]MP…
-
Page 27: Inspection
Triumph dealer may affect the handling, stability or other aspects of the motorcycle operation which may result in an accident causing serious injury or death. Service Manual — Daytona 675, Street Triple and Street Triple R 1.21 Il,l MP…
-
Page 28: Servicetools And Garage Equipment
T3880105 — Angular Torque Gauge 13880315 — Extractor, Cylinder Liner (use with adaptor T3880101) Increment markings gakh T3880057 — Engine Management Diagnostics 13880027 — Chain Link Took Kit 1.22 Service Manual — Daytona 675, Street Triple and Street Triple R Il1MP…
-
Page 29
T3880102 — Wrench, CamTurning cdpr 3880160-TO301 — Fork Filler / Evacuator T3880026 — Clutch Holding Tool, Universal ccna T3880375 — Alternator Rotor Holder T3880313 — Oil Filter Wrench 1.23 Service Manual — Daytona 675, Street Triple and Street Triple R 111MP… -
Page 30
T3880365 — Puller, Alternator Rotor gakh T3880106 — Holder, Balancer Gear T3880028 — Holder, Damping Cylinder T3880103 — Wrench, Engine Mounting Adjuster T3880104 — Wrench, Swinging Arm Adjuster 1.24 Service Manual — Daytona 675, Street Triple and Street Triple R ll.l MP… -
Page 31
T3880003 — Fork Seal and Bush Fitment ccxb T3880002 — Support Plate T3880067 — Fork Spring Compressor L ti T3880001 — Fuel Pressure Gauge 3880065 — T0301 — Bearing Installer _ _ 9 1.25 Service Manual — Daytona 675, Street Triple and Street Triple R I!lM… -
Page 32
T3880123 — Extension Cable 3880070 — 10301 — Bearing Installer T3880053 — Extraction Kit, Wheel Bearing BatteryMate Battery Charger — See Latest Parts Catalogue for Part Number Information 1.26 Service Manual — Daytona 675, Street Triple and Street Triple R !l.l MP… -
Page 33: Engine
..68 Nm (50.1 ft.lbf) at 9,200 rpm) 73 Nm (53.3 ft.lbf) at 11,900 rpm Note: For Daytona 675 up to VIN 381274. • For Daytona 675 from VIN 381275. • 1.27 Service Manual — Daytona 675, Street Triple and Street Triple R Il1Mp…
-
Page 34: Cylinderhead & Valves
….0.275-0.325 mm Ex..0.275-0.325 mm Ex ..0.325-0.375 mm Note: For Daytona 675 up to VIN 381274. • For Daytona 675 from VIN 381275. • Service Manual — Daytona 675, Street Triple and Street Triple R 1.28 II,I MP…
-
Page 35: Camshafts
ServiceLimit ……0.40 mm ……0.40 mm CamshaftRun-out ….. 0.15 mm max…….0.15 mm max Note: For Daytona 675 up to VIN 381274. • For Daytona 675 from VIN 381275. • 1.29 Service Manual — Daytona 675, Street Triple and Street Triple R Il1MP…
-
Page 36: Clutch/Primary Drive
Connecting Rod Small End Diameter..16.016-16.029 mm ….16.016-16.029 mm ServiceLimit ……. 16.039 mm……16.039 mm Connecting Rod Big End Side Clearance… 0.15-0.30 mm …… 0.15-0.30 mm ServiceLimit ……. 0.50 mm……0.50 mm 1.30 Service Manual — Daytona 675, Street Triple and Street Triple R Il1MP…
-
Page 37: Crankshaft
DriveChain Play ……35-40 mm……20-25 mm ChainLubrication …… Mobil chain spray ….Mobil chain spray Note: For Daytona 675 up to VIN 381274. • For Daytona 675 from VIN 381275. • Service Manual — Daytona 675, Street Triple and Street Triple R 1.31 I UMP…
-
Page 38: Lubrication
FuelPump Type …. FuelPressure (nominal) ….3.0 bar ……3.0 bar Purge Control System ….Electronic, via fuel system ECU ..Electronic, via fuel system ECU 1.32 Service Manual — Daytona 675, Street Triple and Street Triple R I UMP…
-
Page 39: Coolantsystem
Up to VIN 331531 use Triumph HD4X Hybrid OAT coolant when replacing the coolant. • From VIN 331532 use Triumph HD4X Hybrid OAT coolant when topping up or replacing the coolant. Coolant Mixture up to VIN 331531 ..50/50 Distilled …..5 /50 Distilled…
-
Page 40: Fuelinjection System
Note: • For Daytona 675 up to VIN 381274. • For Daytona 675 from VIN 381275. • * For Street Triple. • # For Street Triple R 1.34 Service Manual — Daytona 675, Street Triple and Street Triple R Il1MP…
-
Page 41: Brakes(Continued)
Note: • For Daytona 675 up to VIN 381274. For Daytona 675 from VIN 381275. • • For Street Triple. • # For Street Triple R. 1.35 Service Manual — Daytona 675, Street Triple and Street Triple R I UMP…
-
Page 42: Frame
*The starter solenoid has an additional 30 Amp fuse, attached directly to the solenoid, beneath the rider’s seat. Note: For Daytona 675 up to VIN 381274. • For Daytona 675 from VIN 381275. • 1.36 Service Manual — Daytona 675, Street Triple and Street Triple R I UMP…
-
Page 43: Torquewrench Settings
Secondary air injection valve covers to cam cover Use new fixings Cam chain tensioner to cylinder head — All models except Daytona 675 from VIN 381275 Cam chain tensioner to cylinder head — Daytona 675 from VIN 381275…
-
Page 44: Engine Covers
Oil pump drive sprocket to pump shaft Apply ThreeBond 1374 to the threads Oil pump rotor cover to pump body bolts Transmission oil feed pipes to crankcase Use new fixings 1.38 Service Manual — Daytona 675, Street Triple and Street Triple R 1lIMP…
-
Page 45: Final Drive
Silencer mounting bracket to subframe (Daytona 675) Silencer mounting bracket to subframe (Street Triple) Exhaust clamp — header to intermediate pipe Exhaust clamp — silencer to intermediate pipe (Daytona 675) 1.39 Service Manual — Daytona 675, Street Triple and Street Triple R ILiMP…
-
Page 46: Rearsuspension
Rear suspension unit upper clevis to frame Rear suspension unit lower mounting bolt Drag link pivot at frame Drop links to swinging arm Swinging arm end-float adjuster sleeve 1.40 Service Manual — Daytona 675, Street Triple and Street Triple R I UMP…
-
Page 47: Frontsuspension
Torque (Nm) Notes Front brake caliper to fork (Daytona 675 and Street Triple R) Front brake caliper half to caliper half (Daytona 675 and Street Triple R) Use new fixings Front brake caliper to fork (Street Triple) Front brake pad retaining pin…
-
Page 48: Rear Brakes
Street Triple and Street Triple R only Side stand mounting bracket Side stand pivot Apply ThreeBond 1360 to threads Bank angle indicator Apply ThreeBond 1360 to threads 1.42 Service Manual — Daytona 675, Street Triple and Street Triple R Il]MP…
-
Page 49: Electrical
Number plate bracket to subframe (Street Triple) Heat shield to silencer (Daytona 675) Lower fairing fixings (Daytona 675) See section 16 Cockpit fixings (Daytona 675) See section 16 Windshield fixings (Daytona 675) 1.43 Service Manual — Daytona 675, Street Triple and Street Triple R I UMP…
-
Page 50: Clutch Cable Routing — Daytona 675
General Information Clutch Cable Routing — Daytona 675 1.44 Service Manual — Daytona 675, Street Triple and Street Triple R IL1MP…
-
Page 51: Clutch Cable Routing — Street Triple And Street Triple R
General Information Clutch Cable Routing — Street Triple and Street Triple R 1.45 Service Manual — Daytona 675, Street Triple and Street Triple R I UMP…
-
Page 52: Throttle Cable Routing — Daytona 675
General Information Throttle Cable Routing — Daytona 675 1.46 Service Manual — Daytona 675, Street Triple and Street Triple R IIIMP…
-
Page 53: Throttle Cable Routing — Street Triple
General Information Throttle Cable Routing — Street Triple 1.47 Service Manual — Daytona 675, Street Triple and Street Triple R I UMP…
-
Page 54: Throttlecable Routing — Street Triple R
General Information Throttle Cable Routing — Street Triple R 1.48 Service Manual — Daytona 675, Street Triple and Street Triple R I UMP…
-
Page 55: Main Wiring Harness Routing — Daytona 675 Up To Vin 381274
General Information Main Wiring Harness Routing — Daytona 675 up to VIN 381274 1.49 Service Manual — Daytona 675, Street Triple and Street Triple R ILIMP…
-
Page 56: Main Wiring Harness Routing — Daytona 675 From Vin 381275
General Information Main Wiring Harness Routing — Daytona 675 from VIN 381275 1.50 Service Manual — Daytona 675, Street Triple and Street Triple R S UMP…
-
Page 57: Main Wiring Harness Routing — Street Triple And Street Triple R
General Information Main Wiring Harness Routing — Street Triple and Street Triple R 1.51 Service Manual — Daytona 675, Street Triple and Street Triple R ILIMP…
-
Page 58: Rear Light Harness Routing — Daytona 675
General Information Rear Light Harness Routing — Daytona 675 1.52 Service Manual — Daytona 675, Street Triple and Street Triple R II.I MP…
-
Page 59: Front Brake Hose Routing — Daytona 675
General Information Front Brake Hose Routing — Daytona 675 1.53 Service Manual — Daytona 675, Street Triple and Street Triple R I UMP…
-
Page 60: Frontbrake Hose Routing — Street Triple
General Information Front Brake Hose Routing — Street Triple 1.54 Service Manual — Daytona 675, Street Triple and Street Triple R ll1MP…
-
Page 61: Brake Hose Routing — Street Triple R
General Information Front Brake Hose Routing — Street Triple R 1.55 Service Manual — Daytona 675, Street Triple and Street Triple R lgmp…
-
Page 62: Rear Brake Hose Routing — All Models (Daytona 675 Shown)
General Information Rear Brake Hose Routing — All Models (Daytona 675 shown) 1.56 Service Manual — Daytona 675, Street Triple and Street Triple R Il1MP…
-
Page 63: Fuel Tank Breather Hose Routing — Daytona 675
General Information Fuel Tank Breather Hose Routing — Daytona 675 1.57 Service Manual — Daytona 675, Street Triple and Street Triple R IIIMP…
-
Page 64: Fuel Tank Breather Hose Routing — Street Triple And Street Triple R
General Information Fuel Tank Breather Hose Routing — Street Triple and Street Triple R 1.58 Service Manual — Daytona 675, Street Triple and Street Triple R II,I MP…
-
Page 65: Fuel Tank Breather Hose Routing — Models With Evaporative Emissions — Daytona
Fuel Tank Breather Hose Routing — Models with Evaporative Emissions — Daytona 675 A — Purge Hose to Throttle Bodies B — Breather Hose to Carbon Canister C — Breather hose — Fuel Tank Filler Drain 1.59 Service Manual — Daytona 675, Street Triple and Street Triple R iiiiiiiij…
-
Page 66
Fuel Tank Breather Hose Routing — Models with Evaporative Emissions — Street Triple and Street Triple R B — Breather Hose to Carbon Canister C — Breather hose — Fuel Tank Filler Drain 1.60 Service Manual — Daytona 675, Street Triple and Street Triple R I UMP… -
Page 67: Intake Air Flap Vacuum Hose Routing — Daytona 675 Only
General Information Intake Air Flap Vacuum Hose Routing — Daytona 675 only Service Manual — Daytona 675, Street Triple and Street Triple R 1.61 111MP…
-
Page 68
2 Scheduled Maintenance Table of Contents Introduction …………….ScheduledMaintenance Chart ………….. Service Manual — Daytona 675, Street Triple and Street Triple R I UMP… -
Page 69: Scheduled Maintenance
Triumph strongly recommends that your authorised Triumph dealer carries out all scheduled maintenance. A dangerous riding condition could result from incorrect maintenance leading to loss of motorcycle control and an accident. Service Manual — Daytona 675, Street Triple and Street Triple R Il1MP…
-
Page 70: Scheduled Maintenance Chart
Exhaust butterfly valve cables — check/adjust (Daytona 675 only) • • Secondary exhaust clamp bolts — check/adjust • Fuel and evaporative loss* hoses — renew *Evaporative system fitted to California models only. Service Manual — Daytona 675, Street Triple and Street Triple R I UMP…
-
Page 71
Camshaft and Camshaft Drive — Daytona 675 up to VIN 381274, Street Triple Exploded View — and Street Triple R all VINs ..Exploded View — Camshaft and Camshaft Drive — Daytona 675 from VIN 381275 ….CylinderHead Description …………..CamshaftCover …………….Removal……………. -
Page 72: Cylinder Head
3.24 Valvesand Valve Stem Seals …………… Removalfrom the Cylinder Head …………. 3.24 Installation……………. 3.25 Valveto Valve Guide Clearance…………3.25 3.25 ValveGuides …………..ValveFace Inspection …………… 3.25 Service Manual — Daytona 675, Street Triple and Street Triple R S UMP…
-
Page 73: Exploded View — Cylinder Head And Valves
Exploded View — Cylinder Head and Valves See T See Text See Text 1305 to 10 Nm Threads) 12 Nm 10 Nm o ° 12 Nm ff17 Service Manual — Daytona 675, Street Triple and Street Triple R L UMP…
-
Page 74: Explodedview — Camshaft Cover
Cylinder Head Exploded View — Camshaft Cover 10 Nm 10 Nm Apply engine oil to seals Service Manual — Daytona 675, Street Triple and Street Triple R Il1MP…
-
Page 75
Cylinder Head Exploded View — Camshaft and Camshaft Drive — Daytona 675 up to VIN 381274, Street Triple and Street Triple R all VINs 9 Nm Service Manual — Daytona 675, Street Triple and Street Triple R I UMP… -
Page 76
Cylinder Head Exploded View — Camshaft and Camshaft Drive — Daytona 675 from VIN 381275 9 Nm Service Manual — Daytona 675, Street Triple and Street Triple R Il1MP… -
Page 77: Cylinderhead Description
1. Spring-close hose clip 2. Secondary air injection hose 3. Reed valve assembly 3•7 Service Manual — Daytona 675, Street Triple and Street Triple R I UMP…
-
Page 78
10 Nm. Refit the throttle bodies, injectors and fuel rail to the cylinder head (see page 10- 108). Check the throttle cable adjustment (see page 10- 103). Service Manual — Daytona 675, Street Triple and Street Triple R 1l,I MP… -
Page 79: Removal
13. Daytona 675 only: Refit the lower fairings (see page 16-22). 14. Reconnect the battery, positive (red) lead first. 15. Refit the rider’s seat (see page 16-17). 1. ‘ Dot’ mark 2. Marker line Service Manual — Daytona 675, Street Triple and Street Triple R I um…
-
Page 80: Installation
For engines fitted with the spring loaded tensioner, continue from step 4 to step 8. Then continue from step 21. For engines fitted with the hydraulic tensioner, continue from step 9. 3.10 Service Manual — Daytona 675, Street Triple and Street Triple R I UMP…
-
Page 81
If installing the original hydraulic tensioner, the engine oil must be drained out of the tensioner to enable the plunger to be set onto the first tooth of the ratchet. 3.11 Service Manual — Daytona 675, Street Triple and Street Triple R tIIMP… -
Page 82
5 seconds. All Engines 22. Check that the tensioner plunger is correctly located in the middle of the camshaft drive chain tensioner blade when viewed from above. 3.12 Service Manual — Daytona 675, Street Triple and Street Triple R Il1MP… -
Page 83
24. Check that the camshaft timing marks align as ill ustrated below. 1. Right hand crank cover 2. Copper washer position gaaa1 Camshaft to Cylinder Head Alignment Marks 3.13 Service Manual — Daytona 675, Street Triple and Street Triple R l!. MP… -
Page 84: Camshaft Drive Chain Tensioner Blade — Daytona 675 — From Vin 381275
2. Clip (one side shown) Detach the top hook from the tensioner blade. 1. Hooks Assembly Assembly is the reverse of disassembly. clef 1. Top hook 2. Tensioner blade 3.14 Service Manual — Daytona 675, Street Triple and Street Triple R IL1MP…
-
Page 85: Camshafts
Lift the camshaft drive chain from the exhaust camshaft sprocket and remove the exhaust camshaft. gabol 1. Inlet camshaft 2. Machined section 3. Exhaust camshaft 4. Raised section 3.15 Service Manual — Daytona 675, Street Triple and Street Triple R I UMp…
-
Page 86: Camshaftand Bearing Cap Inspection
Calculate the journal clearance using the Plastigage chart supplied with the Plastigage kit. 1. Standard journal Examine the camshaft and camshaft ladder for excessive wear and damage. 3.16 Service Manual — Daytona 675, Street Triple and Street Triple R ILIMP…
-
Page 87: Installation
Camshaft Cap Ladder Bolt Tightening Sequence Stage 2 In the sequence shown above, tighten the bolts to 10 Nm. 1. Camshaft drive chain 2. Inlet camshaft 3.17 Service Manual — Daytona 675, Street Triple and Street Triple R I uMP…
-
Page 88: Valveclearances
• If the measurement does not fall within the specified range, adjustment must be made. • The correct valve clearances are in the range given below: 3.18 Service Manual — Daytona 675, Street Triple and Street Triple R ^ uMP…
-
Page 89: Valveclearance Adjustment
Refit the tappet bucket. Refit the camshafts (see page 3- 17). Re-check all valve clearances. Repeat the procedure if the valves require further adjustment. 3.19 Service Manual — Daytona 675, Street Triple and Street Triple R I uMP…
-
Page 90: Camshaftdrive Chain
The camshaft drive chain is removed from inside the Remove the chain from the engine. head-space. Suspend the chain from a pin or hook with a 13kg weight attached at the lower end. 3.20 Service Manual — Daytona 675, Street Triple and Street Triple R Il,l MP…
-
Page 91
12 Nm. Refit the camshafts (see page 3-17). Check for signs of stiffness or kinking. 3.21 Service Manual — Daytona 675, Street Triple and Street Triple R L UMP… -
Page 92
Lightly tap the cylinder head with a rubber mallet to break the seal of the gasket. Remove the cylinder head. Discard the cylinder head bolts and gasket. 3.22 Service Manual — Daytona 675, Street Triple and Street Triple R IIIMP… -
Page 93
A: Tighten the head bolts, in the sequence Carefully lower the cylinder head over the camshaft shown above, to 15 Nm. drive chain and locate the head onto the dowels. 3.23 Service Manual — Daytona 675, Street Triple and Street Triple R L UMP… -
Page 94: Valvesand Valve Stem Seals
Refit the camshaft drive chain (see page 3-21). Refit the camshafts (see page 3-17). Install the engine to the frame (see page 9-4). 3.24 Service Manual — Daytona 675, Street Triple and Street Triple R Il1MP…
-
Page 95: Installation
Once correctly Examine the valve seat face, checking in particular for positioned, the seal cannot be pushed down signs of cracking or pitting. any further. 3.25 Service Manual — Daytona 675, Street Triple and Street Triple R L UMP…
-
Page 96
ExplodedView — Clutch Cover …………… ExplodedView — Clutch Assembly …………ExplodedView — Clutch Controls …………ClutchCable …………….Removal …………….Inspection …………….Assembly…………………………..Clutch Disassembly……………. FrictionPlate Inspection …………..Thickness…………….Bend/warp …………….. Assembly…………….Service Manual — Daytona 675, Street Triple and Street Triple R Il1MP… -
Page 97: Explodedview — Clutch Cover
Clutch Exploded View — Clutch Cover 9 Nm Service Manual — Daytona 675, Street Triple and Street Triple R Il1MP…
-
Page 98: Explodedview — Clutch Assembly
Clutch Exploded View — Clutch Assembly 98 Nm > Service Manual — Daytona 675, Street Triple and Street Triple R Il1MP…
-
Page 99: Explodedview — Clutch Controls
Clutch Exploded View — Clutch Controls 12 Nm Service Manual — Daytona 675, Street Triple and Street Triple R 1lIMP…
-
Page 100: Clutchcable
Examine the two inner cable nipples for signs of from the bracket. looseness and damage. Replace the cable if necessary. 1. Actuating arm 2. Inner cable nipple Align the cable adjuster and lever bracket slots. Service Manual — Daytona 675, Street Triple and Street Triple R I UMP…
-
Page 101: Disassembly
Refit the rider’s seat (see page 16-17). 1. Clutch pull-rod 2. Clutch pressure plate 8. Remove the clutch friction plates and steel plates together with the anti-judder spring and anti-judder seat washer. Service Manual — Daytona 675, Street Triple and Street Triple R I uMP…
-
Page 102
1. Centre nut 2. Belleville washer 3. Flat washer 4. Inner drum S. Thrust washer Service Manual — Daytona 675, Street Triple and Street Triple R L UMP… -
Page 103: Frictionplate Inspection
0.20 mm li mit, replace the friction plates as a set. gaal 1. Clutch friction plate Friction plate thickness — all plates Standard 3.00 mm 2.80 mm Service limit Service Manual — Daytona 675, Street Triple and Street Triple R Il1MP…
-
Page 104: Assembly
_\/ (‘ 1. Clutch outer drum 2. Oil pump sprocket drive pegs Belleville Washer ‘OUT’ Mark 3. Oil pump drive holes 4•9 Service Manual — Daytona 675, Street Triple and Street Triple R IuMP…
-
Page 105
Refit the rider’s seat (see page 16- 17). 1. Steel plate 2. Inner fiction plate 3. Anti -judder spring 4. Anti-judder seat washer 5. Clutch inner drum Refit the clutch pull-rod. 4.10 Service Manual — Daytona 675, Street Triple and Street Triple R Il1MP… -
Page 106
Crankshaftmain bearing/journal wear ……….5.12 Pistons ……………… 5.13 Disassembly……………. 5.13 Piston Wear Check …………..5.13 Cylinder Wear …………… 5.16 CylinderLiners …………….5.16 Removal…………….5.16 Installation…………….5.17 CrankcaseBreather …………… 5.18 Service Manual — Daytona 675, Street Triple and Street Triple R Il1MP… -
Page 107: Exploded View — Crankshaft, Connecting Rod, Piston And Liner
Crankshaft, Connecting Rods and Pistons Exploded View — Crankshaft, Connecting Rod, Piston and Liner sus: 27 Nm (Install a new bolt if removed) Service Manual — Daytona 675, Street Triple and Street Triple R IIiMP…
-
Page 108: Explodedview — Crankcase
Crankshaft, Connecting Rods and Pistons Exploded View — Crankcase 22 Nm Apply ThreeBond 1305 to the threads 22 Nm 22 Nm Apply ThreeBond 1305 to the threads Service Manual — Daytona 675, Street Triple and Street Triple R 1l,i MP…
-
Page 109: Disassembly
3 locating dowels remain in the upper crankcase. ACaution Do not use levers to separate the upper and lower sections of the crankcase or damage to the crankcases could result. Service Manual — Daytona 675, Street Triple and Street Triple R tl1MP…
-
Page 110
Running the engine with low oil pressure will cause sev ere engine damage. Crankcase Bolt Tightening Sequence Service Manual — Daytona 675, Street Triple and Street Triple R L UMP… -
Page 111: Crankshaft
If removed, insert the three piston cooling jets into the main bearing housings in the upper crankcase. 1. Piston cooling jet Daytona 675, Street Triple and Street Triple R Service Manual — IuMP…
-
Page 112
Ensure that the crankshaft is clean, and that the oilways within the crank are clean and free from blockages and debris. Refit the balancer (see page 6-4). Service Manual — Daytona 675, Street Triple and Street Triple R I uMP… -
Page 113: Removal
Detach the piston from the connecting rod (see page li ner from the bottom. 5-13). Fit the liner into the crankcase ensuring that the arrow/’dot’ on the piston faces forward. Service Manual — Daytona 675, Street Triple and Street Triple R ILiMP…
-
Page 114
Align the connecting rod to the crankshaft and fit the big end cap. Increment markings Service Tool 3880105-T0301 1. Big end cap 2. Connecting rod bolt Service Manual — Daytona 675, Street Triple and Street Triple R I UMP… -
Page 115: Connecting Rod Big End Bearing Selection/Crankpin Wear Check
5-9). f) Release the bolts and remove the cap being measured. Using the gauge provided with the Plastigage kit, measure the width of the compressed Plastigage. 5.10 Service Manual — Daytona 675, Street Triple and Street Triple R I UMP…
-
Page 116: Connectingrod Bearing Selection
Repeat the measurements for all connecting rods and their respective crankpins. • It is normal for the bearings selected to differ from one connecting rod to another. 5.11 Service Manual — Daytona 675, Street Triple and Street Triple R IIIMP…
-
Page 117: Crankshaftmain Bearing/Journal Wear
Due to the techniques used during manufacture, the crankshaft cannot be reground and no oversize bearings are available. 5.12 Service Manual — Daytona 675, Street Triple and Street Triple R lliMP…
-
Page 118: Pistons
Do not over-extend the piston rings during removal. Note: If the piston rings are to be re-used, note • the orientation of the oil control rings prior to removal. 5.13 Service Manual — Daytona 675, Street Triple and Street Triple R I uMP…
-
Page 119
• If the gap is too small, check the cylinder bore for distortion, replacing as necessary. Do not file piston rings! 5.14 Service Manual — Daytona 675, Street Triple and Street Triple R It,I MP… -
Page 120
Fit new circlips on both sides of the gudgeon pin ensuring the circlips are correctly fitted in the grooves. 5.15 Service Manual — Daytona 675, Street Triple and Street Triple R ll1MP… -
Page 121: Cylinder Wear
1. Paint mark Mark each liner to identify correct orientation and the cylinder number from which it has been removed. 5.16 Service Manual — Daytona 675, Street Triple and Street Triple R S UMP…
-
Page 122
Installation Thoroughly clean the liner removing all traces of old silicone sealer. Remove all traces of sealer from the crankcase bores. 5.17 Service Manual — Daytona 675, Street Triple and Street Triple R 1l.I MP… -
Page 123: Crankcasebreather
• When the liners have been fitted, they should not be disturbed. If it is necessary to remove the liner after fitting, the sealer must be re-applied. 5.18 Service Manual — Daytona 675, Street Triple and Street Triple R Il1MP…
-
Page 124
6 Balancer Table of Contents ExplodedView — Balancer Shaft ………….. Balancer…………….. Removal…………….Inspection…………….Assembly/Installation …………..Service Manual — Daytona 675, Street Triple and Street Triple R I UMP… -
Page 125: Explodedview — Balancer Shaft
Balancer Exploded View — Balancer Shaft Service Manual — Daytona 675, Street Triple and Street Triple R (LIMP…
-
Page 126: Removal
The drive gear is aligned to the shaft. If the balancer and drive gear are not correctly aligned, severe engine vibration will occur leading to damage to components. Service Manual — Daytona 675, Street Triple and Street Triple R IIiMP…
-
Page 127: Assembly/Installation
• Engage the peg of tool T3880106 into a tooth of the backlash gear. Rotate the backlash gear against the spring until the marks align. cdon 1. Balancer shaft 2. Wave washer 3. Circlip Service Manual — Daytona 675, Street Triple and Street Triple R ^ uMP…
-
Page 128
If the balancer and cranksha are not correctly aligned, severe engine vibration will occur leading to damage to components. 1. Balancer shaft (right hand bearing) 2. Circlip 3. Dowel Service Manual — Daytona 675, Street Triple and Street Triple R I UMP… -
Page 129
13. Check that the balancer and crankshaft are correctly crankcase aligned before continuing to assemble the crankcase halves. 14. Assemble the crankcase halves (see page 5-4). 1. Balancer shaft (left hand bearing) 2. Circlip 3. Dowel Service Manual — Daytona 675, Street Triple and Street Triple R 111MP… -
Page 130
ExplodedView — Input Shaft …………… 7.16 OutputShaft …………….7.19 Disassembly……………. 7.19 lodedView — Output Shaft ………….. 7.20 Assembly…………….7.21 StarterDrive Gears/Sprag Clutch …………7.23 Removal…………….7.23 Inspection…………….. 7.24 Installation…………….. 7.24 Service Manual — Daytona 675, Street Triple and Street Triple R Il.l MP… -
Page 131: Exploded View, Input And Output Shafts — Up To Engine Number 330118
Transmission Exploded View, Input and Output Shafts — up to Engine Number 330118 See text 12 Nm Service Manual — Daytona 675, Street Triple and Street Triple R IIJMP…
-
Page 132: Exploded View, Input And Output Shafts — From Engine Number 330119
Transmission Exploded View, Input and Output Shafts — from Engine Number 330119 See text _^ W 12 Nm 7•3 Service Manual — Daytona 675, Street Triple and Street Triple R ILIMP…
-
Page 133: Explodedview, Sprag Clutch And Starter Gears
Transmission Exploded View, Sprag Clutch and Starter Gears 11111 See xt Service Manual — Daytona 675, Street Triple and Street Triple R Il1 MP…
-
Page 134: Explodedview, Gear Selectors And Drum
Transmission Exploded View, Gear Selectors and Drum 12 Nm 12 Nm 12 Nm Service Manual — Daytona 675, Street Triple and Street Triple R I UMP…
-
Page 135: Exploded View, Gear Change Mechanism
Transmission Exploded View, Gear Change Mechanism 9 Nm — 6 Nm _-® 22 Nm , CO Service Manual — Daytona 675, Street Triple and Street Triple R IIIMP…
-
Page 136: Selectorshaft, Selector Forks And Drum
Remove the E-clip and washer from the gear pedal end of the gear change shaft. 1. Detent arm 2. Fixing 3. Spring 4. Detent wheel kalj,t 1. Gear change shaft 2. E-clip 3. Washer 7•7 Service Manual — Daytona 675, Street Triple and Street Triple R I UMP…
-
Page 137
• Daytona 675 from VIN381275: The fifth and sixth gear selector forks have a special molybdenum coating on the selector forks. 1. Input selector shaft 2. Selector fork Service Manual — Daytona 675, Street Triple and Street Triple R Il1MP… -
Page 138: Inspection
The selector forks can be fitted incorrectly. Ensure the position and orientation of the selector forks are the same as noted during removal. Incorrect fitting of the selector forks will cause ge box da mage. Service Manual — Daytona 675, Street Triple and Street Triple R L UMP…
-
Page 139
1. Spring 2. Washer 3. Detent arm 4. Flanged sleeve 5. Fixing 1. Output selector shaft 2. Sixth gear selector fork 3. Fifth gear selector fork 7.10 Service Manual — Daytona 675, Street Triple and Street Triple R L UMP… -
Page 140
2.Abutment bolt 3.Spring 14. Ensure that the gear change shaft fingers locate in the detent wheel/arm and that the spring fits either side of the abutment bolt. 7.11 Service Manual — Daytona 675, Street Triple and Street Triple R I uMP… -
Page 141: Removal
5-4). fixings securing the input shaft bearing housing to Refit the engine to the frame (see page 9-4). the upper crankcase. cdmb 1. Fixings 2. Bearing housing 7.12 Service Manual — Daytona 675, Street Triple and Street Triple R tl1MP…
-
Page 142: Installation
Carefully fit new O-rings to the transmission oil tube and insert the tube into the crankcase, ensuring the tag on the tube locates in the slot in the crankcase. 7.13 Service Manual — Daytona 675, Street Triple and Street Triple R IIiMP…
-
Page 143: Input Shaft
2. Dowel from the bearing housing. 11. Assemble the two halves of the crankcase (see page 5-4). Refit the engine to the frame (see page 9-4). 7.14 Service Manual — Daytona 675, Street Triple and Street Triple R L UMP…
-
Page 144: Inspection
Thoroughly clean the bearing housing and inspect for damage, scoring and cracks. Replace the housing if necessary. 1. Press bars 2. Bearing/housing 7.15 Service Manual — Daytona 675, Street Triple and Street Triple R I UMP…
-
Page 145: Explodedview — Input Shaft
5. Splined bush 14. Input shaft 15. Circlip 6. Sixth gear 7. Splined thrust washer 16. Bearing 8. Circlip 17. Bearing housing 9. Third/fourth gear 18. Bearing retainer 7.16 Service Manual — Daytona 675, Street Triple and Street Triple R 111MP…
-
Page 146
Fit the plain bush (13) to the shaft. Fit fifth gear (12) to the input shaft as noted during disassembly, with the dog teeth pointing away from the input shaft bearing. 7.17 Service Manual — Daytona 675, Street Triple and Street Triple R ll p… -
Page 147
10. Fit a new circlip (8) to the input shaft ensuring that the circlip is located in the circlip groove as shown below. camp 1. Sixth gear 2. Thrust washer 3. Circlip 7.18 Service Manual — Daytona 675, Street Triple and Street Triple R ILiM^… -
Page 148: Outputshaft
11. Mark one side of sixth gear to denote its correct orientation. Remove sixth gear (17) from the shaft. 12. Remove the circlip (18) from in front of second gear. 7.19 Service Manual — Daytona 675, Street Triple and Street Triple R lllMP…
-
Page 149: Exploded View — Output Shaft
26. Output shaft seal 11. Lock washer 27. Output sprocket 12. Splined washer 13. Splined bush 28. Tab washer 29. Output sprocket nut 14. Third gear 15. Splined washer 7.20 Service Manual — Daytona 675, Street Triple and Street Triple R ll1Mp…
-
Page 150: Assembly
Caution Press only on the bearing inner race to prevent bearing damage. 1. Second gear 2. Thrust washer 3. Circlip 7.21 Service Manual — Daytona 675, Street Triple and Street Triple R Il1MP…
-
Page 151
11. Fit the splined bush (10) from fourth gear. Ensure that the oil holes in the gear DO NOT align with the corresponding oil hole in the output shaft. 7.22 Service Manual — Daytona 675, Street Triple and Street Triple R I UMP… -
Page 152: Starterdrive Gears/Sprag Clutch
2. Copper washer position 9. Remove and discard the fixings securing the sprag 3. Solenoid/fairing bracket clutch housing to the alternator rotor. Withdraw the sprag clutch housing. 7.23 Service Manual — Daytona 675, Street Triple and Street Triple R puuu1LlrH…
-
Page 153: Inspection
1. Sta er drive gear 2. Sprag clutch housing 3. Alternator rotor 1. Sprag clutch housing 2. Sprag clutch assembly Fit the housing to the alternator rotor. 7.24 Service Manual — Daytona 675, Street Triple and Street Triple R IUMP…
-
Page 154
10. Position a new gasket to the crankcase dowels then 13. Reconnect the battery, positive (red) lead first. refit the left hand engine cover. 14. Refit the rider’s seat (see page 16-17) 7.25 Service Manual — Daytona 675, Street Triple and Street Triple R L UMP… -
Page 155
Assembly…………….Installation…………….8.13 LowOil Pressure Warning Light Switch …………8.15 8.15 Installation…………….8.15 Sump……………… 8.15 Removal…………….Installation…………….8.16 8.18 HeatExchanger…………….Removal…………….8.18 Inspection…………….8.18 8.19 Installation…………….Service Manual — Daytona 675, Street Triple and Street Triple R 1 uMP… -
Page 156: Explodedview — Sump
Lubrication Exploded View — Sump 25 Nm Service Manual — Daytona 675, Street Triple and Street Triple R S UMP…
-
Page 157: Exploded View — Oil Pump/Water Pump, Gears And Heat Exchanger
Exploded View — Oil Pump/Water Pump, Gears and Heat Exchanger 13 Nm ° ® 9Nm 9 Nm 9 Nm 12 IN 10Nm — ——^ 59 Nm ^I yThreeBond 1305 ie threads 15 Nm Service Manual — Daytona 675, Street Triple and Street Triple R Il1MP…
-
Page 158
Lubrication Engine Oil Circuit ^0 0 D A — COOLED OIL A — I INrnnI Fn nil Service Manual — Daytona 675, Street Triple and Street Triple R IIIMP… -
Page 159: Engineoil Circuit Description
On the Daytona 675, Street Triple and Street Triple R, oil is also fed to the alternator to aid cooling of the alternator components.
-
Page 160: Engineoil
Mobil 1 Racing 4T, specially filled for Triumph, is available 1. Filler from your authorised Triumph dealer. 2. Dipstick location in crankcase 3. Dipstick 4. Upper marking 5. Lower marking Service Manual — Daytona 675, Street Triple and Street Triple R ILiMP…
-
Page 161: Oiland Oil Filter Change
Remove the oil drain plug cdga 1. Oil drain plug 2. Oil filter With the motorcycle on level ground, and on the sidestand, allow the oil to completely drain. Service Manual — Daytona 675, Street Triple and Street Triple R I UMP…
-
Page 162: Disposalof Used Engine Oil
Dispose of used oil sensibly. If in doubt contact your local plug to 25 Nm. authority. 11. Fill the engine with new oil of the type and grade listed previously and in the specification section. Service Manual — Daytona 675, Street Triple and Street Triple R IL1MP…
-
Page 163: Removal
Warning The oil may be hot to the touch. Contact with hot oil may cause the skin to be scalded or burned. 1. Oil pick-up 2. Fixings Service Manual — Daytona 675, Street Triple and Street Triple R I UMP…
-
Page 164
Remove and discard the three 0-rings from the pipe. 1. Oil pump drive sprocket 2. Needle roller bearing 1. Coolant outlet pipe 2. Fixing 8.10 Service Manual — Daytona 675, Street Triple and Street Triple R I UMP… -
Page 165
3. Drive chain cover 17. Carefully withdraw the oil pump from the crankcase. 18. Remove and discard the 0-ring from the inlet sleeve on the water pump body. 8.11 Service Manual — Daytona 675, Street Triple and Street Triple R il.1 MP… -
Page 166: Inspection
Severe engine damage may result from the continued Measure the pump end clearance. use of a faulty oil pump. Pump End Clearance Standard: 0.04 — 0.09 mm Service limit: 0.17 mm 8.12 Service Manual — Daytona 675, Street Triple and Street Triple R II,I MP…
-
Page 167: Assembly
Fill the oil pump with new engine oil, turning the pump rotor as the oil is poured in to ensure all surfaces are coated with oil. Service Manual — Daytona 675, Street Triple and Street Triple R 8.13 I UMP…
-
Page 168
Refill the cooling system (see page 11-7 for Daytona 675, or page 11-9 for Street Triple and Street Triple R). 1. Coolant inlet elbow 2. Fixing 8.14 Service Manual — Daytona 675, Street Triple and Street Triple R t uMP… -
Page 169: Lowoil Pressure Warning Light Switch
Contact with a hot exhaust could result in burn injuries. Refit the rider’s seat (see page 16-17). Release the bolts securing the sump to the lower crankcase. 1. Sump 2. Fixings 8.15 Service Manual — Daytona 675, Street Triple and Street Triple R I UMP…
-
Page 170
AASZ z 1. Gasket 2. Gasket/baffle Up to engine number 395929 only: Remove and discard the sump gasket. From engine number 395930 only: Remove the sump gasket/baffle. 8.16 Service Manual — Daytona 675, Street Triple and Street Triple R I UMP… -
Page 171
Tighten the sump fixings to 12 Nm. 1. Sump 2. Fixings 5. Refit the exhaust system (see page 10-119 for Daytona 675 or page 10-124 for Street Triple and Street Triple 10. 8.17 Service Manual — Daytona 675, Street Triple and Street Triple R ll1MP… -
Page 172: Removal
In addition used engine oil contains potentially harmful contaminants which can cause cancer. Wear suitable clothing and avoid skin contact. Disconnect the coolant hoses from the heat exchanger. 8.18 Service Manual — Daytona 675, Street Triple and Street Triple R ^ UMp…
-
Page 173
Instead, firmly hold the heat exchanger in position by hand. 1. Heat exchanger tab 2. Crankcase boss Fit the heat exchanger to the crankcase and tighten the centre bolt to 59 Nm. 8.19 Service Manual — Daytona 675, Street Triple and Street Triple R I UMP… -
Page 174
9 Engine Removal/Refit Table of Contents ExplodedView — Frame Fixings ………….. ineRemoval/Refit …………..Removal…………….Installation…………….Service Manual — Daytona 675, Street Triple and Street Triple R Il1MP… -
Page 175
Engine Removal/Refit Exploded View — Frame Fixings text 48 Nm 48 Nm 6 Nm < 48 Nm text 48 Nm text Service Manual — Daytona 675, Street Triple and Street Triple R ll1MP… -
Page 176
Remove the throttle bodies (see page 10- 106). Drain the engine oil (see page 8-7). 10. Drain the coolant (see page 11-6 for Daytona 675 or page 11-8 for Street Triple and Street Triple R). 11. Remove the radiator (see page 11-13 for Daytona 675, or page 11-1S for Street Triple and Street Triple R). -
Page 177
Align the left hand centre engine mounting and using tool T3880103, tighten the frame adjuster to 3 Nm. Carefully fit the bolt but do not fully tighten at this stage. Service Manual — Daytona 675, Street Triple and Street Triple R t uMP… -
Page 178
3. Rear lower frame adjuster 7. Fit the right hand front bolt (located at the front of the cylinder head), fit a new nut and tighten to 48 Nm. Service Manual -Daytona 675, Street Triple and Street Triple R 1L1MP… -
Page 179
15. Refit the clutch cable (see page 4-6). 16. Reconnect all electrical connections to the engine. 17. Set the drive chain adjustment (see page 12-7). 18. Refit the gearchange linkage. Service Manual — Daytona 675, Street Triple and Street Triple R Il1MP… -
Page 180
Ignitionswitch position ………….. 10.16 nitiontiming …………..10.17 ulse ector ti me …………..10.17 Lambda02 Sensor …………..10.17 Longterm fuel trim …………..10.17 MAPsensor …………… 10.17 1 0.1 Service Manual — Daytona 675, Street Triple and Street Triple R ll.i MP… -
Page 181
VIN 323545 to VIN 381274… 10.26 675 — Circuit Diagram — Engine Management System — Daytona 675 — from VIN 323545 to VIN 381274… 10.27 Circuit Diagram — Engine Management System — Daytona 675 — from VIN 381275 …. -
Page 182
EEPROMError …………….10.64 Fall Detection Switch …………..10.65 PinpointTests …………..10.65 VehicleSpeed Sensor …………..10.66 PinpointTests …………..10.66 InstrumentCommunication (CAN) …………10.67 ointTests …………..10.67 1 0.3 Service Manual — Daytona 675, Street Triple and Street Triple R L UMP… -
Page 183
PinpointTests …………..10.76 IntakeAir Flap Solenoid — Daytona 675 only ……….10.78 PinpointTests …………..10.78 Exhaust Butterfly Valve (EXBV) Position Sensor — Daytona 675 only ……10.80 PinpointTests …………..10.80 Exhaust Butterfly Valve (EXBV) Motor — Daytona only ……..10.81 PinpointTests ………….. -
Page 184
Removal…………….. 10.104 10.105 Inspection……………. Installation……………. 10.105 ThrottleBodies/Injectors …………..10.106 Removal…………….. 10.106 Inspection……………. 10.107 10.108 Installation……………. ThrottleBody Balancing …………..10.109 ThrottlePosition Sensor …………..10.110 Removal…………….. 10.110 1 0.5 Service Manual — Daytona 675, Street Triple and Street Triple R L UMP… -
Page 185
EvaporativeEmissions Control System …………. California Models Only …………. 10.137 ComponentLocations ………….. 10.137 EvaporativeControl System — Engine Off ……….10.138 EvaporativeControl System — Engine Running ……… 10.139 1 0.6 Service Manual — Daytona 675, Street Triple and Street Triple R I UMP… -
Page 186
Fuel System/Engine Management Exploded View — Fuel Tank and Fuel Pump 9 Nm H — . . © c 9 Nm 9 Nm E^^J See text Service Manual — Daytona 675, Street Triple and Street Triple R 1 0.7 1LIMP… -
Page 187
Fuel System/Engine Management Exploded View — Fuel Rail, Throttles and Injectors 3.5 Nm 3.5 N m 1 0.8 Service Manual — Daytona 675, Street Triple and Street Triple R L UMP… -
Page 188
Fuel System/Engine Management Exploded View — Airbox — Daytona 675 1.5 Nm 3 Nm 3 Nm 7 Nm 7 Nm 1 0.9 Service Manual — Daytona 675, Street Triple and Street Triple R I UMP… -
Page 189
Fuel System/Engine Management Exploded View — Airbox — Street Triple and Street Triple R 4 Nm 1.5 Nm 6 Nm 4 Nm 3 Nm 7 Nm 7 Nm 1 0.10 Service Manual — Daytona 675, Street Triple and Street Triple R IllMP… -
Page 190
Fuel System/Engine Management Exploded View — Exhaust System — Daytona 675 10 Nm ^ ^ I o 15 Nm ^ ^O 5 Nm 12 Nm 2 Nm 19 Nm 10.11 Service Manual — Daytona 675, Street Triple and Street Triple R lllMP… -
Page 191
15 Nm ^/’ ® Up to VIN 330765 15 Nm 8 Nm ‘/ 10 • 15 Nm 22 Nrr m® ®a See text 19 Nm 5 Nm 1 0.12 Service Manual — Daytona 675, Street Triple and Street Triple R S UMP… -
Page 192
Fuel System/Engine Management Exploded View — Evaporative System m 8 Nm 3 Nm 8 Nm 10.13 Service Manual — Daytona 675, Street Triple and Street Triple R I UMp… -
Page 193
Fuel System/Engine Management Exploded View — Secondary Air Injection 9 Nm 1 0.14 Service Manual — Daytona 675, Street Triple and Street Triple R IuMP… -
Page 194: Fuel Requirements
Ethanol fuel is a mixture of 10% ethanol and 90% gasoline and is often described under the names ‘gasohol’, ‘ethanol enhanced’, or ‘contains ethanol’. This fuel may be used in Triumph motorcycles. 1 0.15 Service Manual — Daytona 675, Street Triple and Street Triple R I UMP…
-
Page 195
The ‘on’ or ‘off condition of the cooling fan. The ‘ON’ or ‘OFF’ position of either or both the ignition switch and the engine stop switch. 1 0.16 Service Manual — Daytona 675, Street Triple and Street Triple R I uMP… -
Page 196
Purge valve duty cycle The time the purge valve is open in an open/close cycle, Vbatt expressed as a percentage of the cycle time. Battery voltage. 1 0.17 Service Manual — Daytona 675, Street Triple and Street Triple R L UMP… -
Page 197: Engine Management System
The toothed rotor gives a reference point 1 0.18 Service Manual — Daytona 675, Street Triple and Street Triple R L UMP…
-
Page 198
CLUTCH SWITCH ABSOLUTE PRESSURE (MAP) SENSOR THROTTLE POSITION SENSOR BAROMETRIC PRESSURE SENSOR ROAD SPEED SENSOR GEAR POSITION /… 77^ I1 SENSOR ° TION SIDE STAND SWITCH 1 0.19 Service Manual — Daytona 675, Street Triple and Street Triple R 1liMP… -
Page 199
ECM for 1 minute. The ECM power down sequence includes: writing the adaption data to ECM memory and referencing the position of the throttle stepper motor. 1 0.20 Service Manual — Daytona 675, Street Triple and Street Triple R I UMP… -
Page 200
.O°°®`: ‘ MAIN POWER RELAY FUEL PUMP SECONDARY AIR INJECTION SOLENOID ° FUEL I NJECTORS ° O MAIN POWER °^ CANISTER RELAY ° 4°D PURGE VALVE 1 0.21 Service Manual — Daytona 675, Street Triple and Street Triple R I UMP… -
Page 201
Fuel System/Engine Management Engine Management Circuit Diagram — Daytona 675 — up to VIN 300525 — without the Fuel Pump Relay Key To Wiring Circuit Diagram Key To Wiring Colour Codes Code Wiring Colour Item Description Black Engine Control Module… -
Page 202
Fuel System/Engine Management Engine Management Circuit Diagram — Daytona 675 — up to VIN 300525 — without the Fuel Pump Relay 1 0.23 Service Manual — Daytona 675, Street Triple and Street Triple R tl1MP… -
Page 203
Fuel System/Engine Management Fuel Pump Circuit Diagram — Daytona 675 — from VIN 300526 to VIN 323544 — with the Fuel Pump Relay Key To Wiring Circuit Diagram Key To Wiring Colour Codes Code Wiring Colour Item Description Black Fuel Pump Relay… -
Page 204
Fuel System/Engine Management Fuel Pump Circuit Diagram — Daytona 675 — from VIN 300526 to VIN 323544 — with the Fuel Pump Relay FUEL PUMP SUBHARNESS r——————————— NK -13 BP J2 2 2 -NK 1 1- I- ————————J 1 0.25… -
Page 205
Fuel System/Engine Management Circuit Diagram — Engine Management System — Daytona 675 — from VIN 323545 to VIN 381274 Key To Wiring Colour Codes Key To Wiring Circuit Diagram Wiring Colour Code Item Description Black Engine Control Module Blue Diagnostic Connector… -
Page 206
Fuel System/Engine Management Circuit Diagram — Engine Management System — Daytona 675 — from VIN 323545 to VIN 381274 1 0.27 Service Manual — Daytona 675, Street Triple and Street Triple R I uMP… -
Page 207
Fuel System/Engine Management Circuit Diagram — Engine Management System — Daytona 675 — from VIN 381275 Key To Wiring Circuit Diagram Key To Wiring Colour Codes Wiring Colour Code Item Description Black Engine Control Module Blue Diagnostic Connector Instrument Assembly… -
Page 208
Fuel System/Engine Management Circuit Diagram — Engine Management System — Daytona 675 — from VIN 381275 1 0.29 Service Manual — Daytona 675, Street Triple and Street Triple R lgmp… -
Page 209
ECM (as per the illustration), pins are numbered from Clutch Switch right to left with number one in the top right corner. Vehicle Speed Sensor Instrument Assembly Alarm Diagnostic Connector Engine Control Module 1 0.30 Service Manual — Daytona 675, Street Triple and Street Triple R I UMP… -
Page 210
I V’ BY- B30 NK ^YO YO 38 r— GK B17 NK ^GP GP AIB 4K — —23 ^ -^ E[II] l l-f-BU -BG M a^ 1135 1 0.31 Service Manual — Daytona 675, Street Triple and Street Triple R IuMP… -
Page 211
The coolant temperature must have risen by 23° C or more from its start temperature, when 72° C is reached. A controlled power-down sequence must take place. 1 0.32 Service Manual — Daytona 675, Street Triple and Street Triple R I UMP… -
Page 212
Triumph diagnostic software. Note: • Full details of how to operate the software and how to interpret the data can be found in the Triumph Diagnostic Tool User Guide, which can be downloaded by authorised Triumph dealers from www.triumphonline.net . -
Page 213
Intake air temperature °C Absolute throttle position Bank 1 — oxygen sensor 1 Volts Bank 1 — oxygen sensor 1 — short term fuel trim 1 0.34 Service Manual — Daytona 675, Street Triple and Street Triple R I UMP… -
Page 214
Exhaust butterfly valve sensor voltaget t Applies to models fitted with an exhaust butterfly valve only. All other models will show Not Applicable in this field. 1 0.35 Service Manual -Daytona 675, Street Triple and Street Triple R lliMP… -
Page 215
Secondary air injection statust SAI on/off t Applies to models fitted with a Secondary air injection only. All other models will show Not Applicable in this field. 1 0.36 Service Manual — Daytona 675, Street Triple and Street Triple R 111MP… -
Page 216
Exhaust butterfly valve sensor voltaget t Applies to models fitted with an exhaust butterfly valve only. All other models will show Not Applicable in this field. 1 0.35 Service Manual — Daytona 675, Street Triple and Street Triple R IliMp… -
Page 217
Secondary air injection statust SAI on/off t Applies to models fitted with a Secondary air injection only. All other models will show Not Applicable in this field. 1 0.36 Service Manual — Daytona 675, Street Triple and Street Triple R Il1MP… -
Page 218
Oxygen sensor 1 adaption range (off idle) Oxygen sensor 1 adaption range (idle) Oxygen sensor 1 adaption status (off idle) Oxygen sensor 1 adaption status (idle) 1 0.37 Service Manual — Daytona 675, Street Triple and Street Triple R I UMP… -
Page 219: Functiontests
• • coolant warning light illuminates when coolant temperature gauge is at maximum; • end of test. Instruments return to normal operation. 1 0.38 Service Manual — Daytona 675, Street Triple and Street Triple R L UMP…
-
Page 220: Adjust Tune
Vehicle speed km/h Ignition advance degrees Intake air temperature °C Throttle position Oxygen sensor 1 output Voltage Volts Oxygen sensor 1 short term fuel trim 1 0.39 Service Manual — Daytona 675, Street Triple and Street Triple R 1LimP ,,.,…
-
Page 221: Diagnostictrouble Codes
The number of warm-up cycles required to extinguish the MIL will always be less than the number required to remove a DTC from the ECM memory. DTCs can be removed at any time using the Triumph diagnostic software.
-
Page 222
(short to Vcc) (Daytona 675 only) P0078 Exhaust control valve actuator circuit malfunction ( Daytona 675 only) P1080 Exhaust control valve actuator mechanism malfunction ( Daytona 675 only) 1 0.41 Service Manual — Daytona 675, Street Triple and Street Triple R I uMP… -
Page 223
Sensor supply (Vcc) circuit malfunction P1698 Only if Flashing Tunelock P1602 Tunelock is unlocked Only if Flashing P 1614 ECM or tune ID Incorrect Instrument ID Matching 1 0.42 Service Manual — Daytona 675, Street Triple and Street Triple R I UMP… -
Page 224: Electricalconnectors
Push together squarely to ensure terminals on the upper section of the airbox. are not bent or incorrectly located. • Push the two halves together positively. 1 0.43 Service Manual — Daytona 675, Street Triple and Street Triple R Il1MP…
-
Page 225: Reconnectionof Ecm Connectors
Damage to the connector pins may result if an attempt to fit the connectors incorrectly is made. 1. ECM (Daytona 675 shown, Street Triple and Street Triple R similar) 1 0.44 Service Manual — Daytona 675, Street Triple and Street Triple R IIIMP…
-
Page 226: Crankshaftsensor
Reconnect harness, clear fault code and run Action complete — quit test engine to verify fault cleared Fault still present Contact Triumph service Circuit Diagram Crankshaft Sensor _UB A09 1 0.45 Service Manual — Daytona 675, Street Triple and Street Triple R I UMP…
-
Page 227: Idlespeed Control
Action complete — quit test Reconnect harness, clear fault code and run diagnostic software function test to visually verify operation of stepper motor Fault still present Contact Triumph service 1 0.46 Service Manual — Daytona 675, Street Triple and Street Triple R I UMP…
-
Page 228
Fuel System/Engine Management Circuit Diagram Idle Speed Control Stepper Motor 1 0.47 Service Manual — Daytona 675, Street Triple and Street Triple R I uMP… -
Page 229: Fuelinjectors
Renew relevant injector, proceed to test 7 Reconnect harness, clear fault code and run Action complete — quit test engine to verify fault cleared Fault still present Contact Triumph service 1 0.48 Service Manual — Daytona 675, Street Triple and Street Triple R S UMP…
-
Page 230
Fuel System/Engine Management Circuit Diagram EMS Main Relay Fuel Injectors 10.49 Service Manual — Daytona 675, Street Triple and Street Triple R I TMP… -
Page 231: Throttleposition Sensor
Locate and rectify wiring fault, proceed to test Reconnect harness, clear fault code and run Action complete — quit test engine to verify fault cleared Fault still present Contact Triumph service 1 0.50 Service Manual — Daytona 675, Street Triple and Street Triple R tl1MP…
-
Page 232
Fuel System/Engine Management Circuit Diagram Throttle Position Sensor 1 0.51 Service Manual — Daytona 675, Street Triple and Street Triple R L UMP… -
Page 233: Purgevalve
Reconnect harness, clear fault code and run Action complete — quit test diagnostic software function test to visually verify operation of purge valve Fault still present Contact Triumph service 1 0.52 Service Manual — Daytona 675, Street Triple and Street Triple R II,I MP…
-
Page 234
Fuel System/Engine Management Circuit Diagram EMS Main Relay Purge Valve 1 0.53 Service Manual — Daytona 675, Street Triple and Street Triple R Il1MP… -
Page 235: Ignitioncoils
Renew relevant ignition coil, proceed to test 7 Reconnect harness, clear fault code and run Action complete — quit test engine to verify fault cleared Fault still present Contact Triumph service 1 0.54 Service Manual — Daytona 675, Street Triple and Street Triple R ^ uM…
-
Page 236
Fuel System/Engine Management Circuit Diagram EMS Main Relay Ignition Coils 1 0.55 Service Manual — Daytona 675, Street Triple and Street Triple R I UMP… -
Page 237: Coolanttemperature Sensor
Locate and rectify wiring fault, proceed to test Reconnect harness, clear fault code and run Action complete — quit test engine to verify fault cleared Fault still present Contact Triumph service 1 0.56 Service Manual — Daytona 675, Street Triple and Street Triple R ILiMP…
-
Page 238
Resistance data under typical conditions: 200 to 400Q Warm engine: Cold engine: 20°C ambient 2.35 to 2.65K-Q -10°C ambient 8.50 to 10.25KQ Coolant Temperature Sensor 1 0.57 Service Manual — Daytona 675, Street Triple and Street Triple R L UMP… -
Page 239: Intakeair Temperature Sensor
— ECM pin All to ground Action complete — quit test Reconnect harness, clear fault code and run engine to verify fault cleared Fault still present Contact Triumph service 1 0.58 Service Manual — Daytona 675, Street Triple and Street Triple R ILIMP…
-
Page 240
Resistance data: Ambient temp Resistance value 80°C 200 to 400Q 20°C 2.35 to 2.65KQ -10°C 8.50 to 10.25KQ Inlet Air Temperature Sensor 1 0.59 Service Manual — Daytona 675, Street Triple and Street Triple R I uMP… -
Page 241: Systemvoltage
Reconnect harness, clear fault code and run Action complete — quit test engine to verify fault cleared Contact Triumph service Fault still present Circuit Diagram EMS Main Relay 1 0.60 Service Manual — Daytona 675, Street Triple and Street Triple R ll,l MP…
-
Page 242: Coolingfan Relay
Fault still present Contact Triumph service Circuit Diagram Cooling Fan Relay EMS Main Relay 1 0.61 Service Manual — Daytona 675, Street Triple and Street Triple R I UMP…
-
Page 243: Lambdasensor
Reconnect harness, clear fault code and run engine. Check adaptation status Fault still present Contact Triumph service Circuit Diagram EMS Main Relay Lambda Sensor B HA26 1 0.62 Service Manual — Daytona 675, Street Triple and Street Triple R Il1MP…
-
Page 244: Lambdasensor Heater
Reconnect harness, clear fault code and run engine. Check adaption status Fault still present Contact Triumph service Circuit Diagram EMS Main Relay Lambda Sensor NK A06 1 0.63 Service Manual — Daytona 675, Street Triple and Street Triple R I UMP…
-
Page 245: Eepromerror
Fuel System/Engine Management EEPROM Error Fault Code Possible cause Action P0603 EEPROM error View & note ‘freeze frame’ data if available. No tests available — contact Triumph service. 1 0.64 Service Manual — Daytona 675, Street Triple and Street Triple R Il1MP…
-
Page 246: Fall Detection Switch
Locate and rectify wiring fault, proceed to test Action complete, quit test Reconnect harness, clear fault code Contact Triumph service Fault still present Circuit Diagram Fall Detection Switch 1 0.65 Service Manual — Daytona 675, Street Triple and Street Triple R 111MP…
-
Page 247: Pinpointtests
Action complete, quit test engine Fault still present Contact Triumph service Circuit Diagram Engine Stop Alarm Control Unit Switch Fuse Box Instruments ——^ — — Road Speed Sensor 1 0.66 Service Manual — Daytona 675, Street Triple and Street Triple R 1L1MP…
-
Page 248
— ECM pin B27 to Instrument pin 5 Reconnect harness, clear fault code and run Action complete, quit test engine Fault still present Contact Triumph service Circuit Diagram Instruments 1 0.67 Service Manual — Daytona 675, Street Triple and Street Triple R Il1MP… -
Page 249: Fuellevel Sensor
Locate and rectify wiring fault, proceed to test Reconnect harness, clear fault code Action complete, quit test Fault still present Contact Triumph service Circuit Diagram Fuel Level Sensor 1 0.68 Service Manual — Daytona 675, Street Triple and Street Triple R I uMP…
-
Page 250: Ambient(Barometric) Pressure Sensor
Locate and rectify wiring fault, proceed to test Reconnect harness, clear fault code and run Action complete, quit test engine Fault still present Contact Triumph service Circuit Diagram Ambient Pressure Sensor 1 0.69 Service Manual — Daytona 675, Street Triple and Street Triple R L UMP…
-
Page 251: Manifoldabsolute Pressure (Map) Sensor
Locate and rectify wiring fault, proceed to test Action complete, quit test Reconnect harness, clear fault code and run engine Fault still present Contact Triumph service Circuit Diagram Sensor 1 0.70 Service Manual — Daytona 675, Street Triple and Street Triple R IIIMP…
-
Page 252: Gearposition Sensor
Locate and rectify wiring fault, proceed to test Reconnect harness, clear fault code Action complete, quit test Fault still present Contact Triumph service Circuit Diagram Gear Position Sensor 1 0.71 Service Manual — Daytona 675, Street Triple and Street Triple R I uMP…
-
Page 253: Secondaryair Injection Valve
Action complete — quit test Reconnect harness, clear fault code and run diagnostic software function test to visually verify operation of SAI valve Fault still present Contact Triumph service 1 0.72 Service Manual — Daytona 675, Street Triple and Street Triple R ILIMP…
-
Page 254
Fuel System/Engine Management Circuit Diagram EMS Main Relay `—’ Secondary Air Valve 1 0.73 Service Manual — Daytona 675, Street Triple and Street Triple R I uMP… -
Page 255: Fuel Pump — Up To Vin 300525 — Without Fuel Pump Relay
Reconnect harness, clear fault code and run Action complete — quit test diagnostic software function test to verify operation of fuel pump Fault still present Contact Triumph service 1 0.74 Service Manual — Daytona 675, Street Triple and Street Triple R tl1MP…
-
Page 256
Fuel System/Engine Management Circuit Diagram Engine Stop Switch 1 0.75 S ervice Manual — Daytona 675, Street Triple and Street Triple R… -
Page 257: Fuelpump — From Vin 300526 — With Fuel Pump Relay
Reconnect harness, clear fault code and run Action complete — quit test diagnostic software function test to verify operation of fuel pump Fault still present Contact Triumph service 1 0.76 Service Manual — Daytona 675, Street Triple and Street Triple R Il1MP…
-
Page 258
Fuel System/Engine Management Circuit Diagram Fuel Pump Main Relay Alarm 1 0.77 Service Manual — Daytona 675, Street Triple and Street Triple R I uMP… -
Page 259: Intakeair Flap Solenoid — Daytona 675 Only
To verify the correct operation of the air intake flap, start the engine and briefly raise the engine • speed above 4500 rpm. The flap should be seen to open as the engine speed rises and close again as the engine speed falls. 1 0.78 Service Manual — Daytona 675, Street Triple and Street Triple R Ii1MP…
-
Page 260
Fuel System/Engine Management Circuit Diagram Intake Air EMS Main Relay Flap Solenoid 1 0.79 Service Manual -Daytona 675, Street Triple and Street Triple R 1liMP… -
Page 261: Exhaust Butterfly Valve (Exbv) Position Sensor — Daytona 675 Only
Contact Triumph service Fault still present Circuit Diagram Exhaust Valve Position Sensor 1 0.80 Service Manual — Daytona 675, Street Triple and Street Triple R ILIMP…
-
Page 262: Exhaust Butterfly Valve (Exbv) Motor — Daytona 675 Only
Action complete — quit test diagnostic software function test to visually verify operation of the exhaust control valve actuator Fault still present Contact Triumph service Circuit Diagram Exhaust Valve Actuator 1 0.81 Service Manual — Daytona 675, Street Triple and Street Triple R…
-
Page 263: Emsmain Relay Circuit
Switch ignition on and check that the EMS main relay operates. Start engine as final check Fault still present Contact Triumph service 1 0.82 Service Manual — Daytona 675, Street Triple and Street Triple R Il1MP…
-
Page 264
Fuel Syste m/Engine Management Circuit Diagram Fuse box EMS Main Relay 1 0.83 Service Manual — Daytona 675, Street Triple and Street Triple R L UMP… -
Page 265: Emsignition Voltage Input Circuit
Fault still present Contact Triumph service Circuit Diagram Engine Alarm Stop Switch Control Unit Fuse Box r — — — — — co co 1 0.84 Service Manual — Daytona 675, Street Triple and Street Triple R 111MP…
-
Page 266: Volt Sensor Supply Circuit
5V sensor supply voltage level Fault still present Contact Triumph service Circuit Diagram Exhaust Valve Ambient Fall Detection Throttle Pressure MAP Sensor Position Sensor Switch Sensor Position 1 0.85 Service Manual — Daytona 675, Street Triple and Street Triple R II.I MP…
-
Page 267: Tunelock
This is also identified by a fast flashing motorcycle from being operated MIL indication, and a disabled engine management system. Unlock ECM using the diagnostic software supplied unlock code from Triumph service. 1 0.86 Service Manual — Daytona 675, Street Triple and Street Triple R I UMP…
-
Page 268: Ecmor Tune Id Incorrect
Update tune using the diagnostic software, proceed to test 3 Clear fault code, check for normal operation Action complete — quit test Fault still present Contact Triumph service Service Manual — Daytona 675, Street Triple and Street Triple R 1 0.87 I UMP…
-
Page 269: Fault Finding — Non Electrical
Intake air flap inoperative — (Daytona 675 only) Vacuum leak to actuator, vacuum reservoir or hoses 1 0.88 Triple R Service Manual — Daytona 675, Street Triple and Street ILIMP…
-
Page 270: Fueltank
1. Front fuel tank to frame bolts 7. Disconnect the fuel hose by squeezing the sides of the connector and pulling the hose free from its spigot on the fuel pump plate. 1 0.89 Service Manual — Daytona 675, Street Triple and Street Triple R Il1MP…
-
Page 271: Installation
Reconnect the battery, positive (red) lead first. Start the engine and check carefully for fuel leaks. Rectify as necessary. Refit the rider’s seat (see page 16-17). 1 0.90 Service Manual — Daytona 675, Street Triple and Street Triple R L UMP…
-
Page 272: Fuel Tank — Lowering And Securing — Street Triple And Street Triple R Only
1. Fuel tank support 2. Fuel tank 1 0.91 Service Manual — Daytona 675, Street Triple and Street Triple R ll1MP…
-
Page 273: Fuelpump, Fuel Filter And Low Fuel Level Sensor
1. Mounting plate 2. Mounting plate fixings Lift the fuel pump assembly and manoeuvre it from the fuel tank aperture. 1 0.92 Service Manual — Daytona 675, Street Triple and Street Triple R L UMP…
-
Page 274: Fuelpressure Checking
Street Triple R). Use of an incorrect adapter will result in a fuel leak. A fuel leak can result in a fire causing damage to property and injury t o pe rsons. 1 0.93 Service Manual — Daytona 675, Street Triple and Street Triple R I UMP…
-
Page 275
3. Fuel pump connection 12. Refit the rider’s seat (see page 16-17). 4. Wiring extension T3880123 5. Fuel pump connection 6. Fuel pump plate outlet 1 0.94 Service Manual — Daytona 675, Street Triple and Street Triple R I UMP… -
Page 276: Fueldelivery System
1. Relay and fuse box bracket 2. Fixings All models: Disconnect the intake air temperature sensor multi-plug. Direction of Fuel Flow 1. Intake air temperature sensor 2. Multi-plug 1 0.95 Service Manual — Daytona 675, Street Triple and Street Triple R 111MP…
-
Page 277: Inspection
Connect the engine breather hose and refit the spring hose clip. 1. Airbox front fixing location Connect the secondary air injection hose and refit the spring hose clip. 2. Airbox intake trumpet fixings 1 0.96 Service Manual — Daytona 675, Street Triple and Street Triple R ll1MP…
-
Page 278: Airfilter Element
Refit the airbox upper section (see page 10-96). Refit the fuel tank (see page 10-90). Reconnect the battery, positive (red) lead first Refit the rider’s seat (see page 16- 17). 1 0.97 Service Manual — Daytona 675, Street Triple and Street Triple R I UMP…
-
Page 279: Intakeair Temperature Sensor
Reconnect the battery, positive (red) lead first. Reconnect the battery, positive (red) lead first. Refit the rider’s seat (see page 16-17). Refit the rider’s seat (see page 16-17). 1 0.98 Service Manual — Daytona 675, Street Triple and Street Triple R Il1MP…
-
Page 280: Barometricpressure Sensor — Daytona 675 Only
Refit the rider’s seat (see page 16-17). 675 from VIN 381275). Reconnect the battery, positive (red) lead first. Refit the rider’s seat (see page 16- 17). 1 0.99 Service Manual — Daytona 675, Street Triple and Street Triple R I UMP…
-
Page 281: Removal
675 up to VIN 381274, see page 16-25 for Daytona 675 from VIN 381275). Reconnect the battery, positive (red) lead first. Refit the rider’s seat (see page 16- 17). 1 0.100 Service Manual — Daytona 675, Street Triple and Street Triple R I UMP…
-
Page 282: Intakeair Duct — Daytona 675 Only
Refit the barometric pressure sensor (see page 10- 99). Refit the cockpit (see page 16-24). Reconnect the battery, positive (red) lead first. Refit the rider’s seat (see page 16-17). 1 0.101 Service Manual — Daytona 675, Street Triple and Street Triple R mjI111.1r1i…
-
Page 283: Installation
Refit the intake air duct grille. Refit the cockpit (see page 76-24). Reconnect the battery, positive (red) lead first. Refit the rider’s seat (see page 16-17). 1 0.102 Service Manual — Daytona 675, Street Triple and Street Triple R I uMP…
-
Page 284: Crankshaftposition Sensor
Tighten the locknut. Remove the fuel tank (see page 10-89). Remove the airbox (see page 10-95). 1 0.103 Service Manual — Daytona 675, Street Triple and Street Triple R I uMP…
-
Page 285: Removal
Refit the airbox (see page 10-96). Refit the fuel tank (see page 10-90). 10. Reconnect the battery, positive (red) lead first. 11. Refit the rider’s seat (see page 16-17). 1 0.104 Service Manual — Daytona 675, Street Triple and Street Triple R (LIMP…
-
Page 286: Inspection
‘closing’ cable to the bottom. Installation Locate the cables to the frame following the routing noted during removal. 1 0.105 Service Manual — Daytona 675, Street Triple and Street Triple R I UMP…
-
Page 287: Throttlebodies/Injectors
Ease the throttle bodies from the transition pieces and lay the assembly carefully on the cam cover. 10. Release both throttle cables from the throttle cam (see page 10-104). 1 0.106 Service Manual — Daytona 675, Street Triple and Street Triple R Il1MP…
-
Page 288: Inspection
Check all joints and seals for splits, cuts and damage. Check the throttles for sticking, loose or damaged throttle plates. Check the transition piece O-rings for damage. cdvp 1. Injector 2. Fuel rail 1 0.107 Service Manual — Daytona 675, Street Triple and Street Triple R I mp…
-
Page 289: Installation
12. Refit the airbox (see page 10-96). 13. Refit the fuel tank (see page 10-90). 14. Reconnect the battery, positive (red) lead first. 15. Refit the rider’s seat (see page 16-17). 1 0.108 Service Manual — Daytona 675, Street Triple and Street Triple R L UMP…
-
Page 290: Throttlebody Balancing
Guide. Start the engine, and allow to idle. 11. On the diagnostic software navigate to ‘ADJUST TUNE’. 12. Select ‘BALANCE THROTTLES’. 13. Click the Adjust button. 1 0.109 Service Manual — Daytona 675, Street Triple and Street Triple R ll.i MP…
-
Page 291: Throttleposition Sensor
Remove the exhaust extraction hoses from the On the diagnostic software navigate to and select the silencer. ‘ADJUST TUNE’ option. Refit the rider’s seat (see page 16-17). 1 0.110 Service Manual — Daytona 675, Street Triple and Street Triple R Ii1MP…
-
Page 292
User Guide. obstruction/sticking and has a smooth action Refit the rider’s seat (see page 16- 17). throughout the full range of its movement. Rectify as necessary. 1 0.111 Service Manual — Daytona 675, Street Triple and Street Triple R I UMP… -
Page 293: Installation
1. Idle speed control stepper motor 2. Bracket 3. Fi xings • 4. Direction of removal • 1 0.112 Service Manual — Daytona 675, Street Triple and Street Triple R Il1MP…
-
Page 294
Mount the throttle body onto the engine. stepper motor arm. Temporarily reconnect the battery, positive (red) lead first. Attach the Triumph diagnostic tool to the dedicated plug, refer to the Triumph Diagnostic Tool User Guide. Turn the ignition to the ‘ON’ position. -
Page 295
ACaution Do not operate the throttle while the stepper motor is being adjusted, otherwise the incorrect value will be adapted and the engine will not start. 1 0.114 Service Manual — Daytona 675, Street Triple and Street Triple R ILiMP… -
Page 296: Enginemanagement Adaption
In these circumstances, locate and rectify the fault, and reset the adaptions as described above. 1 0.115 Service Manual — Daytona 675, Street Triple and Street Triple R I UMP…
-
Page 297: Exhaust System — Daytona 675
If the rear light bracket is to be removed, release the four silencer heatshield fixings and remove the two heatshields. 1. Silencer 2. Intermediate pipe cdov 3. Clamp 1. Silencer 2. Heatshields 3. Fixings 1 0.116 Service Manual — Daytona 675, Street Triple and Street Triple R ILIMP…
-
Page 298
14. Slacken both cable adjusters at the actuator to give the maximum amount of slack in the cables. 1. Intermediate pipe 2. Clamp 3. Header pipe cd*z 1. Actuator 2. Adjusters 1 0.117 Service Manual — Daytona 675, Street Triple and Street Triple R… -
Page 299
22. Detach the header pipe assembly and collect the seals from the cylinder head ports. cdps 1. Actuator pulley wheel 2. Opening cable 3. Closing cable 19. Remove the radiator (see page 11-13). 1 0.118 Service Manual — Daytona 675, Street Triple and Street Triple R IuMP… -
Page 300: Inspection
• Once satisfied that the valve is in a serviceable condition, refit the header pipes to the motorcycle and adjust the butterfly valve cables (see page 10-131). 1 0.119 Service Manual — Daytona 675, Street Triple and Street Triple R ILiMp…
-
Page 301
A’warningl- Incorrect alignment of the exhaust clamp may cause interference with the rear suspension which may lead to loss of motorcycle control and an accident. 1 0.120 Service Manual — Daytona 675, Street Triple and Street Triple R Il1MP… -
Page 302
Refit the rear bodywork (see page 16-18). Refit the seats (see page 16-17). 1. Exhaust clamp position 2. Exhaust cut-out 3. Exhaust clamp alignment feature 1 0.121 Service Manual — Daytona 675, Street Triple and Street Triple R L UMP… -
Page 303: Exhaustsystem — Street Triple And Street Triple R
Release the clamp securing the intermediate pipe to the header pipes. 1. Clamp bolts 2. Intermediate pipe 3. Left hand silencer 4. Right hand silencer 1. Intermediate pipe 2. Clamp 3. Header pipes 1 0.122 Service Manual — Daytona 675, Street Triple and Street Triple R 111MP…
-
Page 304
Do not fully tighten at this stage. 18. Release the fixings securing the header pipe joints to the cylinder head. Discard the fixings. 1. Header pipes 2. Fixings 1 0.123 Service Manual — Daytona 675, Street Triple and Street Triple R I UMP… -
Page 305: Assembly
2. Seal 3. Seal tab 3. Locate the header pipes and align the header pipe flanges to the fixing points. Fit new nuts and hand tighten. 1 0.124 Service Manual — Daytona 675, Street Triple and Street Triple R Il]MP…
-
Page 306
Refit the rear bodywork (see page 16-18). Refit the seat (see page 16- 17). cere 1. Silencer mounting bracket fixing 2. Nut 19. Repeat steps 17 and 18 above for the left hand silencer. 10.125 Service Manual — Daytona 675, Street Triple and Street Triple IuMP… -
Page 307: Exhaustbutterfly Valve Actuator — Daytona 675 Only
1. Actuator pulley wheel 2. Fixing 1. Cover Slide the actuator pulley off the actuator shaft. 2. Fixings Slide the outer portion of the cables out of the actuator. 1 0.126 Service Manual — Daytona 675, Street Triple and Street Triple R ILIMP…
-
Page 308: Installation
Refit the right hand lower fairing (see page 16-20). Reconnect the battery, red (positive) lead first. 1. Actuator Refit the rider’s seat (see page 16-17). 2. Fixings 1 0.127 Service Manual — Daytona 675, Street Triple and Street Triple R I UMP…
-
Page 309: Exhaustbutterfly Valve Cables — Daytona 675 Only
1. Cover 1. Cover 2. Fixings 2. Fixings Remove and discard the actuator pulley wheel fixing. 1. Actuator pulley wheel 2. Fixing 1 0.128 Service Manual — Daytona 675, Street Triple and Street Triple R II,I MP…
-
Page 310: Inspection
1. Opening cable adjuster/locknuts 2. Closing cable adjuster/locknuts 3. Opening cable nipple 4. Closing cable nipple 5. Exhaust valve pulley wheel 1 0.129 Service Manual — Daytona 675, Street Triple and Street Triple R I uMP…
-
Page 311
(black) cable uppermost. cdps 1.Actuator pulley wheel (fixing boss facing outwards) 2. Opening cable 3. Closing cable 4. Fixing boss 5. Black coating on cable outer 1 0.130 Service Manual — Daytona 675, Street Triple and Street Triple R ILlMP… -
Page 312: Exhaust Butterfly Valve Cable Adjustment — Daytona 675 Only
Guide. 10. Turn the ignition to the ‘ON’ position. 11. On the diagnostic software navigate to and select the ‘ADJUST TUNE’ option. 1. Actuator 2. Adjusters 1 0.131 Service Manual -Daytona 675, Street Triple and Street Triple R L UMP…
-
Page 313
2. Butterfly valve ‘stop’ casting 3. Adjuster 16. Turn the adjuster shown in the illustration below to remove the slack from the cables. Measure the cable slack as follows: 1 0.132 Service Manual — Daytona 675, Street Triple and Street Triple R IL1MP… -
Page 314
18. On the diagnostic software, click the OK button to return the actuator to normal control and return the diagnostic software to the ‘ADJUST TUNE’ menu. 1 0.133 Service Manual — Daytona 675, Street Triple and Street Triple R 1l _MP… -
Page 315: Secondaryair Injection
If air was fed to the exhaust system when the oxygen sensor was operational, the incoming air would cause inaccuracies in the readings sensed by the oxygen sensor (which requires access to ‘raw’ combustion gases) which would lead to rough running. 1 0.134 Service Manual — Daytona 675, Street Triple and Street Triple R ILIMP…
-
Page 316: Secondaryair Injection Solenoid Valve
Refit the fuel tank (see page 10-90). Reconnect the battery, positive (red) lead first. Refit the rider’s seat (see page 16-17). 1. Valves Detach the valves from the camshaft cover. 1 0.135 Service Manual — Daytona 675, Street Triple and Street Triple R I uMP…
-
Page 317: Inspection
Refit the airbox (see page 10-96). damage. Refit the fuel tank (see page 10-90). Reconnect the battery, positive (red) lead first Refit the rider’s seat (see page 16- 17). 1 0.136 Service Manual — Daytona 675, Street Triple and Street Triple R I uMP…
-
Page 318: Evaporativeemissions Control System
Purge Control Valve (3)- adjacent to frame, left hand side (electronically controlled by the ECM) 1. Breather hoses 2. Carbon filled canister 3. Purge valve 4. Purge hose to throttle bodies 1 0.137 Service Manual — Daytona 675, Street Triple and Street Triple R I UMP…
-
Page 319: Evaporativecontrol System — Engine Off
Once in the canister, vapour cannot enter the engine because the purge valve is closed. 1. Breather hoses 2. Carbon filled canister 3. Purge valve (closed) 4. Purge hose to throttle bodies 1 0.138 Service Manual — Daytona 675, Street Triple and Street Triple R 111MP…
-
Page 320
Once in the canister, vapour cannot enter the engine because the purge valve is closed. 1. Breather hoses 2. Carbon filled canister 3. Purge valve (closed) 4. Purge hose to throttle bodies 1 0.138 Service Manual — Daytona 675, Street Triple and Street Triple R I UMP… -
Page 321: Evaporativecontrol System — Engine Running
1. Breather hoses 2. Carbon filled canister 3. Purge valve (open under ECM control) 4. Purge hose to throttle bodies 1 0.139 Service Manual — Daytona 675, Street Triple and Street Triple R 1LlMP…
-
Page 322
11.13 Removal…………….I nspection…………….. 11.14 I nstallation…………….. 11.14 Radiator- Street Triple and Street Triple R ……….. 11.15 Removal …………….11.15 I nspection…………….. 11.16 I nstallation…………….. 11.16 11.1 Service Manual — Daytona 675, Street Triple and Street Triple R I UMP… -
Page 323: Exploded View — Cooling System — Daytona 675
® ® 12 Nm 2 Nm 3Nm 9Nm 2 Nm 12 Nm ^ ^ Q 2 Nm / 9 Nm 3 Nm 12 Nm 2 Nm 11.2 Service Manual — Daytona 675, Street Triple and Street Triple R IL] MP…
-
Page 324: Exploded View — Cooling System — Street Triple And Street Triple R
Exploded View — Cooling System — Street Triple and Street Triple R 1 Nm 2 Nm 9 Nm 2 Nm 2 Nm 12 Nm 2.5 Nm «- ^„ 3Nm 10 Nm 12 Nm 2 Nm 5 Nm Service Manual — Daytona 675, Street Triple and Street Triple R 11.3 Il1MP…
-
Page 325: Coolant
Reduced cooling system efficiency may cause the engine to overheat and suffer severe damage. 11.4 Service Manual — Daytona 675, Street Triple and Street Triple R ILIMP…
-
Page 326: Radiatorand Cooling Fan
If necessary, pressure test the system to locate the source of the leak and rectify as necessary. Loss of coolant may cause the engine to overheat and suffer severe damage. 11.5 Service Manual — Daytona 675, Street Triple and Street Triple R I UMP…
-
Page 327: Coolant Level Inspection — Street Triple And Street Triple R
If necessary, pressure test the system to locate the source of the leak and rectify as necessary. Loss of coolant may cause the engine to overheat and suffer severe damage. 11.6 Service Manual — Daytona 675, Street Triple and Street Triple R Il1MP…
-
Page 328
Stop the engine. Check and top up the coolant level as necessary. 11.7 Service Manual — Daytona 675, Street Triple and Street Triple R I UMP… -
Page 329: Coolant Replacement — Street Triple And Street Triple R
Do not allow the radiator cowl to hang from the direction indicator harness. Repeat steps 4 to 6 above for the left hand radiator cowl. 11.8 Service Manual — Daytona 675, Street Triple and Street Triple R Il1MP…
-
Page 330
Note: 1. Coolant outlet tube • A hand operated vacuum pump or similar 2. Drain bolt should be used to syphon the coolant through the system. 11.9 Service Manual — Daytona 675, Street Triple and Street Triple R L UMP… -
Page 331
Repeat steps 18 and 19 above for the left hand radiator cowl. Check the expansion tank level and top up if necessary. Refit the rider’s seat (see page 16-17). 11.10 Service Manual — Daytona 675, Street Triple and Street Triple R Il1MP… -
Page 332: Coolantpressure Cap
2. Pressure test the cap to the blow off pressure of 1.1 bar. If the cap opens at a lower pressure or fails to open at 1.1 bar, replace the cap. 1. Thermostat housing 2. Fixings 11.11 Service Manual — Daytona 675, Street Triple and Street Triple R iliMP…
-
Page 333: Inspection
Installation Locate the thermostat into the cylinder head. Ensure the bleed valve is uppermost as shown below. 1. Thermostat 2. Bleed valve 11.12 Service Manual — Daytona 675, Street Triple and Street Triple R ILiMP…
-
Page 334: Radiator — Daytona 675
Contact with the camshaft cover. the pressurised coolant will cause scalds and skin damage. Drain the coolant (see page 11-6). 11.13 Service Manual -Daytona 675, Street Triple and Street Triple R «fl1IIIIMrH…
-
Page 335: Inspection
Check that the fan spins freely and without tight Refit the lower fairings (see page 16-22). spots. Refill the cooling system (see page 11-7). Check the fan blades for signs of heat distortion. 11.14 Service Manual — Daytona 675, Street Triple and Street Triple R I UMP…
-
Page 336: Radiator-Street Triple And Street Triple R
Disconnect the two horn electrical connectors. 1. Heat exchanger hose 2. Radiator lower mount fixing Disconnect the cooling fan connection, located above the camshaft cover. 1. Horn connectors 11.15 Service Manual -Daytona 675, Street Triple and Street Triple R Il.1 MP…
-
Page 337: Inspection
Check that the fan spins freely and without tight spots. Check the fan blades for signs of heat distortion. 11.16 Service Manual — Daytona 675, Street Triple and Street Triple R ll1MP…
-
Page 338
ExplodedView — Swinging Arm …………12.2 lodedView — Rear Hub and Wheel …………12.3 Exploded View — Rear Suspension Unit — Daytona 675 and Street Triple R ……12.4 Exploded View — Rear Suspension Unit — Street Triple ………. 12.5 — Drop/Drag Link ………… -
Page 339: Explodedview — Swinging Arm
Rear Suspension Exploded View — Swinging Arm Street Triple — —- 9 Nm Daytona 675 9 Nm 9 Nm 9 Nm 110 Nm 20 Nm 6 Nm 12.2 Service Manual — Daytona 675, Street Triple and Street Triple R 111MP…
-
Page 340: Exploded View — Rear Hub And Wheel
Rear Suspension Exploded View — Rear Hub and Wheel 110 Nm 55 Nm 30 Nm 12.3 Service Manual — Daytona 675, Street Triple and Street Triple R Il1MP…
-
Page 341: Exploded View — Rear Suspension Unit — Daytona 675 And Street Triple R
Rear Suspension Exploded View — Rear Suspension Unit — Daytona 675 and Street Triple R 52 Nm 48 Nm 1 2.4 Service Manual — Daytona 675, Street Triple and Street Triple R Il1MP…
-
Page 342: Exploded View — Rear Suspension Unit — Street Triple
Rear Suspension Exploded View — Rear Suspension Unit — Street Triple 52 Nm 48 Nm Id vi 1 2.5 Service Manual — Daytona 675, Street Triple and Street Triple R ll1MP…
-
Page 343: Exploded View — Drop/Drag Link
Rear Suspension Exploded View — Drop/Drag Link 48 Nm 48 Nm 1 2.6 Service Manual — Daytona 675, Street Triple and Street Triple R 1lIMP…
-
Page 344: Chainfree-Movement Inspection
O-ring seals prevents this from happening. Caution Do not use a power ‘jet’ wash to clean the chain as this may cause damage to the chain components. 1 2.7 Service Manual — Daytona 675, Street Triple and Street Triple R I UMp…
-
Page 345: Chainfree-Movement Adjustment
A chain that breaks or jumps off the sprockets could snag on the engine sprocket or lock the rear wheel, severely damaging the motorcycle and causing loss of control and an accident. 1 2.8 Service Manual — Daytona 675, Street Triple and Street Triple R I UMP…
-
Page 346: Rearsuspension Unit
Remove the three drop link plate fixings. Discard the components, replace the drive chain and/or any nuts. other damaged components. Refit the chain guard, tightening the fixings to 9 Nm. 1 2.9 Service Manual — Daytona 675, Street Triple and Street Triple R ll.l MP…
-
Page 347: Inspection
1. Swinging arm bolt position motorcycle. 2. Rear suspension bolt position 3. Drag link bolt position Service Manual — Daytona 675, Street Triple and Street Triple R 1 2.10 I UMP…
-
Page 348
Daytona 675 or page 16-19 for Street Triple and page 16-22). Street Triple R). 11. Fit the rear panel(s) (see page 16-18 for Daytona 675 Daytona 675 only: Remove the lower fairings (see or page 16-25 for Street Triple and Street Triple R). -
Page 349: Inspection
Detach the chain from the output sprocket. Warning Do not allow the caliper to hang on the brake hose as this may damage the hose and could lead to an accident. 12.12 Service Manual — Daytona 675, Street Triple and Street Triple R Il1MP…
-
Page 350
1. Swinging arm 2. Spindle 1. Frame adjuster sleeve 2. Sleeve 3. Seal 4. Needle roller bearing 5. Spacer tube 6. Ball Bearing 7. Circlip 8. Seal 9. Spacer 12.13 Service Manual — Daytona 675, Street Triple and Street Triple R puII1IrH… -
Page 351: Inspection
Fit a new swinging arm spindle nut and tighten to 110 Nm. Fit the drive chain to the output sprocket. 10. Refit the sprocket cover and tighten the bolts to 9 Nm. 12.14 Service Manual — Daytona 675, Street Triple and Street Triple R I UMP…
-
Page 352: Drivechain Replacement
15. Daytona 675 only: Refit the lower fairings (see page 16-22). 16. Fit the rear panel(s) (see page 16-18 for Daytona 675 or page 16-25 for Street Triple and Street Triple R). 17 Connect the battery, red (positive) lead first.
-
Page 353
12.16 Service Manual — Daytona 675, Street Triple and Street Triple R II,I MP… -
Page 354
Ensure the split li nk pin is centrally located on the flare pin. 12.17 Service Manual — Daytona 675, Street Triple and Street Triple R lump… -
Page 355
Service Manual — Daytona 675, Street Triple and Street Triple R 1 2.18 S UMP… -
Page 356
13 Front Suspension Table of Contents Exploded View — Front Fork — Daytona 675 and Street Triple R ……..13.2 ExplodedView — Handlebars — Daytona 675 ……….13.3 ExplodedView — Front Fork — Street Triple ………… 13.4 Exploded View — Handlebars — Street Triple and Street Triple R …….. -
Page 357: Exploded View — Front Fork — Daytona 675 And Street Triple R
Front Suspension Exploded View — Front Fork — Daytona 675 and Street Triple R See text 18Nm 20 Nm 17 Nm —` 12Nm 20 Nm 18 Nm/ Daytona 675 22 Nm 24 Nm 13.2 Service Manual — Daytona 675, Street Triple and Street Triple R…
-
Page 358: Exploded View — Handlebars — Daytona 675
Front Suspension Exploded View — Handlebars — Daytona 675 5 Nm 13.3 Service Manual — Daytona 675, Street Triple and Street Triple R lump…
-
Page 359: Explodedview — Front Fork — Street Triple
Front Suspension Exploded View — Front Fork — Street Triple See text 20 Nm 17 Nm 25 Nm 22 Nm ® 1 24 Nm 13.4 Service Manual — Daytona 675, Street Triple and Street Triple R I uMP…
-
Page 360
Front Suspension Exploded View — Handlebars — Daytona 675 5 Nm 1 3.3 Service Manual — Daytona 675, Street Triple and Street Triple R I UMP… -
Page 361
Front Suspension Exploded View — Front Fork — Street Triple See text ®D 17 Nm 25 Nm 22 Nm 24 Nm 13.4 Service Manual — Daytona 675, Street Triple and Street Triple R Il1MP… -
Page 362: Exploded View — Handlebars — Street Triple And Street Triple R
Front Suspension Exploded View — Handlebars — Street Triple and Street Triple R 5 Nm 000.000 u^^oou,°•po• 6 Nm 4 Nm 5 Nm 35 Nm 13.5 Service Manual — Daytona 675, Street Triple and Street Triple R I UMp…
-
Page 363: Front Fork
A damaged brake hose can cause a reduction in braking efficiency leading to loss of motorcycle contr o l and an accident. 13.6 Service Manual — Daytona 675, Street T ri ple and Street Triple R IUMP…
-
Page 364
1. Top yoke clamp bolt Caution Care must be taken when removing the forks, to ensure that the outer surfaces do not become scratched. 13.7 Service Manual — Daytona 675, Street Triple and Street Triple R L UMP… -
Page 365: Front Suspension Installation
Leave the fork for a few minutes to allow the oil to stabilise. 13.8 Service Manual — Daytona 675, Street Triple and Street Triple R IIIMP…
-
Page 366: Forkoil Level Chart
Incorrect fork oil levels could result in an unsafe riding condition leading to loss of control and an accident. Assemble the fork (see page 13-13). Refit the fork (see page 13-8). 13.9 Service Manual — Daytona 675, Street Triple and Street Triple R I UMP…
-
Page 367: Disassembly
Pump the damper rod to remove all the oil. cdli Return the fork to the soft jawed vice. 1. Preload adjuster marks 2. Compression/rebound adjuster 13.10 Service Manual — Daytona 675, Street Triple and Street Triple R 111MP…
-
Page 368
If the spring compressor or holder should dislodge or detach, the resulting release of spring tension could cause parts to fly off resulting in injury to the user. 13.11 Service Manual — Daytona 675, Street Triple and Street Triple R lump… -
Page 369: Inspection
Inspect the spring for damage, cracks and deformation. Renew the spring if necessary. Inspect all the bushes and seals for damage. Renew any damaged items if necessary. 13.12 Service Manual — Daytona 675, Street Triple and Street Triple R I UMP…
-
Page 370: Assembly
Invert and position the outer fork tube to tool T3880002. Apply a smear of fork oil to the bushes and seals. 1.Tool T3880003 2. Seal 3. Washer 4. Bush 5. Tool T3880002 13.13 Service Manual — Daytona 675, Street Triple and Street Triple R ILIMP…
-
Page 371
18. Refit tool T3880067 as previously described, compress the fork spring and refit the spring holder. 1. Damper locknut 2. Tool T3880067 3. Spring holder (part of T3880067) 13.14 Service Manual — Daytona 675, Street Triple and Street Triple R I uMP… -
Page 372: Headstockbearing Check/Adjustment
28. Tighten the top cap to 25 Nm. Note: • It is much easier to tighten the top cap when the fork has been refitted. Refit the fork (see page 13-8). 13.15 Service Manual — Daytona 675, Street Triple and Street Triple R l ump…
-
Page 373: Adjustment — Daytona 675
Care must be taken when removing the headstock top nut, to ensure that the top nut and top yoke do not become scratched. Protect the surfaces with a suitable cloth or tape to prevent scratching. 13.16 Service Manual — Daytona 675, Street Triple and Street Triple R lliMP…
-
Page 374: Adjustment — Street Triple And Street Triple R
Adjust the bearing free-play as follows, all using tool T3880023: • Remove the locknut and tab washer. • Slacken the adjuster nut then tighten to 40 Nm. 13.17 Daytona 675, and Street Service Manual — Street Triple Triple R IUMp…
-
Page 375
10. Tighten the top yoke clamp bolts to 26 Nm. Locate the handlebar assembly in the lower halves of the clamps. Fit the upper clamps and bolts. 13.18 Service Manual — Daytona 675, Street Triple and Street Triple R ILiMP… -
Page 376: Headstockbearing Removal
1. Examine the frame for any raised witness marks caused by the removal process. Remove any such marks with fine emery paper or a gentle file. 13.19 Service Manual — Daytona 675, Street Triple and Street Triple R I UMP…
-
Page 377
Evenly and progressively drive a new complete upper bearing into the frame headstock. Lubricate the lower bearing using multi-purpose grease. Drive a new lower outer bearing into the frame headstock. 13.20 Service Manual — Daytona 675, Street Triple and Street Triple R 11.1 MP… -
Page 378: Steeringdamper — Daytona 675 Only
Noting its orientation, collect the flanged sleeve located between the damper body and the lower yoke. 1. Steering damper 2. Upper fixing 3. Flanged sleeve 13.21 Service Manual — Daytona 675, Street Triple and Street Triple R I uMP…
-
Page 379
Note and mark the position of each cable relative to the twist grip in order to correctly identify their location during reassembly. 13.22 Service Manual — Daytona 675, Street Triple and Street Triple R Il1MP… -
Page 380
15. Slide the top yoke off the front forks and lay aside. 16. Slide the handlebars off the front forks. 17. If required, remove the left hand handlebar grip. 13.23 Service Manual — Daytona 675, Street Triple and Street Triple R I UMP… -
Page 381
20. Check the throttle cable free play setting. Adjust as necessary. See page 10-103. Reconnect the battery, positive (red) lead first. Refit the seat. 1. Opening cable 2. Closing cable 13.24 Service Manual — Daytona 675, Street Triple and Street Triple R I uMP… -
Page 382
Note and mark the position of each cable relative to the twist grip in order to correctly identify their location during reassembly. 13.25 Service Manual — Daytona 675, Street Triple and Street Triple R ll. mP… -
Page 383
Slide the twist grip onto the right hand side of the handlebar. 1. Upper Clamp 2. Handlebar 3. Riser 14. Remove the left hand handlebar grip. 13.26 Service Manual — Daytona 675, Street Triple and Street Triple R I uMP… -
Page 384
15 Nm. 14. Street Triple R only: Attach the front brake reservoir to its mounting bracket. Tighten the fixing to 7 Nm. 13.27 Service Manual — Daytona 675, Street Triple and Street Triple R L UMP… -
Page 385
Exploded View — Front Brake Master Cylinder — Daytona 675 and Street Triple R ….Exploded View — Front Brake Master Cylinder — Street Triple ……..14.4 Exploded View — Front Brake Caliper — Daytona 675 up to VIN 381274 and Street Triple R..14.5 14.6 Exploded View — Front Brake Caliper — Daytona 675 from VIN 381275 …… -
Page 386
Disassembly…………..14.26 Installation…………… 14.28 FrontDiscs — All Models …………..14.28 Wear…………….14.28 Removal…………….. 14.29 Installation…………… 14.29 Front Brake Master Cylinder — Daytona 675 and Street Triple R ……… 14.30 Removal…………….. 14.30 Disassembly…………..14.30 Inspection…………….. 14.31 Assembly…………….. 14.31 Installation……………. 14.31 FrontBrake Master Cylinder — Street Triple ………. -
Page 387: Exploded View — Front Brake Master Cylinder — Daytona 675 And Street Triple R
Brakes Exploded View — Front Brake Master Cylinder — Daytona 675 and Street Triple R 7 Nm revW11 25 Nm 25 Nm 25 Nm 1 4.3 Service Manual — Daytona 675, Street Triple and Street Triple R I UMP…
-
Page 388: Exploded View — Front Brake Master Cylinder — Street Triple
Brakes Exploded View — Front Brake Master Cylinder — Street Triple 1.5 Nm 1 Nm 12 Nm 25 Nm 25 Nm 25Nm 14.4 Service Manual — Daytona 675, Street Triple and Street Triple R 1L1MP…
-
Page 389: Exploded View — Front Brake Caliper — Daytona 675 Up To Vin 381274 And Street Triple R
Brakes Exploded View — Front Brake Caliper — Daytona 675 up to VIN 381274 and Street Triple R 35 Nm / 7 , t …- 1 8Nm m° m ° ^^^ m °m o° m 22 Nm m°° ^ 1 4.5…
-
Page 390: Exploded View — Front Brake Caliper — Daytona 675 From Vin 381275
Brakes Exploded View — Front Brake Caliper — Daytona 675 from VIN 381275 35 Nm 18 Nm 22 Nm 14.6 Service Manual — Daytona 675, Street Triple and Street Triple R IL1MP…
-
Page 391: Exploded View — Front Brake Caliper — Street Triple
Brakes Exploded View — Front Brake Caliper — Street Triple 28 Nm 6 Nm 3 Nm (5—- 18 Nm 22 Nm 1 4.7 Service Manual -Daytona 675, Street Triple and Street Triple R I UMP…
-
Page 392: Exploded View — Rear Brake Master Cylinder — All Models
Brakes Exploded View — Rear Brake Master Cylinder — All Models 25 Nm 25 Nm 6 Nm r Th —-^’ 22 Nm 18 1 Nm `— Service Manual — Daytona 675, Street Triple and Street Triple R 1 4.8 Il1MP…
-
Page 393: Explodedview — Rear Brake Caliper — All Models
Brakes Exploded View — Rear Brake Caliper — All Models 22 Nm 1 4.9 Service Manual — Daytona 675, Street Triple and Street Triple R 1L1Mp…
-
Page 394: Brakingsystem Maintenance Safety Precautions
Failure to change the brake fluid at the interval specified in the scheduled maintenance chart may reduce braking efficiency resulting in an accident. 1 4.10 Service Manual — Daytona 675, Street Triple and Street Triple R tllMP…
-
Page 395: Front Brake Fluid Level Inspection — Daytona 675 And Street Triple R
Refit the safety clip. • Refit the cover, ensuring that the diaphragm seal is correctly positioned between the cap and reservoir body. Tighten the cap retaining screws. 1 4.11 Service Manual — Daytona 675, Street Triple and Street Triple R L UMP…
-
Page 396: Rearbrake Fluid Level Inspection — All Models
Replacing individual pads will reduce braking efficiency and may cause an ccident. 1 4.12 Service Manual — Daytona 675, Street Triple and Street Triple R I UMP…
-
Page 397: Bleedingthe Front Brakes, Renewing Brake Fluid
10. Get an assistant to slowly pull the brake lever to the dangerous riding condition leading to loss of motorcycle handlebar. control and an accident could result if this warning is ignored. 14.13 Service Manual — Daytona 675, Street Triple and Street Triple R l ump…
-
Page 398
Failure to take remedial action may reduce braking efficiency leading to loss of motorcycle control and an accident. 1 4.14 Service Manual — Daytona 675, Street Triple and Street Triple R Il1MP… -
Page 399: Front Brake Pads — Daytona 675 Up To Vin 381274 And Street Triple R
Ease the brake pads apart to force the caliper pistons back to allow withdrawal of the pads. 14.15 Service Manual — Daytona 675, Street Triple and Street Triple R Il1MP…
-
Page 400
2. Anti-rattle spring 3. Brake pads Pump the brake lever to correctly position the caliper pistons. Repeat the removal, inspection and installation process for the other caliper. 1 4.16 Service Manual — Daytona 675, Street Triple and Street Triple R Il.l MP… -
Page 401
• Complete the assembly of the brake pads to one caliper (see assembly for details) before removing the pads from the other caliper. 1. Pad retaining pin 2. Caliper mounting bolts 1 4.17 Service Manual — Daytona 675, Street Triple and Street Triple R t UMP… -
Page 402
Slide the caliper onto the disc, ensuring the pads pass either side, and fit the mounting bolts. Tighten the mounting bolts to 35 Nm. 1 4.18 Service Manual — Daytona 675, Street Triple and Street Triple R Il1MP… -
Page 403
Slacken and remove the caliper mounting bolts and slide the caliper off the disc. 14.19 Service Manual -Daytona 675, Street Triple and Street Triple R I UMP… -
Page 404
Slide the caliper onto the disc, ensuring the pads pass either side, and fit the mounting bolts. Tighten the mounting bolts to 28 Nm. Tighten the pad retaining pin to 18 Nm. 1 4.20 Service Manual — Daytona 675, Street Triple and Street Triple R I UMP… -
Page 405
Discard the old seals, these must not be re- used. 1. Caliper bolts Manoeuvre the caliper clear of the disc, taking care not to damage the wheel. 14.21 Service Manual — Daytona 675, Street Triple and Street Triple R I UMP… -
Page 406
Apply a small drop of Loctite Hydraulic Sealant 569 to the threads of new caliper bolts and secure the two halves of the caliper together. Tighten the caliper bolts to 22 Nm. 1 4.22 Service Manual — Daytona 675, Street Triple and Street Triple R lllMP… -
Page 407
Failure to take remedial action may result in reduced braking efficiency leading to loss of motorcycle control and an accident. 1 4.23 Service Manual — Daytona 675, Street Triple and Street Triple R lump… -
Page 408
14.24 Service Manual — Daytona 675, Street Triple and Street Triple R Il,1 MP… -
Page 409
DOT 4 brake fluid. Ease the pistons squarely back into the bores as noted for removal, taking care not to displace the seals. 14.25 Service Manual — Daytona 675, Street Triple and Street Triple R L UMP… -
Page 410
If damage is present, renew the worn component or the complete caliper assembly. 1 4.26 Service Manual — Daytona 675, Street Triple and Street Triple R It,I MP… -
Page 411
Damage caused by contact with mineral based grease may reduce braking efficiency resulting in an accident. 1 4.27 Service Manual — Daytona 675, Street Triple and Street Triple R I UMP… -
Page 412: Wear
Failure to take remedial action may result in reduced braking efficiency leading to loss of motorcycle control and an accident. 1. Disc 2. Dial gauge 1 4.28 Service Manual — Daytona 675, Street Triple and Street Triple R Il1MP…
-
Page 413
1. Wheel 2. Support blocks Remove and discard the bolts. Detach the disc. Repeat for the other disc 14.29 Service Manual — Daytona 675, Street Triple and Street Triple R I UMP… -
Page 414: Front Brake Master Cylinder — Daytona 675 And Street Triple R
/ ^ 5 cdod 1. Master cylinder 2. Spring 1. Pivot bolt 3. Piston seals 2. Nut 4. Piston 5. Circlip 14.30 Service Manual — Daytona 675, Street Triple and Street Triple R IuMP…
-
Page 415: Inspection
Do not tighten the clamp bolts at this stage. Connect the brake hose to the master cylinder incorporating new sealing washers. Tighten the banjo bolt to 25 Nm. 14.31 Service Manual — Daytona 675, Street Triple and Street Triple R LUMP…
-
Page 416: Frontbrake Master Cylinder — Street Triple
Failure to take remedial action may result in reduced braking efficiency leading to loss of motorcycle control and an accident. 1 4.32 Service Manual — Daytona 675, Street Triple and Street Triple R Il1MP…
-
Page 417: Disassembly
1. Ports cequ 1. Master cylinder 2. Spring and piston assembly 3. Circlip 4. Rubber boot 1 4.33 Service Manual — Daytona 675, Street Triple and Street Triple R I UMp…
-
Page 418: Assembly
Observe the brake fluid handling warnings given earlier in this section of the manual. 1 4.34 Service Manual — Daytona 675, Street Triple and Street Triple R ll1MP…
-
Page 419: Bleedingthe Rear Brakes, Renewing Brake Fluid
Caution To prevent paint damage, do not spill brake fluid onto any area of the bodywork. Spilled brake fluid will damage paintwork. 14.35 Service Manual — Daytona 675, Street Triple and Street Triple R I uMP…
-
Page 420
Repeat steps 6 and 7 until no more air appears in the bleed tube. Maintain the brake fluid level between the upper and lower reservoir levels whilst bleeding is being carried out. 1 4.36 Service Manual — Daytona 675, Street Triple and Street Triple R ll1MP… -
Page 421: Rearbrake Pads
Mineral based grease will damage the hydraulic seals and dust seals in the calipers and master cylinders. Damage caused by contact with mineral based grease may reduce braking efficiency resulting in an accident. 14.37 Service Manual — Daytona 675, Street Triple and Street Triple R ll111A1P…
-
Page 422
Tighten the pad retaining pin to 18 Nm. 10. Fit the retaining plug and tighten to 3 Nm. 11. Pump the brake pedal to correctly position the caliper pistons. 1 4.38 Service Manual — Daytona 675, Street Triple and Street Triple R L UMP… -
Page 423: Rearbrake Caliper
Eye, face and skin damage will result from d irect contact w i th co mpressed a ir. 14.39 Service Manual — Daytona 675, Street Triple and Street Triple R lump…
-
Page 424
Do not apply more than a minimum coating of grease to the pad retaining pins. Excess grease may contaminate the brake pads, hydraulic seals and discs causing reduced braking ef fi ciency and an accident. 1 4.40 Service Manual — Daytona 675, Street Triple and Street Triple R Il1MP… -
Page 425: Rearbrake Disc
1. Disc 2. Dial gauge Note: • Details of rear brake disc removal and installation can be found in the wheel section. 1 4.41 Service Manual — Daytona 675, Street Triple and Street Triple R I UMP…
-
Page 426: Rearmaster Cylinder
7. Remove the screws securing the master cylinder and Ensure all ports are clear of obstruction. heel guard to the frame to release the master cylinder. 1 4.42 Service Manual — Daytona 675, Street Triple and Street Triple R Il1MP…
-
Page 427
4. Push rod 5. Clevis pin 6. Clip 7. Circlip If the pushrod has been disassembled, adjust the length of the pushrod as shown below: 1. Pushrod 2. Locknut 14.43 Service Manual — Daytona 675, Street Triple and Street Triple R IUMP… -
Page 428
Failure to take remedial action may result in reduced braking efficiency leading to loss of motorcycle control and an accident. 14.44 Service Manual — Daytona 675, Street Triple and Street Triple R illMP… -
Page 429
FrontWheel Bearings …………..Removal…………….15.10 15.10 Inspection…………….. Installation…………….. 15.10 RearWheel Bearings …………..15.11 Removal…………….15.11 15.12 Inspection…………….. 15.12 Installation…………….. 15.13 FinalDrive …………….15.13 Removal…………….Inspection…………….. 15.13 Installation…………….. 15.13 15.1 Service Manual — Daytona 675, Street Triple and Street Triple R Il1MP… -
Page 430
Wheels/Tyres Exploded view — Front Wheel 65 Nm 15.2 Service Manual — Daytona 675, Street Triple and Street Triple R Il1MP… -
Page 431
Wheels/Tyres Exploded View — Rear Wheel & Final Drive 110 Nm •O0 55 Nm 30 Nm ———- 15.3 Service Manual — Daytona 675, Street Triple and Street Triple R 1lJMP… -
Page 432
Tyres must be replaced after such use as continued use of a damaged tyre may lead to instability, loss of control and an accident. gafj 1. Tread wear indicator 1 5.4 Service Manual — Daytona 675, Street Triple and Street Triple R iLlMP… -
Page 433
1 5.5 Service Manual — Daytona 675, Street Triple and Street Triple R 1l, mP… -
Page 434: Front Wheel
Slacken both pinch bolts at the lower end of the left an acci dent. hand fork. I W 1. Fork pinch bolts Release and remove the wheel spindle, which is threaded into the right hand fork. 1 5.6 Service Manual — Daytona 675, Street Triple and Street Triple R Il1MP…
-
Page 435
14-23 for Daytona 675 up to VIN 381274 and Street Tiple R; • see page 14-25 for Daytona 675 from VIN 381275; • see page 14-28 for Street Triple. 15.7 Service Manual — Daytona 675, Street Triple and Street Triple R I uMP… -
Page 436: Rear Wheel
Damaged hoses could cause brake failure leading to loss of control and an accident. Tie the rear brake caliper aside. 1 5.8 Service Manual — Daytona 675, Street Triple and Street Triple R 11,1 MP…
-
Page 437
Incorrectly fitted wheel spacers will cause a dangerous riding condition leading to loss of motorcycle control and an accident. Fit the wheel spindle with the threaded end facing to the left. 15.9 Service Manual — Daytona 675, Street Triple and Street Triple R ‘rrII111Av1i… -
Page 438
Large face wheel, drift out the wheel bearings. Collect the Wheel centre sleeve. Right bearing T3880053 3880065 T0301 Small face bearing Large face wheel Wheel Bearing Removal 15.10 Service Manual — Daytona 675, Street Triple and Street Triple R Il1MP… -
Page 439
4. Using a suitable pin punch, through the centre of the wheel, drift out the wheel bearings. Collect the centre sleeve. gaeo Rear Wheel Bearing Removal 15.11 Service Manual — Daytona 675, Street Triple and Street Triple R I uMP… -
Page 440
Support tool tool Left bearing 3880070 3880065 T0301 T0301 Small face Large face bearing Wheel 3880065 Right bearing 3880070 T0301 T0301 Small face Large face bearing wheel 15.12 Service Manual — Daytona 675, Street Triple and Street Triple R L UMP… -
Page 441
Install the cush drive rubbers to the wheel. Refit the drive flange to the wheel. Refit the rear wheel (see page 15-8). 1. Rear wheel 2. Drive flange 15.13 Service Manual — Daytona 675, Street Triple and Street Triple R lump… -
Page 442
Exploded View — Rear Subframe — Street Triple and Street Triple R ……. 16.5 Exploded View — Cockpit and Mountings — Daytona 675 up to VIN 381274 ……16.6 Explode View — Cockpit and mountings — Daytona 675 from VIN 381275 …… -
Page 443
16.23 16.23 Installation…………… 16.23 Cockpit Daytona 675 …………..Removal…………….. 16.23 Installation…………… 16.24 RadiatorCowl — Street Triple and Street Triple R ……….16.25 Removal…………….. 16.25 Installation…………… 16.25 1 6.2 Service Manual — Daytona 675, Street Triple and Street Triple R Il1MP… -
Page 444: Frame And Bodywork
Exploded View — Frame — all Models section 9 section 9 48 Nm 48 Nm 6 Nm 48 Nm 48 Nm ®^ °^ 48 Nm section 9 48 Nm section 9 1 6.3 Service Manual — Daytona 675, Street Triple and Street Triple R lliMP…
-
Page 445: Exploded View — Rear Subframe — Daytona 675
Frame and Bodywork Exploded View — Rear Subframe — Daytona 675 48 Nm 48 Nm 1 6.4 Service Manual — Daytona 675, Street Triple and Street Triple R ILIMP…
-
Page 446: Exploded View — Rear Subframe — Street Triple And Street Triple R
Frame and Bodywork Exploded View — Rear Subframe — Street Triple and Street Triple R 48 Nm 16.5 Service Manual — Daytona 675, Street Triple and Street Triple R IgmP…
-
Page 447: Exploded View — Cockpit And Mountings — Daytona 675 Up To Vin 381274
Frame and Bodywork Exploded View — Cockpit and Mountings — Daytona 675 up to VIN 381274 p®^ 9 Nm 8 Nm 8 Nm 1 6.6 Service Manual — Daytona 675, Street Triple and Street Triple R Il1MP…
-
Page 448: Explode View — Cockpit And Mountings — Daytona 675 From Vin 381275
Frame and Bodywork Explode View — Cockpit and mountings — Daytona 675 from VIN 381275 9 Nm 7O.5 N 7 Nm ^^ 4 16.7 Service Manual — Daytona 675, Street Triple and Street Triple R 111MP…
-
Page 449: Exploded View — Lower Fairings — Daytona 675
Frame and Bodywork Exploded View — Lower Fairings — Daytona 675 3 Nm 7 Nm 3 Nm 4 Nm 7 Nm 3 Nm L —^ 1 6.8 Service Manual — Daytona 675, Street Triple and Street Triple R I UMP…
-
Page 450: Exploded View — Rear Panels — Daytona 675
Frame and Bodywork Exploded View — Rear Panels — Daytona 675 — ^3Nm 6 Nm 1 6.9 Service Manual — Daytona 675, Street Triple and Street Triple R ILIMP…
-
Page 451: Exploded View — Rear Panels — Street Triple And Street Triple R
Frame and Bodywork Exploded View — Rear Panels — Street Triple and Street Triple R no m 1 6.10 Service Manual — Daytona 675, Street Triple and Street Triple R Il1MP…
-
Page 452: Exploded View — Footrests And Mountings — Daytona 675
Frame and Bodywork Exploded View — Footrests and Mountings — Daytona 675 27 Nm ^ja4 \ lW’1 20 Nm 27 Nm 20 Nm 1 6.11 Service Manual — Daytona 675, Street Triple and Street Triple R I UMP…
-
Page 453: Exploded View — Footrests And Mountings — Street Triple And Street Triple R
Frame and Bodywork Exploded View — Footrests and Mountings — Street Triple and Street Triple R 12 Nm 1 6.12 Service Manual — Daytona 675, Street Triple and Street Triple R IIiMP…
-
Page 454: Explodedview — Sidestand — All Models
Frame and Bodywork Exploded View — Sidestand — all Models 45 Nm 20 N 7 Nm 7 Nm 1 6.13 Service Manual — Daytona 675, Street Triple and Street Triple R Il1MP…
-
Page 455: Explodedview — Front Mudguard — All Models
Frame and Bodywork Exploded View — Front Mudguard — all Models 3 Nm 3 Nm 1 6.14 Service Manual — Daytona 675, Street Triple and Street Triple R IL1MP…
-
Page 456: Exploded View — Rear Mudguard — Daytona 675
Frame and Bodywork Exploded View — Rear Mudguard — Daytona 675 1 6.15 Service Manual — Daytona 675, Street Triple and Street Triple R Il1MP…
-
Page 457: Exploded View — Rear Mudguard — Street Triple And Street Triple R
Frame and Bodywork Exploded View — Rear Mudguard — Street Triple and Street Triple R 1 6.16 Service Manual — Daytona 675, Street Triple and Street Triple R 1lIMP…
-
Page 458: Rider’s Seat — All Models
Instead, place the seat, with the seat cover facing up, on a flat surface which is covered with a soft cloth. 1 6.17 Service Manual — Daytona 675, Street Triple and Street Triple R 1liMP…
-
Page 459: Frame, Footrests And Fixings
Warning The frame must not be modified as any modification to the frame such as welding or drilling may weaken the frame resulting in an accident. 1 6.18 Service Manual — Daytona 675, Street Triple and Street Triple R ILIMP…
-
Page 460
Gently pull the panel outwards. Release the rear panel locating peg from the grommet on the subframe. 1. Subframe grommet 2. Rear panel locating peg 1 6.19 Service Manual — Daytona 675, Street Triple and Street Triple R I UMP… -
Page 461
Tighten the fixings to 5 Nm. • Reconnect the battery, positive (red) lead first. 1. Radiator infill panel (right hand shown) 2. Fixings (one fixing is not shown) 1 6.20 Service Manual — Daytona 675, Street Triple and Street Triple R tLiMP… -
Page 462
1. Fuse box grommet/stud 10. Ease the panel away from the cockpit to remove it. 1 6.21 Service Manual — Daytona 675, Street Triple and Street Triple R tl,11 P… -
Page 463
12. Refit the cockpit infill panels (see page 16-20). 13. Reconnect the battery, positive (red) lead first. 14. Refit the rider’s seat (see page 16-17). 1 6.22 Service Manual — Daytona 675, Street Triple and Street Triple R I UMP… -
Page 464
Note: 1. Fairing to cockpit screw • Tighten the windscreen fixings to 0.5 Nm. • Tighten the mirror fixings to 9 Nm. Refit the nut covers. 1 6.23 Service Manual -Daytona 675, Street Triple and Street Triple R tl.1 MP… -
Page 465
Refit the cockpit to the lower fairings, tighten the two fixings to 3 Nm. Refit the two fixings (one on each side) securing the radiator infill panel to the cockpit. 1 6.24 Service Manual — Daytona 675, Street Triple and Street Triple R 1lIMP… -
Page 466
8. Remove the radiator cowl and, noting the routing of the direction indicator harness, carefully feed the harness through the radiator bracket as the cowl is removed. 1 6.25 Daytona 675, Service Manual — Street Triple and Street Triple R LUMP… -
Page 467
Frame and Bodywork This page intentionally left blank 1 6.26 Service Manual — Daytona 675, Street Triple and Street Triple R 111MP… -
Page 468
17.8 Exploded View — Rear Light & Licence Plate Light — all Models ……..17.9 Exploded View — Direction Indicators — Daytona 675 up to VIN 381274 ……17.10 17.11 Exploded View — Direction Indicators — Daytona 675 from VIN 381275 …… -
Page 469
17.34 Assembly…………….. AlternatorRectifier …………..17.35 Daytona 675 up to VIN 381274, Street Triple and Street Triple R all VINs ….17.35 17.35 Daytona675 from VIN 381275 …………1 7.2 Service Manual — Daytona 675, Street Triple and Street Triple R… -
Page 470
Keyto wiring colours …………..17.56 Auxiliary and Accessory Circuit — Street Triple and Street Triple R ……. 17.57 Complete System — Daytona 675 up to VIN 300525 with/without Fuel Pump Relay Modification ..17.58 Keyto circuit diagram …………… 17.58 1 7.3… -
Page 471
Electrical Complete System — Daytona 675 from VIN 300526 to VIN 323544 with Fuel Pump Relay ..17.60 17.60 Keyto circuit diagram …………… Complete System — Daytona 675 — from VIN 323545 to VIN381274 ……17.62 Keyto circuit diagram …………… -
Page 472: Exploded View — Instruments — Daytona 675
Electrical Exploded View — Instruments — Daytona 675 1 7.5 Service Manual — Daytona 675, Street Triple and Street Triple R IIIMP…
-
Page 473: Exploded View — Instruments — Street Triple And Street Triple R
Electrical Exploded View — Instruments — Street Triple and Street Triple R 3 Nm 1 7.6 Service Manual — Daytona 675, Street Triple and Street Triple R ll1MP…
-
Page 474: Exploded View — Headlight — Daytona 675
Electrical Exploded View — Headlight — Daytona 675 3 Nm 1 7.7 Service Manual — Daytona 675, Street Triple and Street Triple R L UMP…
-
Page 475: Exploded View — Headlights — Street Triple And Street Triple R
Electrical Exploded View — Headlights — Street Triple and Street Triple R 15 Nm 30 Nm 15 Nm 15 Nm 30 Nm 1 7.8 Service Manual — Daytona 675, Street Triple and Street Triple R Il1MP…
-
Page 476: Exploded View — Rear Light & Licence Plate Light — All Models
Electrical Exploded View — Rear Light & Licence Plate Light — all Models 2 Nm 1 7.9 Service Manual — Daytona 675, Street Triple and Street Triple R IIIMP…
-
Page 477: Exploded View — Direction Indicators — Daytona 675 Up To Vin 381274
Electrical Exploded View — Direction Indicators — Daytona 675 up to VIN 381274 17.10 Service Manual — Daytona 675, Street Triple and Street Triple R ILIMP…
-
Page 478: Exploded View — Direction Indicators — Daytona 675 From Vin 381275
Electrical Exploded View — Direction Indicators — Daytona 675 from VIN 381275 17.11 Service Manual — Daytona 675, Street Triple and Street Triple R IIIMP…
-
Page 479: Exploded View — Direction Indicators — Street Triple And Street Triple R
Electrical Exploded View — Direction Indicators — Street Triple and Street Triple R ° 3 Nm III1 1 7.1 2 Service Manual — Daytona 675, Street Triple and Street Triple R Il1MP…
-
Page 480: Explodedview — Alternator And Starter — All Models
Electrical Exploded View — Alternator and Starter — All Models —-^ r————— ^— 3 Nm —————, 12 Nm 12 Nm 120 Nm 3 Nm L————— 10 Nm 17.13 Service Manual — Daytona 675, Street Triple and Street Triple R IIIMP…
-
Page 481: Battery
Remove the battery strap. On Street Triple, note the orientation of the strap and the fitted position of the band around the rear of the battery. Take the battery out of the case. 1 7.14 Service Manual — Daytona 675, Street Triple and Street Triple R I UMP…
-
Page 482: Batterycommissioning And Charging
Do not remove the container at this point. If the container has not completely drained, tap the sides of the container to start the electrolyte flowing again. 1 7.15 Service Manual — Daytona 675, Street Triple and Street Triple R 1LiMP…
-
Page 483
Refer to the instructions supplied with the BatteryMate 150-9. For extended periods of storage (beyond two weeks) the battery should be removed and the battery Voltage checked regularly and charged when below 12.8V 1 7.16 Service Manual — Daytona 675, Street Triple and Street Triple R (LIMP… -
Page 484: Batteryalready In Service
11.SV or less 150-9. Re-test after recovery 150-9. Re-test after recovery 17.17 1 7.1 7 Service Manual — Daytona 675, Street Triple and Street Triple R Service Manual -Daytona 675, Street Triple and Street Triple R 1!. MP 11.1 MP…
-
Page 485: Relays — Daytona 675
2. Cooling fan relay 3. Engine management system (EMS) main relay 4. Starter relay 5. Direction indicator unit 6. Fuse box 1. Direction indicator unit 2. Vacuum reservoir Service Manual — Daytona 675, Street Triple and Street Triple R 1 7.18 ll]MP…
-
Page 486
21OA ^5^ ;I 3 5A;oo 4 I c Pr—T ,4 10Aa^C . 15° 620A OPEN 1. Fuse box 2. Fuse box cover 3. Spare fuses 1 7.19 Service Manual — Daytona 675, Street Triple and Street Triple R I UMP… -
Page 487
I _ 114 10Aa^C -6 20A 3 OPEN cdvx 1.Fuse box 1. Ins ument pack 2.Fuse box cover 2. Instrument bracket 3.Spare fuses xing 4. Bayonet fixings 1 7.20 Service Manual — Daytona 675, Street Triple and Street Triple R 1lIMP… -
Page 488
Remove the screw and release the instrument pack Refit the rider’s seat (see page 16-17). from the bracket bayonet fixings. 1. Screw 2. Washer 3. Bayonet fixings 4. Electrical connector 1 7.21 Service Manual — Daytona 675, Street Triple and Street Triple R S UMP… -
Page 489: Headlights — Daytona 675
Switch the headlights off when both beam settings are satisfactorily set. 1 7.22 Service Manual — Daytona 675, Street Triple and Street Triple R I UMP…
-
Page 490: Headlightbulb Replacement
Remove the fairing infill panel (see page 16-20). Remove the four screws and remove the bulb cover from the bulb to be replaced. Disconnect the multi-plug from the bulb retainer. 17.23 Service Manual — Daytona 675, Street Triple and Street Triple R LUMP…
-
Page 491: Headlight Assembly — Daytona 675
Reconnect the battery, positive (red) lead first. Switch the headlights off when both beam settings are satisfactorily set. Refit the adjuster cover. 1. Horizontal beam adjusters 1 7.24 Service Manual — Daytona 675, Street Triple and Street Triple R ILIMP…
-
Page 492: Headlightbulb Replacement
1. Headlight bulb 2. Bulb clip 3. Position lamp Each headlight bulb can be replaced as follows: 1 7.25 Service Manual — Daytona 675, Street Triple and Street Triple R L UMP…
-
Page 493: Rear Light — Daytona 675
Installation is the reverse of the removal procedure. Note: • Tighten the rear light to rear panel fixings to 4 Nm. • Reconnect the battery, positive (red) lead first. 1. Rear light finisher 1 7.26 Service Manual — Daytona 675, Street Triple and Street Triple R Il1MP…
-
Page 494: Directionindicators
The lens on each direction indicator is held in place by a securing screw located in the lens of the light. Release the screw and remove the lens to gain access to the bulb for replacement. 1 7.27 Service Manual — Daytona 675, Street Triple and Street Triple R IllMP…
-
Page 495: Reardirection Indicator — Daytona
Installation is the reverse of the removal procedure, noting the following. Note: • Tighten the direction indicator fixing to 3 Nm. • Reconnect the battery, positive (red) lead first. 1. Rear light finisher 1 7.28 Service Manual — Daytona 675, Street Triple and Street Triple R Il1MP…
-
Page 496
10. Disconnect the direction indicator and licence plate li ght electrical connectors. 1 7.29 Service Manual — Daytona 675, Street Triple and Street Triple R I!IMP… -
Page 497: Frontdirection Indicator — Daytona
8. Remove the radiator cowl and, noting the routing of the direction indicator harness, carefully feed the harness through the radiator bracket as the cowl is removed. 1 7.30 Service Manual — Daytona 675, Street Triple and Street Triple R 111MP…
-
Page 498: Licenceplate Light
Refit the airbox (see page 10-96). Refit the fuel tank (see page 10-90). Reconnect the battery, positive (red) lead first. Refit the rider’s seat (see page 16- 17). 1 7.31 Service Manual — Daytona 675, Street Triple and Street Triple R IL1MP…
-
Page 499: Startermotor
11. Refit the rider’s seat (see page 16-17). 1. Starter motor 2. Starter cable fixing 3. Fixings 10. Ease the starter motor from the upper crankcase. 1 7.32 Service Manual — Daytona 675, Street Triple and Street Triple R IIIMP…
-
Page 500: Alternator
6. To remove the stator and crankshaft position sensor from the cover, release the three bolts in the centre of the cover and release the bolt securing the cable bracket. Discard the bolts. 1 7.33 Service Manual — Daytona 675, Street Triple and Street Triple R I UMP…
-
Page 501: Assembly
11. Assemble tool T3880365 to the threaded centre section of the rotor. Note: • Ensure that the thrust pad does not fall out during assembly of the tool. 1 7.34 Service Manual — Daytona 675, Street Triple and Street Triple R ll1MP…
-
Page 502: Alternatorrectifier
Tighten the cover bolts to 9 Nm. 1. Left hand engine cover 2. Copper washer position 3. Solenoid bracket Daytona 675 only: Refit the left hand lower fairing (see page 76-22). 1 7.35 Service Manual — Daytona 675, Street Triple and Street Triple R I UMP…
-
Page 503
Proceed to test 3 — Rectifier/regulator to alternator harness connector pin 2 Faulty Rectify fault, proceed to test 6 — Rectifier/regulator to alternator harness connector pin 3 1 7.36 Service Manual — Daytona 675, Street Triple and Street Triple R Il1MP… -
Page 504
Triumph service Stator Starter solenoid 1 . ____-N 1 ___ J-`—=_, B RR Battery 1 2 4 3 Rectifier/Regulator Regulator/Rectifier main wiring harness connector pin numbers a» 1 7.37 Service Manual — Daytona 675, Street Triple and Street Triple R lliMP… -
Page 505: Rectifier/Regulator
Negative (-) probe to alternator connector pin 1 Negative (-) probe to alternator connector pin 2 Negative (-) probe to alternator connector pin 3 1 7.38 Service Manual — Daytona 675, Street Triple and Street Triple R L UMP…
-
Page 506
Test rectifier/regulator (see page 17-36) If rectifier/regulator is serviceable, contact Triumph service Diode Rectifier/regulator connector Alternator connector :2:] 3^ ^2 Rectifier/regulator Alternator connector pin numbers Thyristor pin numbers 1 7.39 Service Manual — Daytona 675, Street Triple and Street Triple R l! MP… -
Page 507: Lightingcircuit — Daytona 675 Up To Vin 381274
Main / dip beam switch Pink Pass switch Purple Instrument assembly White Oil pressure switch Yellow Oil pressure warning light Light Green Main beam warning light Light Blue Headlight 1 7.40 Service Manual — Daytona 675, Street Triple and Street Triple R I UMP…
-
Page 508: Lightingcircuit — Daytona 675 Up To Vin 381274
Electrical Lighting Circuit — Daytona 675 up to VIN 381274 1 7.41 Service Manual — Daytona 675, Street Triple and Street Triple R Il1Mp…
-
Page 509: Lightingcircuit — Daytona 675 From Vin 381275
Main / dip beam switch Pass switch Purple Instrument assembly Oil pressure switch White Yellow Oil pressure warning light Light Green Main beam warning light Light Blue Headlight 1 7.42 Service Manual — Daytona 675, Street Triple and Street Triple R I UMP…
-
Page 510: Lightingcircuit — Daytona 675 From Vin 381275
Electrical Lighting Circuit — Daytona 675 from VIN 381275 17.43 Service Manual — Daytona 675, Street Triple and Street Triple R 1L1MP…
-
Page 511: Starting And Charging Circuit — Daytona 675 Up To Vin 381274
Electrical Starting and Charging Circuit — Daytona 675 up to VIN 381274 Key to wiring colours Key to circuit diagram Wiring Colour Item Description Black Battery Blue Starter solenoid Brown Starter motor Green Alternator Slate / Grey Regulator / rectifier…
-
Page 512: Starting And Charging Circuit — Daytona 675 Up To Vin 381274
Electrical Starting and Charging Circuit — Daytona 675 up to VIN 381274 1 7.45 Service Manual — Daytona 675, Street Triple and Street Triple R L UMP…
-
Page 513: Starting And Charging Circuit — Daytona 675 From Vin 381275
Fuse box (Fuses 1, 2 and 6) White Engine control module relay Yellow Instrument assembly Light Green RH switchcube Light Blue Engine stop switch Starter switch Alarm Fuel pump relay 1 7.46 Service Manual — Daytona 675, Street Triple and Street Triple R L UMP…
-
Page 514: Starting And Charging Circuit — Daytona 675 From Vin 381275
Electrical Starting and Charging Circuit — Daytona 675 from VIN 381275 17.47 Service Manual — Daytona 675, Street Triple and Street Triple R IgmP…
-
Page 515: Auxiliary And Accessory Circuit — Daytona 675 Up To Vin 381274
Electrical Auxiliary and Accessory Circuit — Daytona 675 up to VIN 381274 Key to circuit diagram Key to wiring colours Item Description Wiring Colour Fuse box (Fuse 4) Black Blue Ignition switch Indicator relay Brown Front brake light switch Green…
-
Page 516: Auxiliary And Accessory Circuit — Daytona 675 Up To Vin 381274
Electrical Auxiliary and Accessory Circuit — Daytona 675 up to VIN 381274 1 7.49 Service Manual — Daytona 675, Street Triple and Street Triple R I UMP…
-
Page 517: Auxiliary And Accessory Circuit — Daytona 675 From Vin 381275
Direction indicator (Instruments) Light Green Light Blue Alarm LED Front right direction Indicator Front left direction Indicator Alarm unit Rear right direction indicator Rear left direction indicator 1 7.50 Service Manual — Daytona 675, Street Triple and Street Triple R ^ uMP…
-
Page 518: Auxiliary And Accessory Circuit — Daytona 675 From Vin 381275
Electrical Auxiliary and Accessory Circuit — Daytona 675 from VIN 381275 1 7.51 Service Manual — Daytona 675, Street Triple and Street Triple R IllMP…
-
Page 519: Lightingcircuit — Street Triple And Street Triple R
Instrument assembly Light Green Engine sub harness Light Blue Oil pressure switch Coolant temperature sensor Tail light Number plate lamp Fuse box (Fuse 3) Ignition switch 1 7.52 Service Manual — Daytona 675, Street Triple and Street Triple R 1laMP…
-
Page 520: Lightingcircuit — Street Triple And Street Triple R
Electrical Lighting Circuit — Street Triple and Street Triple R C) 0 P — KG —K^ c — 1 7.53 Service Manual — Daytona 675, Street Triple and Street Triple R Il1MP…
-
Page 521: Starting And Charging Circuit — Street Triple And Street Triple R
Engine stop switch Purple Starter switch White Alarm Yellow Fuel pump relay Light Green Engine control module Light Blue Engine control module relay Starter relay Starter motor 1 7.54 Service Manual — Daytona 675, Street Triple and Street Triple R I UMP…
-
Page 522: Starting And Charging Circuit — Street Triple And Street Triple R
Electrical Starting and Charging Circuit — Street Triple and Street Triple R F_EII-t I1/I _____ 1AAfl2AJ j,ii ENGINE STOP SWITCH 1 7.55 Service Manual — Daytona 675, Street Triple and Street Triple R Il]MP…
-
Page 523: Auxiliary And Accessory Circuit — Street Triple And Street Triple R
Alarm unit Light Blue Rear right direction indicator Rear left direction indicator Diagnostic connector Brake light Rear brake light switch Front brake light switch Ignition switch 1 7.56 Service Manual — Daytona 675, Street Triple and Street Triple R ^ uMP…
-
Page 524: Auxiliary And Accessory Circuit — Street Triple And Street Triple R
Electrical Auxiliary and Accessory Circuit — Street Triple and Street Triple R 1 0A 19 9 1 7.57 Service Manual — Daytona 675, Street Triple and Street Triple R I UMP…
-
Page 525: Complete System — Daytona 675 Up To Vin 300525 With/Without Fuel Pump Relay Modification
Electrical Complete System — Daytona 675 up to VIN 300525 with/without Fuel Pump Relay Modification Key to circuit diagram RH rear indicator Number plate light Item Description LH rear indicator Instrument assembly Alarm connector (accessory) Vehicle speed sensor Starter motor…
-
Page 527: Complete System — Daytona 675 From Vin 300526 To Vin 323544 With Fuel Pump Relay
Electrical Complete System — Daytona 675 from VIN 300526 to VIN 323544 with Fuel Pump Relay Key to circuit diagram RH rear indicator Number plate light Item Description LH rear indicator Instrument assembly Alarm connector (accessory) Vehicle speed sensor Starter motor…
-
Page 529: Complete System — Daytona 675 — From Vin 323545 To Vin381274
Electrical Complete System — Daytona 675 — from VIN 323545 to VIN381274 Key to circuit diagram Number plate light LH rear indicator Item Description Alarm connector (accessory) Instrument assembly Starter motor Vehicle speed sensor Starter solenoid (fused) Front brake lever switch…
-
Page 531: Keyto Circuit Diagram
Cooling fan relay Cooling fan Intake flap actuator Sidestand switch Engine ground Crankshaft sensor Diagnostic connector Rear brake lever switch Rear light RH rear indicator 1 7.63 1 7.64 1 uM Service Manual — Daytona 675, Street Triple and Street Triple R…
-
Page 533: Keyto Circuit Diagram
Engine ground Pink Crankshaft sensor Diagnostic connector Purple Rear brake lever switch White Rear light Yellow RH rear indicator Light Green Number plate light Light Blue 1 7.66 Service Manual — Daytona 675, Street Triple and Street Triple R I UMP…
-
Page 535
Electrical This page intentionally left blank ► 36 1 7.67 1 7.68 ^ UM^ Service Manual — Daytona 675, Street Triple and Street Triple R…

1
Foreword
FOREWORD
This handbook contains information on the Triumph Daytona 675, Daytona 675 R, Street Triple
and Street Triple R motorcycles. Always store this owner’s handbook with the motorcycle and
refer to it for information whenever necessary.
Warnings, Cautions and
Notes
Throughout this owner’s handbook
particularly important information is
presented in the following form:
Note:
• This note symbol indicates points
of particular interest for more
efficient and convenient operation.
cdks_1
Warning
This warning symbol identifies special
instructions or procedures, which if not
correctly followed could result in personal
injury, or loss of life.
Caution
This caution symbol identifies special
instructions or procedures, which, if not
strictly observed, could result in damage to,
or destruction of, equipment.
-
Contents
-
Table of Contents
-
Bookmarks
Quick Links
FOREWORD
This handbook contains information on the Triumph Street Triple and Street Triple R
motorcycles. Always store this owner’s handbook with the motorcycle and refer to it for
information whenever necessary.
Warnings, Cautions and
Notes
Throughout
this
owner’s
particularly
important
information
presented in the following form:
Warning
This warning symbol identifies special
instructions or procedures, which if not
correctly followed could result in personal
injury, or loss of life.
This caution symbol identifies special
handbook
instructions or procedures, which, if not
is
strictly observed, could result in damage to,
or destruction of, equipment.
Note:
•
This note symbol indicates points of
particular interest for more efficient
and convenient operation.
Foreword
Caution
1
Chapters
Summary of Contents for Triumph Street Triple
Сборник руководств на английском языке по эксплуатации и техническому обслуживанию скутеров и мотоциклов Triumph с 1945 года выпуска.
- Издательство: Triumph
- Год издания: —
- Страниц: —
- Формат: PDF
- Размер: 206,9 Mb
Руководство на английском языке по ремонту мотоциклов Triumph моделей America, Bonneville, Bonneville T100, Scrambler, Speedmaster и Thruxton.
- Издательство: Triumph Motorcycle Ltd.
- Год издания: 2006
- Страниц: 482
- Формат: PDF
- Размер: 35,7 Mb
Руководство на немецком языке по ремонту мотоциклов Triumph моделей Daytona 955i, Speed Triple, T509 Speed Triple и T595 Daytona.
- Издательство: Triumph Motorcycle Ltd.
- Год издания: 1998
- Страниц: 336
- Формат: PDF
- Размер: 54,8 Mb
Руководство на английском языке по ремонту мотоциклов Triumph Daytona 600.
- Издательство: Triumph Motorcycle Ltd.
- Год издания: 2003
- Страниц: 371
- Формат: PDF
- Размер: 12,1 Mb
Руководство на английском языке по ремонту мотоциклов Triumph Daytona 675.
- Издательство: Triumph Motorcycle Ltd.
- Год издания: —
- Страниц: 427
- Формат: PDF
- Размер: 47,8 Mb
Руководство на английском языке по ремонту мотоциклов Triumph Daytona 675, Street Triple и Street Triple R.
- Издательство: Triumph Motorcycle Ltd.
- Год издания: 2009
- Страниц: 535
- Формат: PDF
- Размер: 116,4 Mb

Руководство на английском языке по установке гоночного комплекта мотоцикла Triumph Daytona 675.
- Издательство: Triumph Motorcycle Ltd.
- Год издания: 2008
- Страниц: 33
- Формат: PDF
- Размер: 2,5 Mb

Руководство на английском языке по ремонту мотоциклов Triumph Daytona 955i и Speed Triple.
- Издательство: Triumph Motorcycle Ltd.
- Год издания: 2003
- Страниц: 410
- Формат: PDF
- Размер: 19,7 Mb
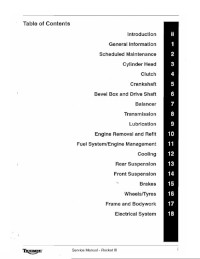
Руководство на английском языке по ремонту мотоциклов Triumph Rocket III.
- Издательство: Triumph Motorcycle Ltd.
- Год издания: —
- Страниц: 425
- Формат: PDF
- Размер: 12,5 Mb
Руководство на английском языке по ремонту мотоциклов Triumph Speed Triple.
- Издательство: Triumph Motorcycle Ltd.
- Год издания: 2005
- Страниц: 379
- Формат: PDF
- Размер: 17,6 Mb
Руководство на немецком языке по ремонту мотоциклов Triumph Speed Triple.
- Издательство: Triumph Motorcycle Ltd.
- Год издания: 2005
- Страниц: 517
- Формат: PDF
- Размер: 45,7 Mb
Руководство на английском языке по ремонту мотоциклов Triumph моделей Sprint ST и Sprint RS с 2002 модельного года.
- Издательство: Triumph Motorcycle Ltd.
- Год издания: 2001
- Страниц: 383
- Формат: PDF
- Размер: 30,1 Mb

Руководство на немецком языке по техническому обслуживанию и ремонту мотоциклов Triumph Tiger.
- Издательство: Triumph Motorcycle Ltd.
- Год издания: 2001
- Страниц: 323
- Формат: PDF
- Размер: 90,1 Mb
Руководство на английском языке по ремонту мотоциклов Triumph TT600 Speed Four.
- Издательство: Triumph Motorcycle Ltd.
- Год издания: —
- Страниц: 357
- Формат: PDF
- Размер: 190,7 Mb
Сборник руководств на английском языке по техническому обслуживанию и ремонту мотоциклов Triumph 1945-1975 годов выпуска.
- Издательство: Triumph Motorcycle Ltd.
- Год издания: —
- Страниц: —
- Формат: PDF
- Размер: 565,5 Mb
В руководстве представлена информация об устройстве и работе всех узлов и агрегатов мотоцикла.
- Издательство: Алфамер
- Год издания: —
- Страниц: 220
- Формат: —
- Размер: —

|
Title |
File Size |
Download Links |
|
Triumph America/ Bonneville/ Bonneville T100/ Speedmaster/ Thruxton/ Scrambler 2006 Service Manual.rar |
35.7Mb |
Download |
|
Triumph America/ Speedmaster Owner’s Manual.pdf |
4.1Mb |
Download |
|
Triumph Bonneville/ Bonneville T100/ Scrambler/ Thruxton Owner’s Manual.pdf |
5.7Mb |
Download |
|
Triumph Daytona 600 2003 Service Manual.pdf |
12.1Mb |
Download |
|
Triumph Daytona 650 Owner’s Manual.pdf |
1.1Mb |
Download |
|
Triumph Daytona 675 Service & Repair Manual.pdf |
2.5Mb |
Download |
|
Triumph Daytona 675 Service Manual.pdf |
47.8Mb |
Download |
|
Triumph Daytona 675/ Street Triple Owner’s Manual.pdf |
5.7Mb |
Download |
|
Triumph Daytona 675/ Street Triple/ Street Triple R Service Manual.rar |
116.4Mb |
Download |
|
Triumph Daytona 955i/ Street Triple 2002 Service Manual.rar |
19.7Mb |
Download |
|
Triumph Daytona 955i/ Street Triple Owner’s Manual.pdf |
1.9Mb |
Download |
|
Triumph Daytona T595/ Daytona 955i/ Speed Triple T509 885 cc/ Speed Triple 955 cc 1998 Service & Repair Manual.rar |
54.8Mb |
Download |
|
Triumph Daytona/ Speed Triple/ Sprint/ Super 3/ Trident Owner’s Manual.rar |
30.4Mb |
Download |
|
Triumph Modern Classics Owners Handbook.pdf |
4.7Mb |
Download |
|
Triumph Rocket III Owner’s Manual.pdf |
1.3Mb |
Download |
|
Triumph Rocket III Service Manual.rar |
12.5Mb |
Download |
|
Triumph Rocket III Touring Owner’s Manual.pdf |
3.1Mb |
Download |
|
Triumph Scrambler/ Bonneville/ Bonneville T100/ Thruxton Owner’s Manual.pdf |
5.7Mb |
Download |
|
Triumph Speed Four Service & Repair Manual.rar |
190.7Mb |
Download |
|
Triumph Speed Triple 1050 Owners Manual.pdf |
4.7Mb |
Download |
|
Triumph Speed Triple Owner’s Manual.pdf |
6Mb |
Download |
|
Triumph Speed Triple Service Manual.rar |
17.6Mb |
Download |
|
Triumph Speed Triple Service Repair Manual.rar |
45.7Mb |
Download |
|
Triumph Speed Triple T509 885 cc/ Speed Triple 955 cc/ Daytona T595/ Daytona 955i 1998 Service Manual.rar |
54.8Mb |
Download |
|
Triumph Speed Triple/ Sprint/ Super 3/ Trident/ Daytona Owner’s Manual.rar |
30.4Mb |
Download |
|
Triumph Speedmaster/ America Owner’s Manual.pdf |
4.1Mb |
Download |
|
Triumph Sprint ST/ Sprint RS Service Manual.rar |
30.1Mb |
Download |
|
Triumph Sprint ST/ Sprint ST ABS Owner’s Manual.pdf |
3.4Mb |
Download |
|
Triumph Street Triple/ Daytona 675 Owner’s Manual.pdf |
5.7Mb |
Download |
|
Triumph Street Triple/ Daytona 955i 2002 Service Manual.rar |
19.7Mb |
Download |
|
Triumph Street Triple/ Daytona 955i Owner’s Manual.pdf |
1.9Mb |
Download |
|
Triumph Street Twin T120 Thruxton Street Cup T100 Owner Manual.pdf |
4.7Mb |
Download |
|
Triumph Super 3/ Daytona/ Speed Triple/ Sprint/ Trident Owner’s Manual.rar |
30.4Mb |
Download |
|
Triumph Thunderbird Owner’s Manual.pdf |
4.8Mb |
Download |
|
Triumph Tiger 1050 Owners Manual — T795NG.pdf |
4.8Mb |
Download |
|
Triumph Tiger 709EN 955i 2001 Service & Repair Manual.rar |
90.1Mb |
Download |
|
Triumph Tiger 800/ 800XC Owner’s Manual.pdf |
5.5Mb |
Download |
|
Triumph Tiger Explorer Owner’s Manual.pdf |
6.4Mb |
Download |
|
Triumph Tiger Owner’s Manual.pdf |
3.7Mb |
Download |
|
Triumph Tiger Sport Owner’s Manual.pdf |
6Mb |
Download |
|
Triumph Trident Mod T-150 V Parts Manual 87.pdf |
2Mb |
Download |
|
Triumph Trident Mod T-160 750 cc Workshop Manual.pdf |
6Mb |
Download |
|
Triumph Trident/ Daytona/ Speed Triple/ Sprint/ Super 3 Owner’s Manual.rar |
30.4Mb |
Download |
|
Triumph Trophy/ Trophy SE Owner’s Manual.pdf |
8.9Mb |
Download |
Motorcycles Triumph is the oldest and at the same time the youngest motor brand in Great Britain, founded in 1902 and resumed its activity again in 1991. Triumph
motorcycles produced: classic, cruisers, roadsters, touristic, touristic enduro, sports and retro models.
The history of Triumph dates back to the late nineteenth century. Two British entrepreneurs of German descent, Bettmann and Schulte, opened the production of bicycles under the Triumph brand back
in 1889. A small British town became the birthplace of this company.
Designers from around the world in the late nineteenth and early twentieth centuries tried to install a motor on a bicycle. Similar attempts were made in England. Already in 1902, the first
Triumph motorcycle was assembled. In the same year, 500 copies of the first model were sold. Five years later, production was doubled. A year later, the famous motorcycle racer Jack Marshall won
the Triumph motorcycle. After that, the company began to increase the production of motorcycles.
Thanks to the support of the Government of England during the First World War, the company was able to introduce advanced technologies of that time into production. Triumph motorcycles had the
highest rates of speed and comfort, as evidenced by increased demand.
In the 20s of the last century, along with the popular bike models, the company masters the production of cars. At the beginning of World War II, a motorcycle was developed for military purposes,
and the production of aircraft engines was also mastered. In the postwar years, a significant portion of Triumph motorcycles manufactured was exported to America.
In the 60s of the last century, competitive Japanese models began to displace the company from the American and European markets. In the next decade, Triumph motorcycle demand began to fall
everywhere. And already in the mid-80s, the company became bankrupt.
In the early 1990s, Triumph’s history is undergoing a rebirth. Fresh ideas and innovative designs allowed to release a line of completely new models in the tourist style. The brand has not
forgotten about the popular heavyweight models of the brutal look in retro style. Subsequent Triumph motorcycles were equipped with ABS brakes and had a high torque value at fairly low revs.
Triumph motorcycles feel time and belonging to different eras and subcultures. The brand successfully produces the main types of motorcycles, including models in retro style.
Classic, sports, tourist and tourist enduro, roadsters and cruisers — each of them has its own design features and specific technical characteristics, thanks to which they make a worthy
competition to American and Japanese competitors.
Since 1990, Triumph Motorcycles has released a large number of models of various classes, featuring an improved modern design and a fresh, innovative design inspired by Japanese brands.
Super-active tourists and sports tourists appeared, Daytona 675, Speed Triple and Sprint ST motorcycles became very popular.
There was a place for the legendary retro-models in the style of cafe-racers and models with a powerful engine and brutal design. All these features manifested themselves in the heavy
350-kilogram Triumph Rocket III with a 2.3-liter engine and 142 horsepower, slightly shocking the audience with a 3-second acceleration to 100 km / h. Pleased with two fresh models of the
«English petrel» — the classic Triumph Thunderbird 2 ABS and its more athletic and fit brother Triumph Thunderbird Storm ABS. The latter surprised with a record torque of 156 Nm
at only 2950 rpm.

1
Foreword
FOREWORD
This handbook contains information on the Triumph Daytona 675, Daytona 675 R, Street Triple
and Street Triple R motorcycles. Always store this owner’s handbook with the motorcycle and
refer to it for information whenever necessary.
Warnings, Cautions and
Notes
Throughout this owner’s handbook
particularly important information is
presented in the following form:
Note:
• This note symbol indicates points
of particular interest for more
efficient and convenient operation.
cdks_1
Warning
This warning symbol identifies special
instructions or procedures, which if not
correctly followed could result in personal
injury, or loss of life.
Caution
This caution symbol identifies special
instructions or procedures, which, if not
strictly observed, could result in damage to,
or destruction of, equipment.
Смотреть руководство для Triumph Street Triple 675 (2009) ниже. Все руководства на ManualsCat.com могут просматриваться абсолютно бесплатно. Нажав кнопку «Выбор языка» вы можете изменить язык руководства, которое хотите просмотреть.

MANUALSCAT | RU
Вопросы и ответы
У вас есть вопрос о Triumph Street Triple 675 (2009), но вы не можете найти ответ в пользовательском руководстве? Возможно, пользователи ManualsCat.com смогут помочь вам и ответят на ваш вопрос. Заполните форму ниже — и ваш вопрос будет отображаться под руководством для Triumph Street Triple 675 (2009). Пожалуйста, убедитесь, что вы опишите свои трудности с Triumph Street Triple 675 (2009) как можно более детально. Чем более детальным является ваш вопрос, тем более высоки шансы, что другой пользователь быстро ответит на него. Вам будет автоматически отправлено электронное письмо, чтобы проинформировать вас, когда кто-то из пользователей ответит на ваш вопрос.
Задать вопрос о Triumph Street Triple 675 (2009)
- Бренд:
- Triumph
- Продукт:
- Мотоциклы
- Модель/название:
- Street Triple 675 (2009)
- Тип файла:
- Доступные языки:
- английский